Trigger on SMS
1. Trigger on SMS
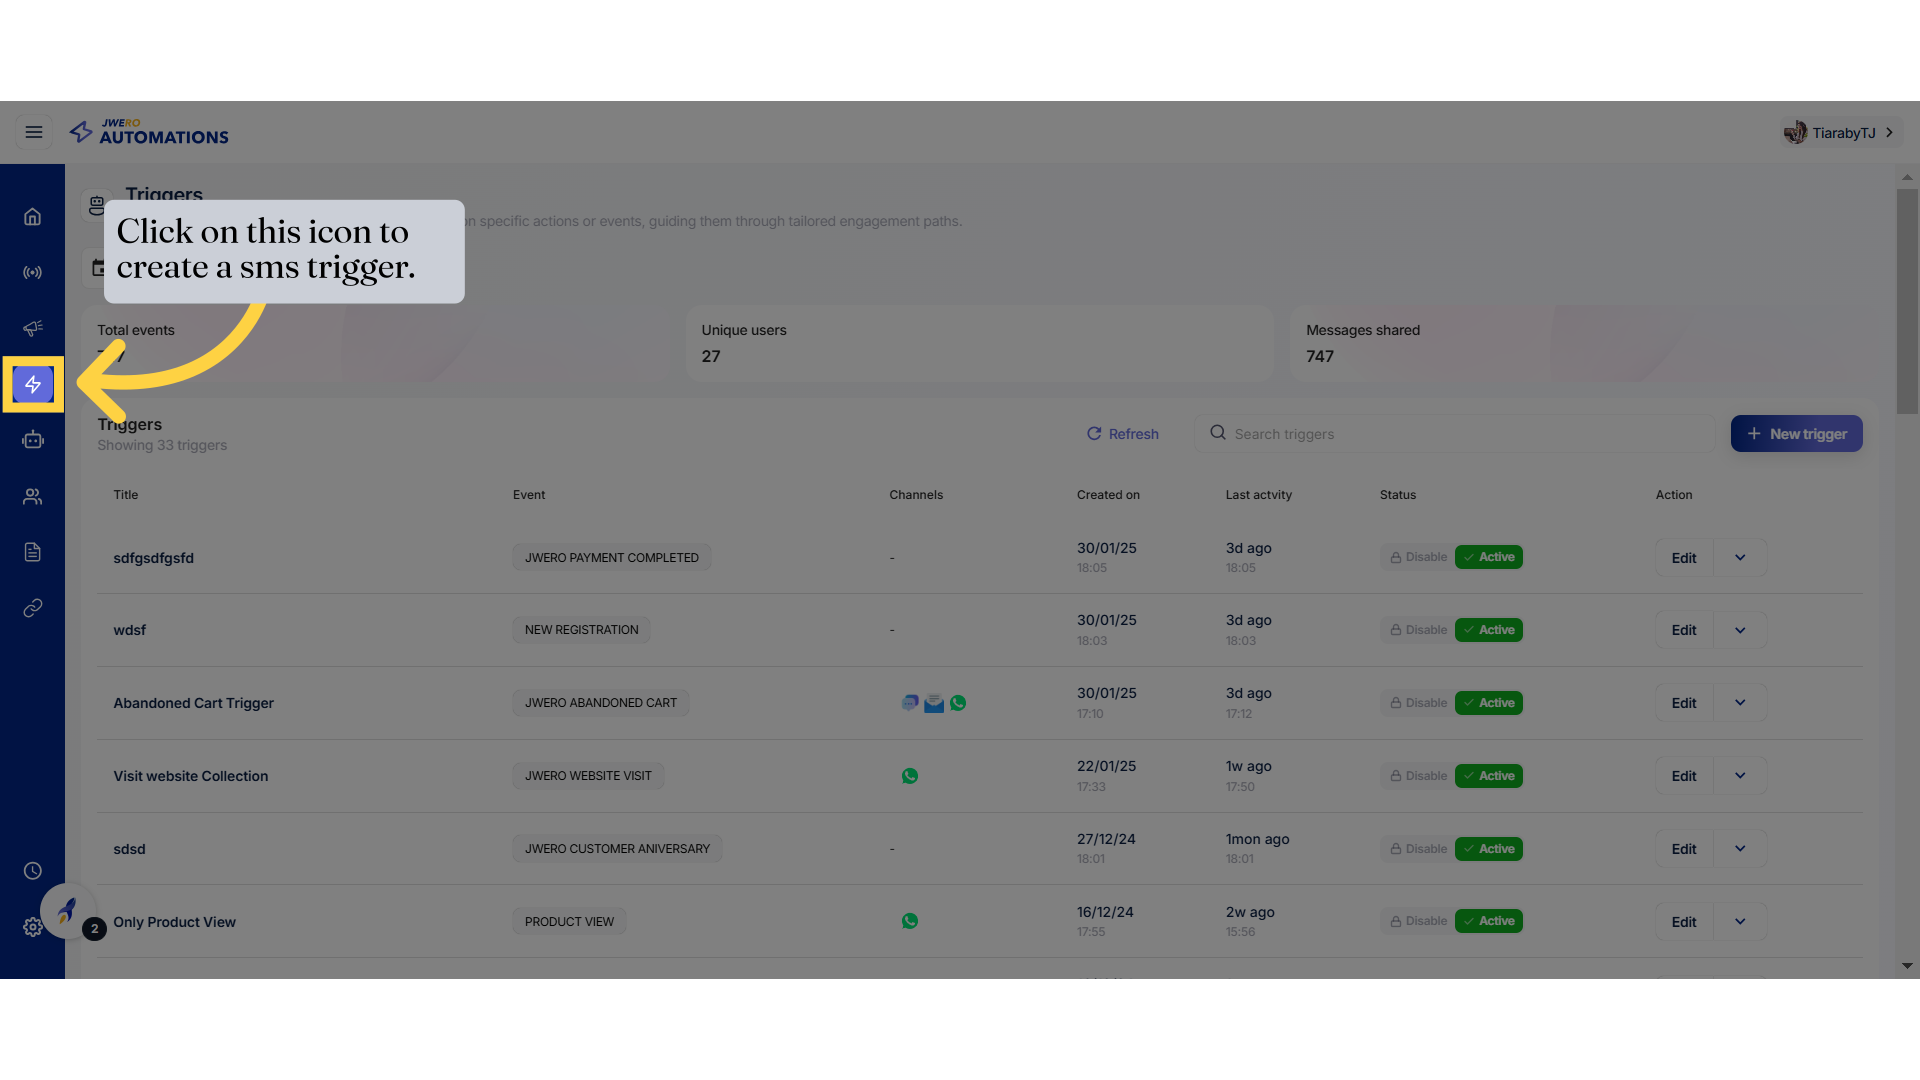
2. Click on this icon to create a sms trigger.
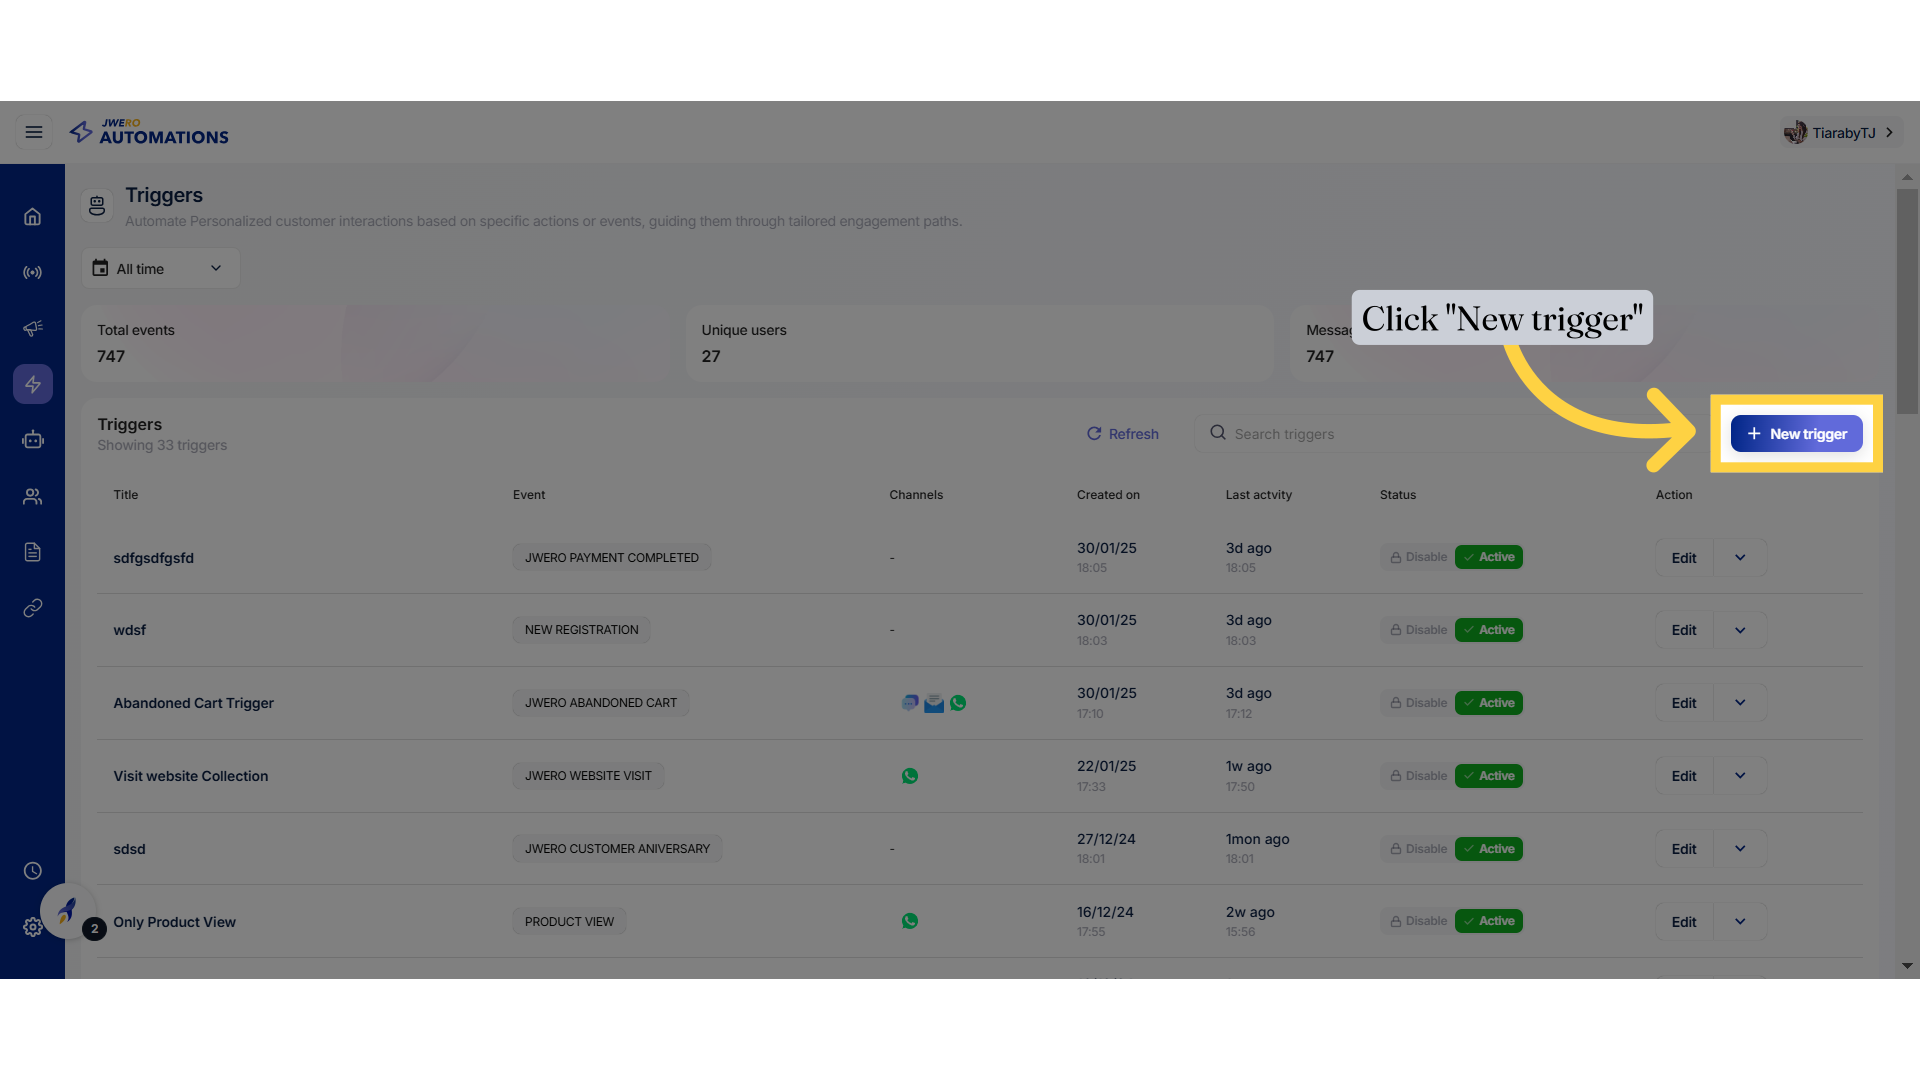
3. Click "New trigger"
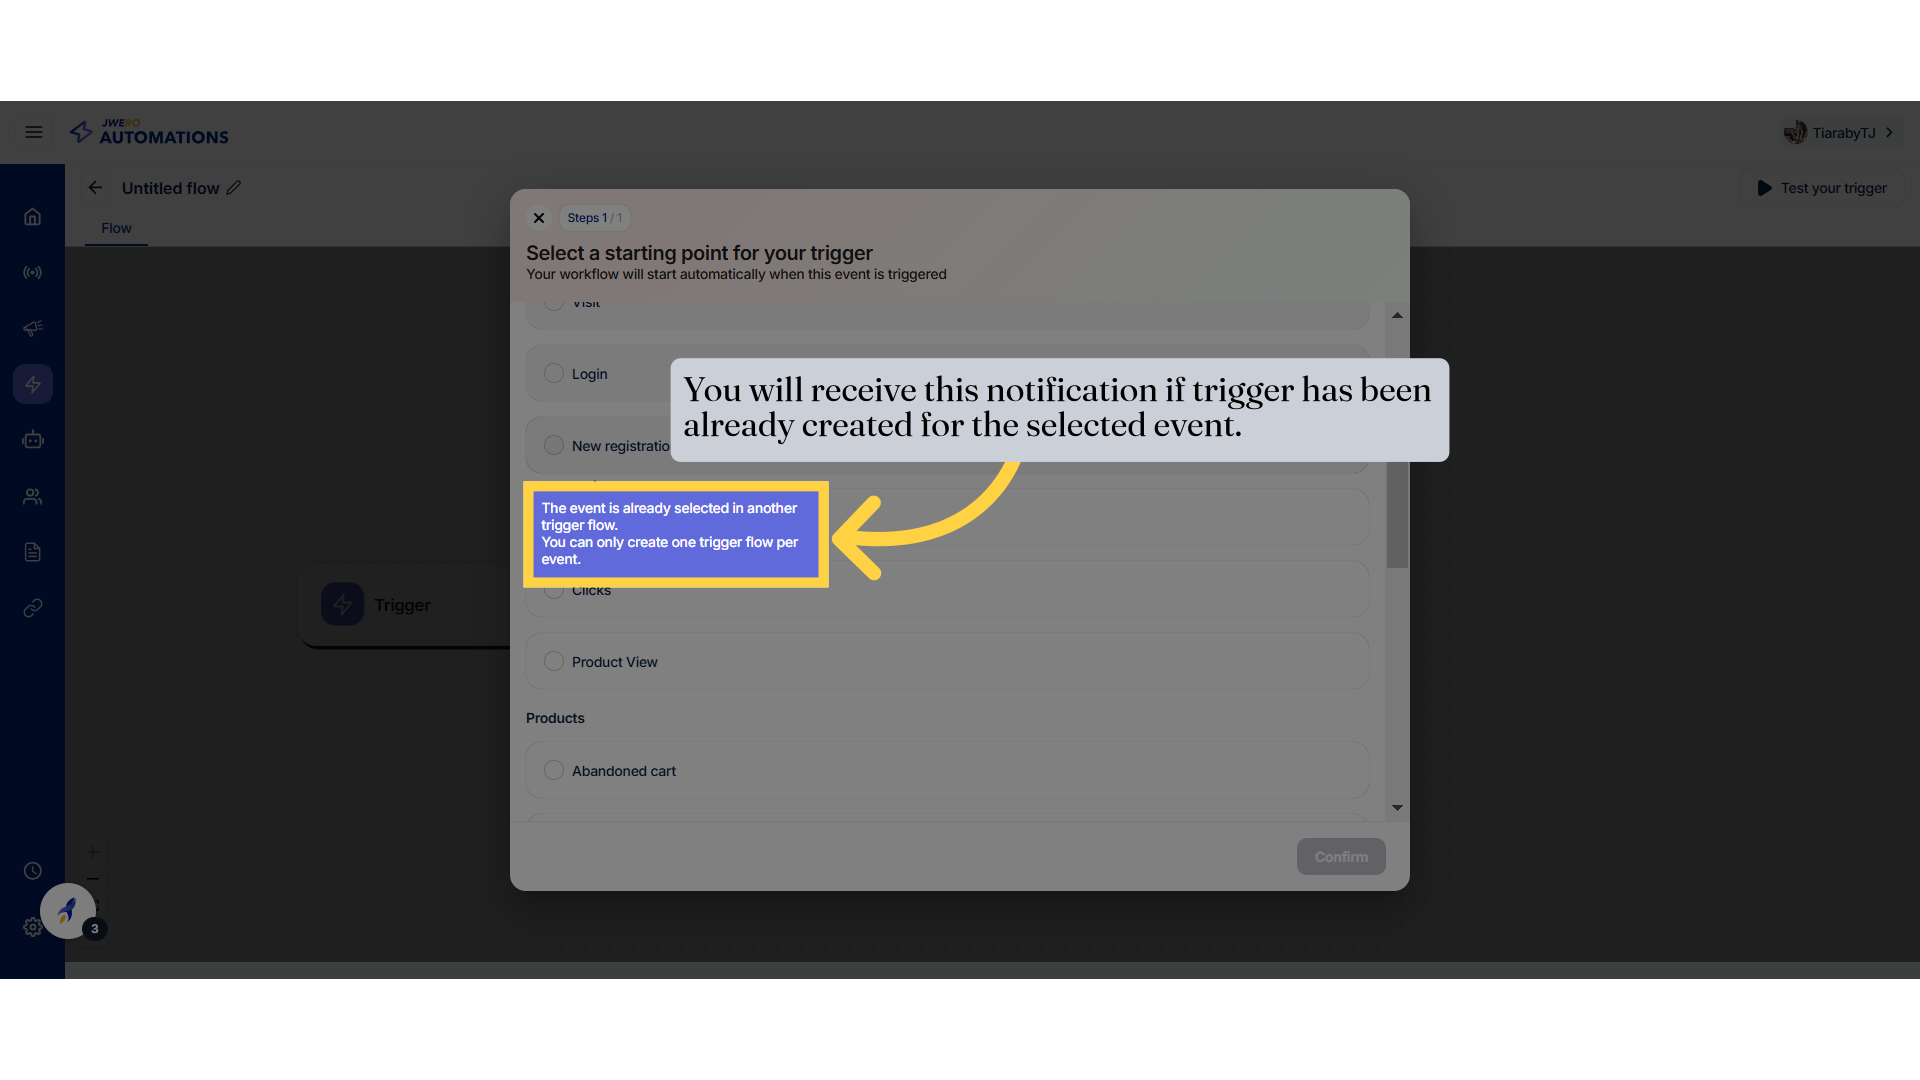
4. Notification
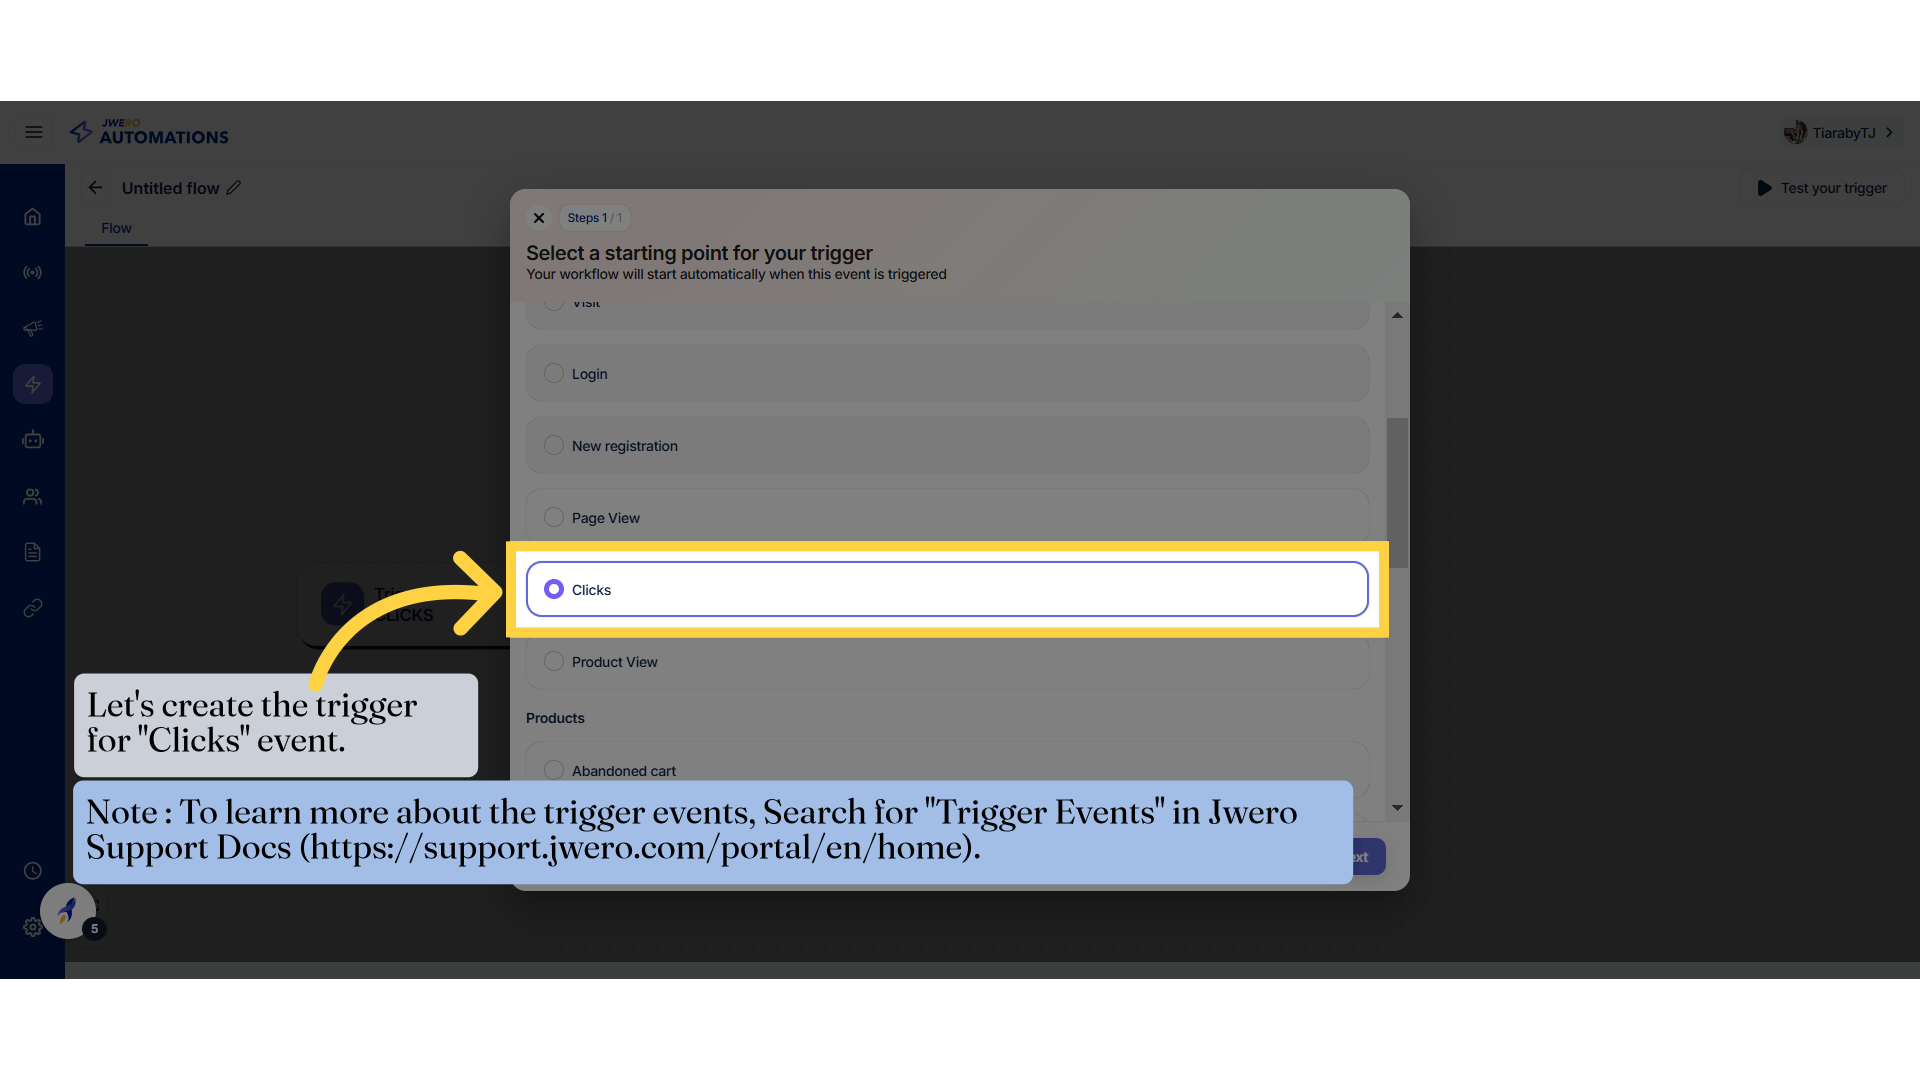
5. Let's create the trigger for "Clicks" event.
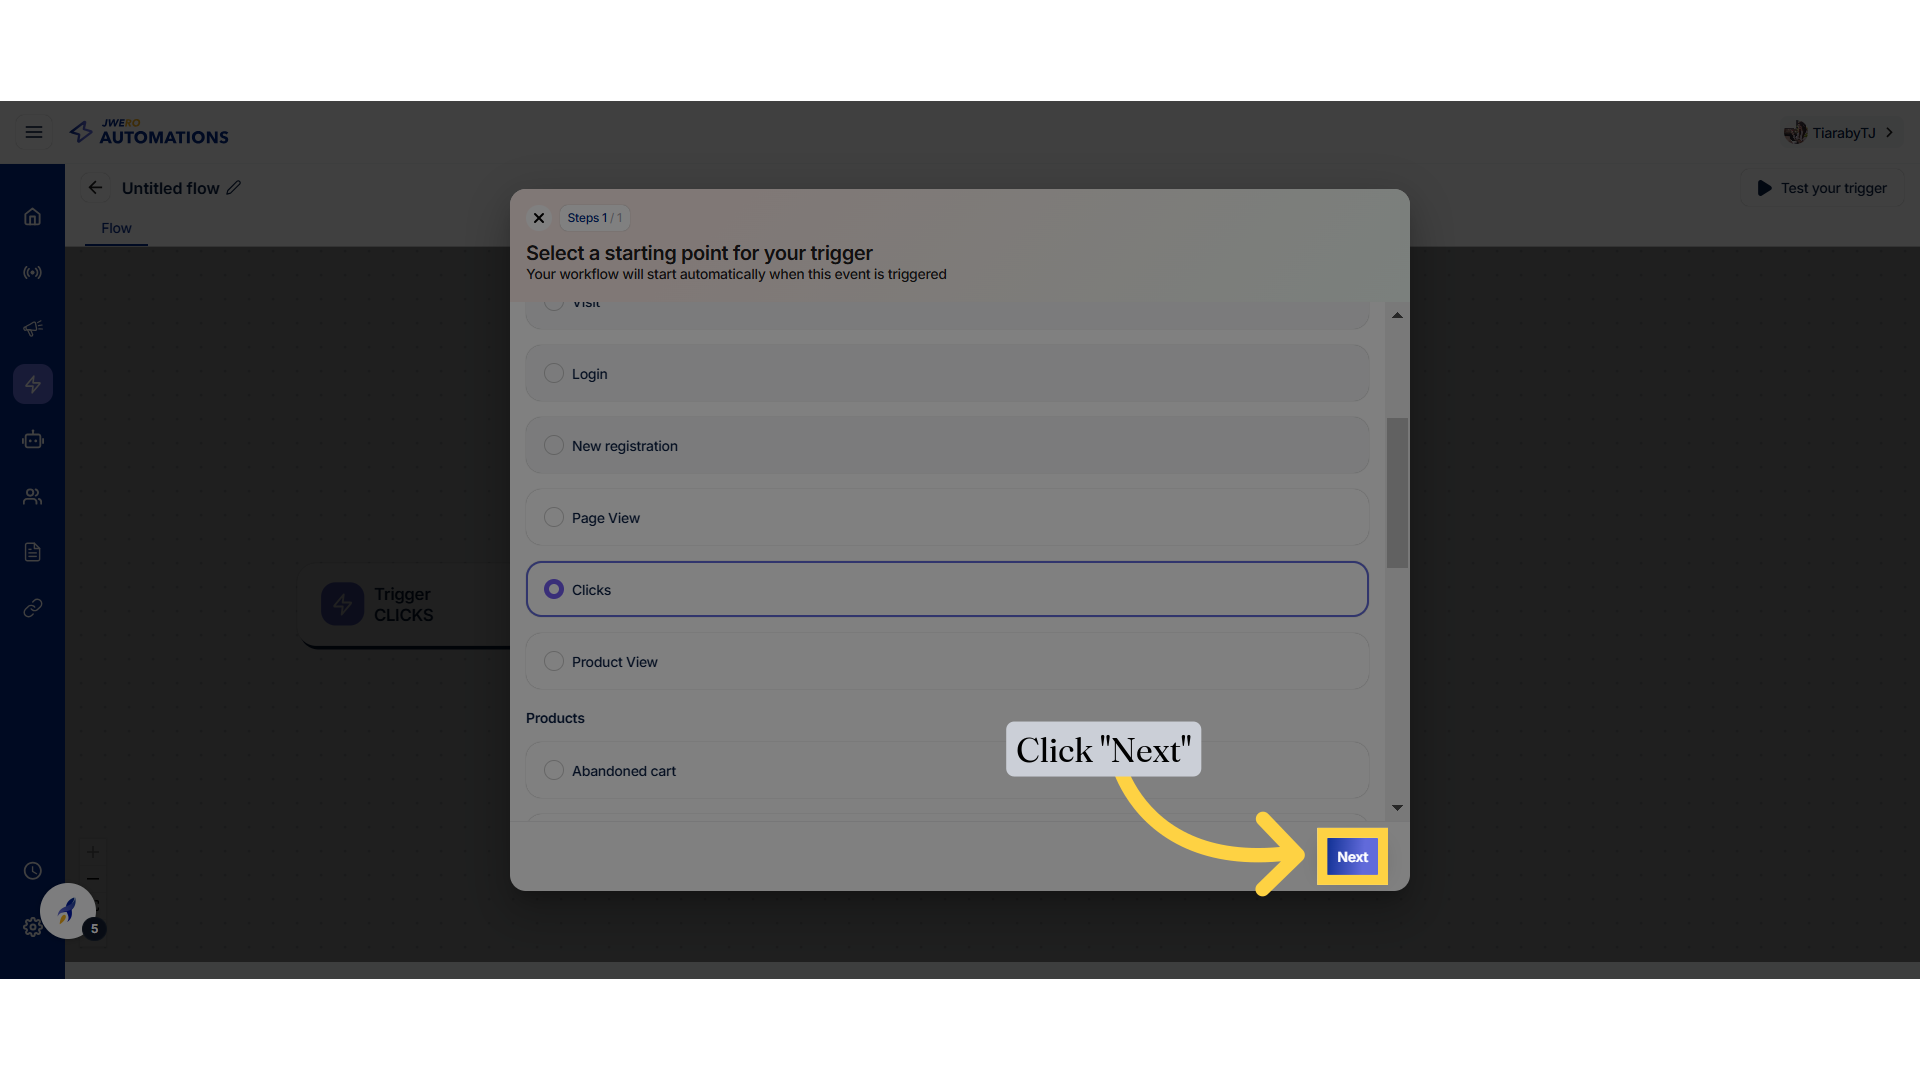
6. Click "Next"
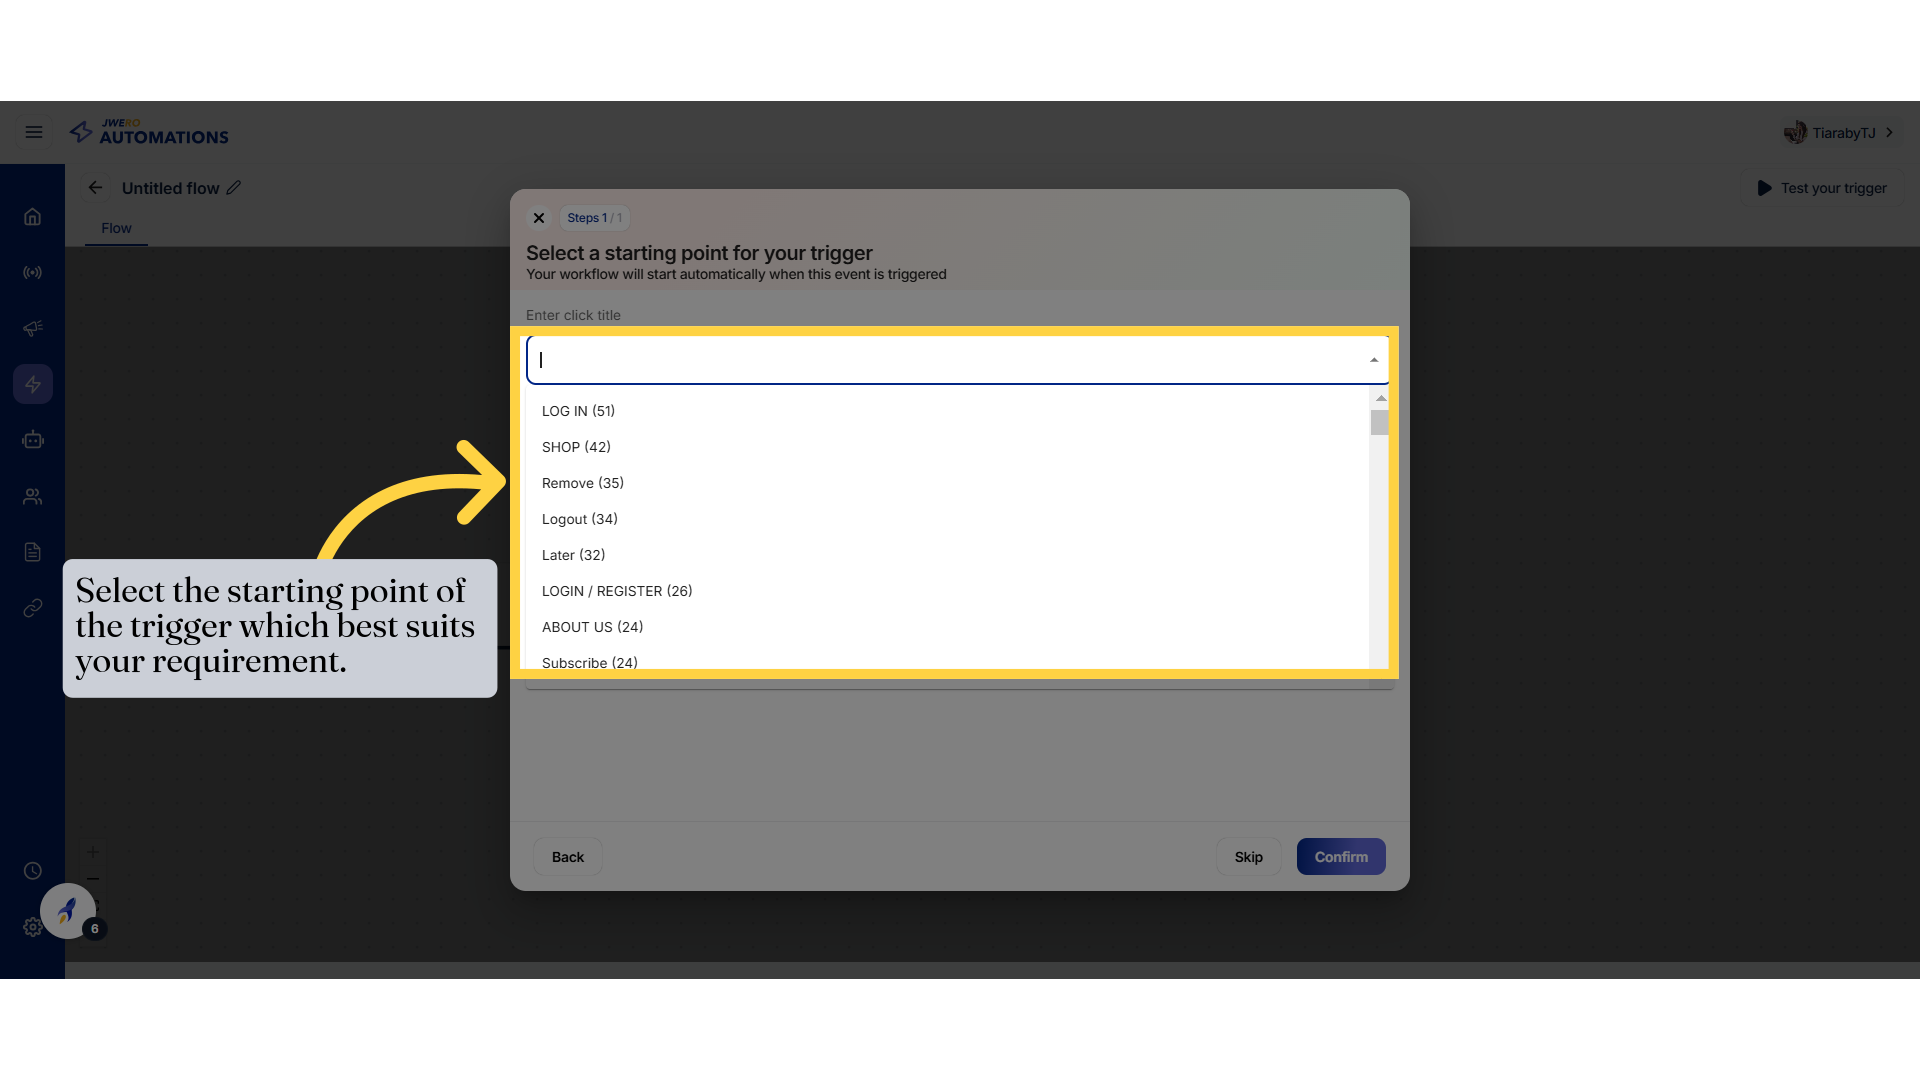
7. Select the starting point.
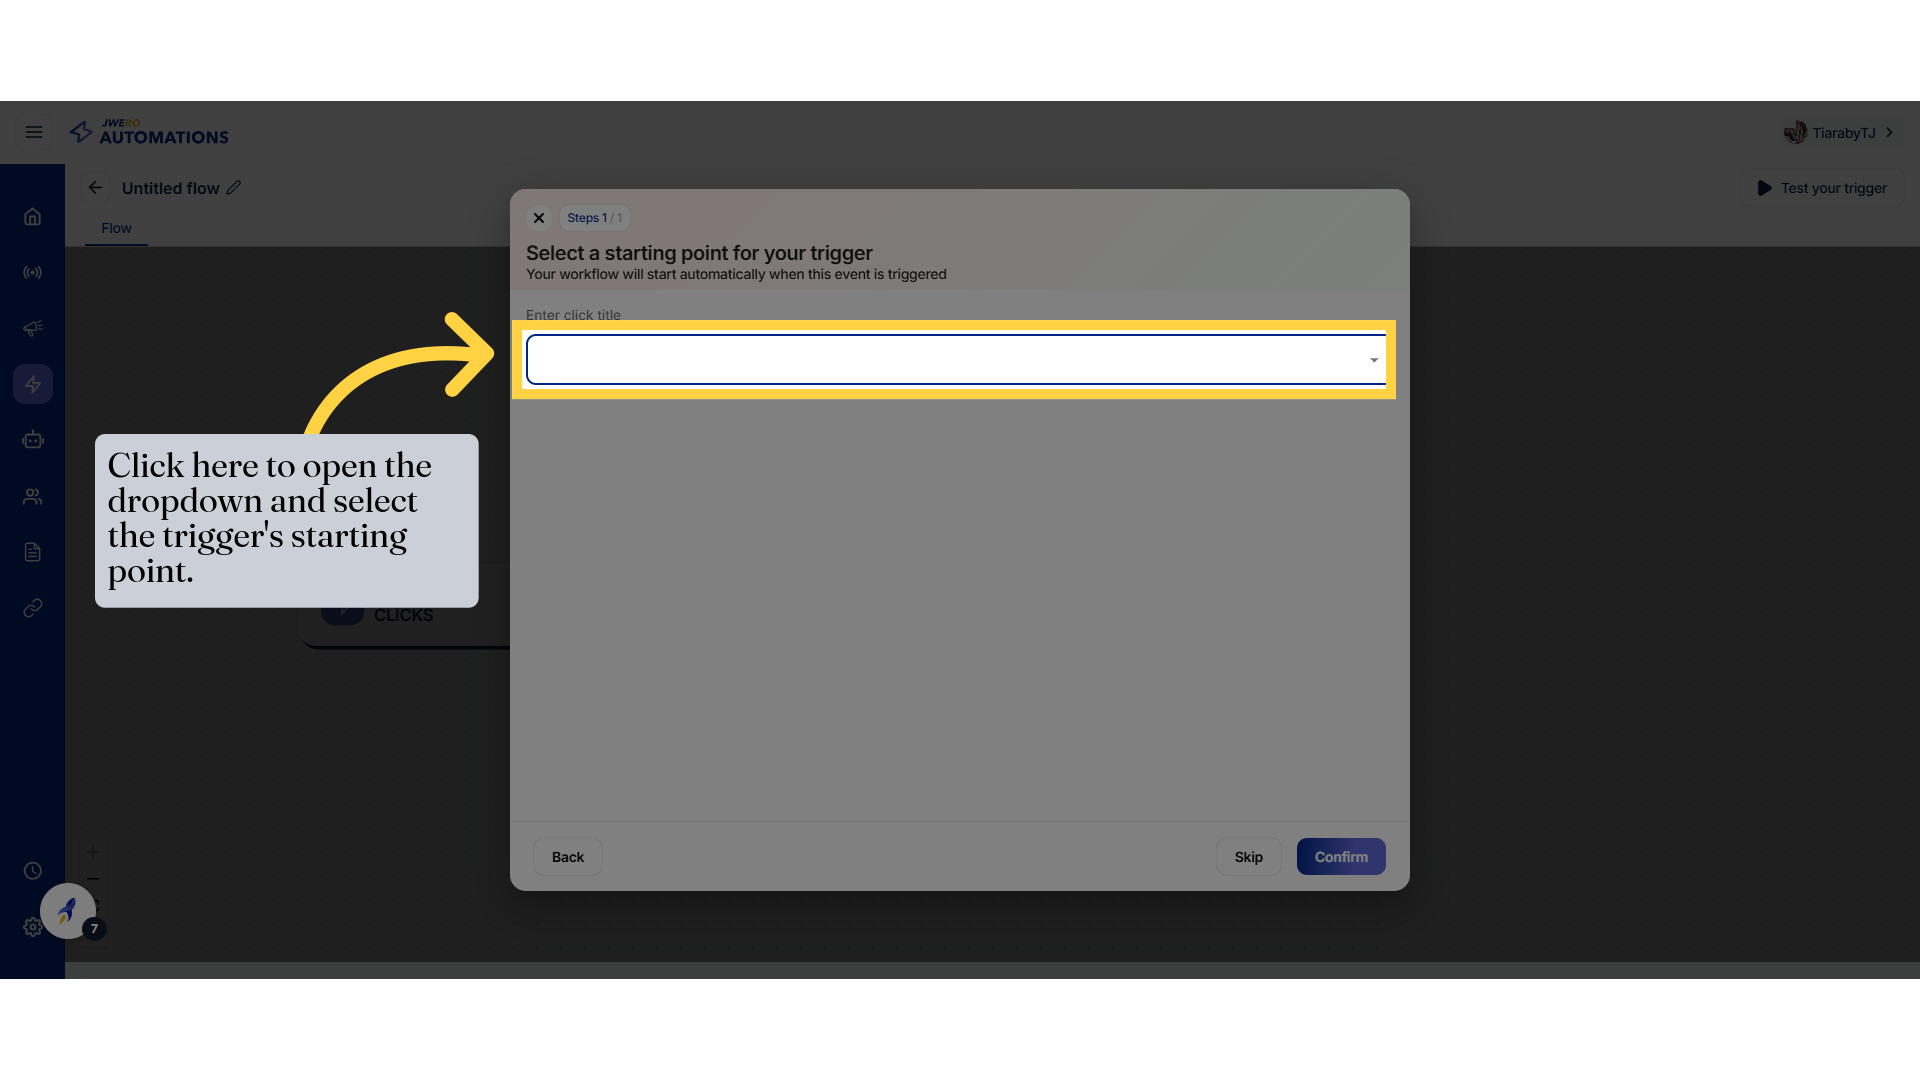
8. Select the starting point of the trigger which best suits your requirement.
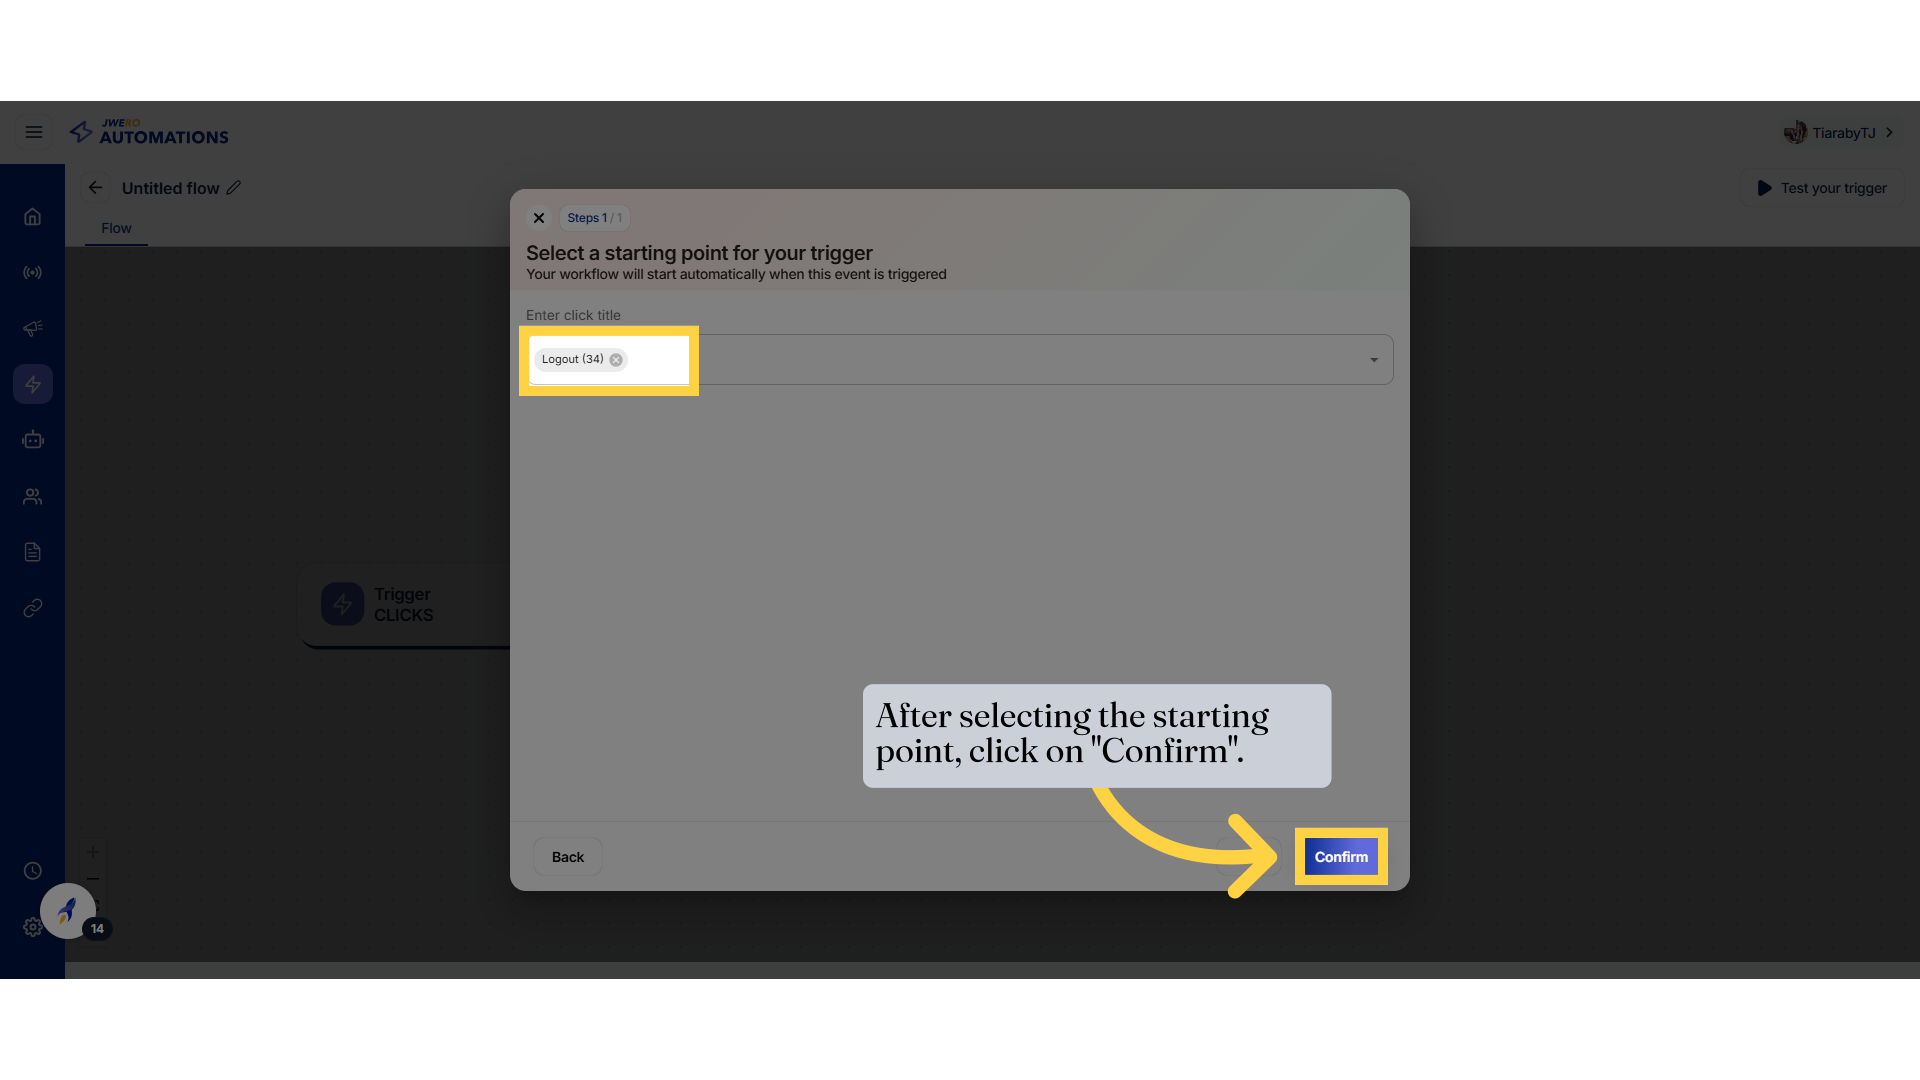
9. After selecting the starting point, click on "Confirm".
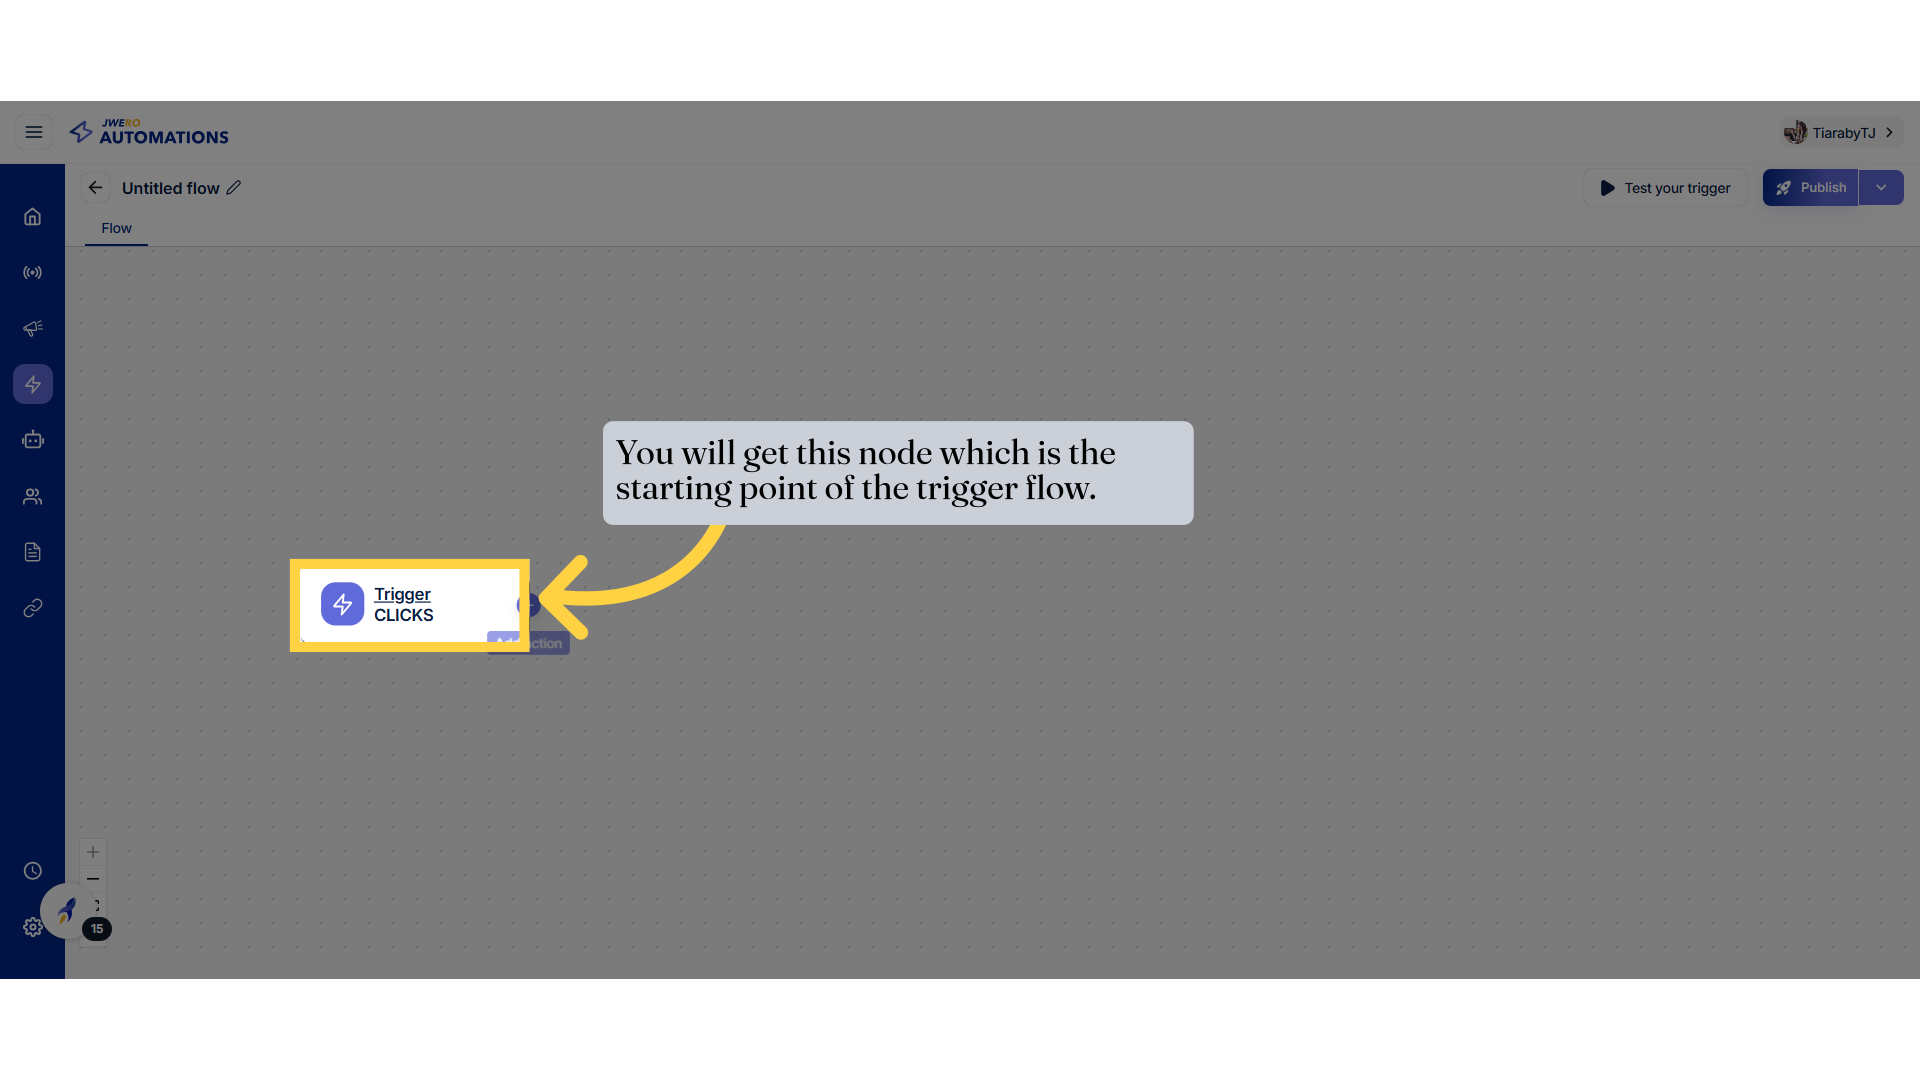
10. You will get this node which is the starting point of the trigger flow.
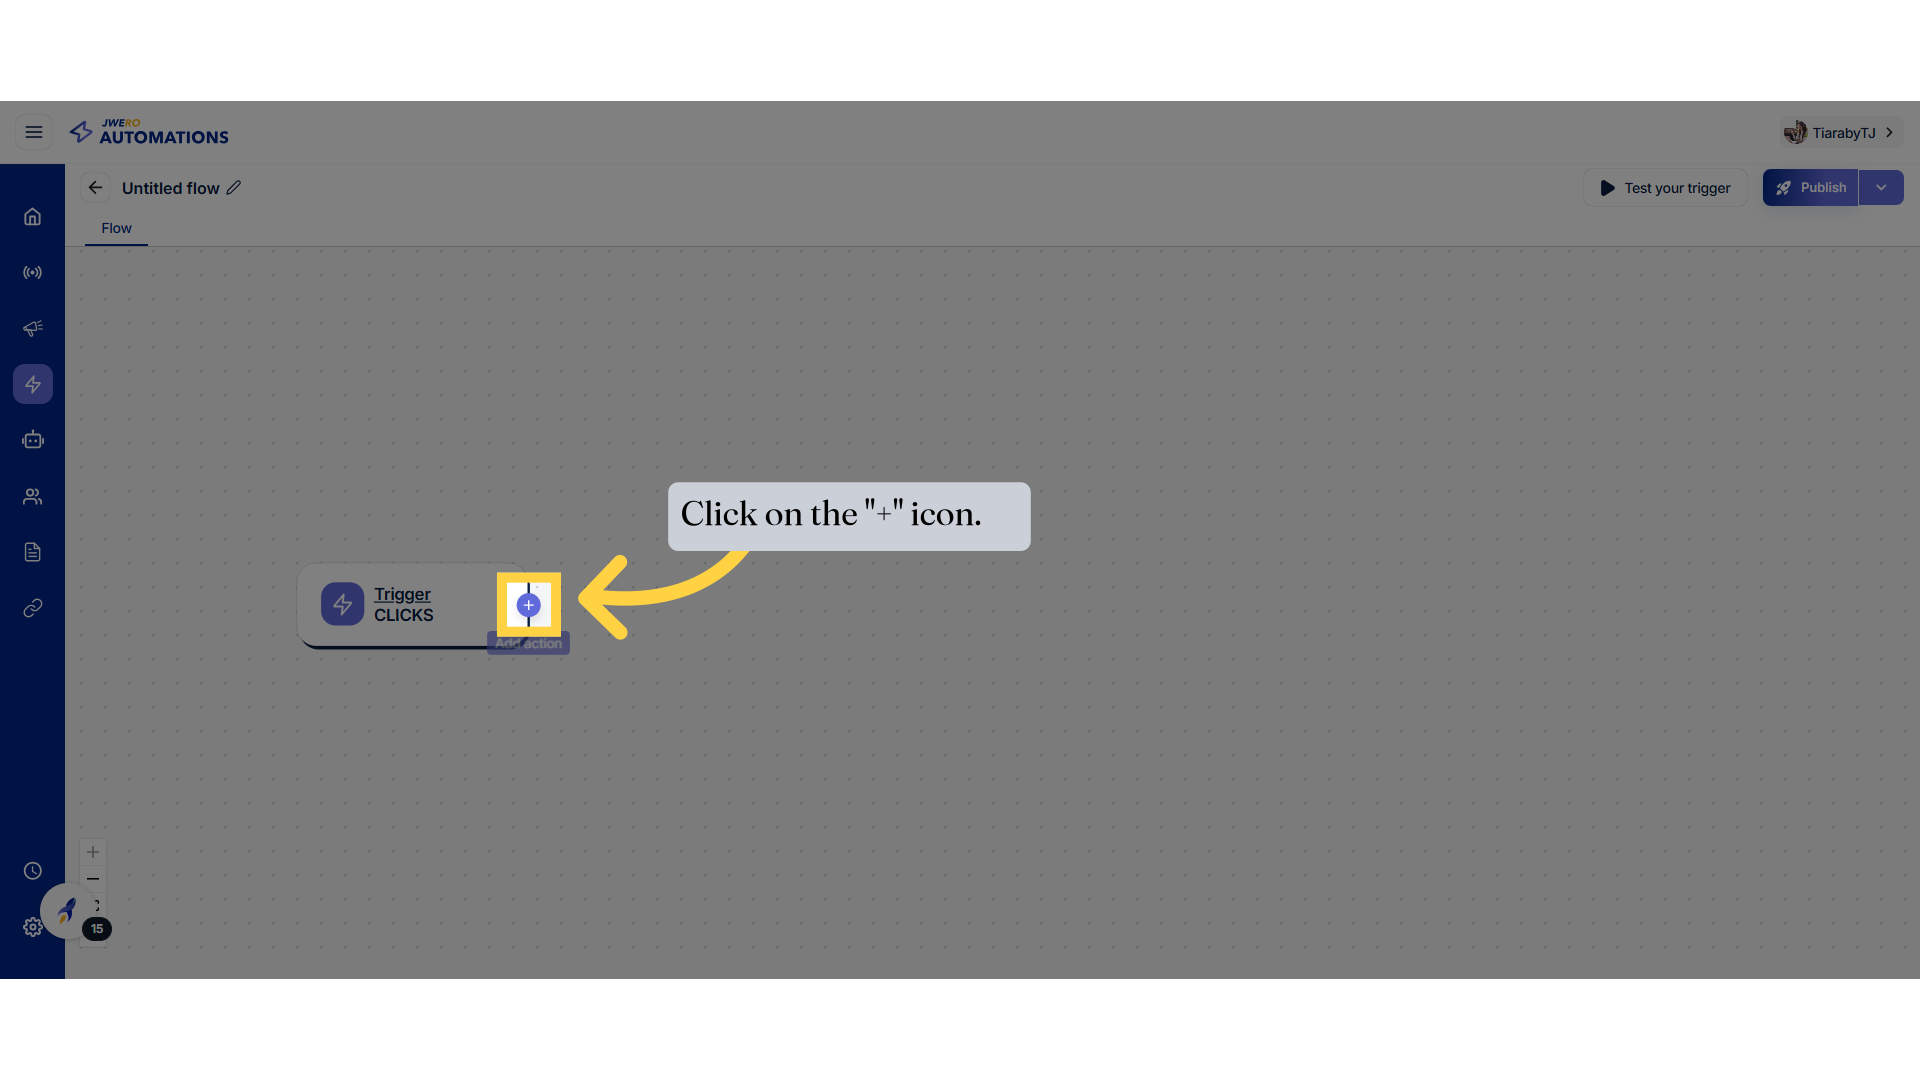
11. Click on the "+" icon.
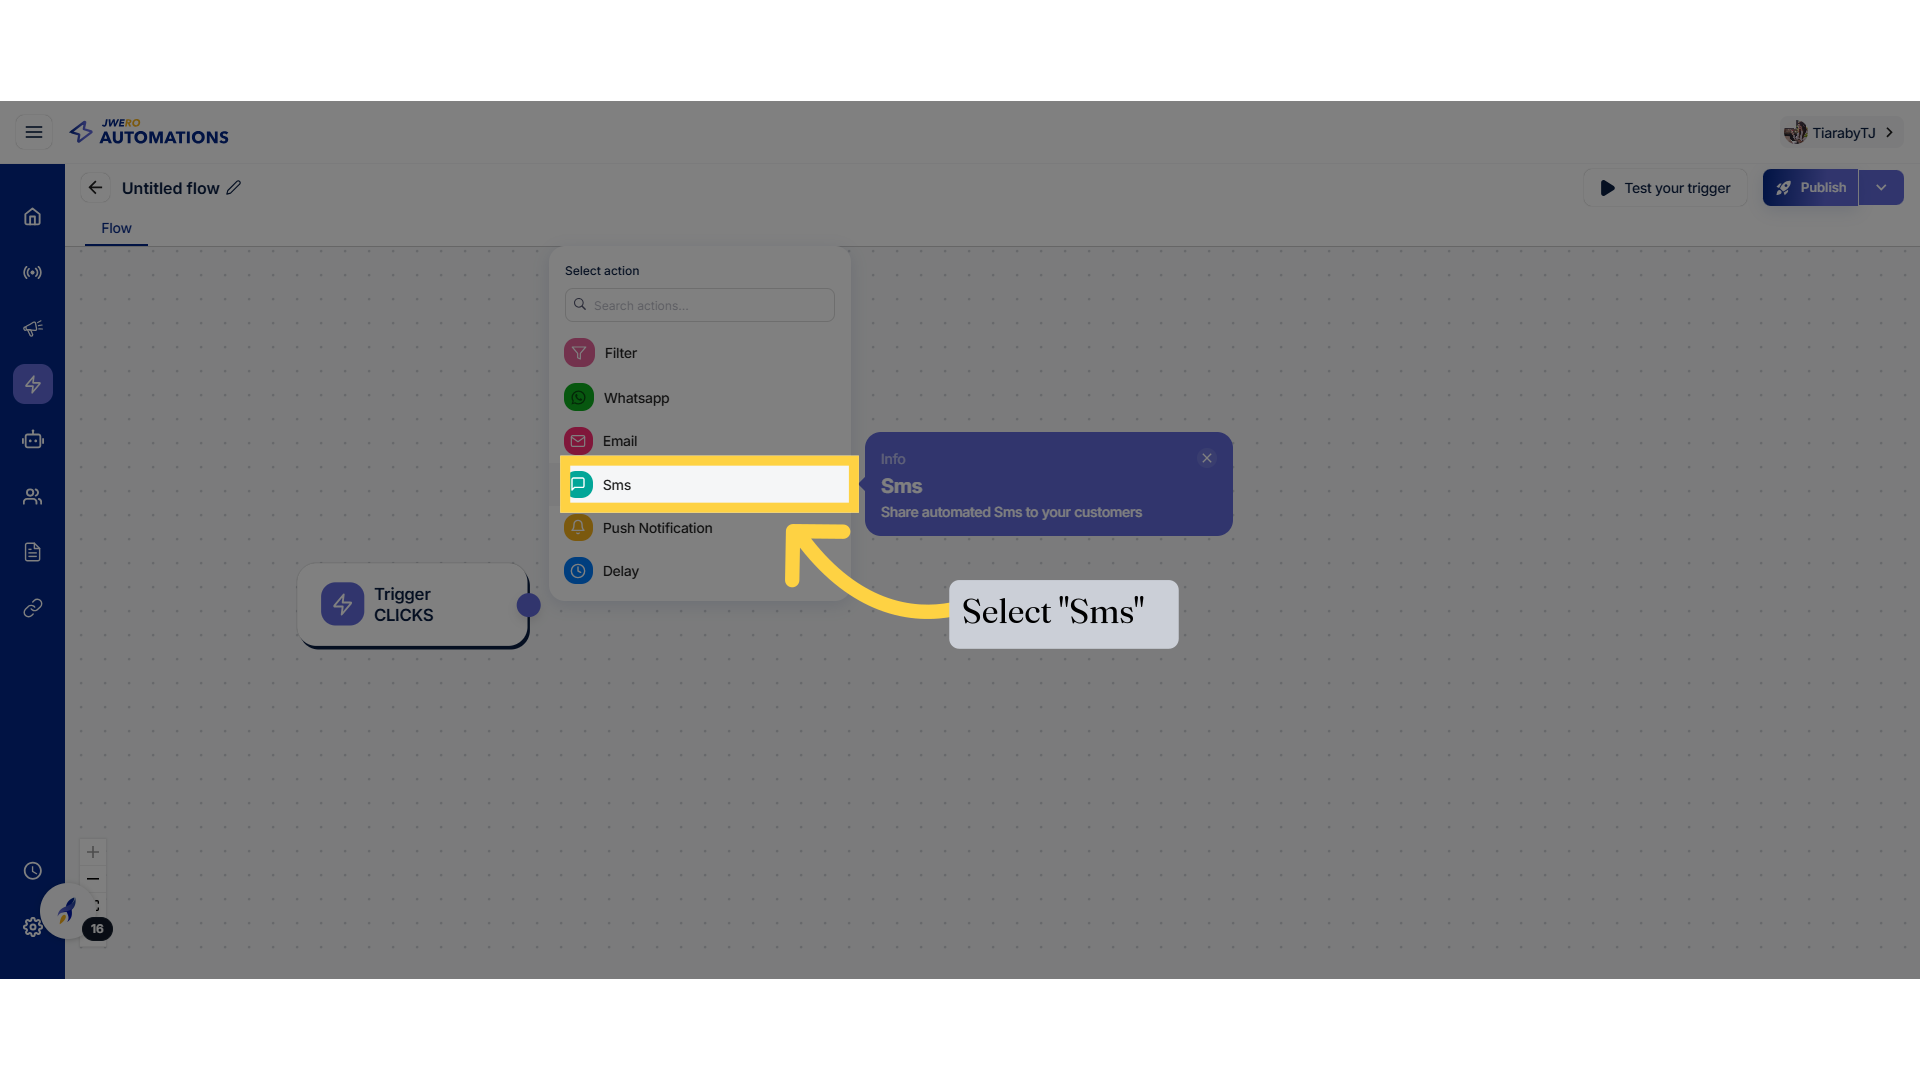
12. Select "Sms"
13. Block Title
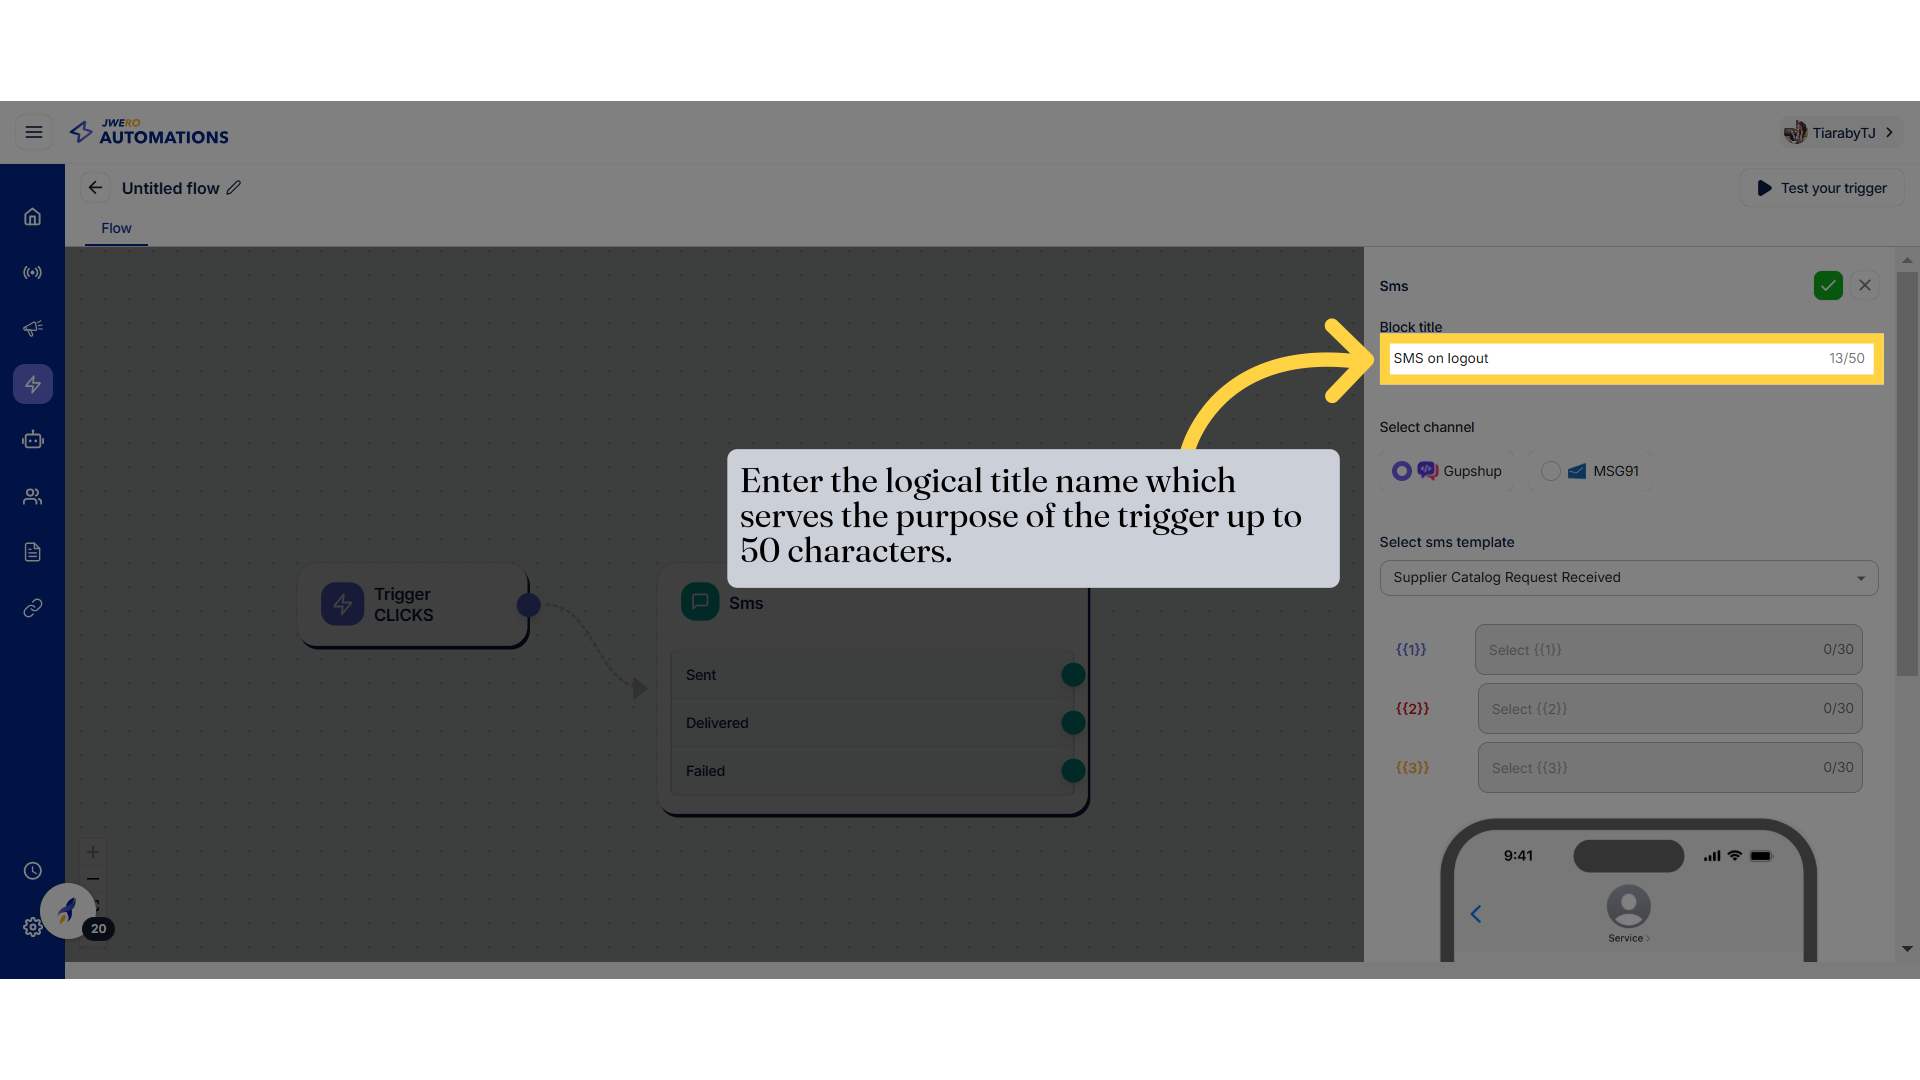
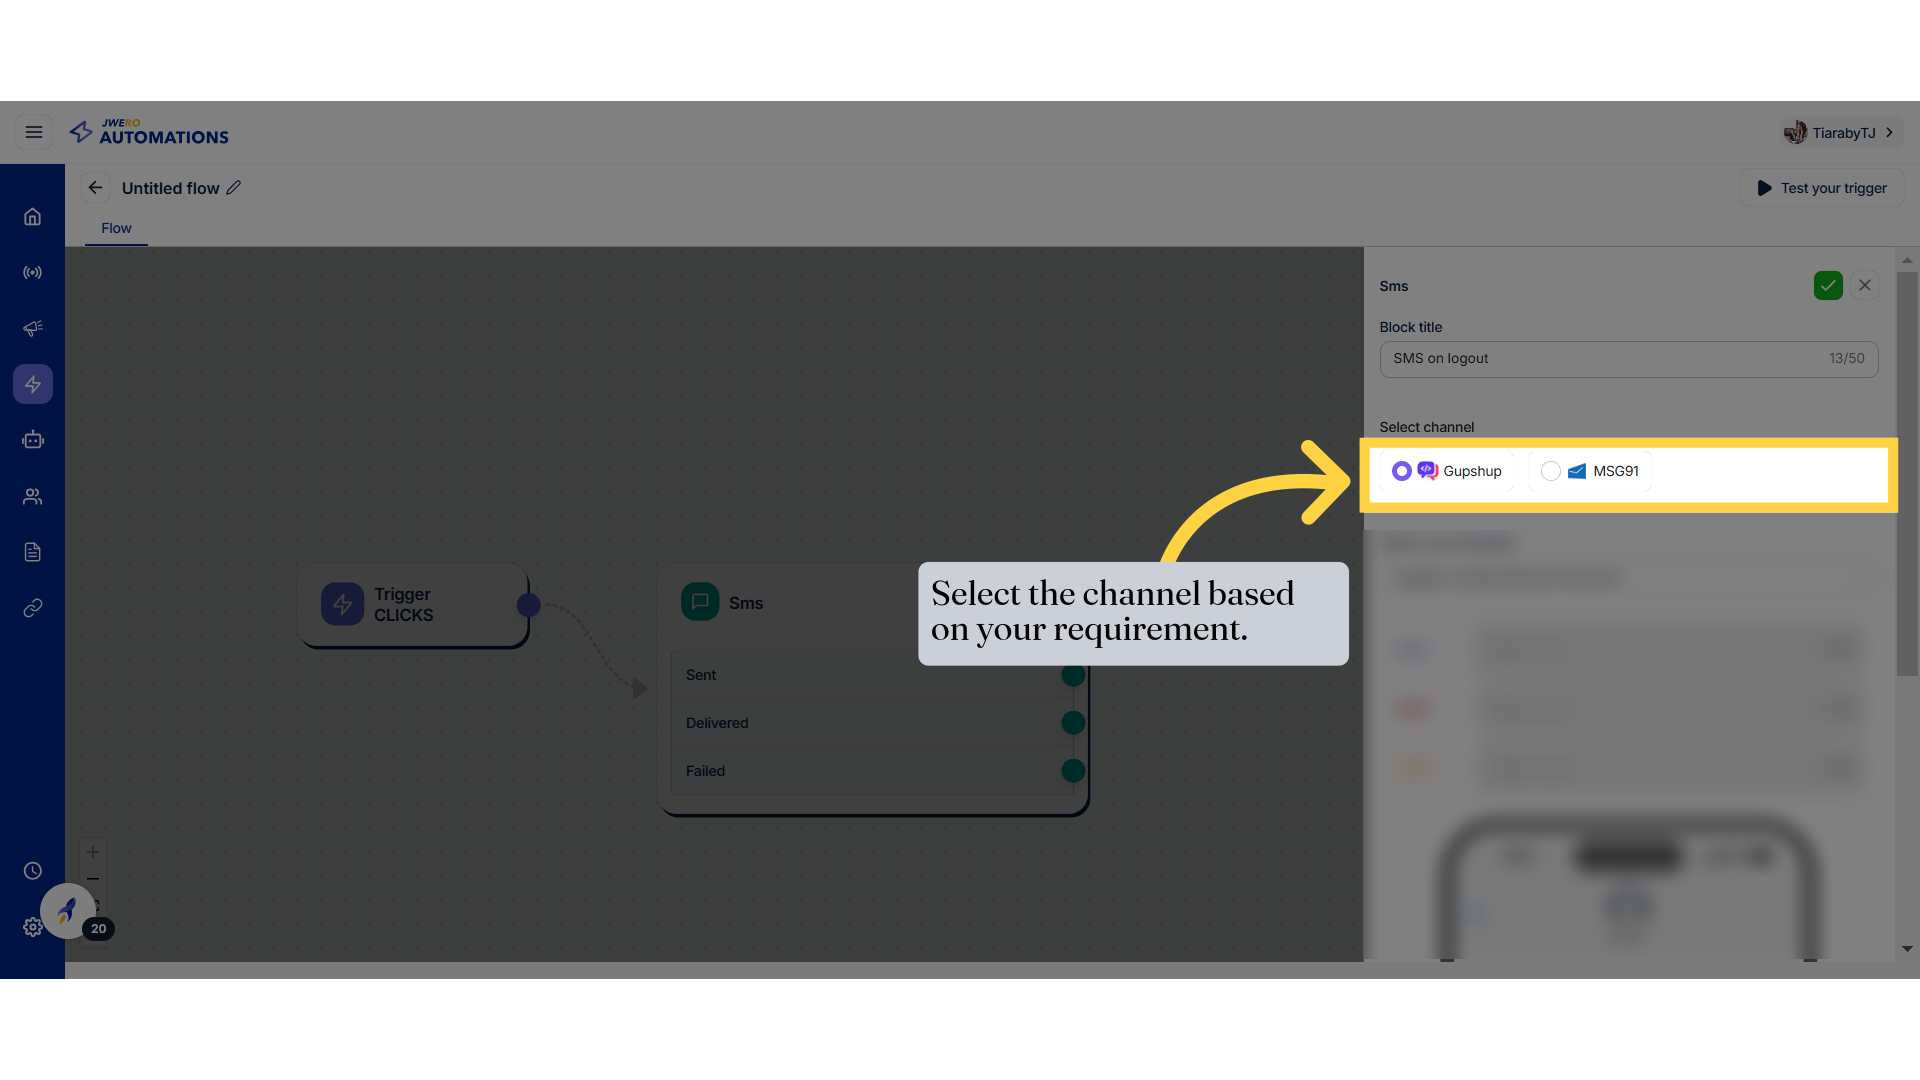
14. Select the channel.
15. Select the template.
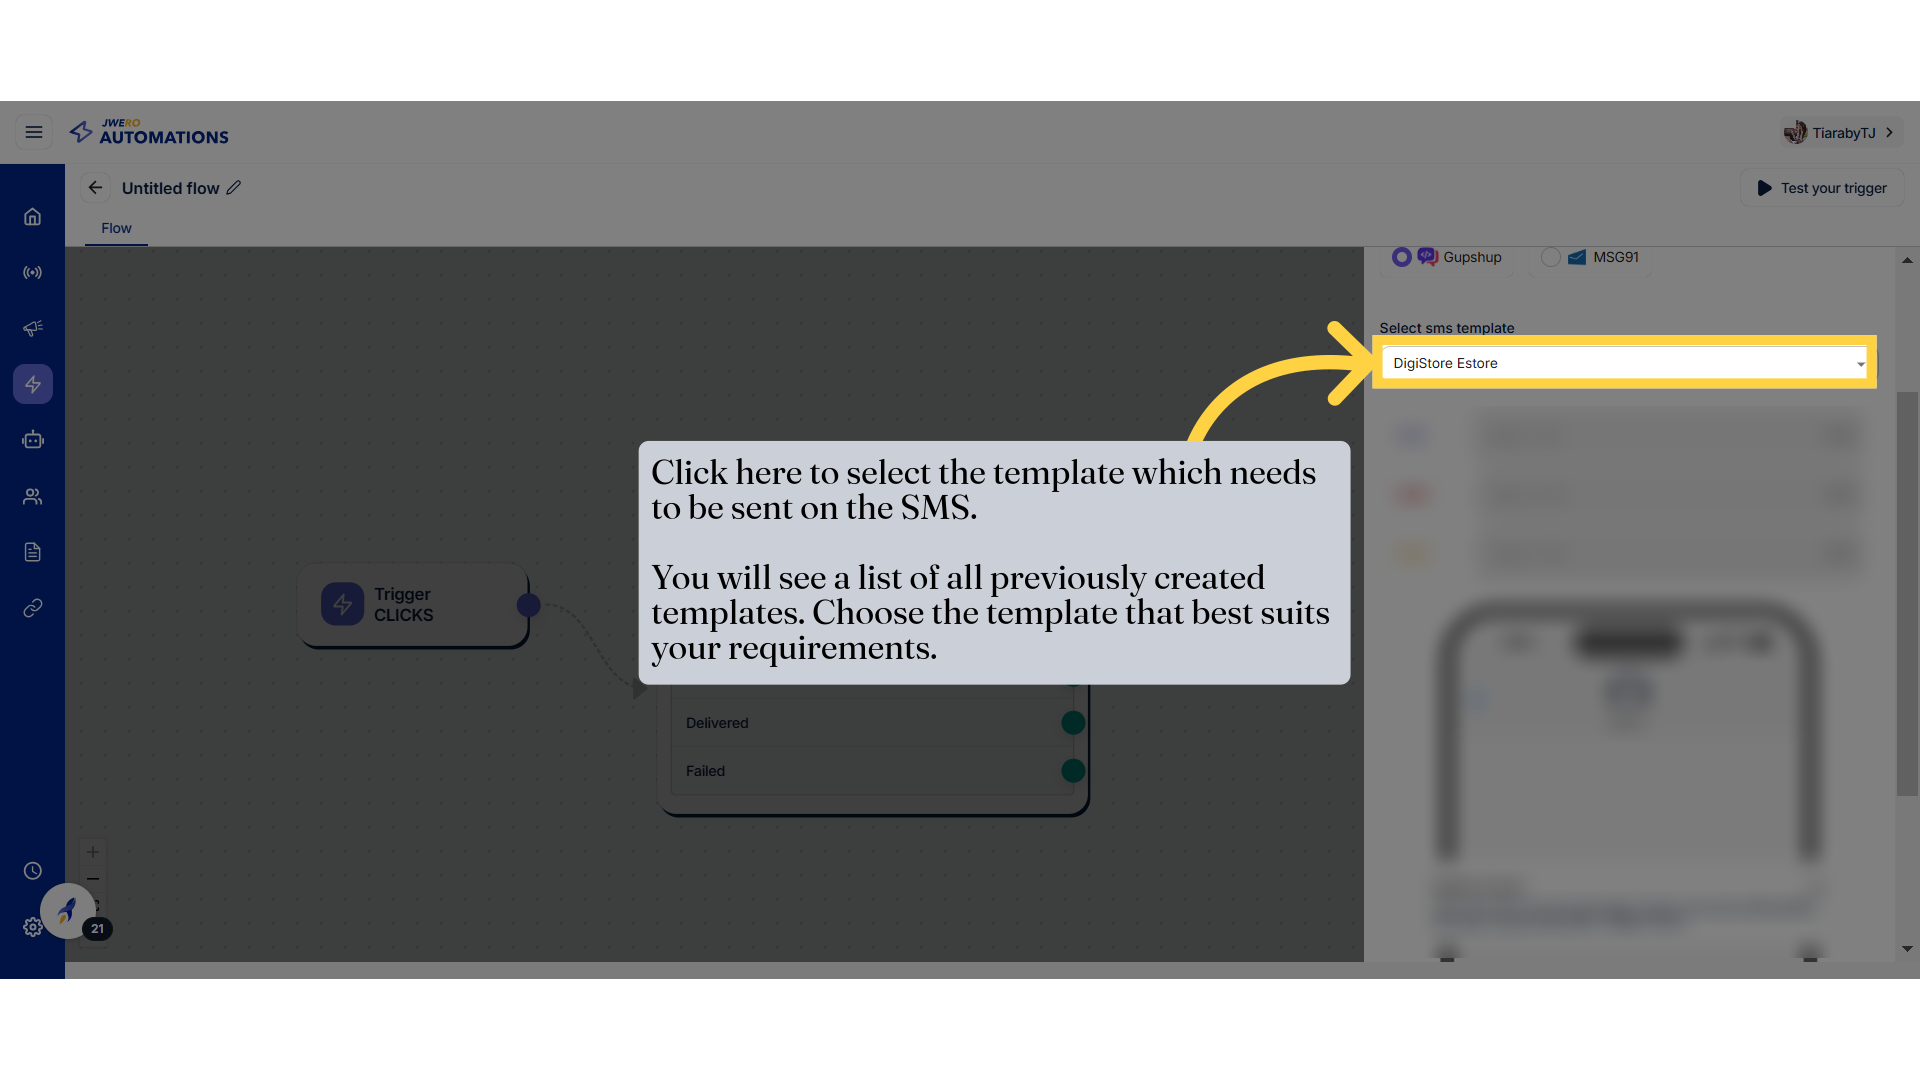
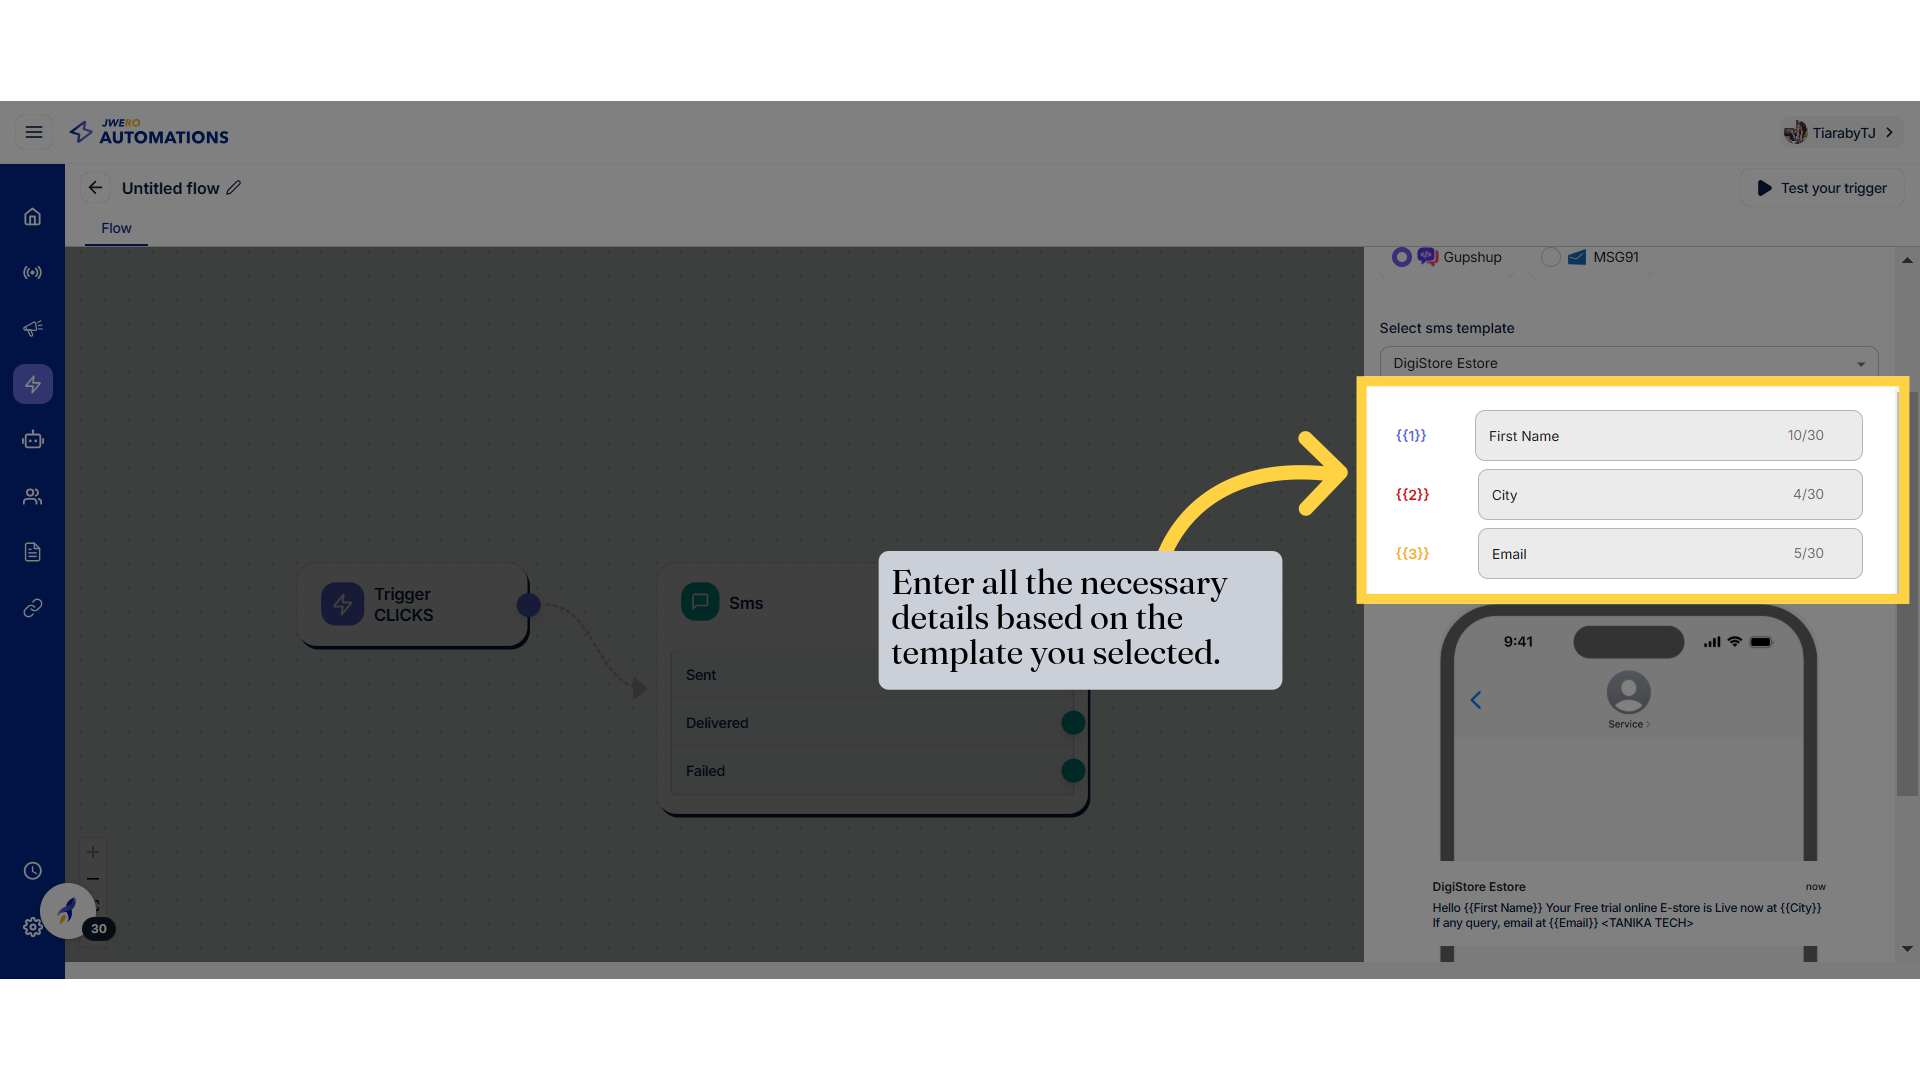
16. Enter all the necessary details based on the template you selected.
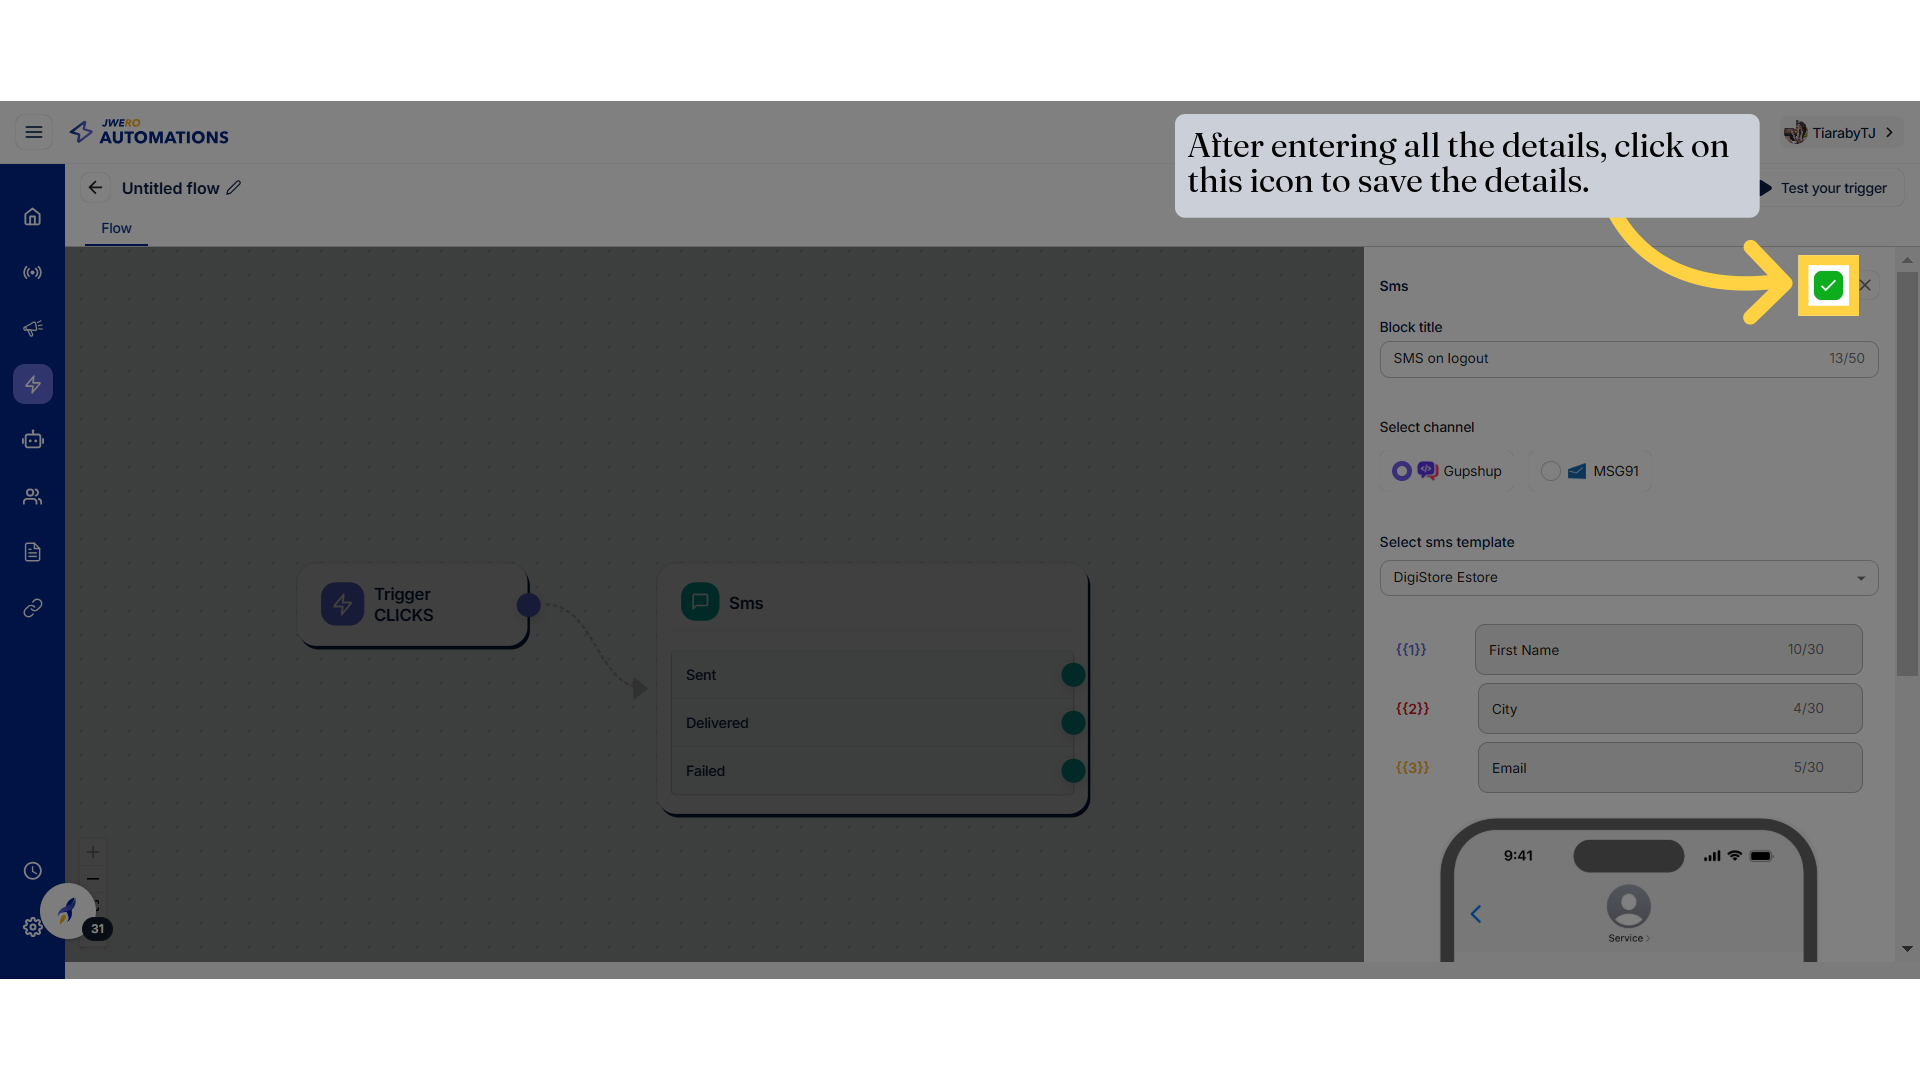
17. After entering all the details, click on this icon to save the details.
18. SMS node
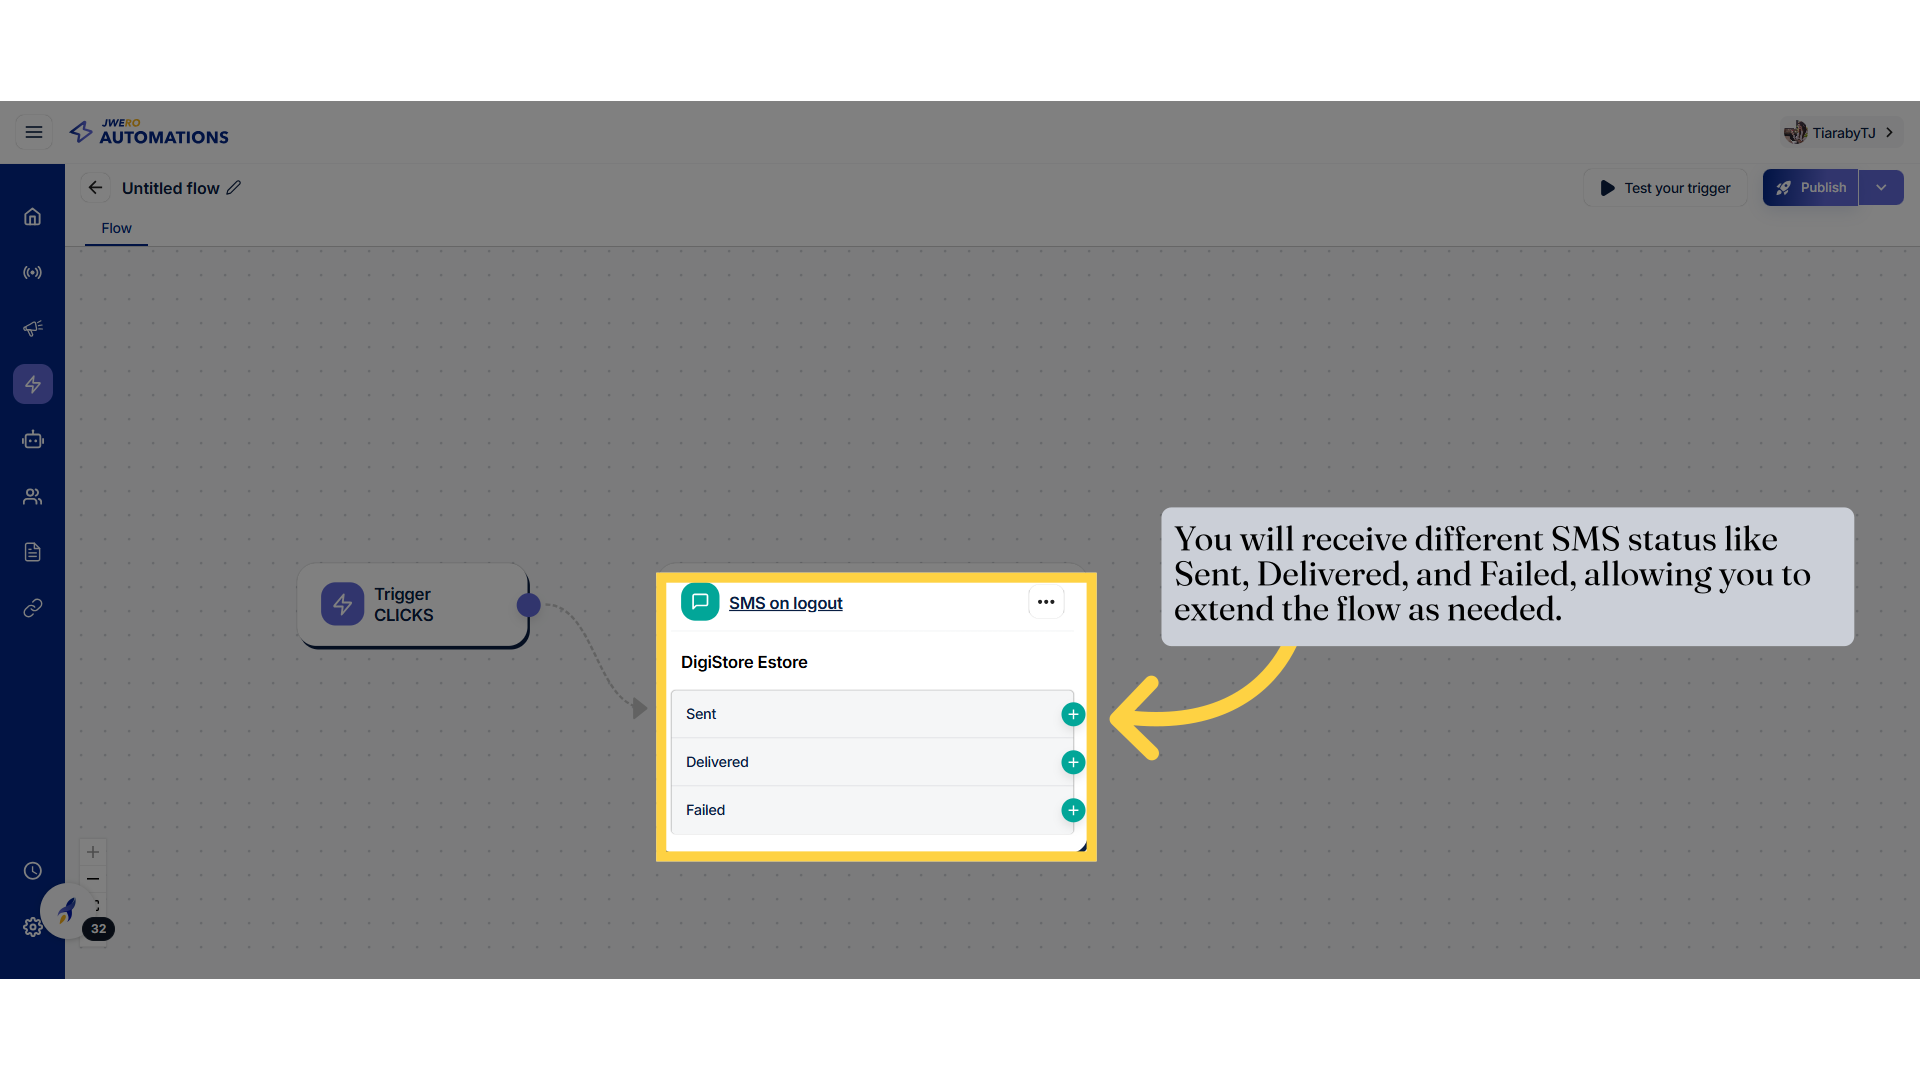
The Sent, Delivered, and Failed statuses in the context of SMS triggers represent the lifecycle and outcome of an SMS message. Here’s what each status means:
Sent : The SMS has been successfully sent from the platform to the SMS gateway (e.g., Gupshup or Msg91).
Delivered : The SMS has been successfully delivered to the recipient’s mobile device.
Failed : The SMS failed to be delivered to the recipient’s device.
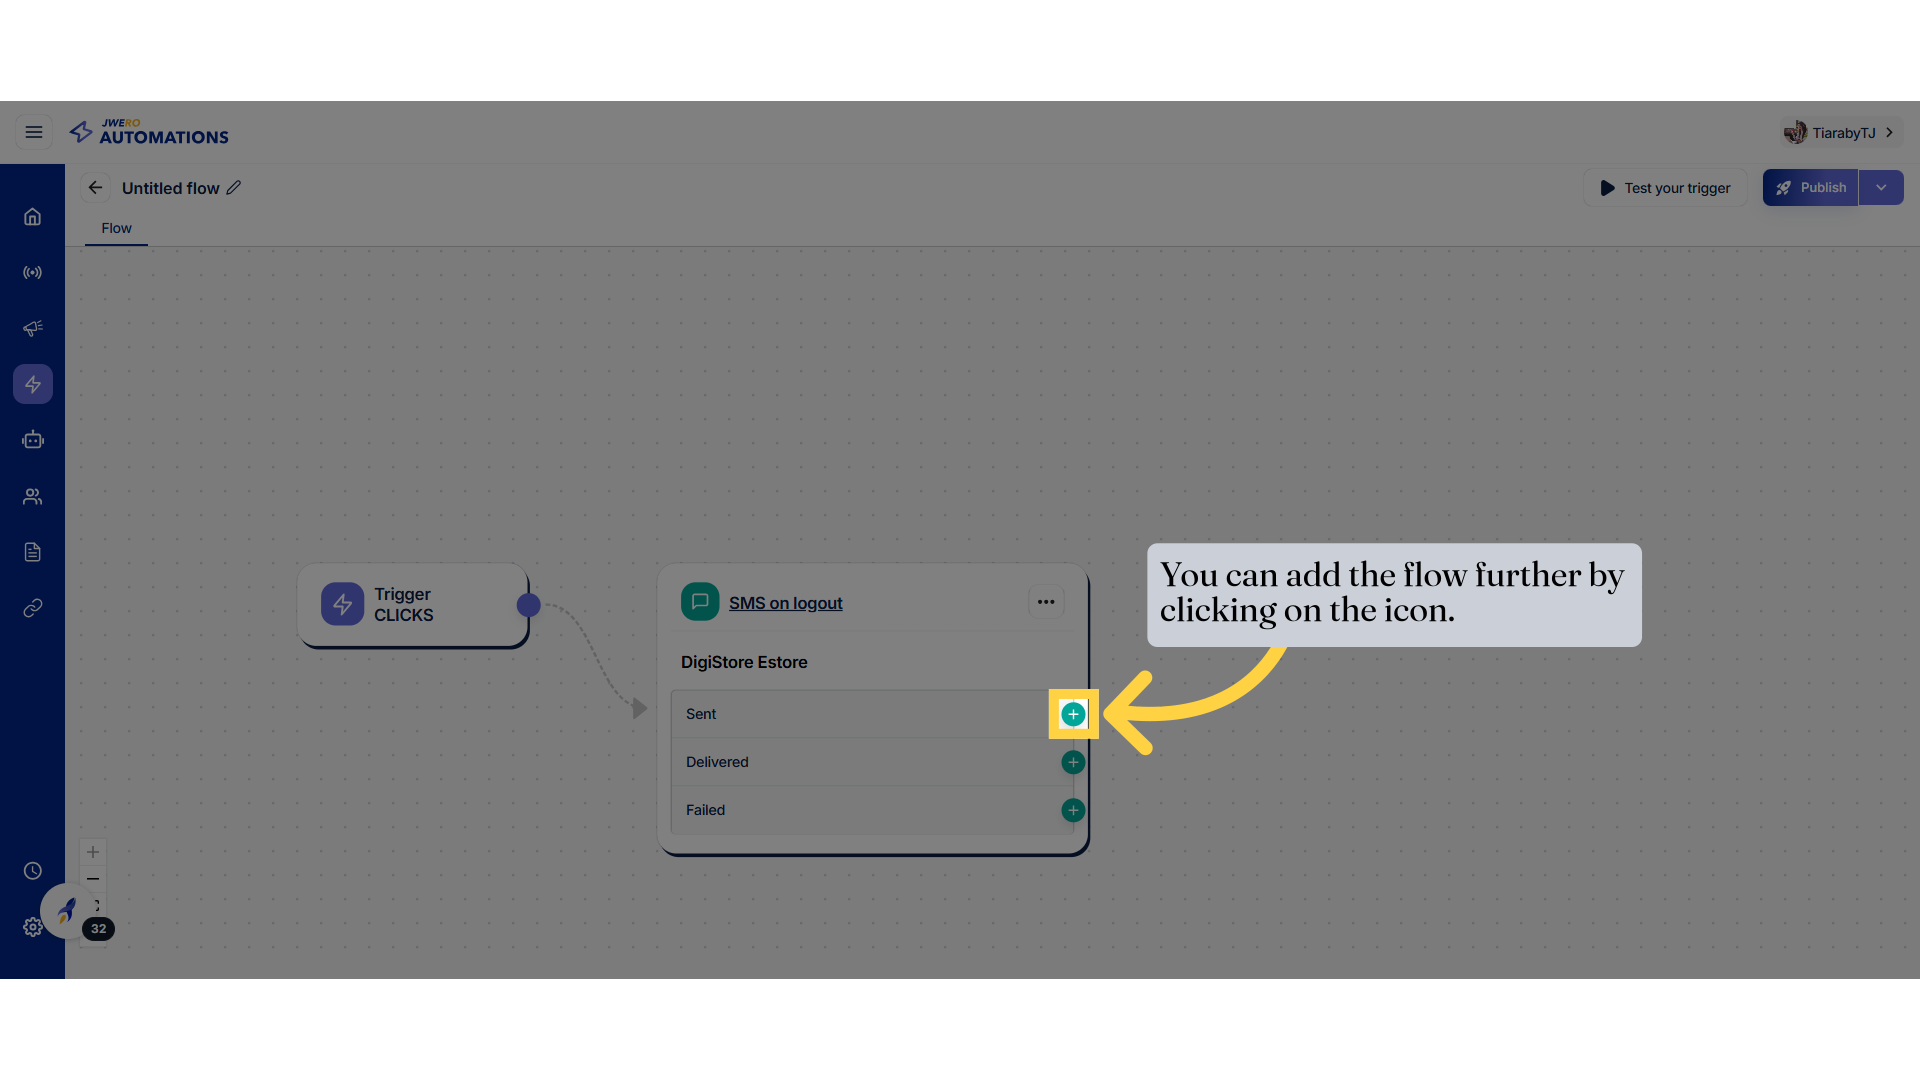
19. You can add the flow further by clicking on the icon.
20. I have configured the actions for the SMS "Sent" status. Similarly you can create a flow further based on your requirement.

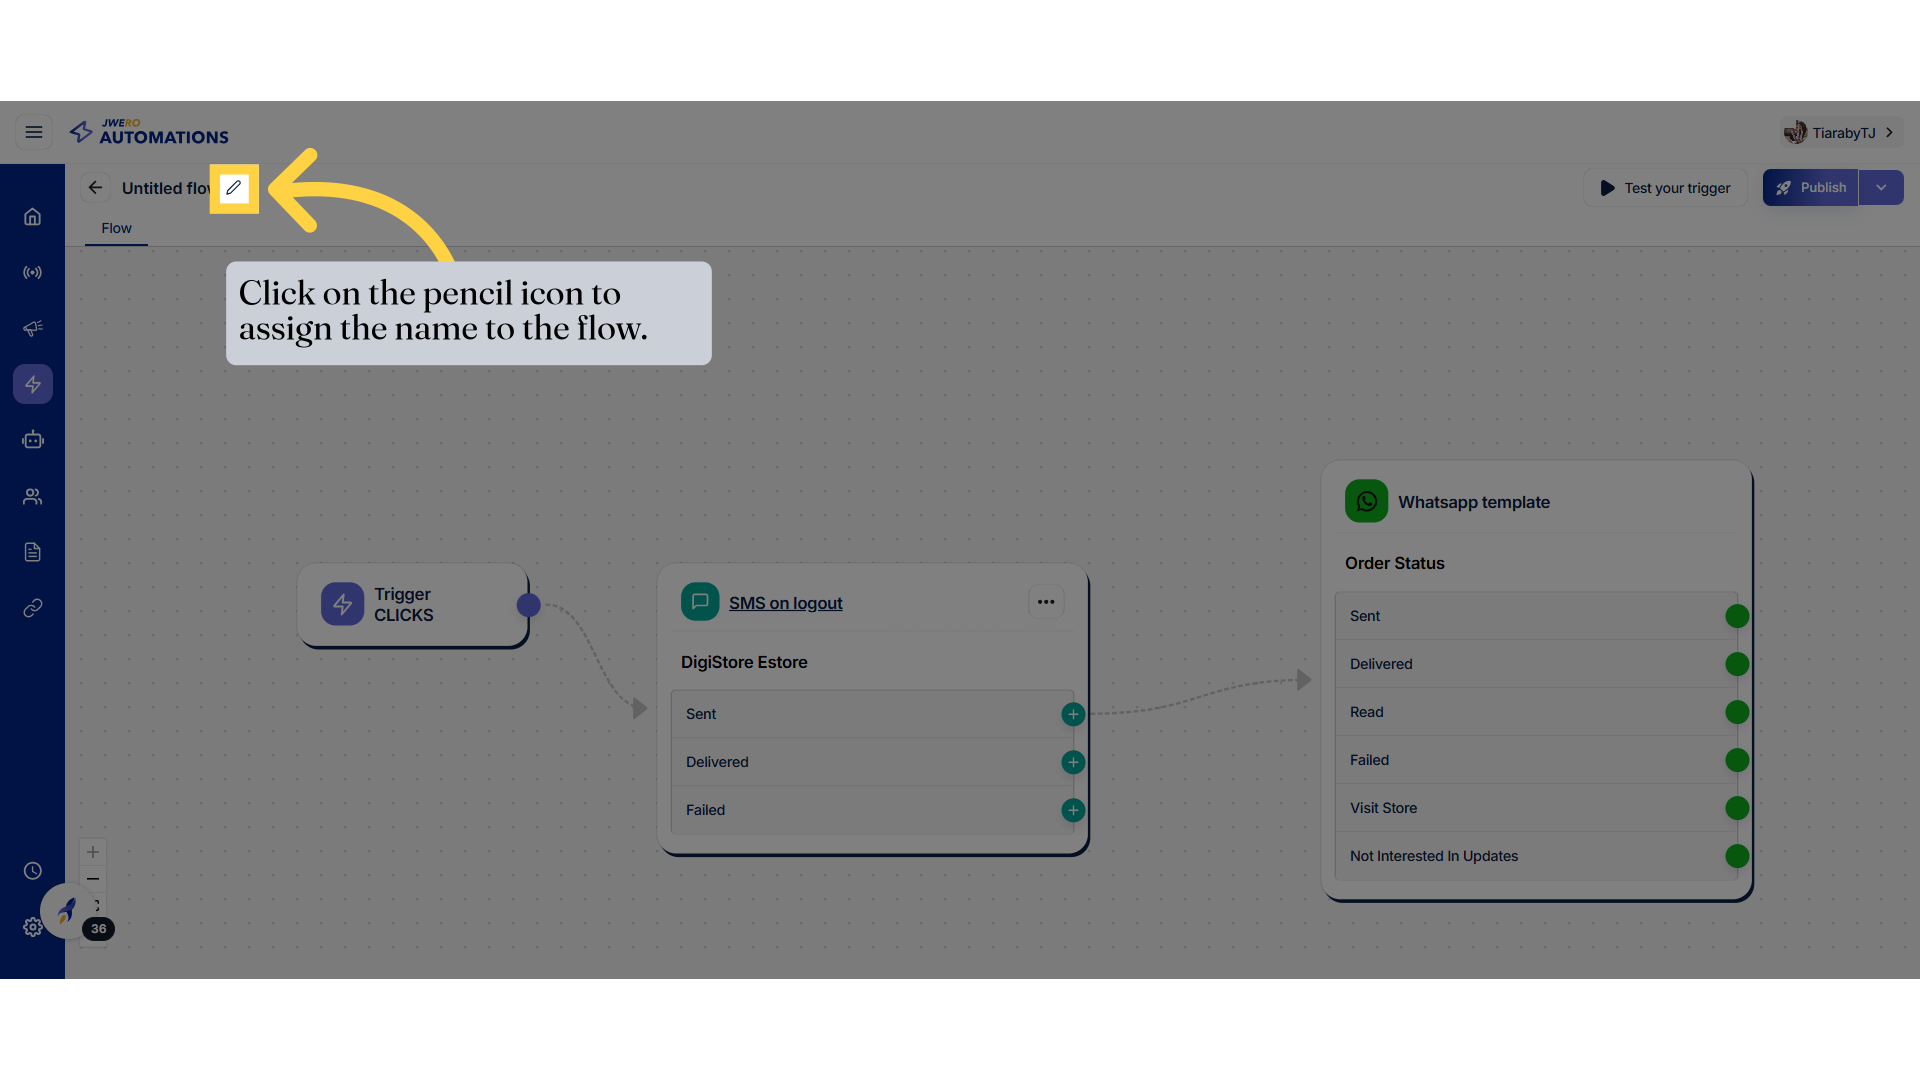
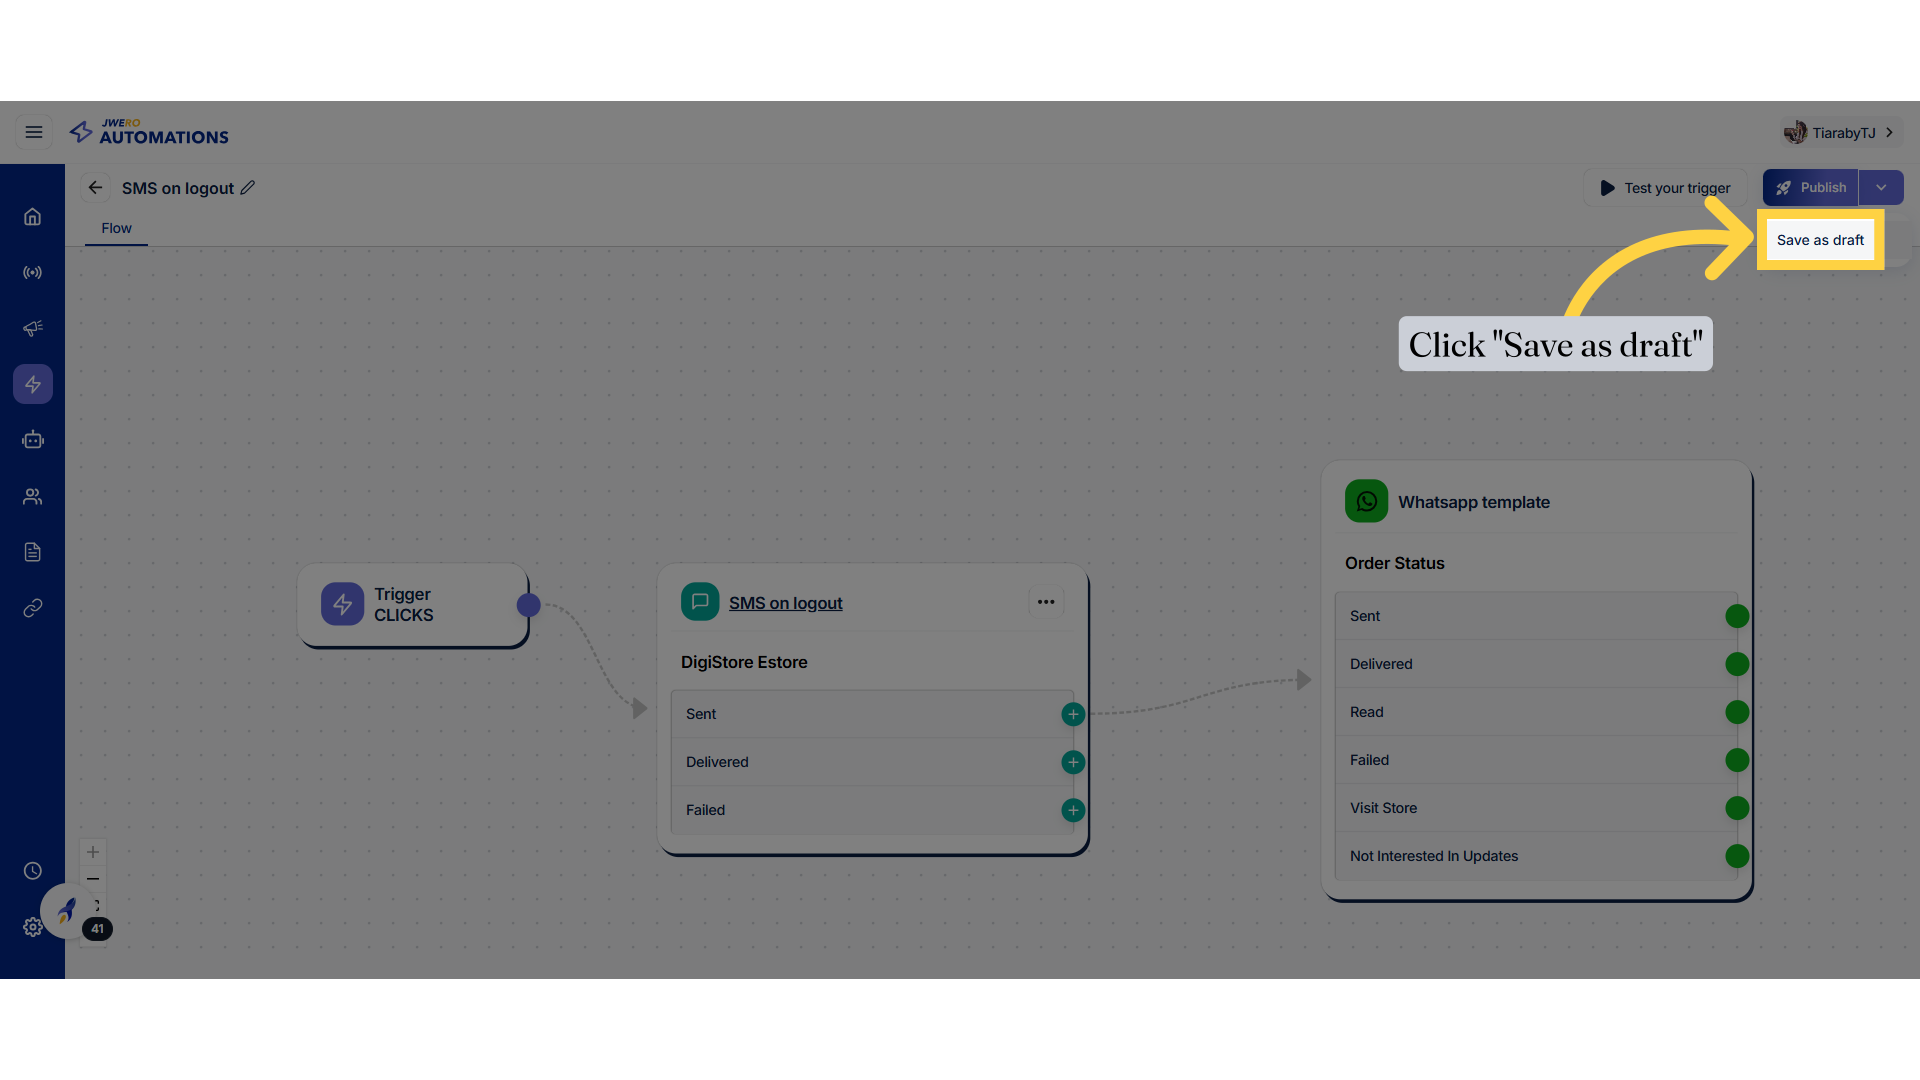
21. Click on the pencil icon to assign the name to the flow.
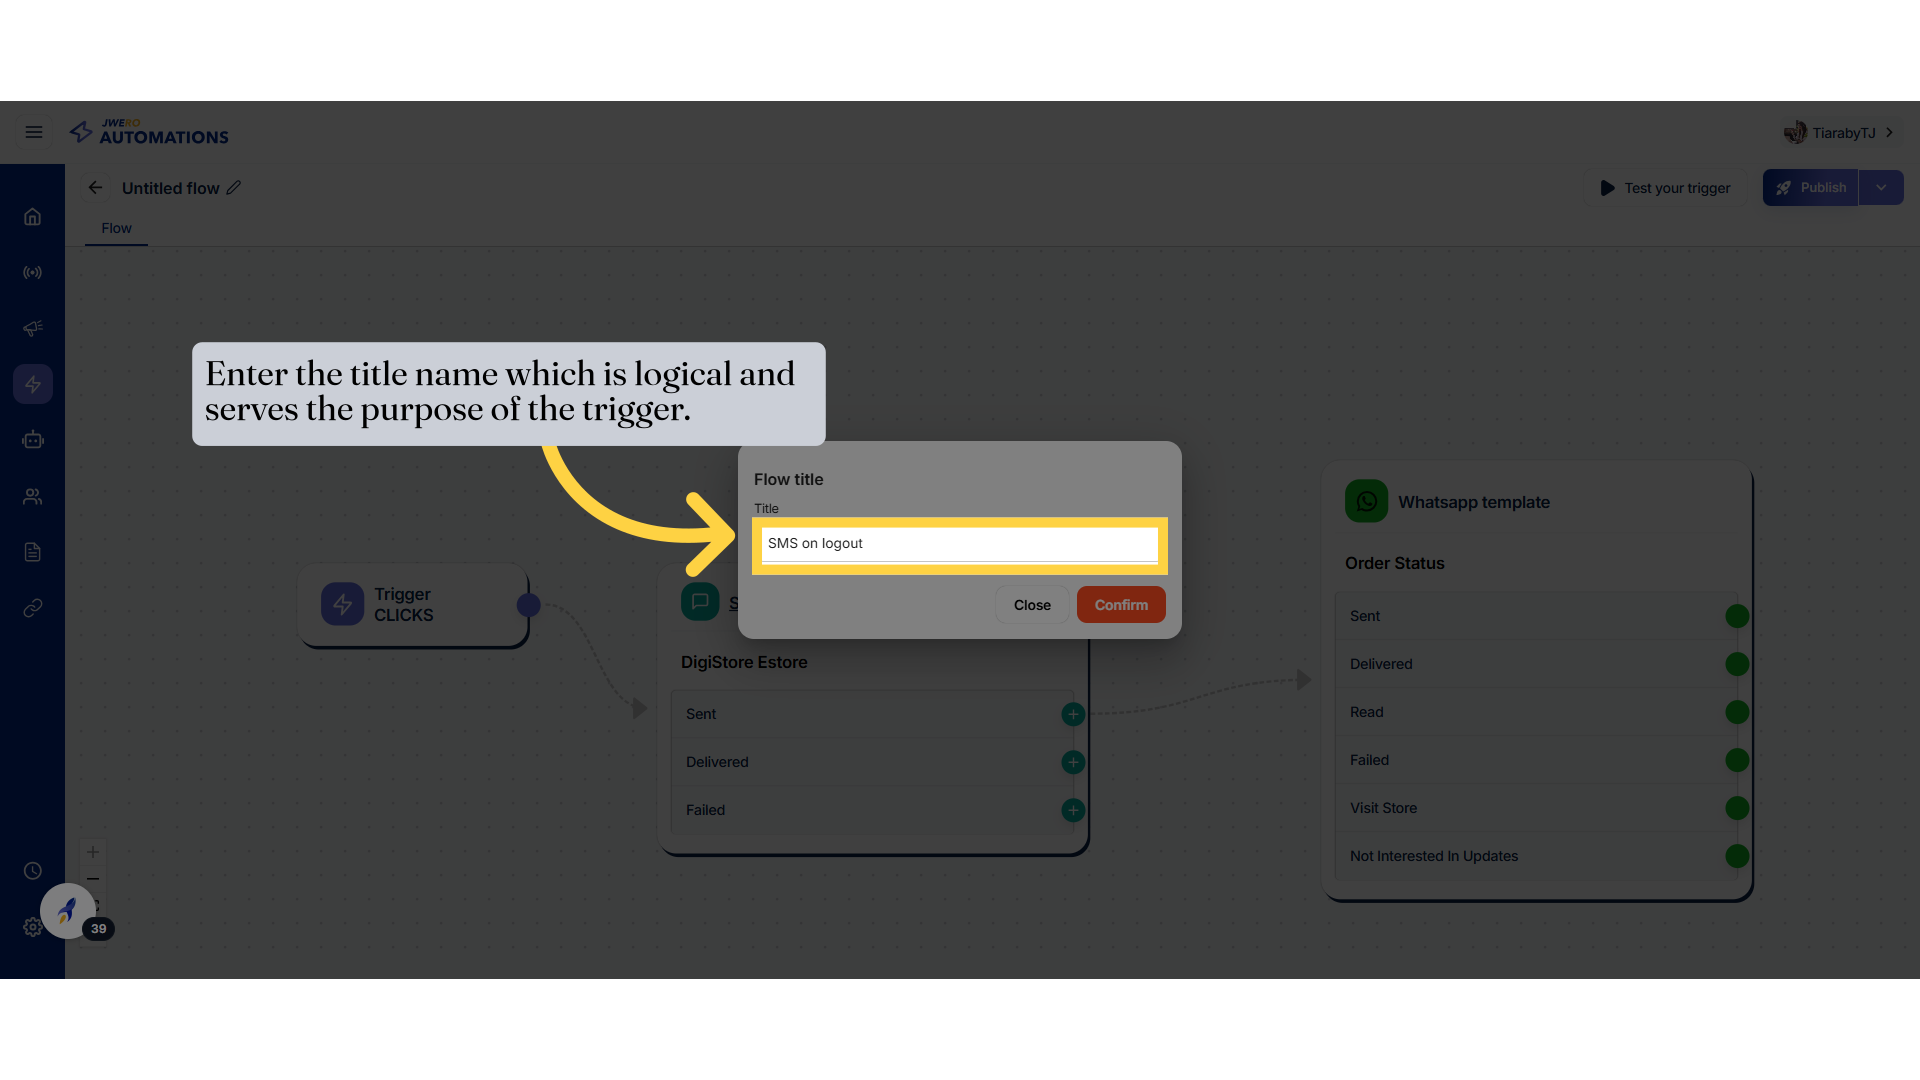
22. Enter the title name which is logical and serves the purpose of the trigger.
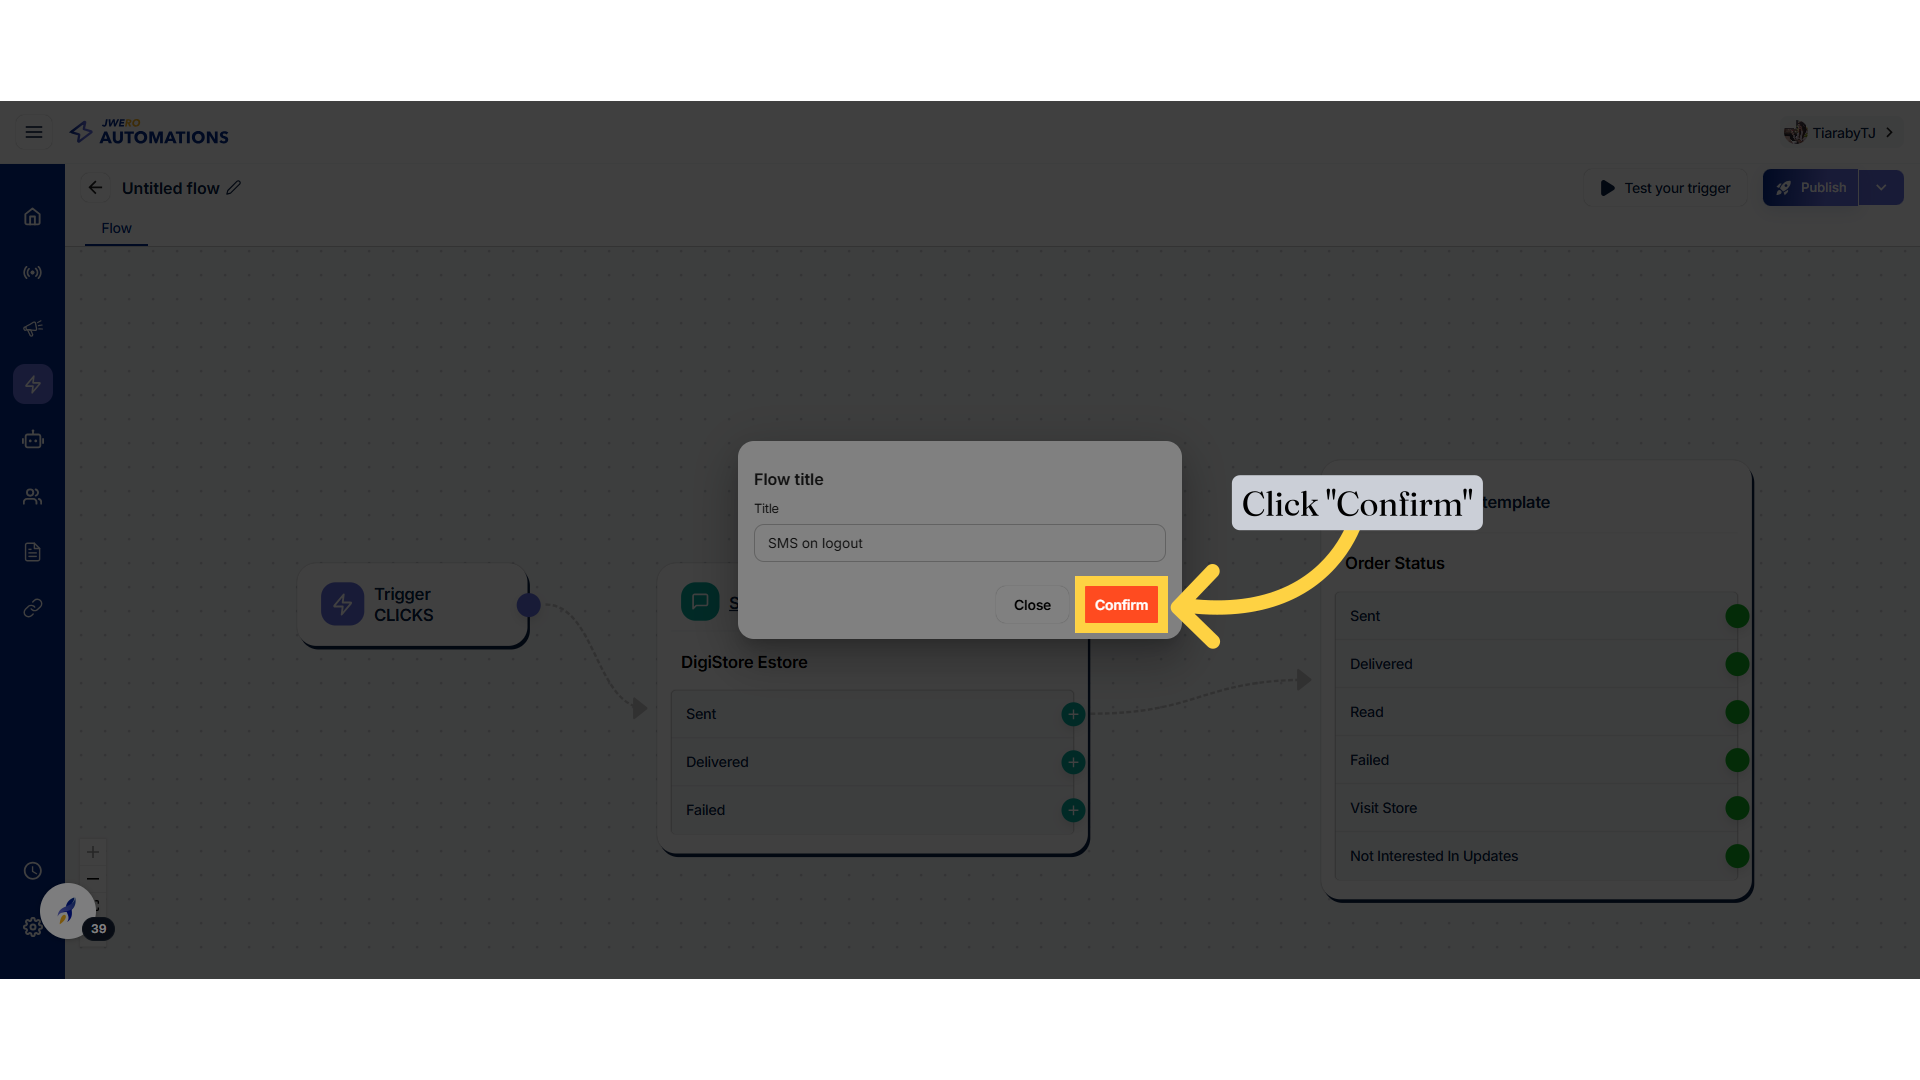
23. Click "Confirm"
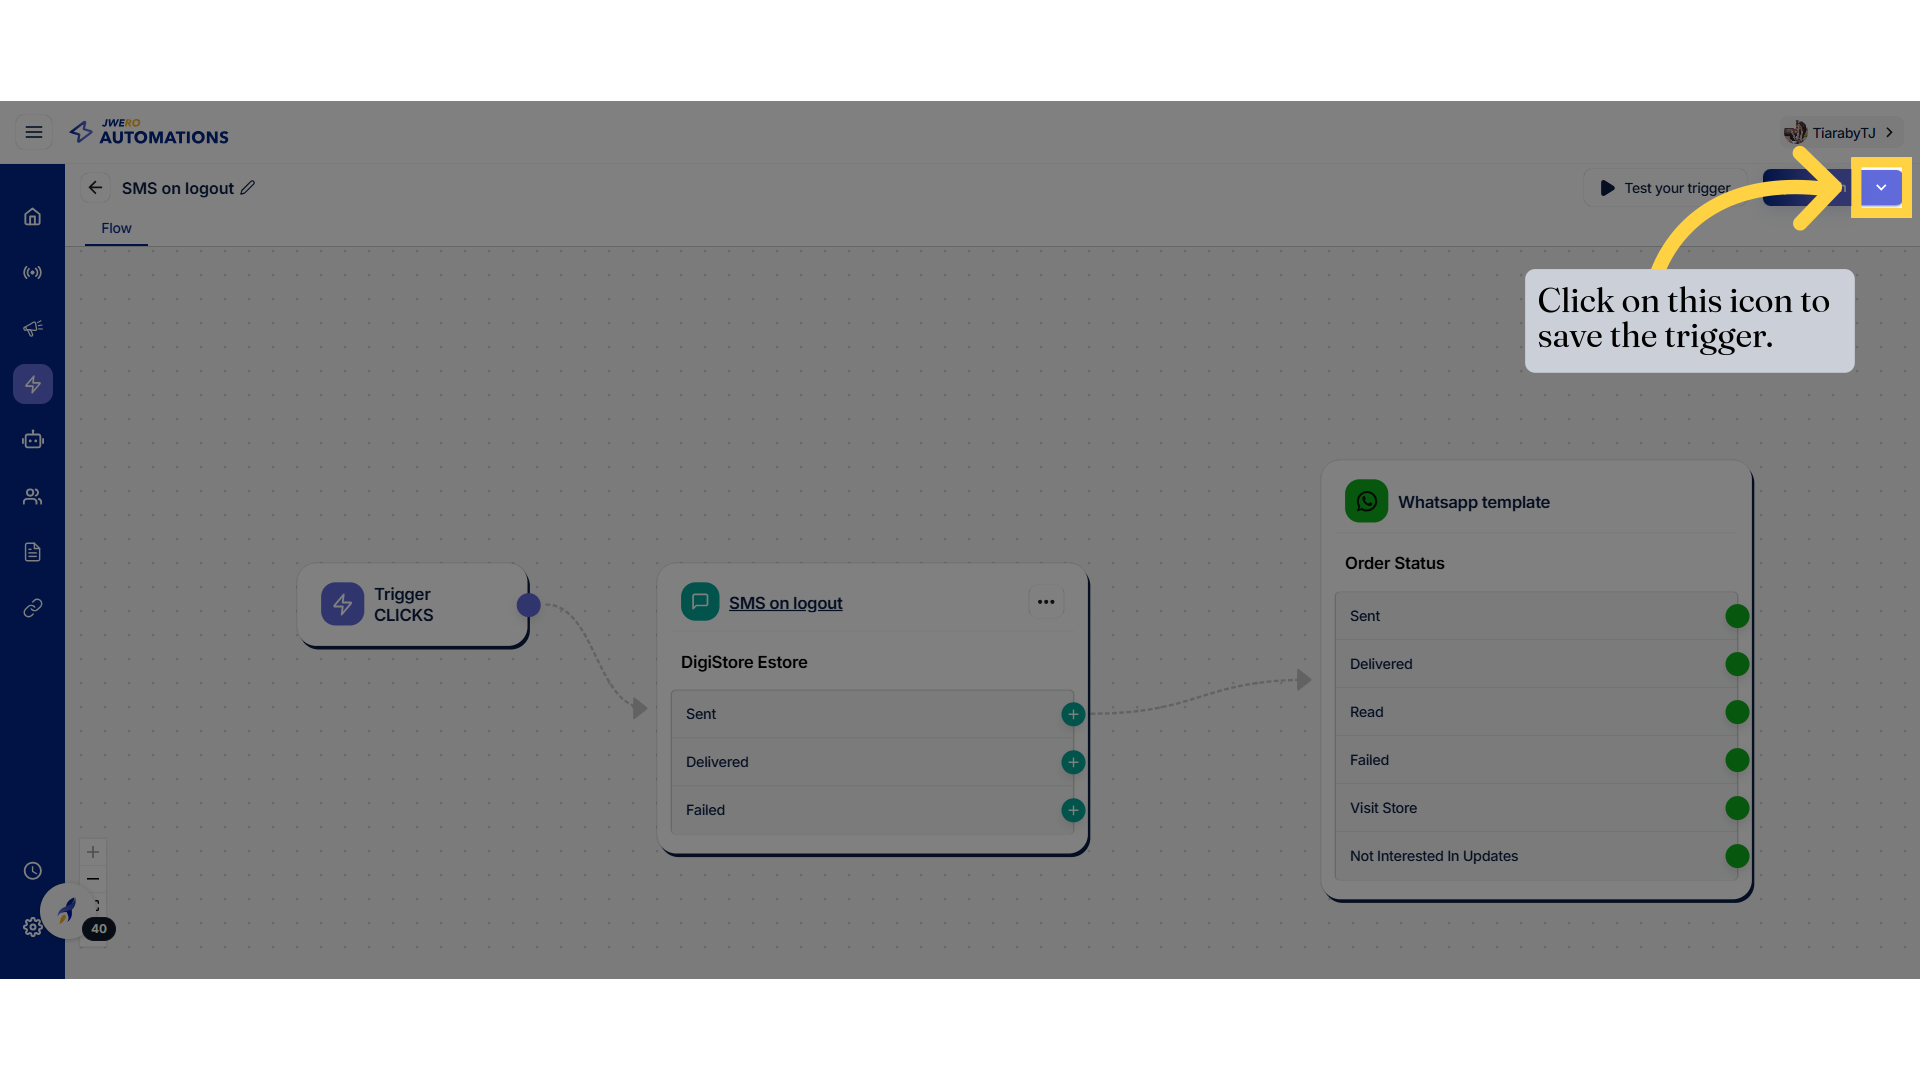
24. Click on this icon to save the trigger.
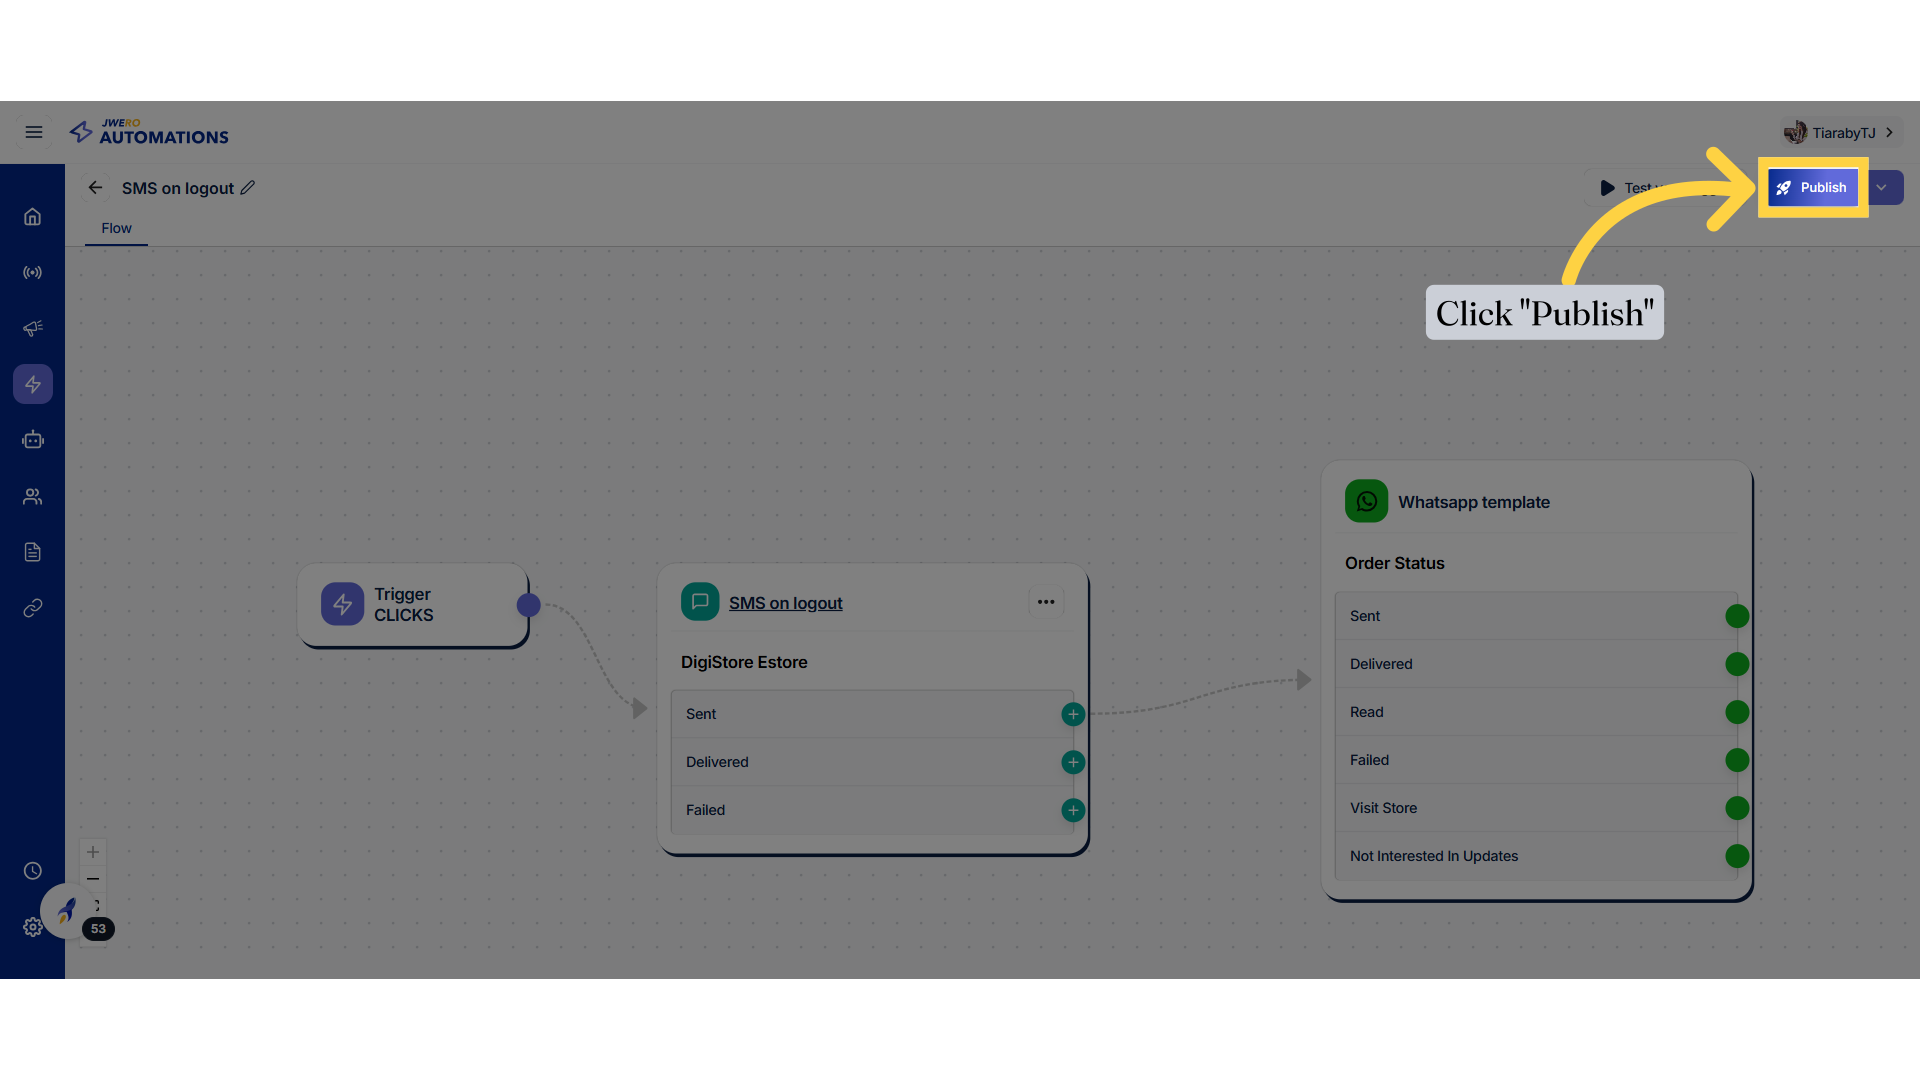
25. Click "Save as draft"
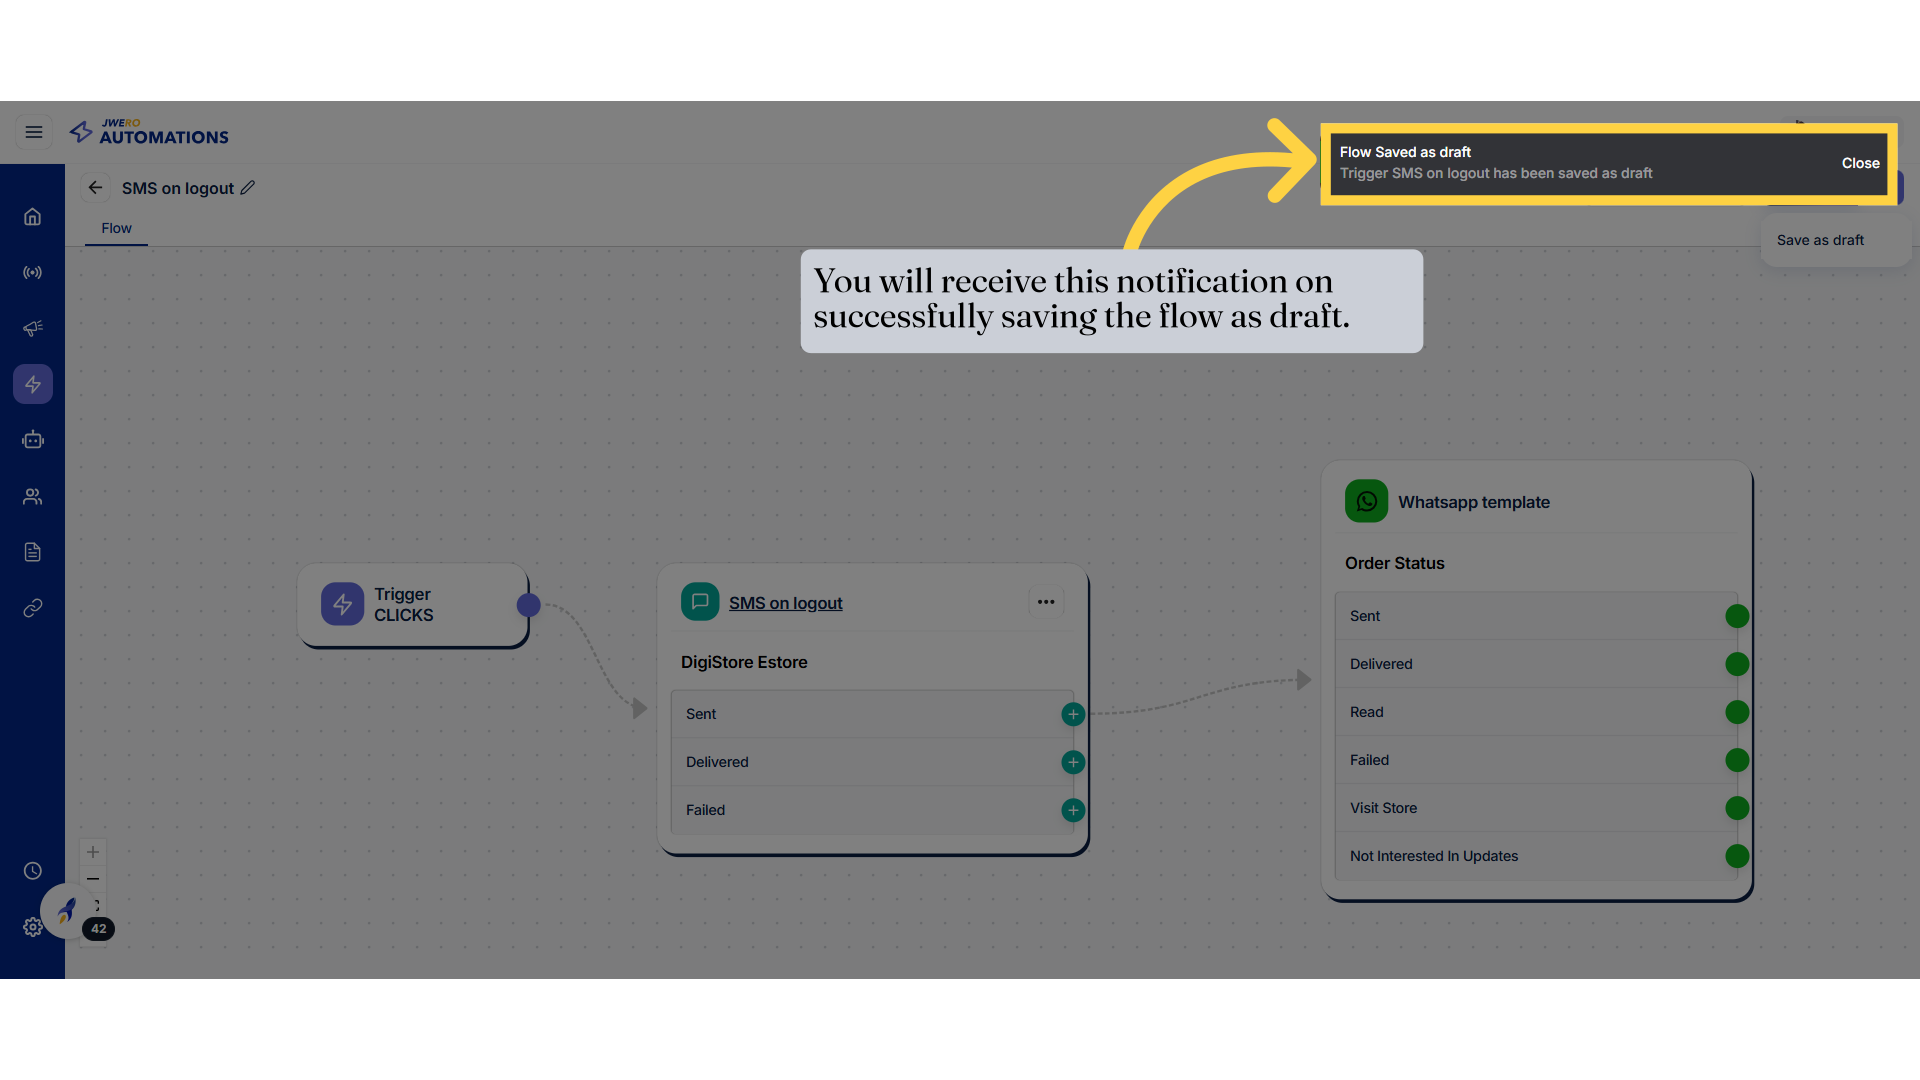
26. You will receive this notification on successfully saving the flow as draft.
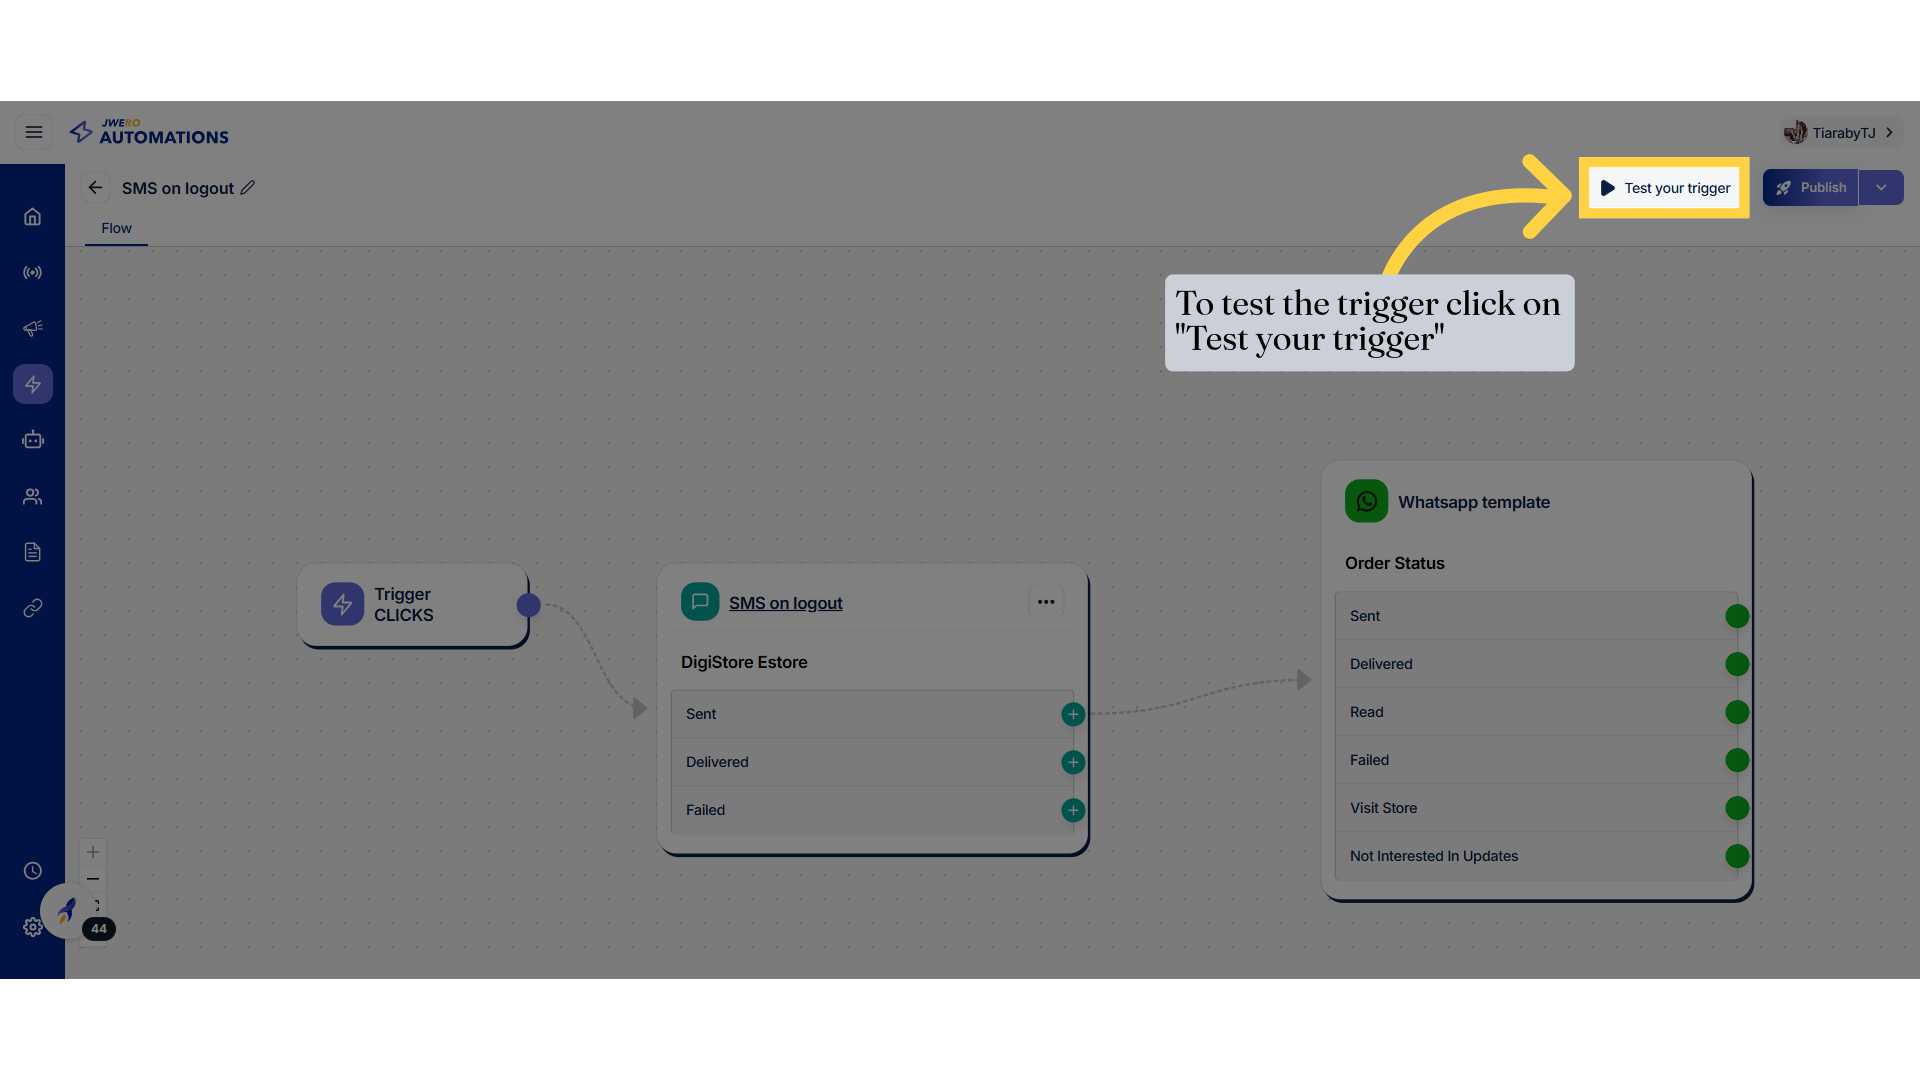
27. Test your trigger
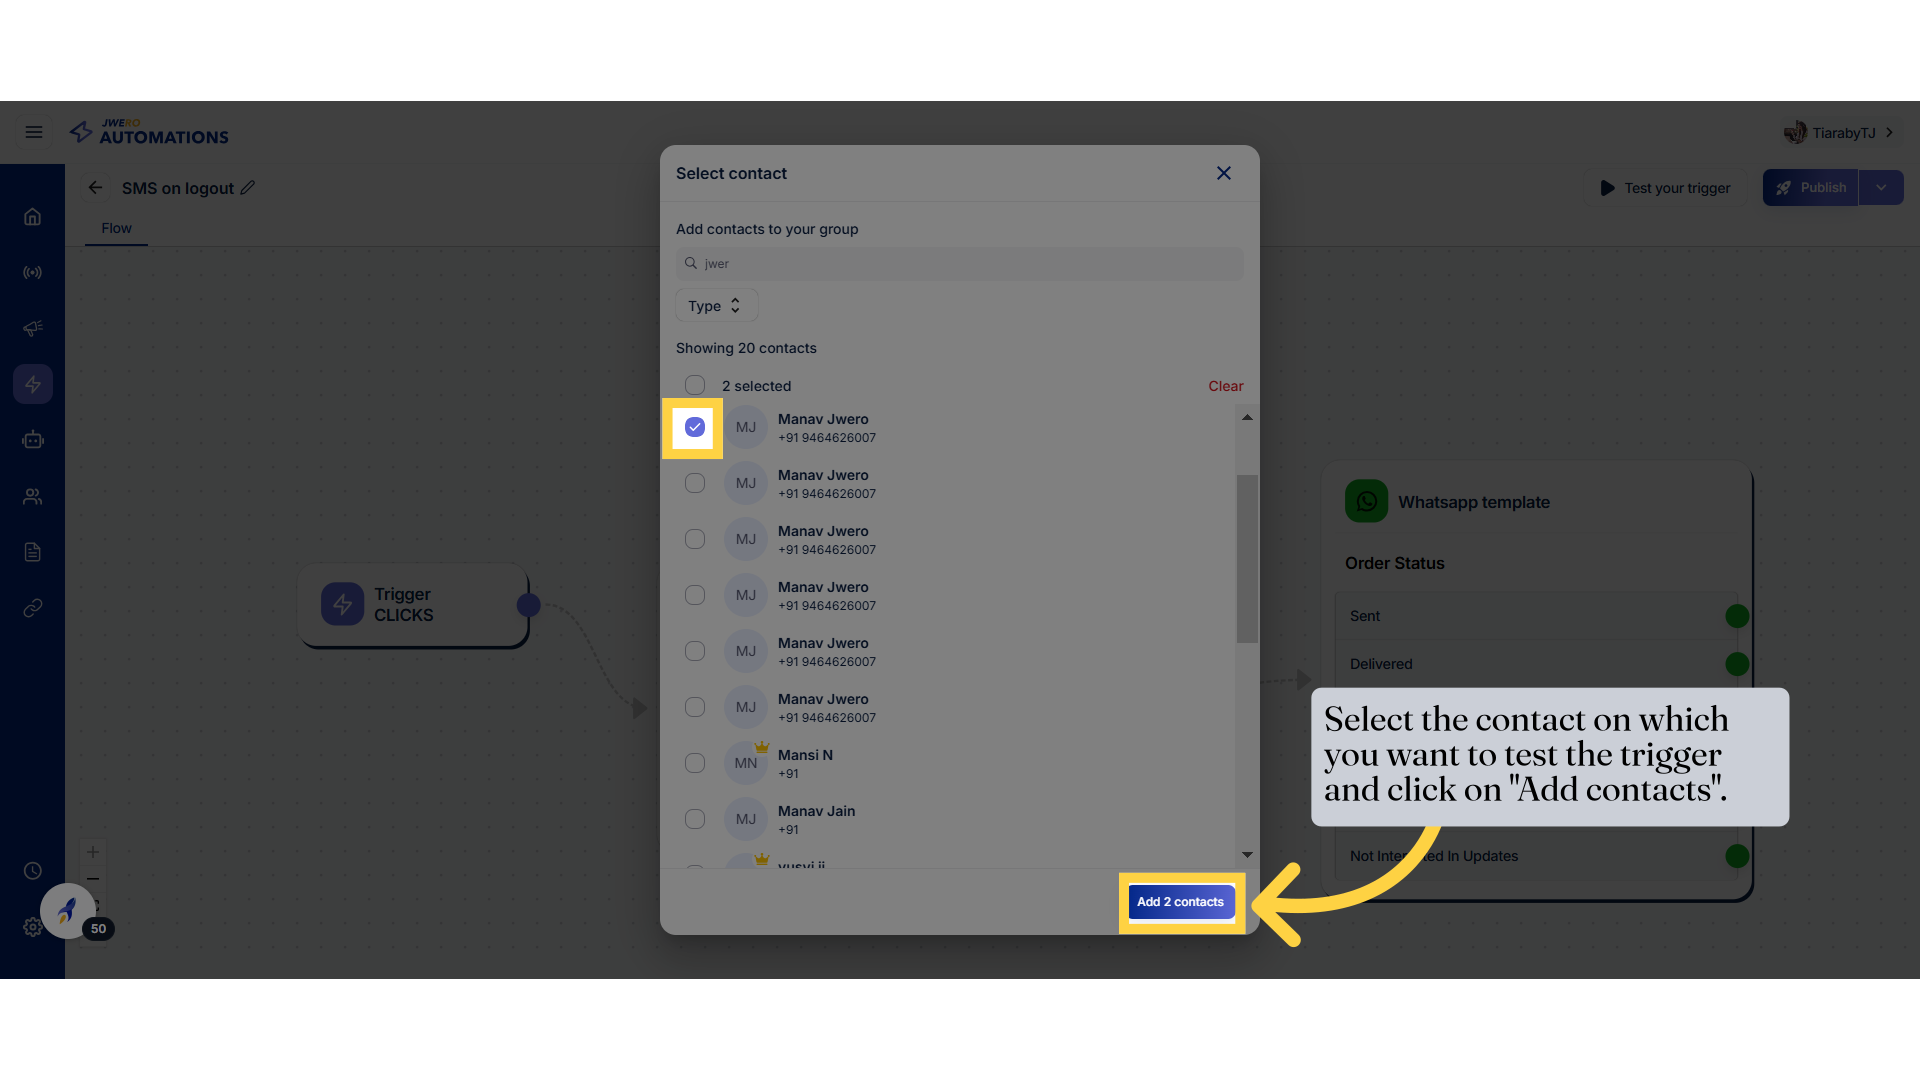
28. Select the contact on which you want to test the trigger and click on "Add contacts".
29. Publish
Publish the trigger.
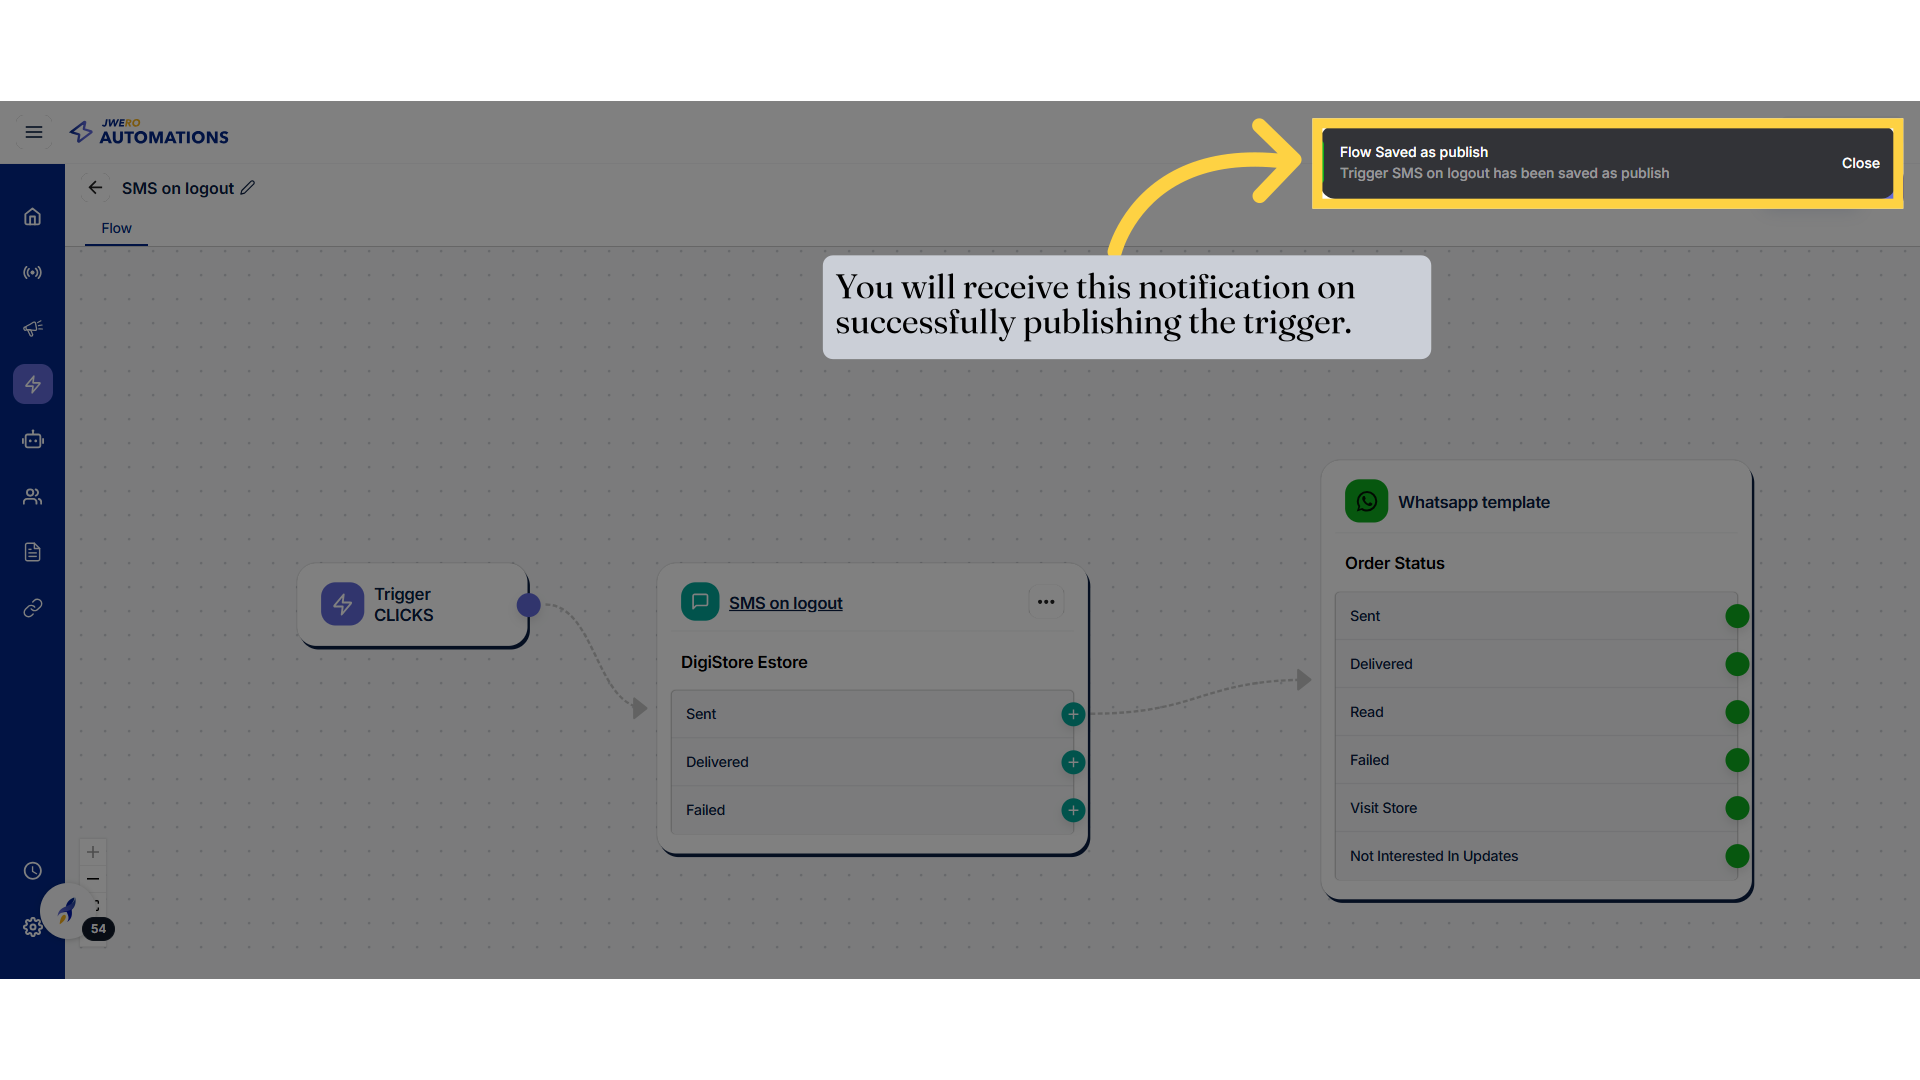
30. You will receive this notification on successfully publishing the trigger.
Confirm the trigger publication.