Trigger Events
Trigger Events
1. A trigger event is a specific action or occurrence that initiates an automated workflow. When the defined event happens, the system automatically executes the corresponding workflow, reducing manual effort and improving efficiency.
2. Customer Triggers
3. Go To Automations
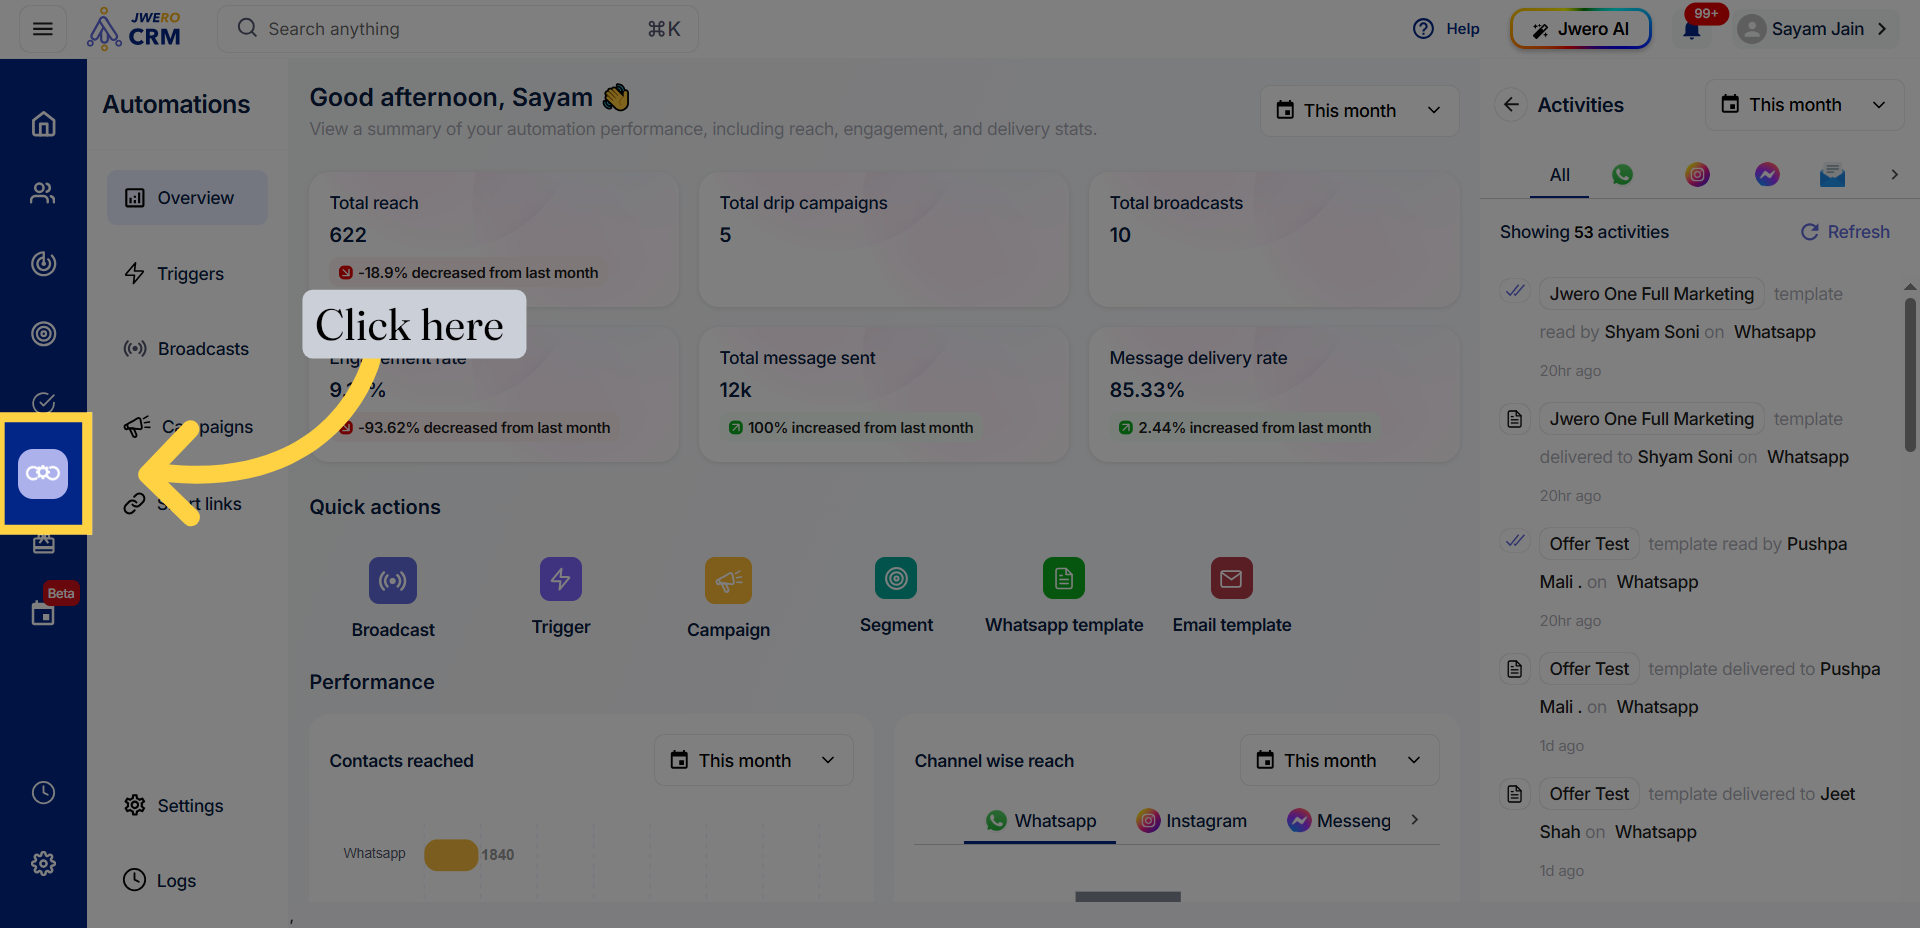
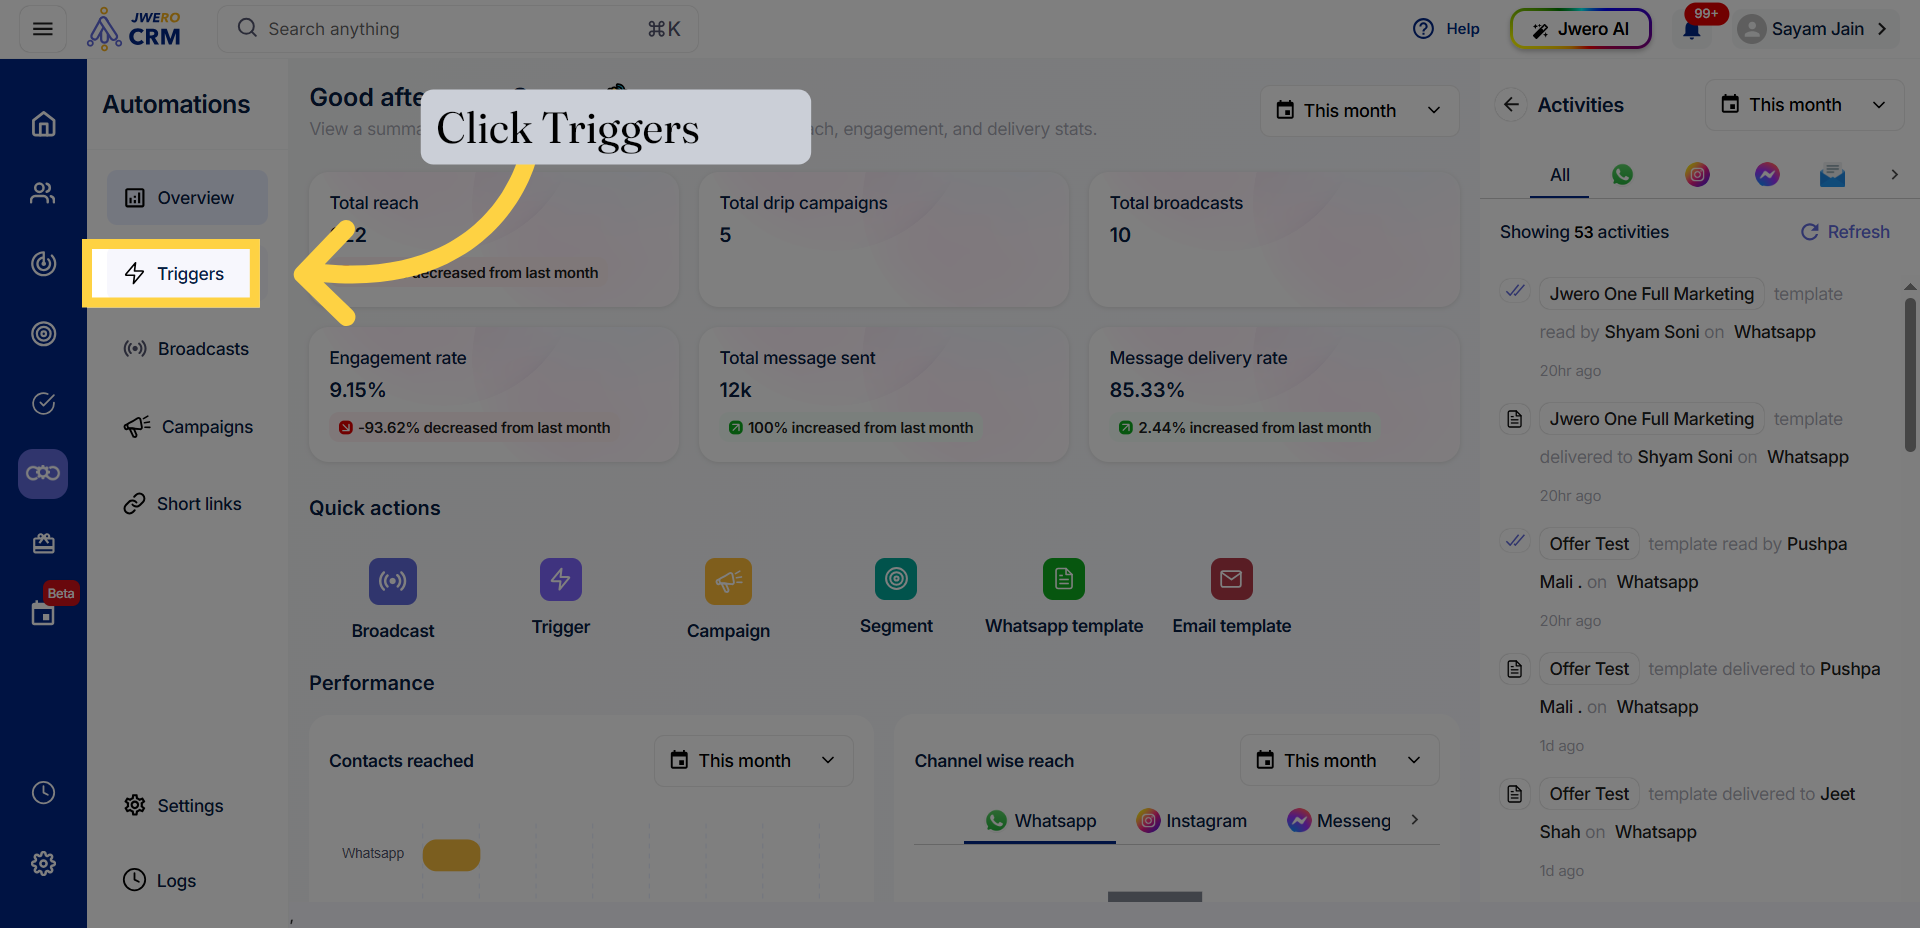
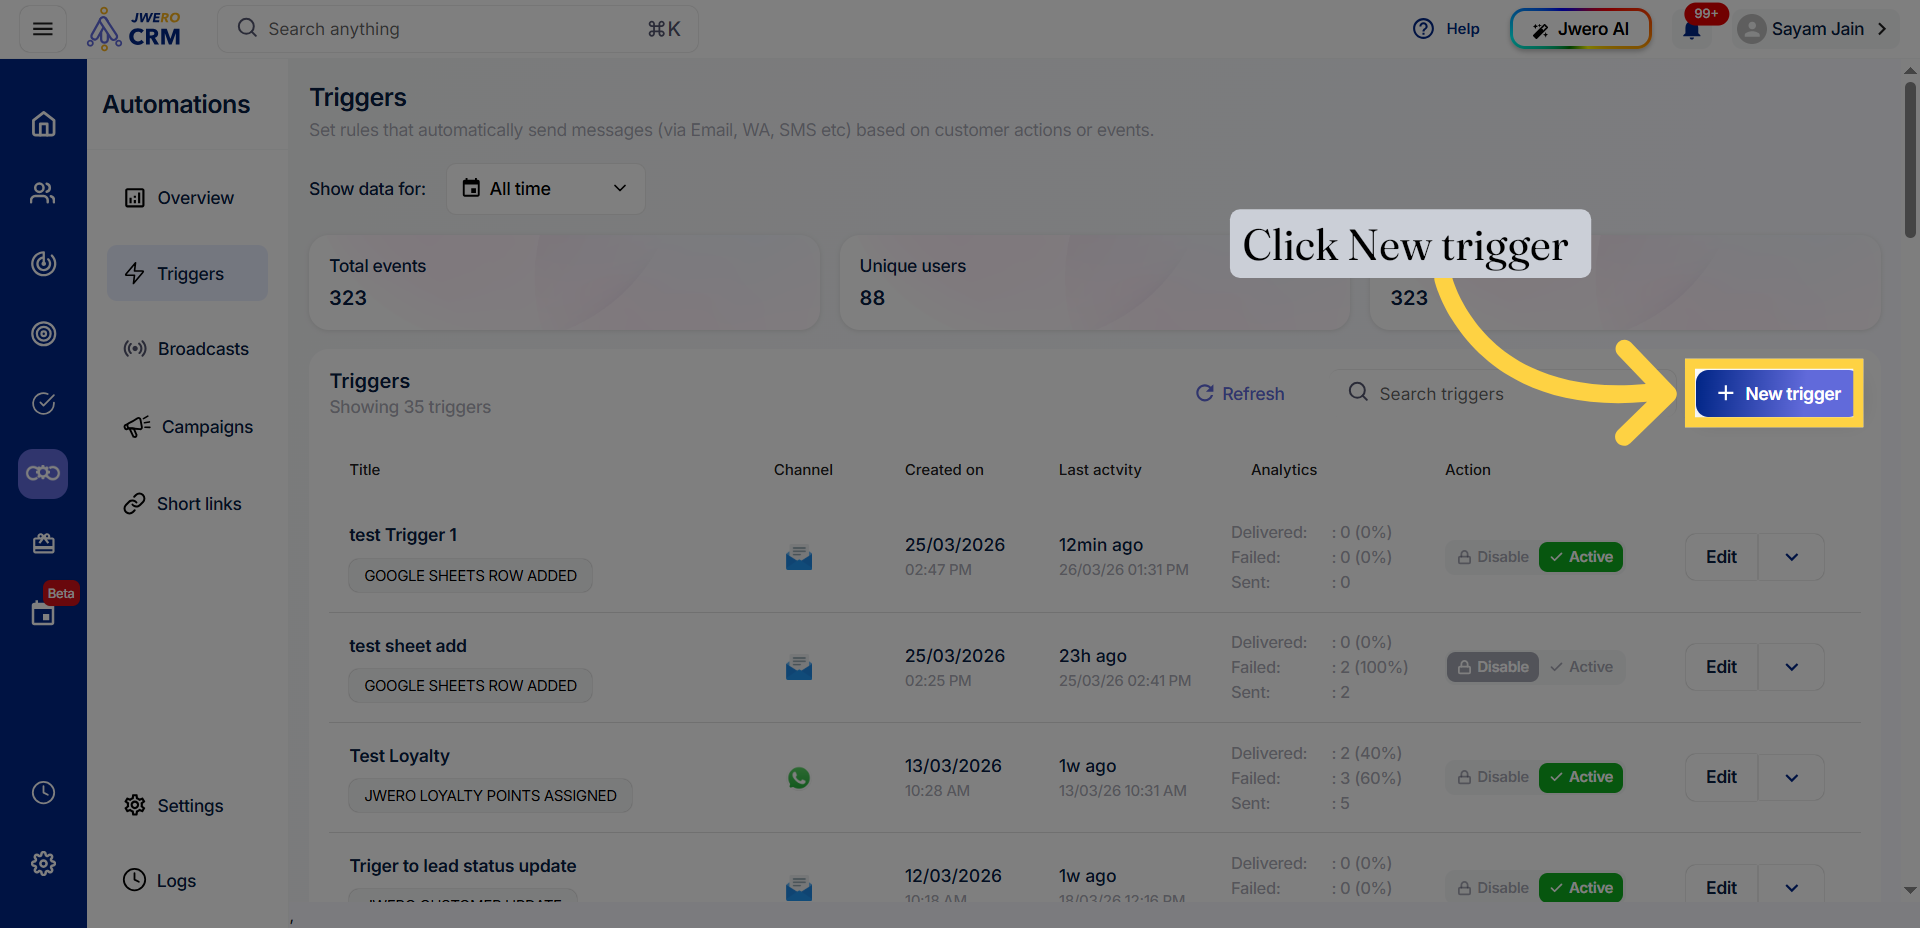
4. Open Triggers Section
Click "Triggers" to open the section where you can manage automation triggers within Jwero CRM.
5. Create New Trigger
Click "New trigger" to start creating a new automation trigger that will help streamline your workflows.
6. Customer Birthday Event
Access the customer section.
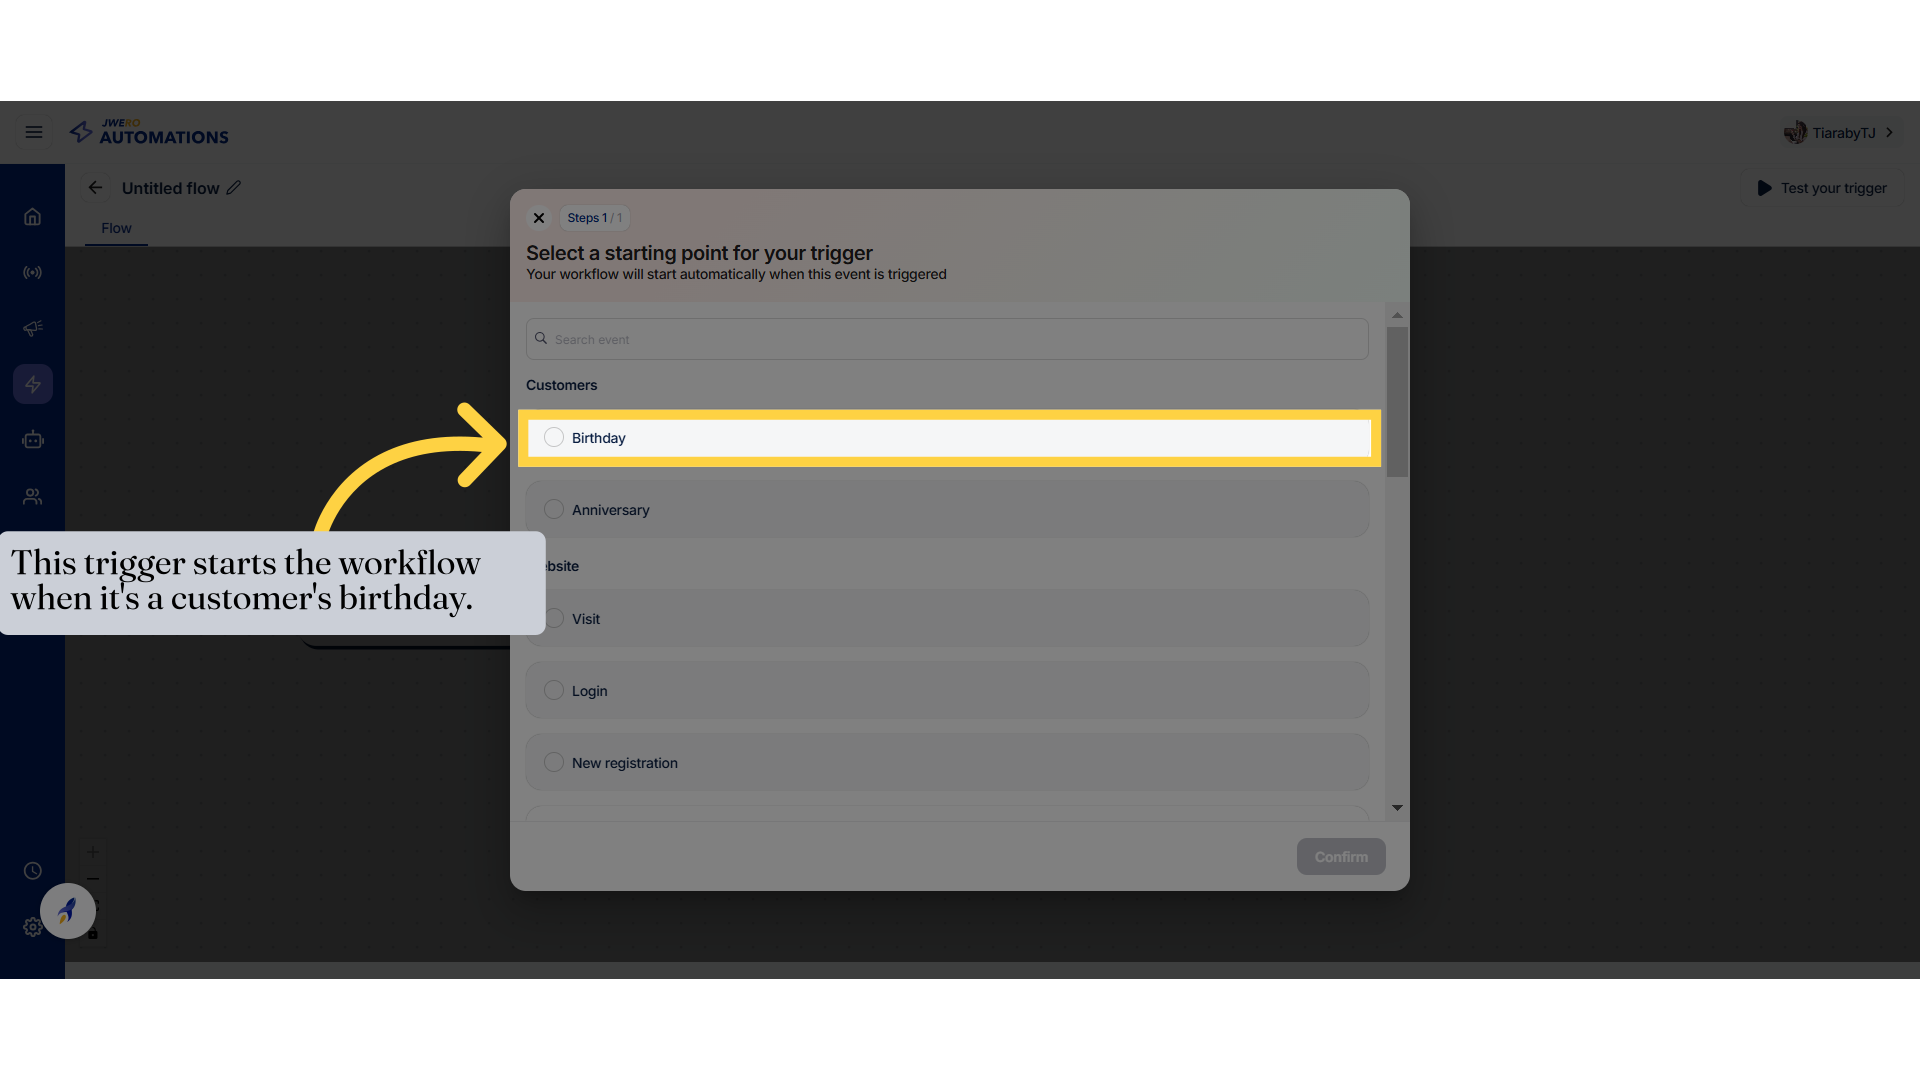
7. Customer Birthday Event
Access the customer section.

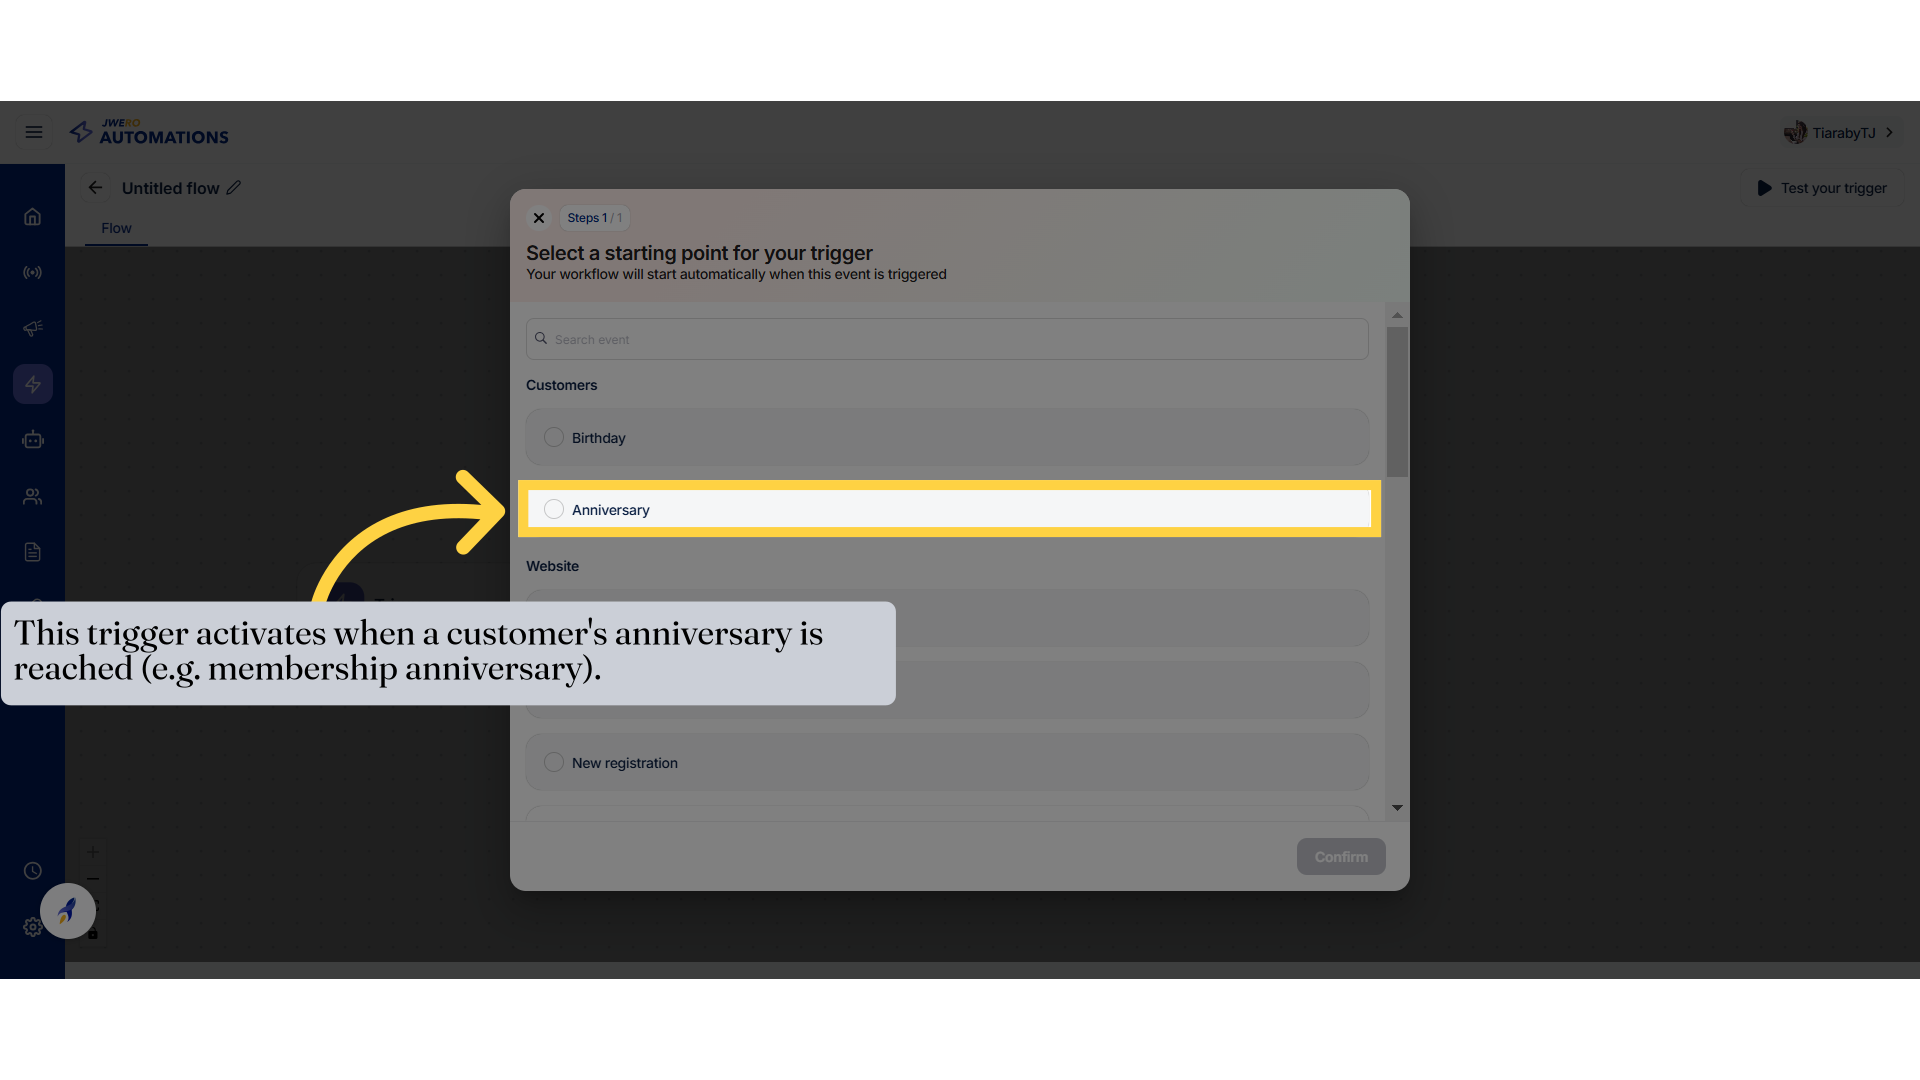
8. Customer Anniversary Event
Access the customer section.
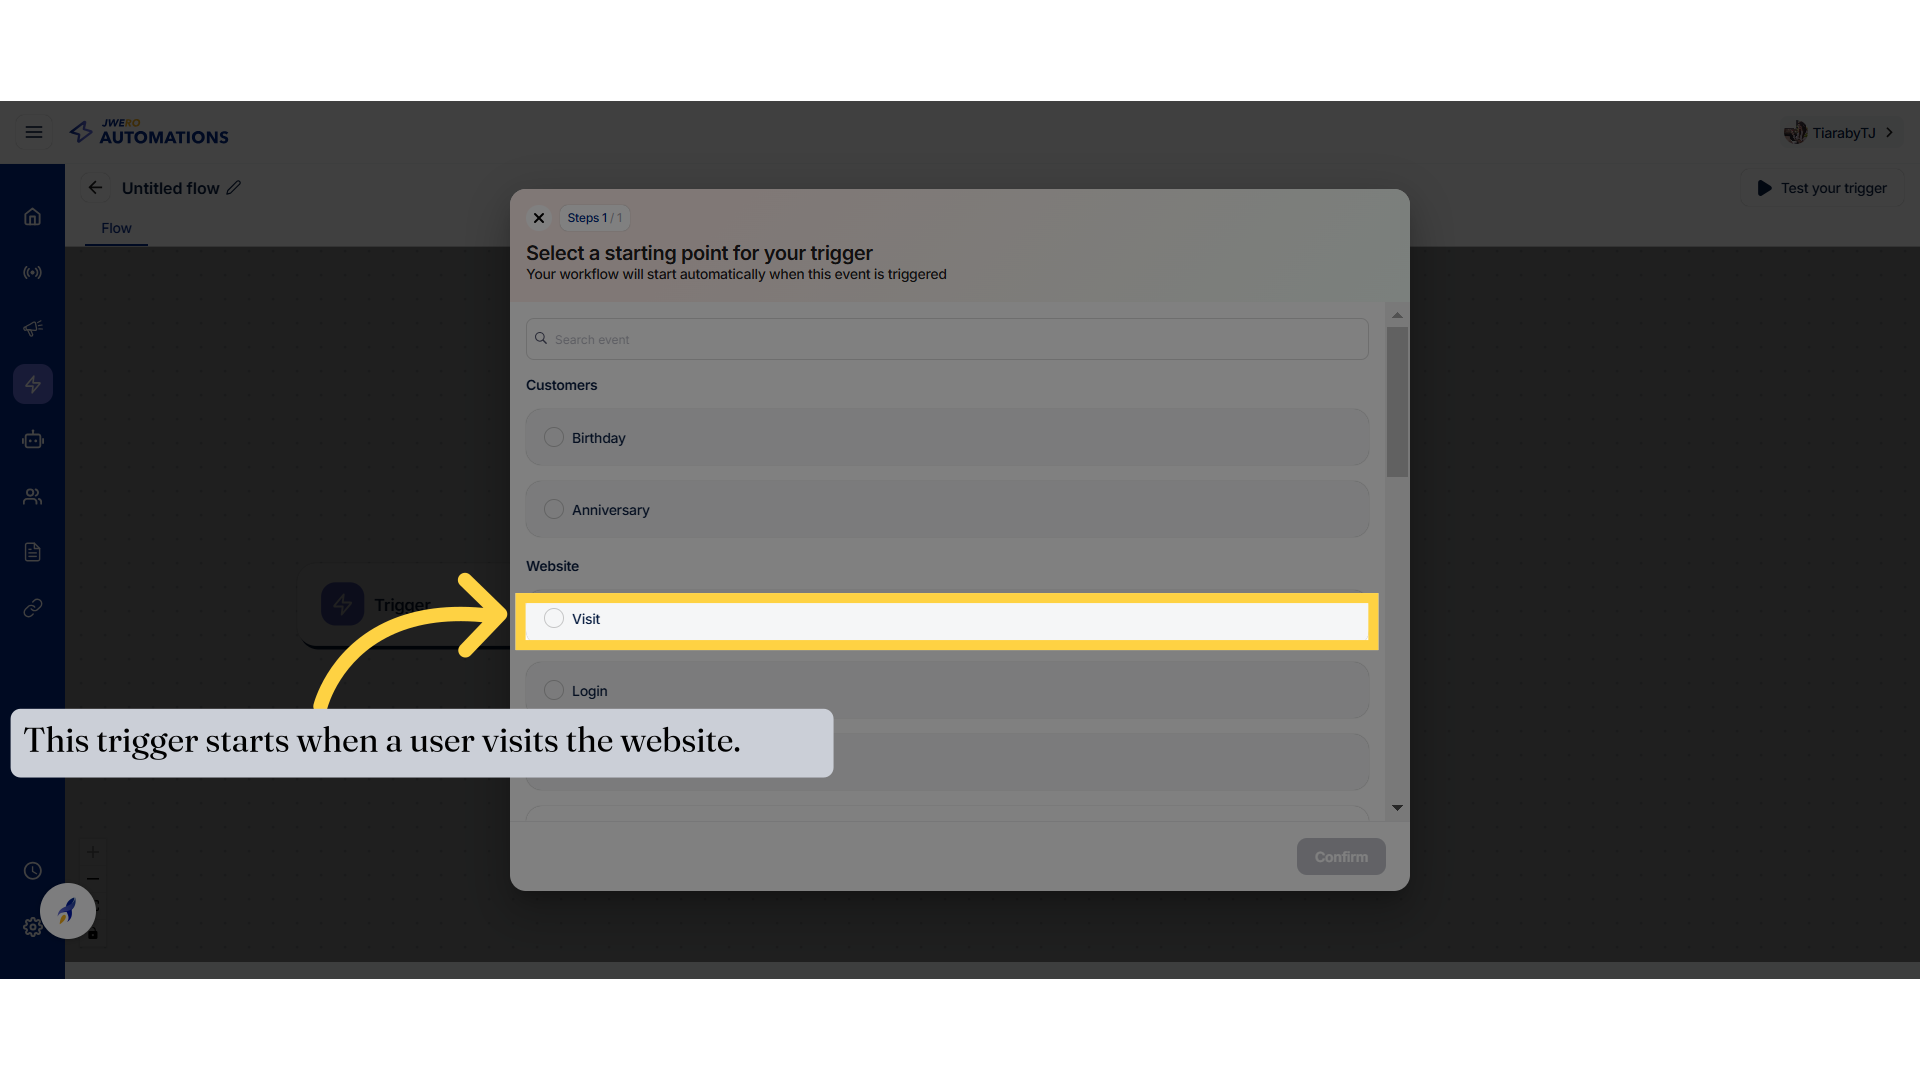
9. Website Trigger

10. Website Visit Event
Access the customer section.
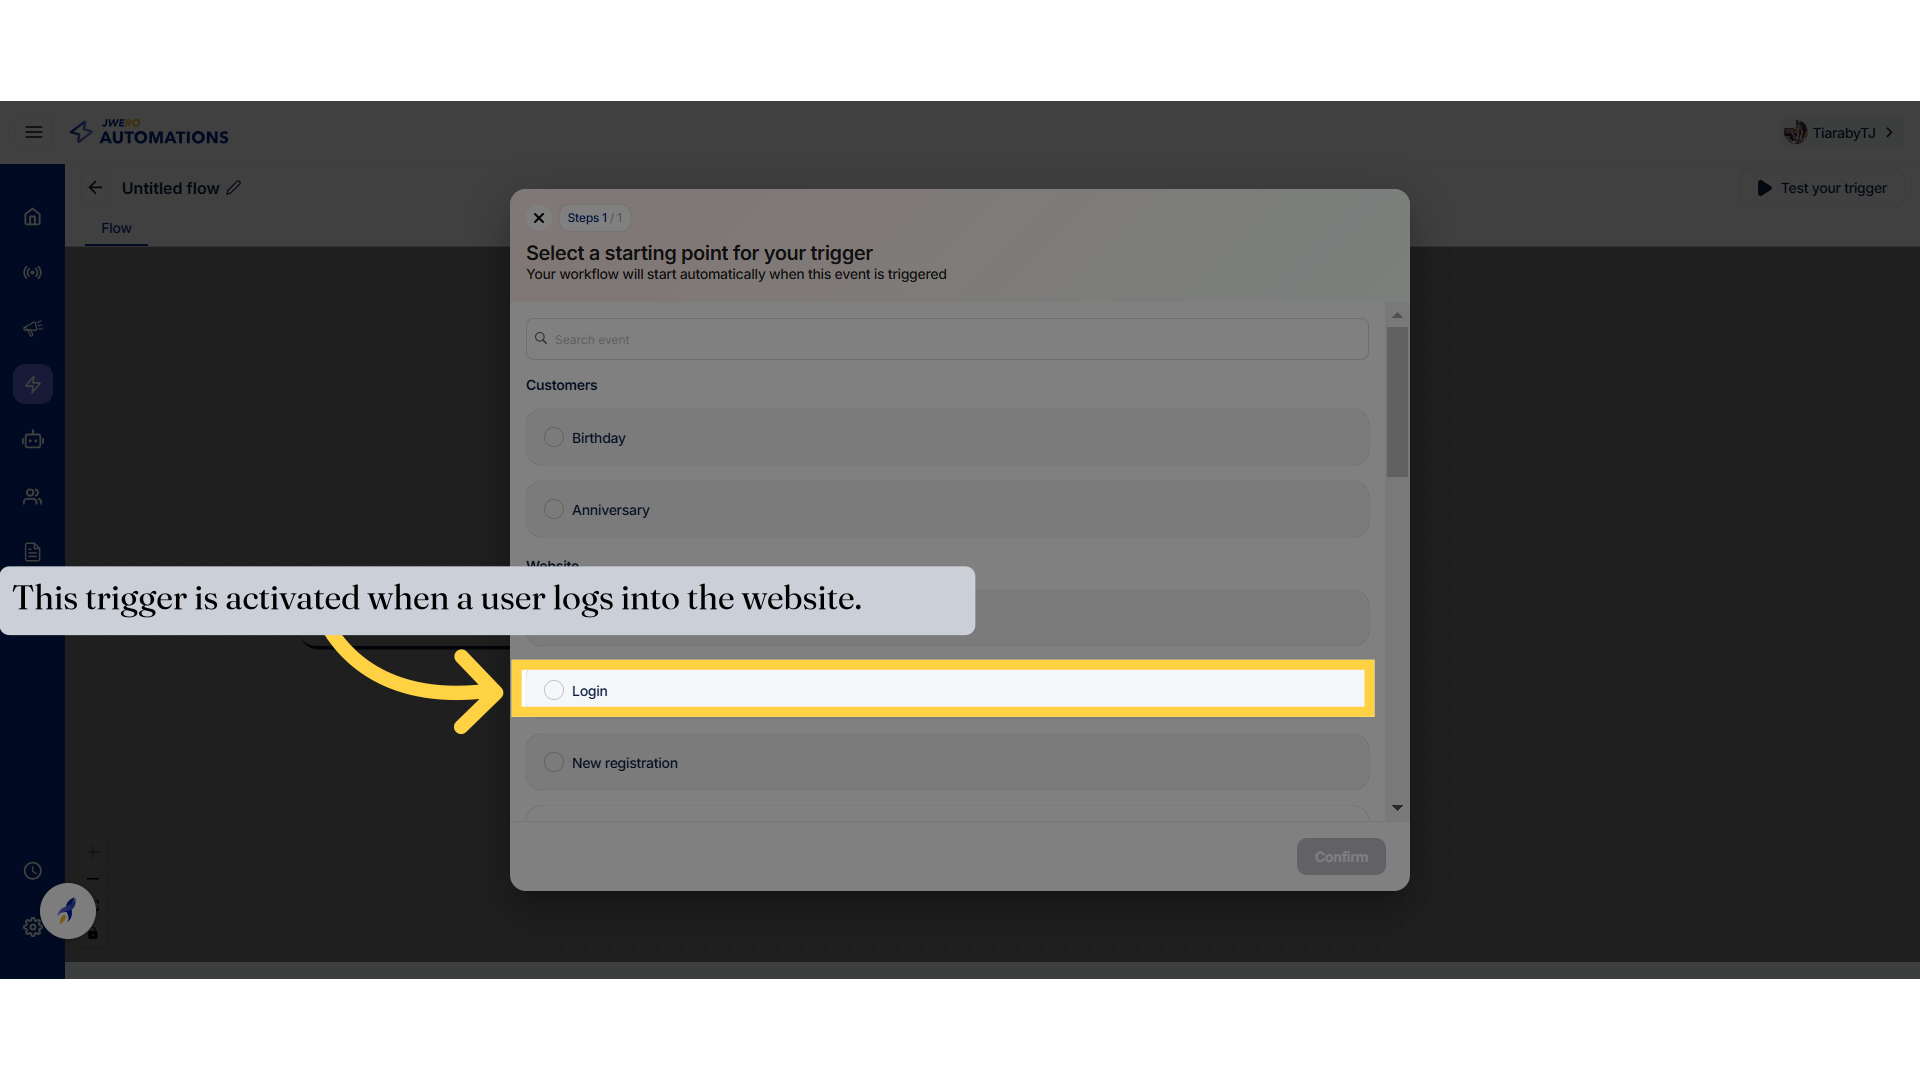
11. Website Login Event
Access the customer section.
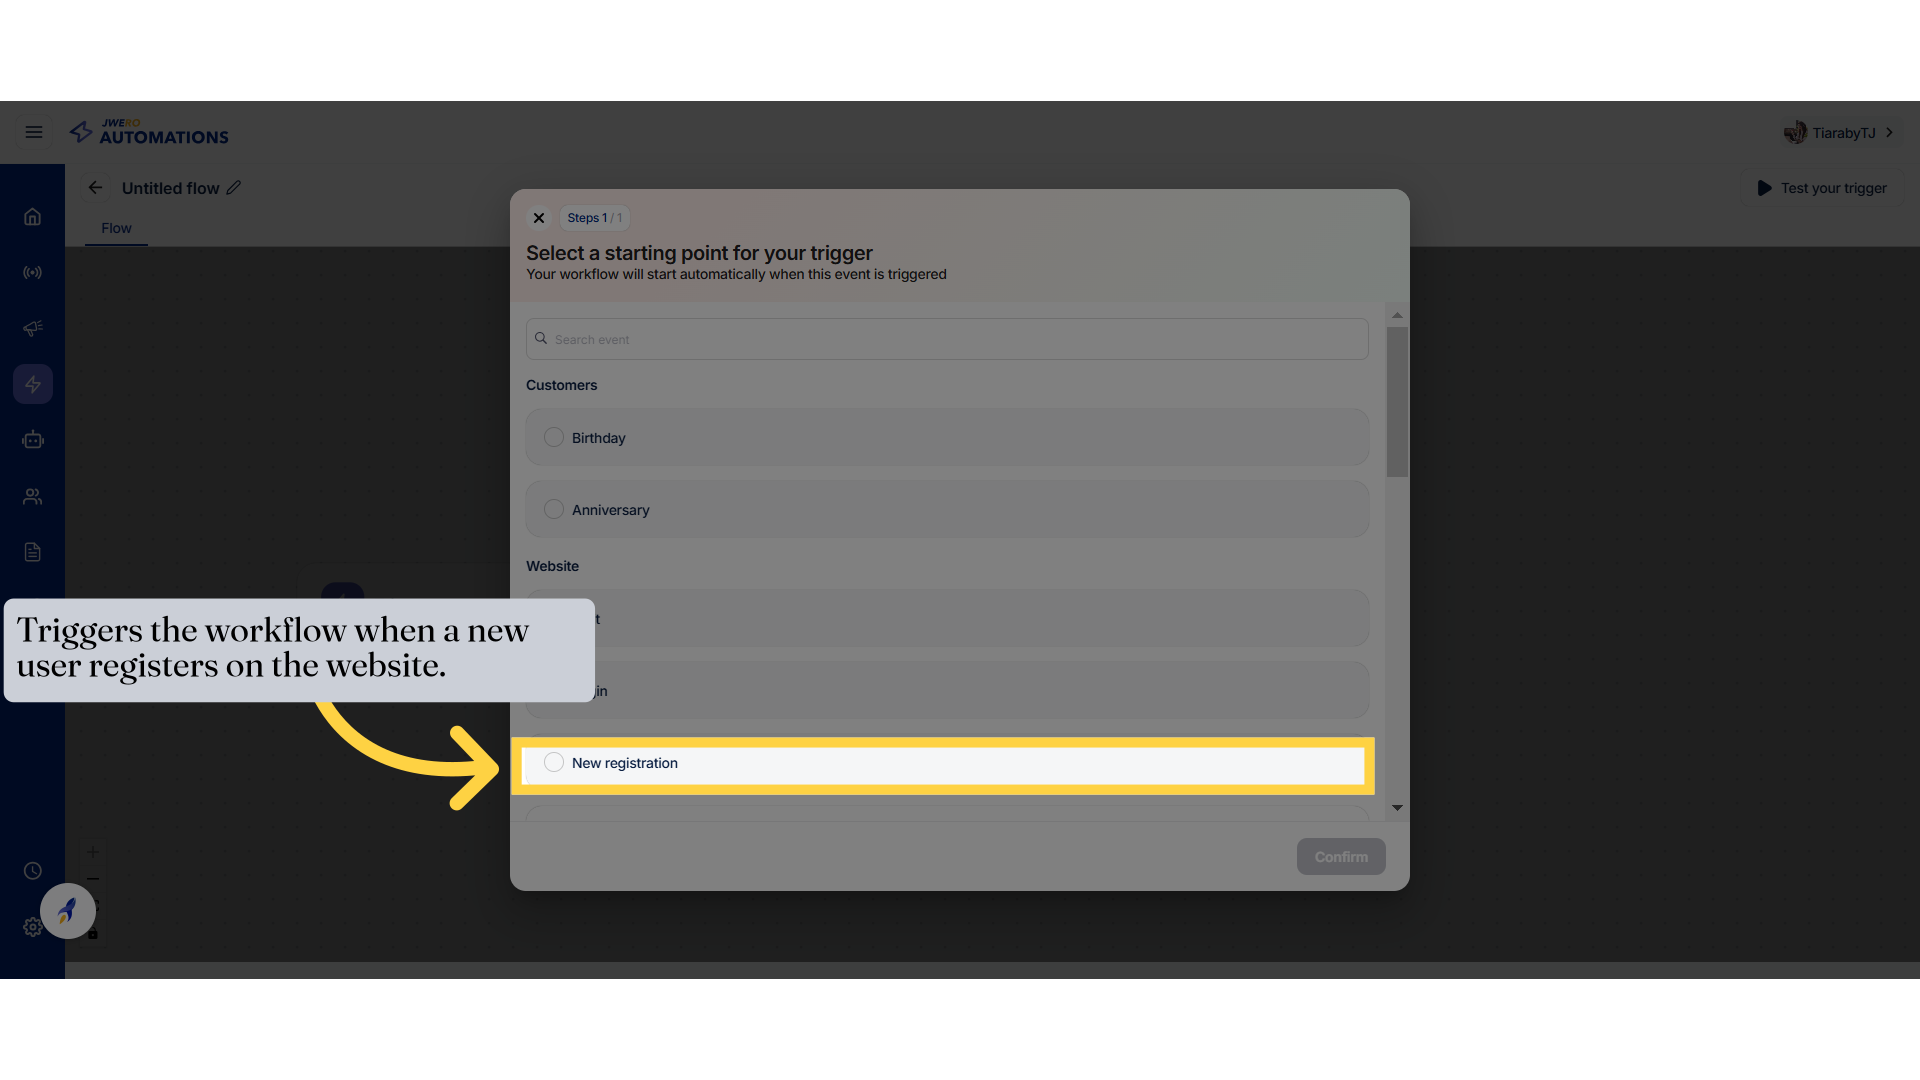
12. Website New Registration Event
Access the customer section.
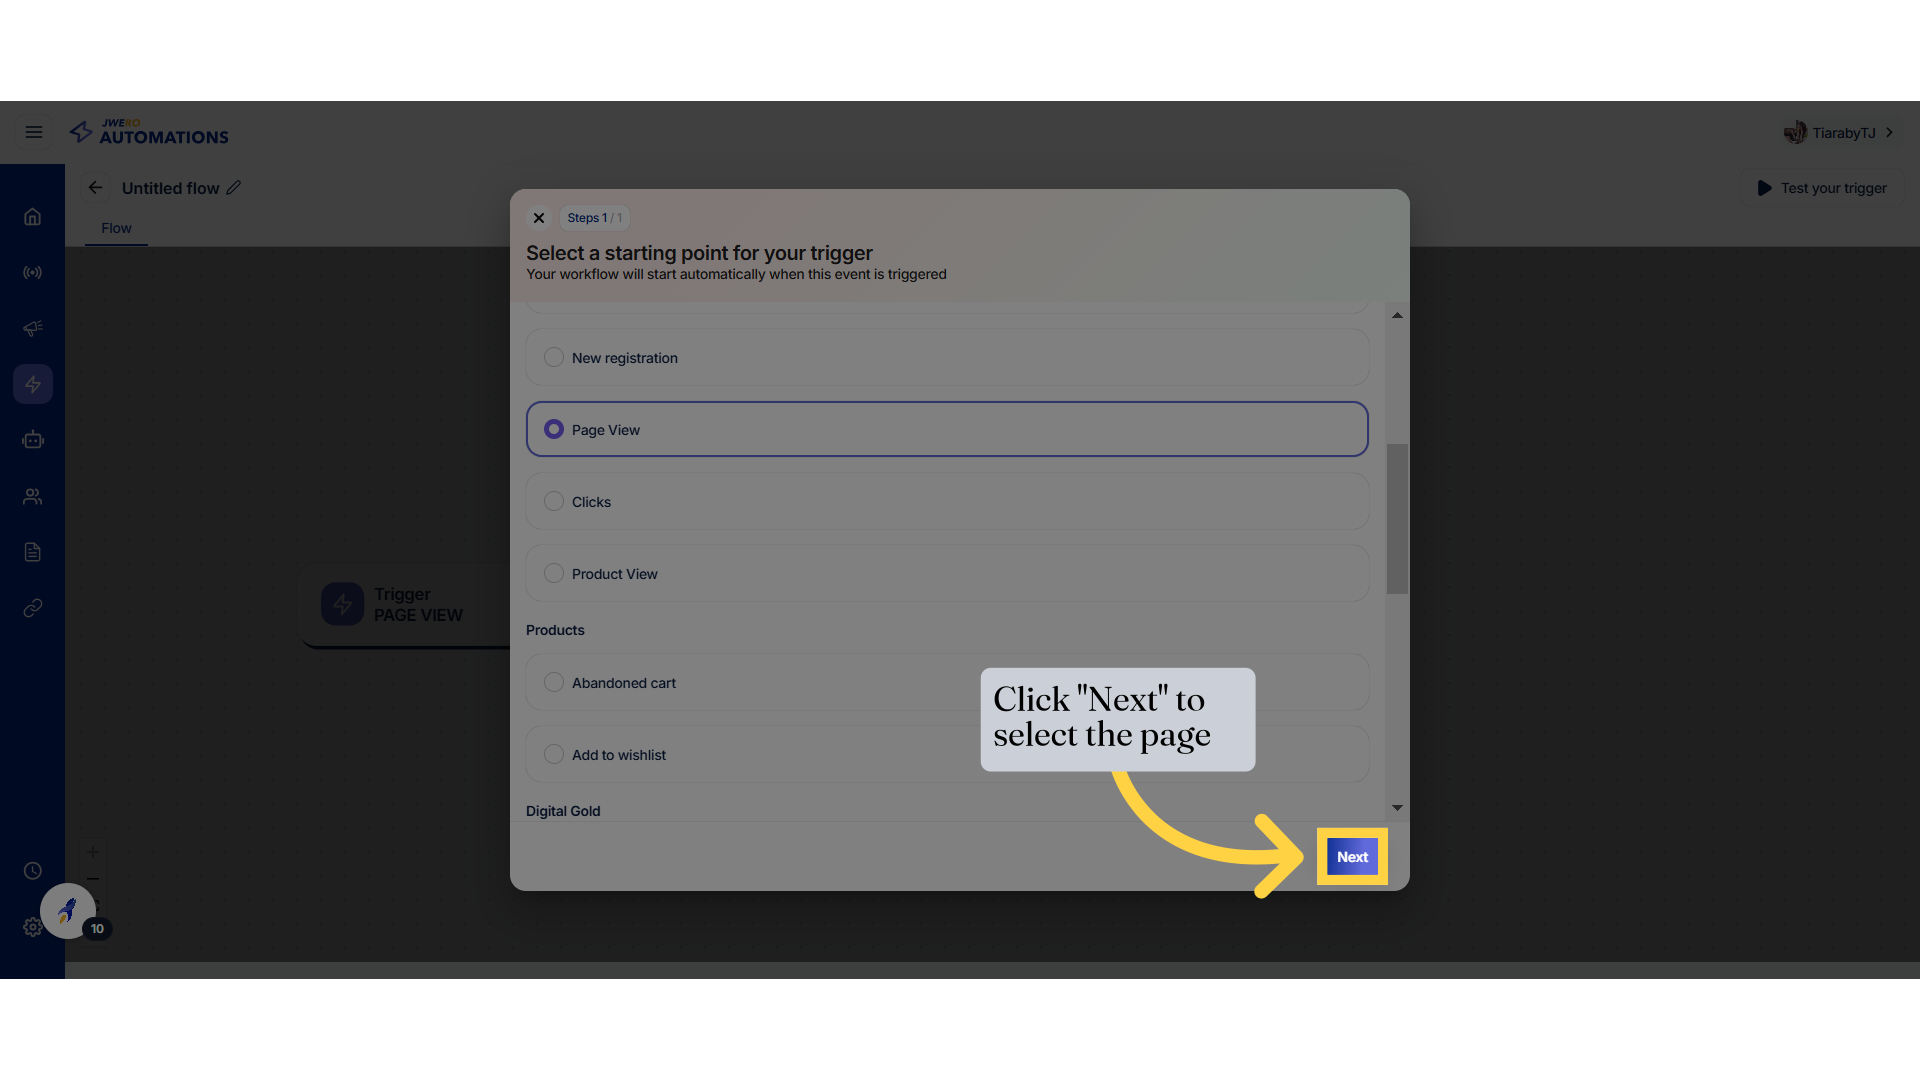
13. Website Page View Event
Proceed to the next step by clicking on "Next."

14. Click "Next" to select the page
Proceed to the next step by clicking on "Next."
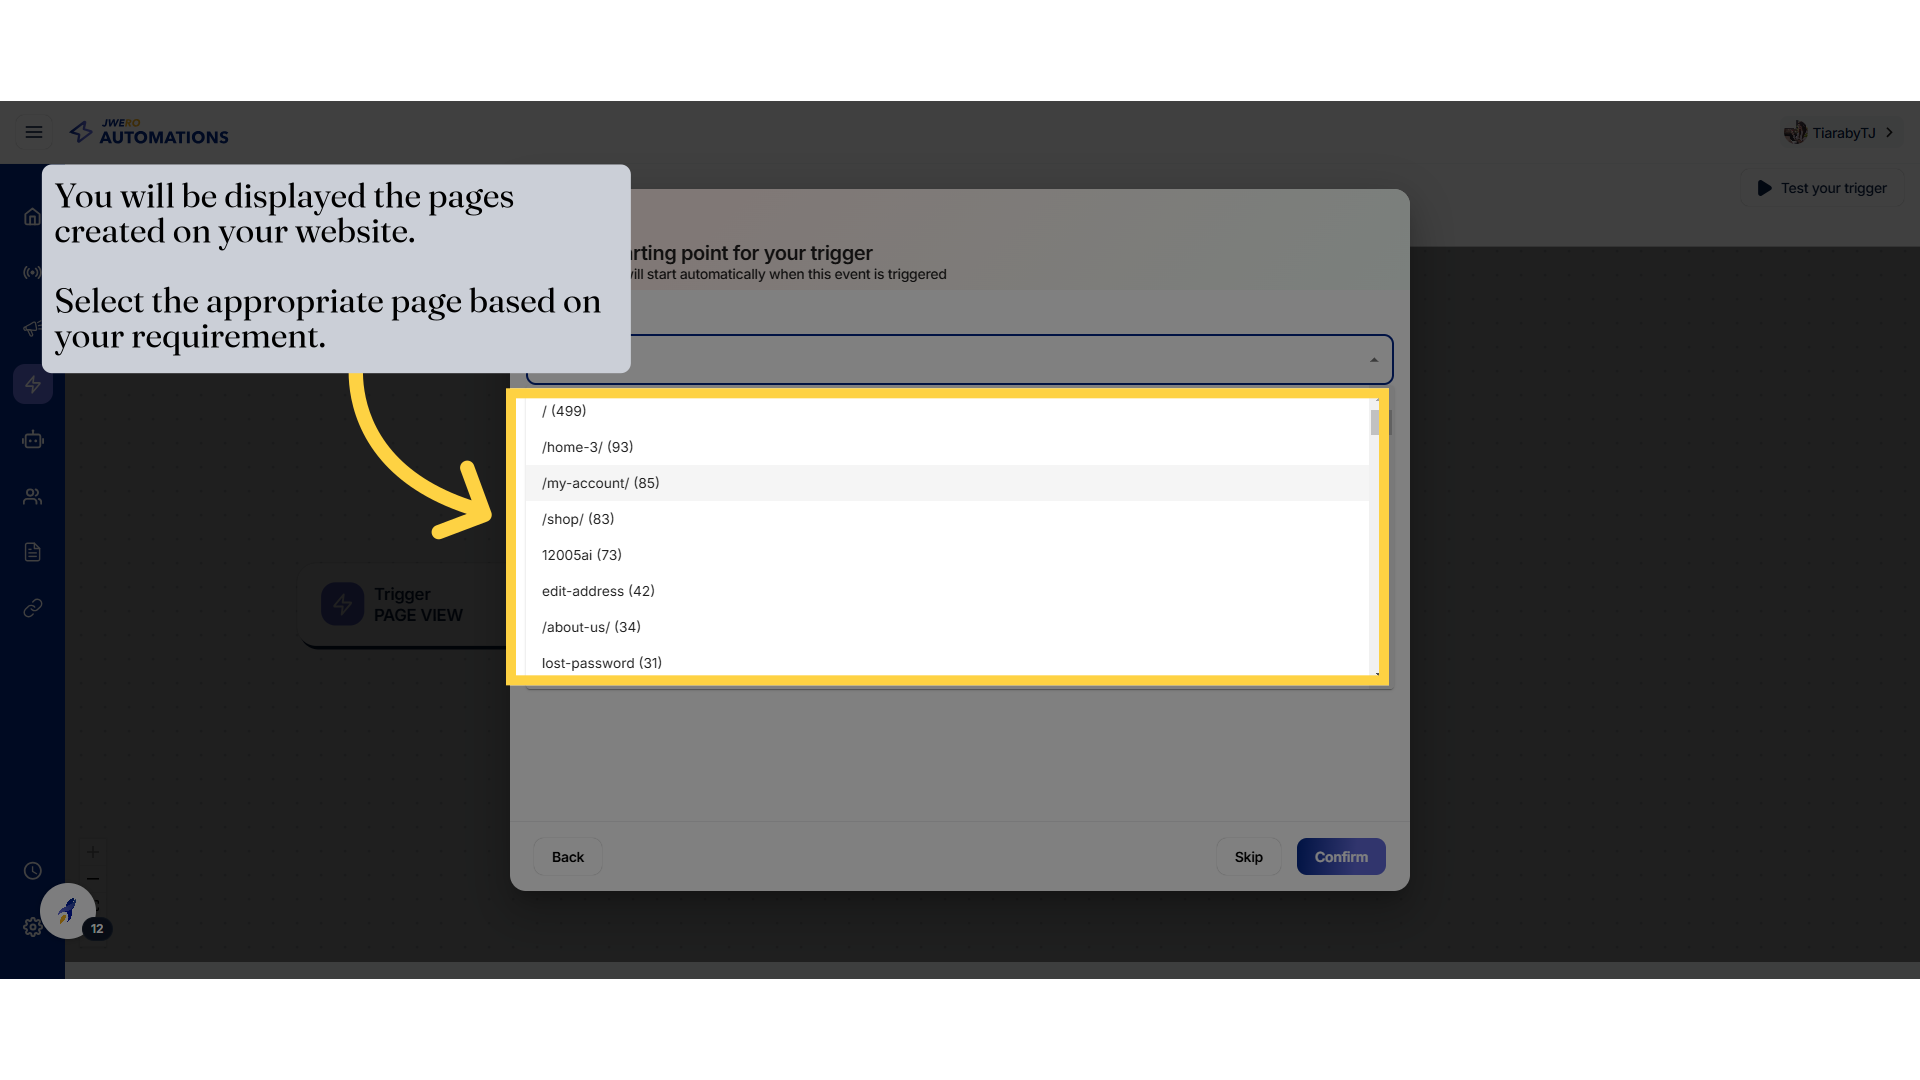
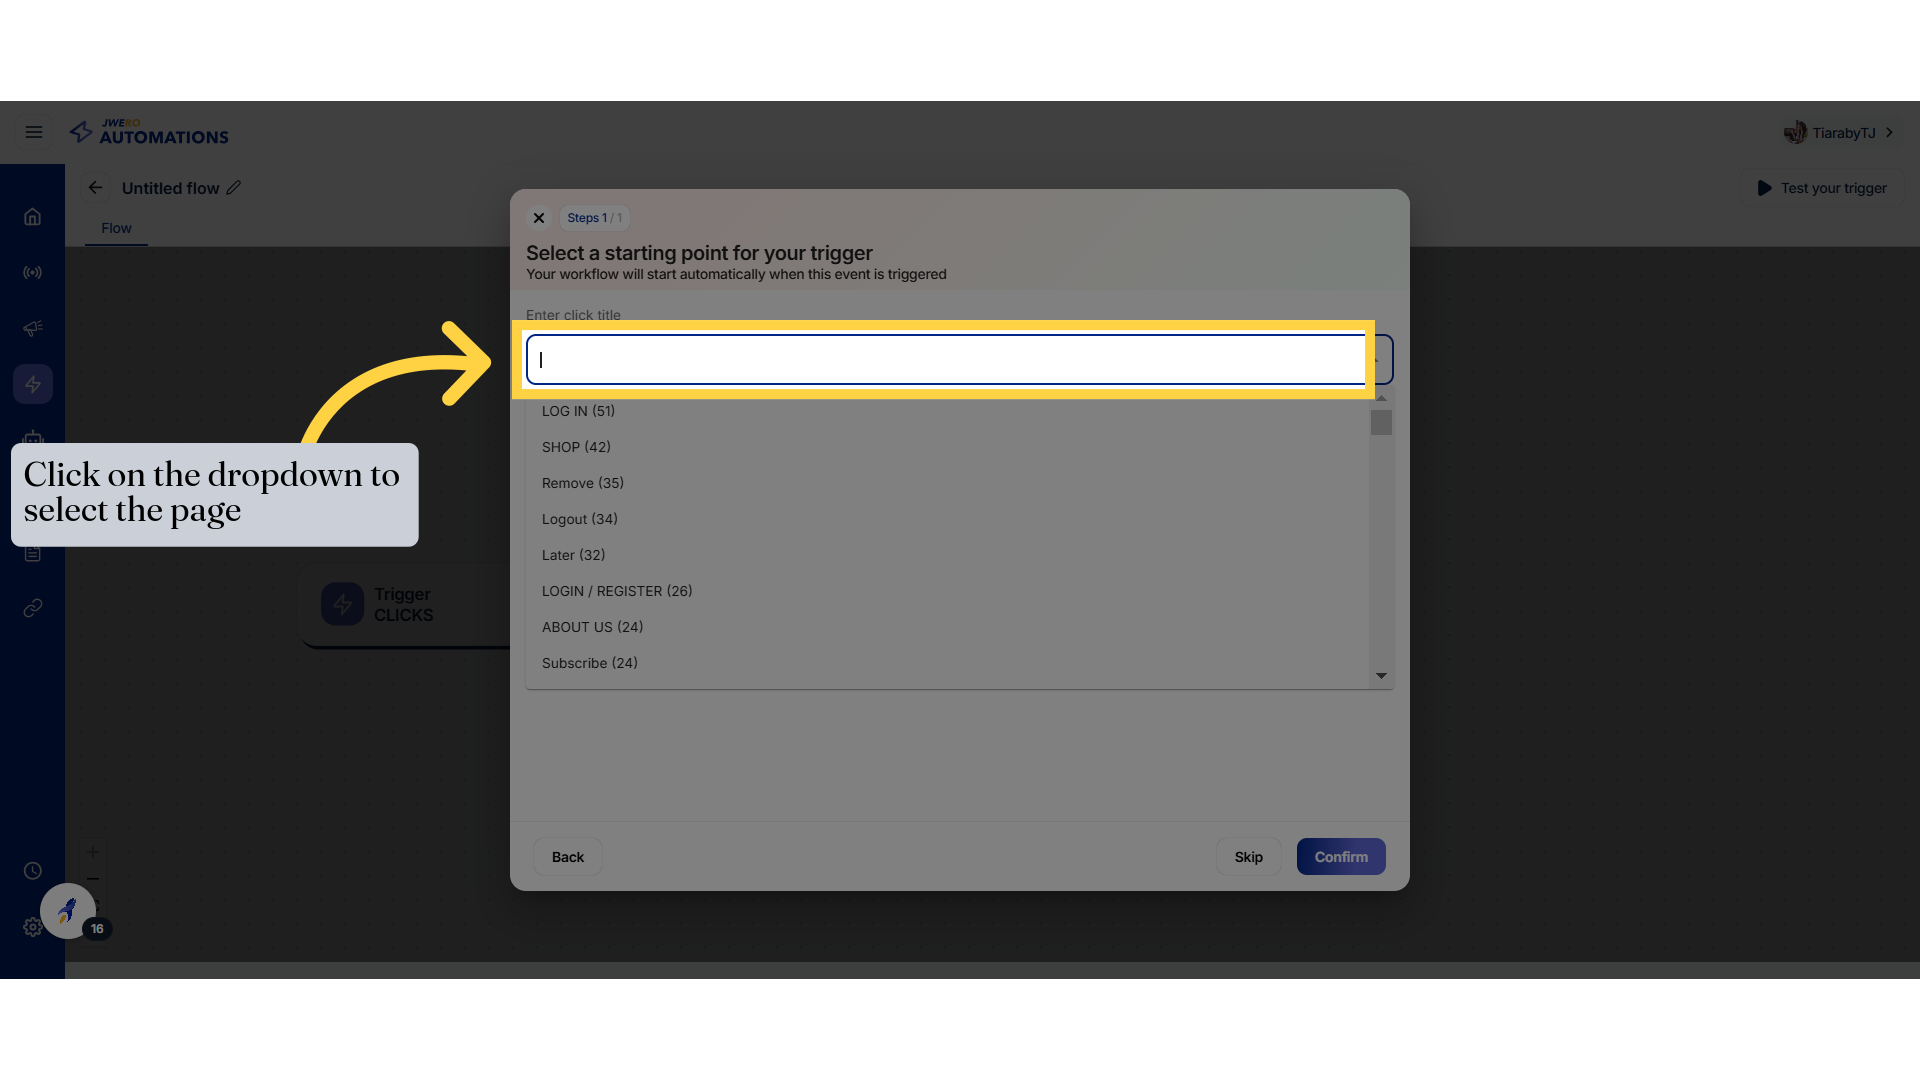
15. Click on the dropdown to select the page.
Navigate to the specified location by clicking "here."
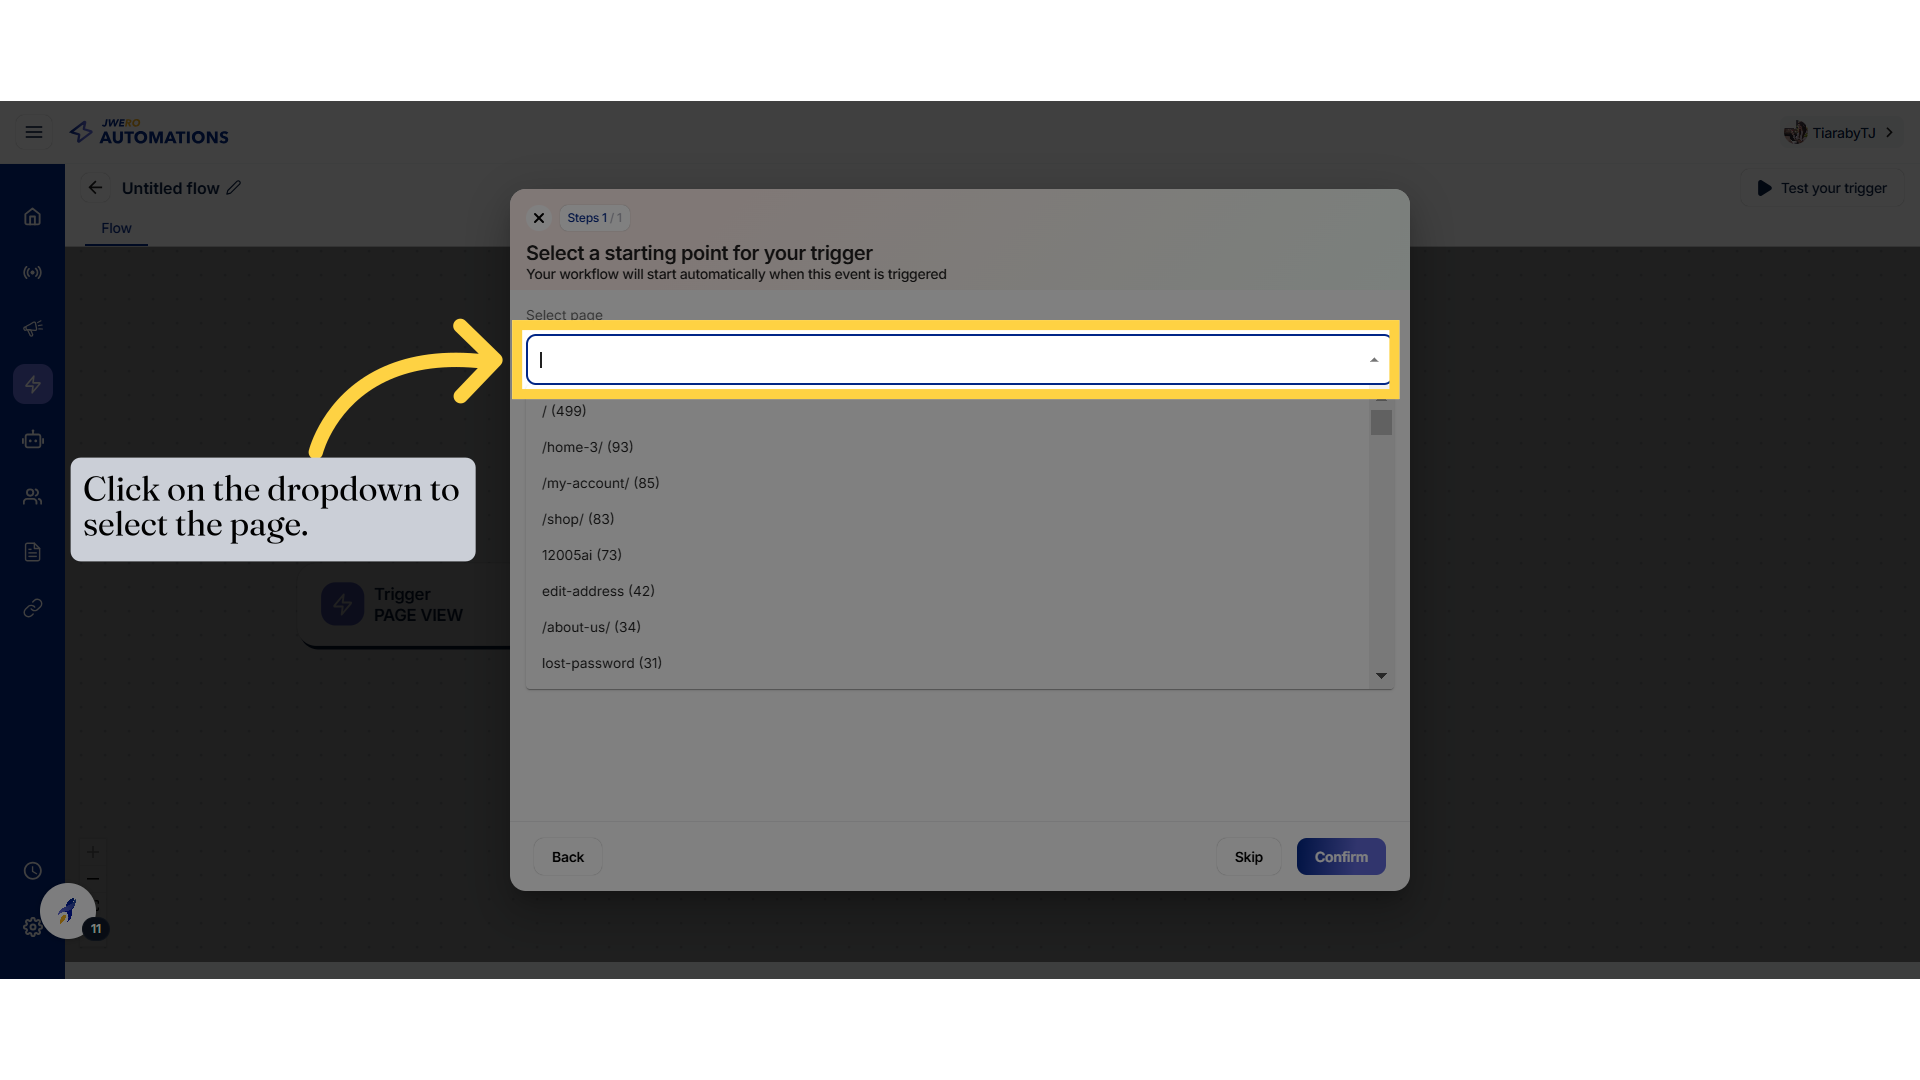
16. You will be displayed the pages created on your website. Select the appropriate page based on your requirement.
Access your account by clicking on "/my-account/ (85)."
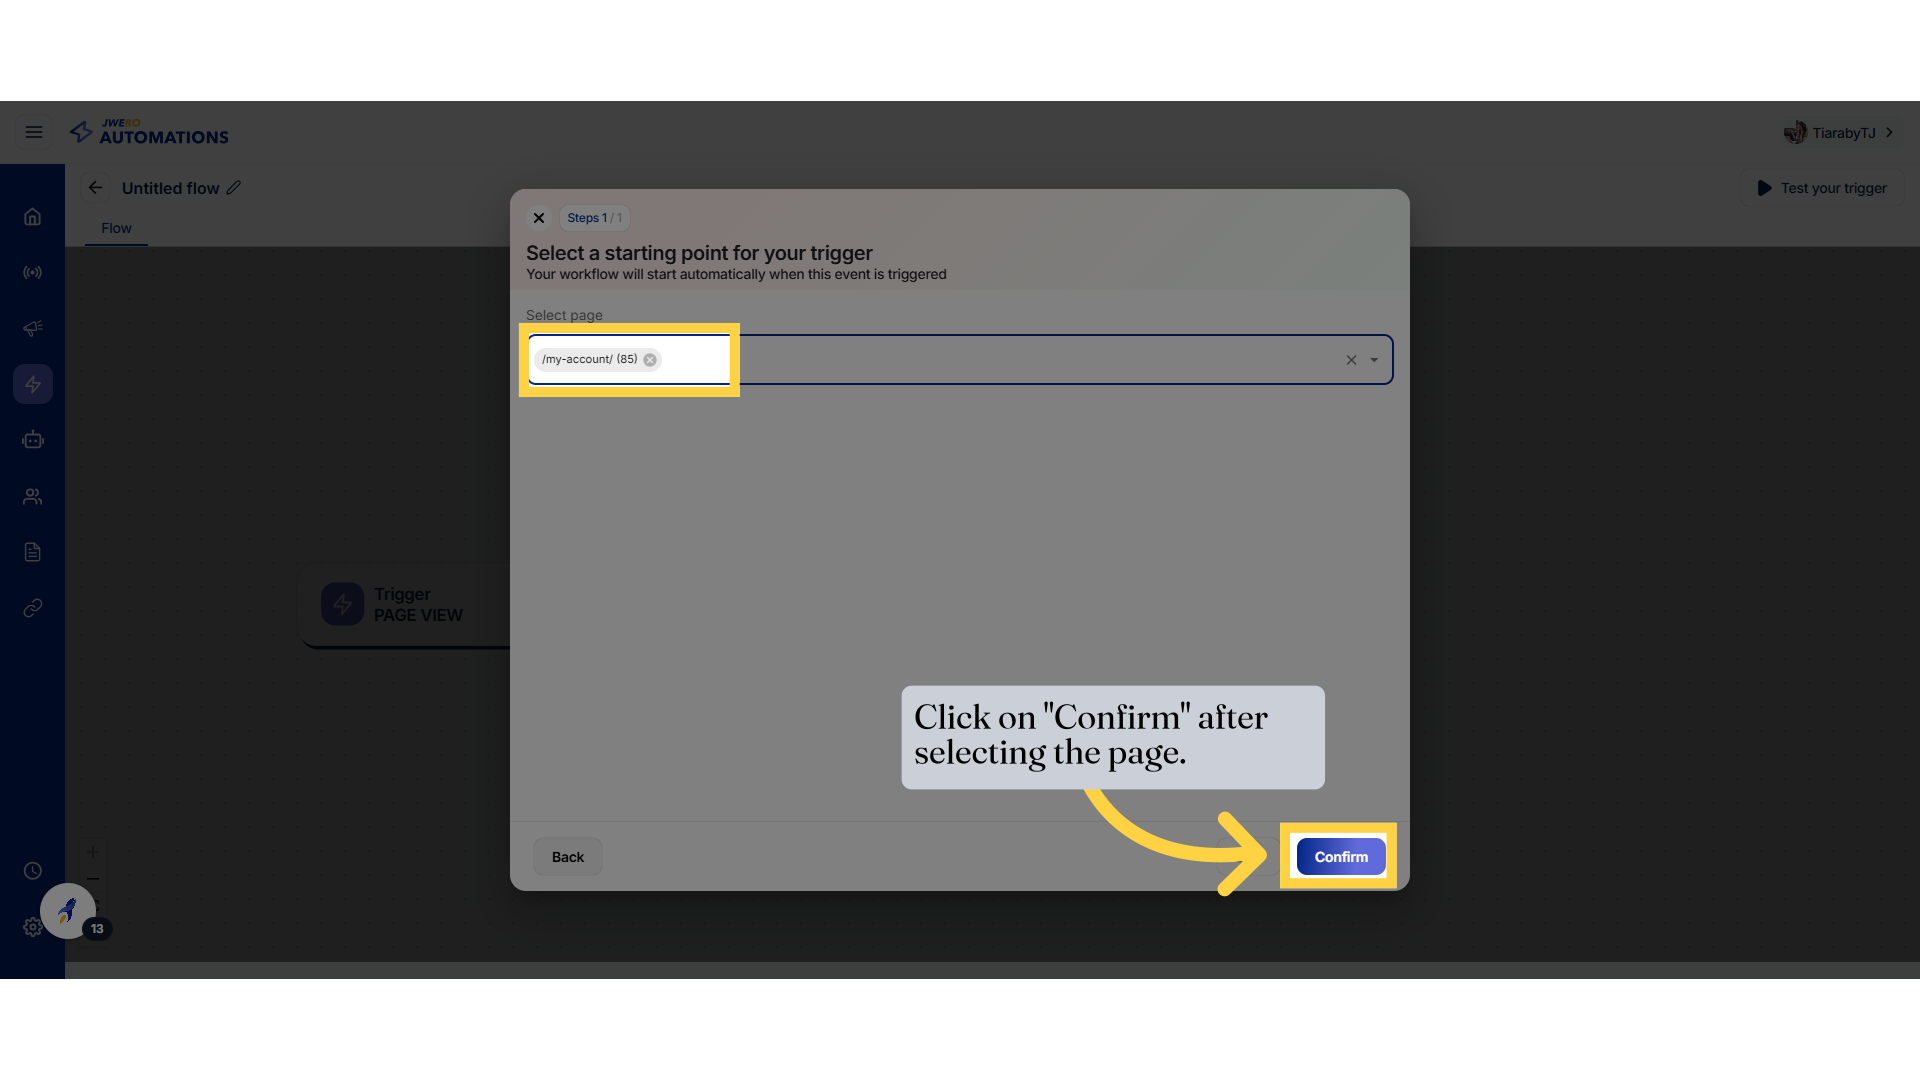
17. Click on "Confirm" after selecting the page.
Go back to the previous page by clicking on "Back."
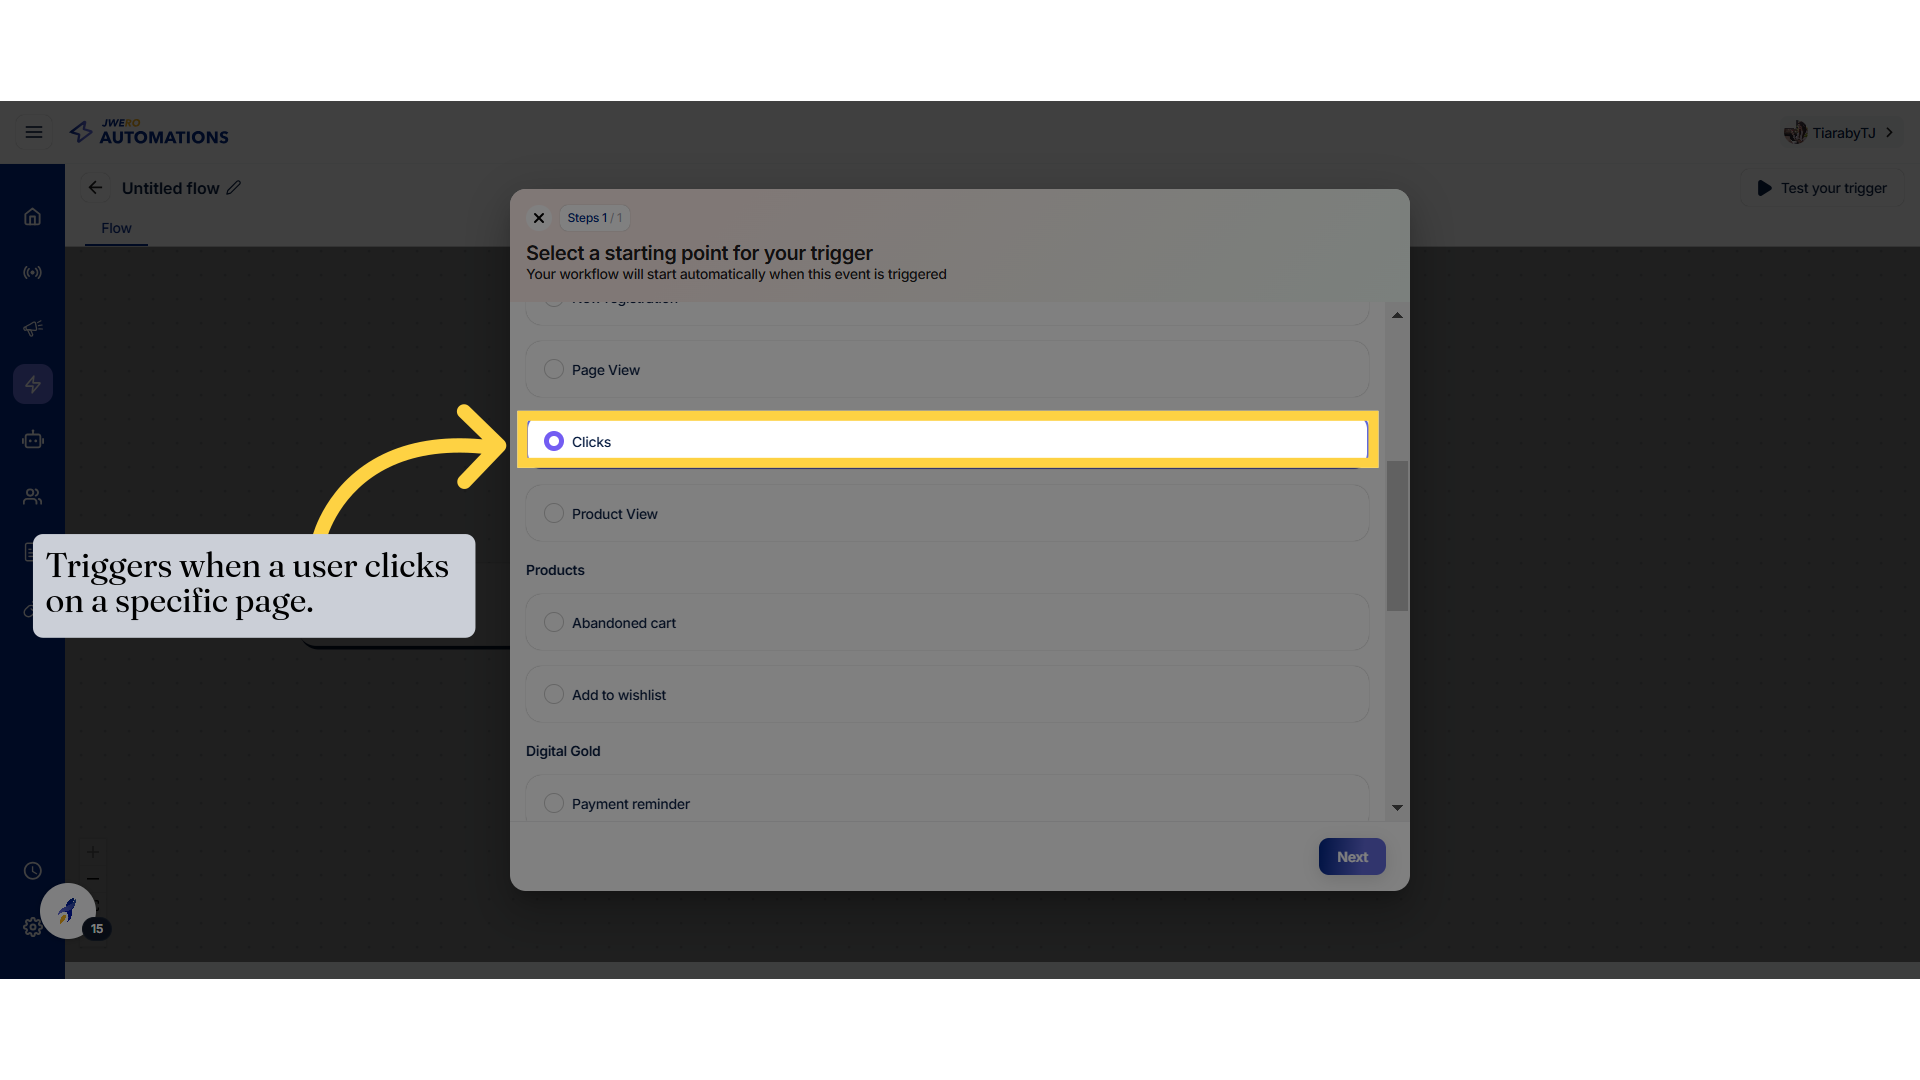
18. Website Clicks Event
Move forward to the next step by clicking on "Next."
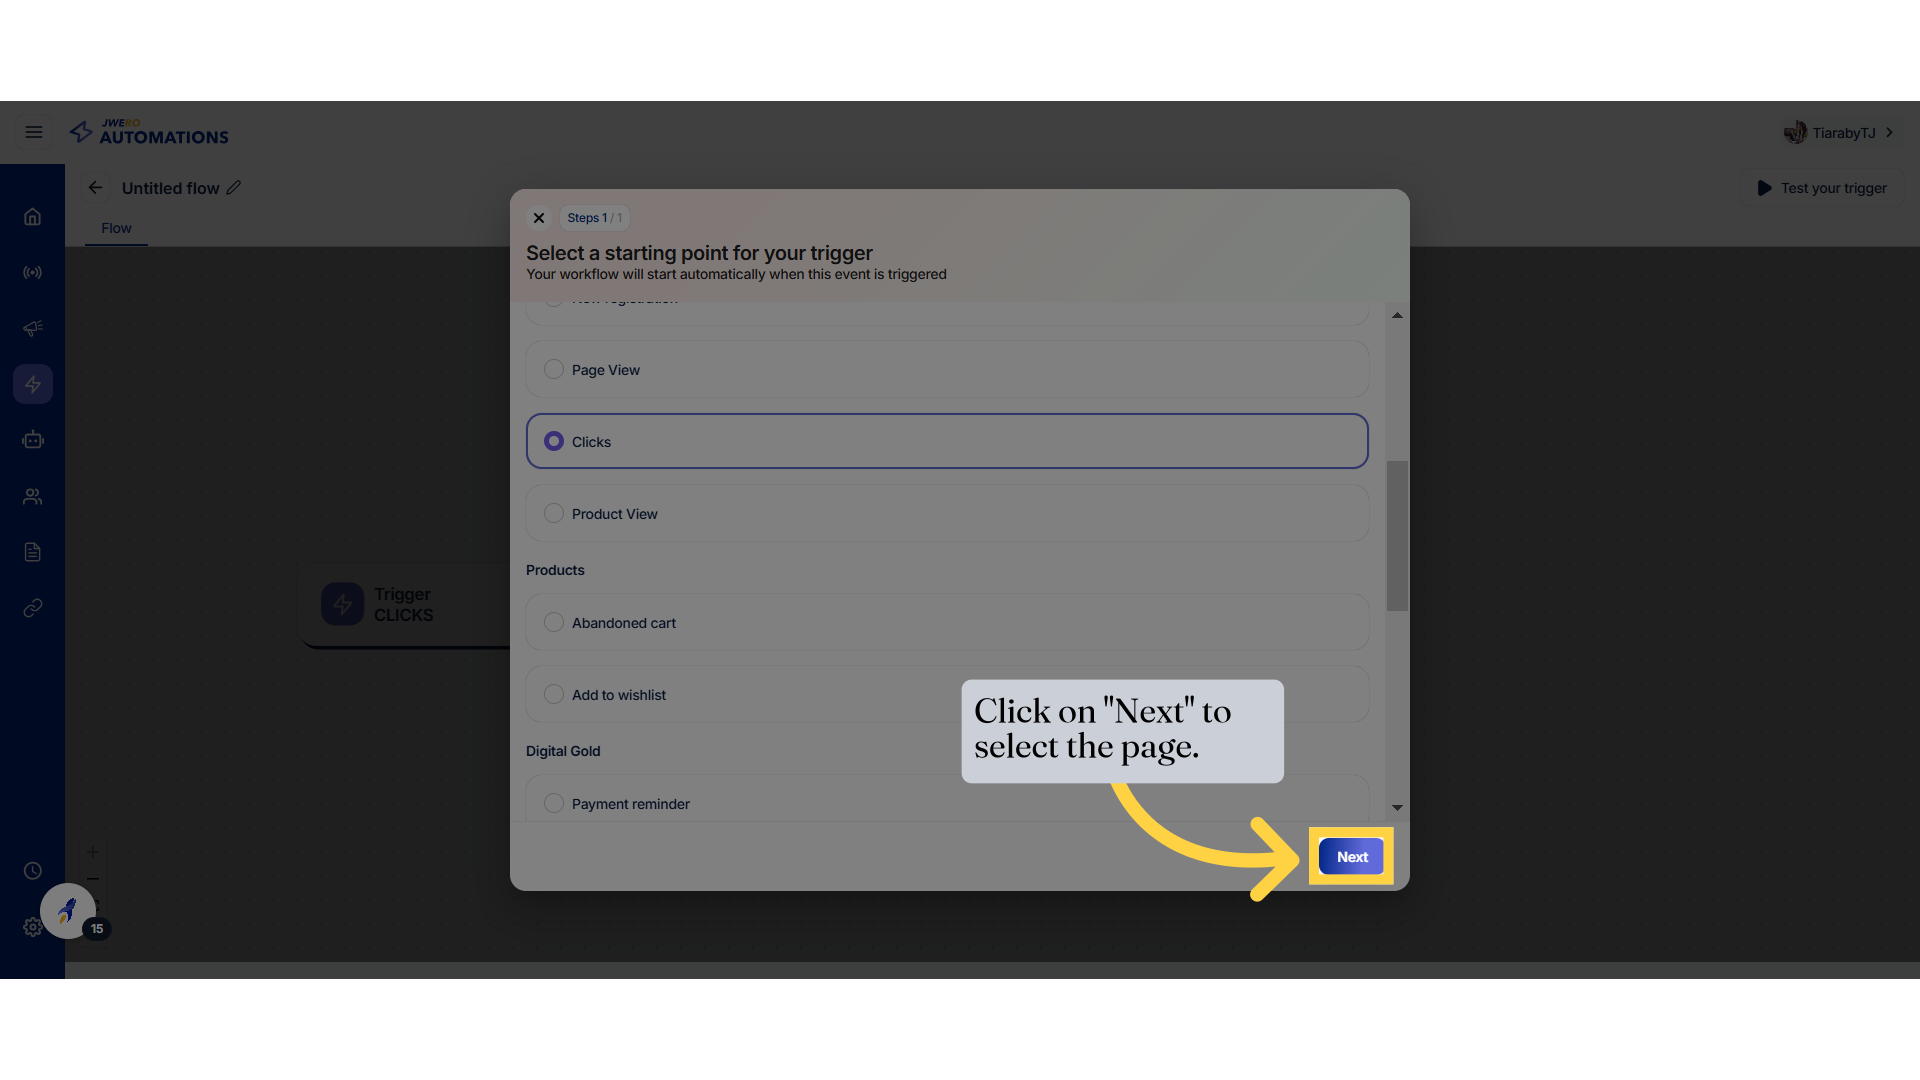
19. Click "Next"
Move forward to the next step by clicking on "Next."
20. Click on the dropdown to select the page
Navigate to the indicated location by clicking "here."
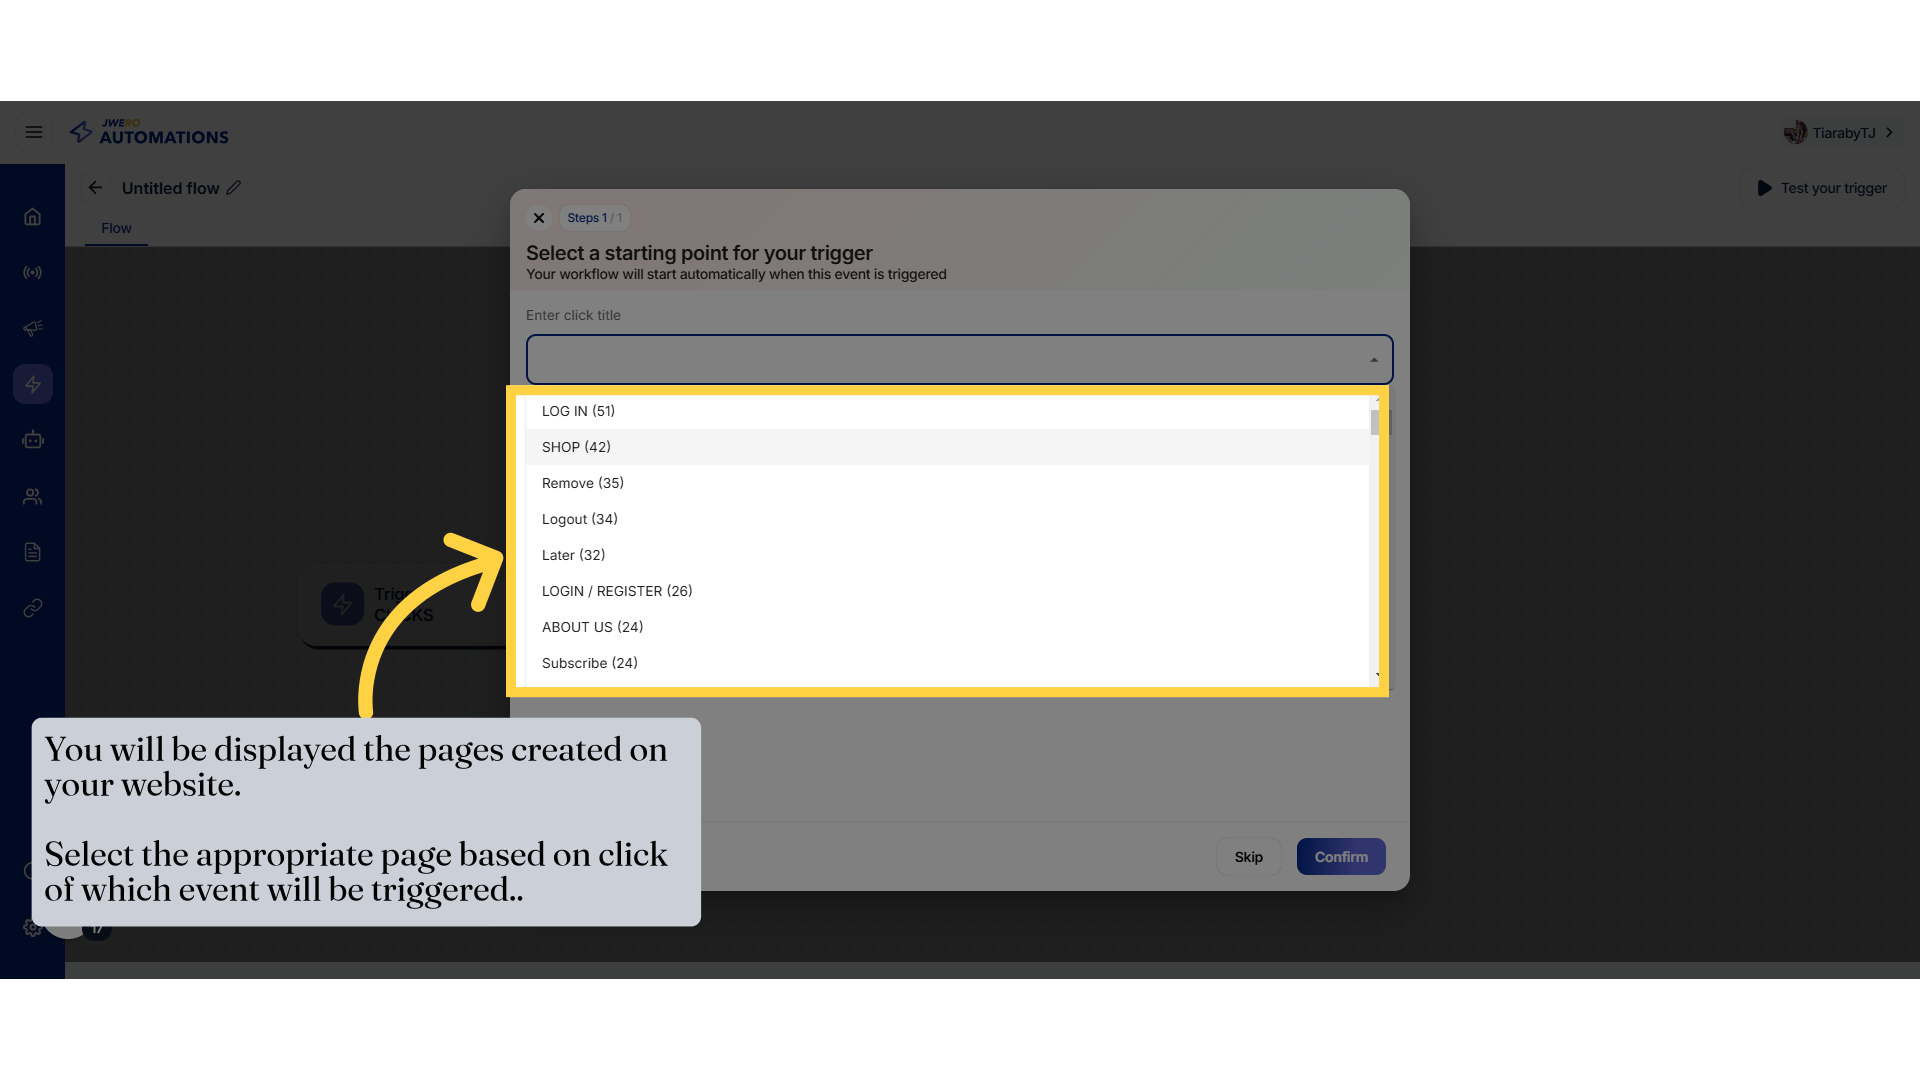
21. You will be displayed the pages created on your website. Select the appropriate page based on click of which event will be triggered..
Explore the shop section by clicking on "SHOP (42)."
22. Click on "Confirm" after selecting the page.
Return to the previous page by clicking on "Back."

23. Website Product View Event
Proceed to the next step by clicking on "Next."
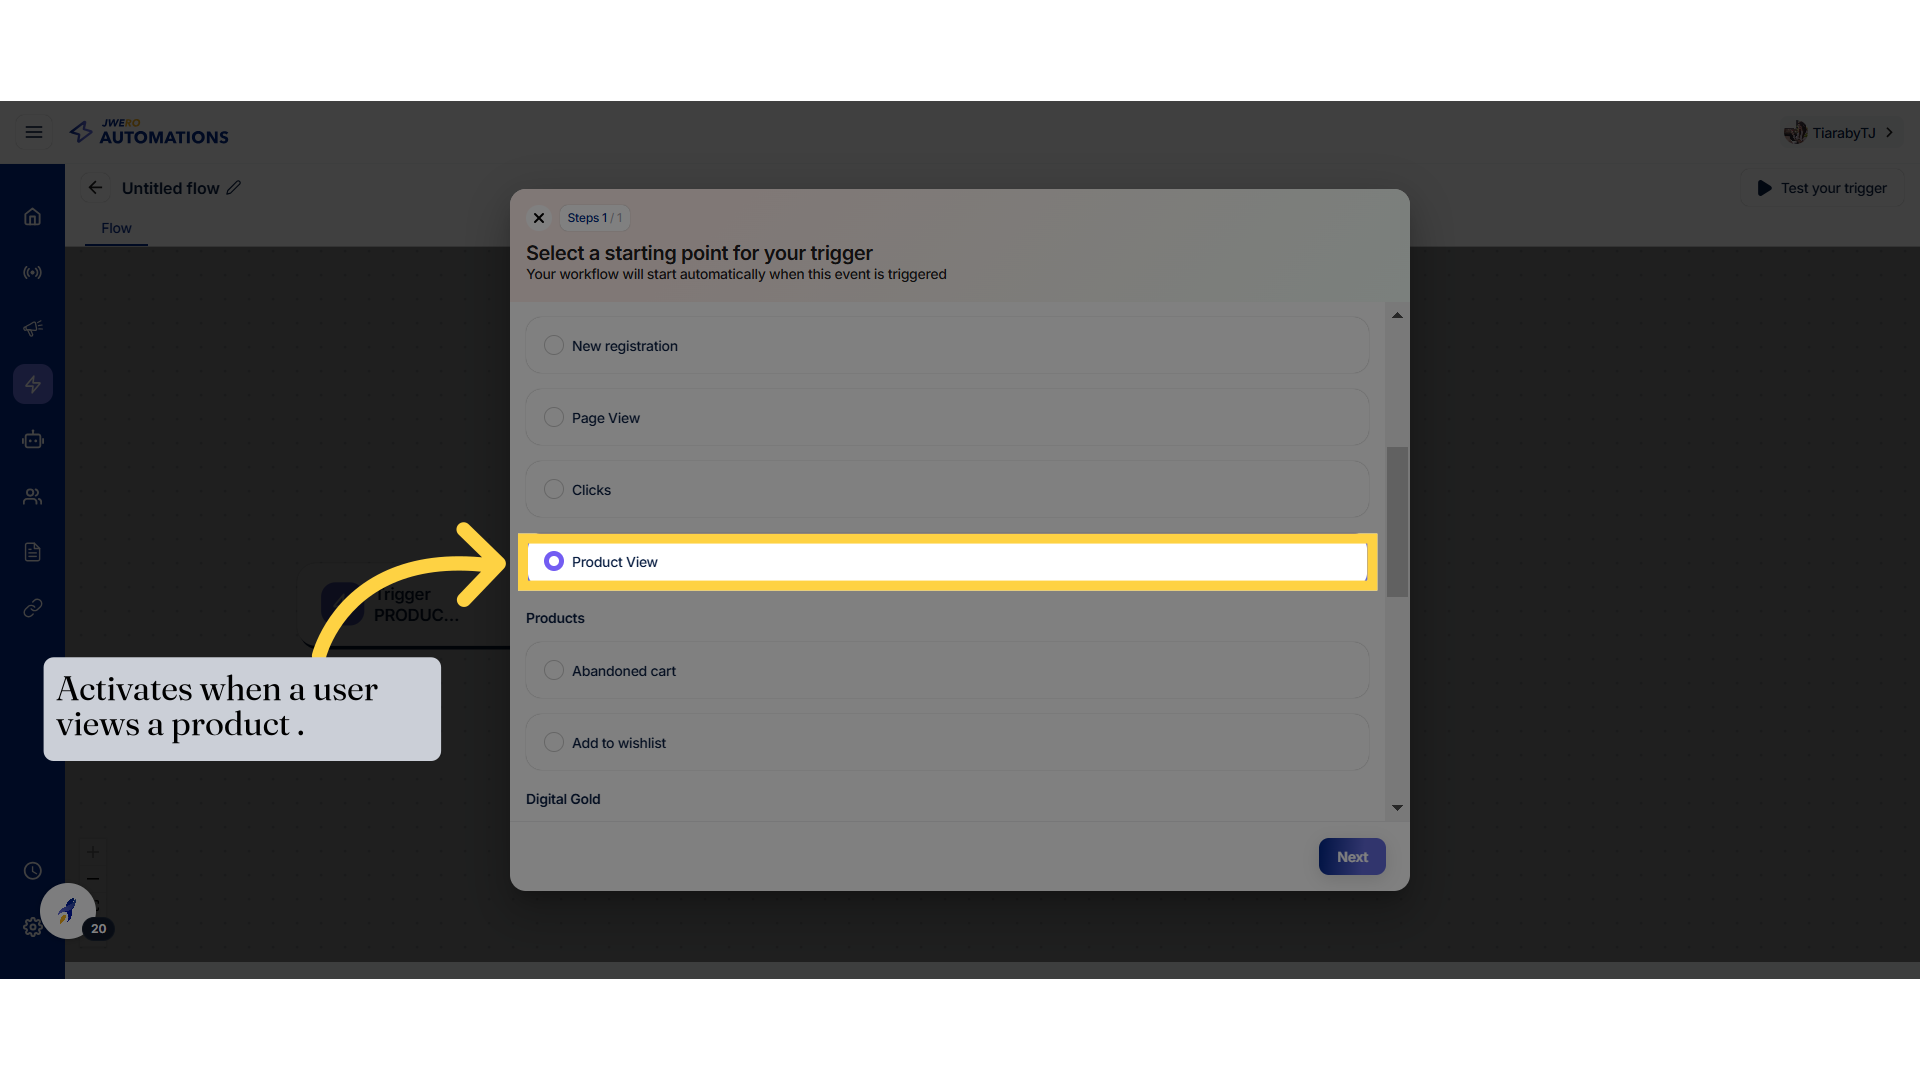
24. Click on "Next" to select the product.
Proceed to the next step by clicking on "Next."

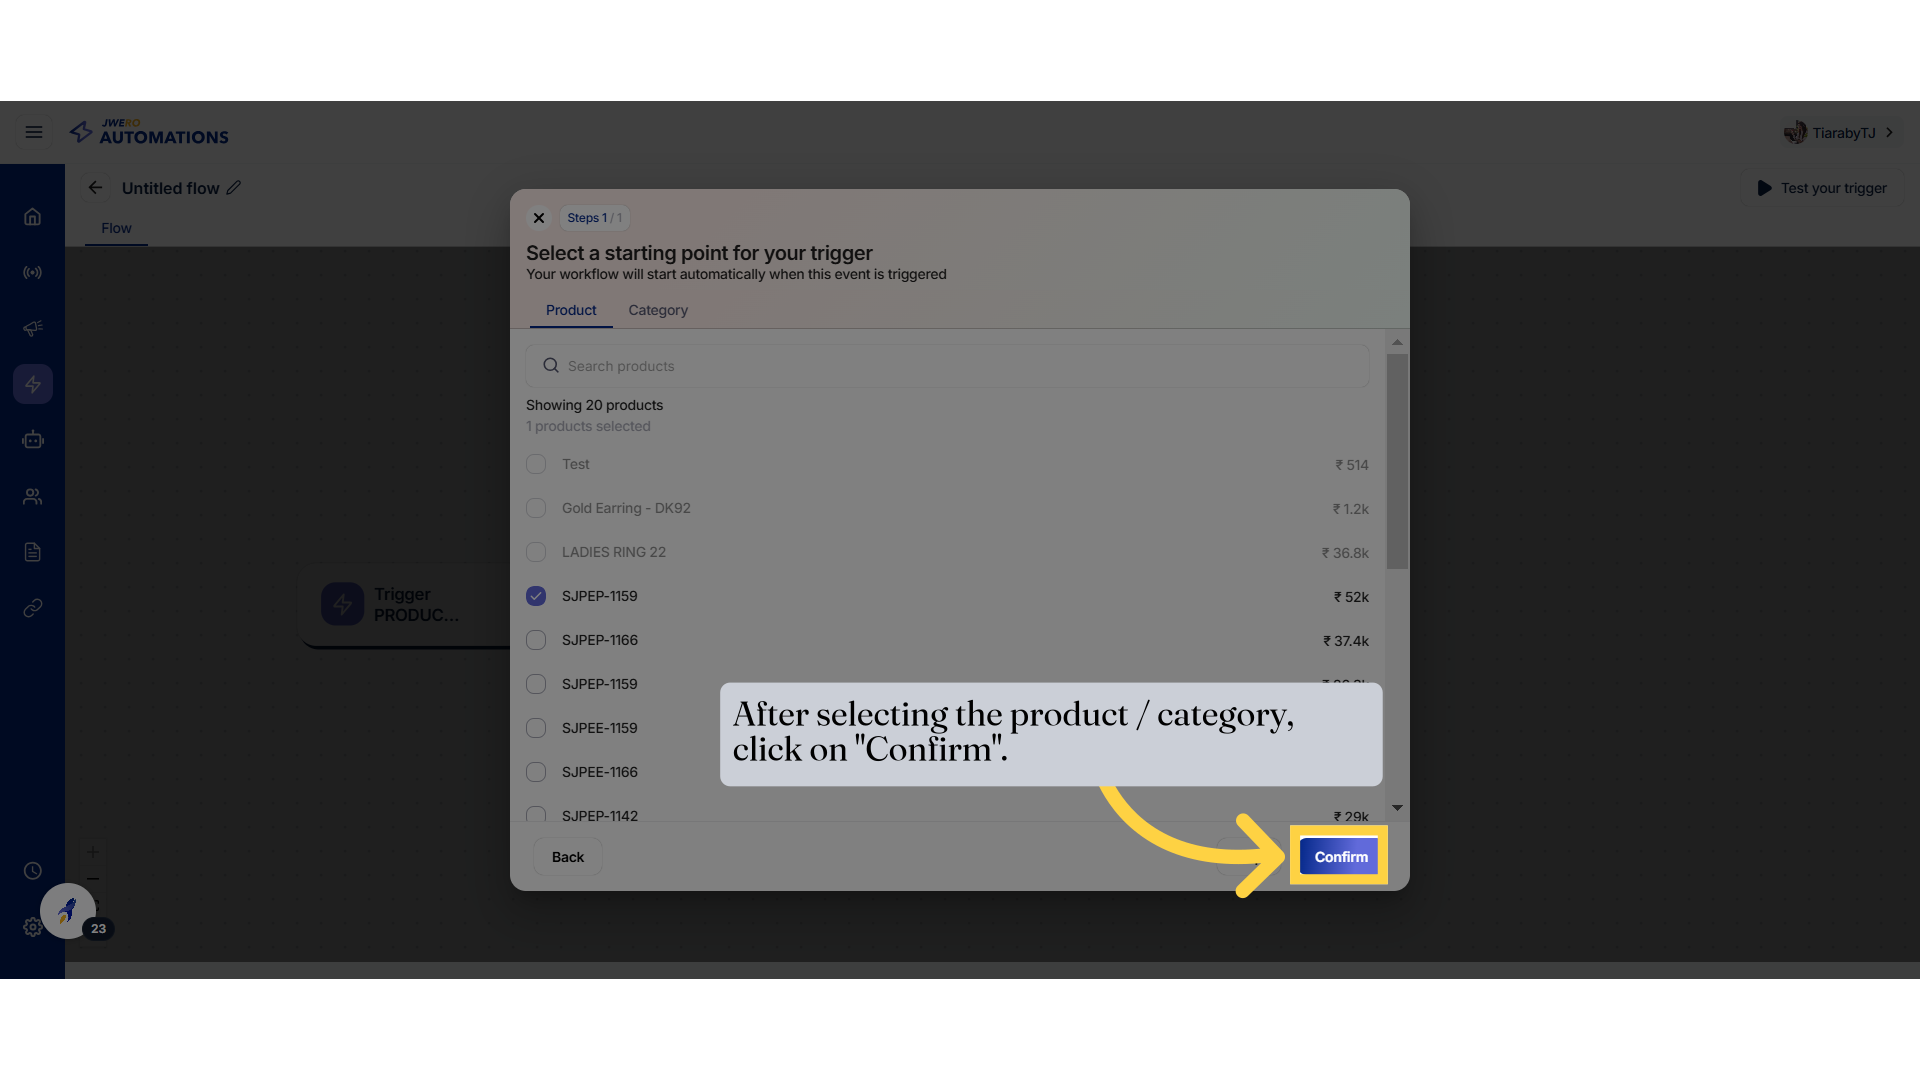
25. Select a product or category that will trigger the event when viewed.
Browse items by category by clicking on "Category."
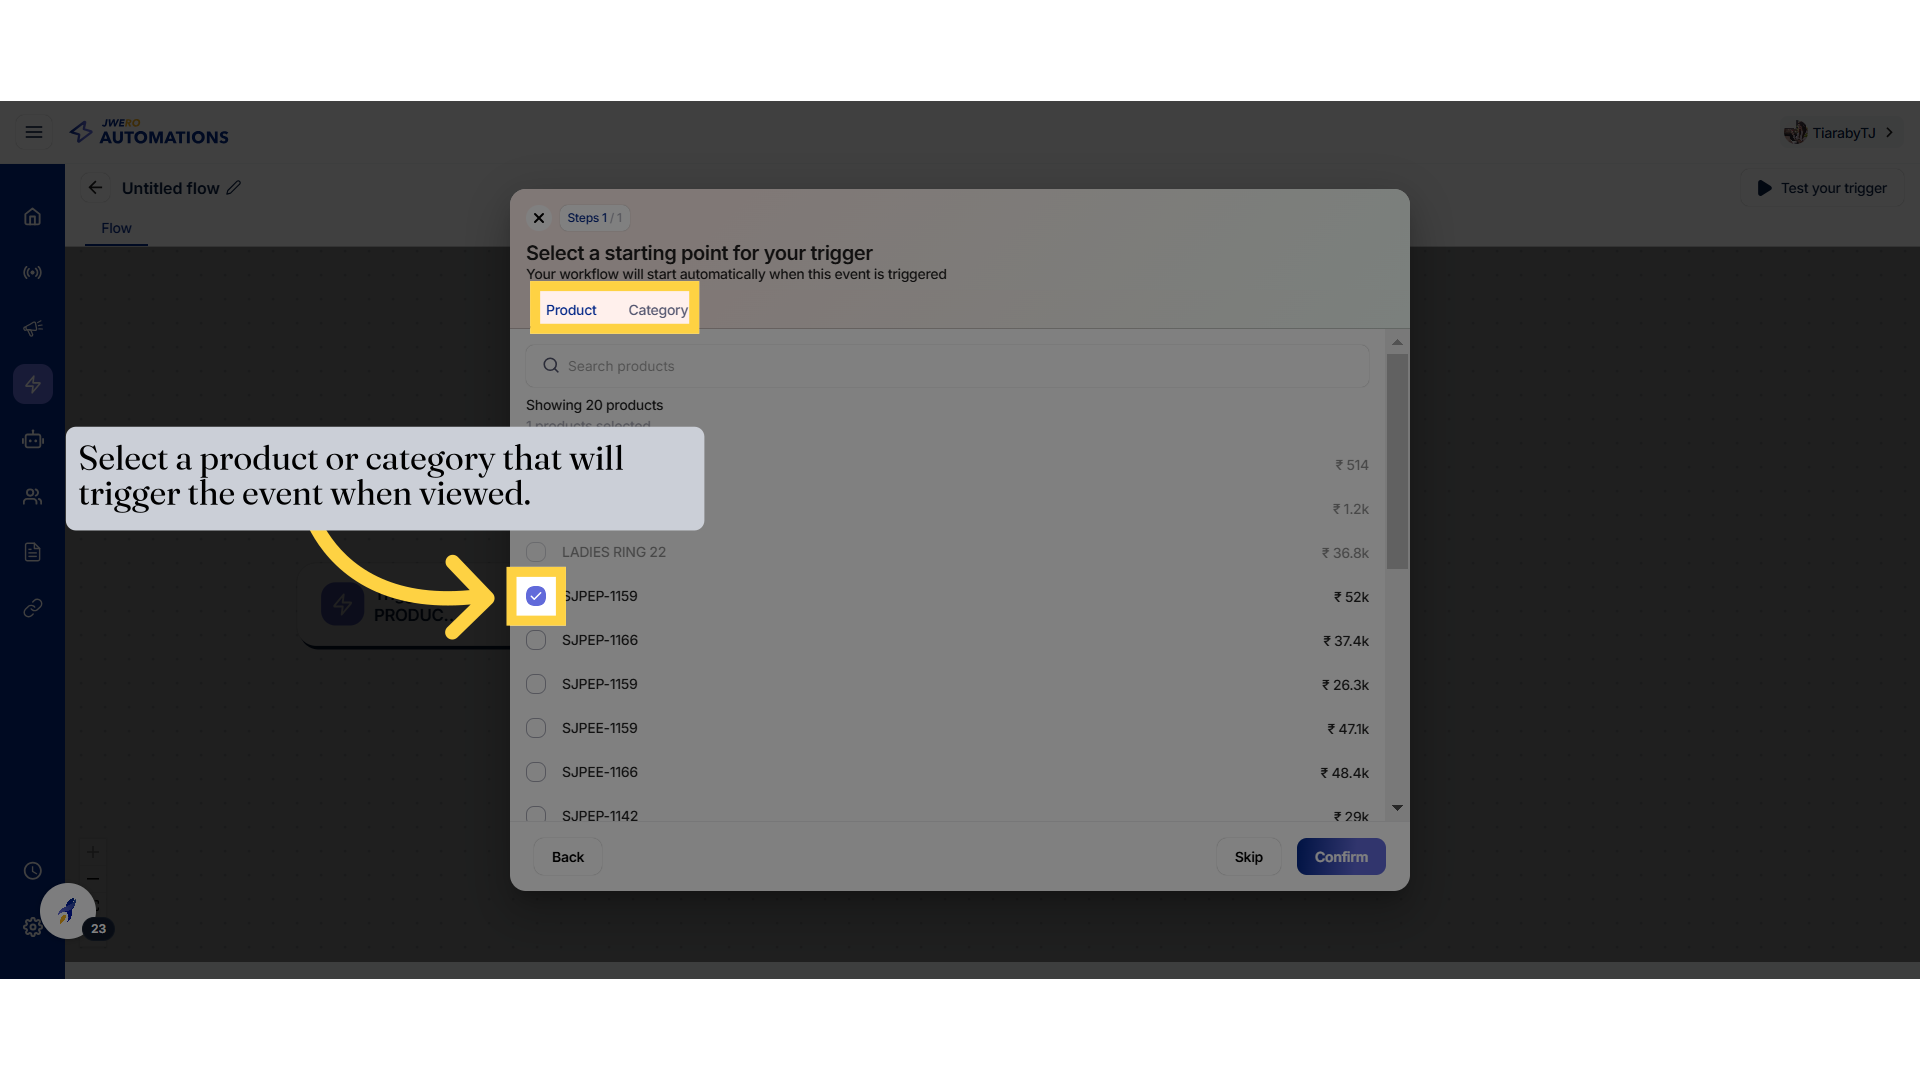
26. After selecting the product / category, click on "Confirm".
Browse items by category by clicking on "Category."

27.
28. Products Abandoned Cart Event
Proceed to the next step by clicking on "Next."
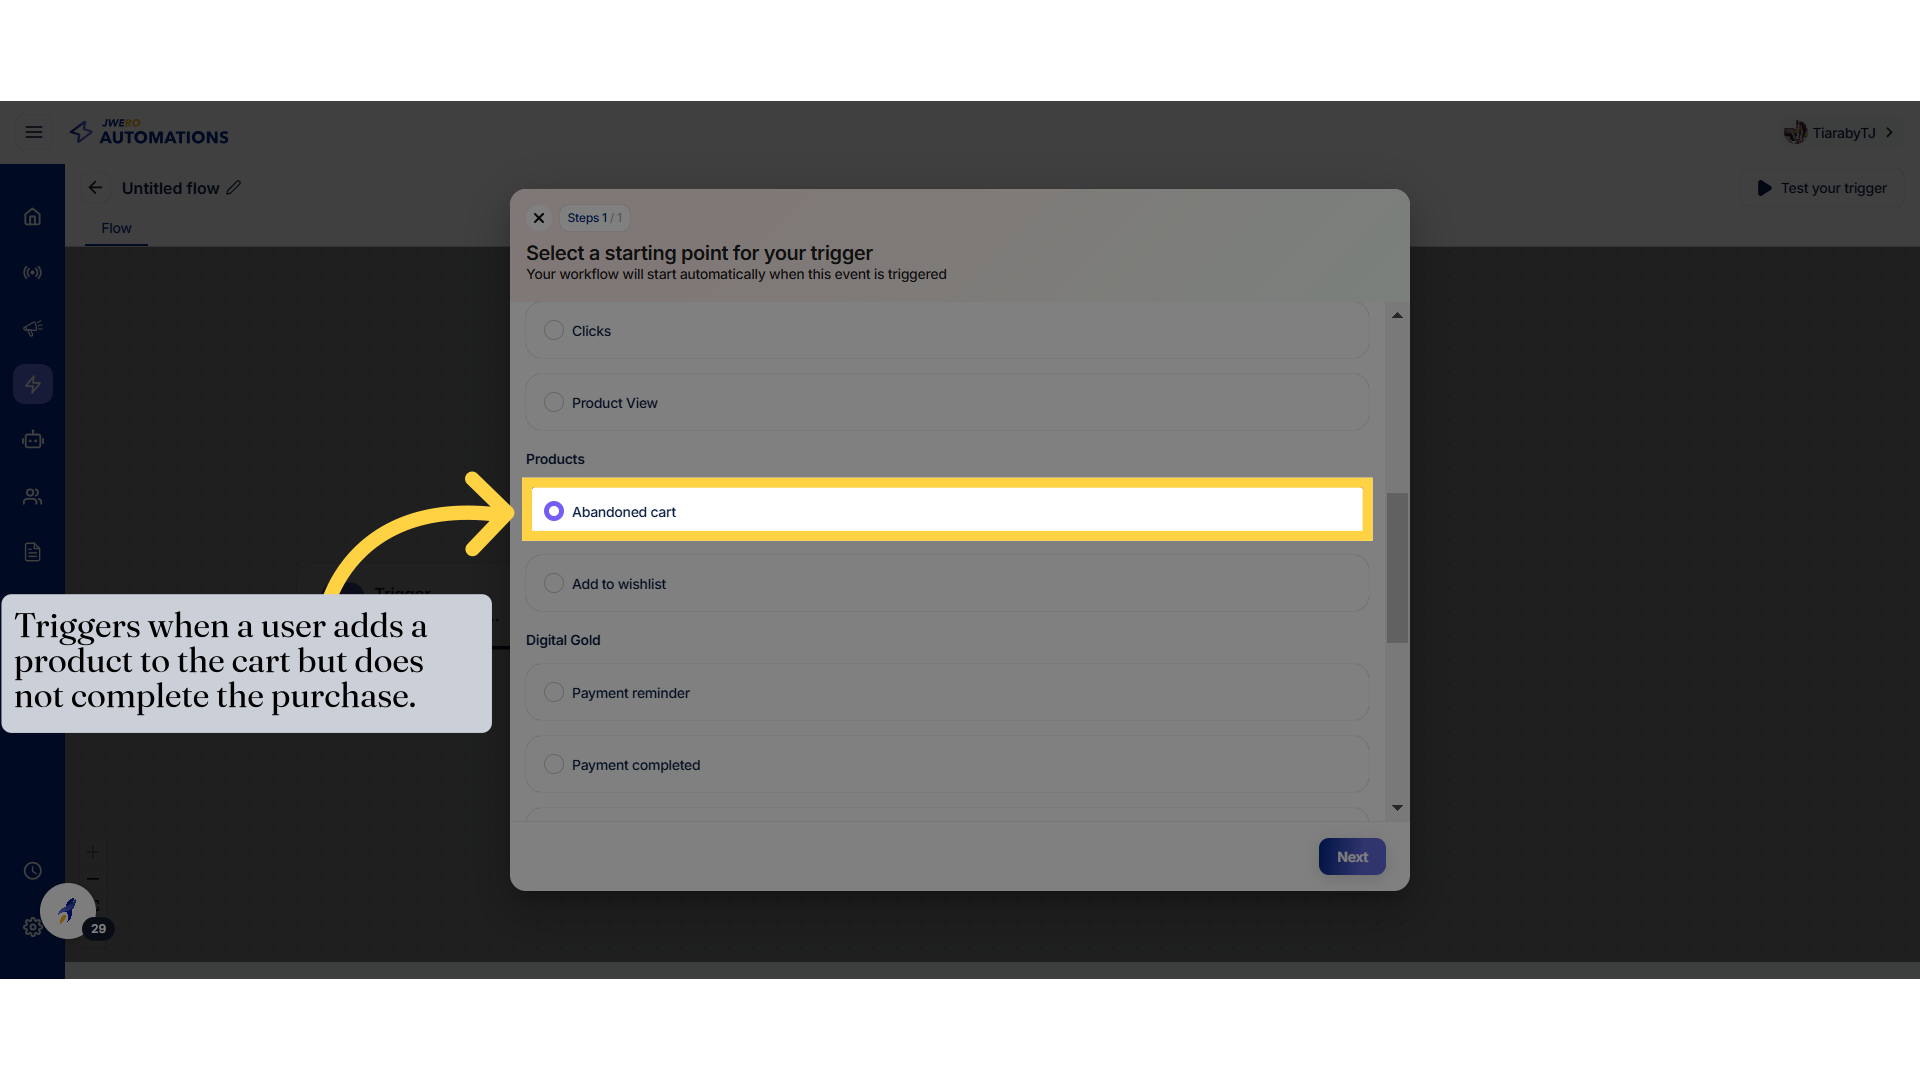
29. Click "Next"
Proceed to the next step by clicking on "Next."

30. Select a product or category that will trigger the event when it is left abandoned in the cart.
Browse items by category by clicking on "Category."

31. After selecting the product / category, click on "Confirm".
Browse items by category by clicking on "Category."

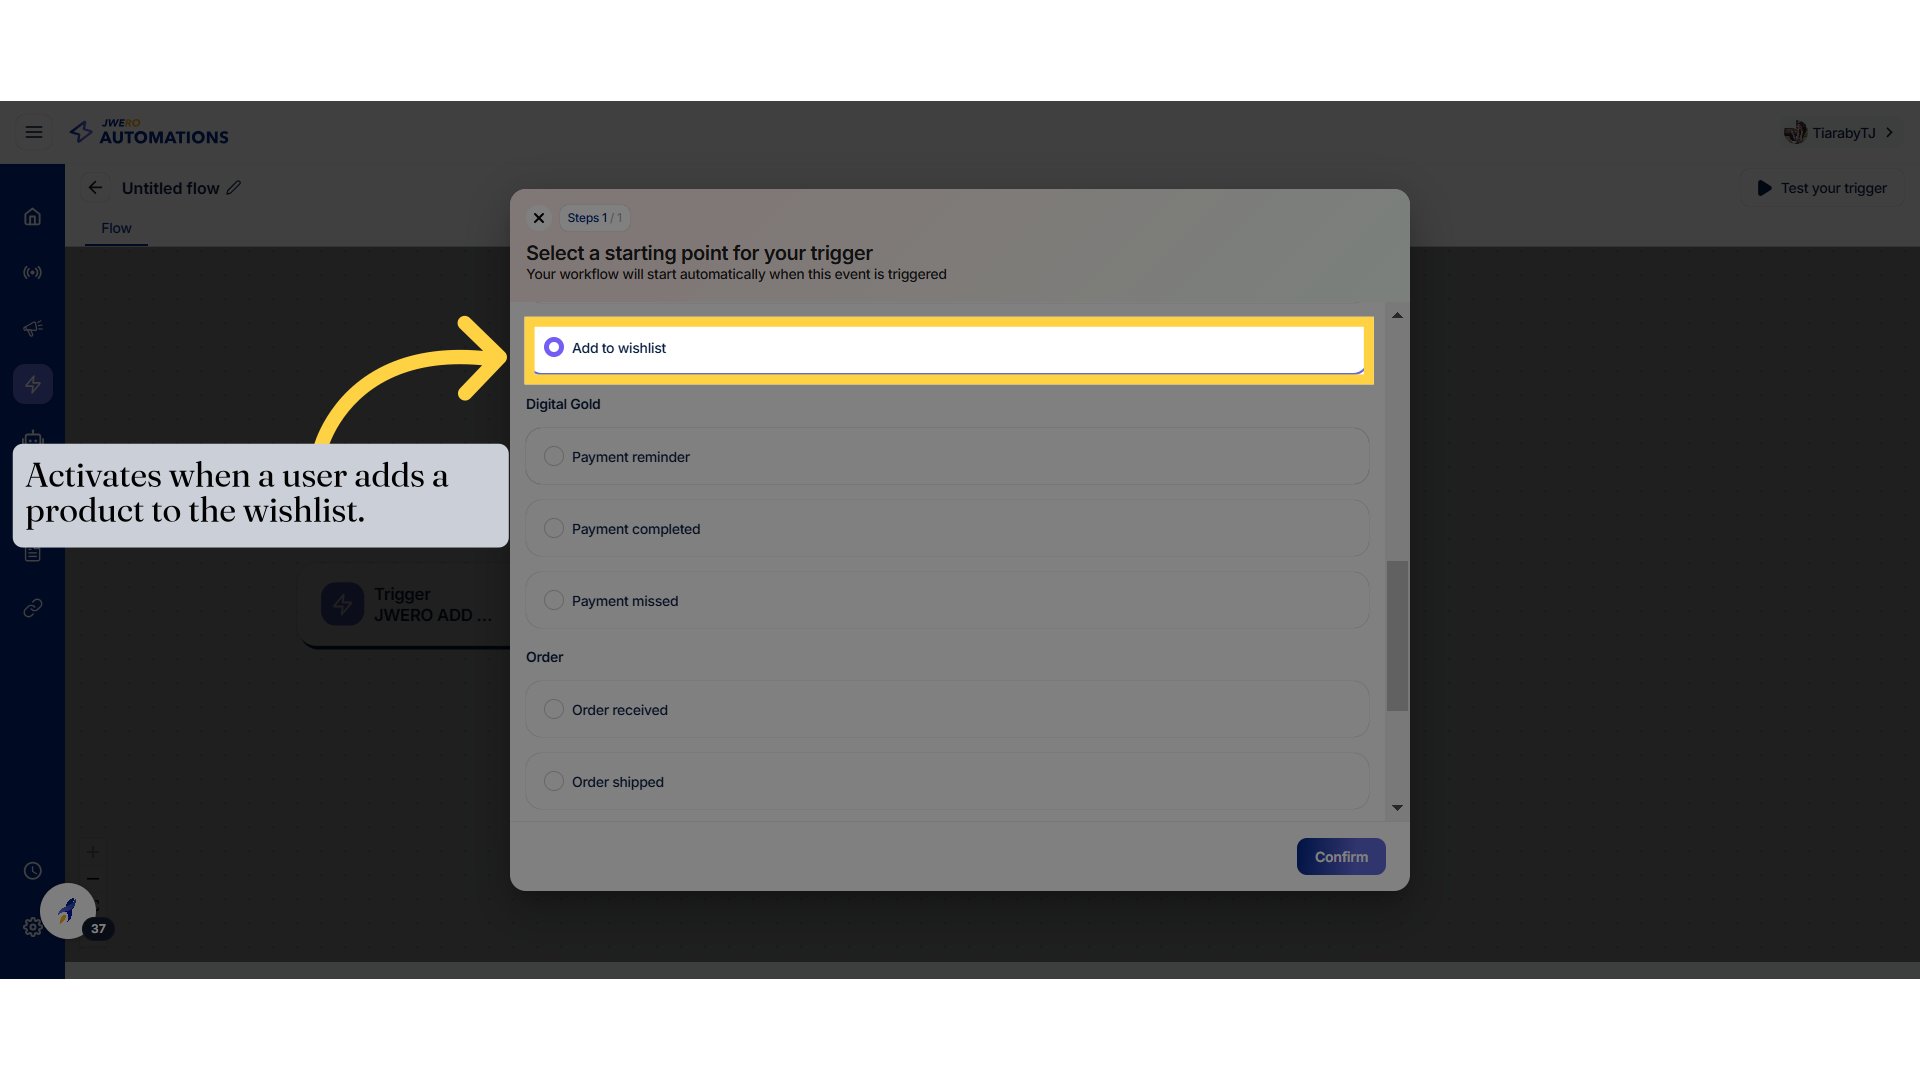
32. Product Add To Wishlist Event
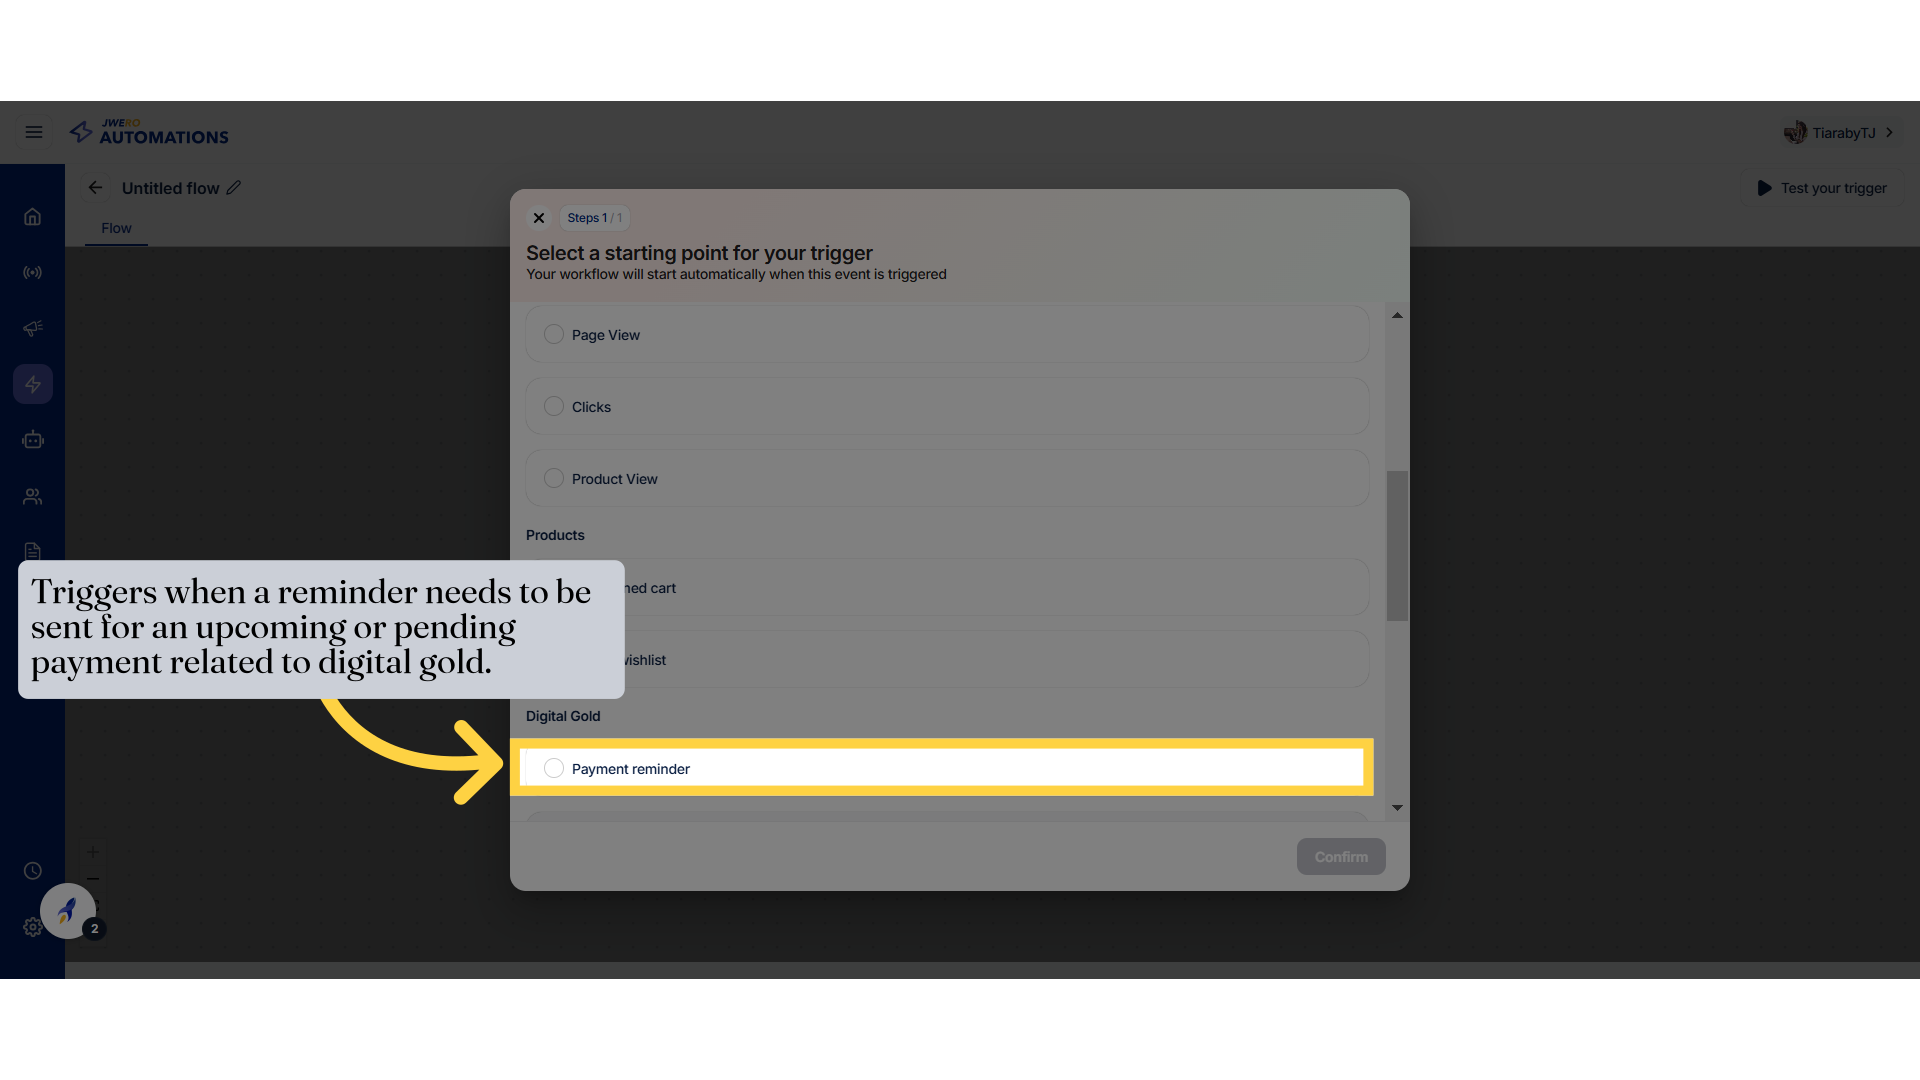
Set a payment reminder by clicking on "Payment reminder."
33. Select a product or category that will trigger the event when it is added to the wishlist.
Browse items by category by clicking on "Category."
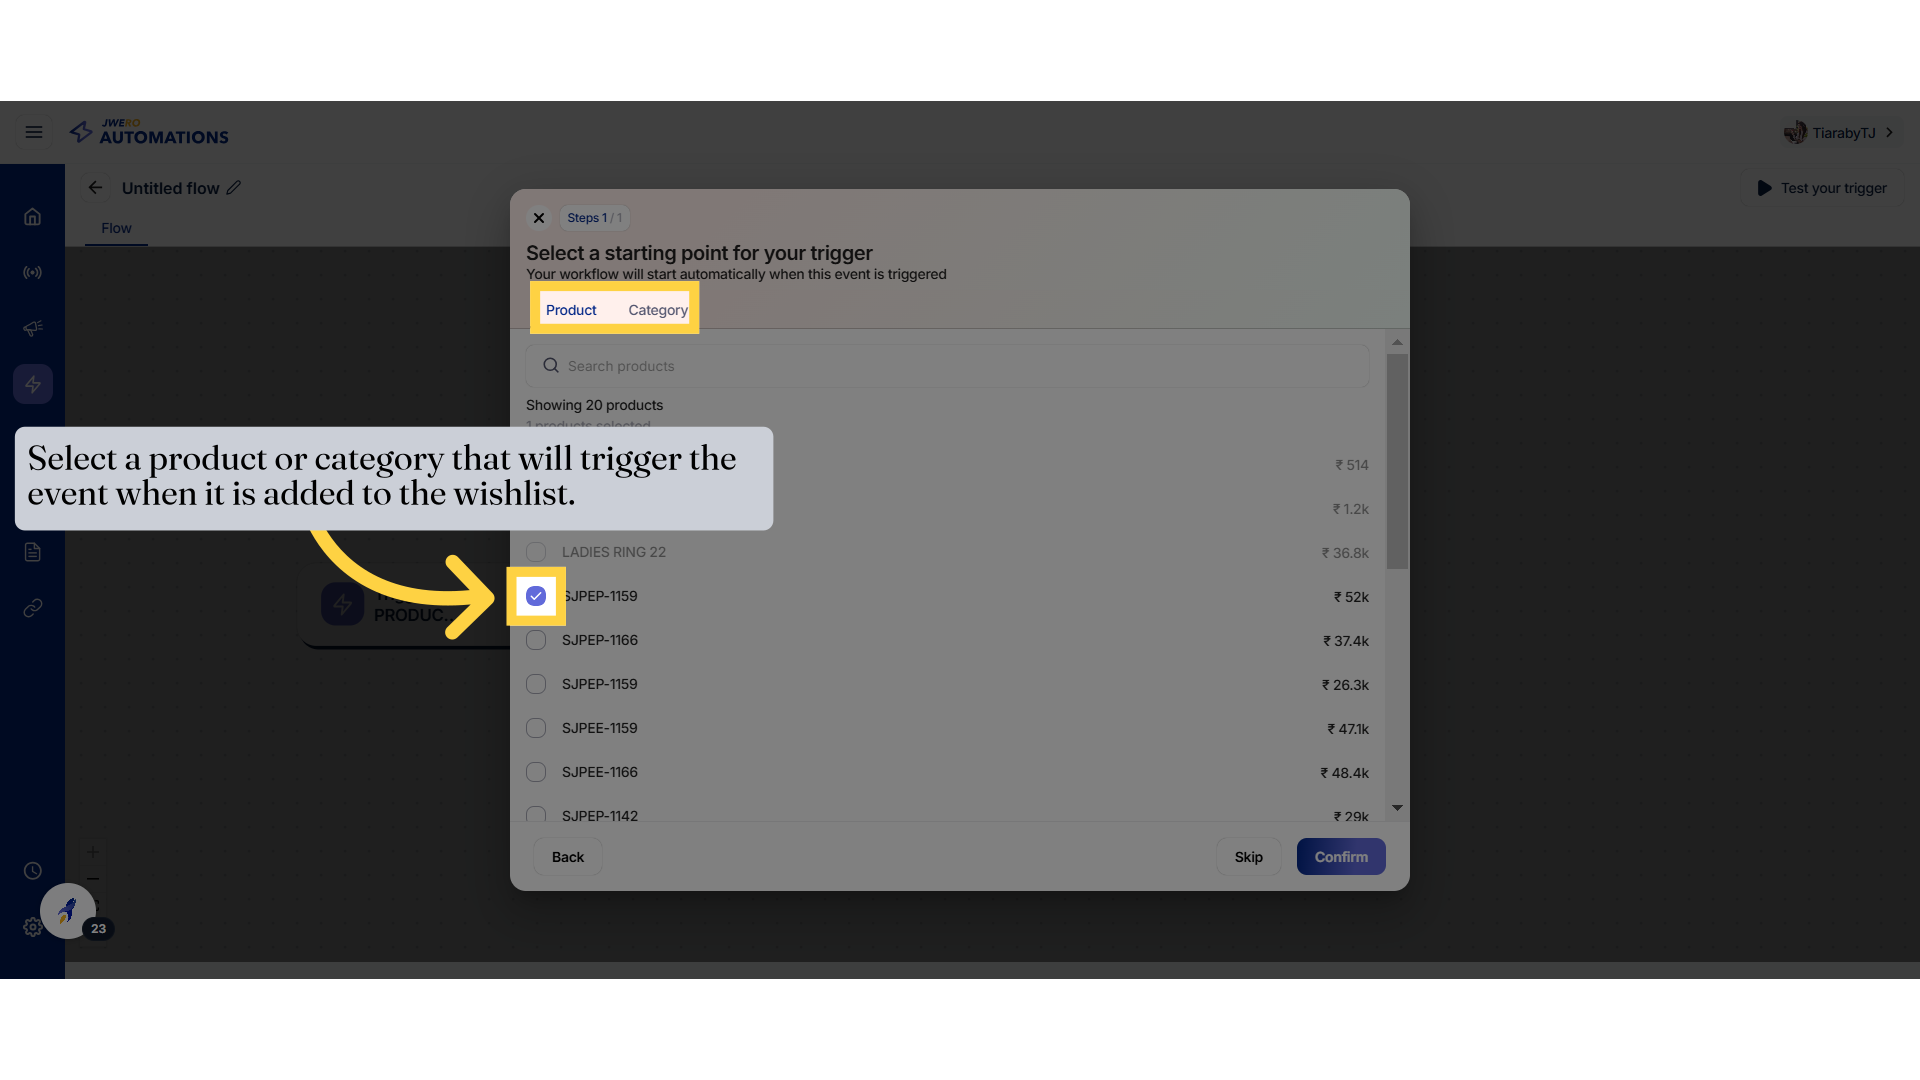
34. After selecting the product / category, click on "Confirm".
Browse items by category by clicking on "Category."

35.
36. Digital Gold Event
Navigate to the products section.
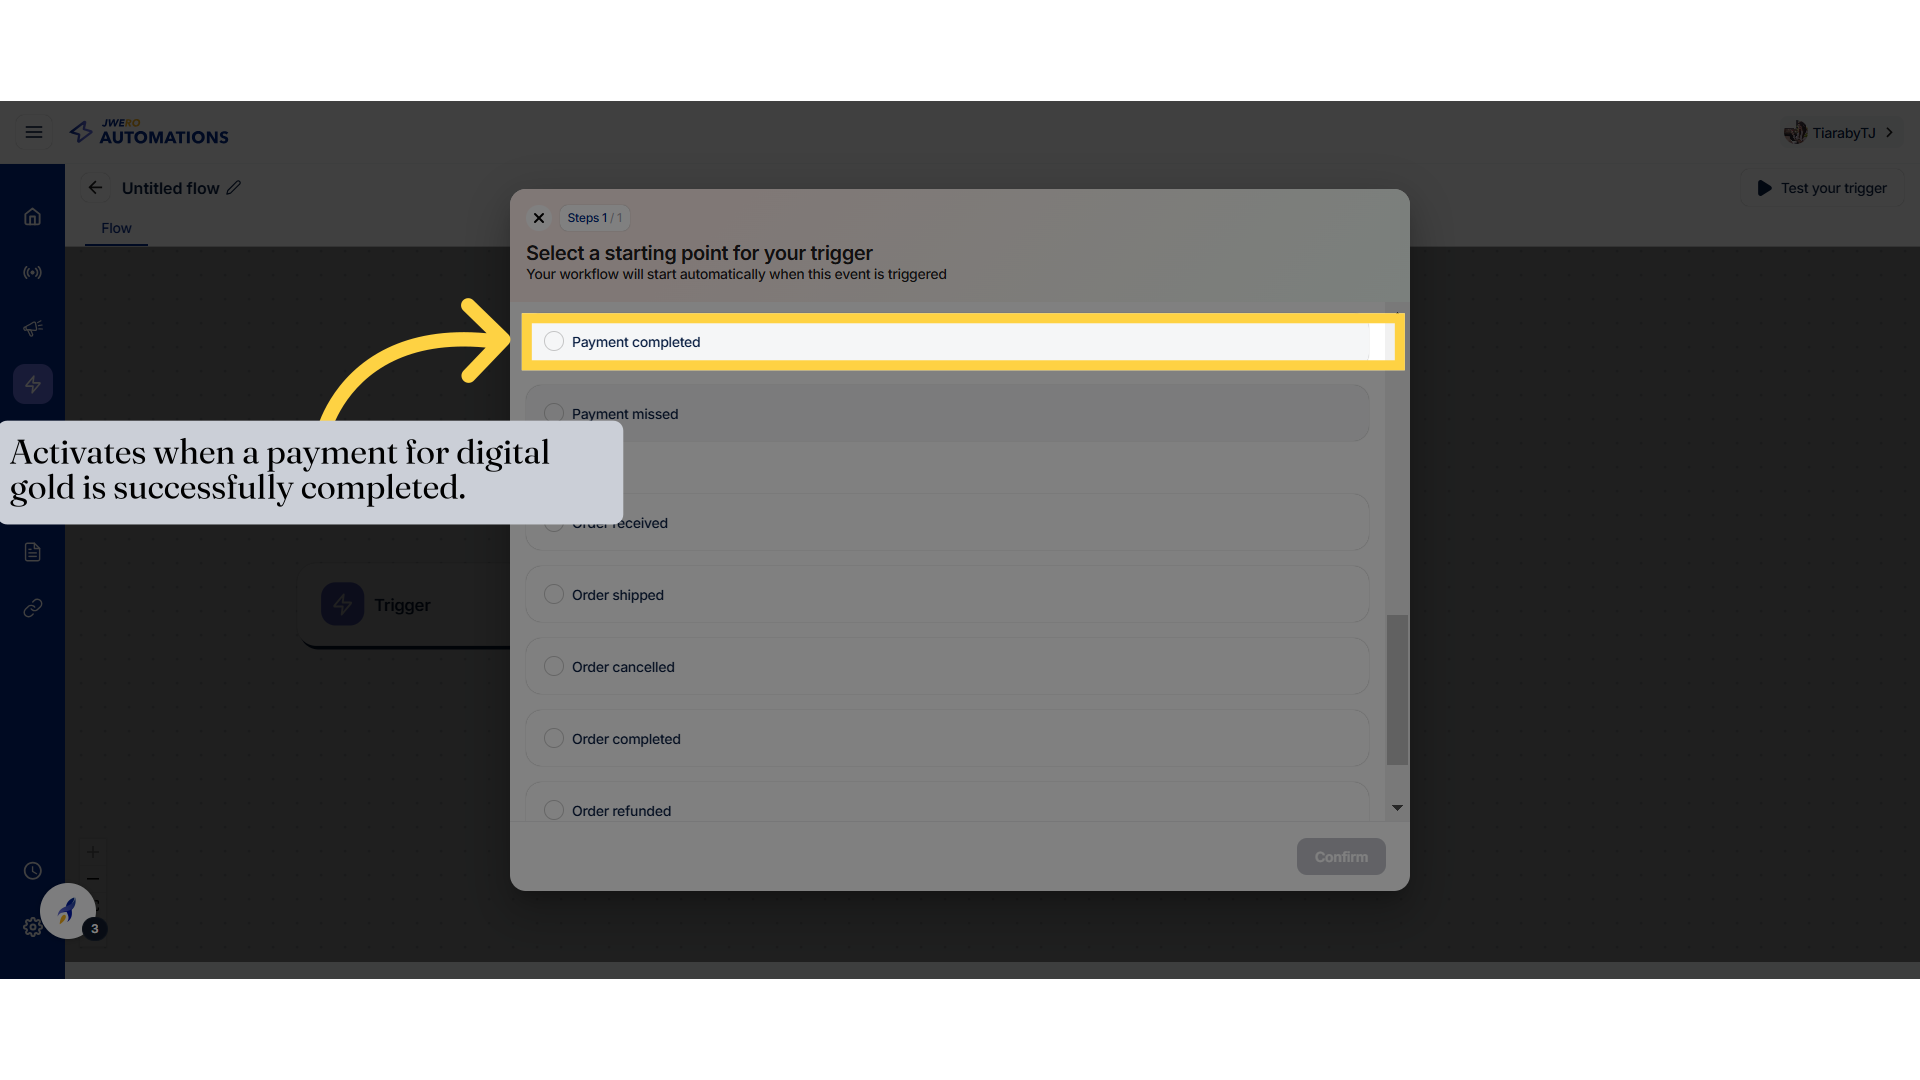
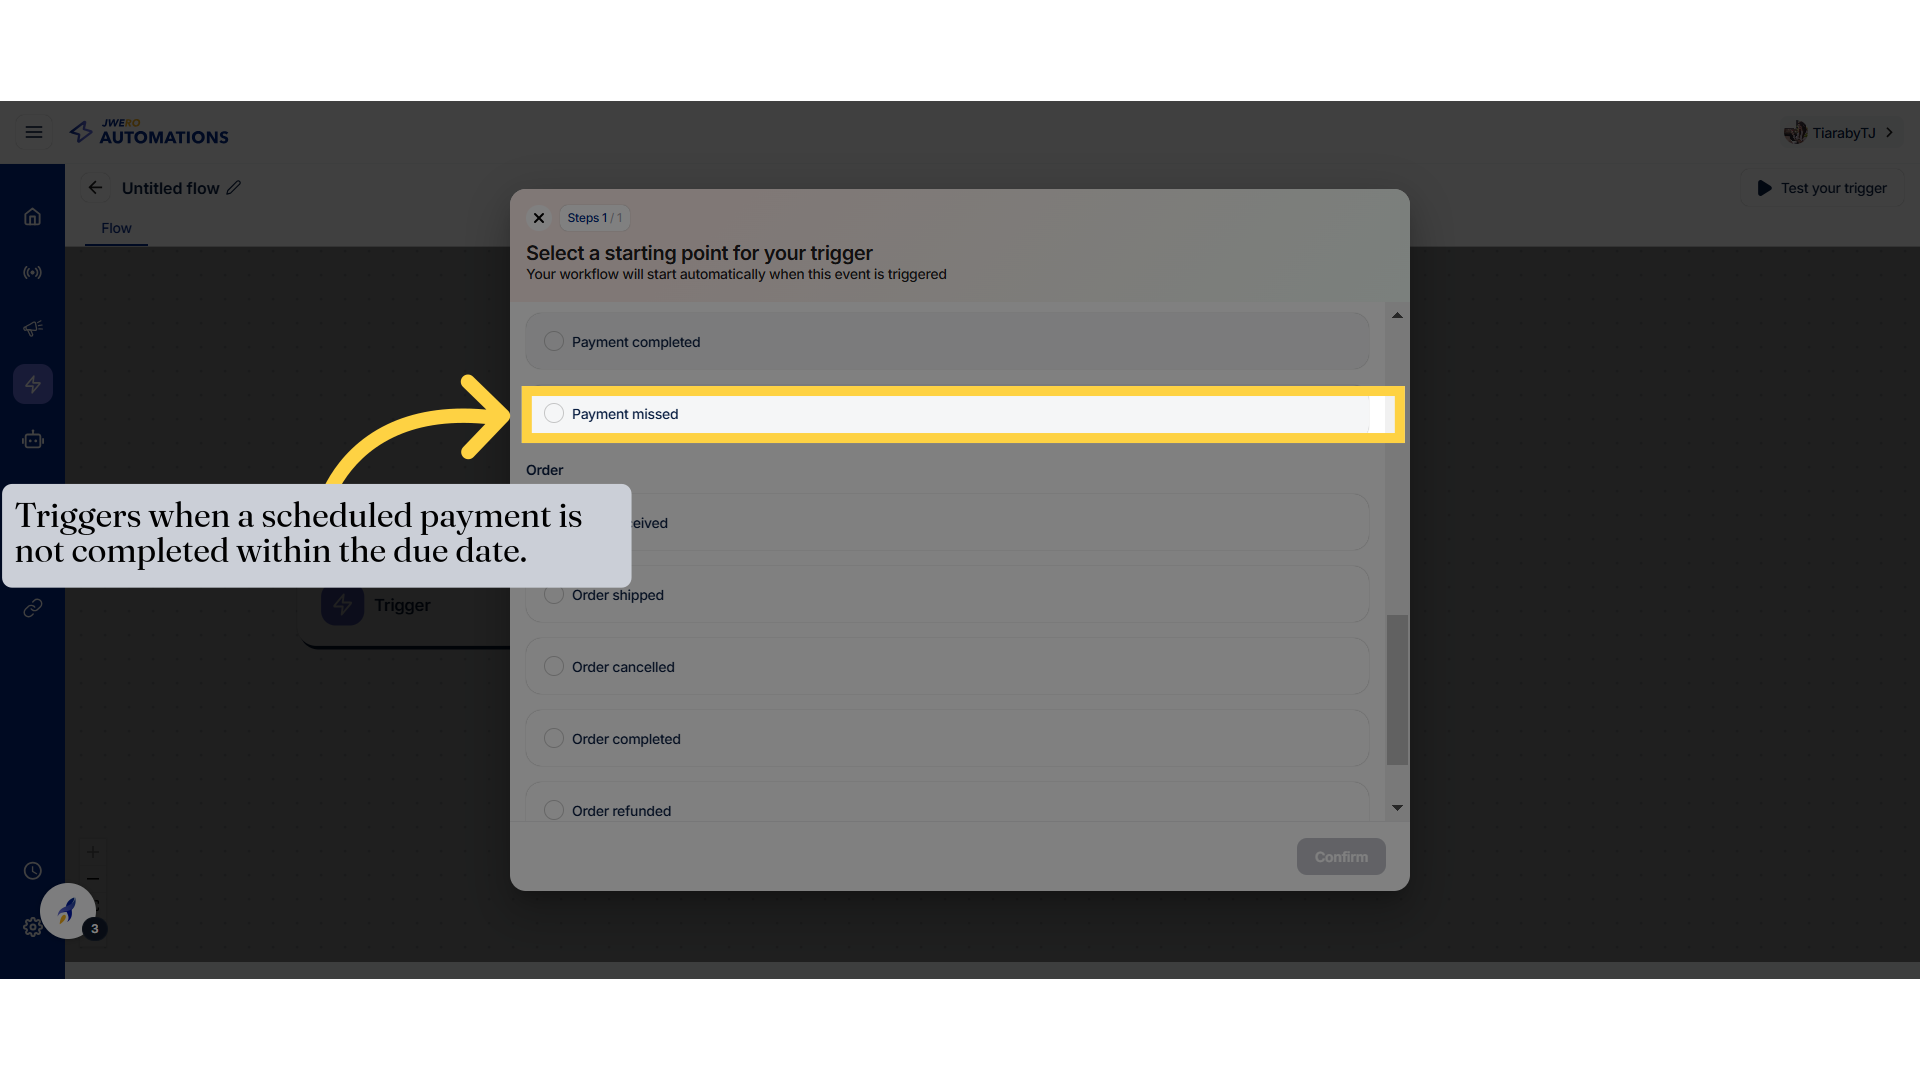
37. Digital Gold Payment Completed
Access the order page.
38.
39. Digital Gold Event
Access the order page.
40. Order Received Event
Access the order page.
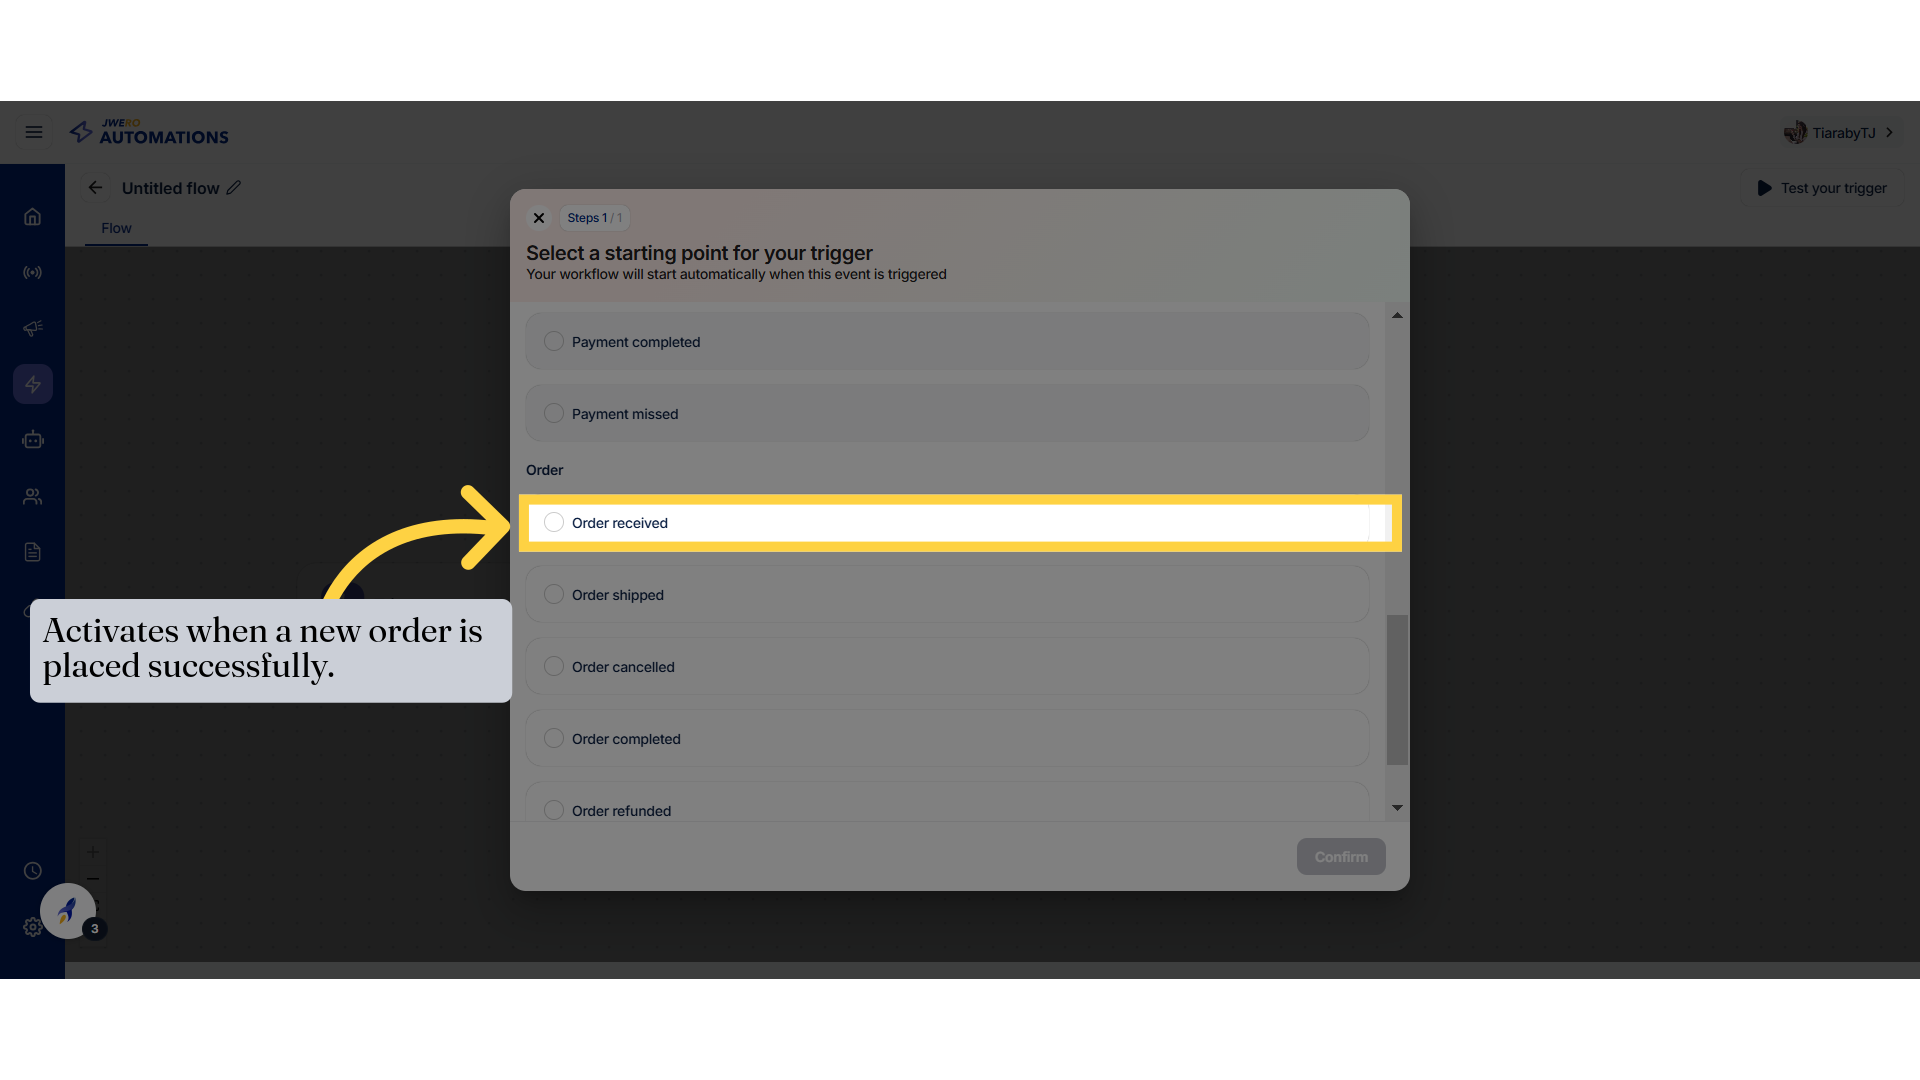
41. Select a product or category that will trigger the event when an order is received.
Browse items by category by clicking on "Category."

42. After selecting the product / category, click on "Confirm".
Browse items by category by clicking on "Category."

43. Order Shipped Event
Access the order page.
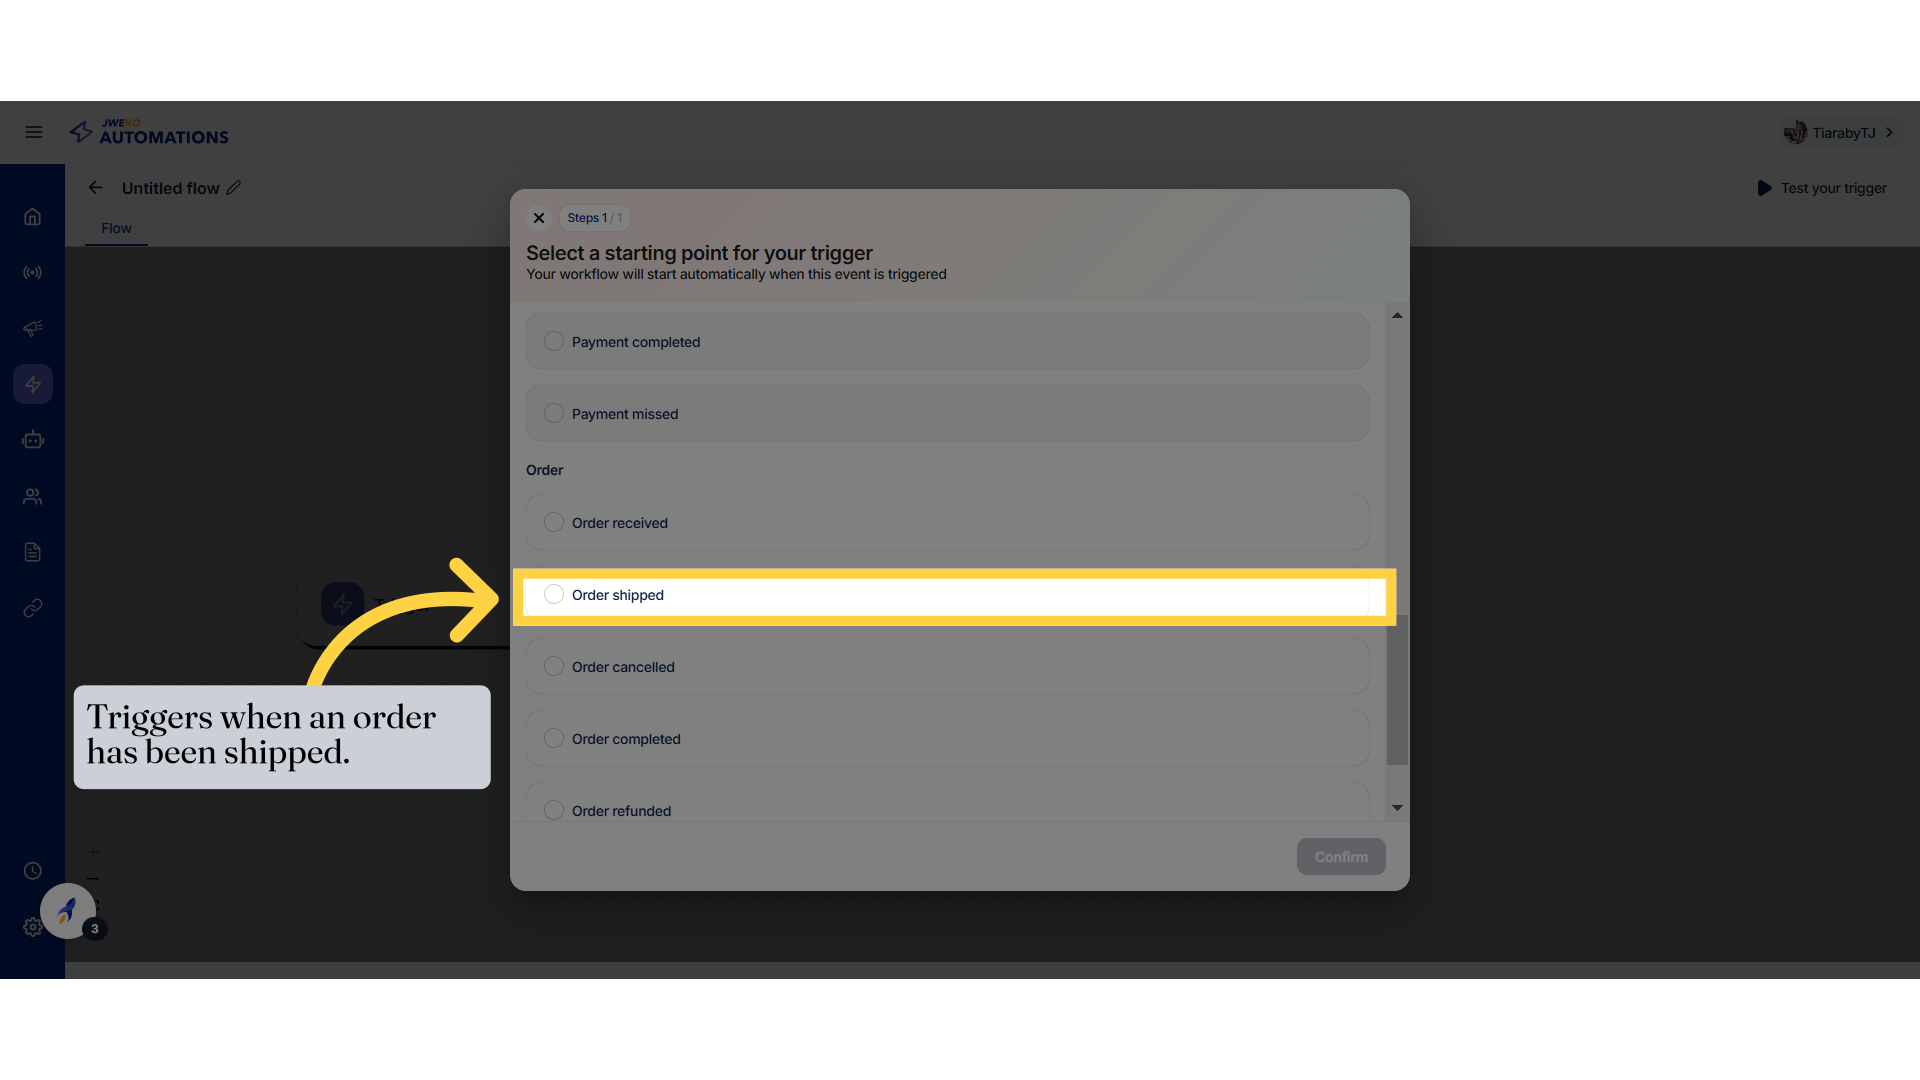
44. Select a product or category that will trigger the event when an order is shipped.
Browse items by category by clicking on "Category."

45. After selecting the product / category, click on "Confirm".
Browse items by category by clicking on "Category."

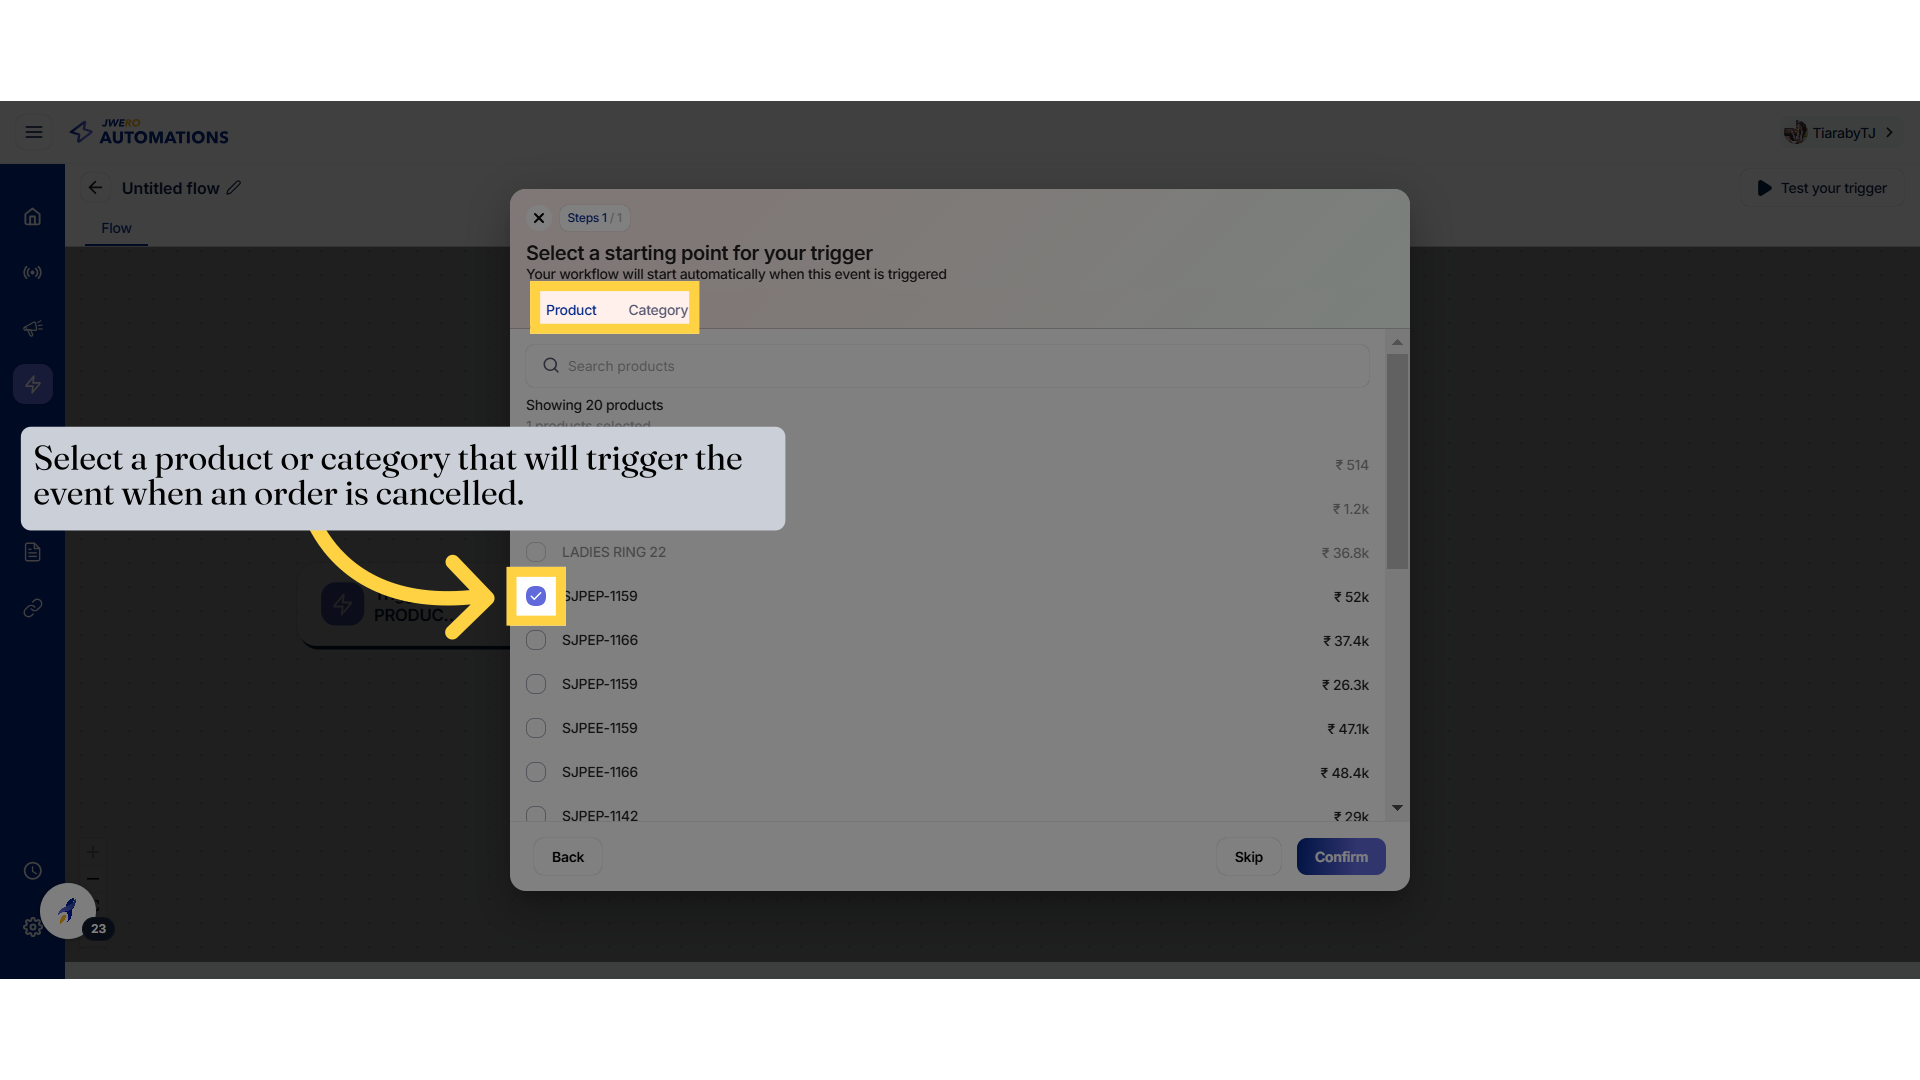
46. Order Cancelled Event
Access the order page.
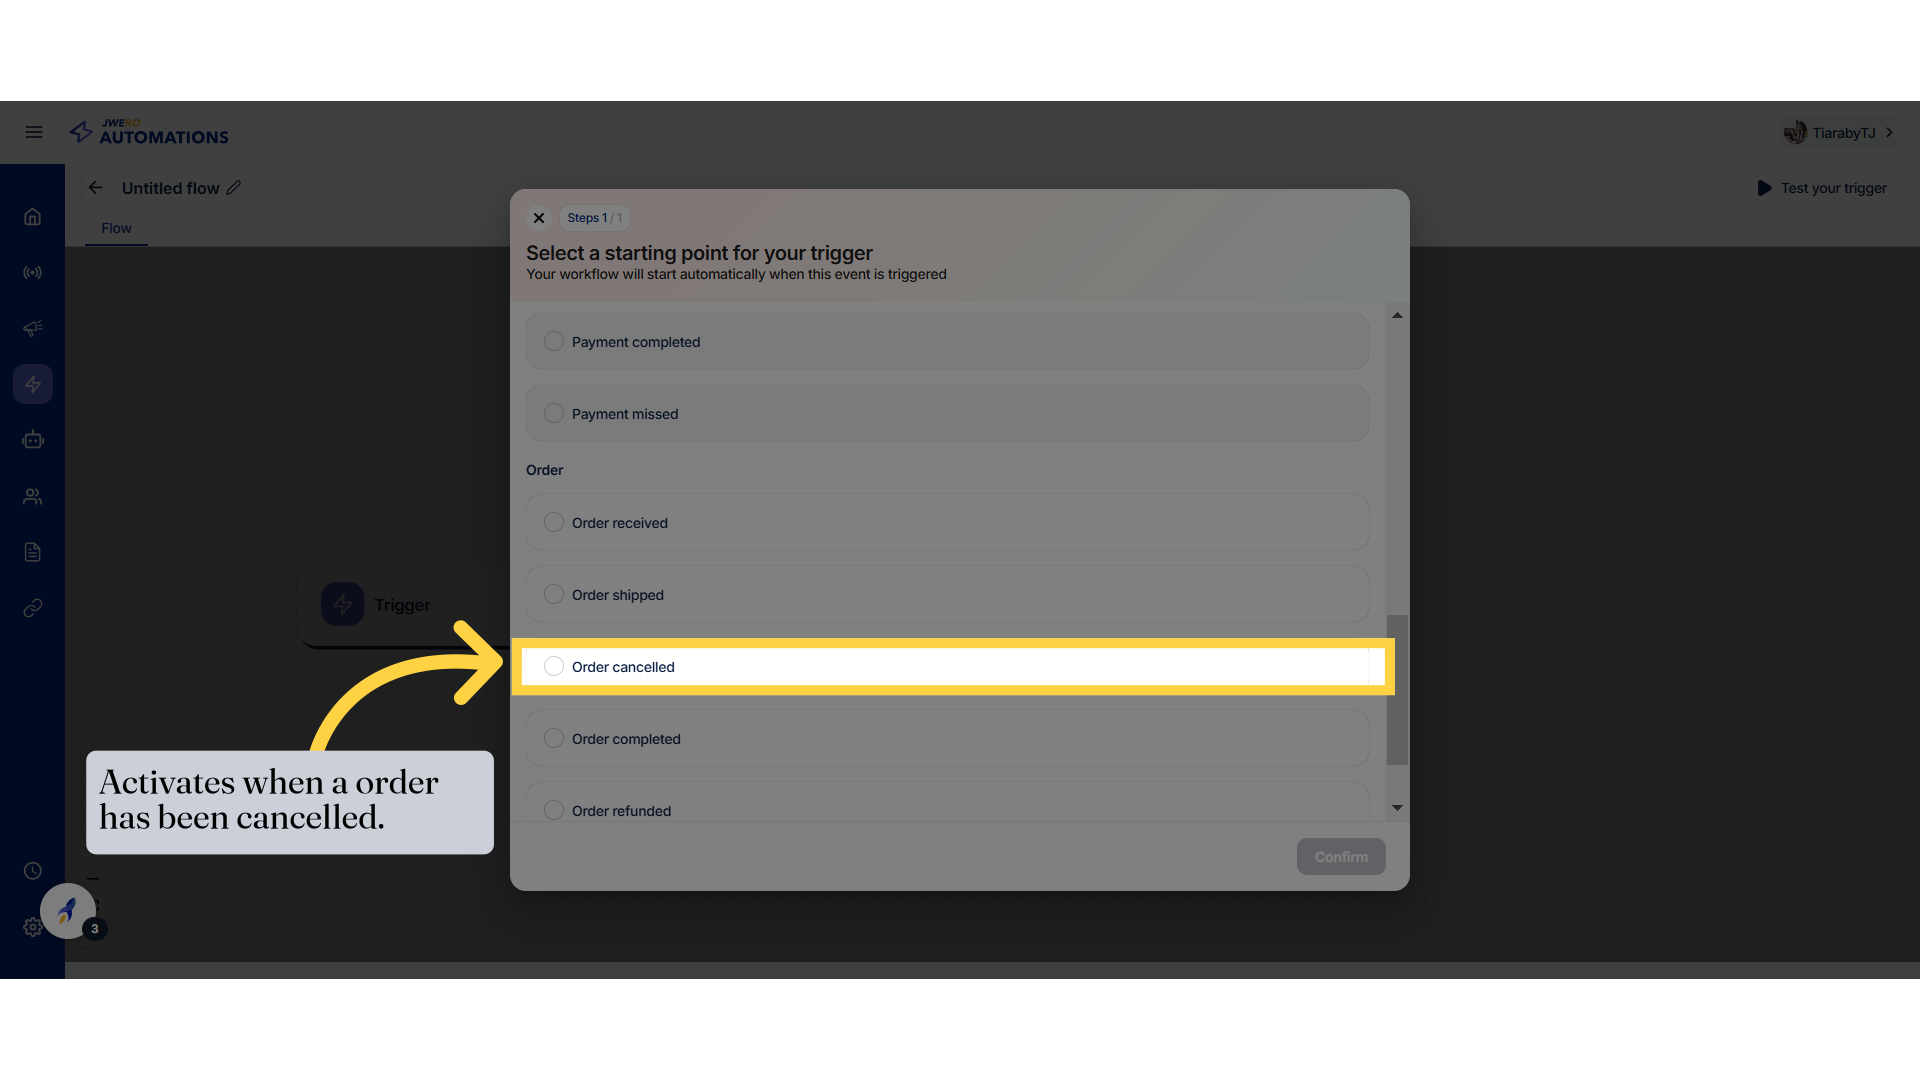
47. Select a product or category that will trigger the event when an order is cancelled.
Browse items by category by clicking on "Category."
48. After selecting the product / category, click on "Confirm".
Browse items by category by clicking on "Category."

49. Order Completed Event
Access the order page.
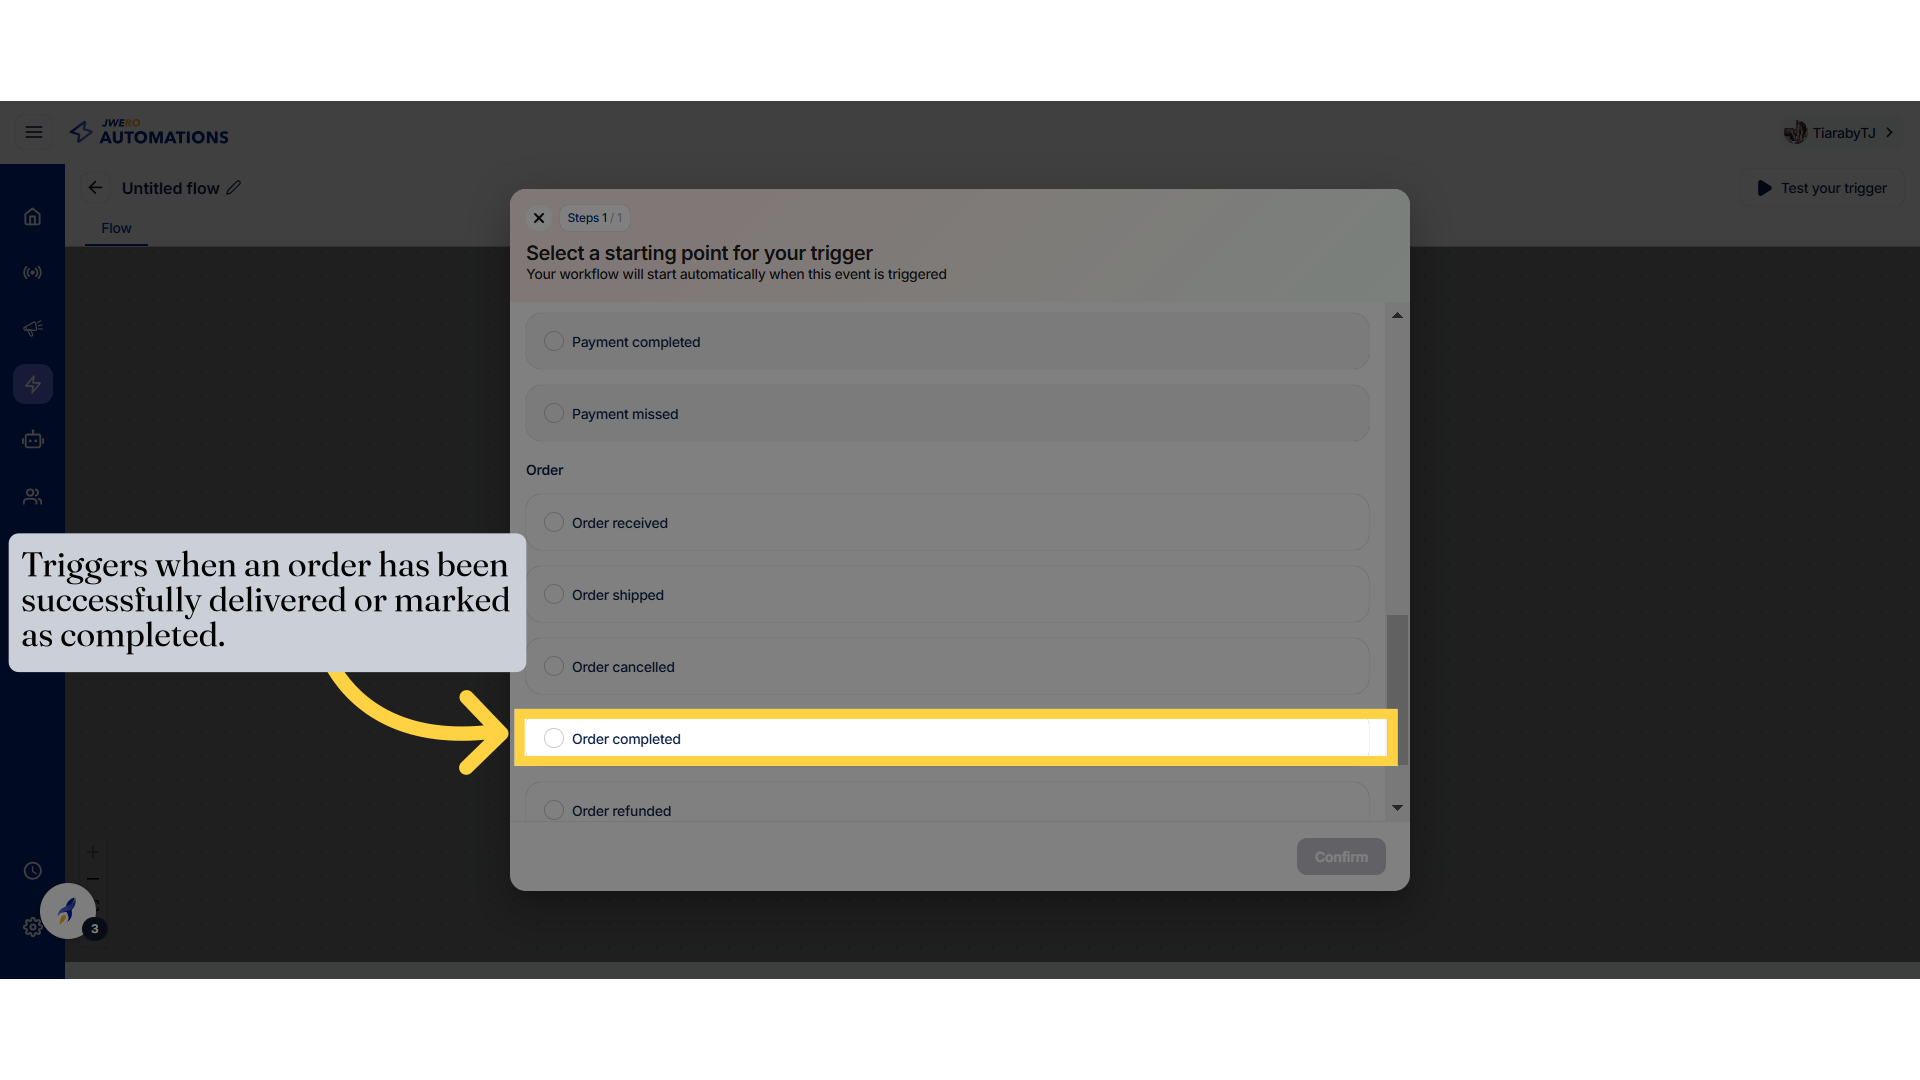
50. Select a product or category that will trigger the event when an order is completed.
Browse items by category by clicking on "Category."

51. After selecting the product / category, click on "Confirm".
Browse items by category by clicking on "Category."

52. Order Refunded Event
Select the relevant order status.
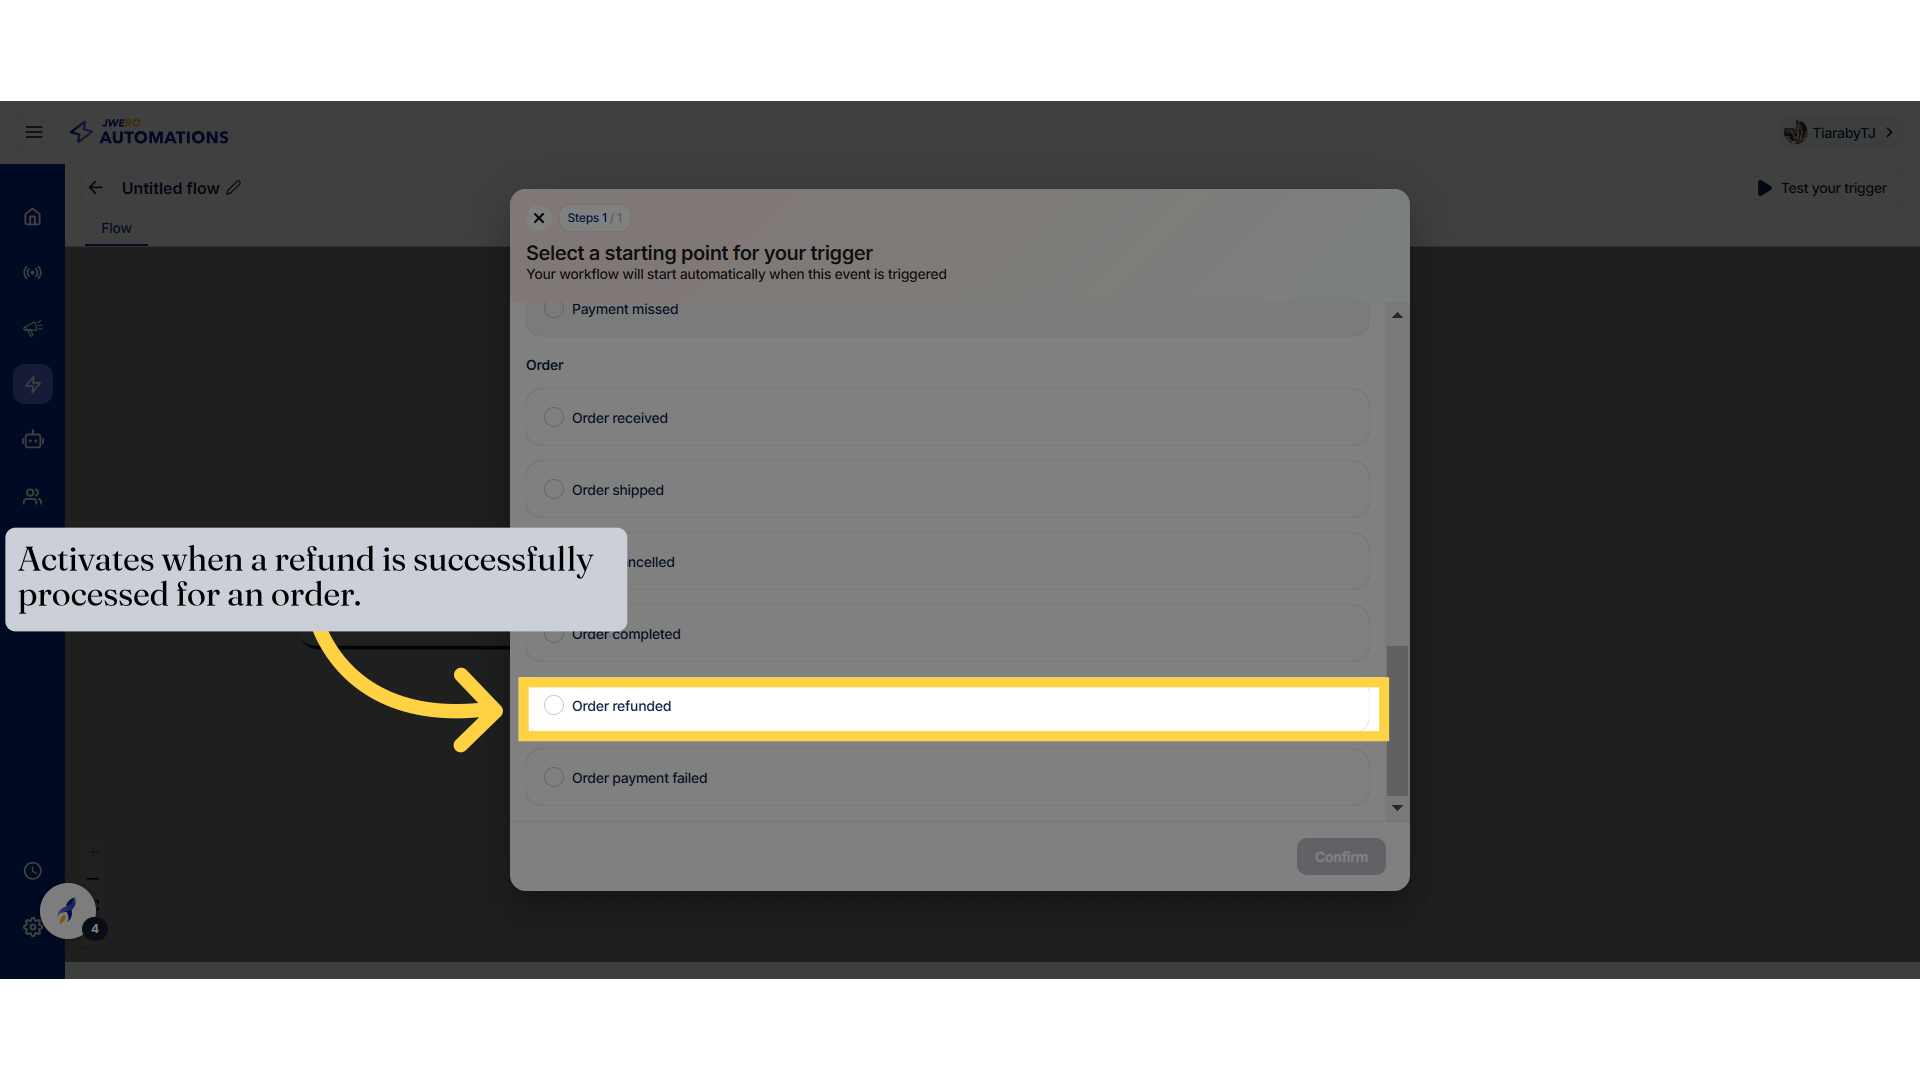
53. Select a product or category that will trigger the event when an order is refunded.
Browse items by category by clicking on "Category."

54. After selecting the product / category, click on "Confirm".
Browse items by category by clicking on "Category."

55. Order Payment Failed Event
Update the selected order status.
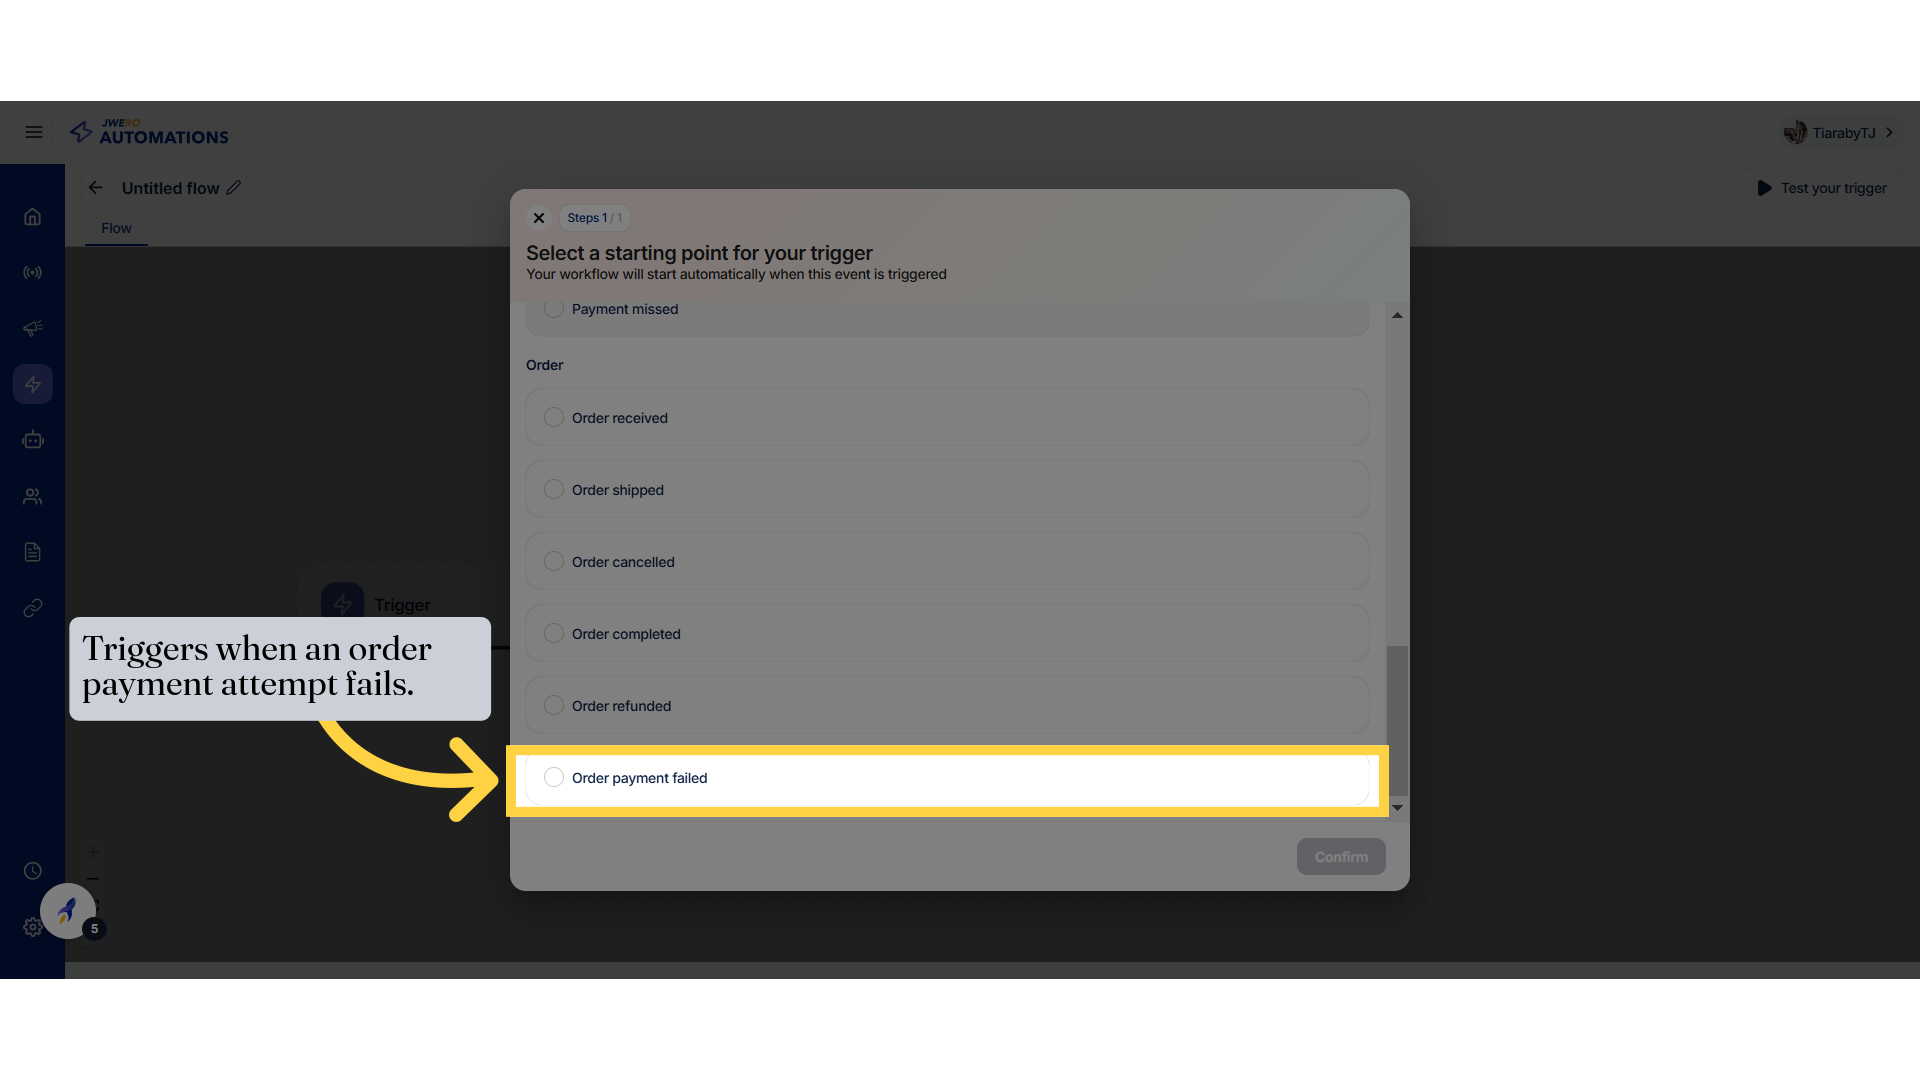
56. Select a product or category that will trigger the event when an order payment is failed.
Browse items by category by clicking on "Category."
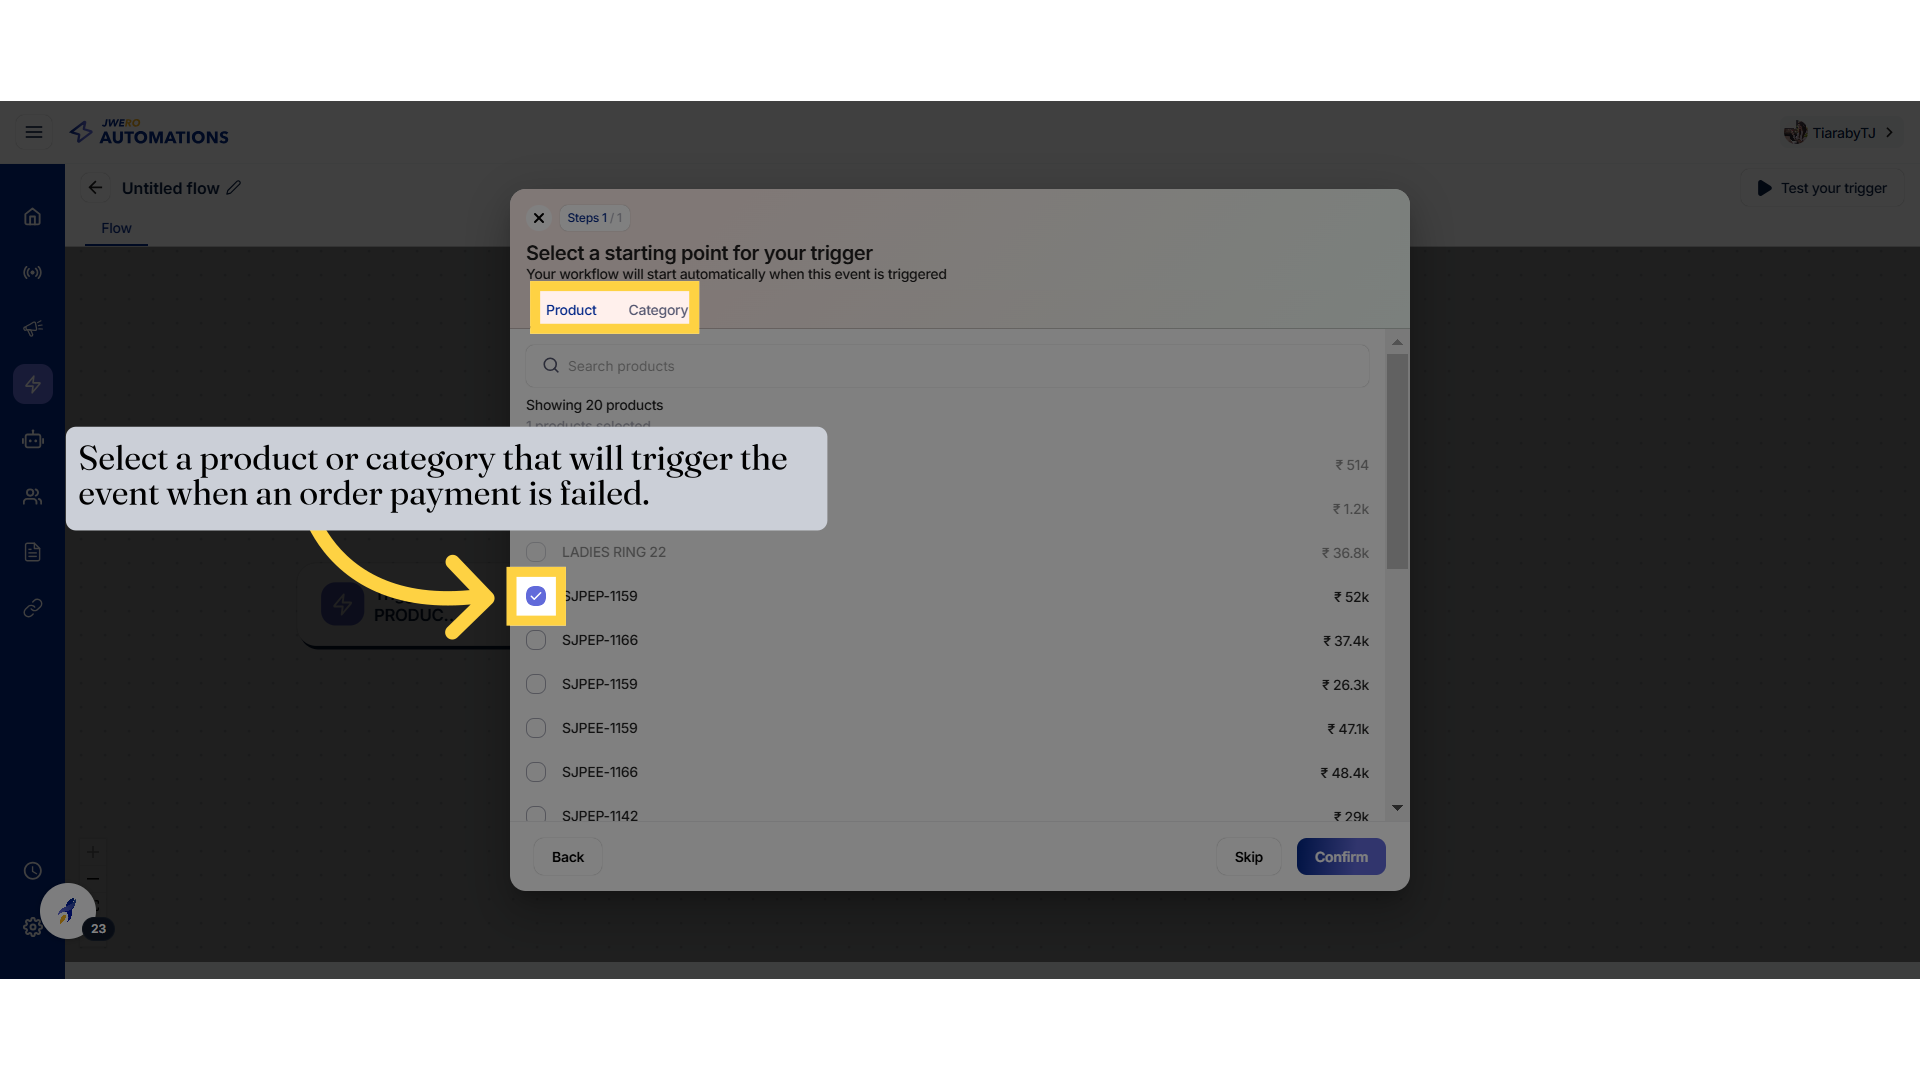
57. After selecting the product / category, click on "Confirm".
Browse items by category by clicking on "Category."