Send Message Action In Chatbot
1. Send Message
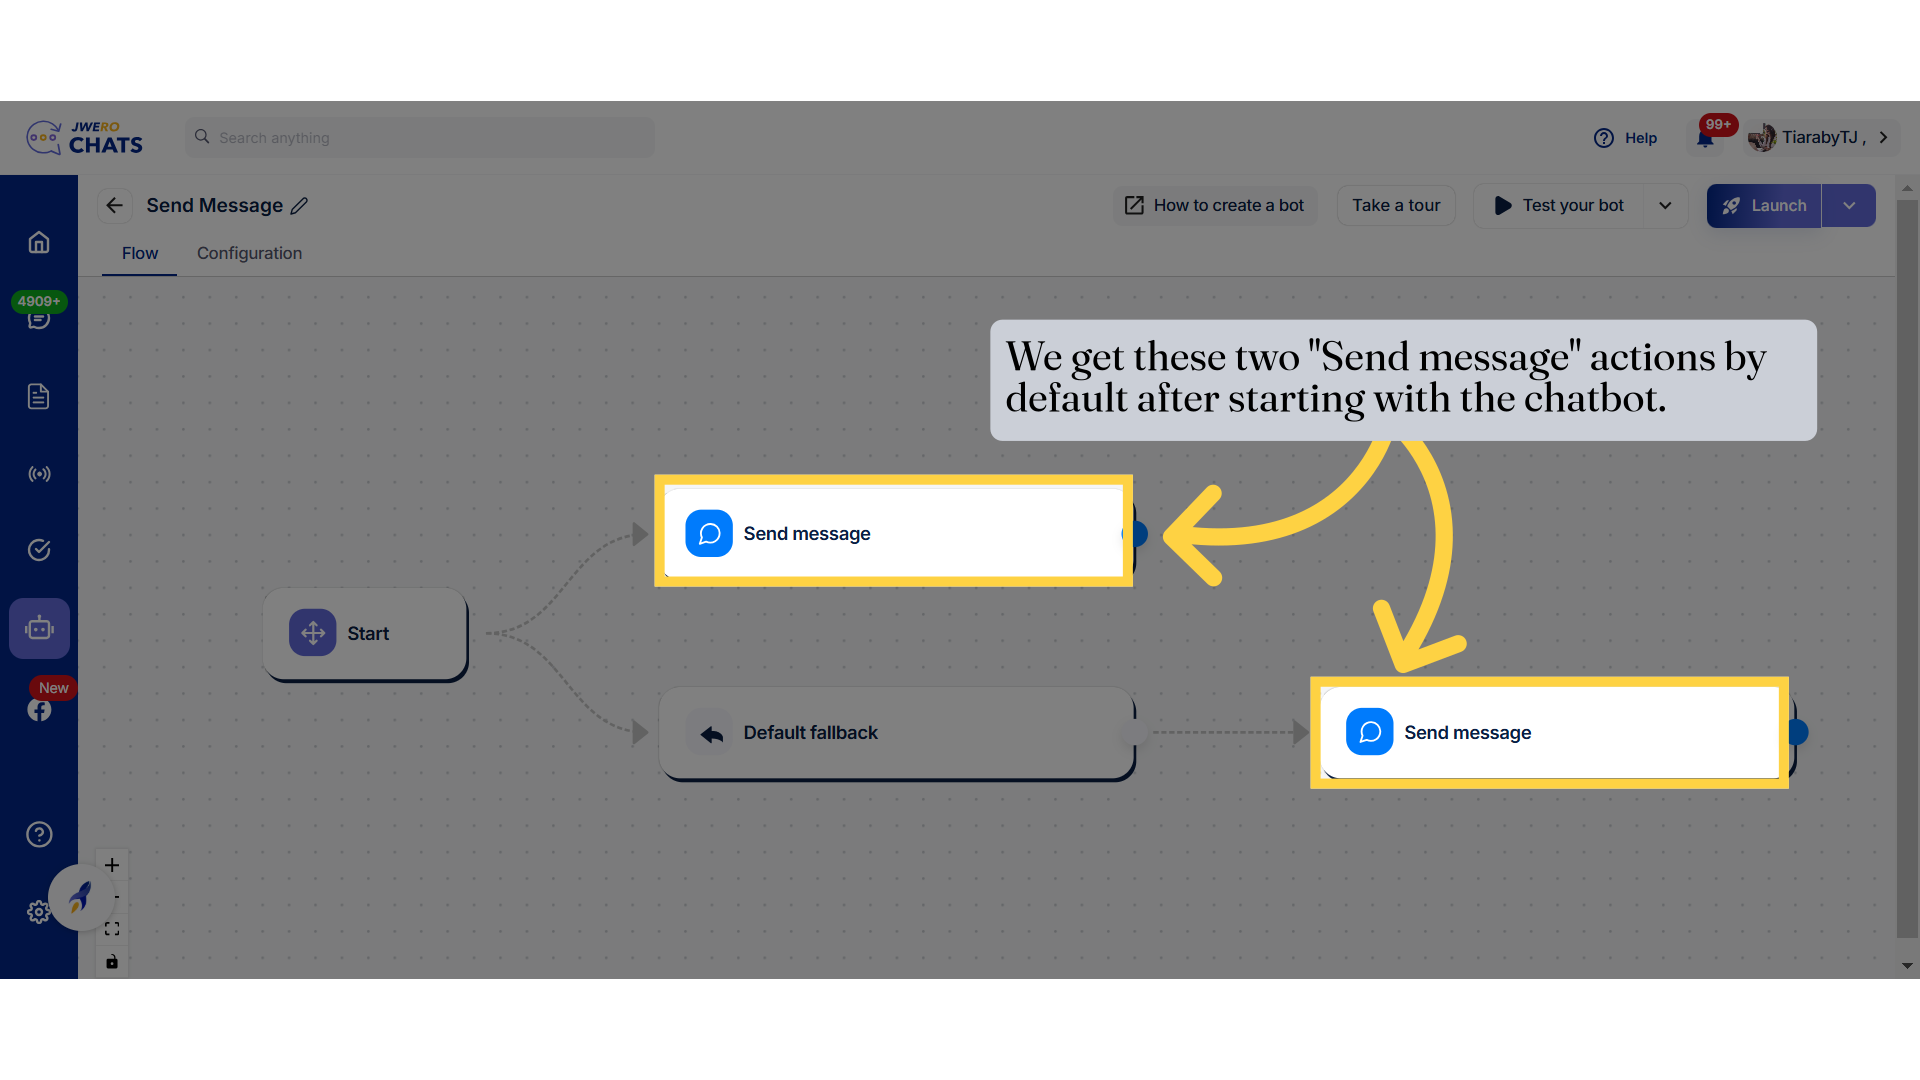
2. We get these two "Send message" actions by default after starting with the chatbot.
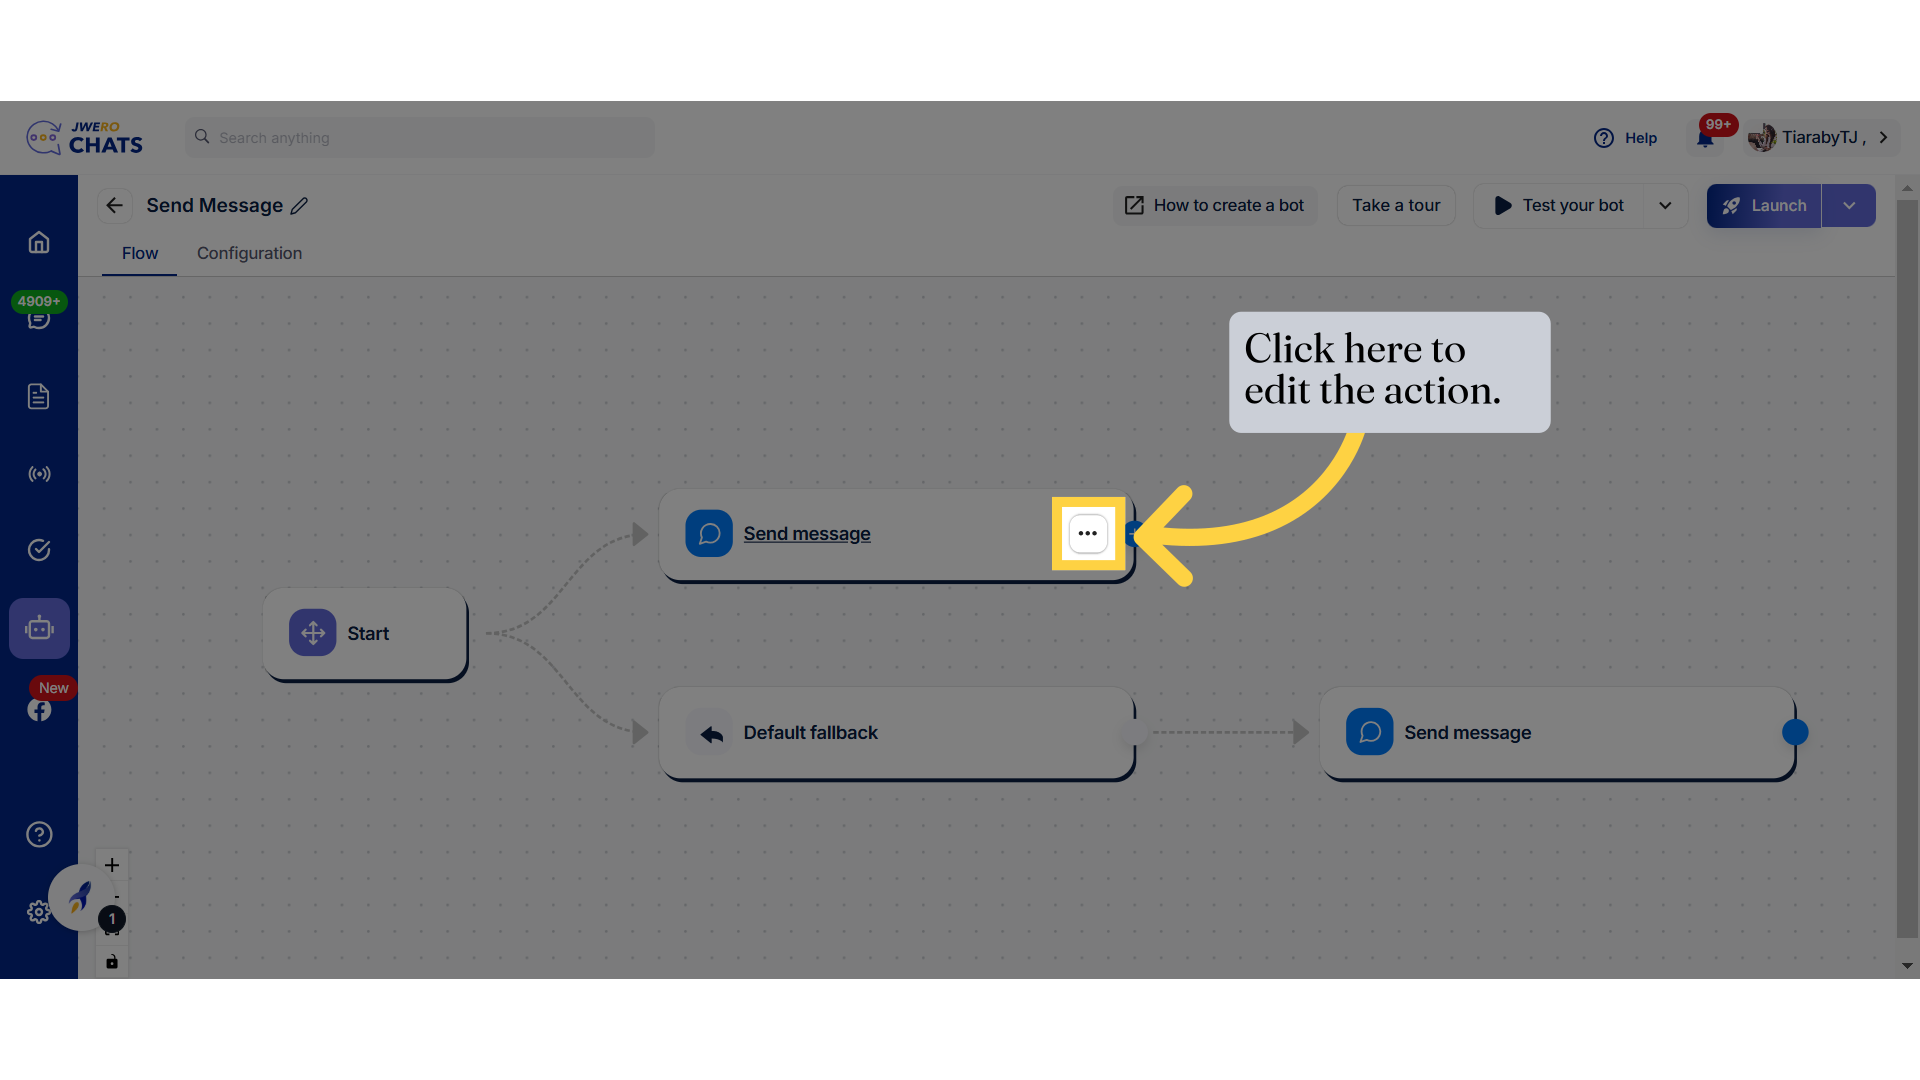
3. Click here to edit the action.
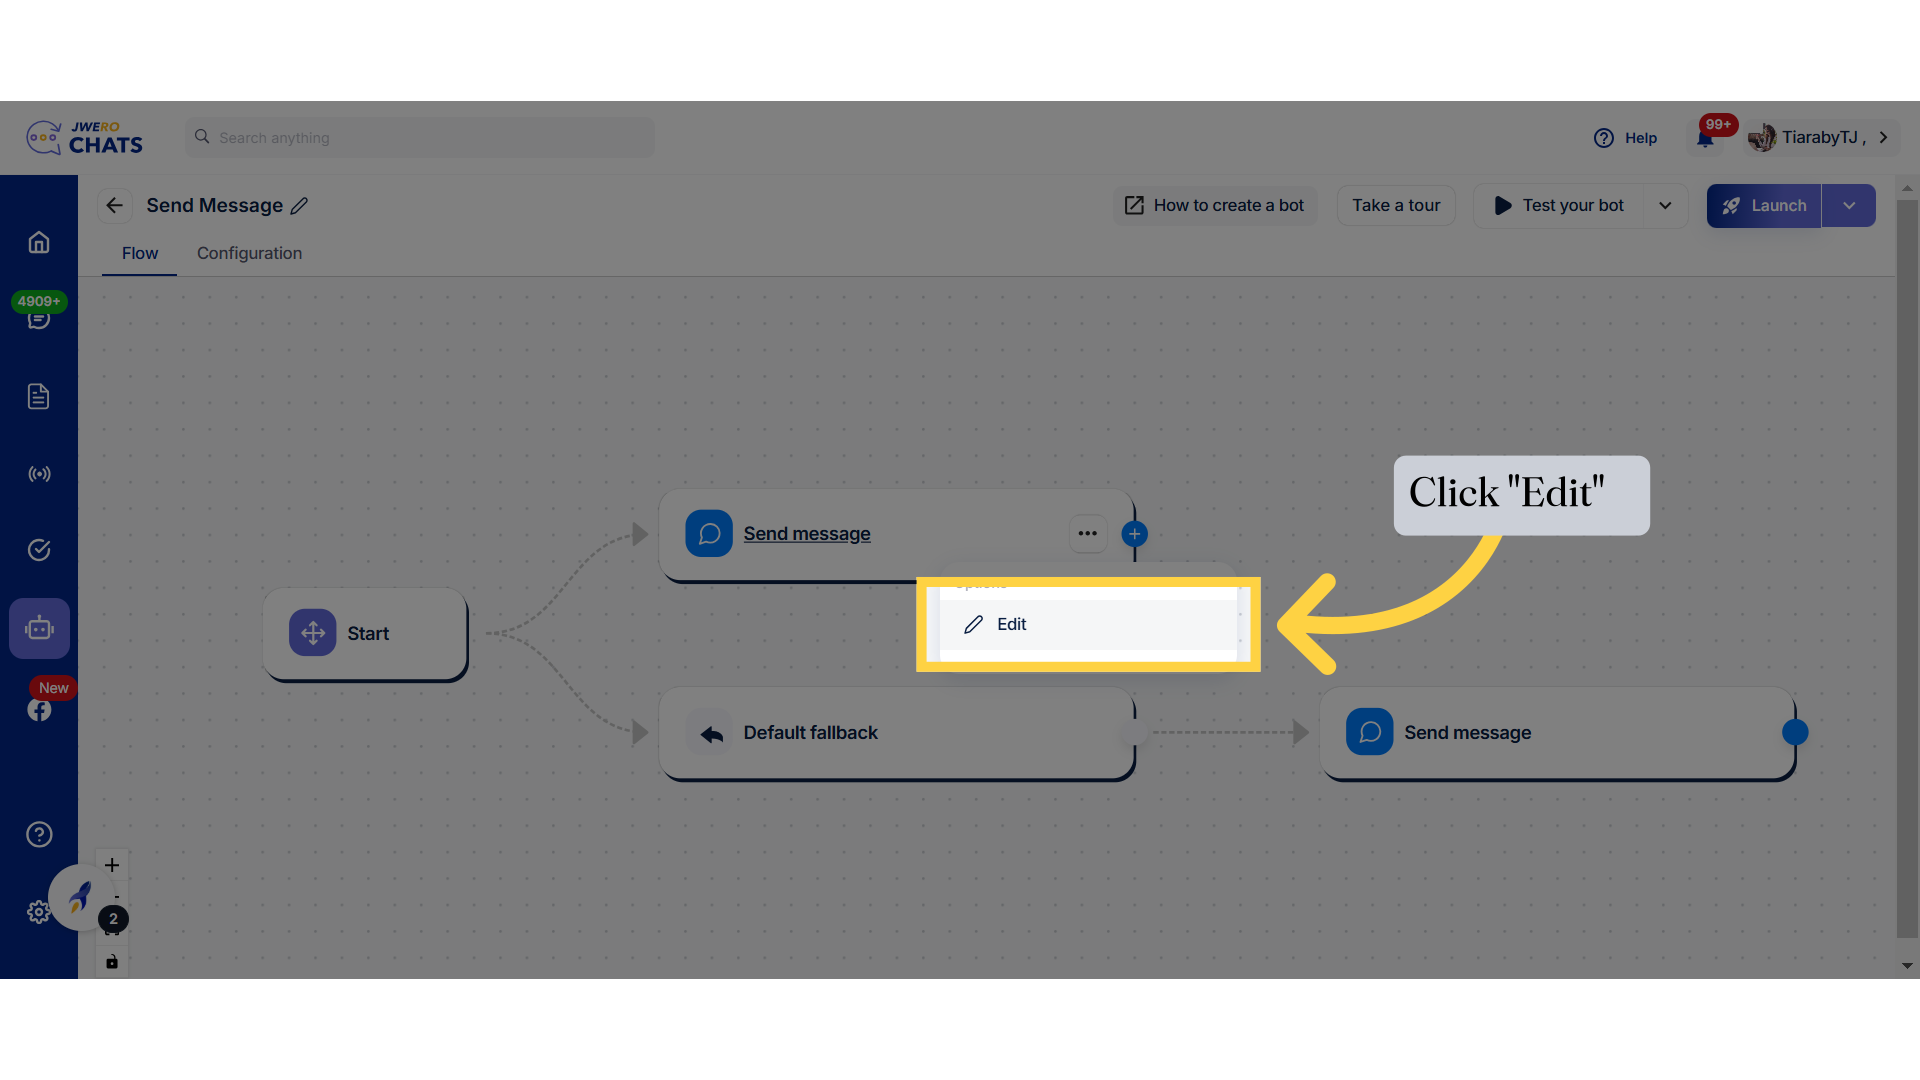
4. Click "Edit"
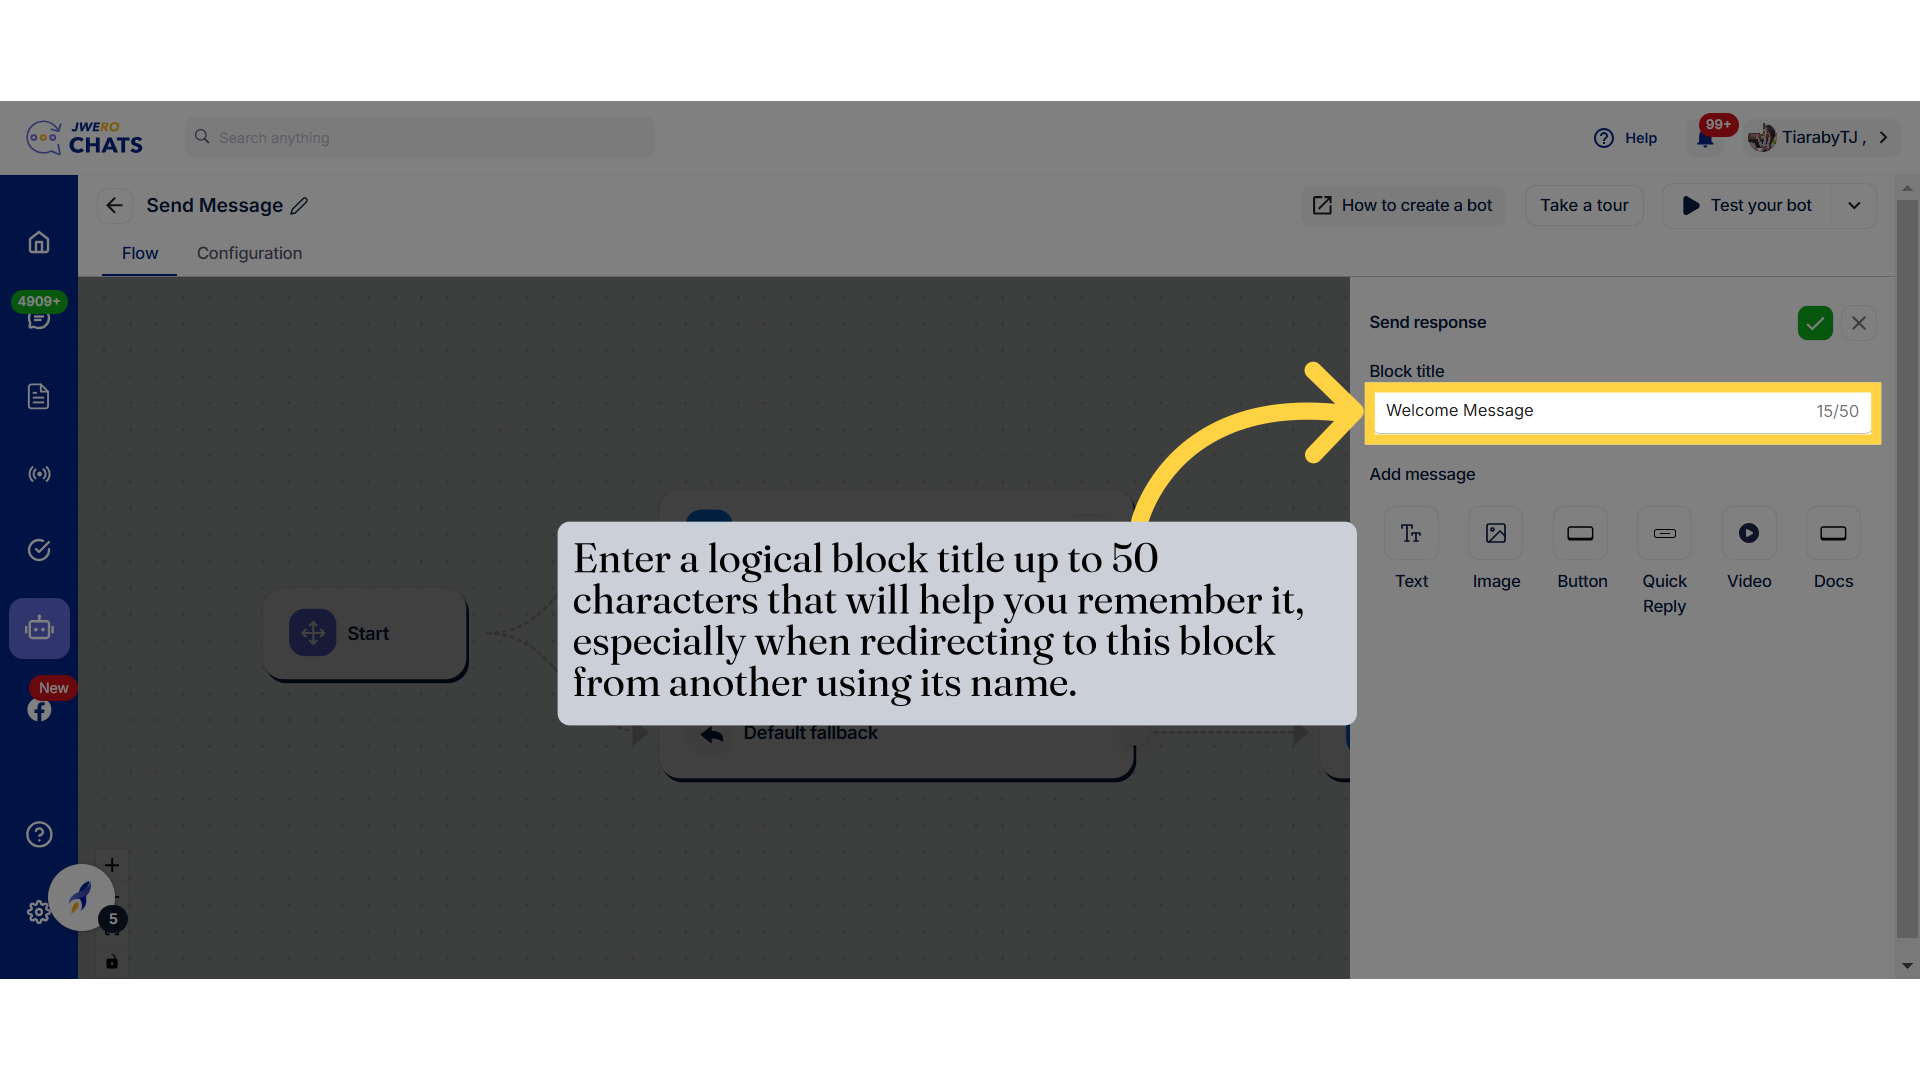
5. Enter a logical block title up to 50 characters that will help you remember it, especially when redirecting to this block from another using its name.
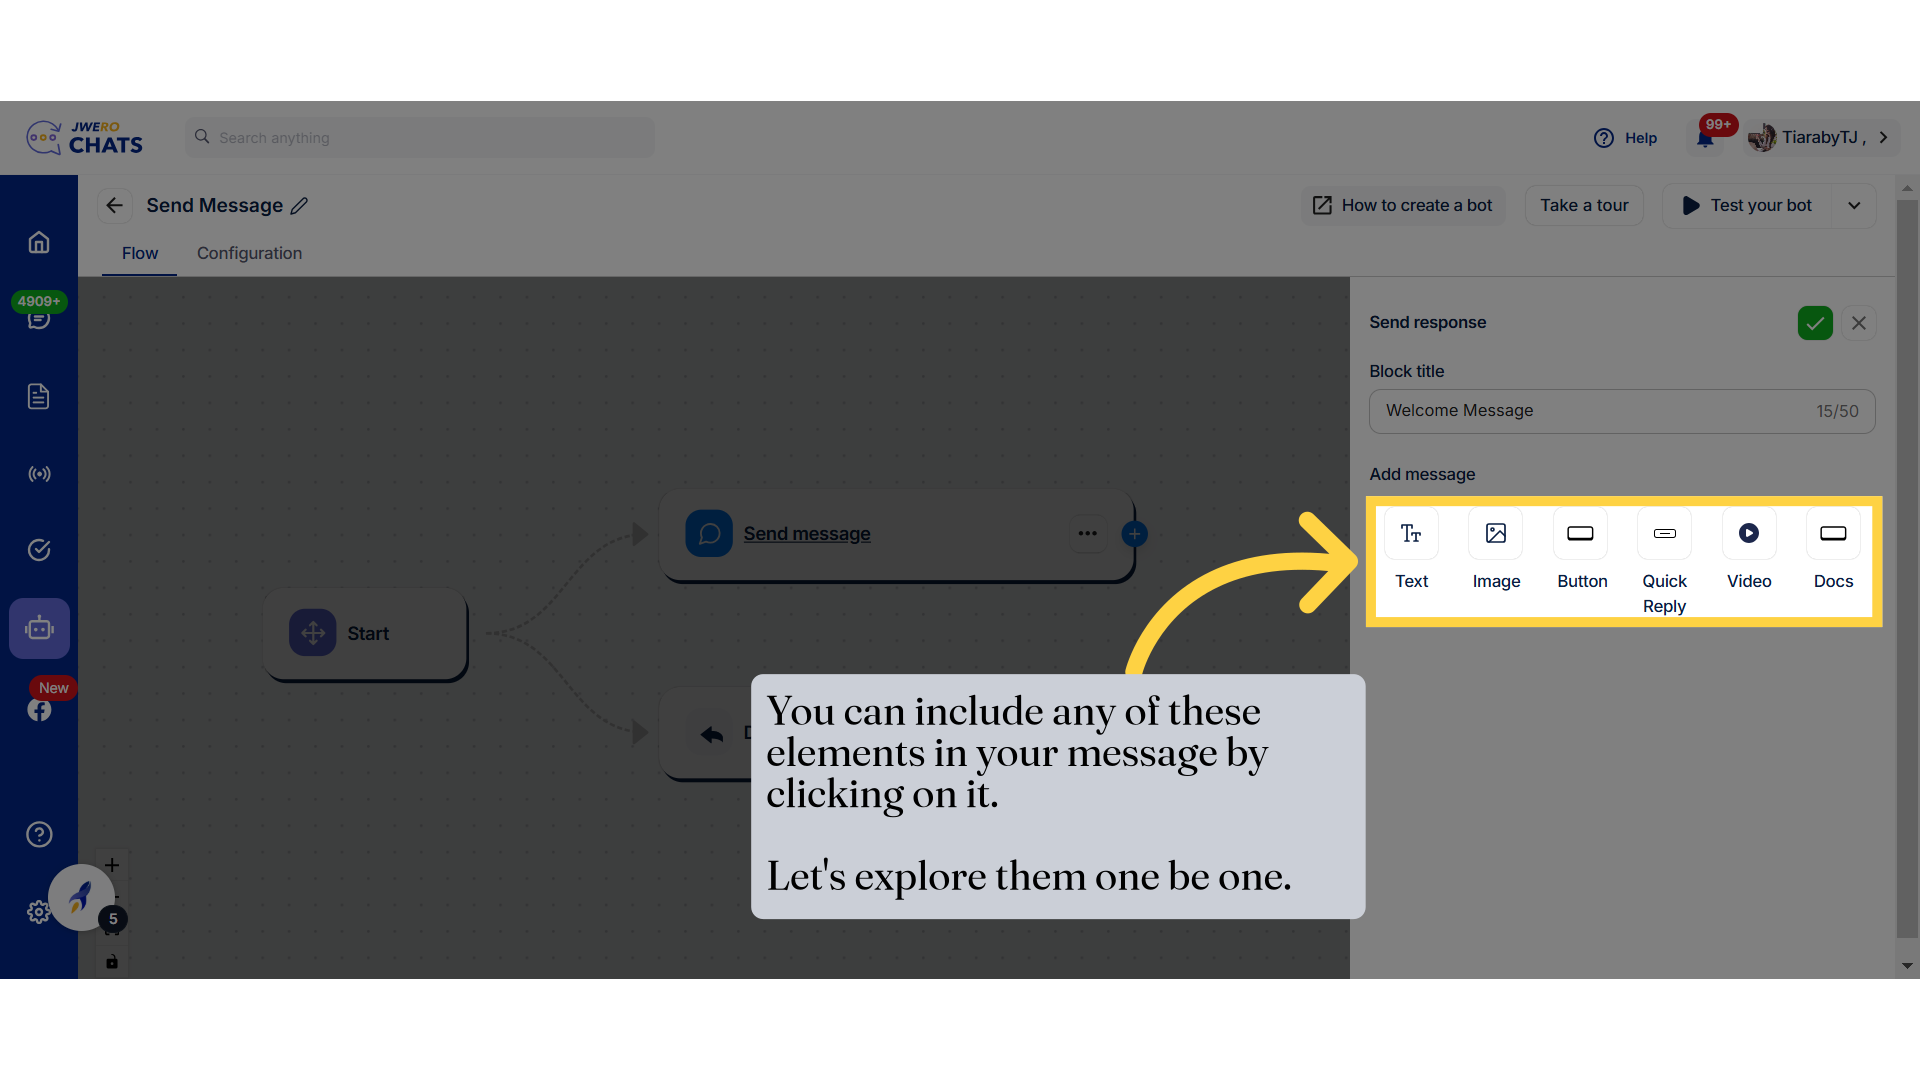
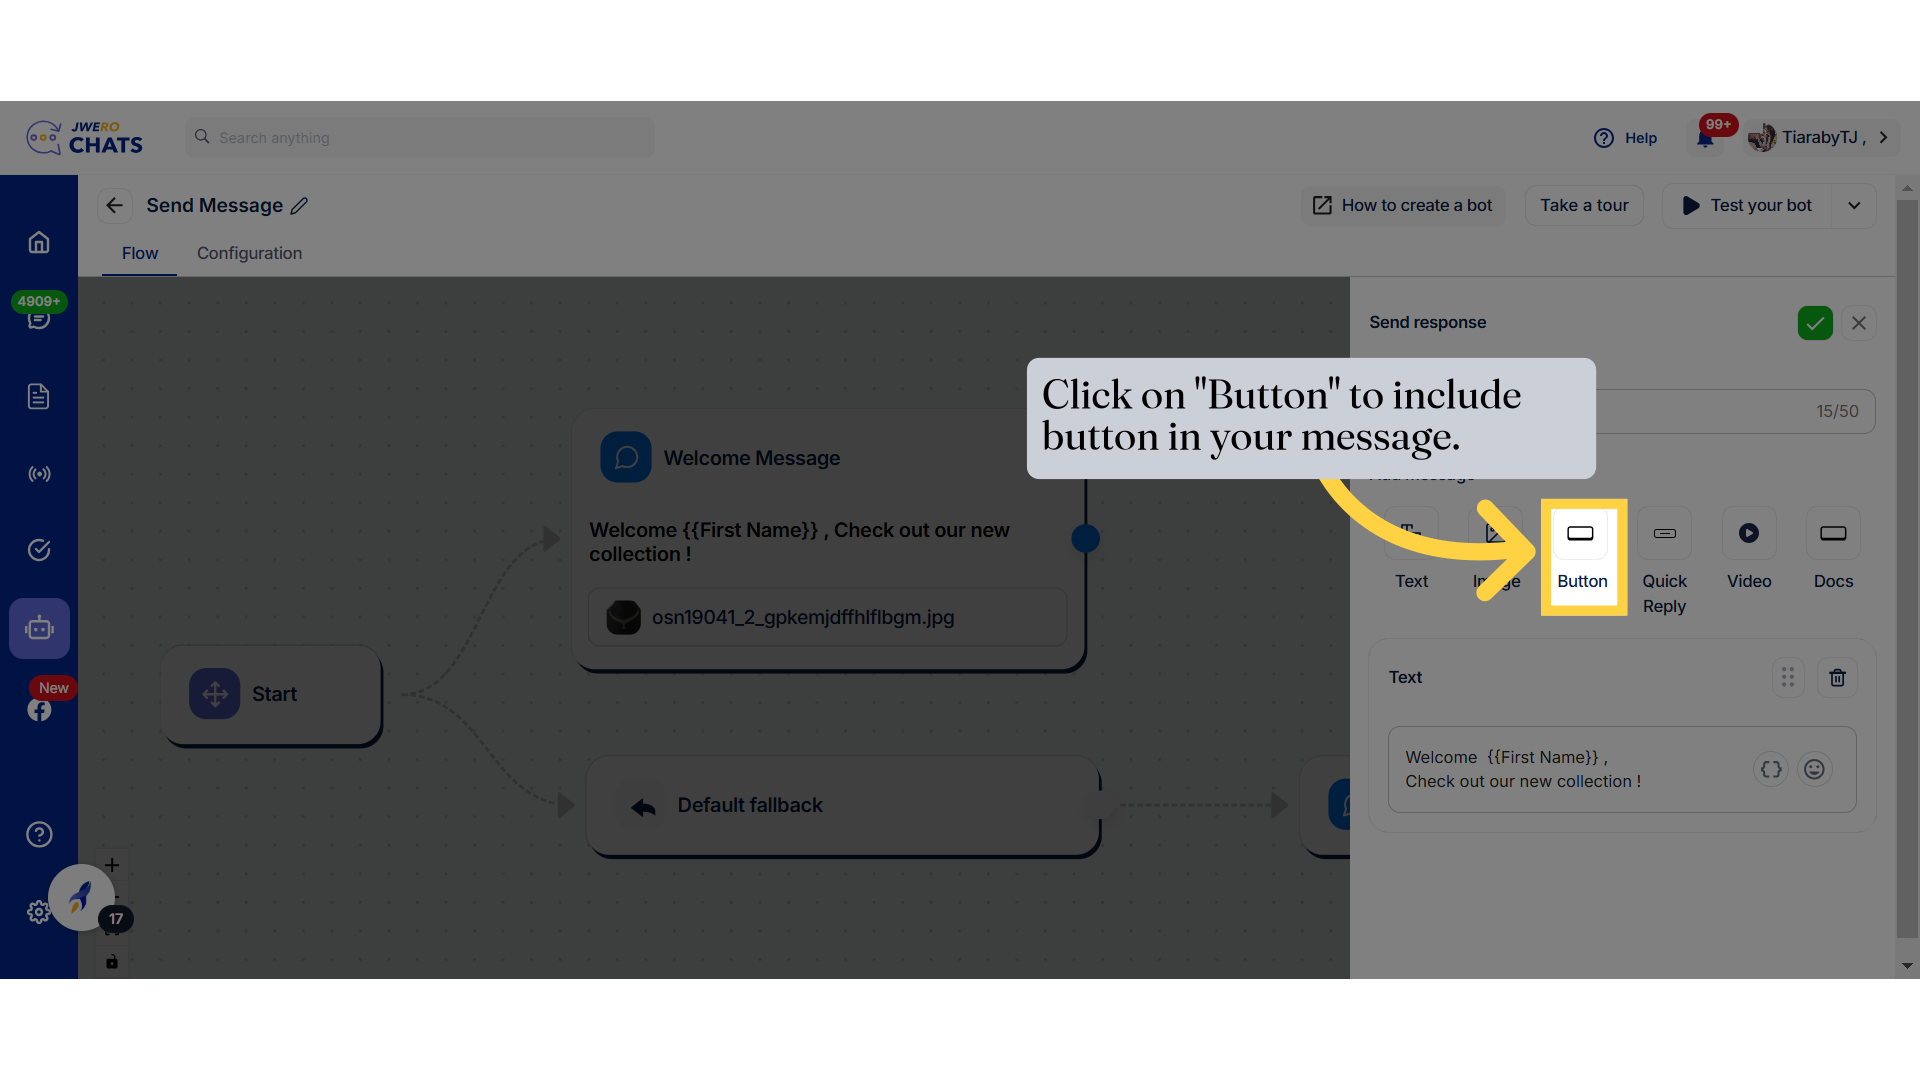
6. You can include any of these elements in your message by clicking on it.
Let's explore them one be one.
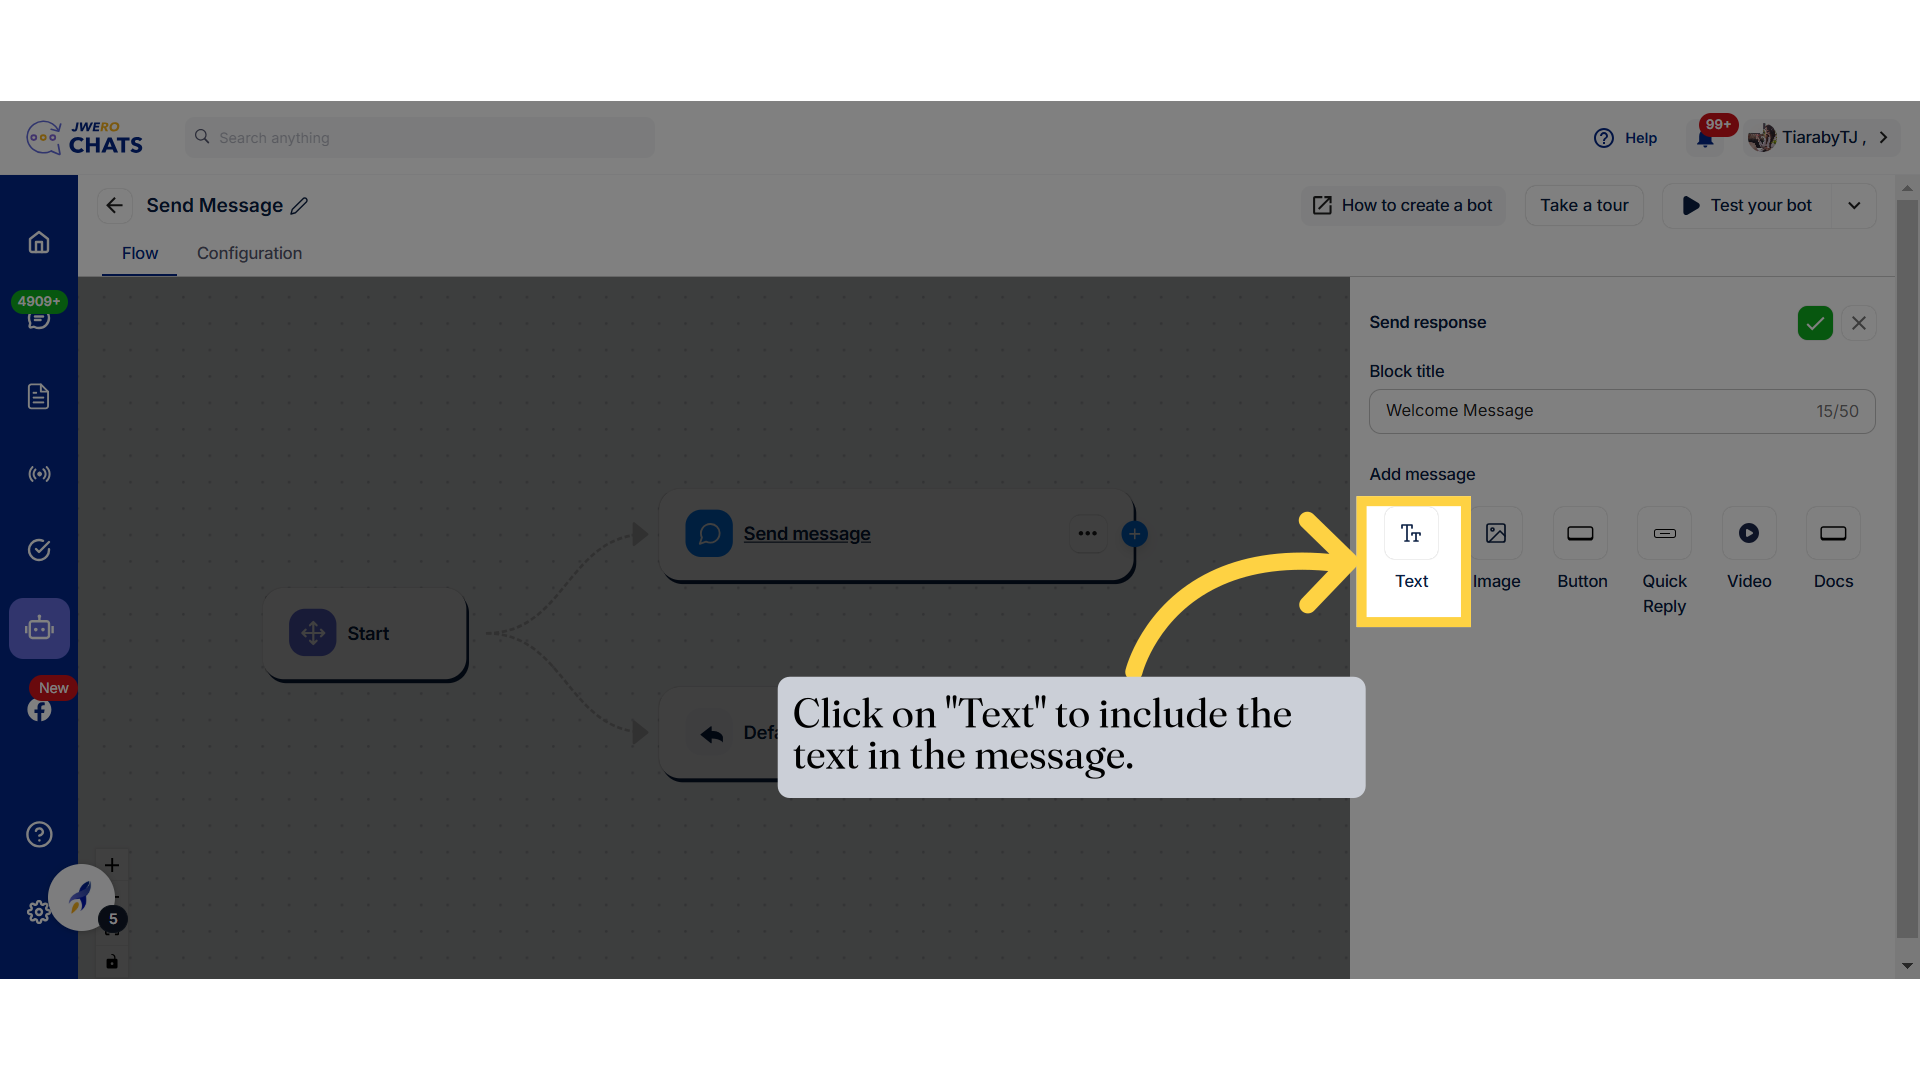
7. Click on "Text" to include the text in the message.
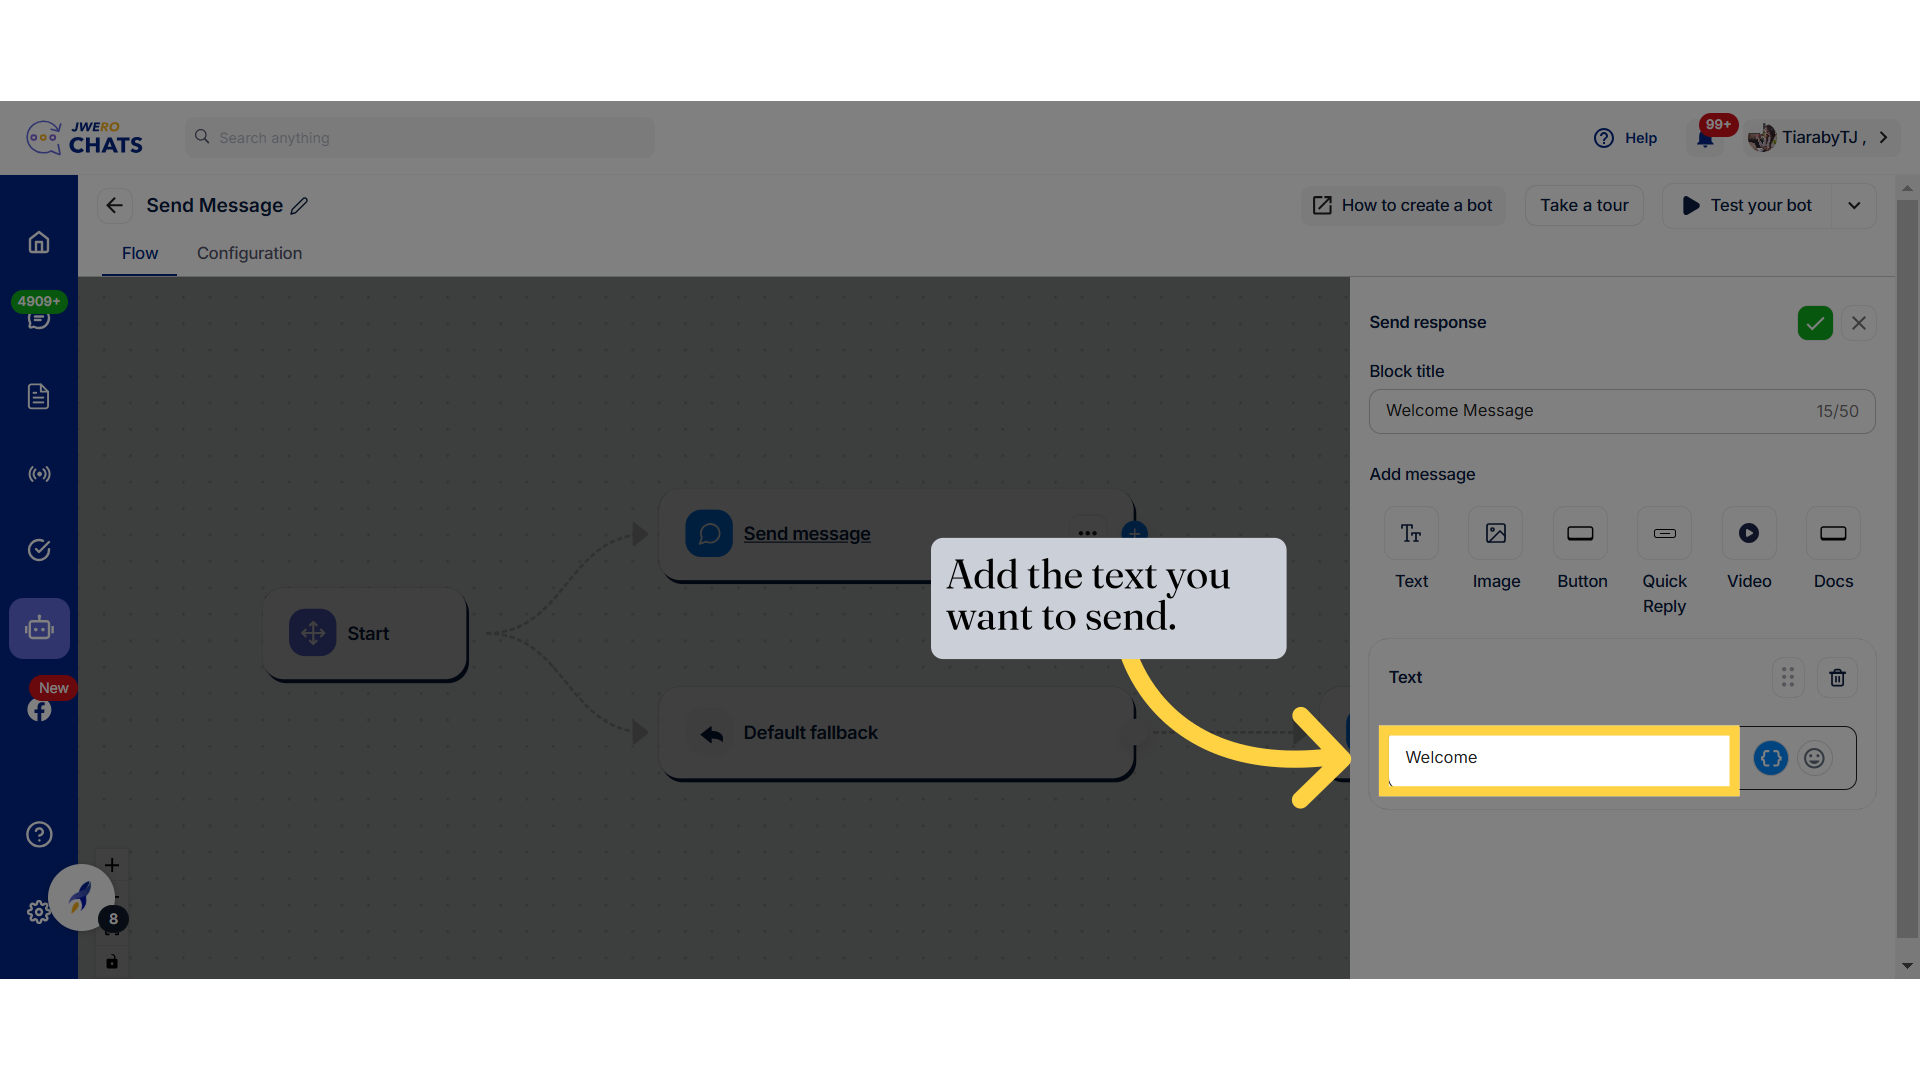
8. Add the text you want to send.
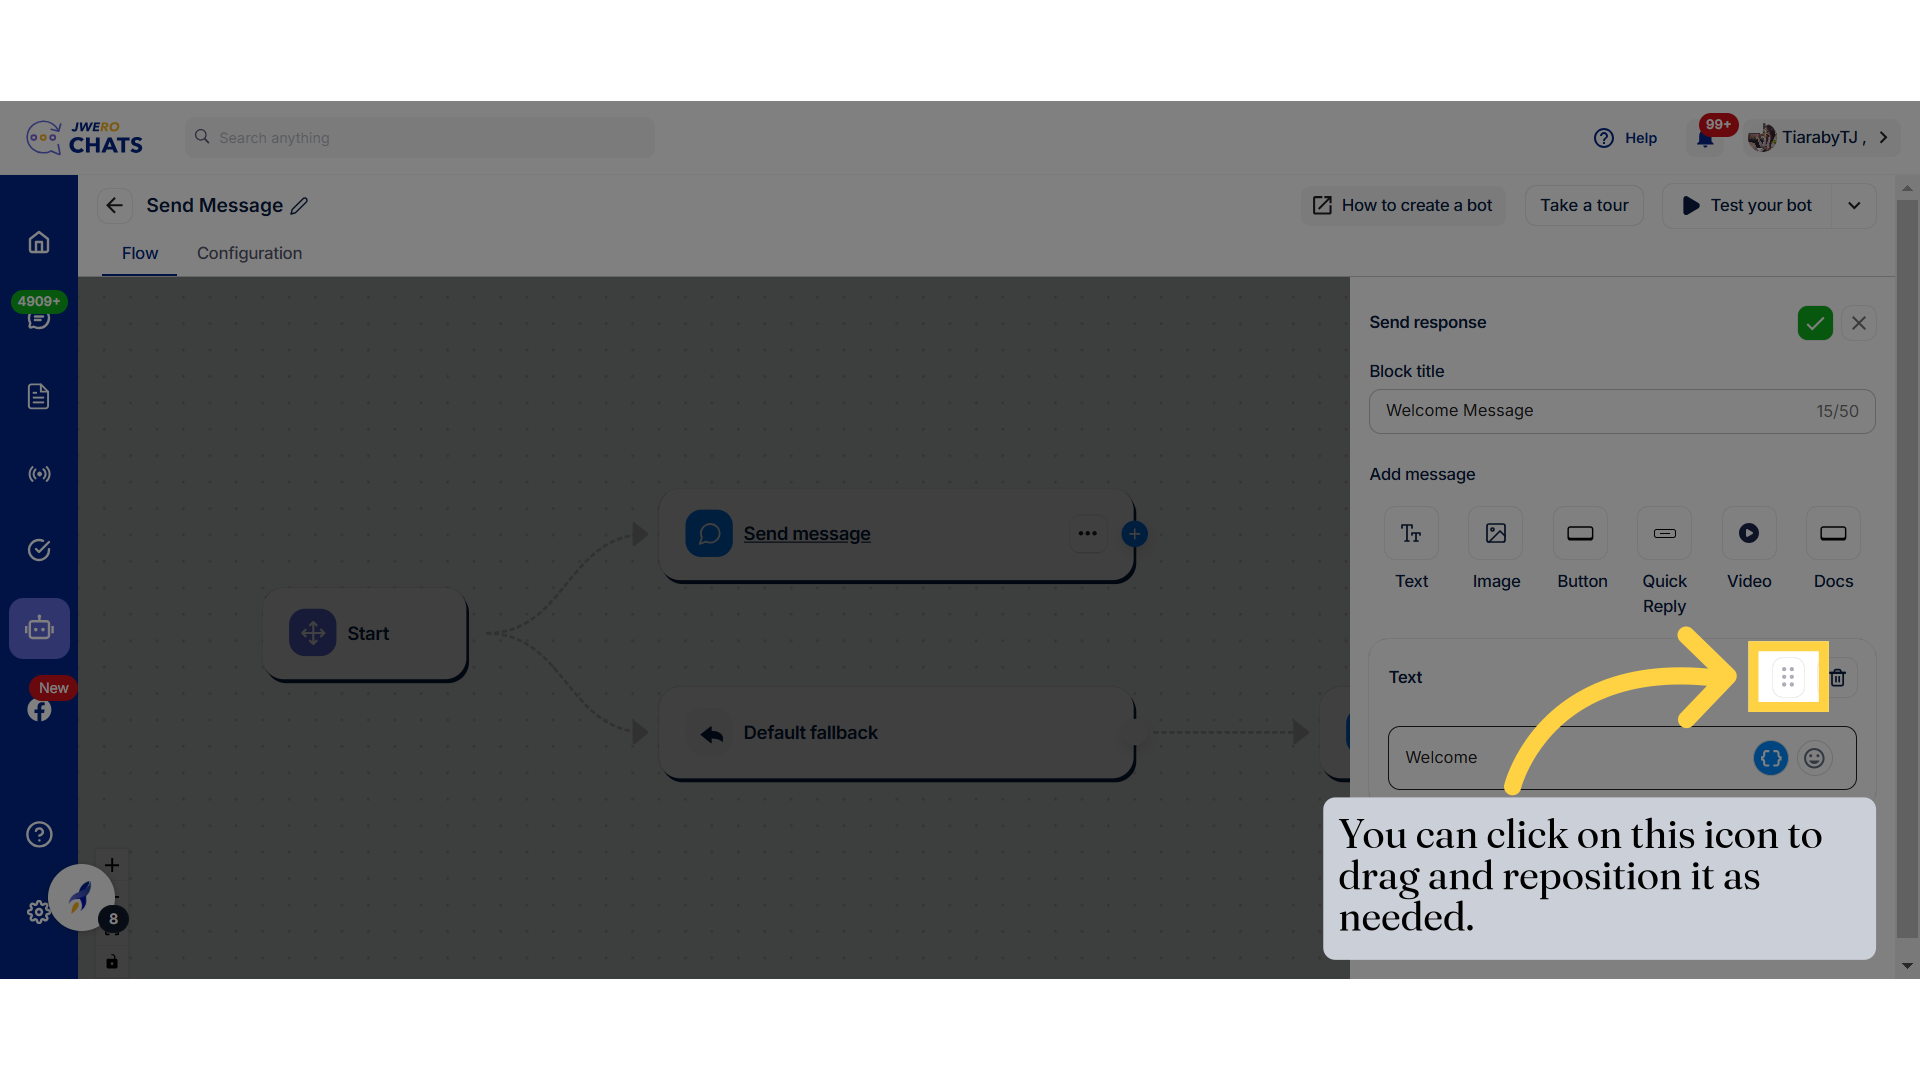
9. You can click on this icon to drag and reposition it as needed.
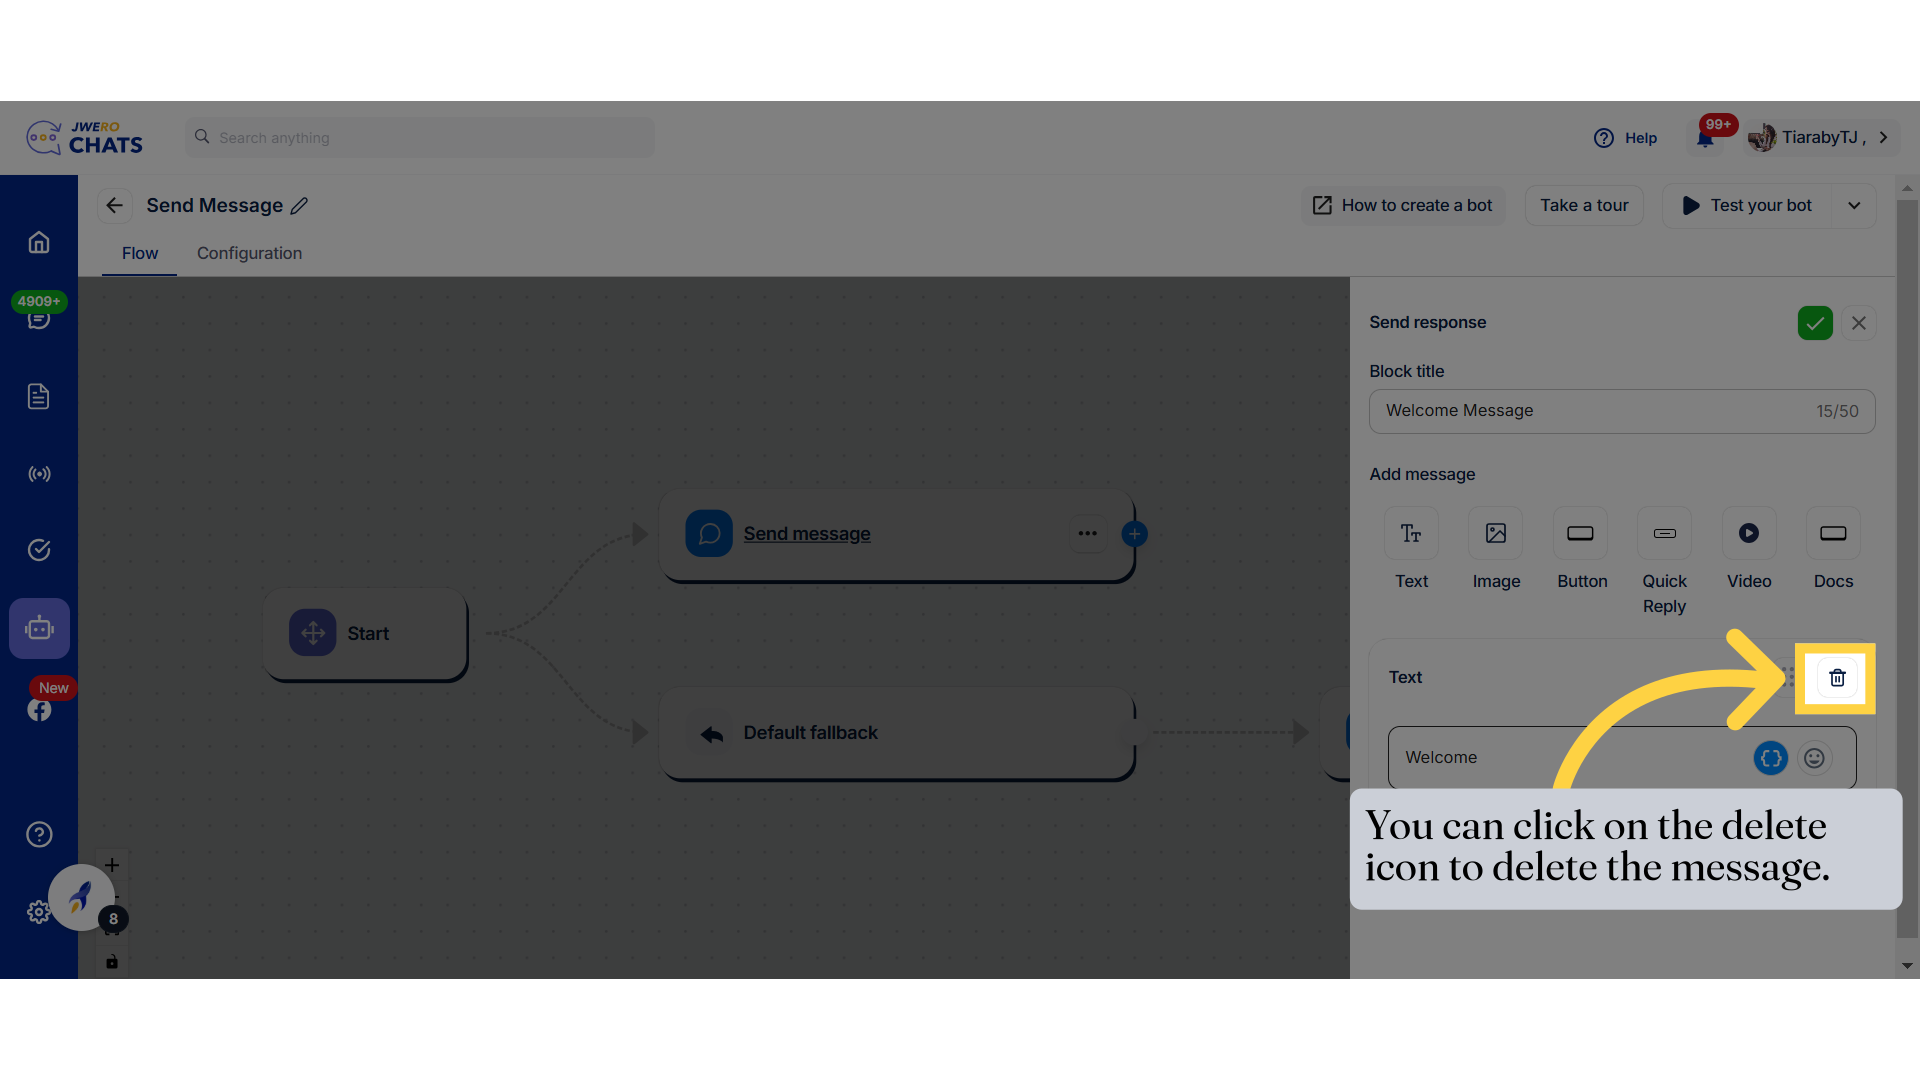
10. You can click on the delete icon to delete the message.
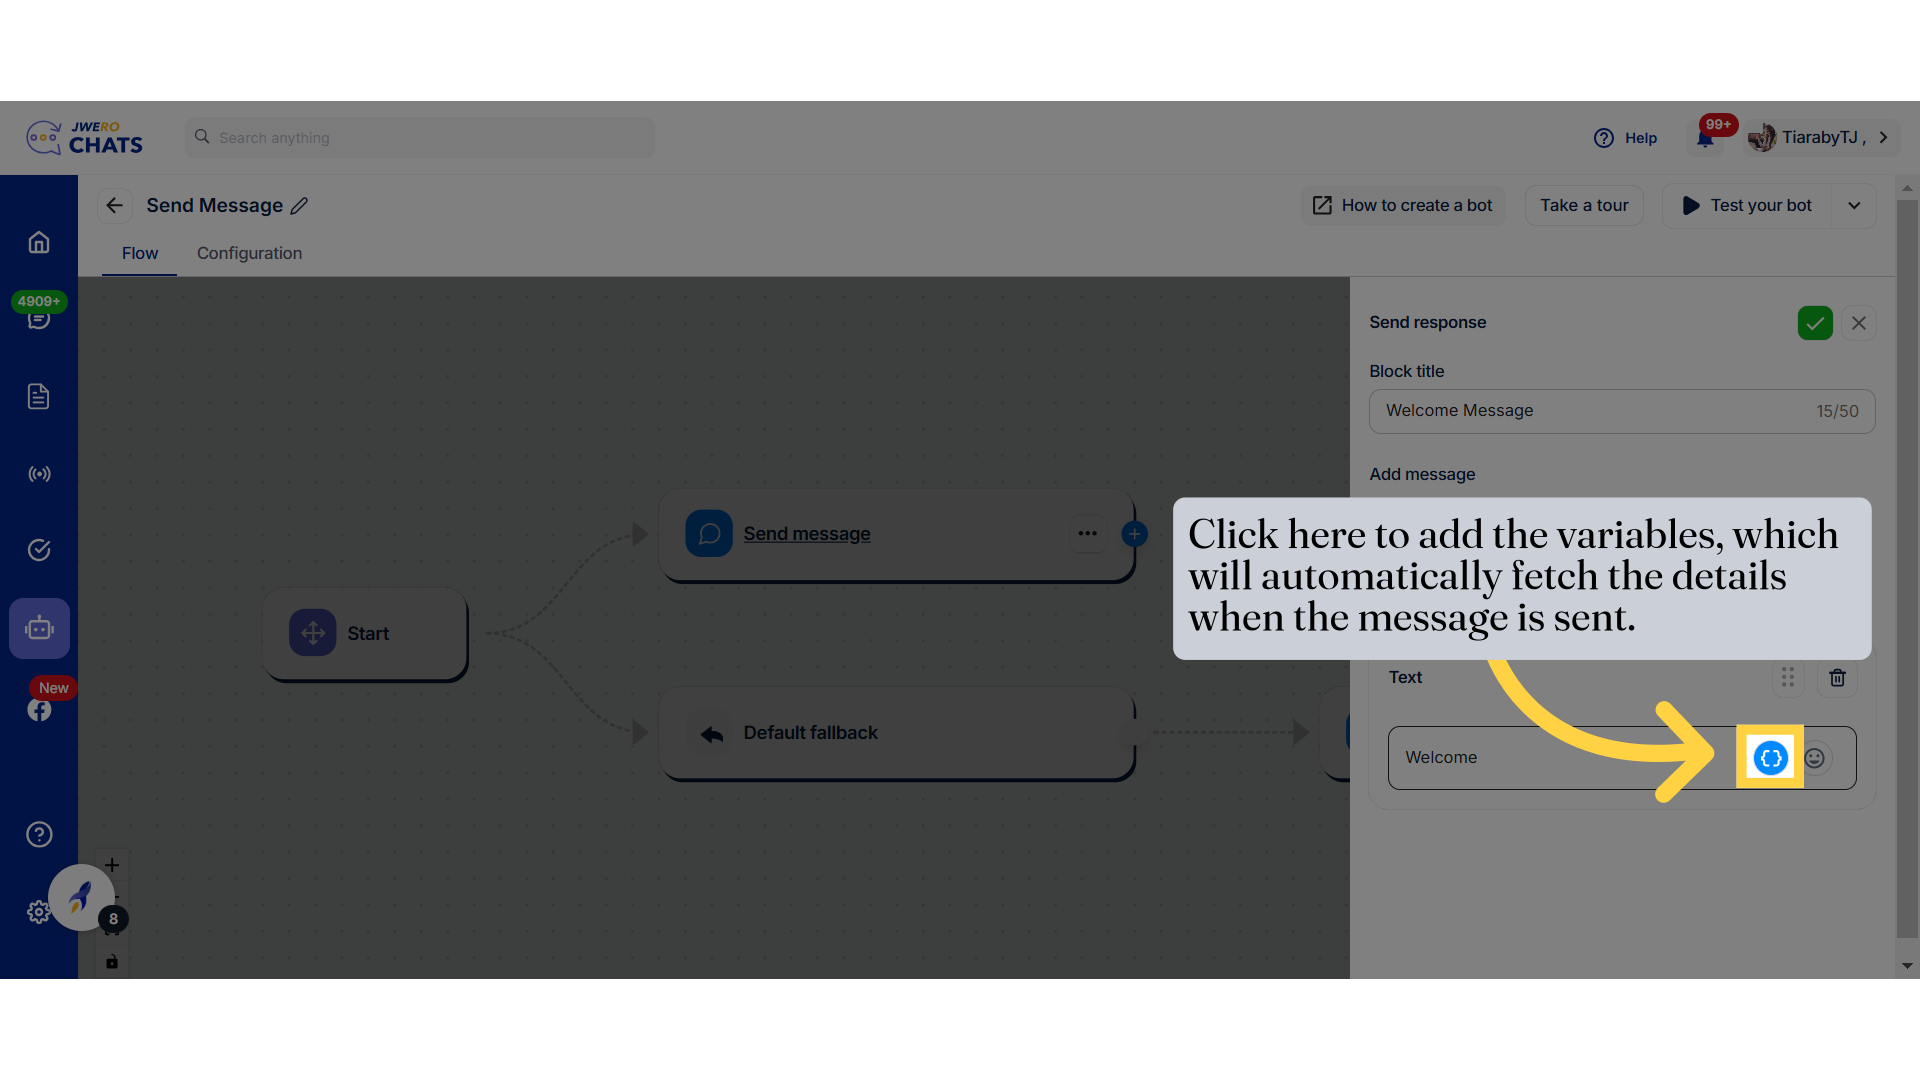
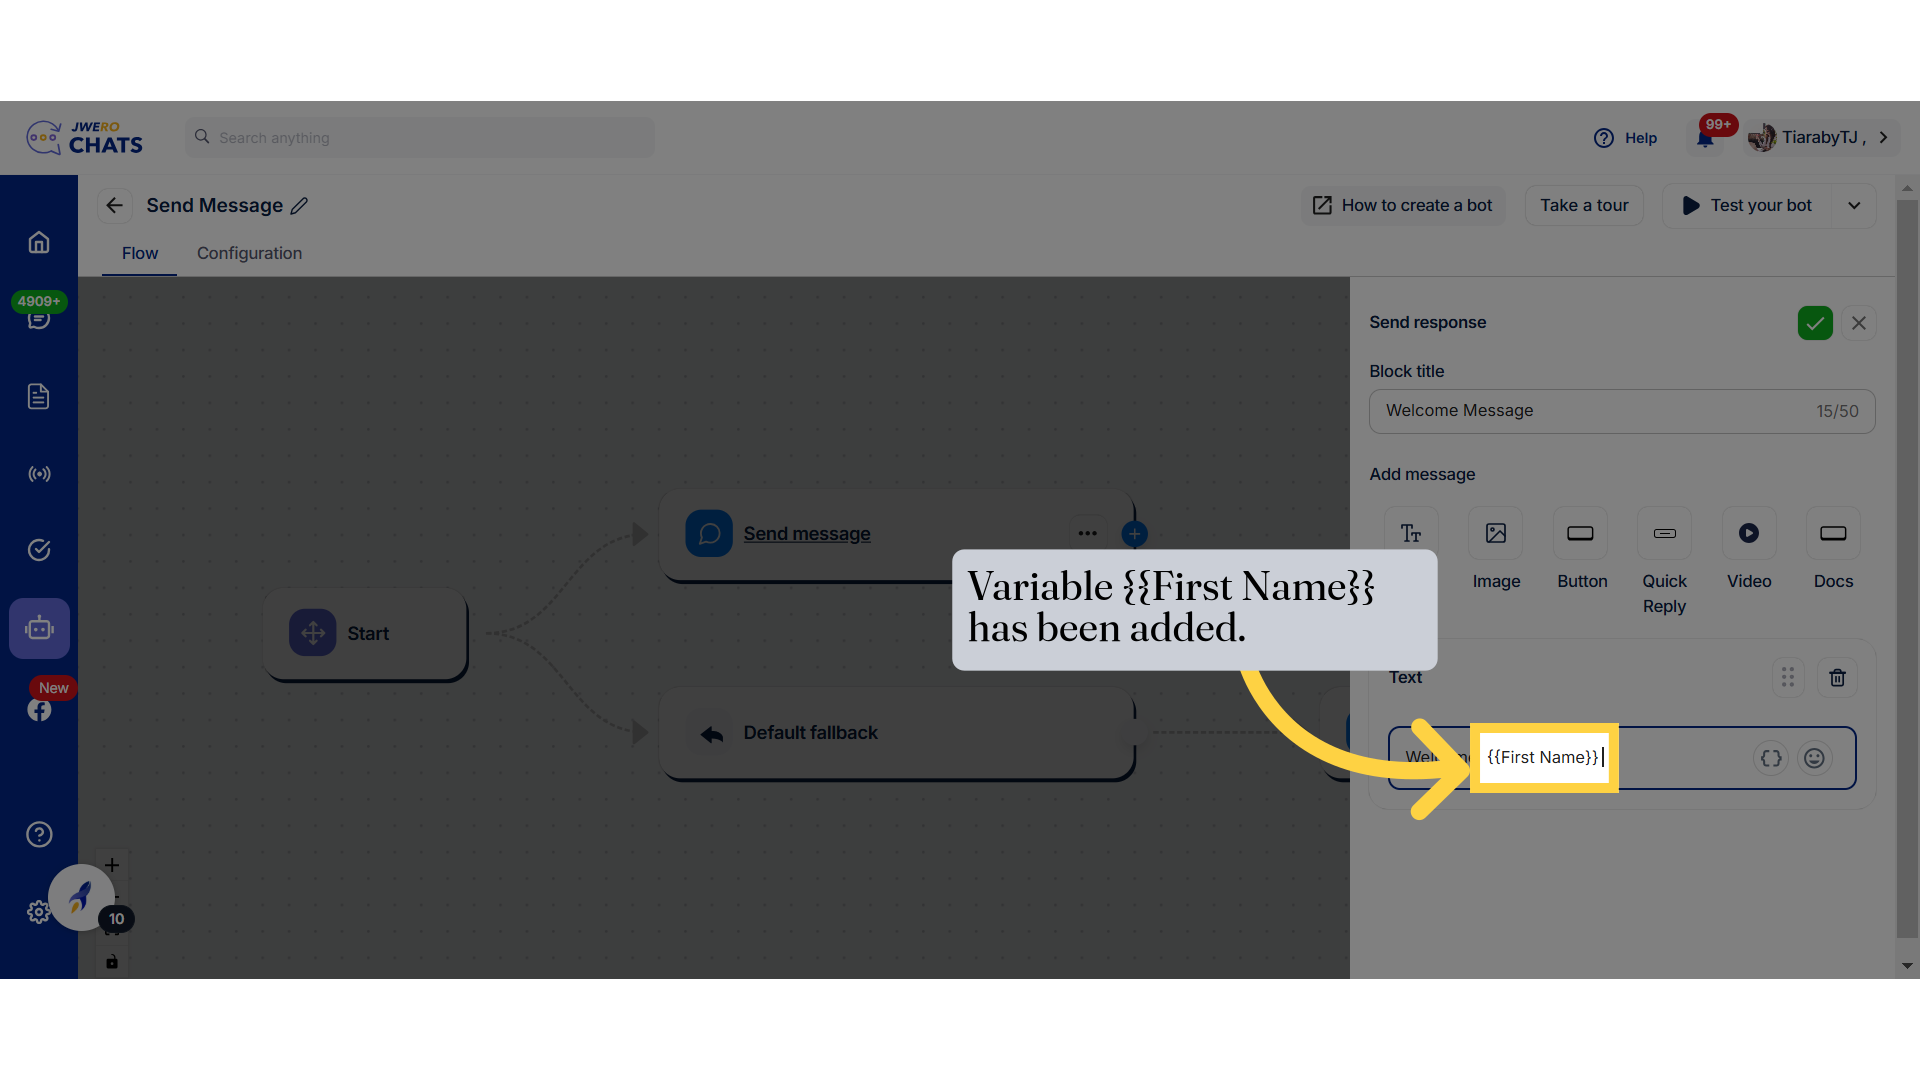
11. Click here to add the variables, which will automatically fetch the details when the message is sent.
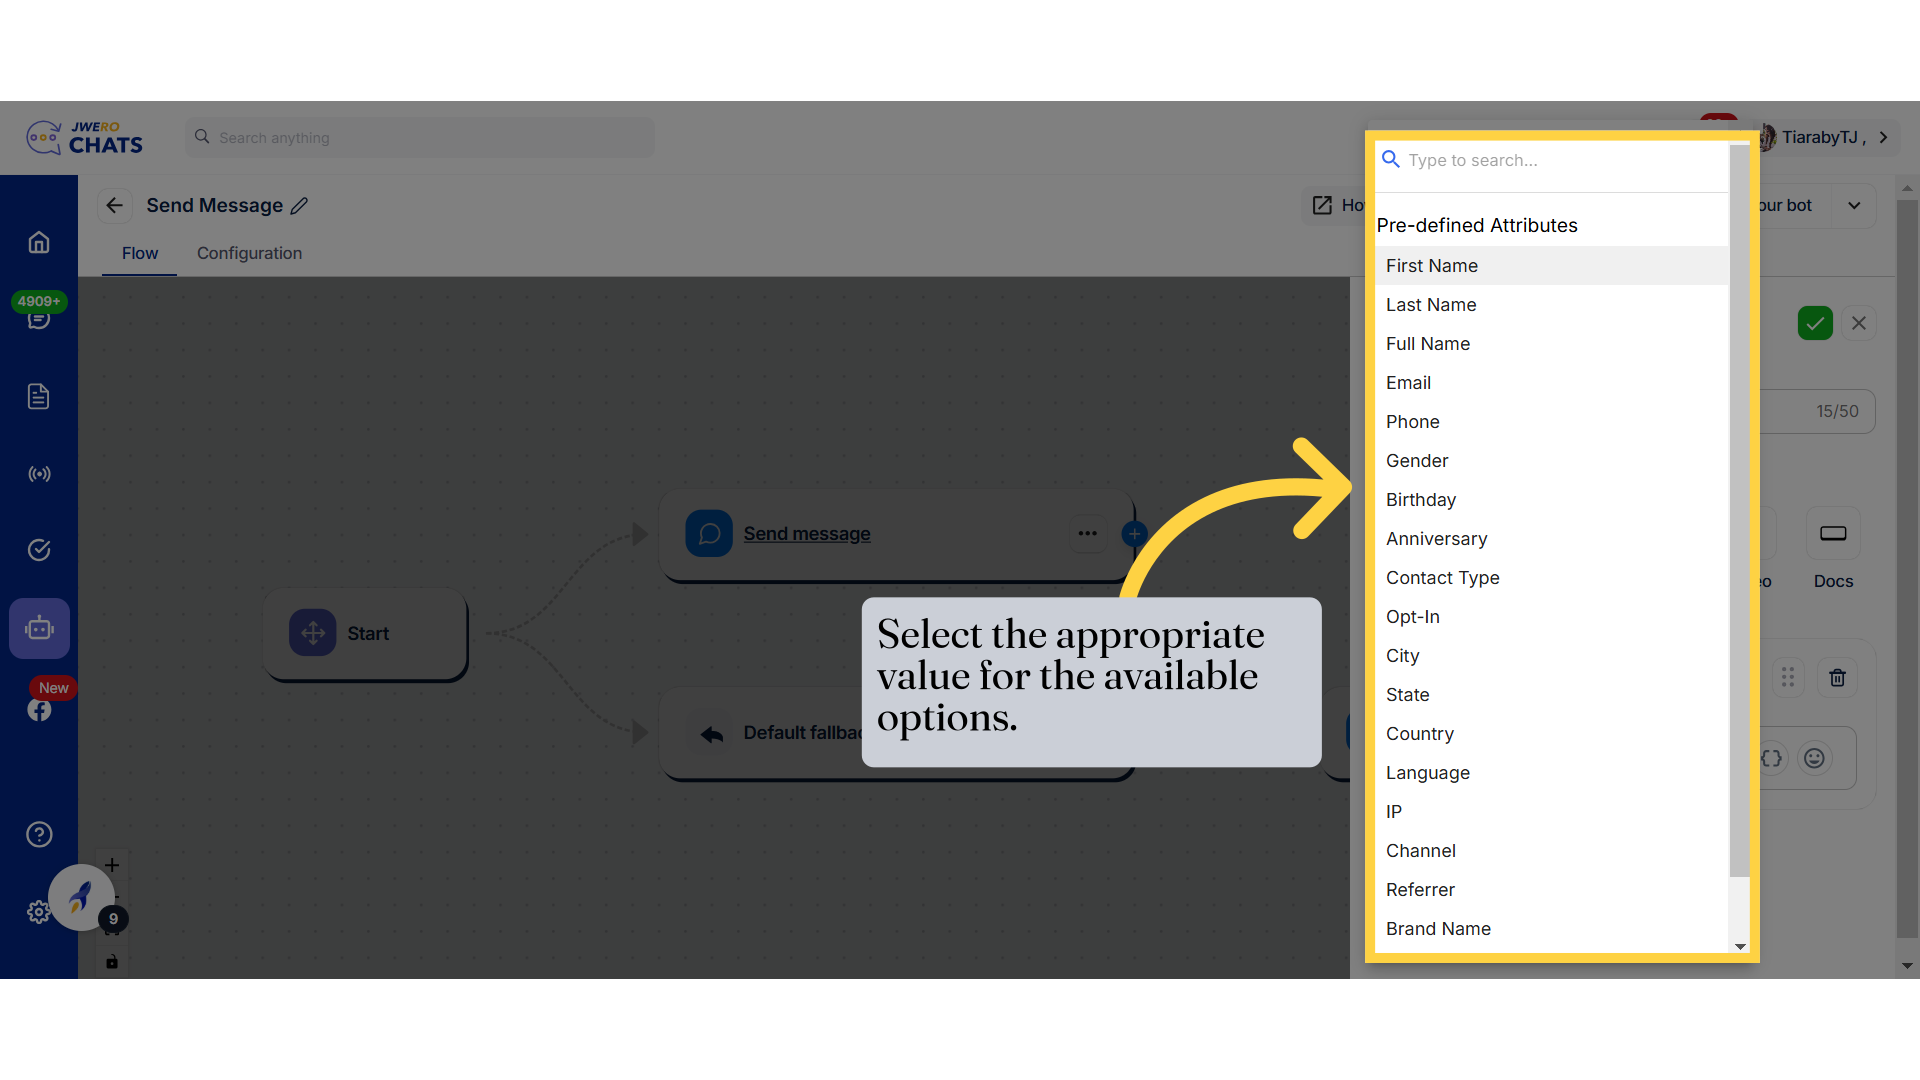
12. Select the appropriate value for the available options.
13. Variable {{First Name}} has been added.
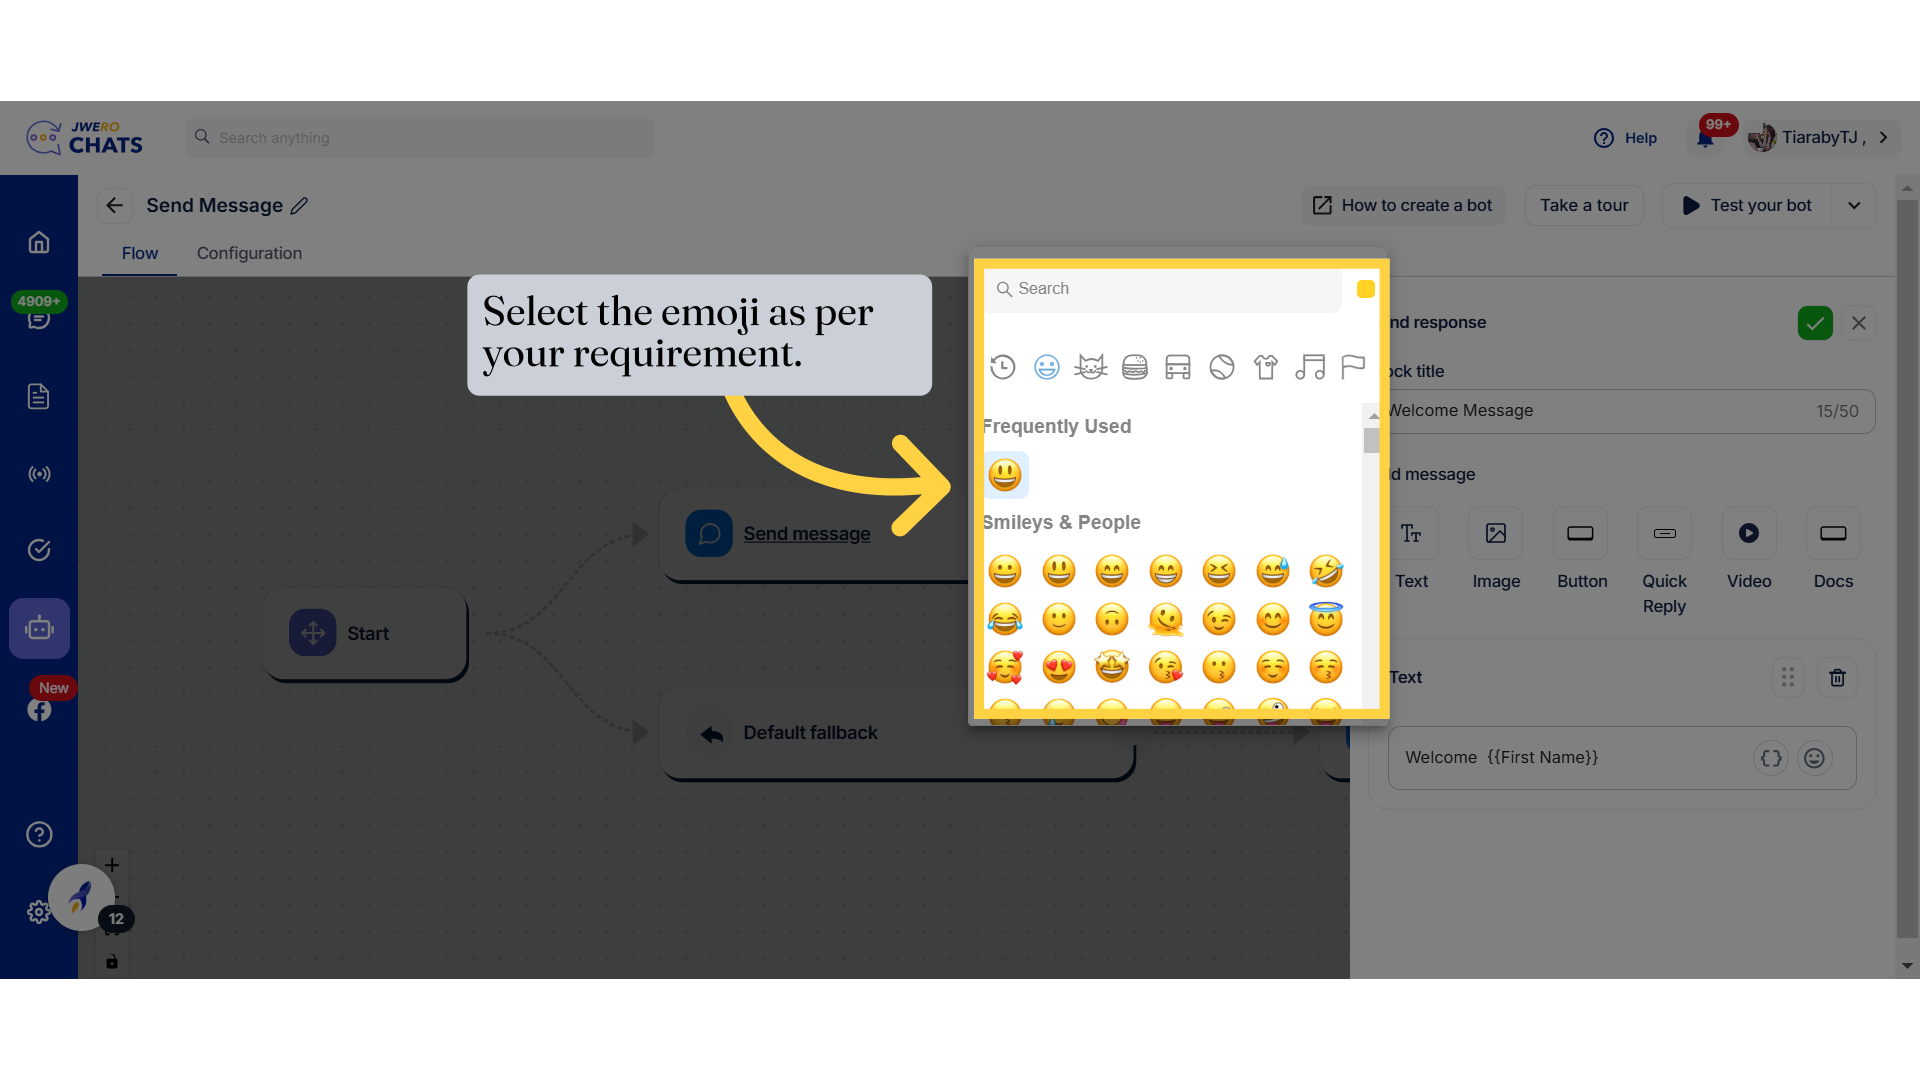
14. You can also include an emoji by clicking on this icon.
15. Select the emoji as per your requirement.
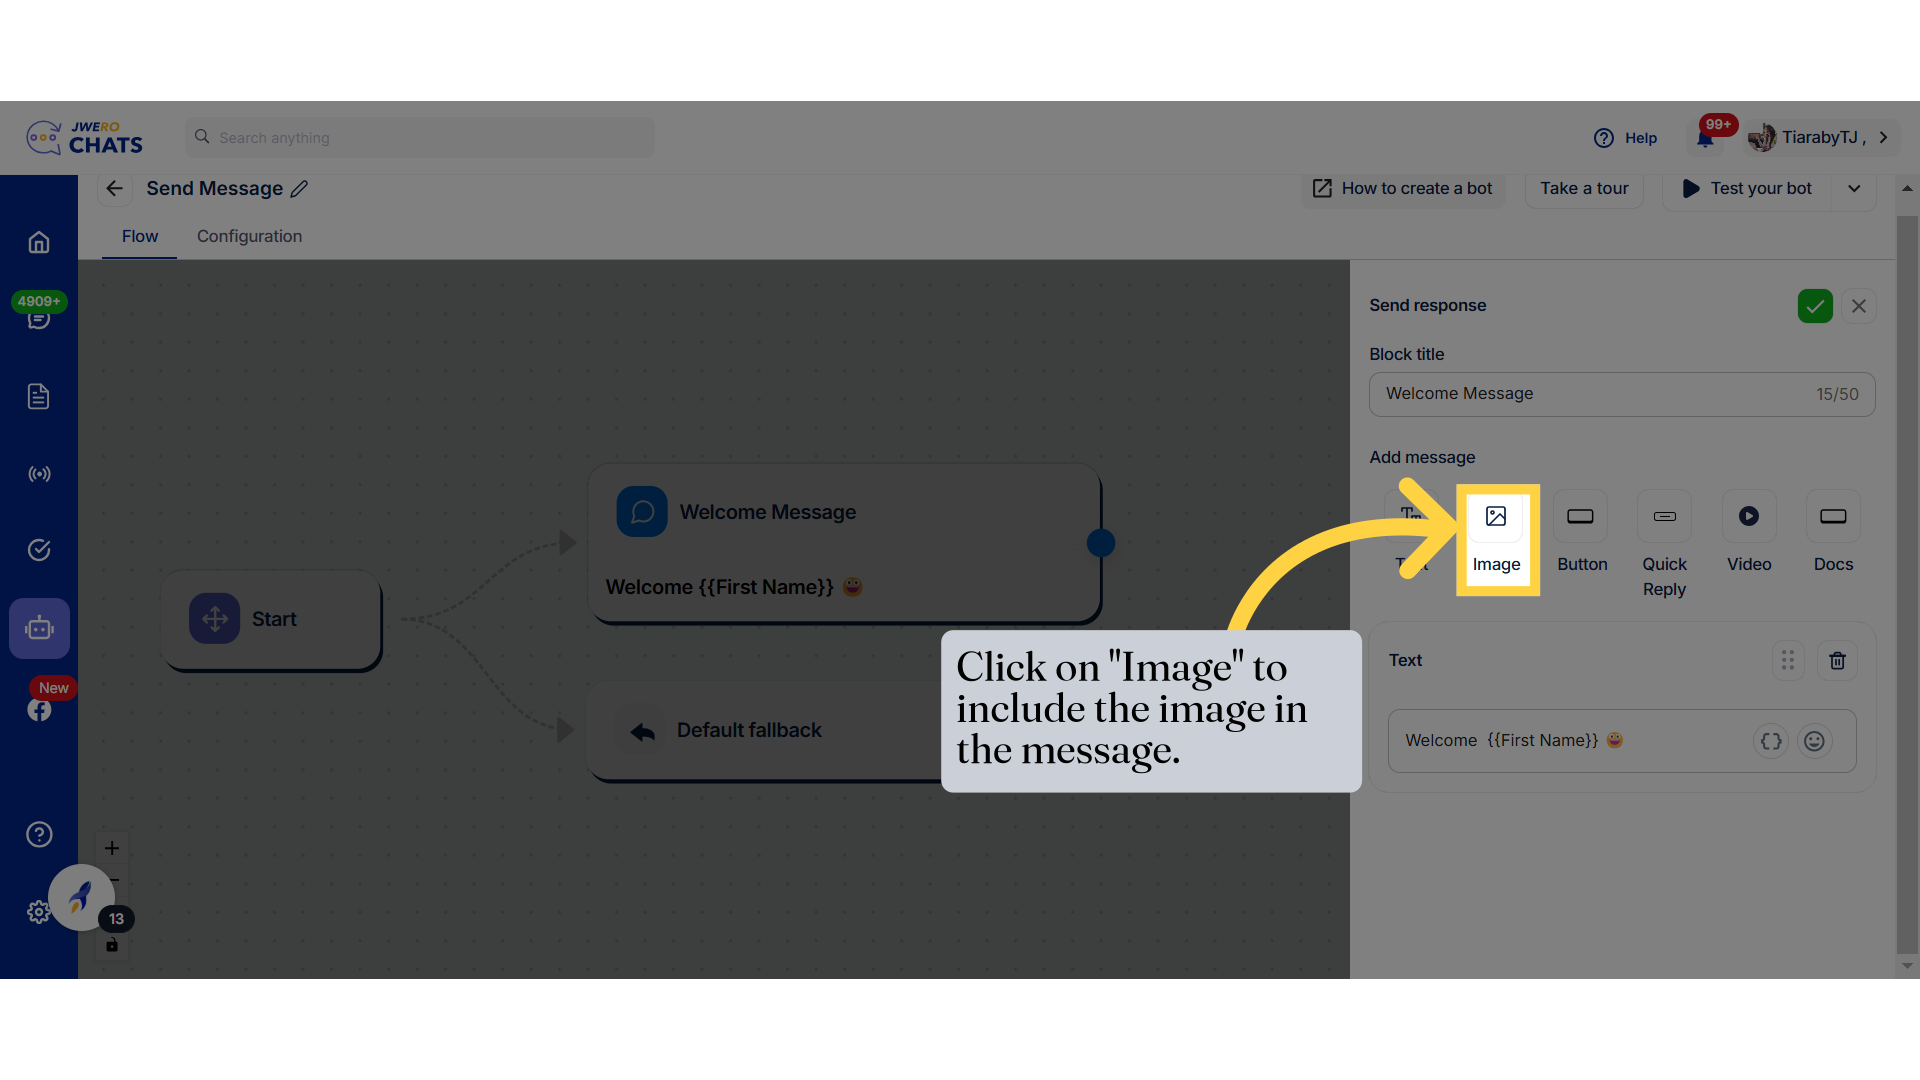
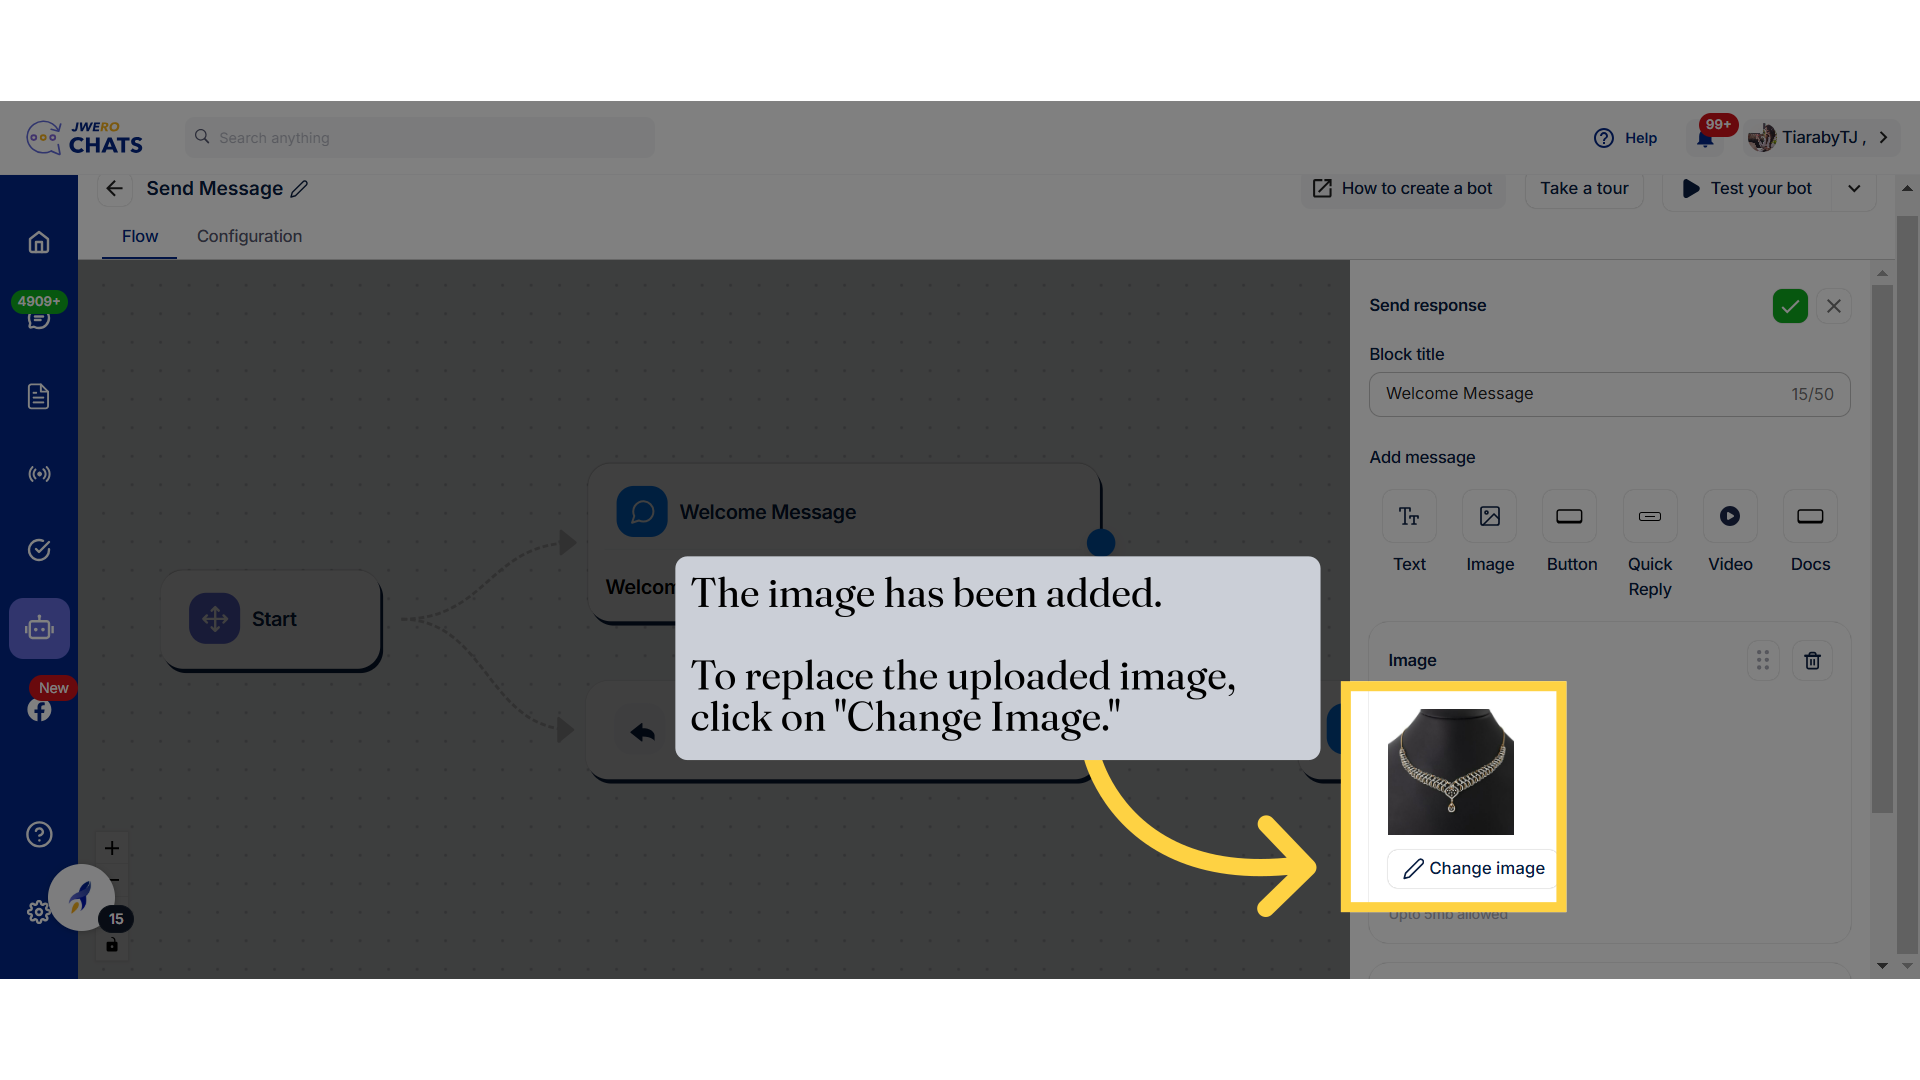
16. This is how the "Text" message will appear, with the variable dynamically fetching the customer's First Name.
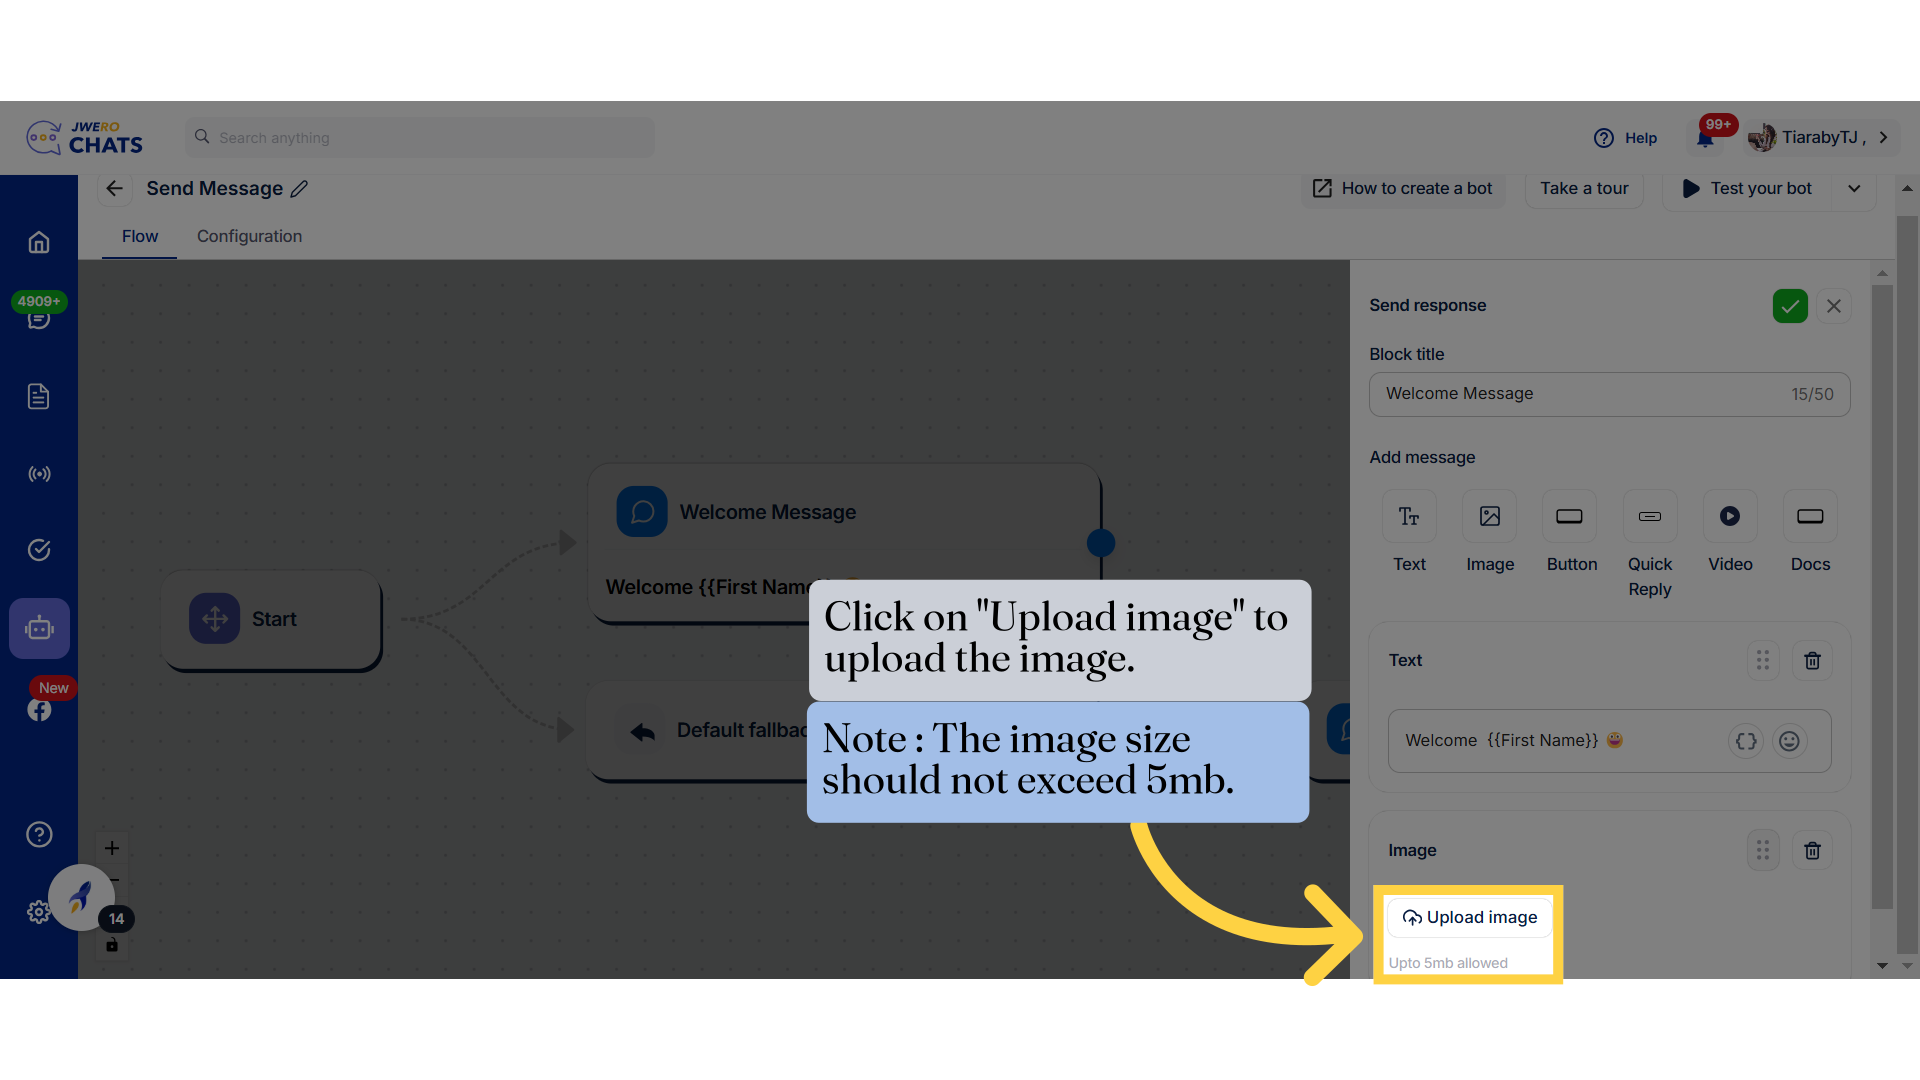
17. Click on "Image" to include the image in the message.
18. Click on "Upload image" to upload the image.
19. The image has been added.
To replace the uploaded image, click on "Change Image."
20. This is how "Image" will look like in the message.
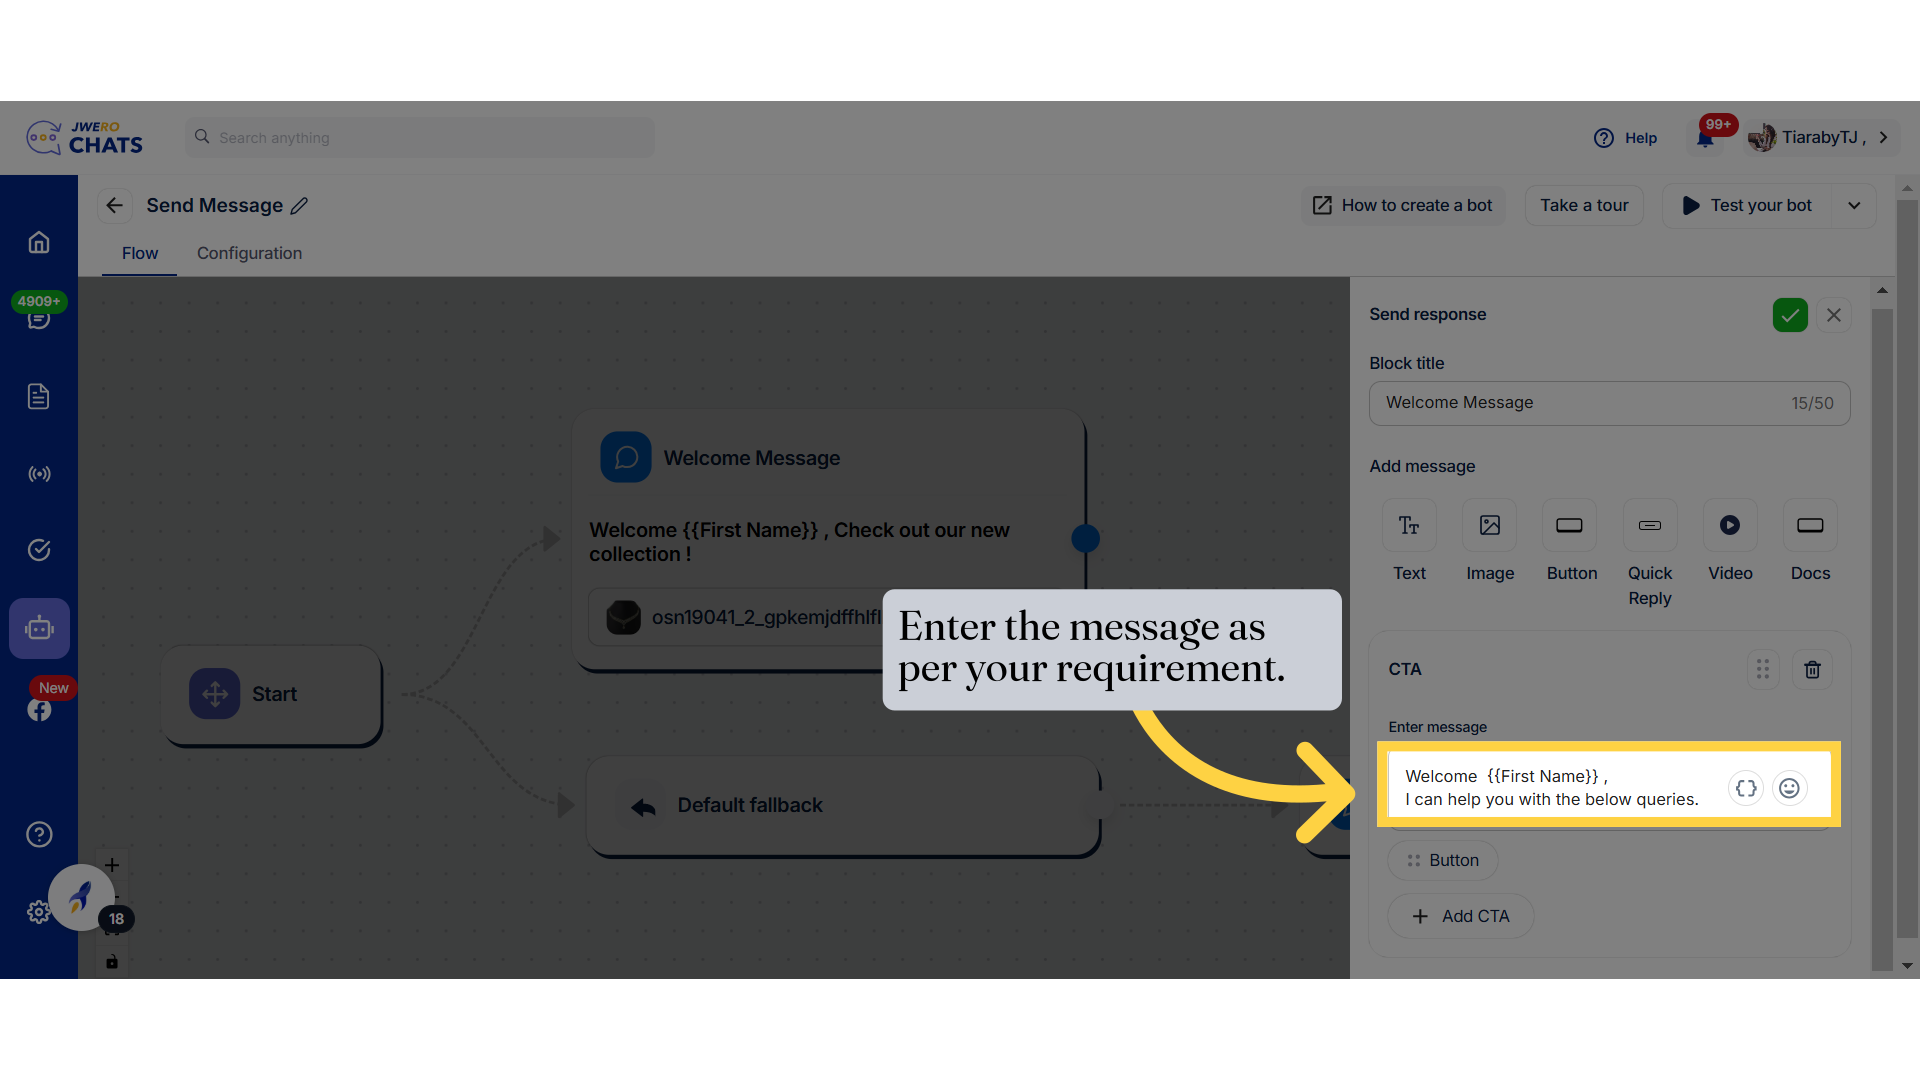
22. Enter the message as per your requirement.
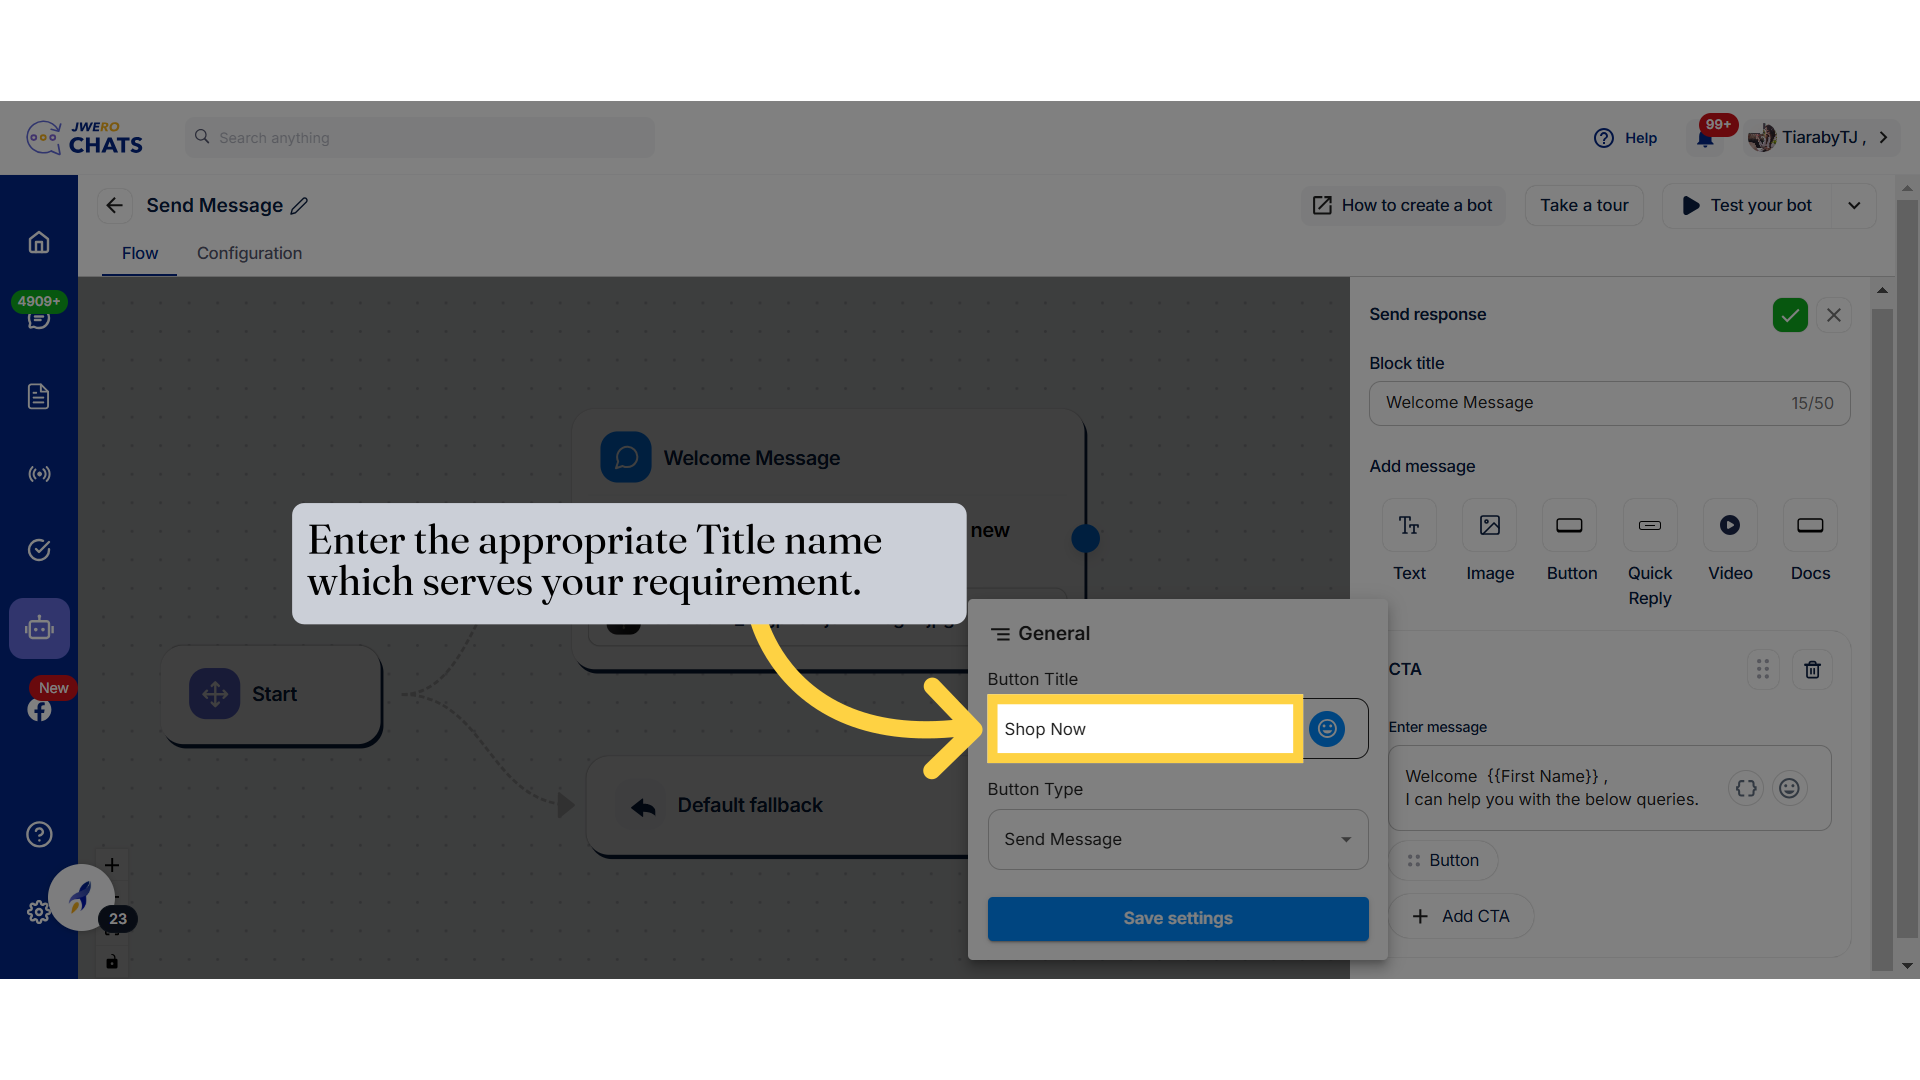
24. Enter the appropriate Title name which serves your requirement.
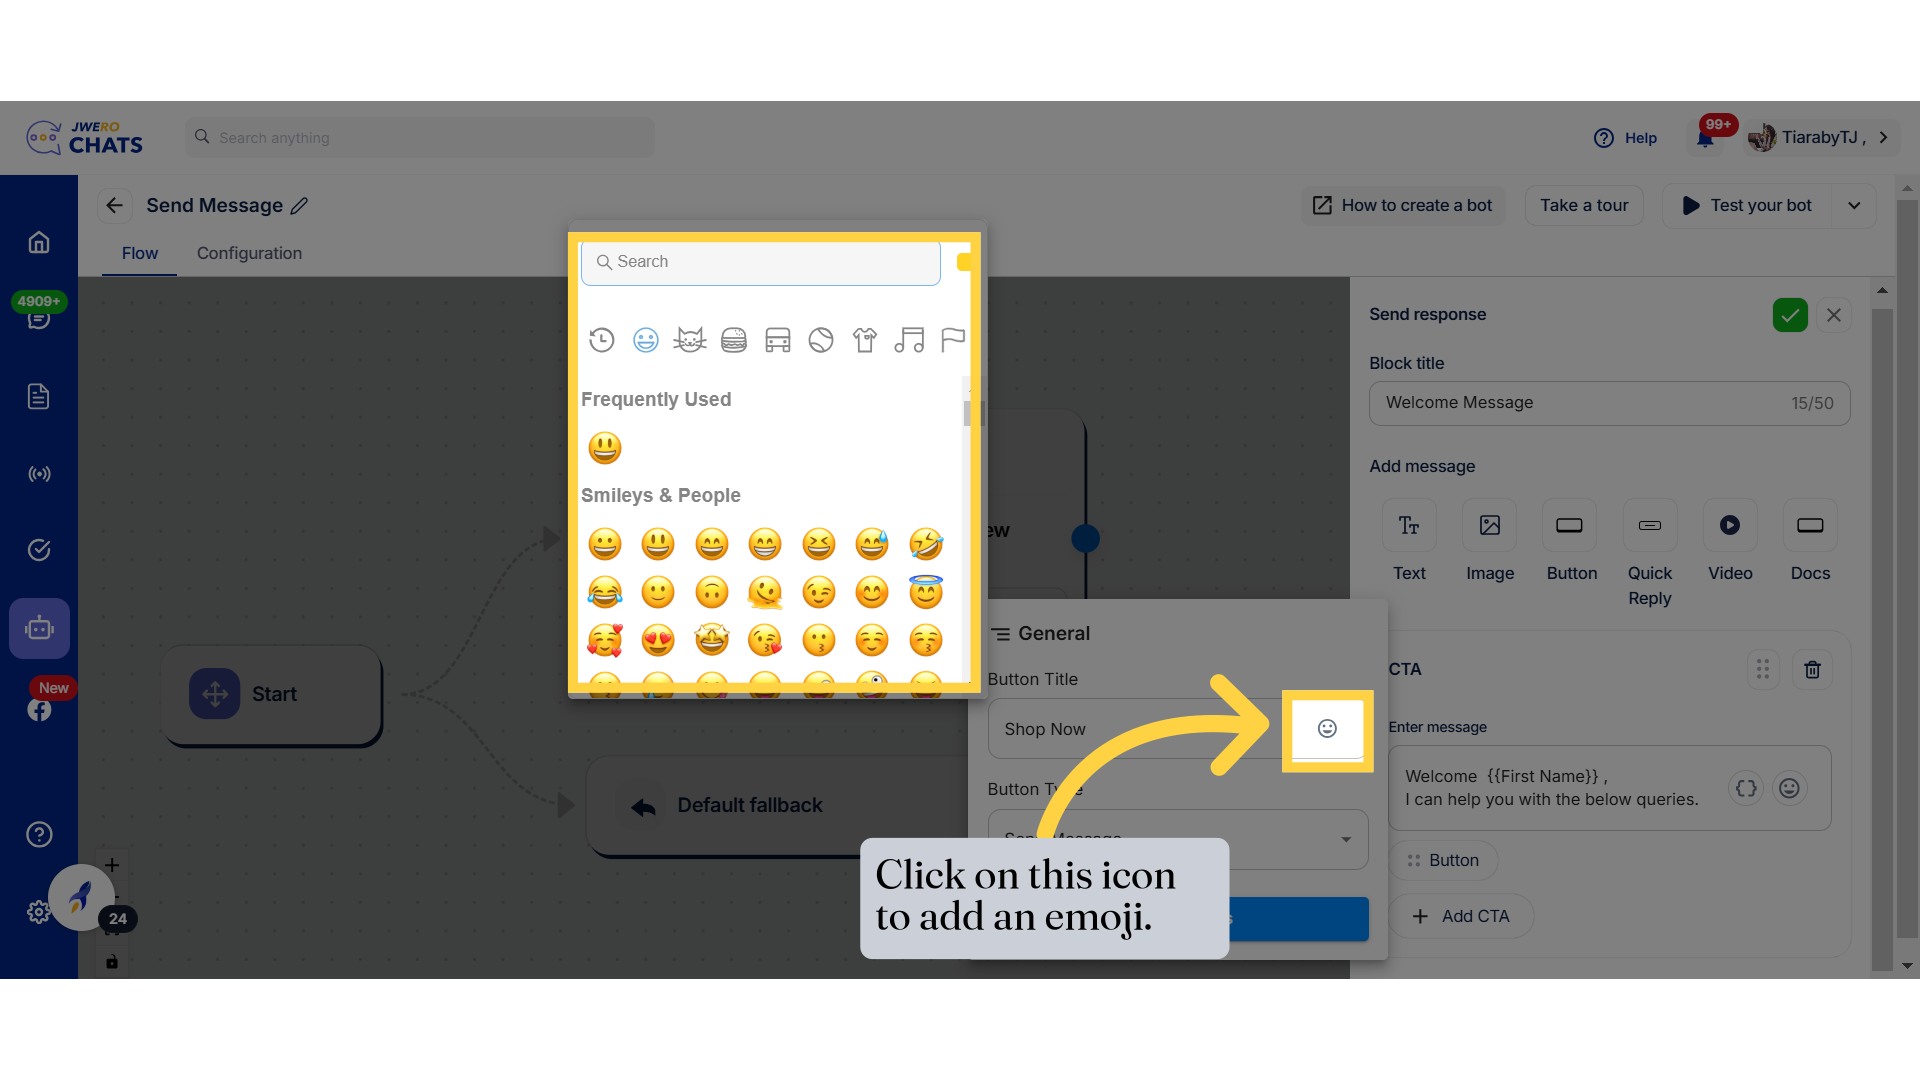
25. Click on this icon to add an emoji.
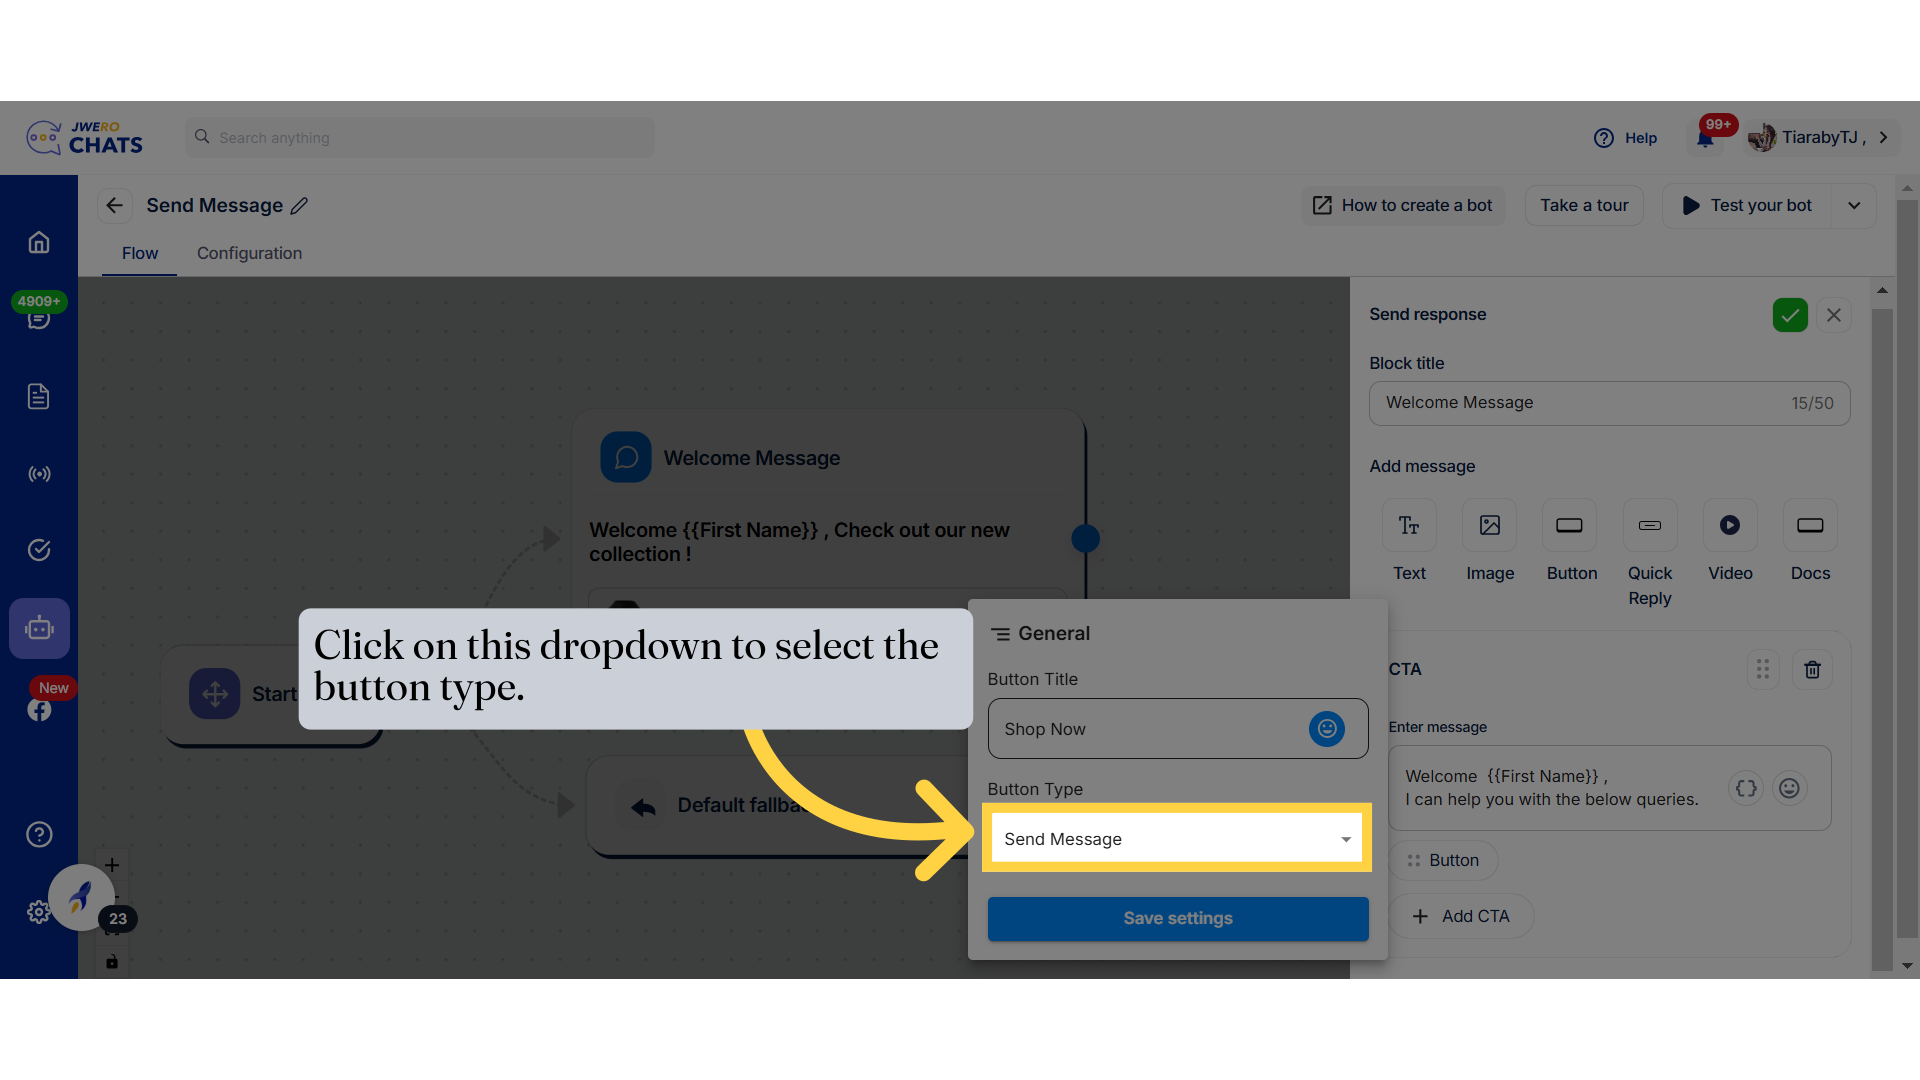
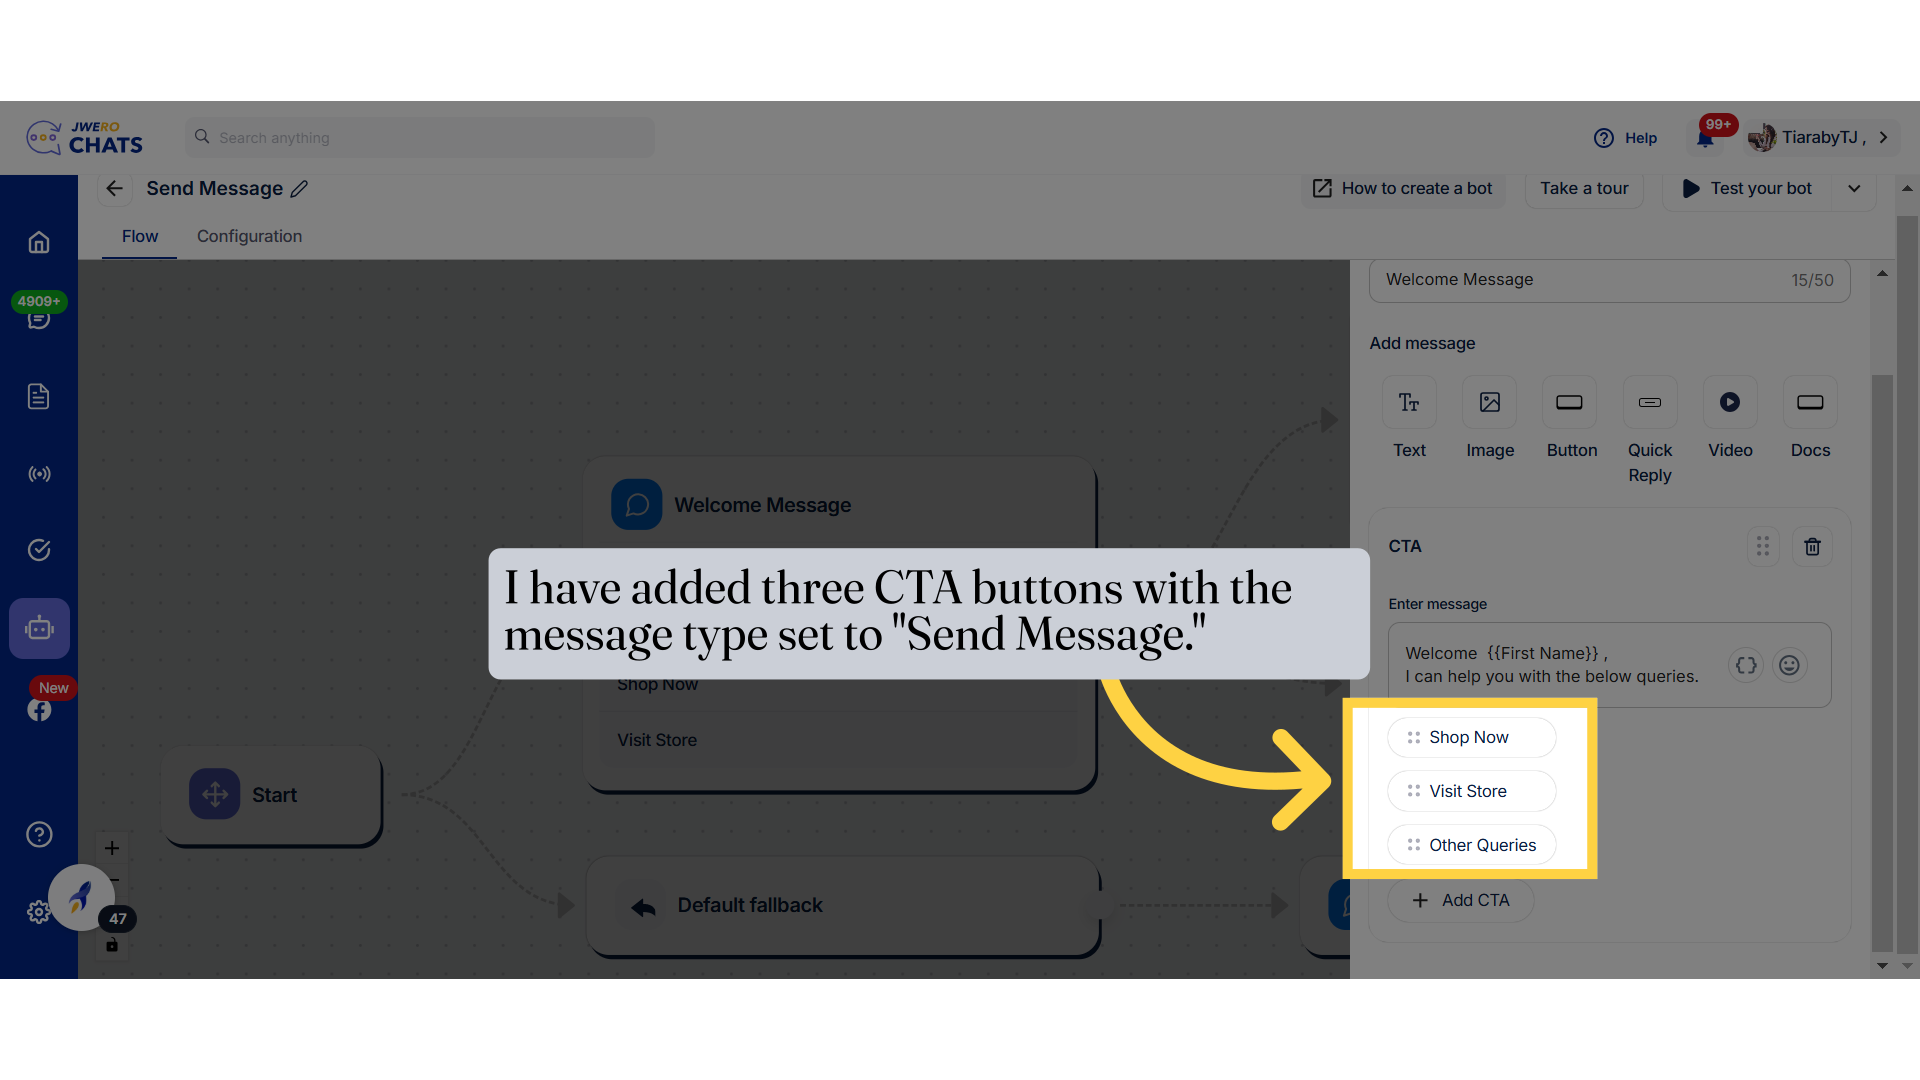
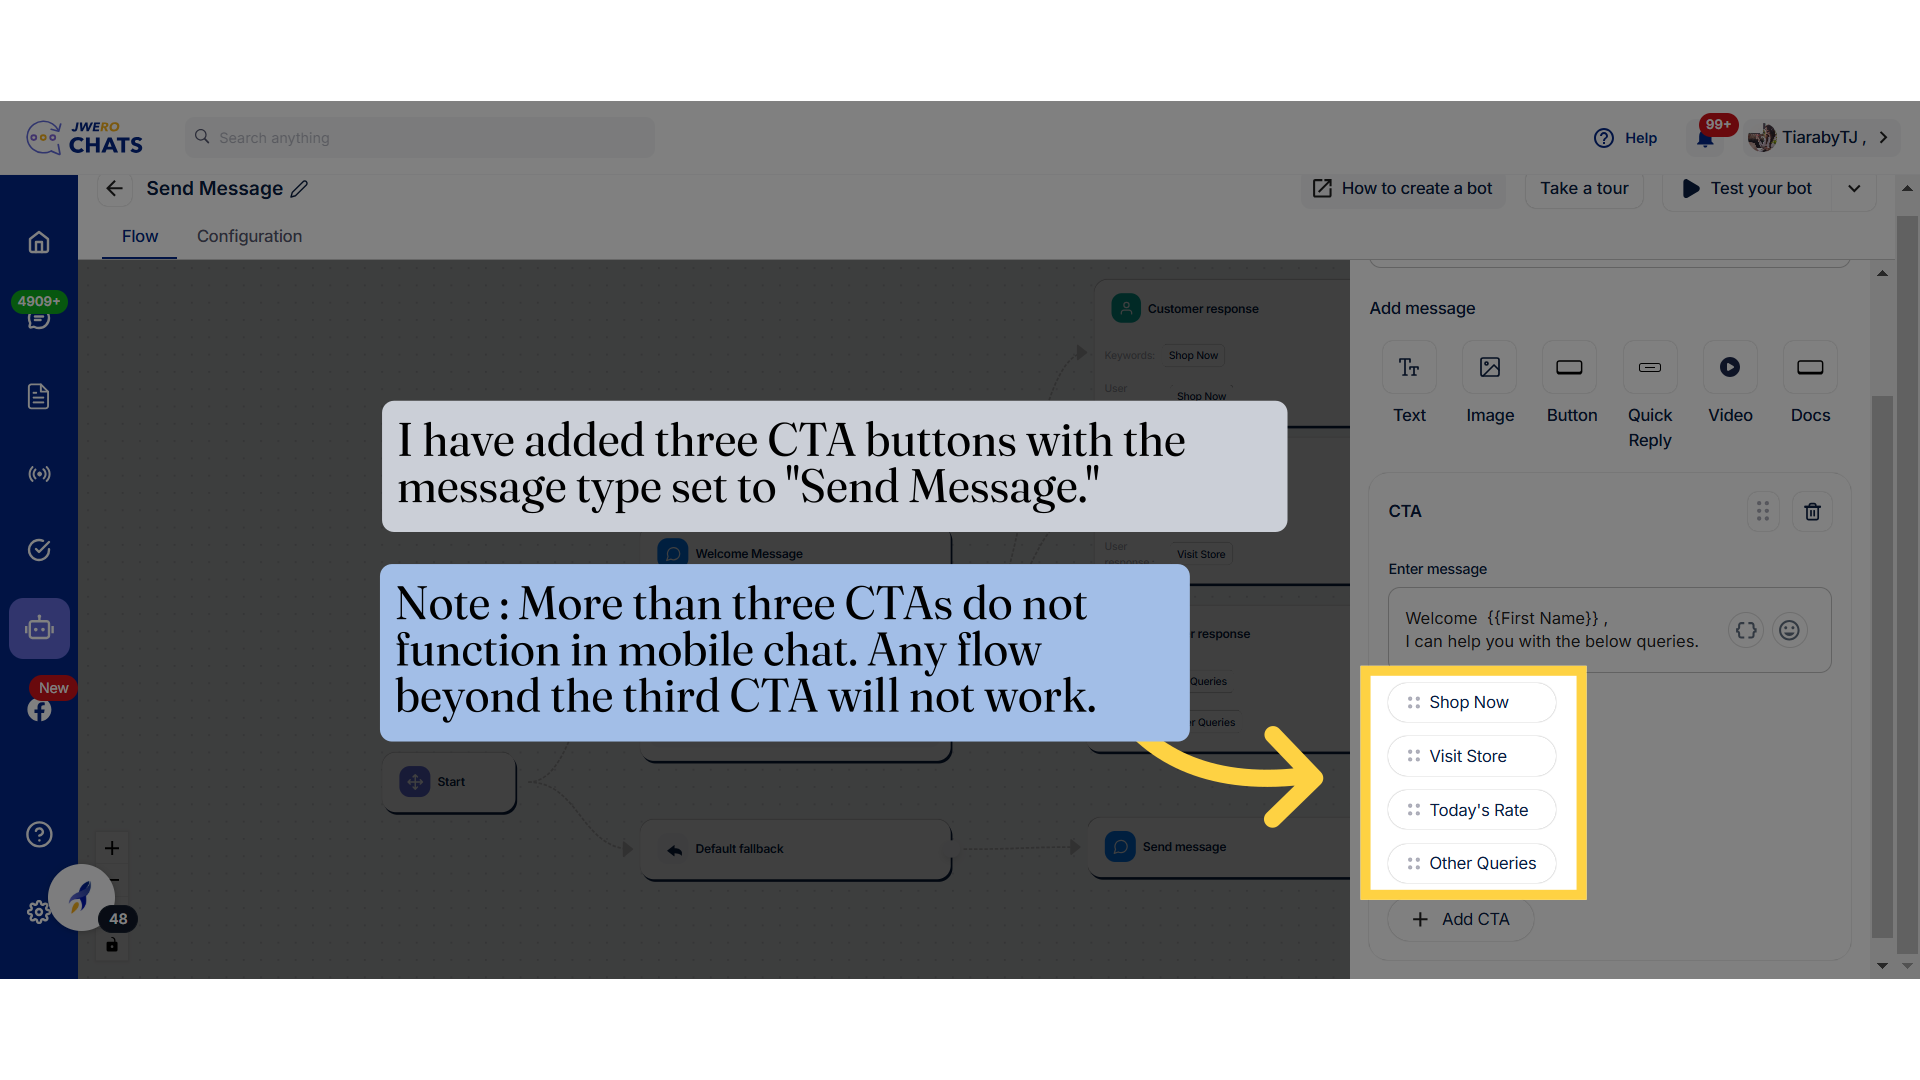
27. Select the message type from the available options.
Let's explore each options one by one.
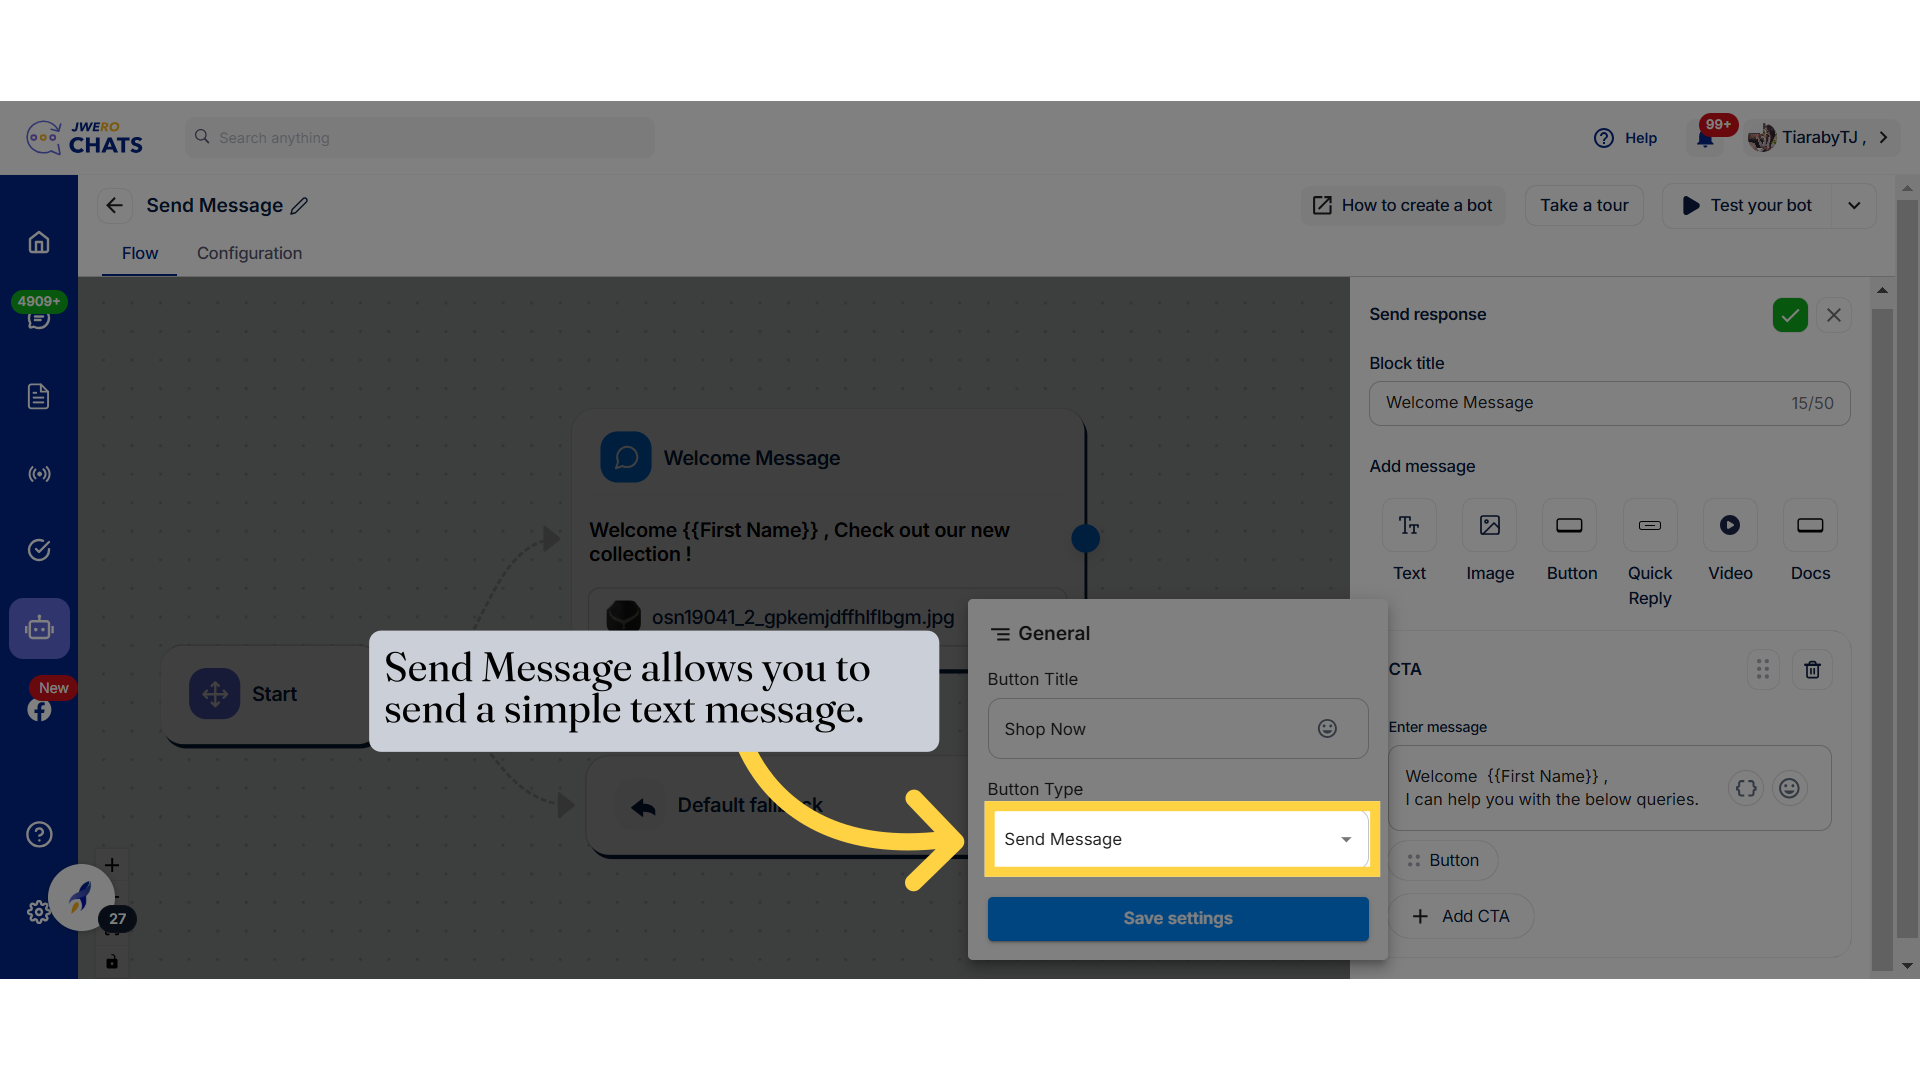
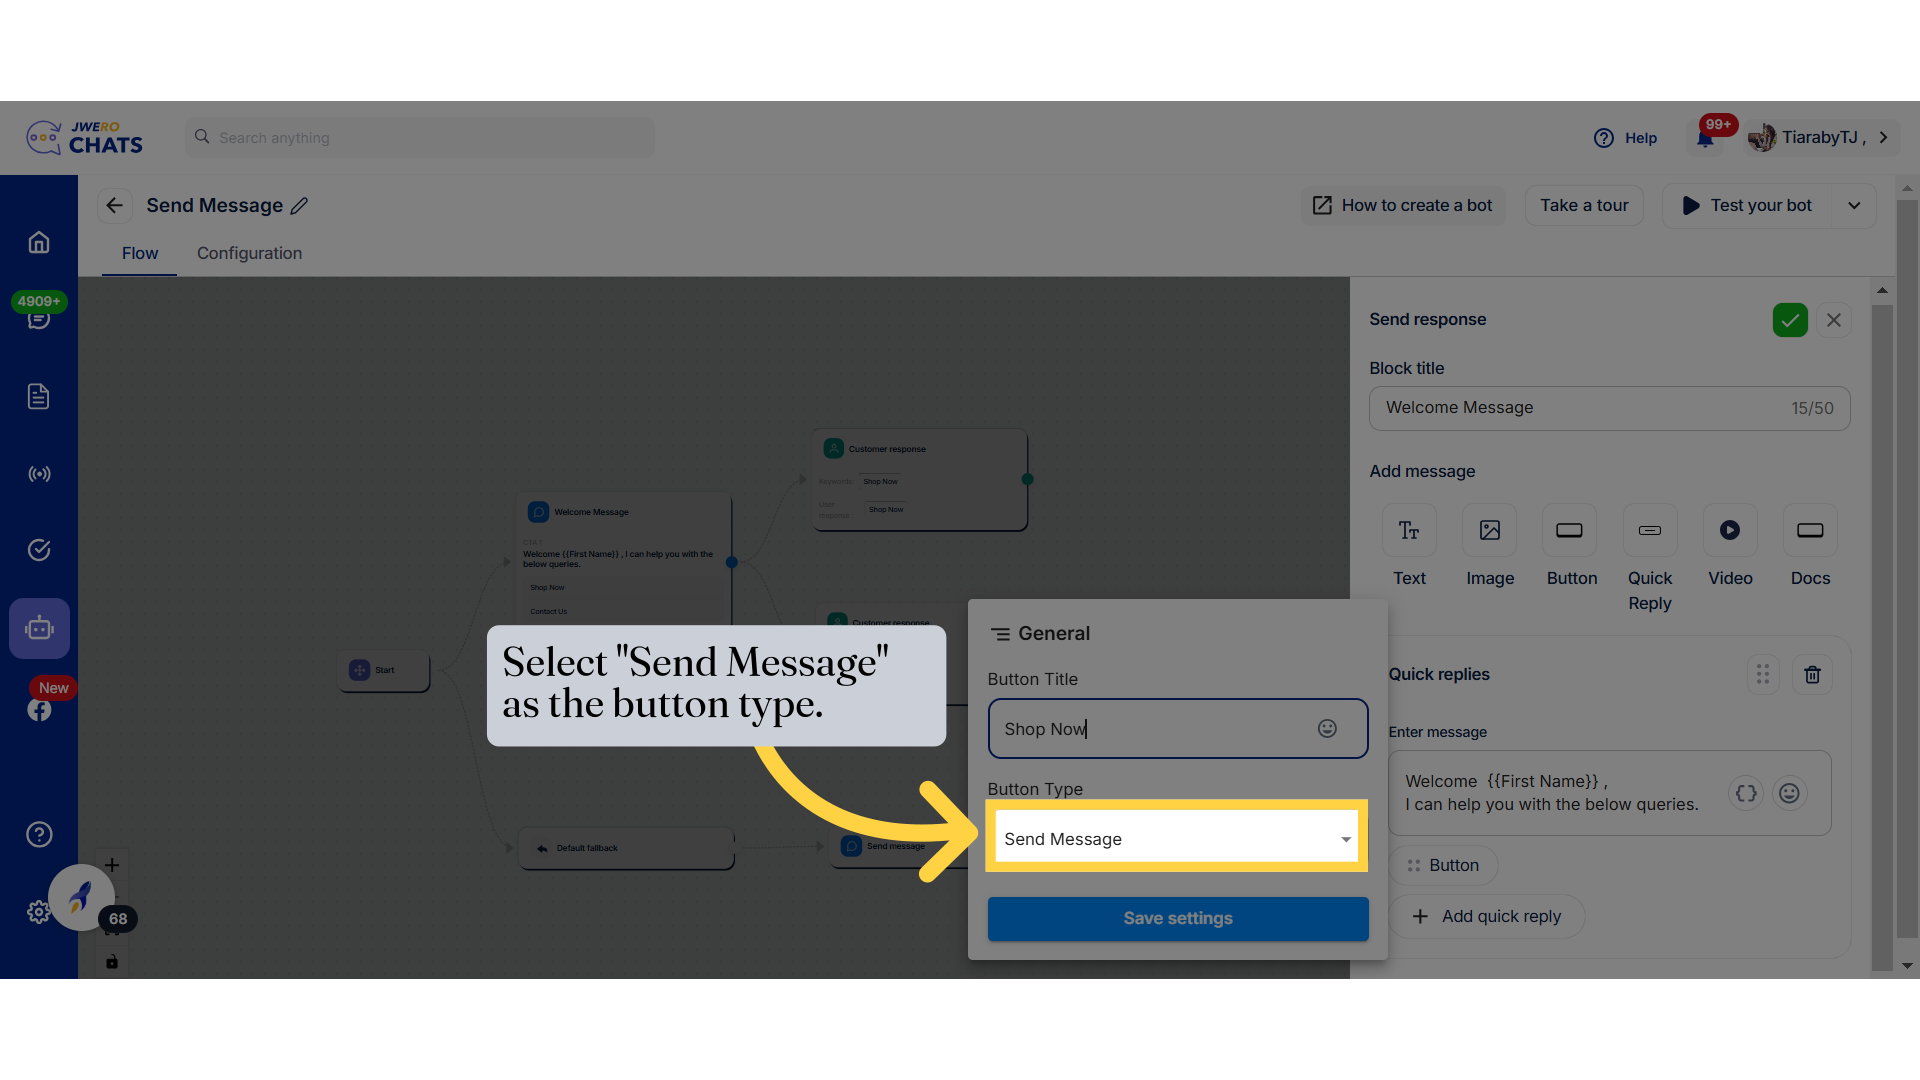
28. Send Message allows you to send a simple text message.
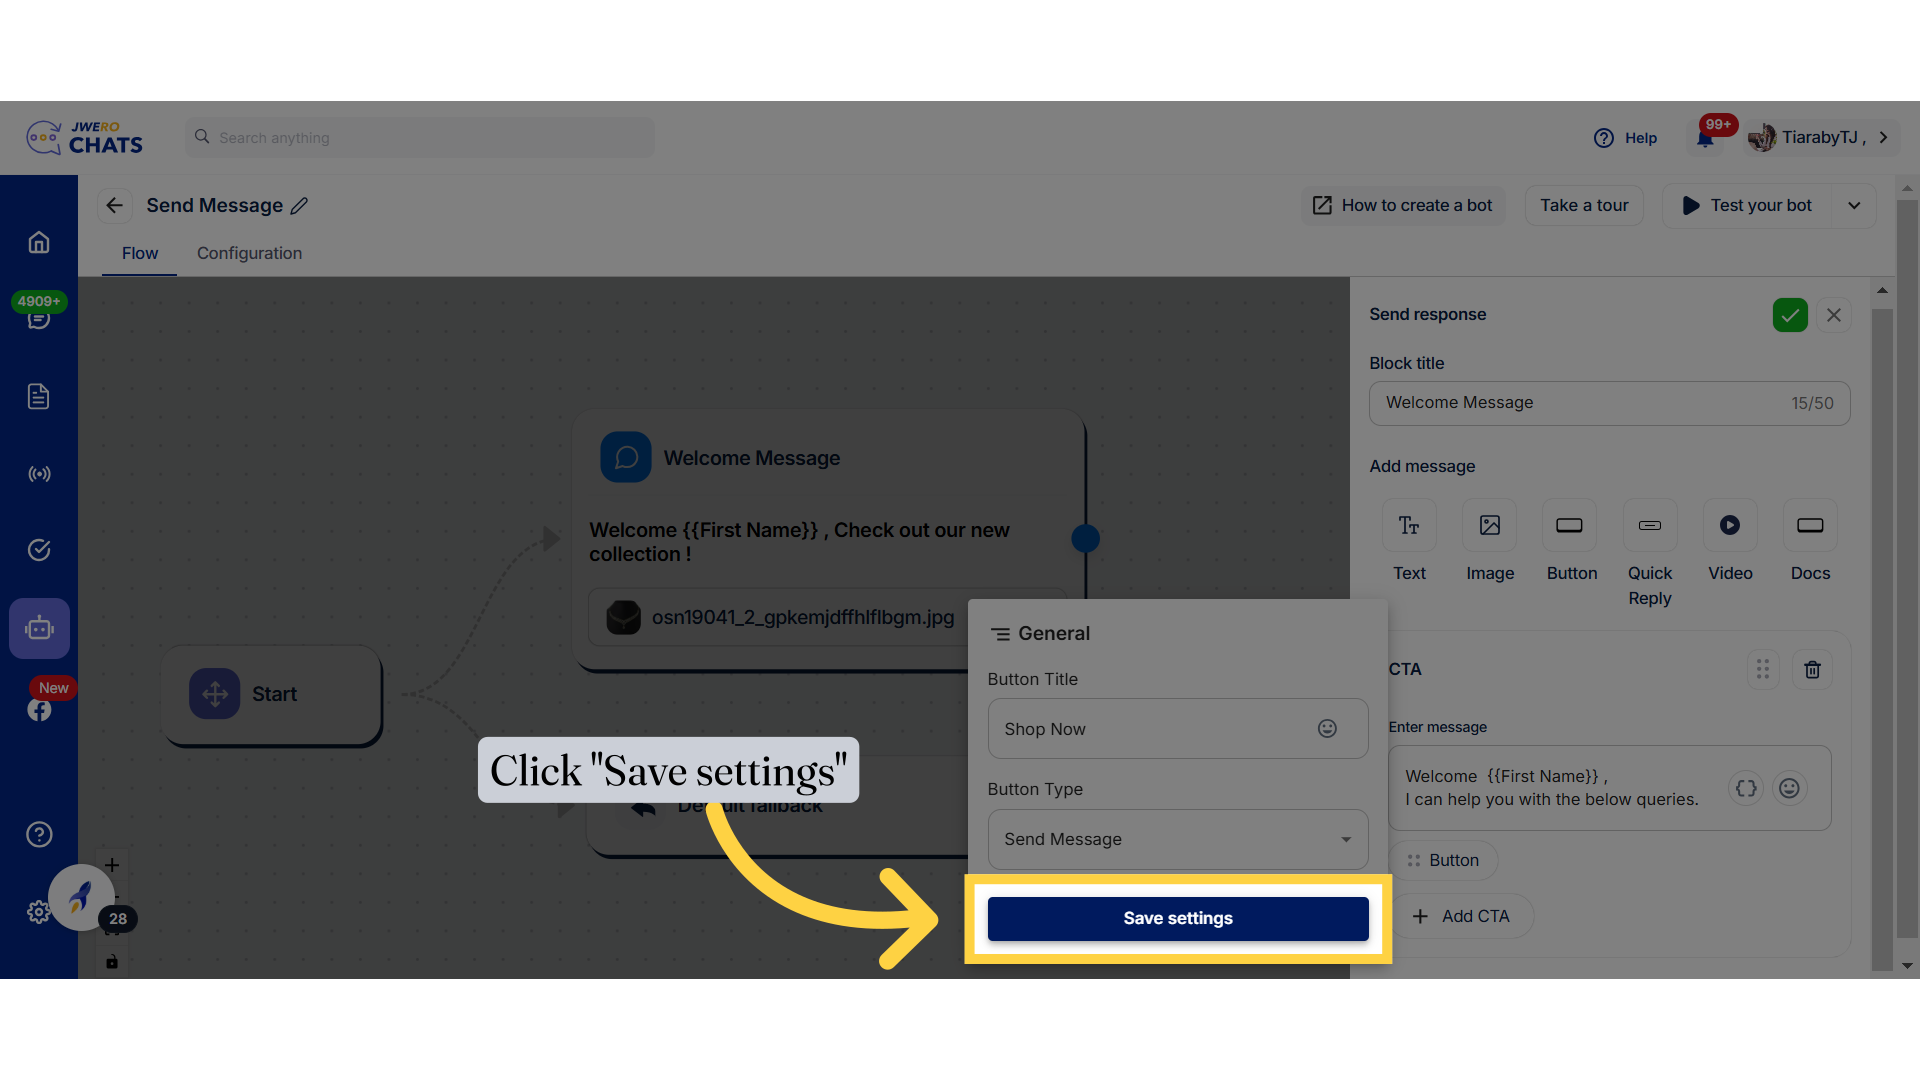
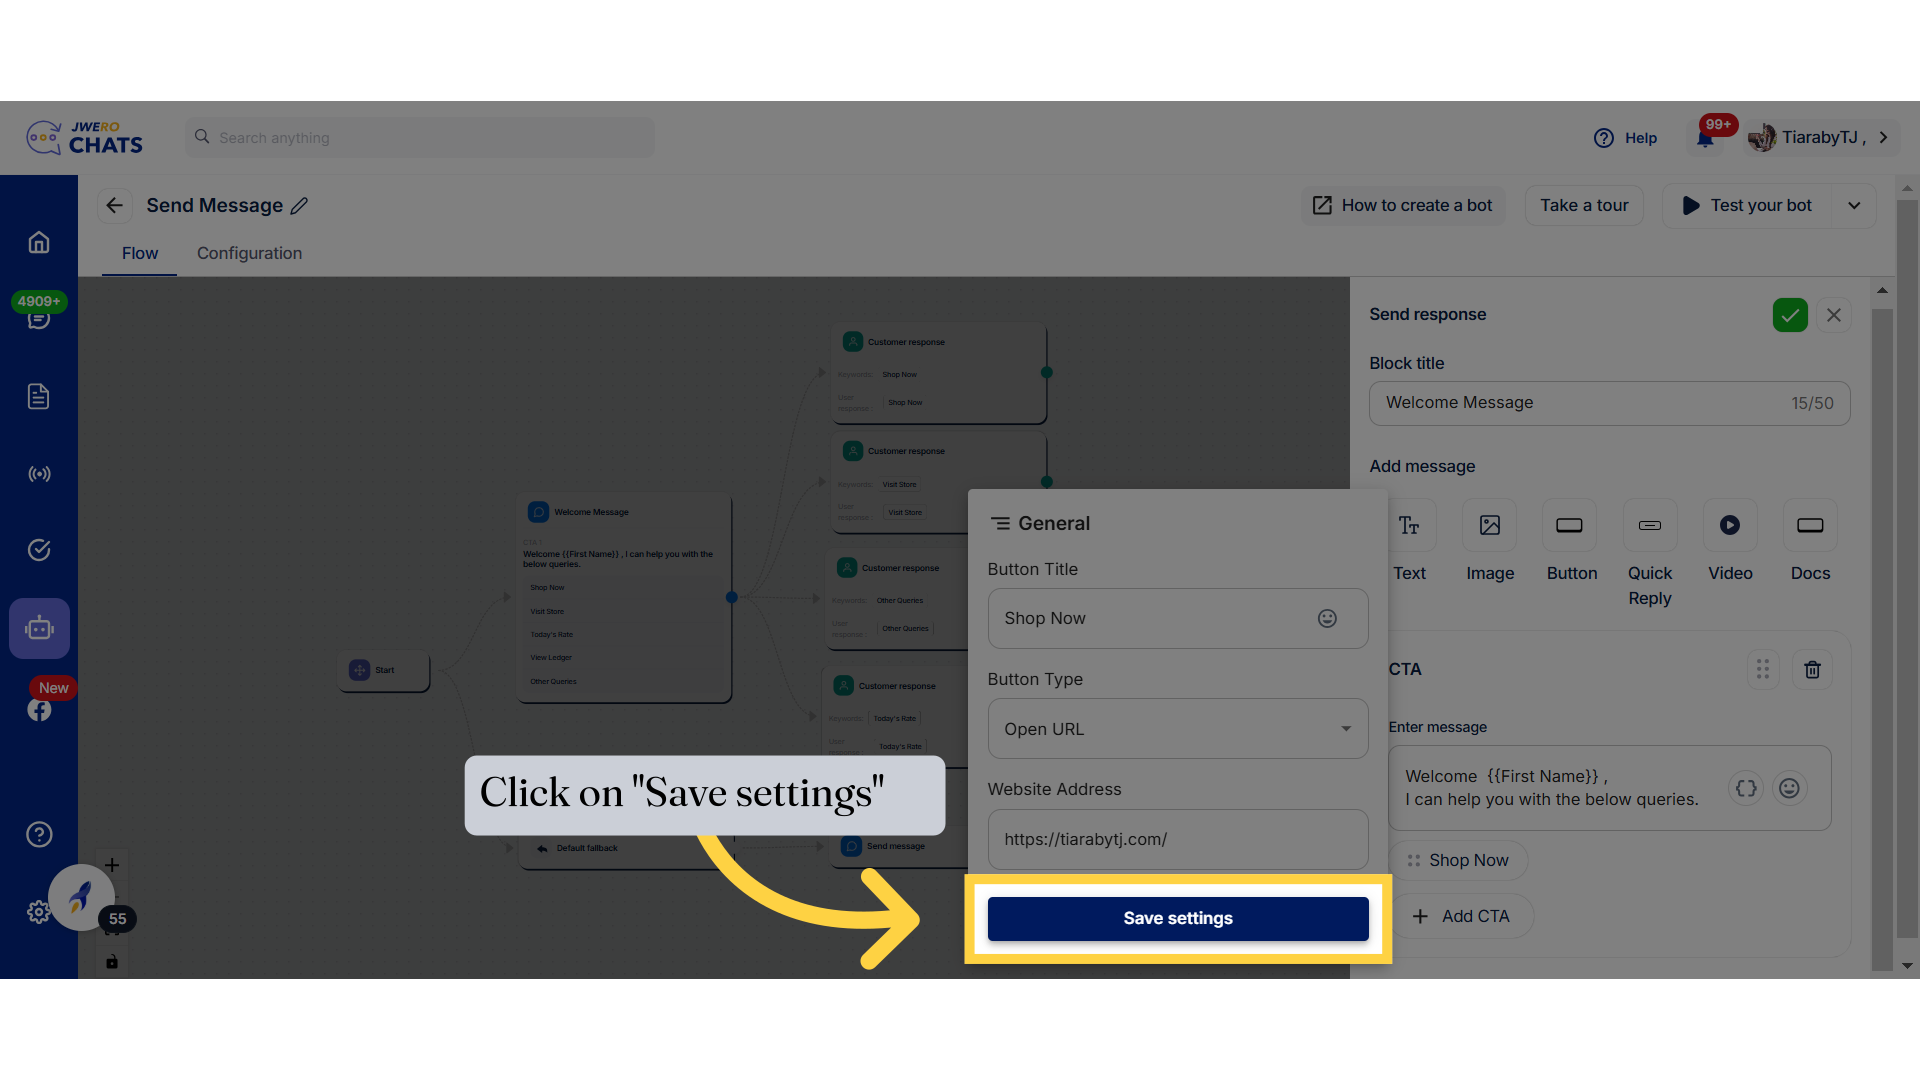
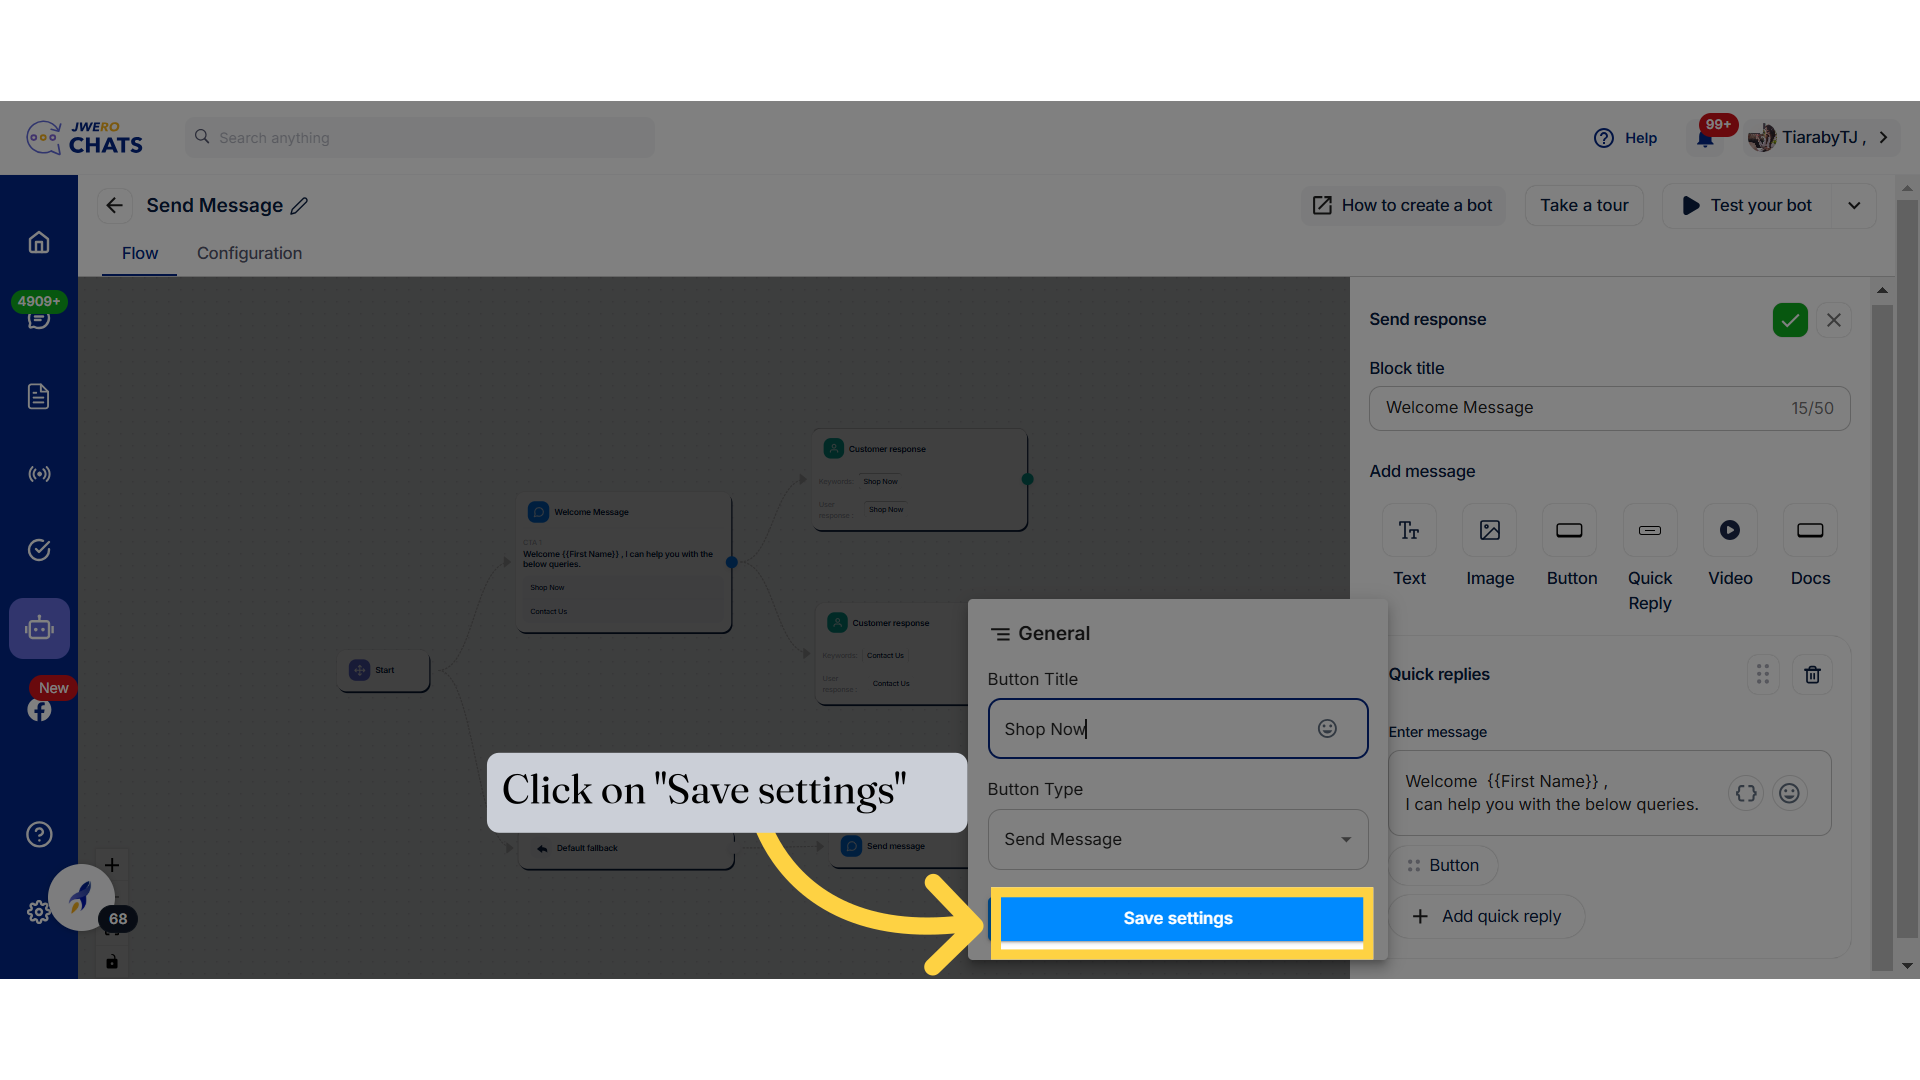
29. Click "Save settings"
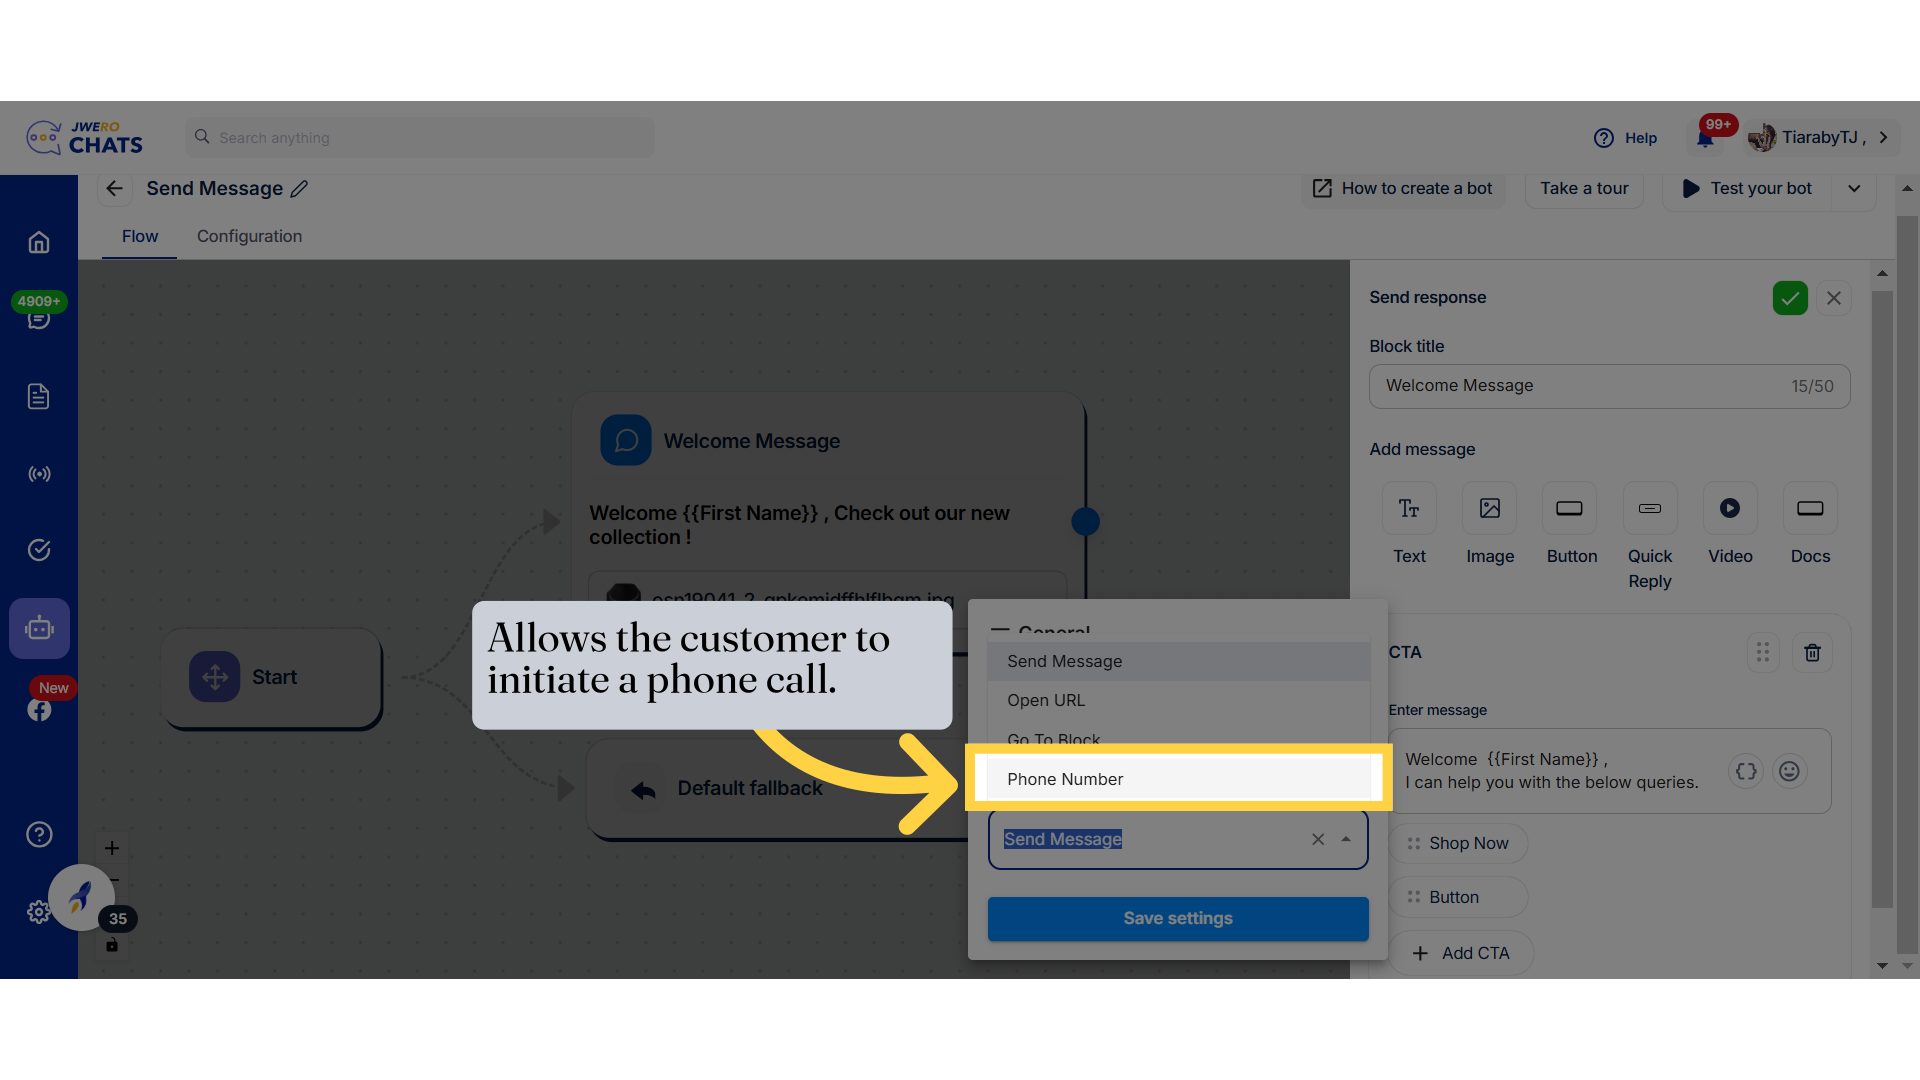
32. Allows the customer to initiate a phone call.
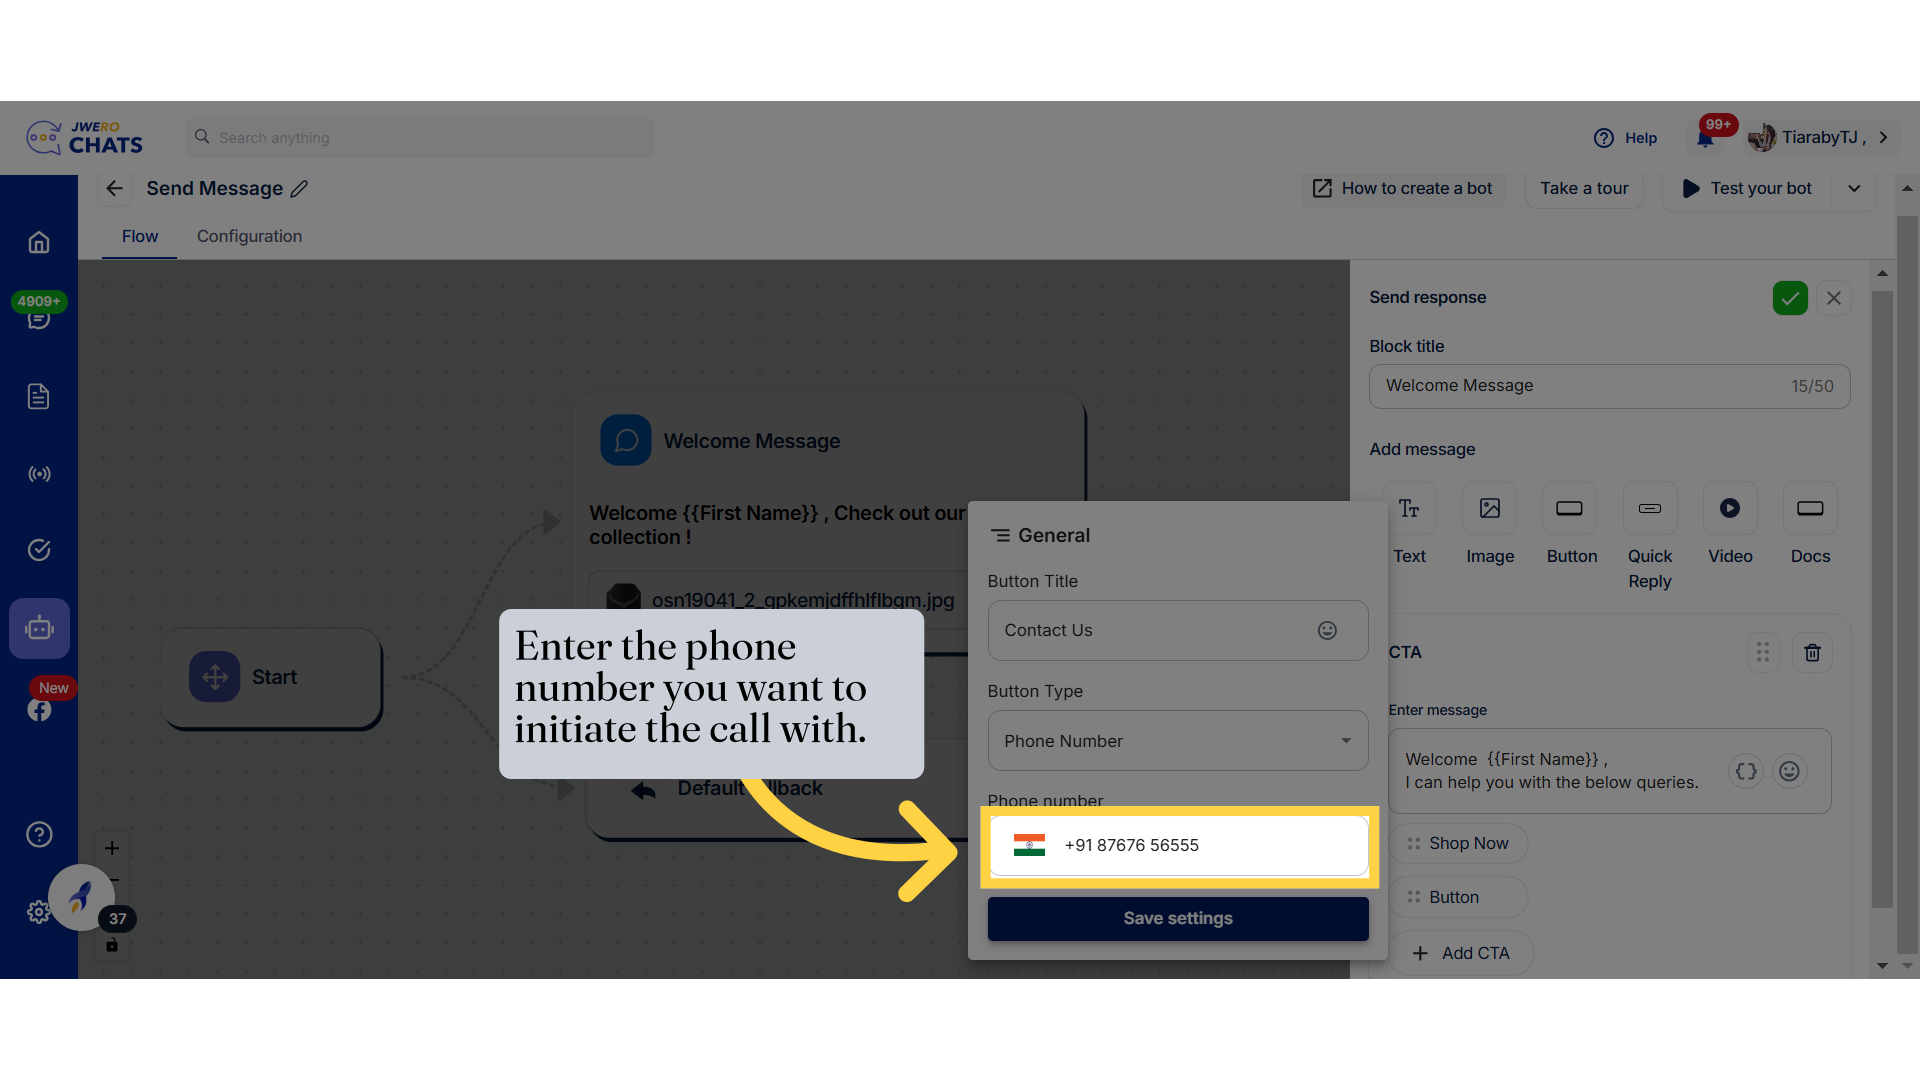
33. Enter the phone number you want to initiate the call with.
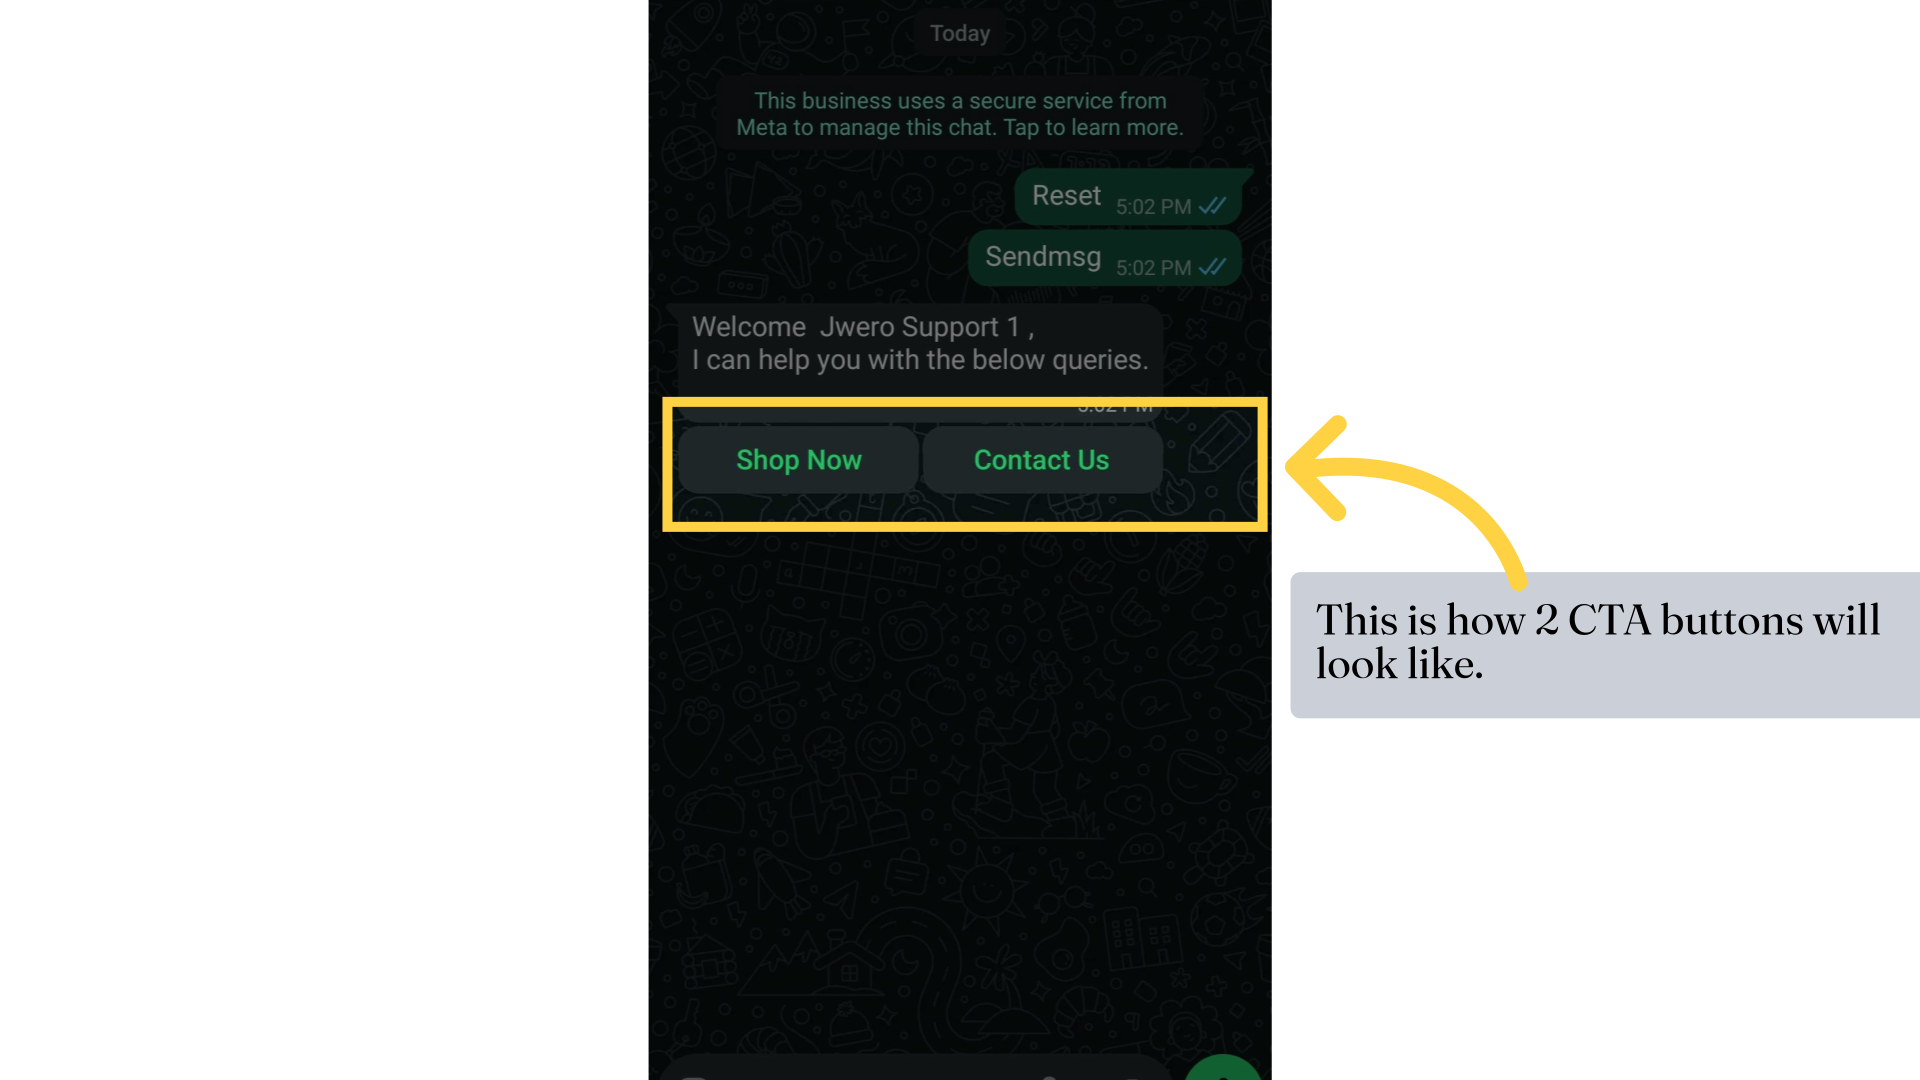
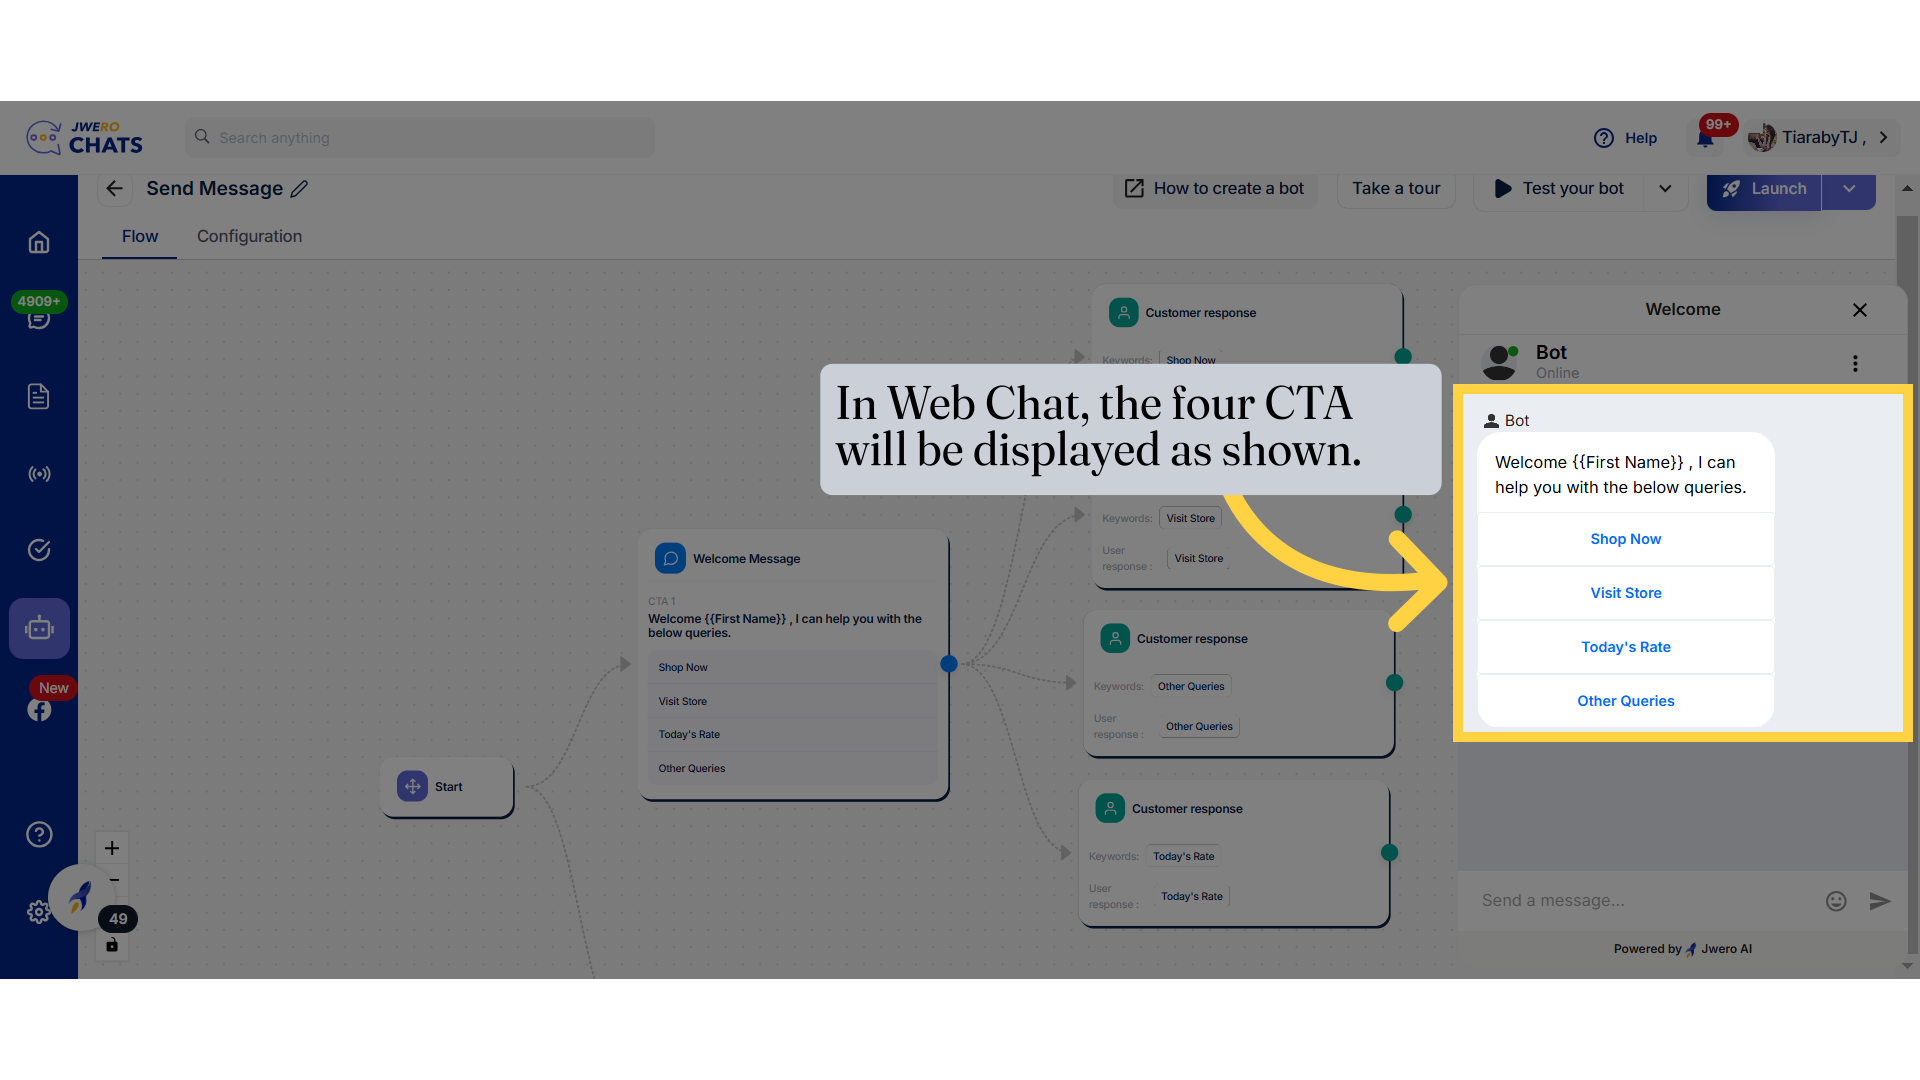
38. In Web Chat, the four CTA will be displayed as shown.
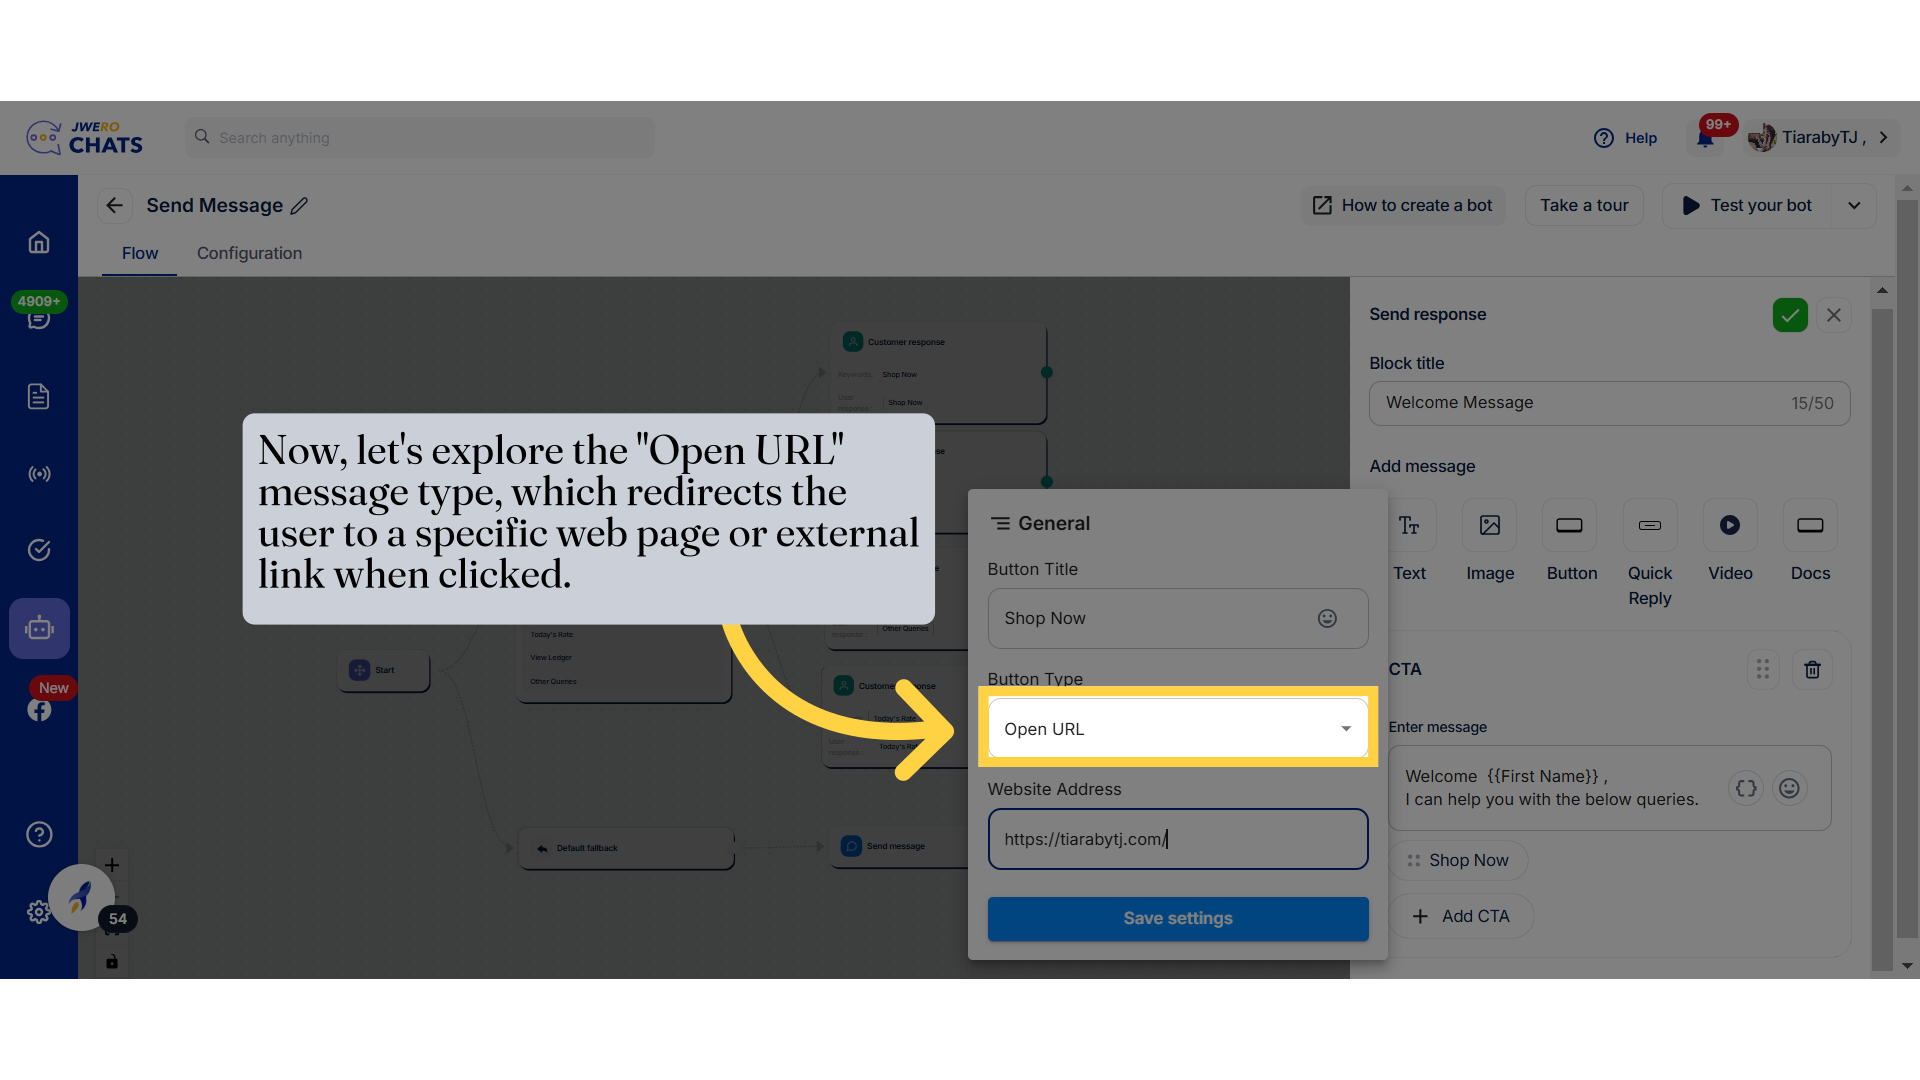
39. Now, let's explore the "Open URL" message type, which redirects the user to a specific web page or external link when clicked.
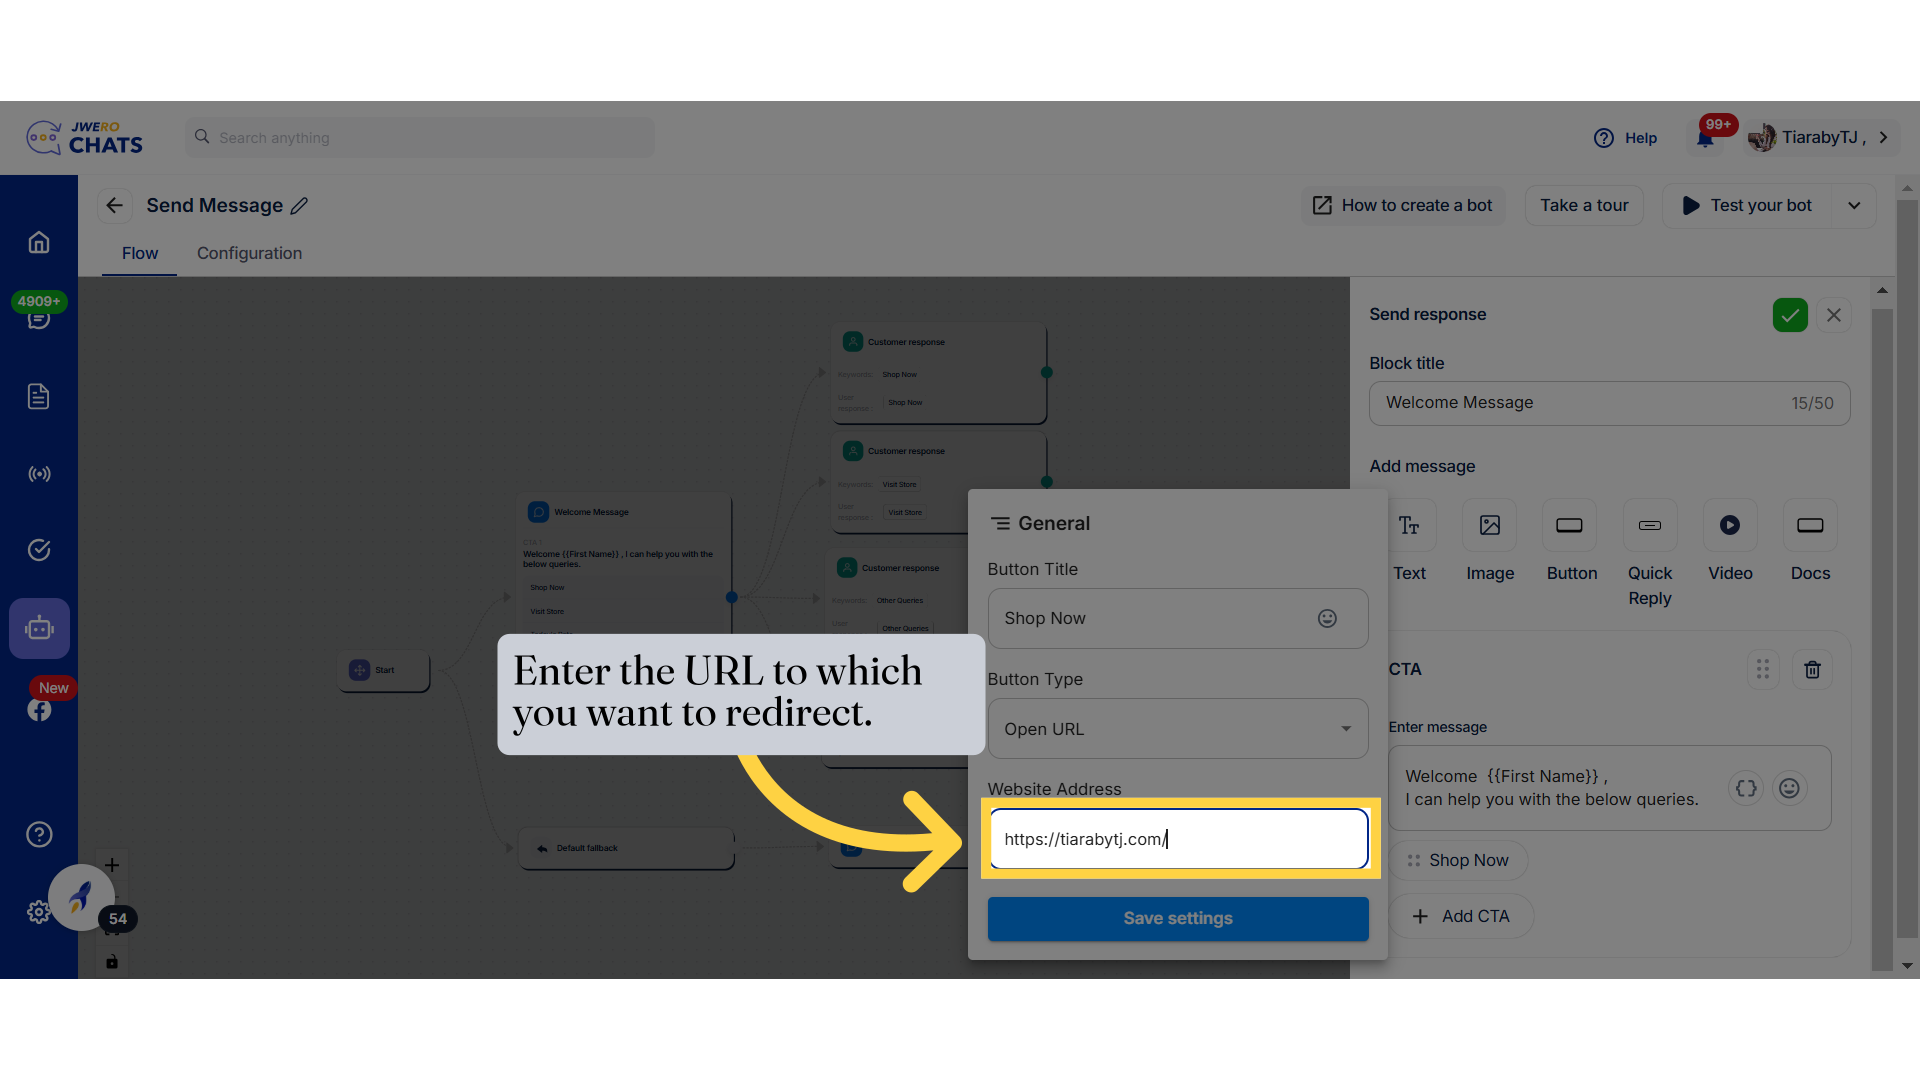
40. Enter the URL to which you want to redirect.
41. Click on "Save settings"
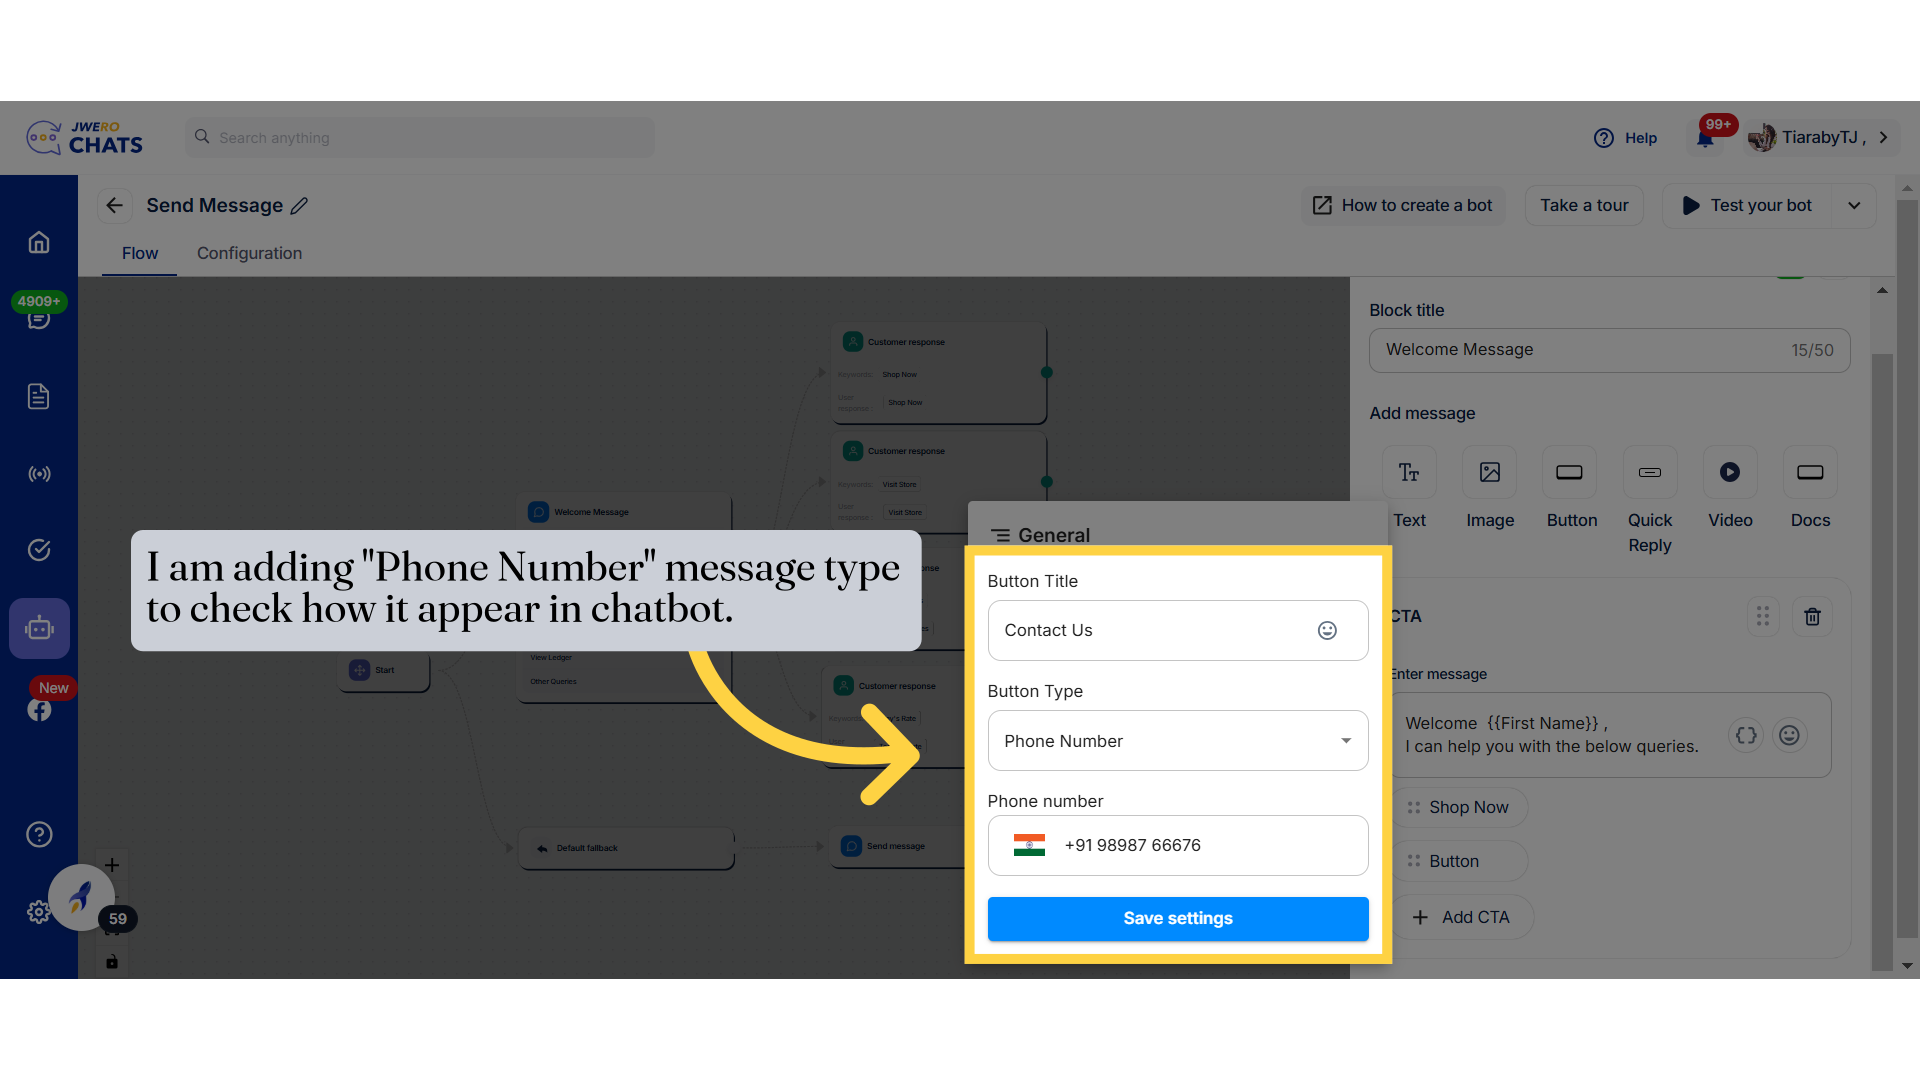
42. I am adding "Phone Number" message type to check how it appear in chatbot.
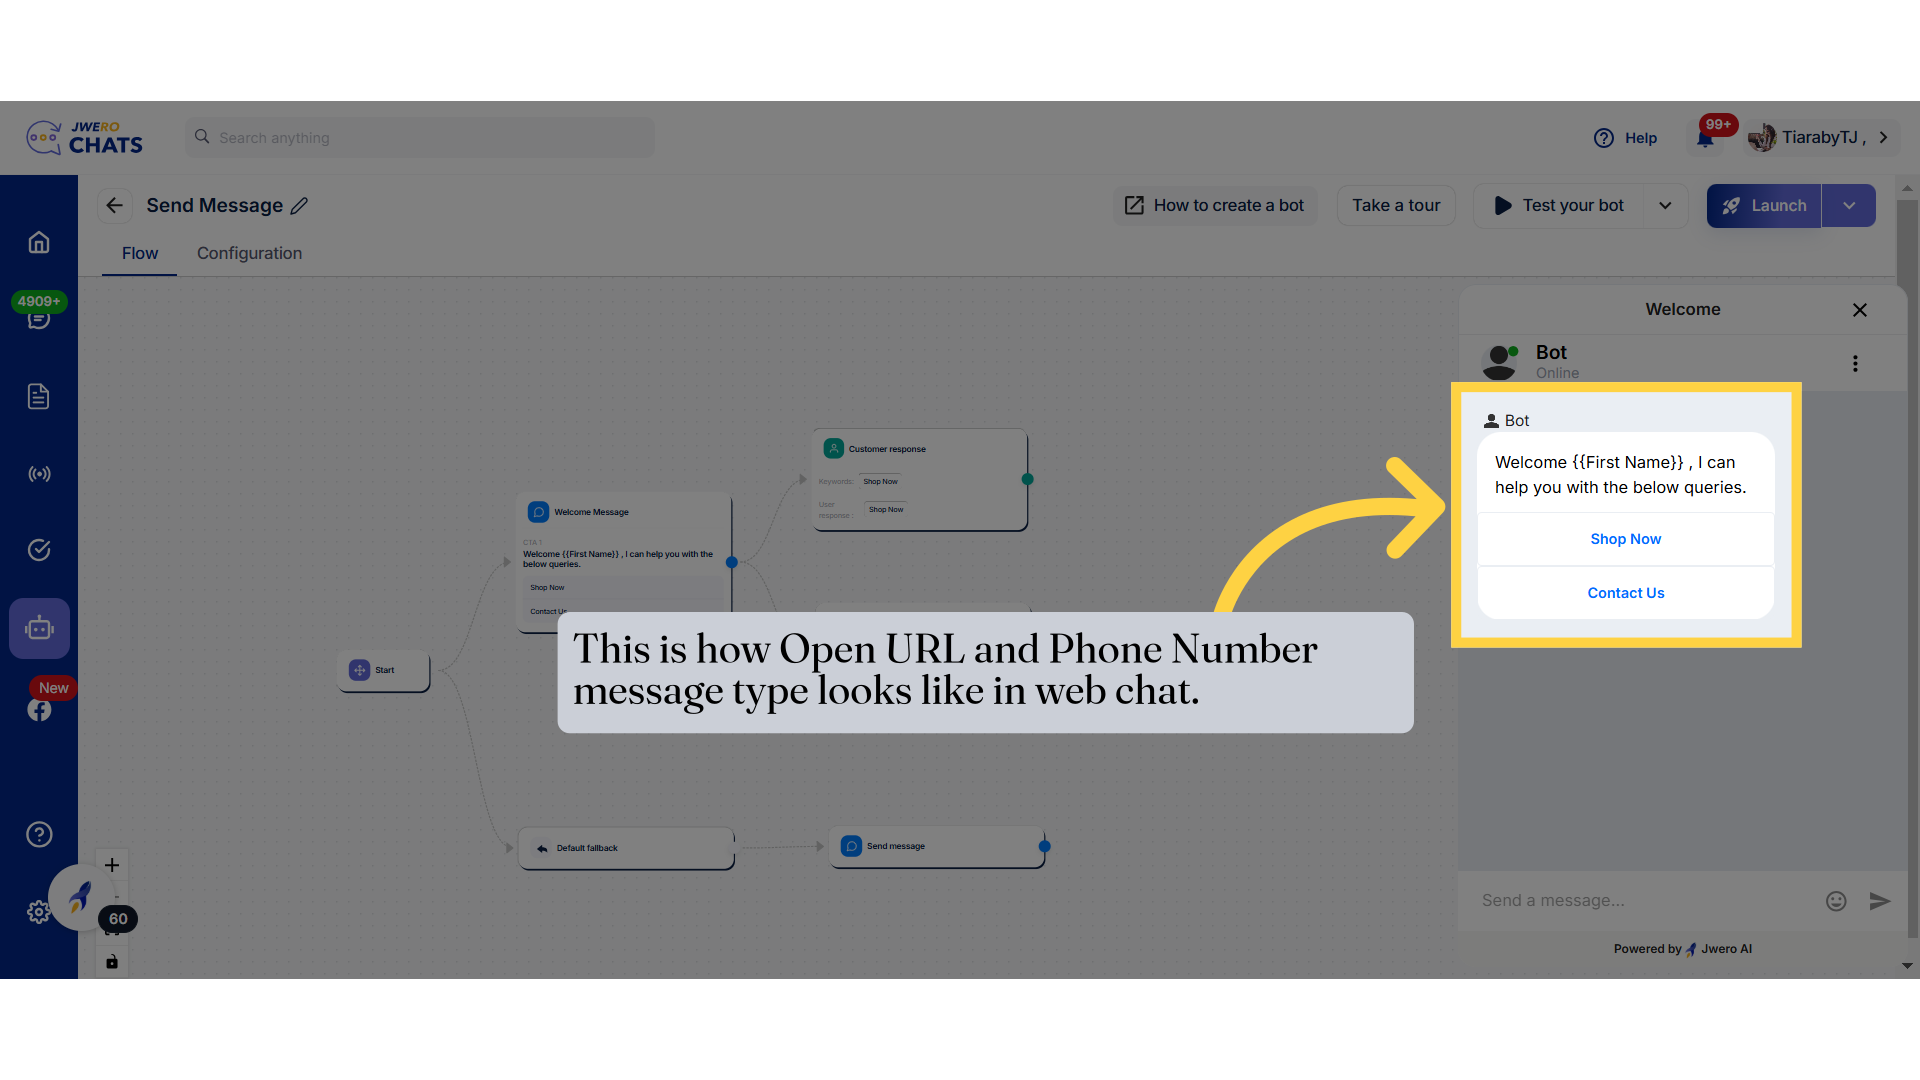
43. This is how Open URL and Phone Number message type looks like in web chat.
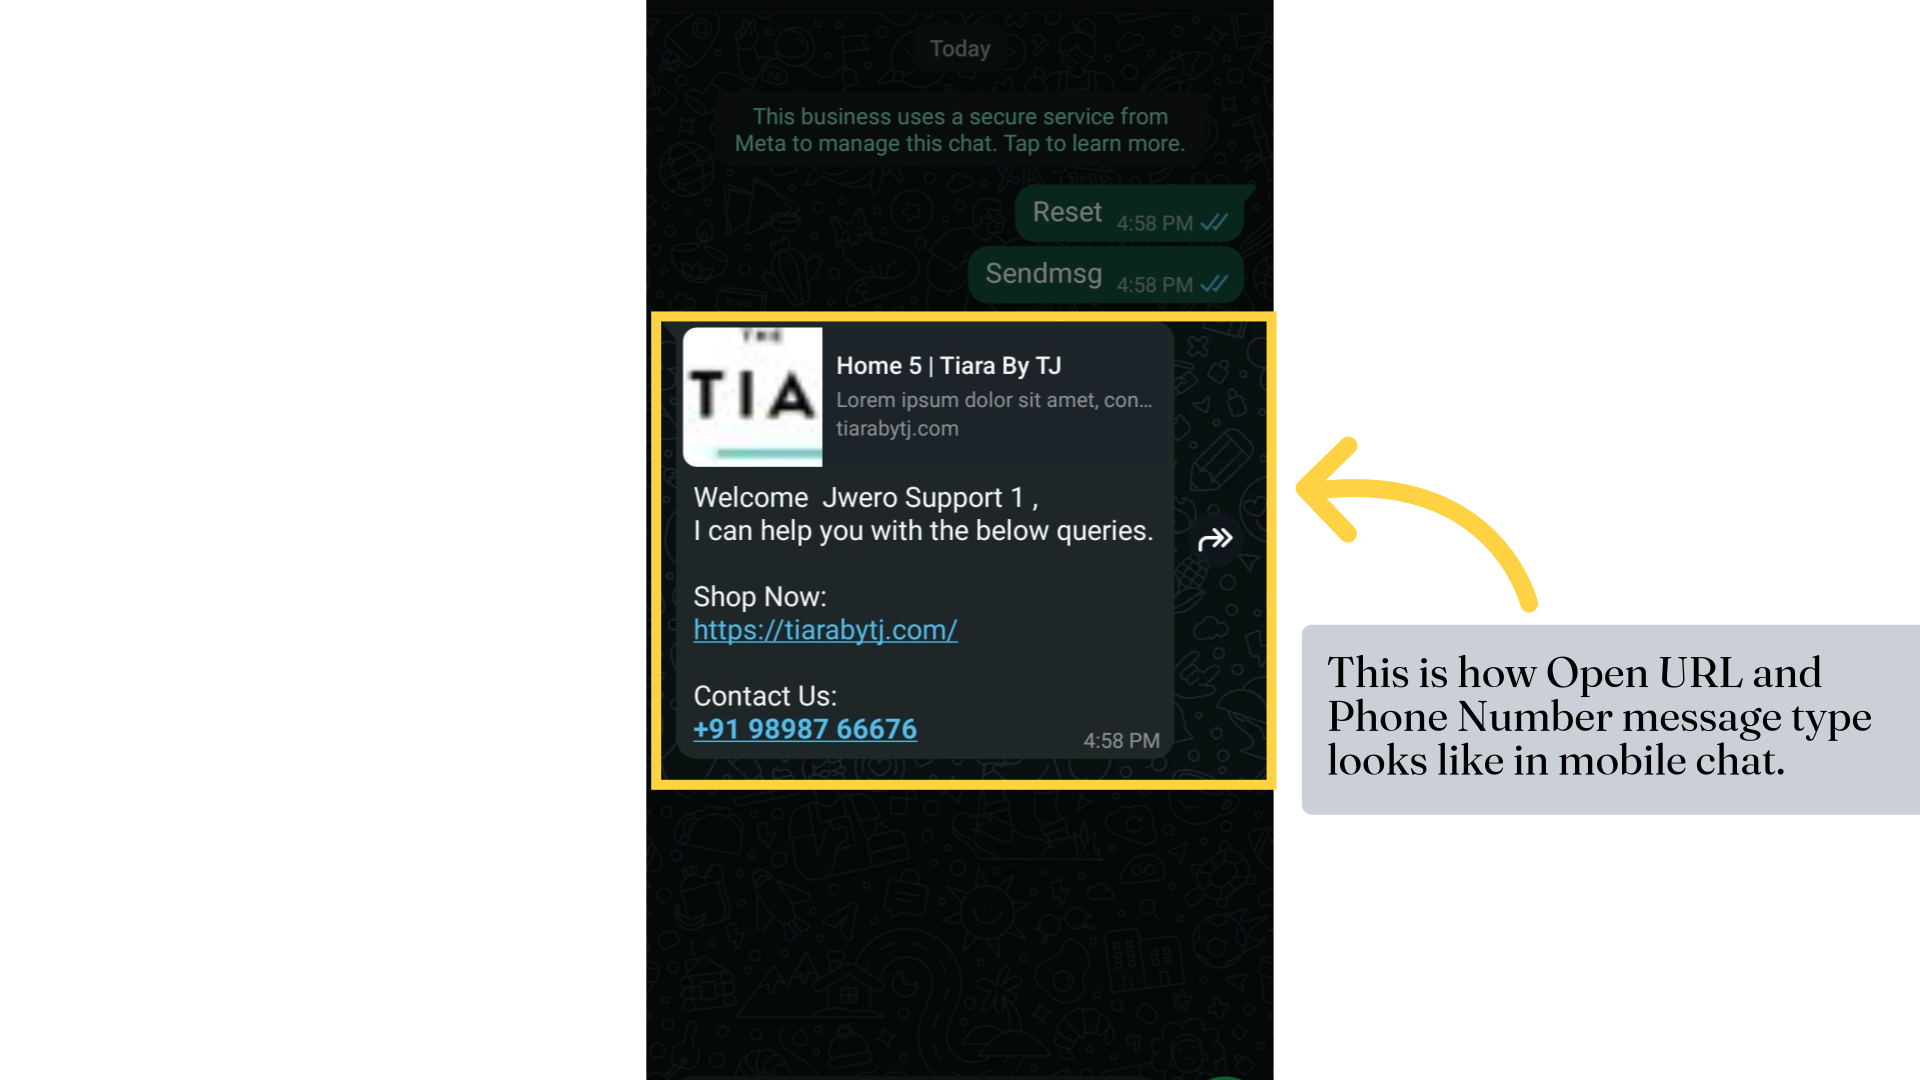
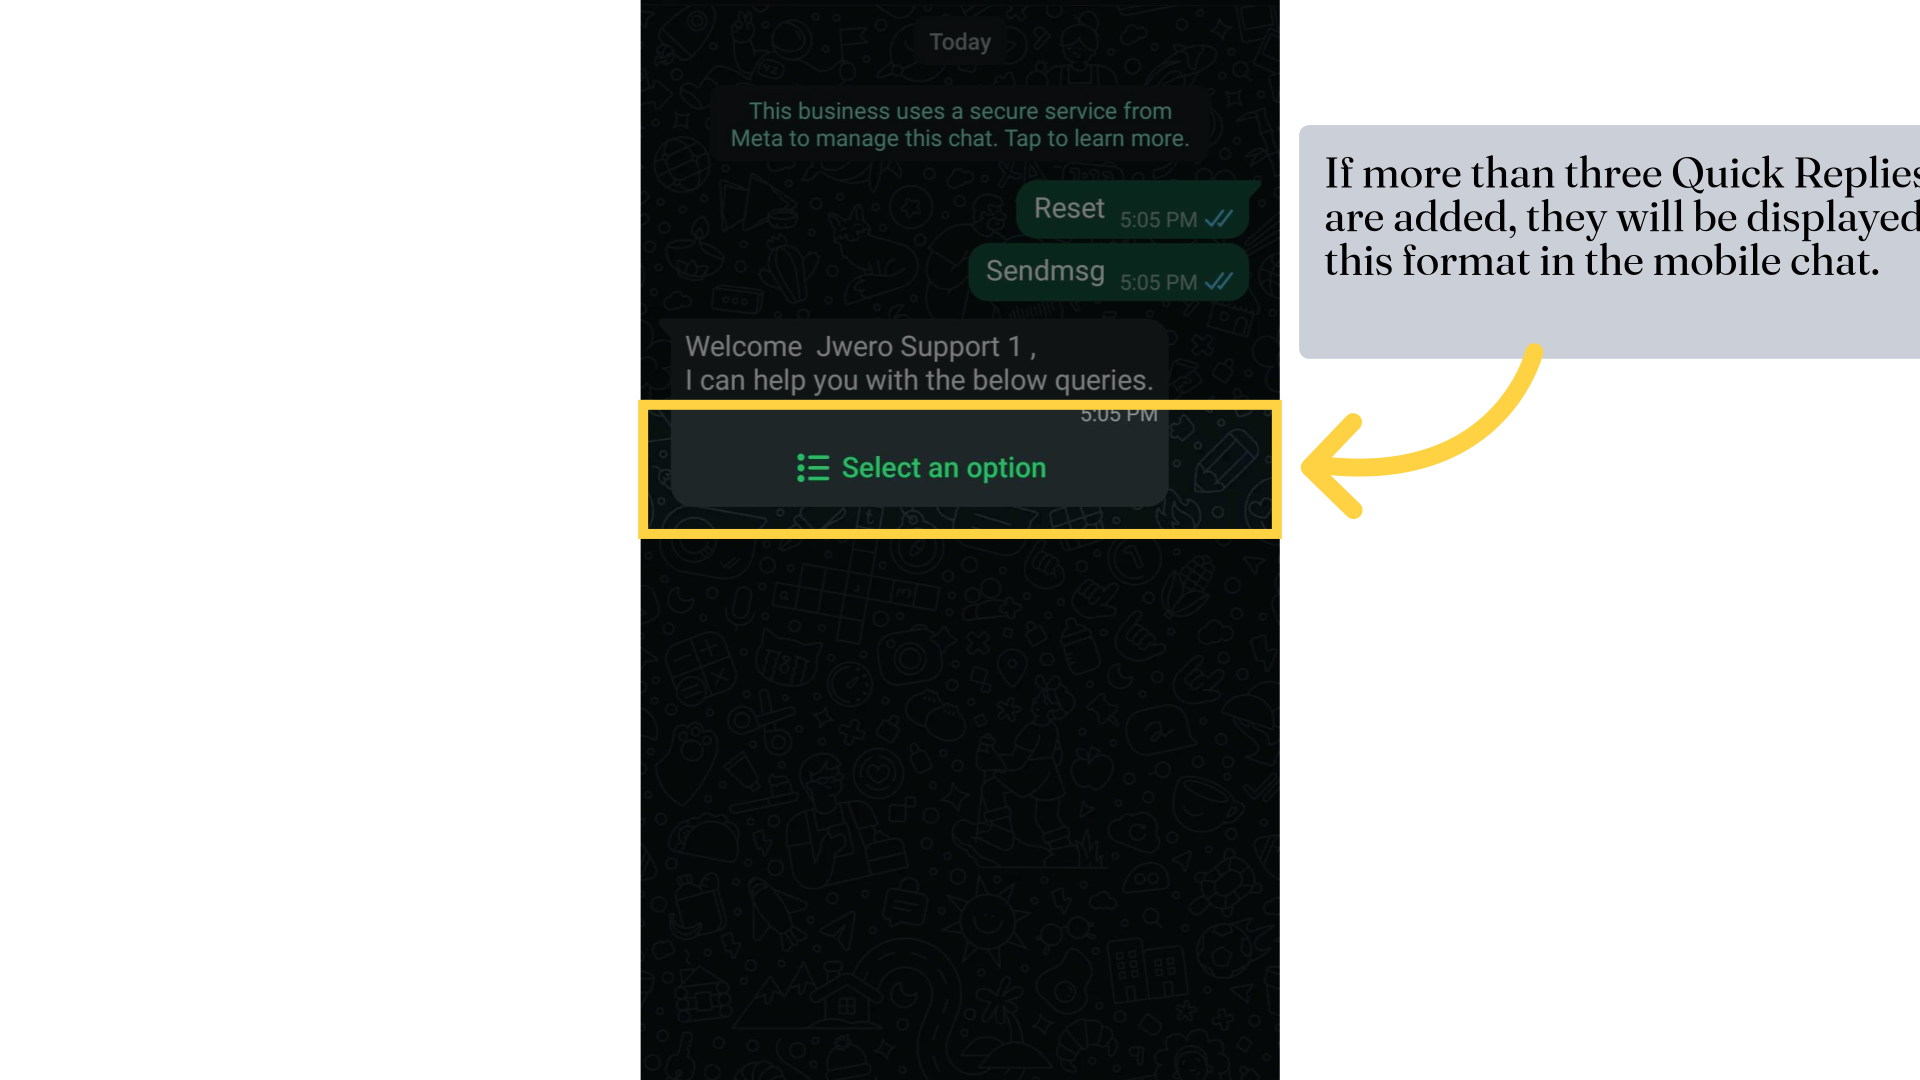
44. This is how Open URL and Phone Number message type looks like in mobile chat.
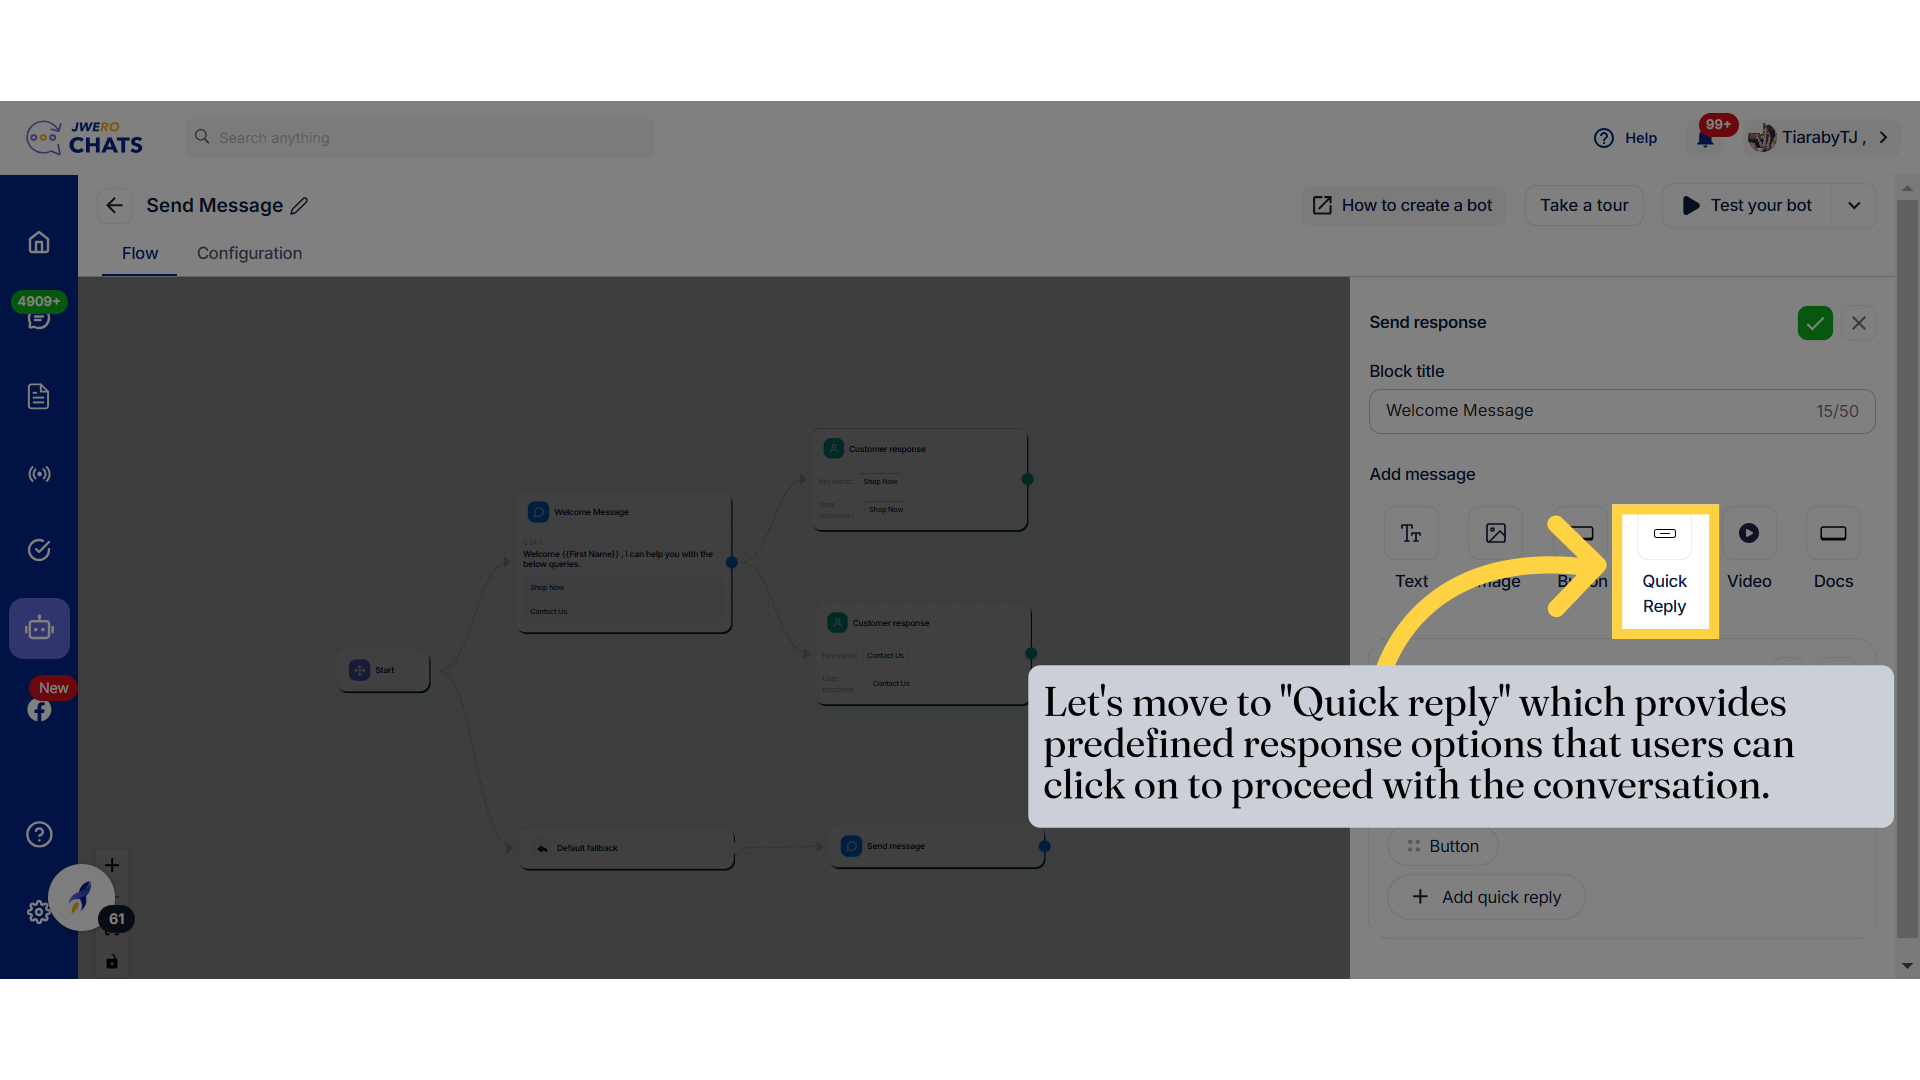
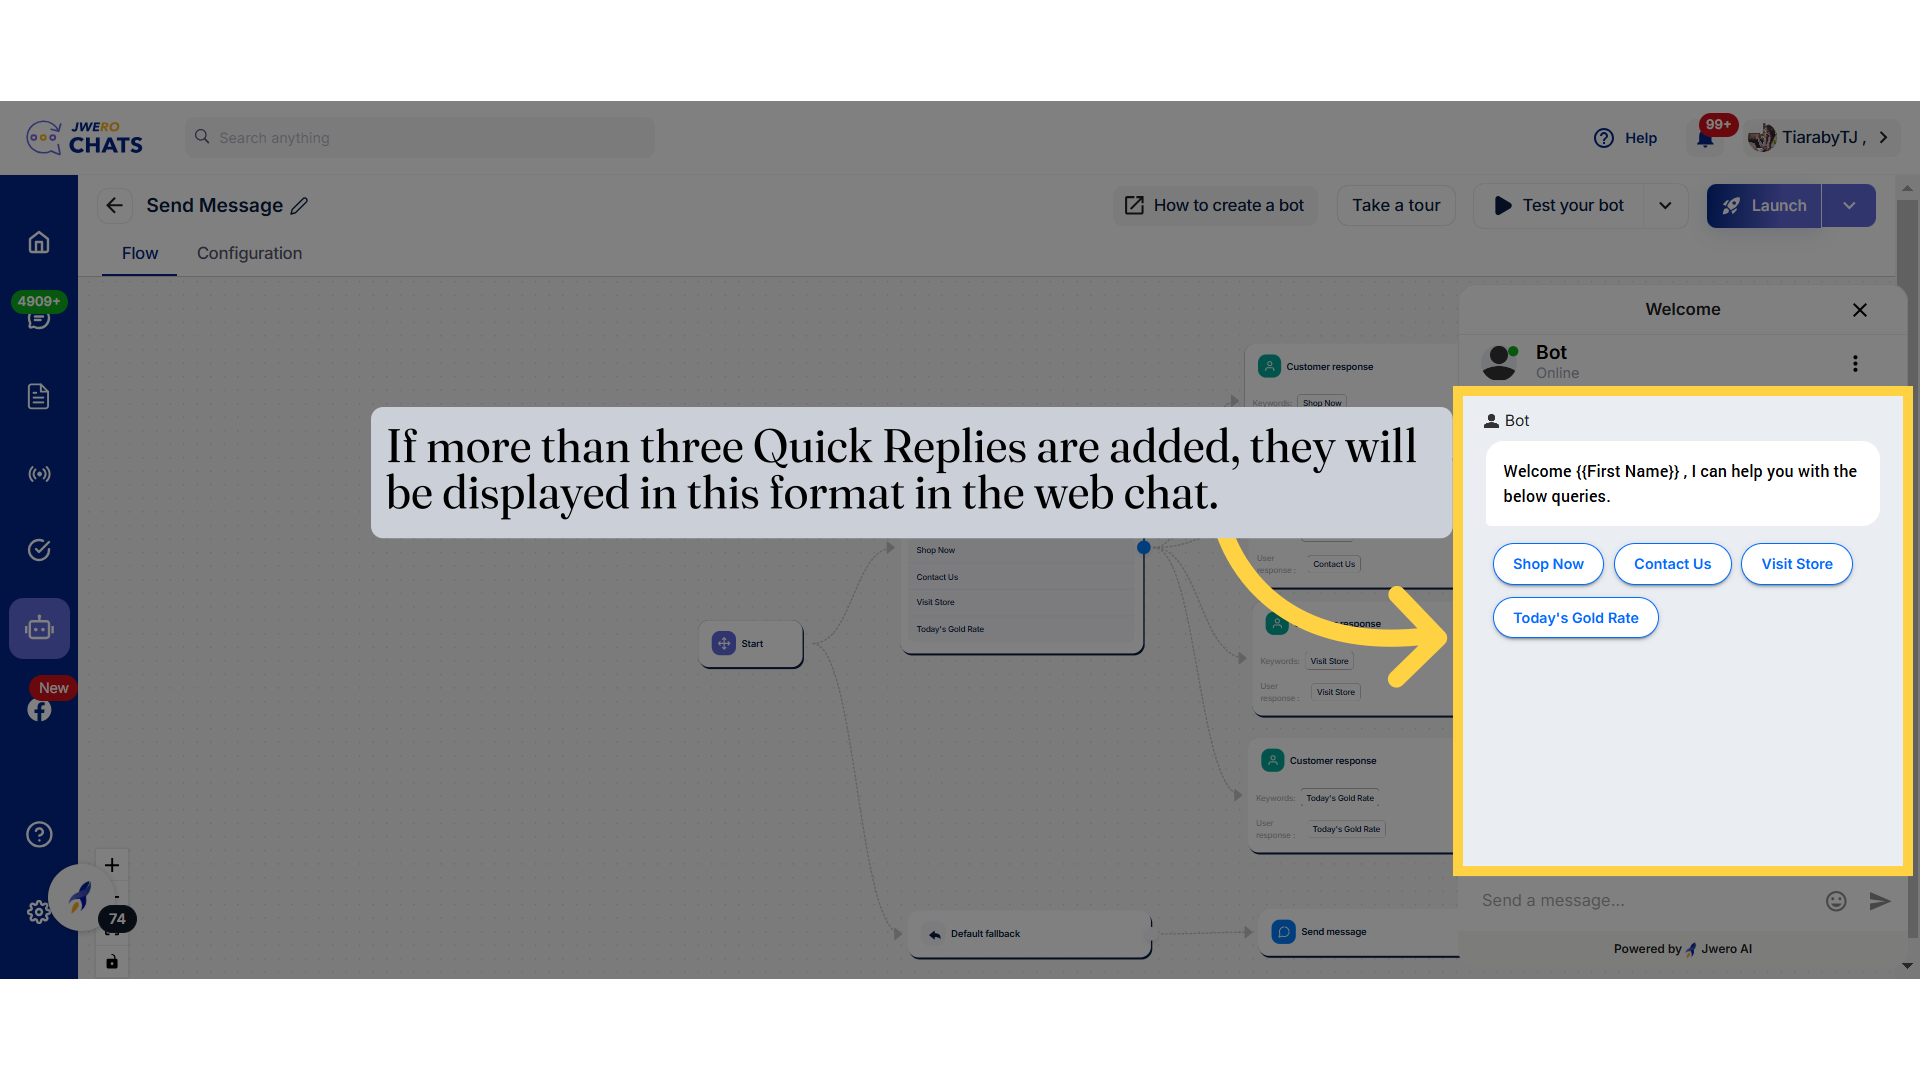
45. Let's move to "Quick reply" which provides predefined response options that users can click on to proceed with the conversation.
46. Enter the text that initiates the interaction or describes the purpose of the buttons.
49. Click on "Save settings"
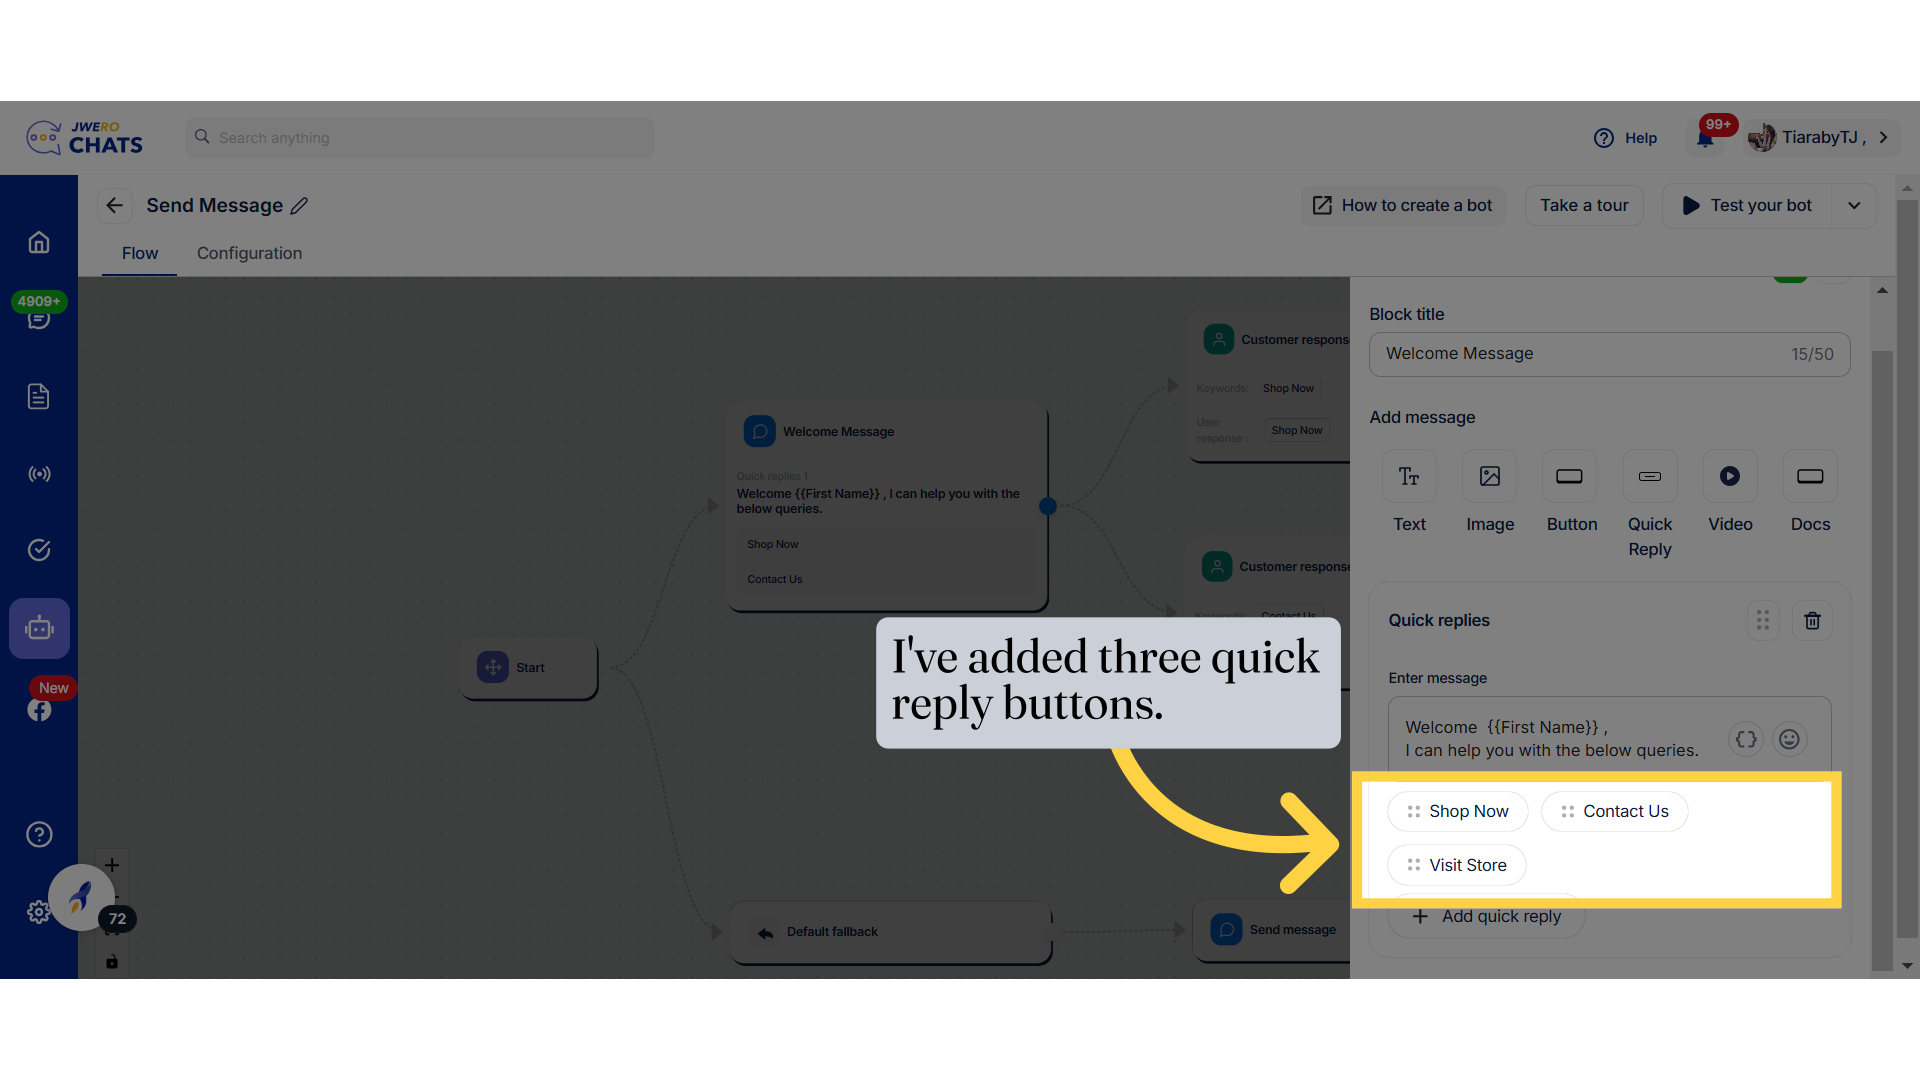
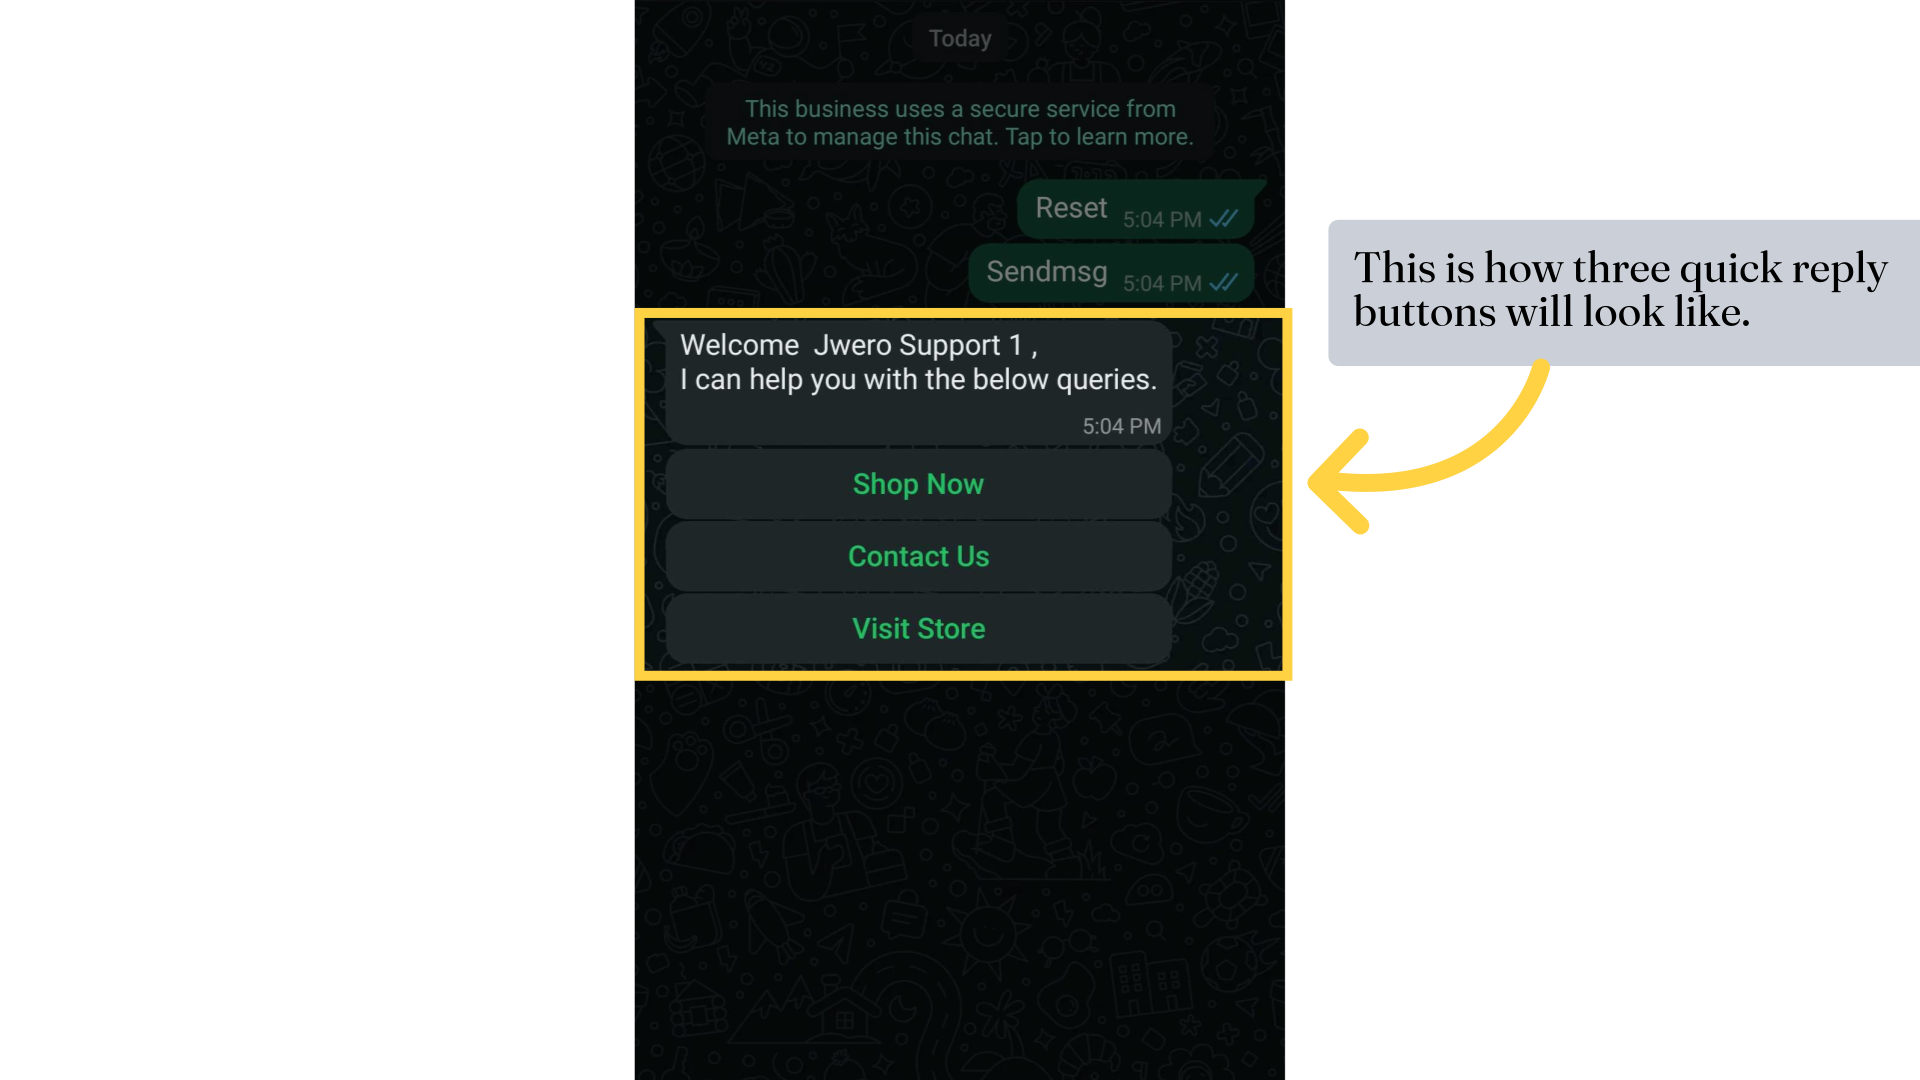
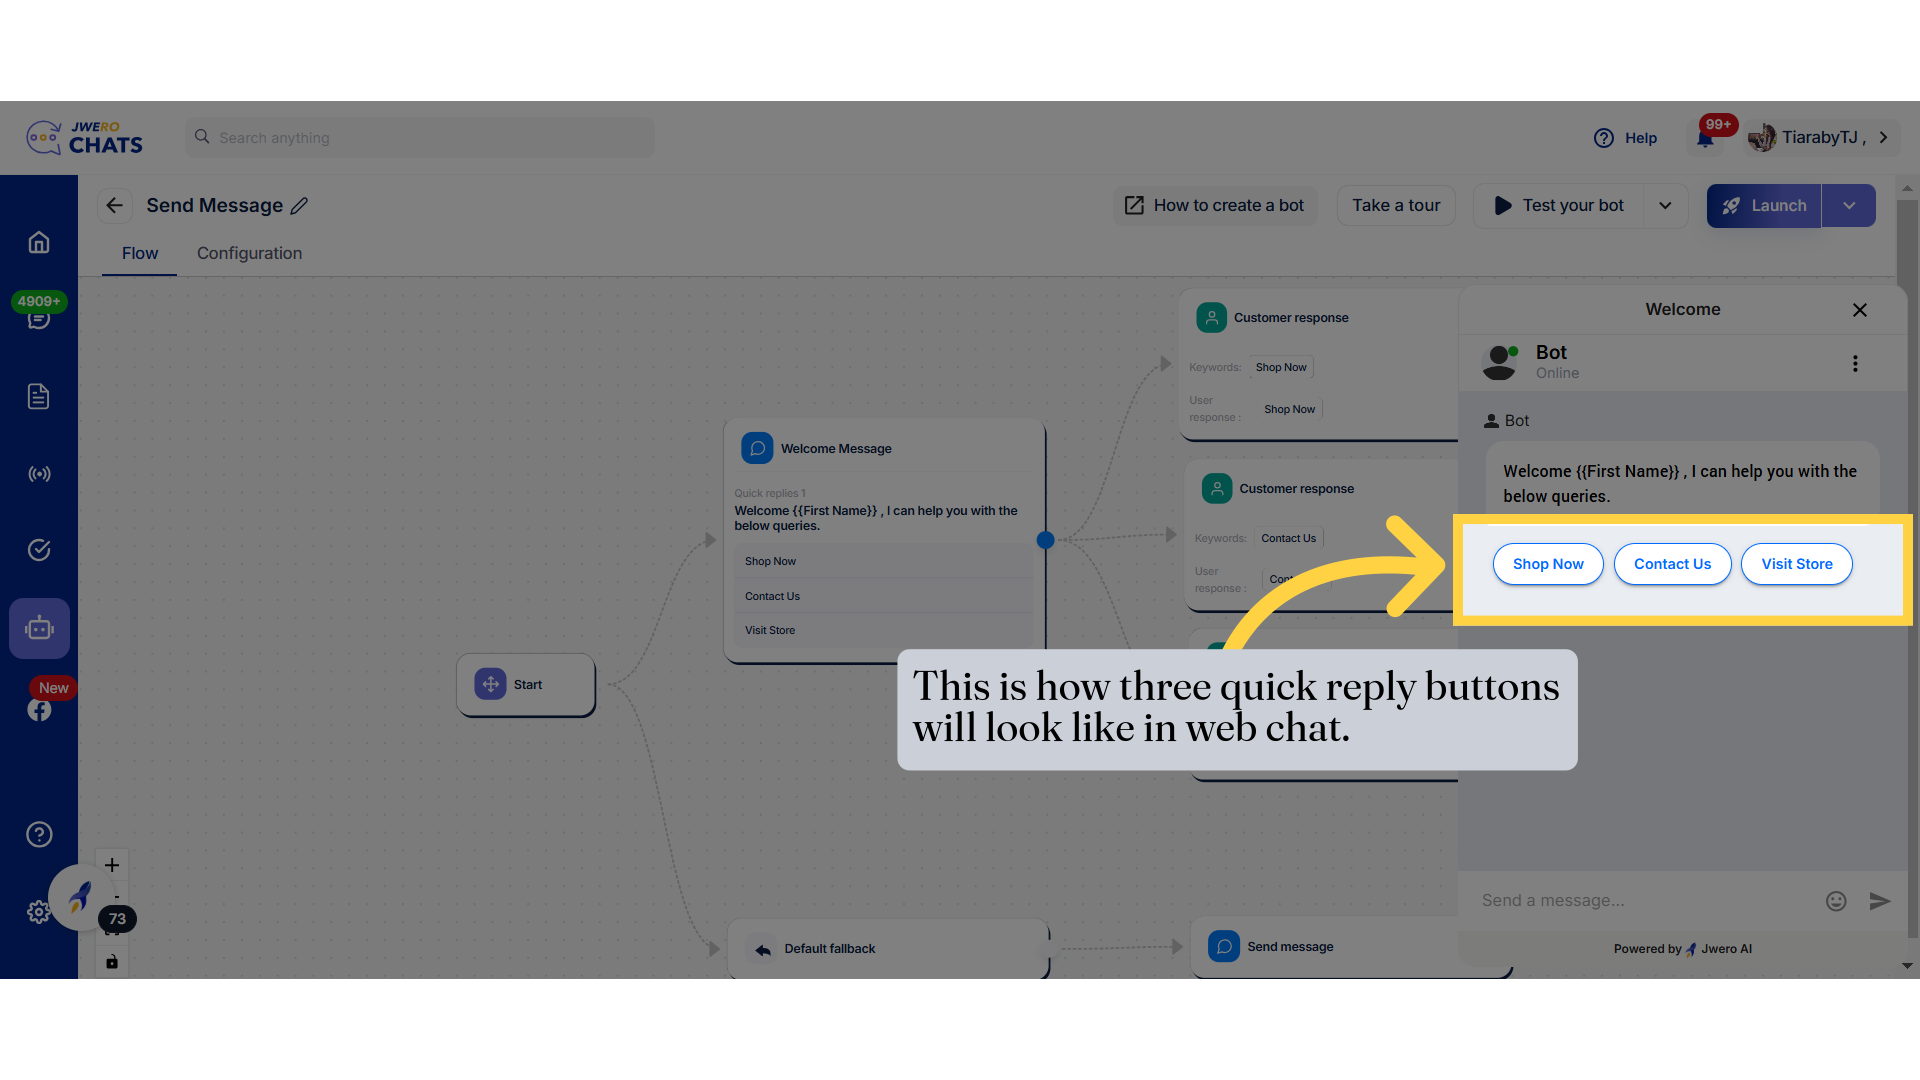
51. This is how adding two "Quick Reply" will look like.
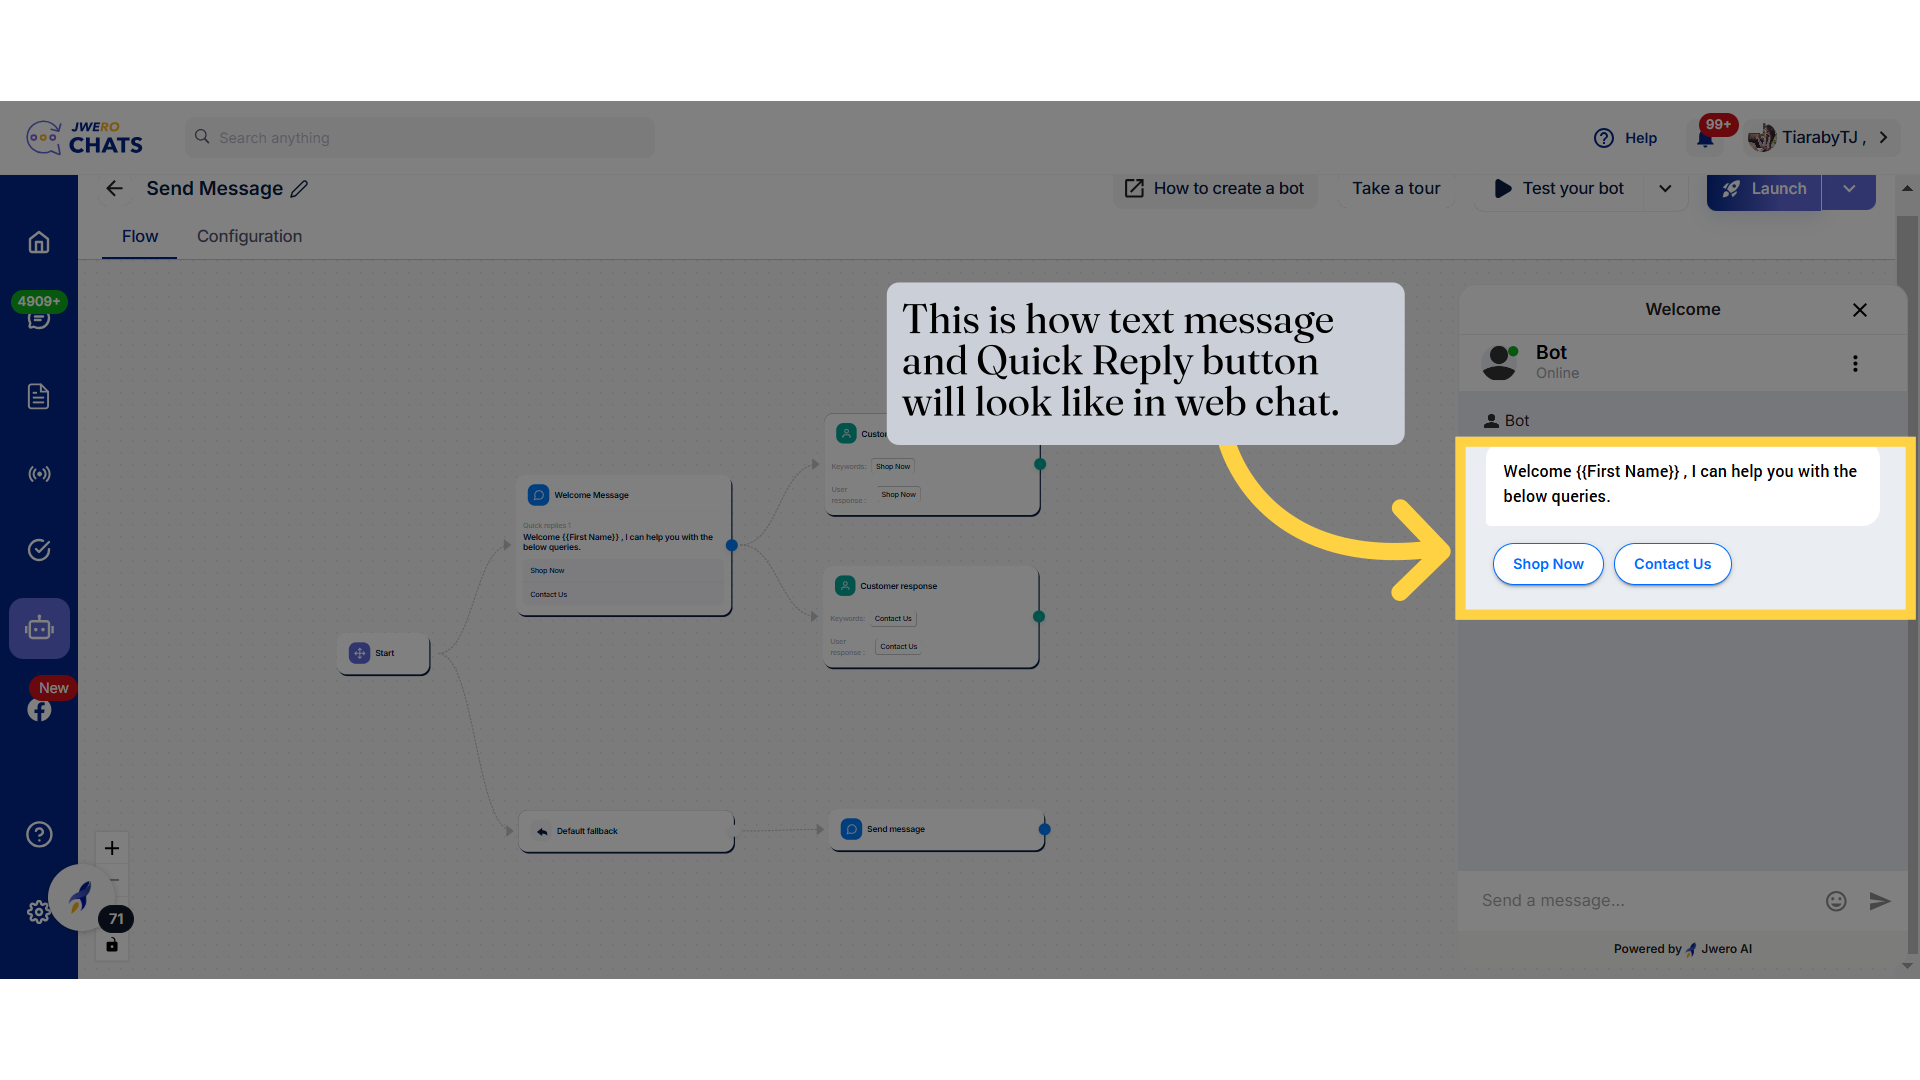
52. This is how text message and Quick Reply button will look like in web chat.
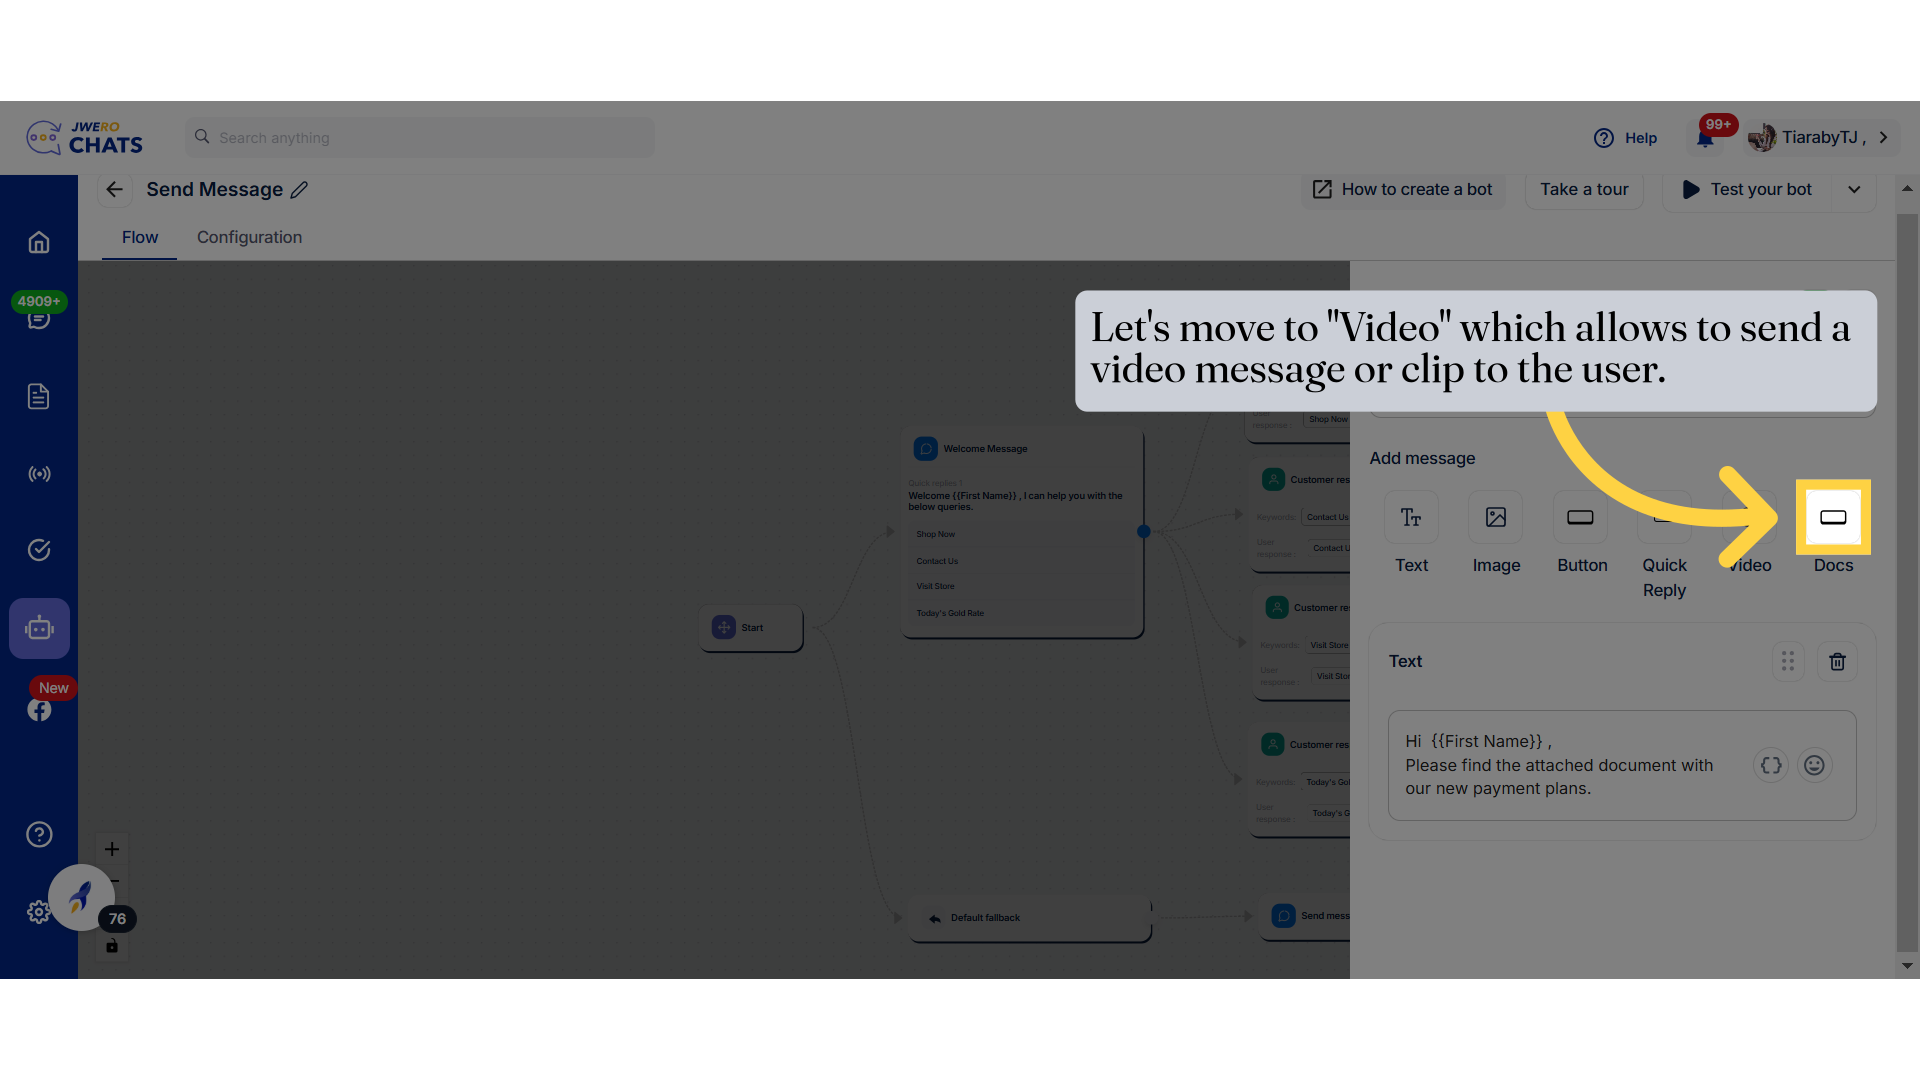
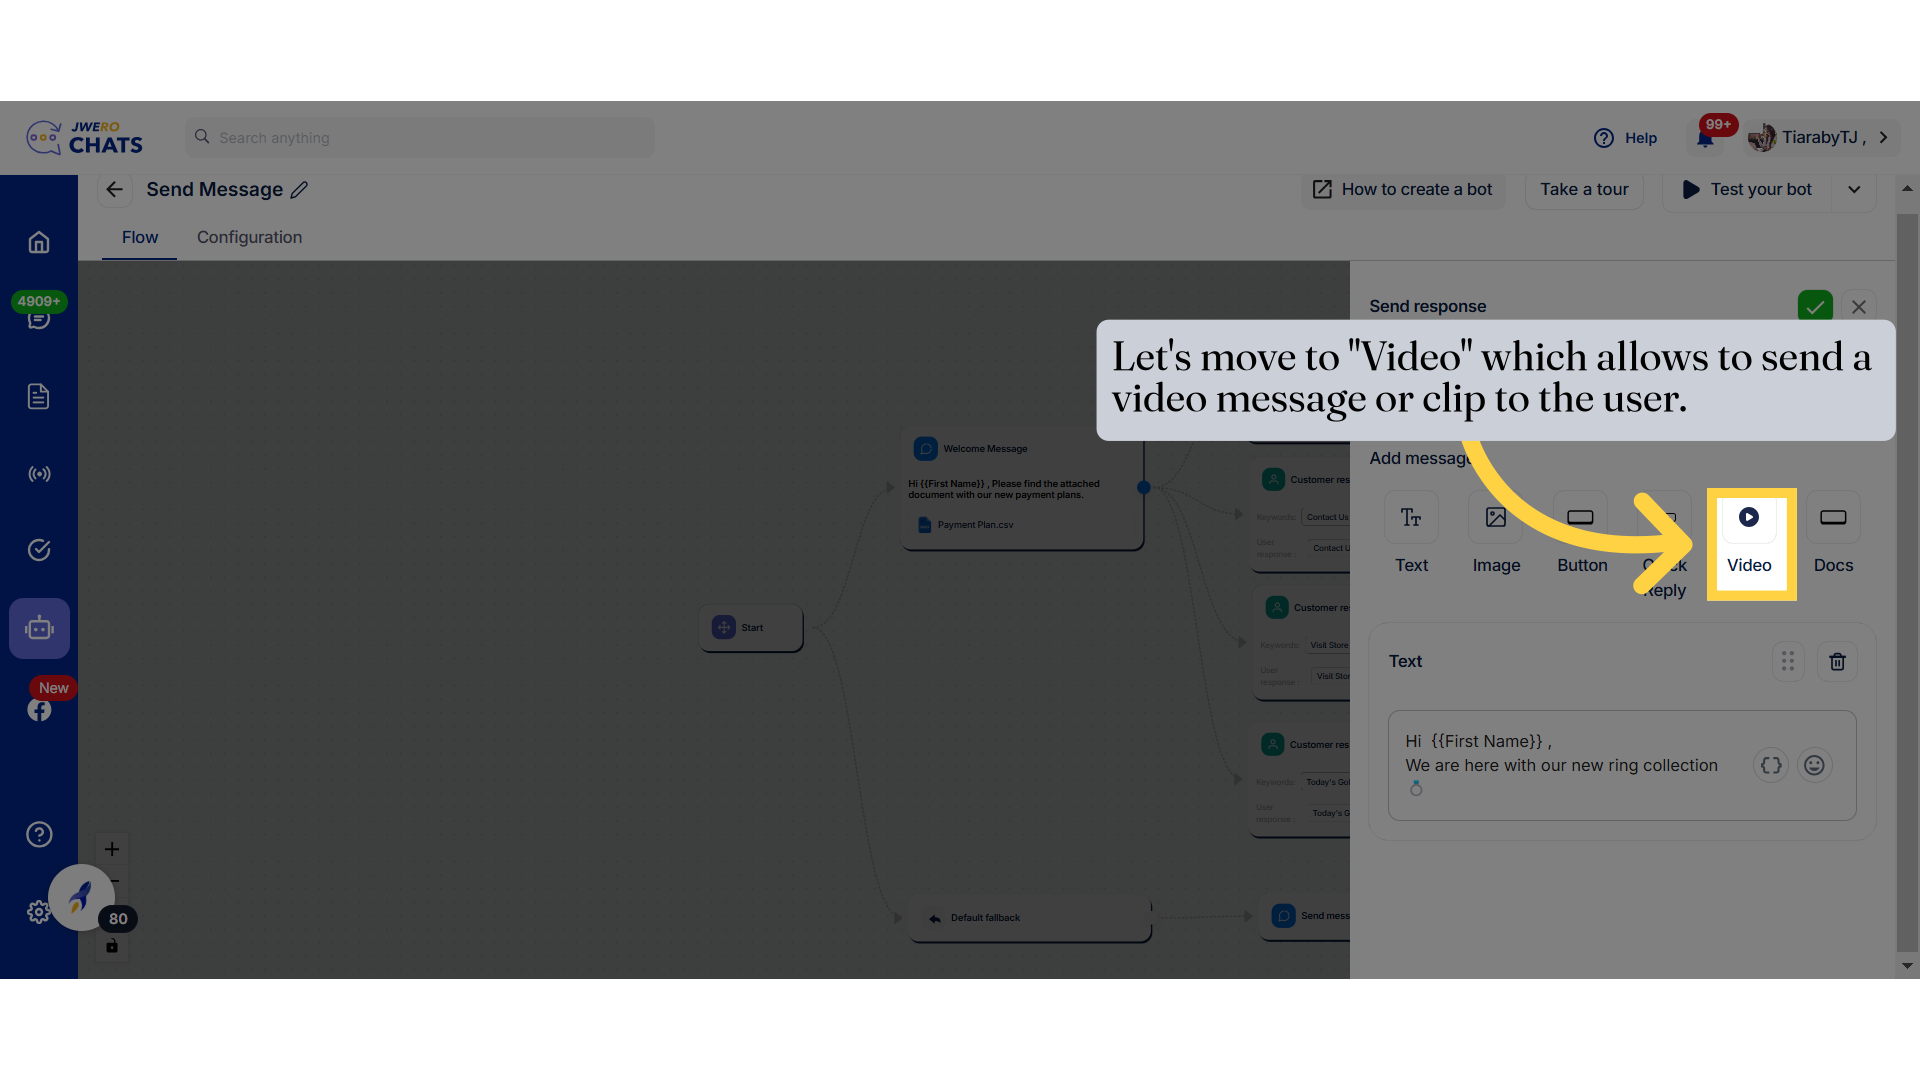
58. Let's move to "Video" which allows to send a video message or clip to the user.
59. Click on "Upload video" to upload the video.
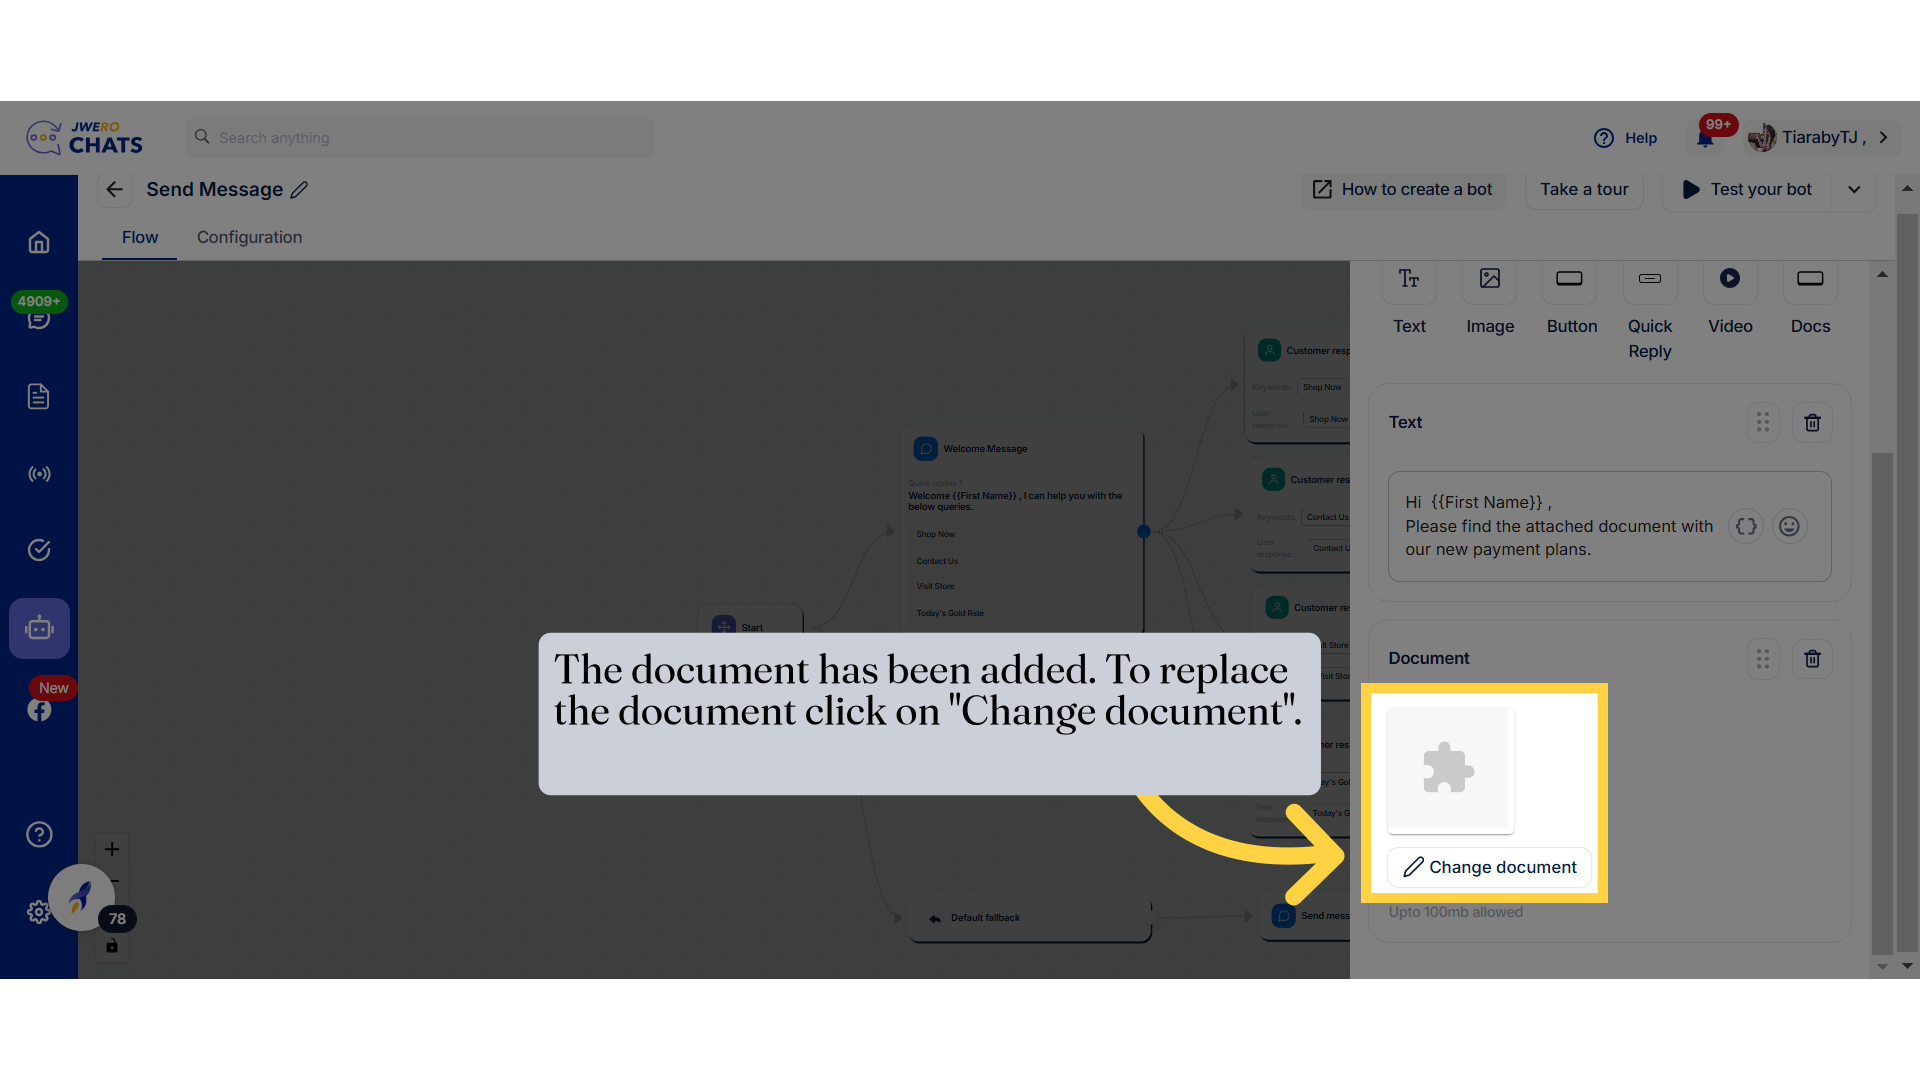
60. The document has been added. To replace the document click on "Change document".
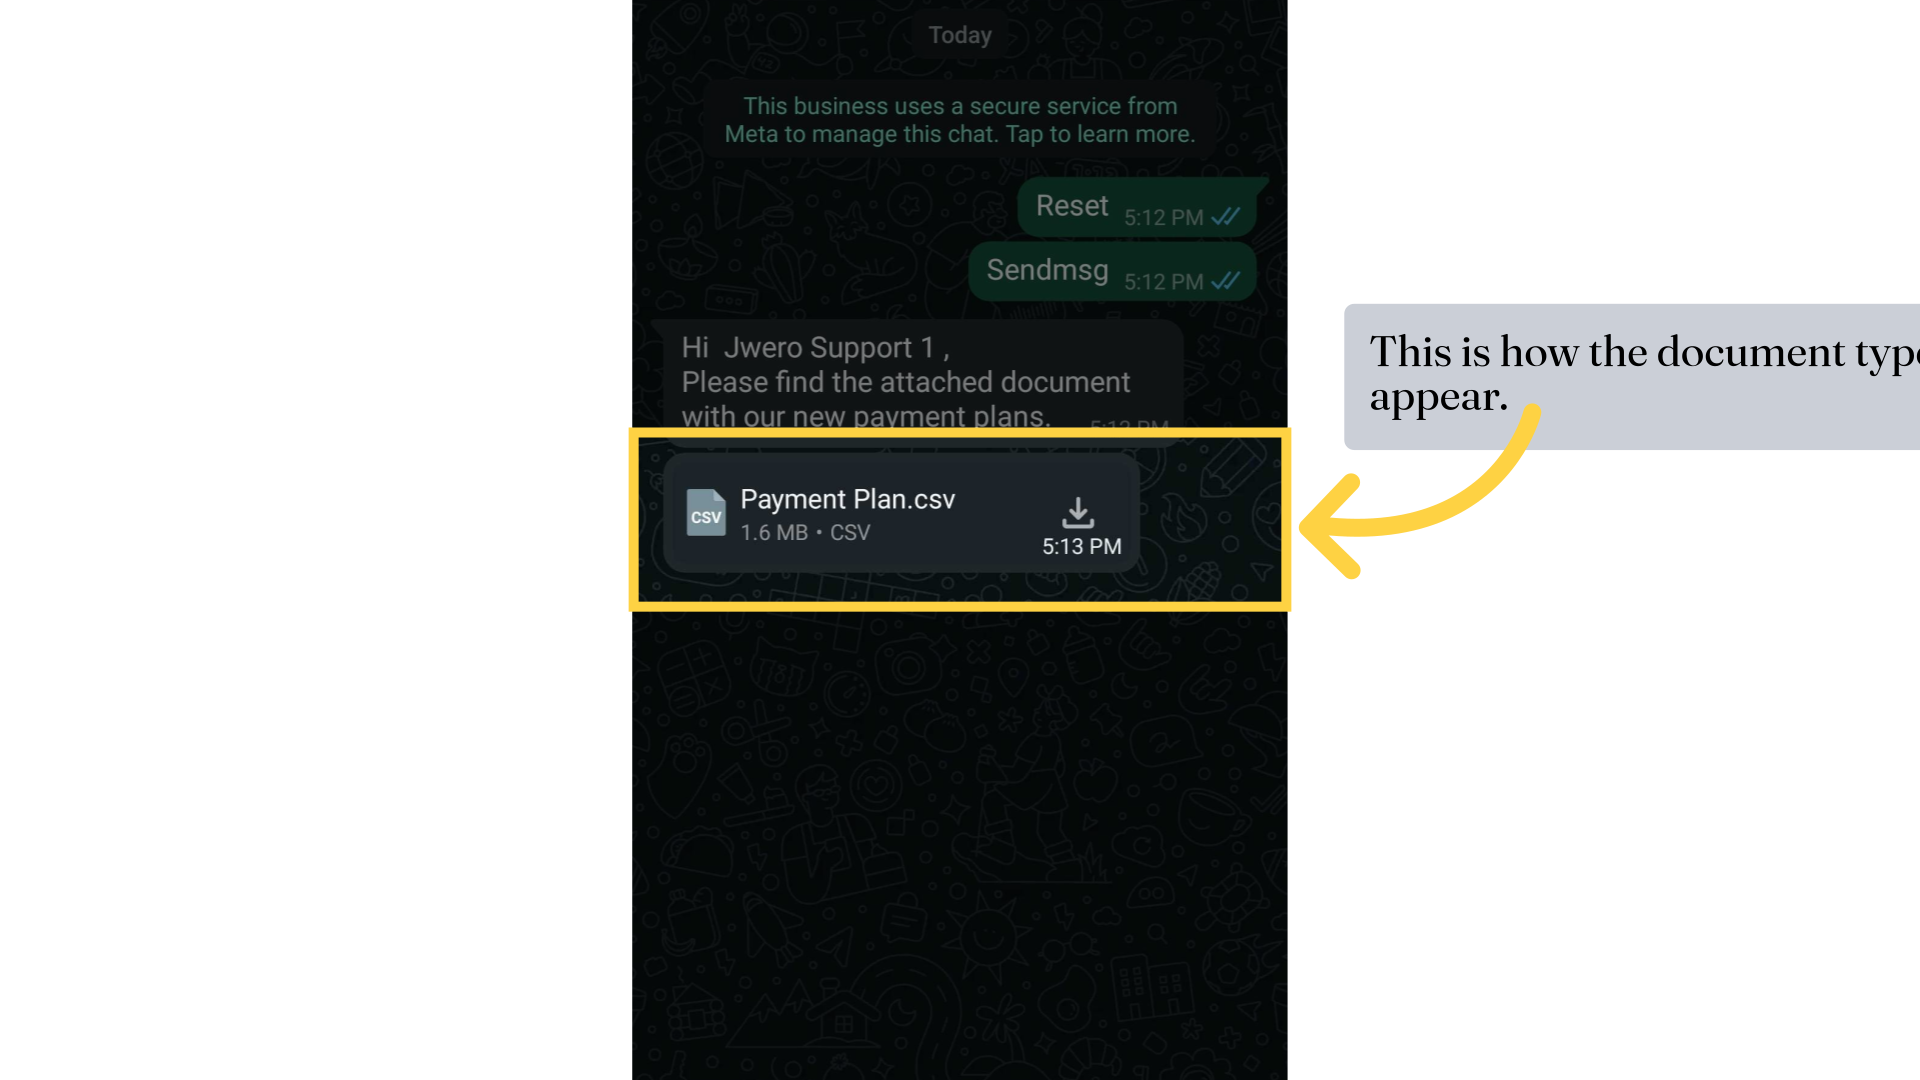
61. This is how the document type will appear.
62. Let's move to "Video" which allows to send a video message or clip to the user.
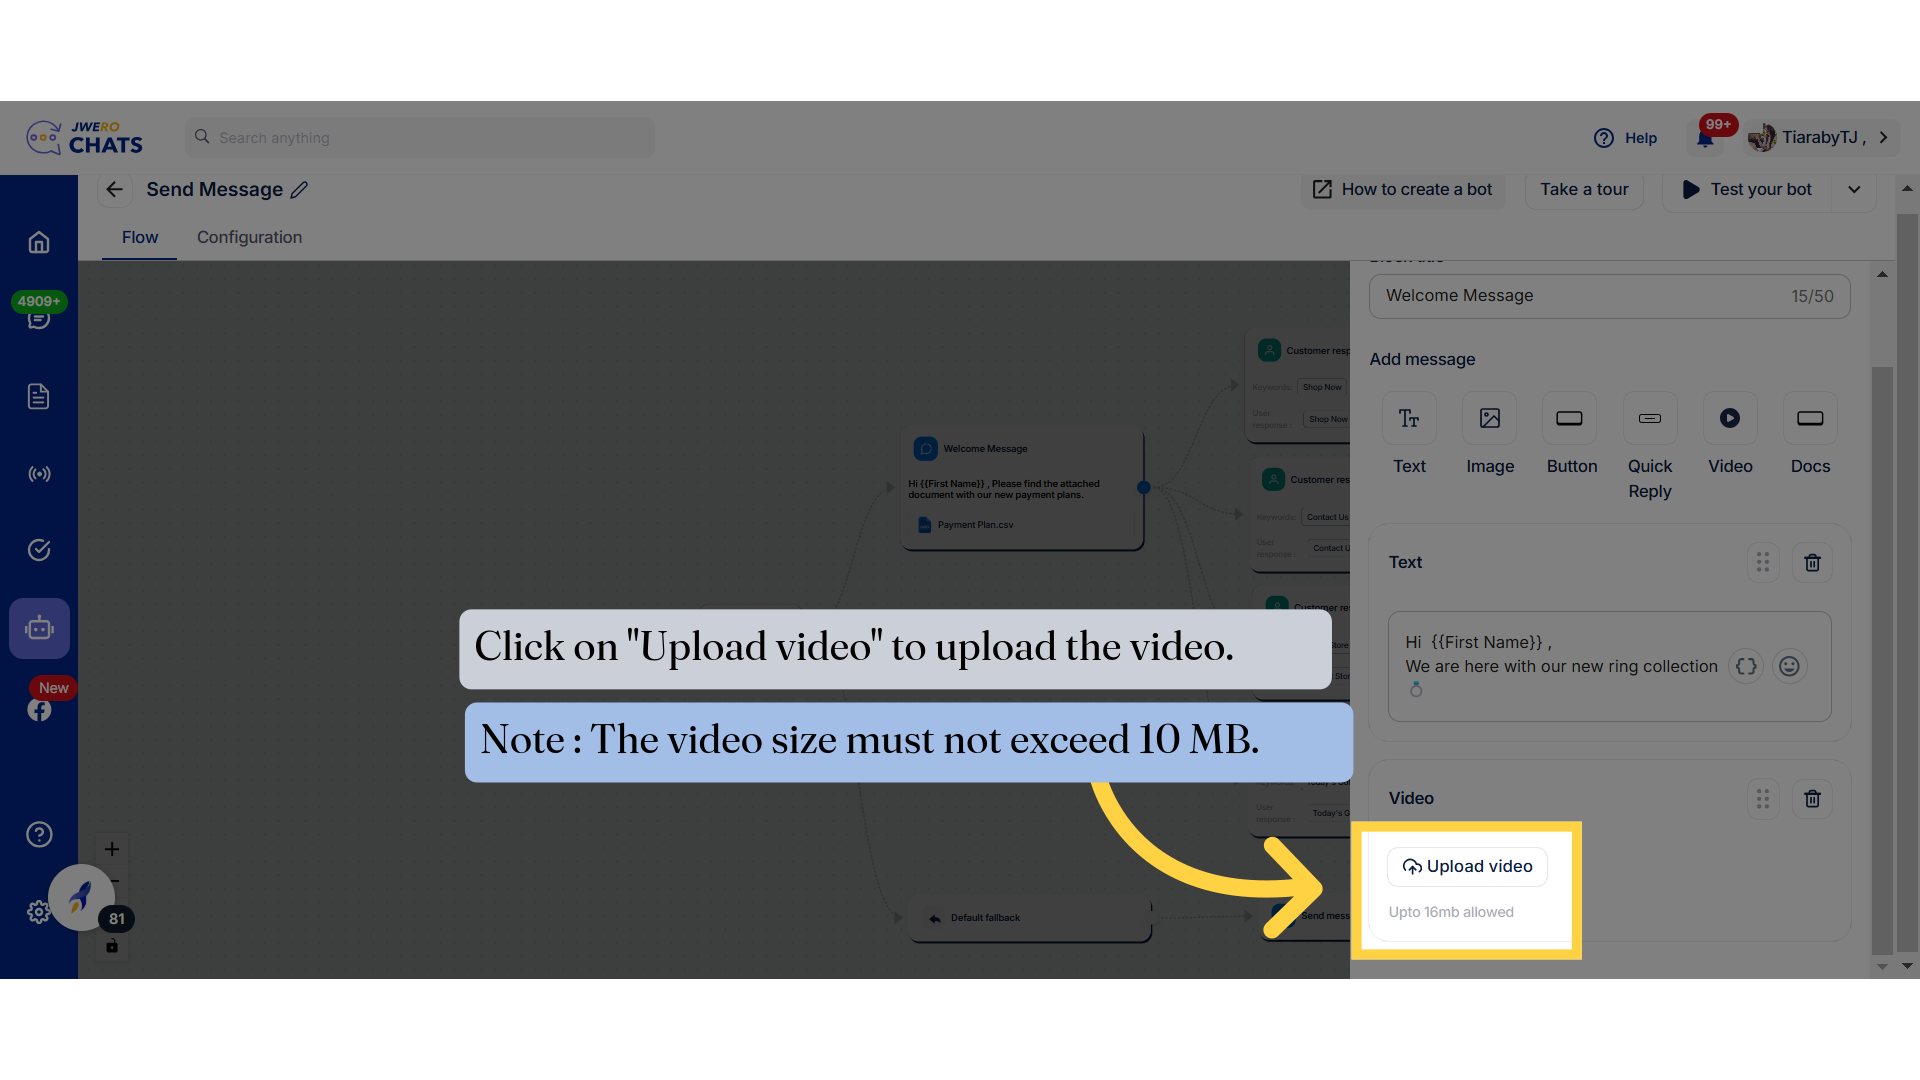
63. Click on "Upload video" to upload the video.
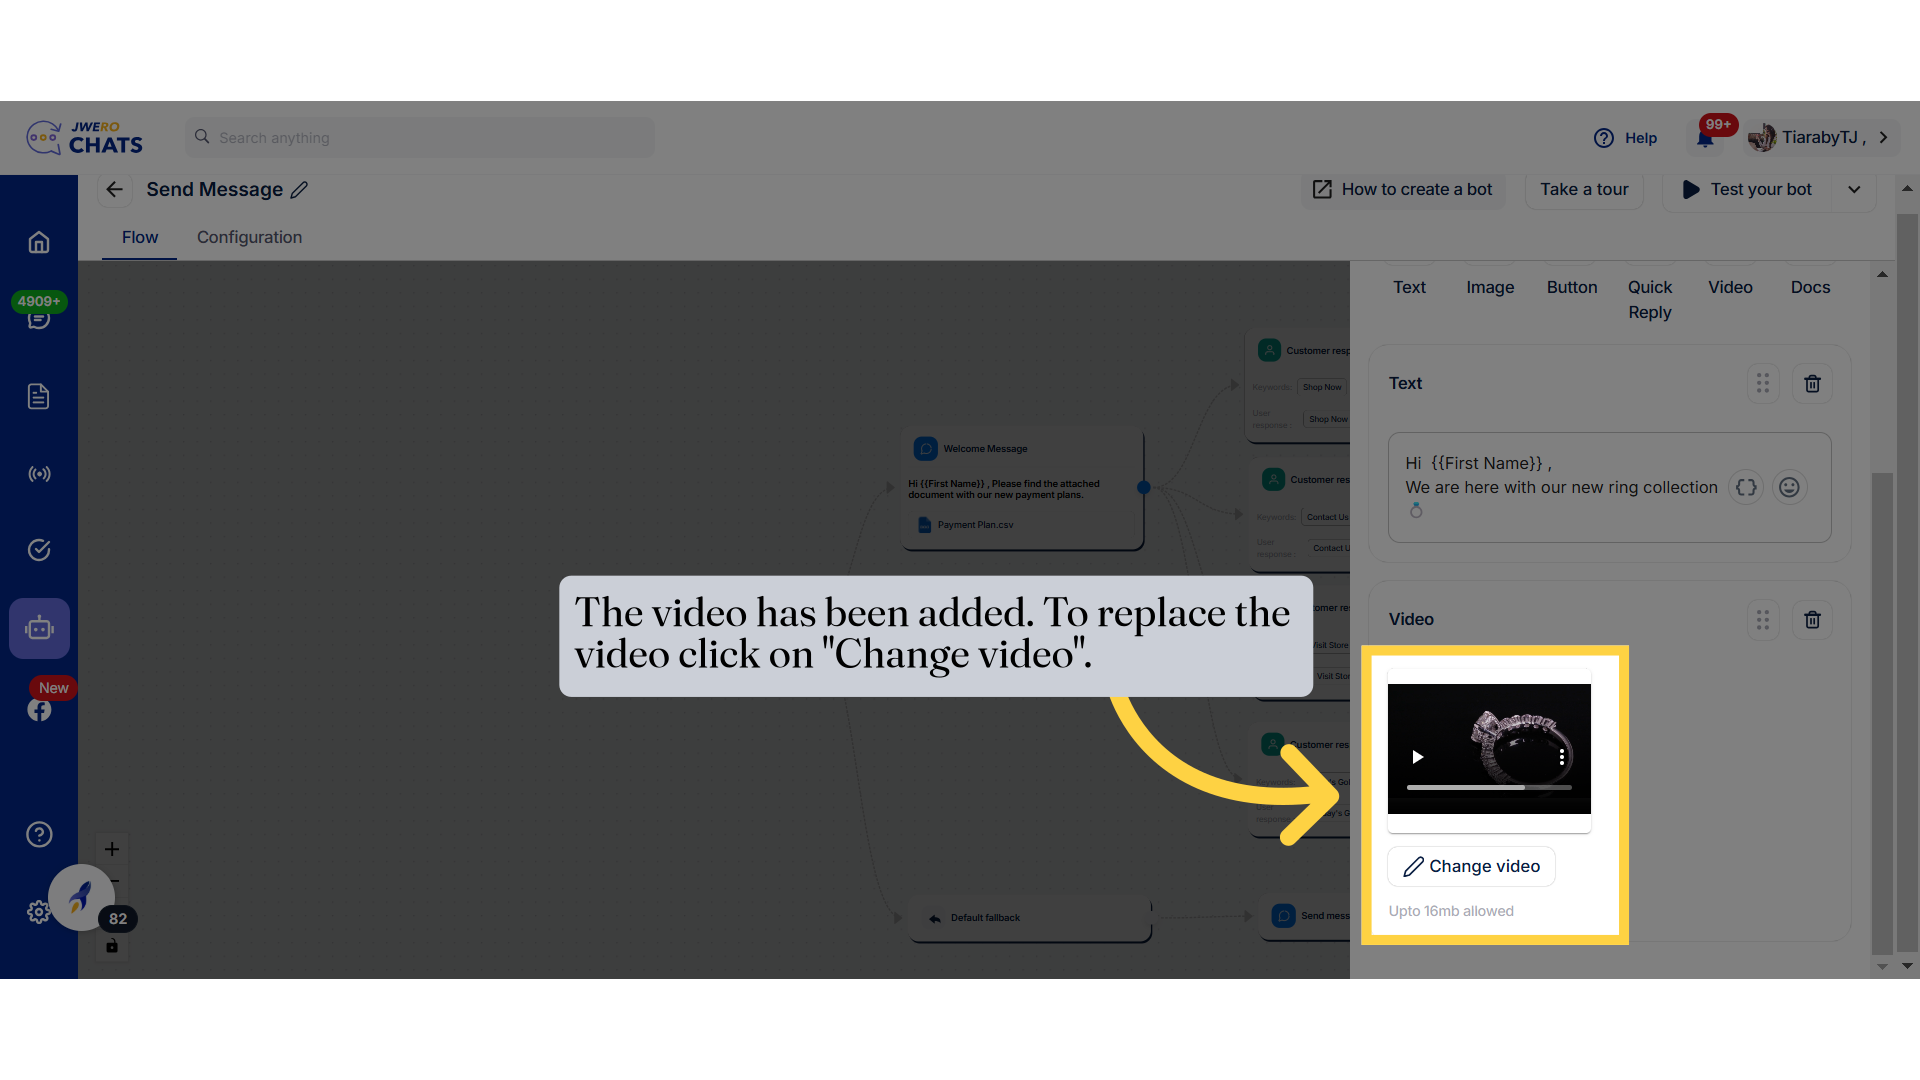
64. The video has been added. To replace the video click on "Change video".
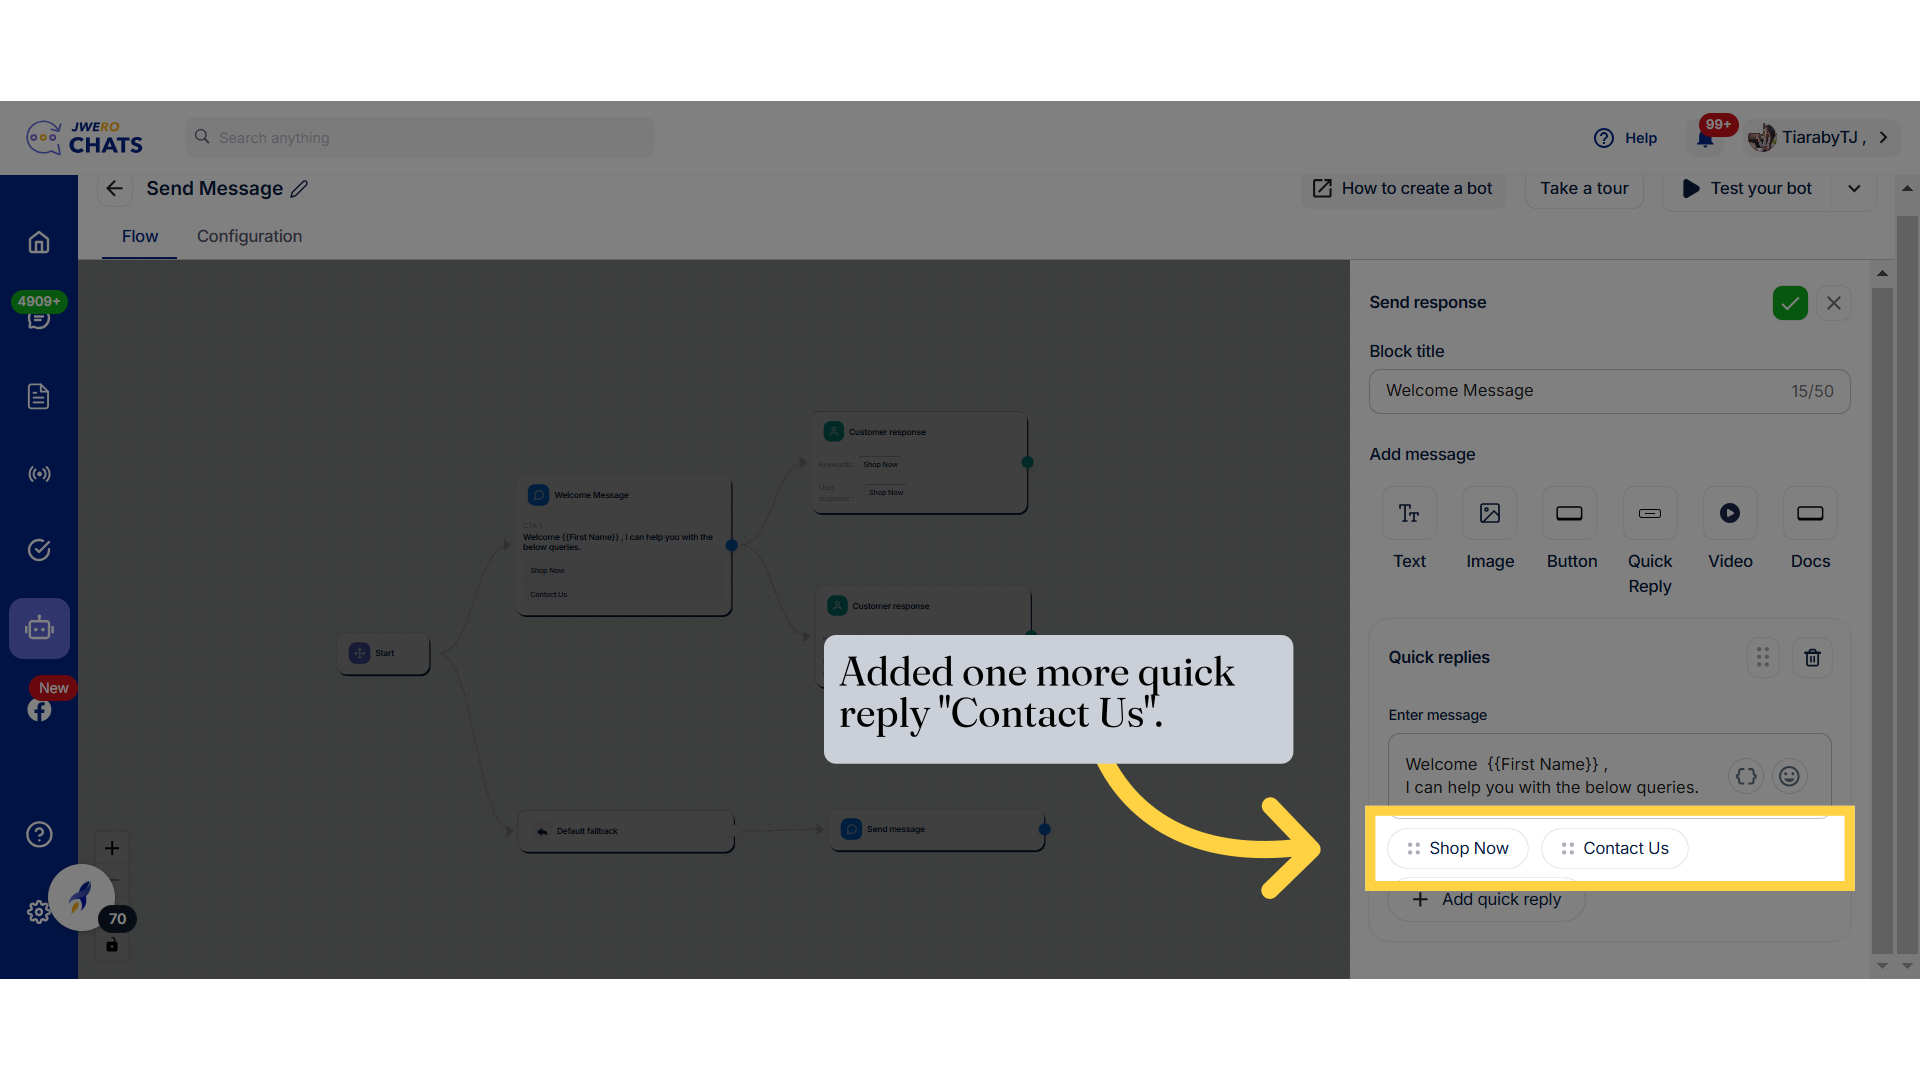
65. This is how the video type will appear.