How To Design The Category pages
Go to app.jwero.ai
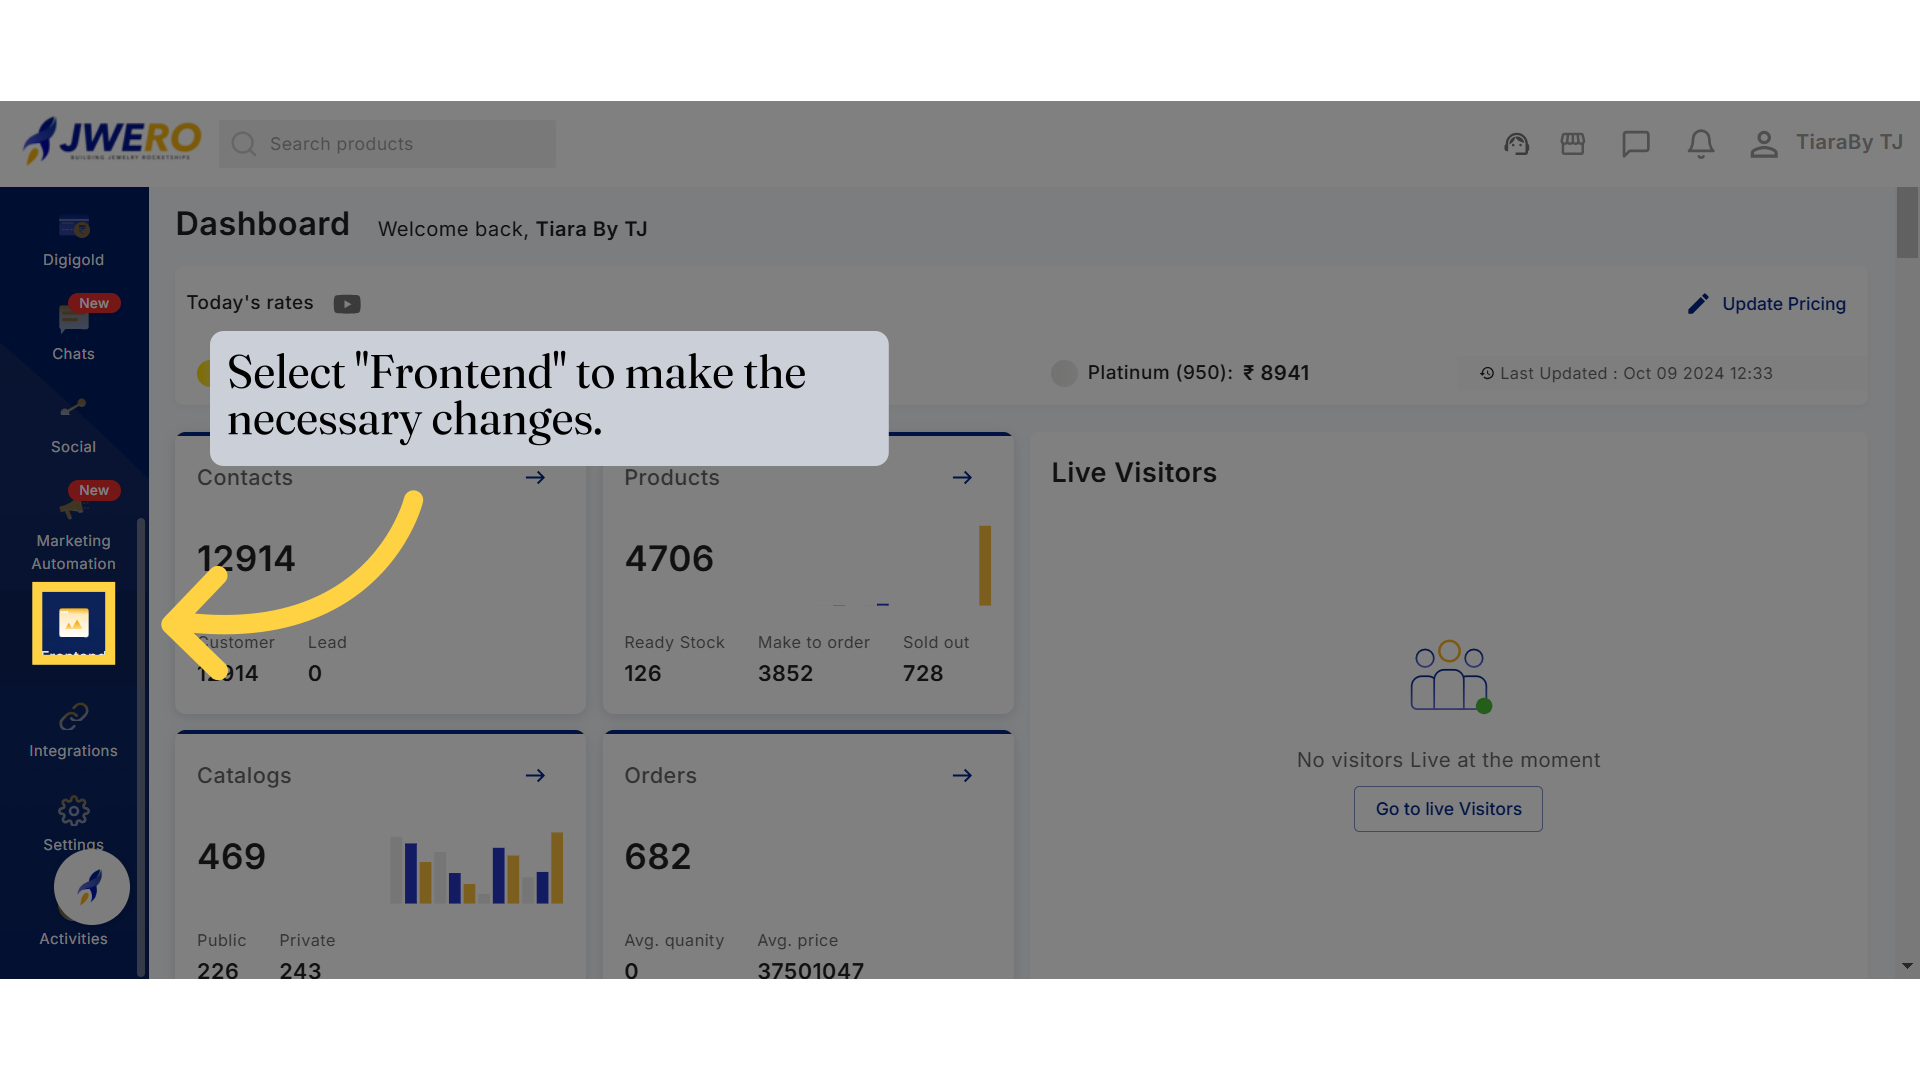
1. Select "Frontend" to make the necessary changes.
Access the Frontend to do the required changes.
2. Click on "Categories" to Edit the Category.

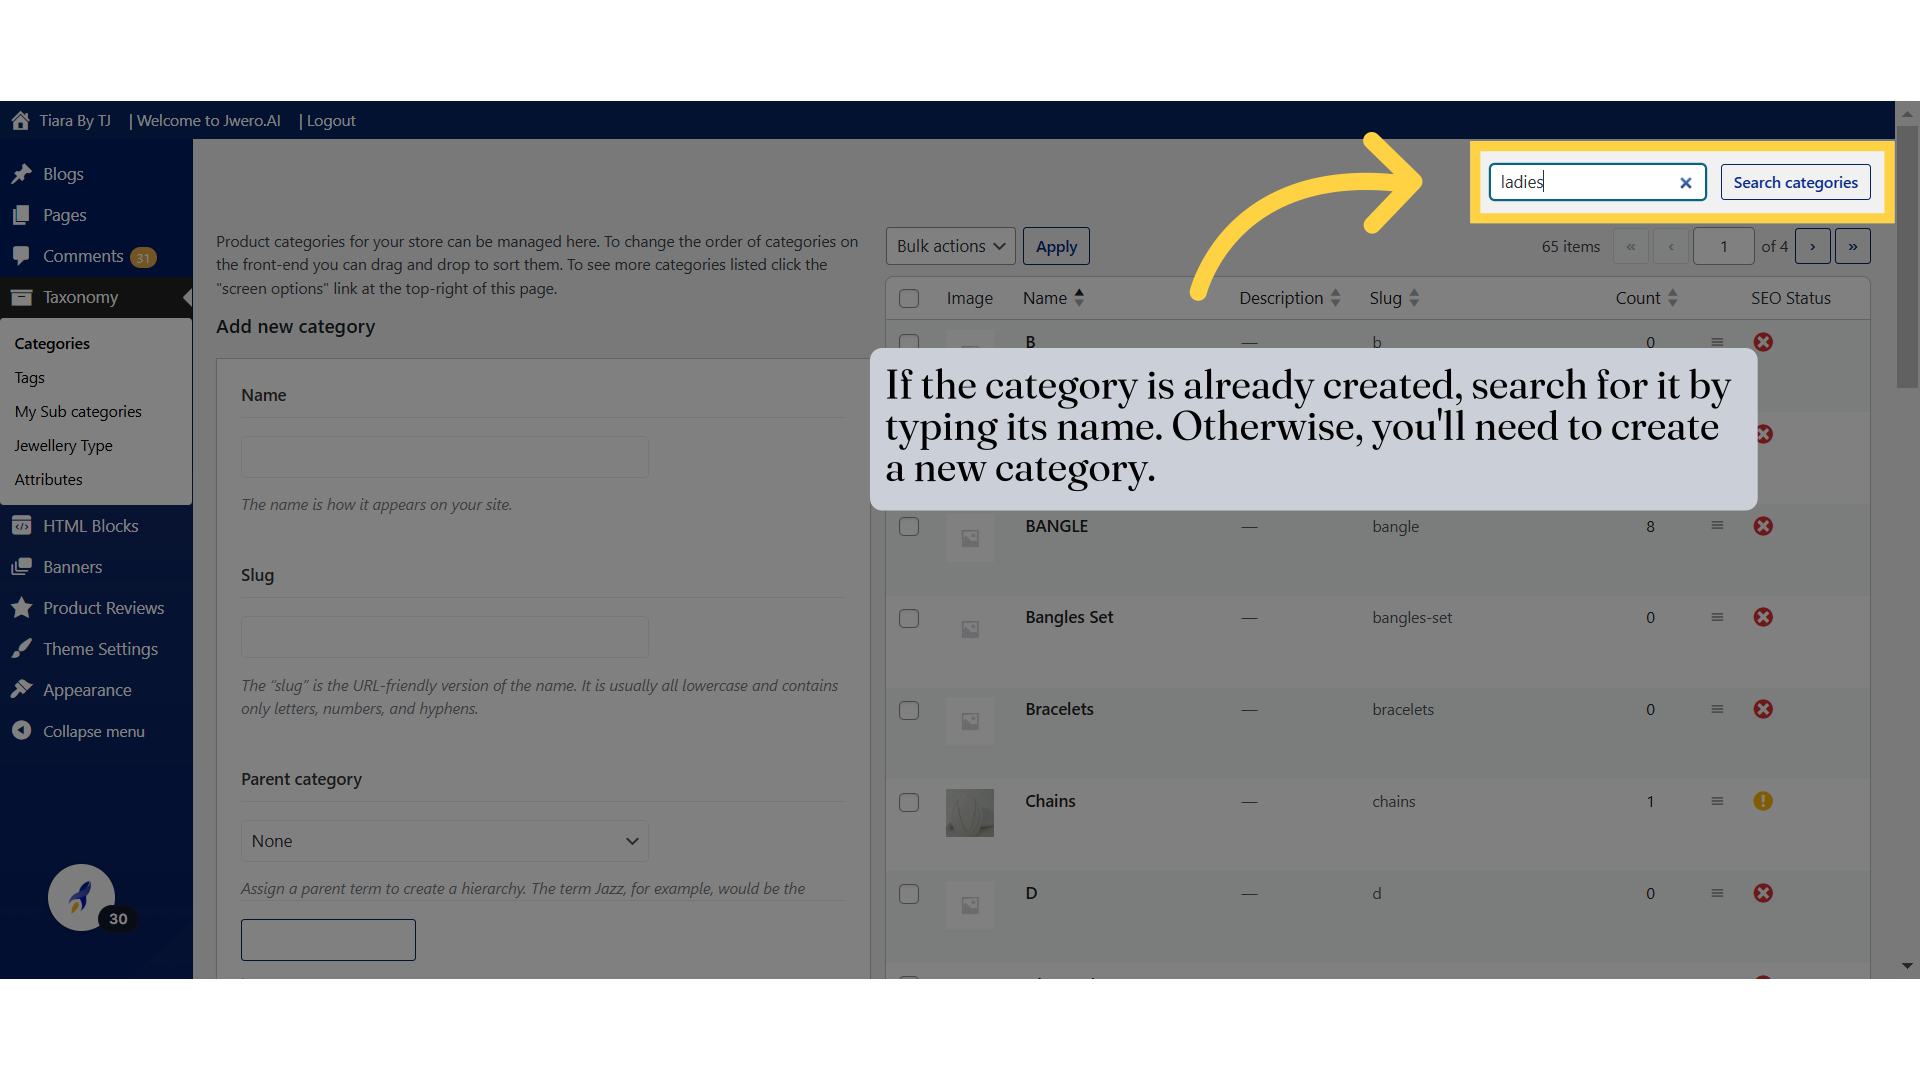
3. If the category is already created, search for it by typing its name. Otherwise, you'll need to create a new category.
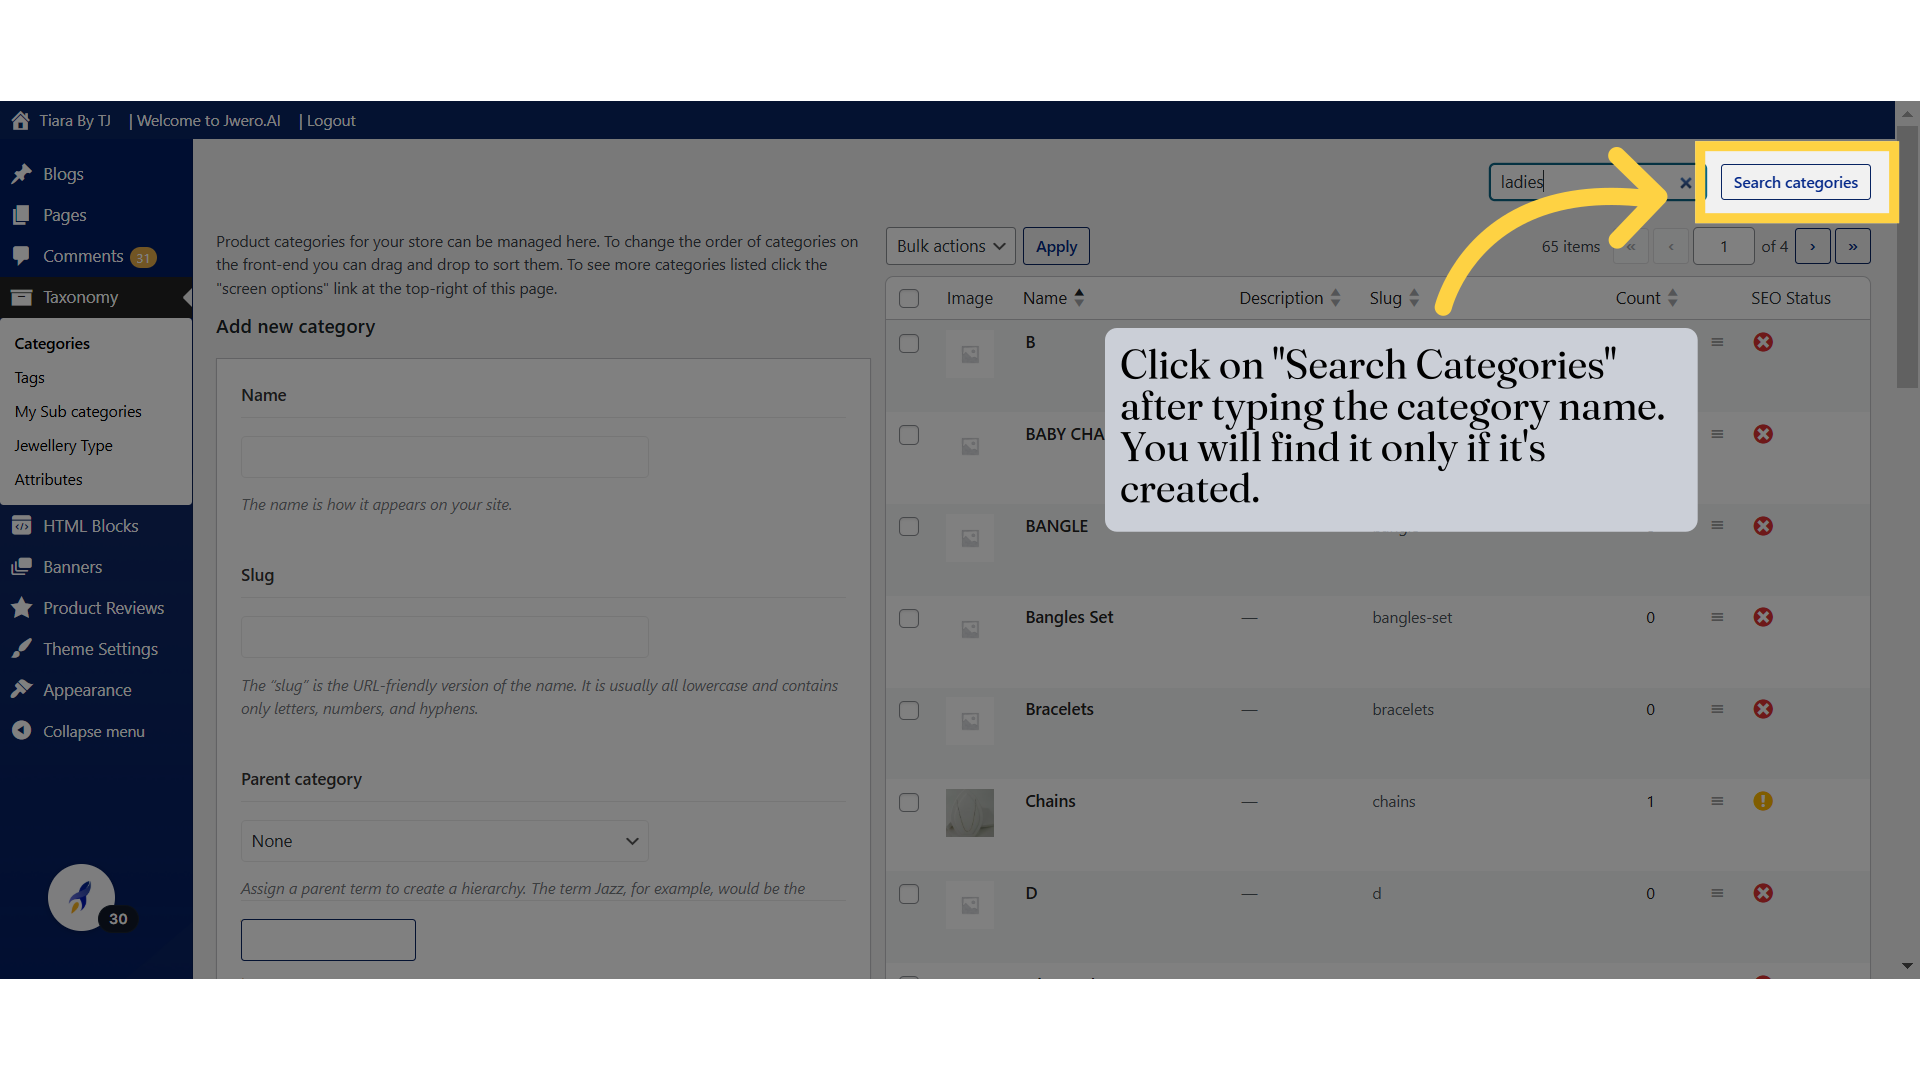
4. Click on "Search Categories" after typing the category name. You will find it only if it's created.
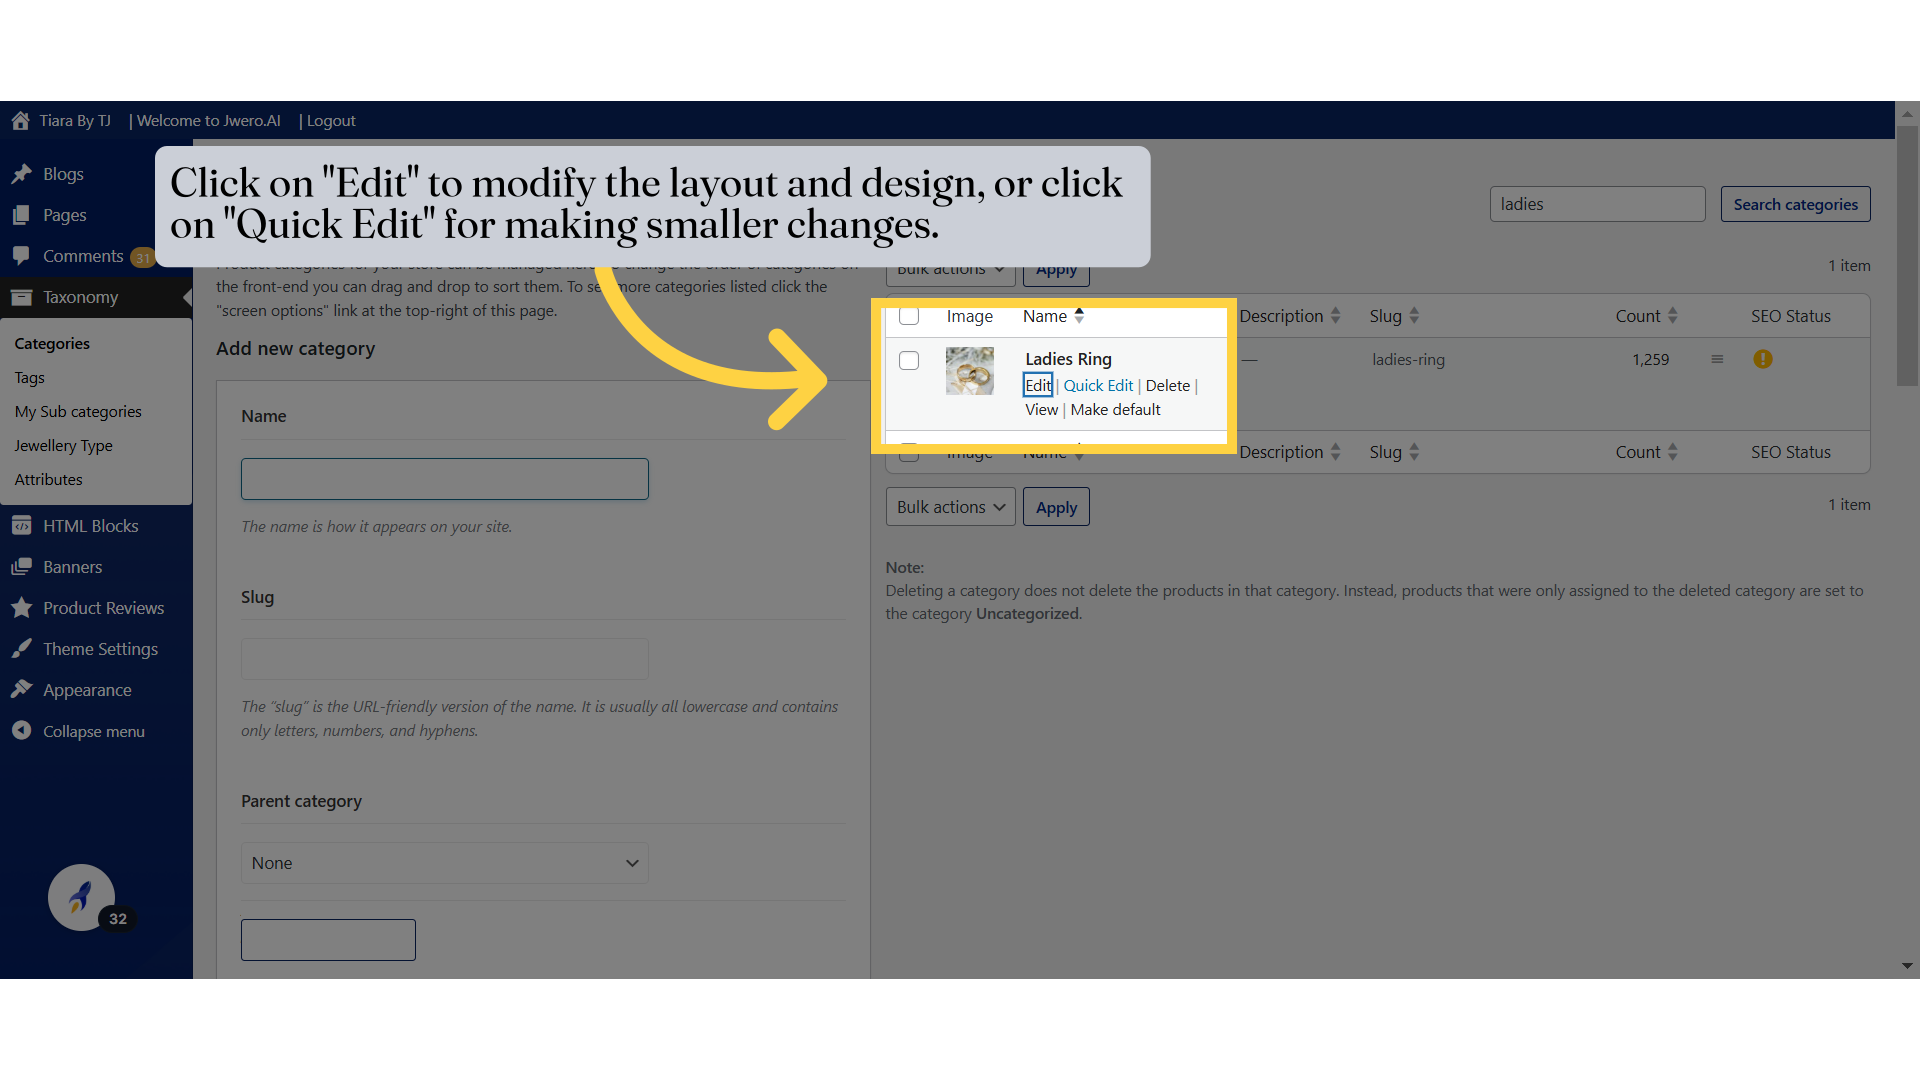
5. Click on "Edit" to modify the layout and design, or click on "Quick Edit" for making smaller changes.
Edit : The Edit option opens the full editor for the selected item (post, page, category, etc.), allowing you to make extensive changes.
Quick Edit : The Quick Edit option allows you to make basic changes to an item without opening the full editor. It’s faster and more convenient for minor adjustments.
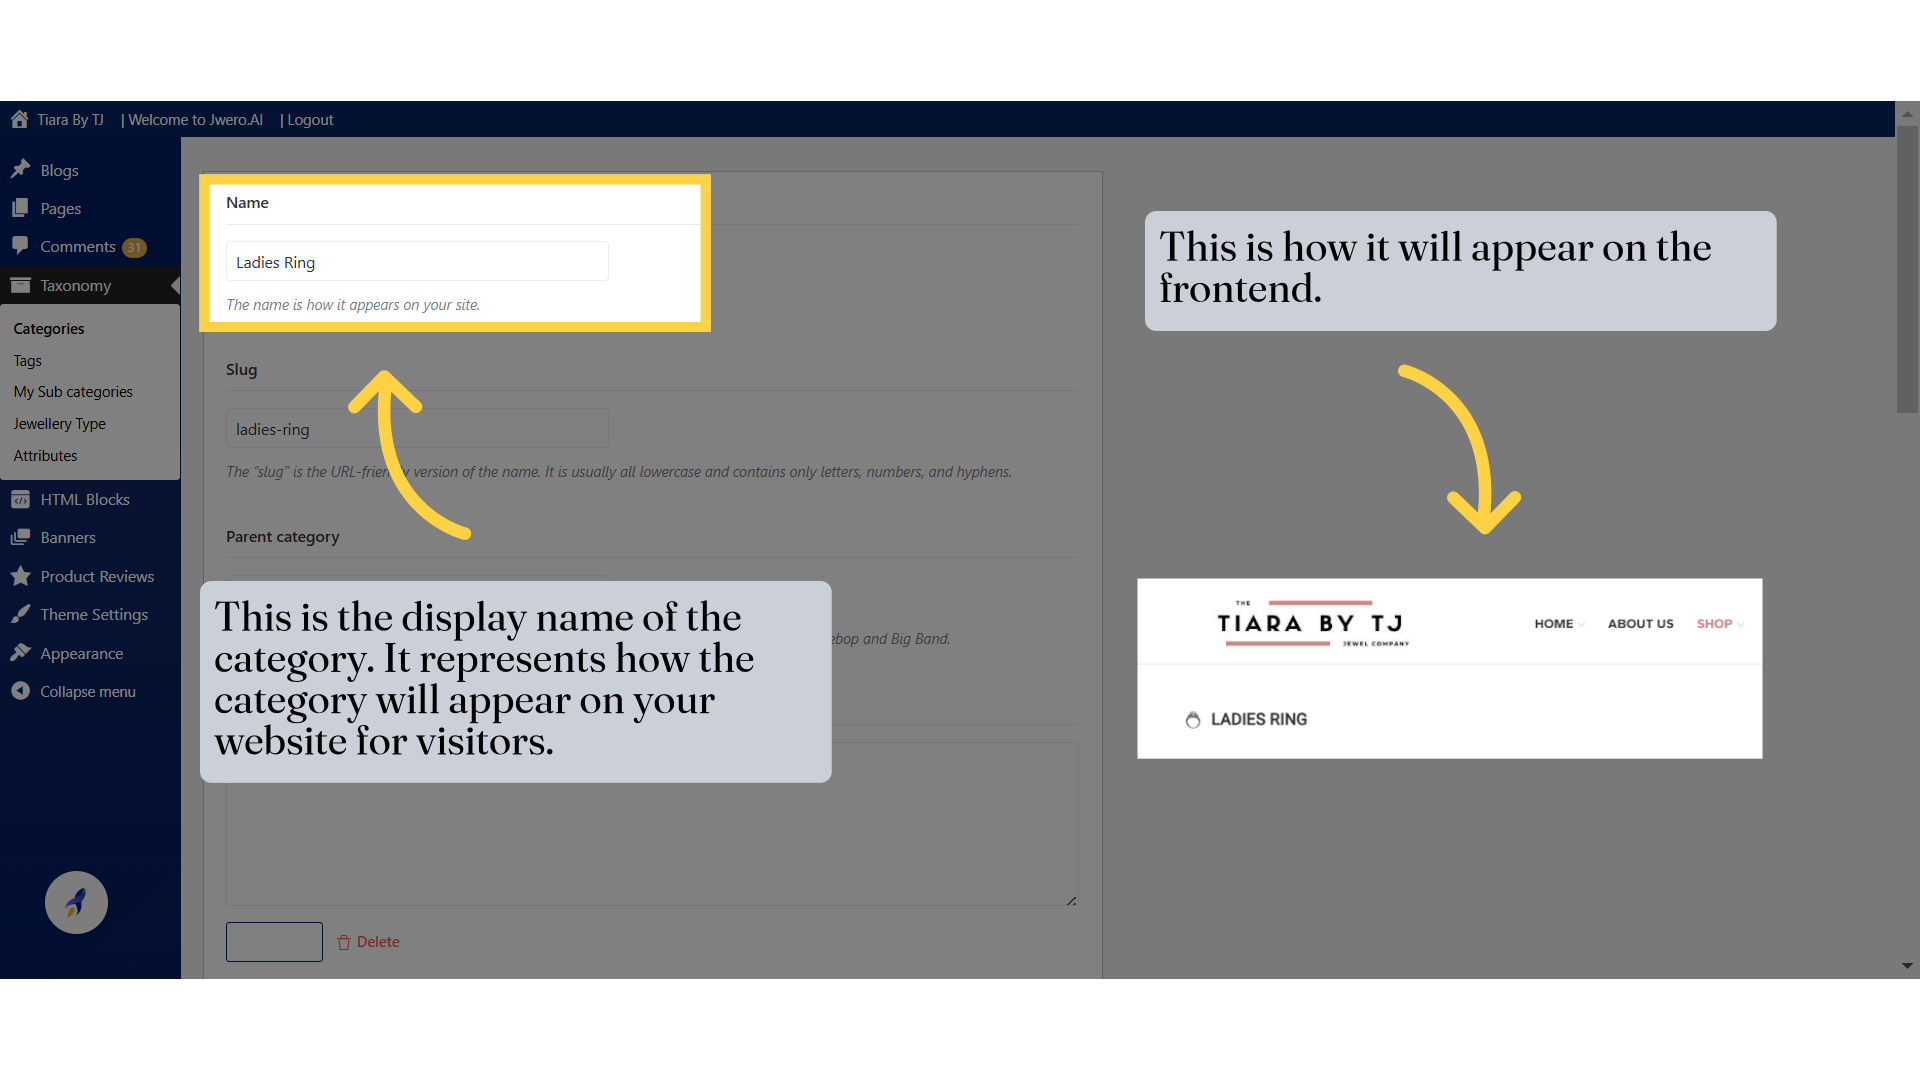
6. This is the display name of the category. It represents how the category will appear on your website for visitors.
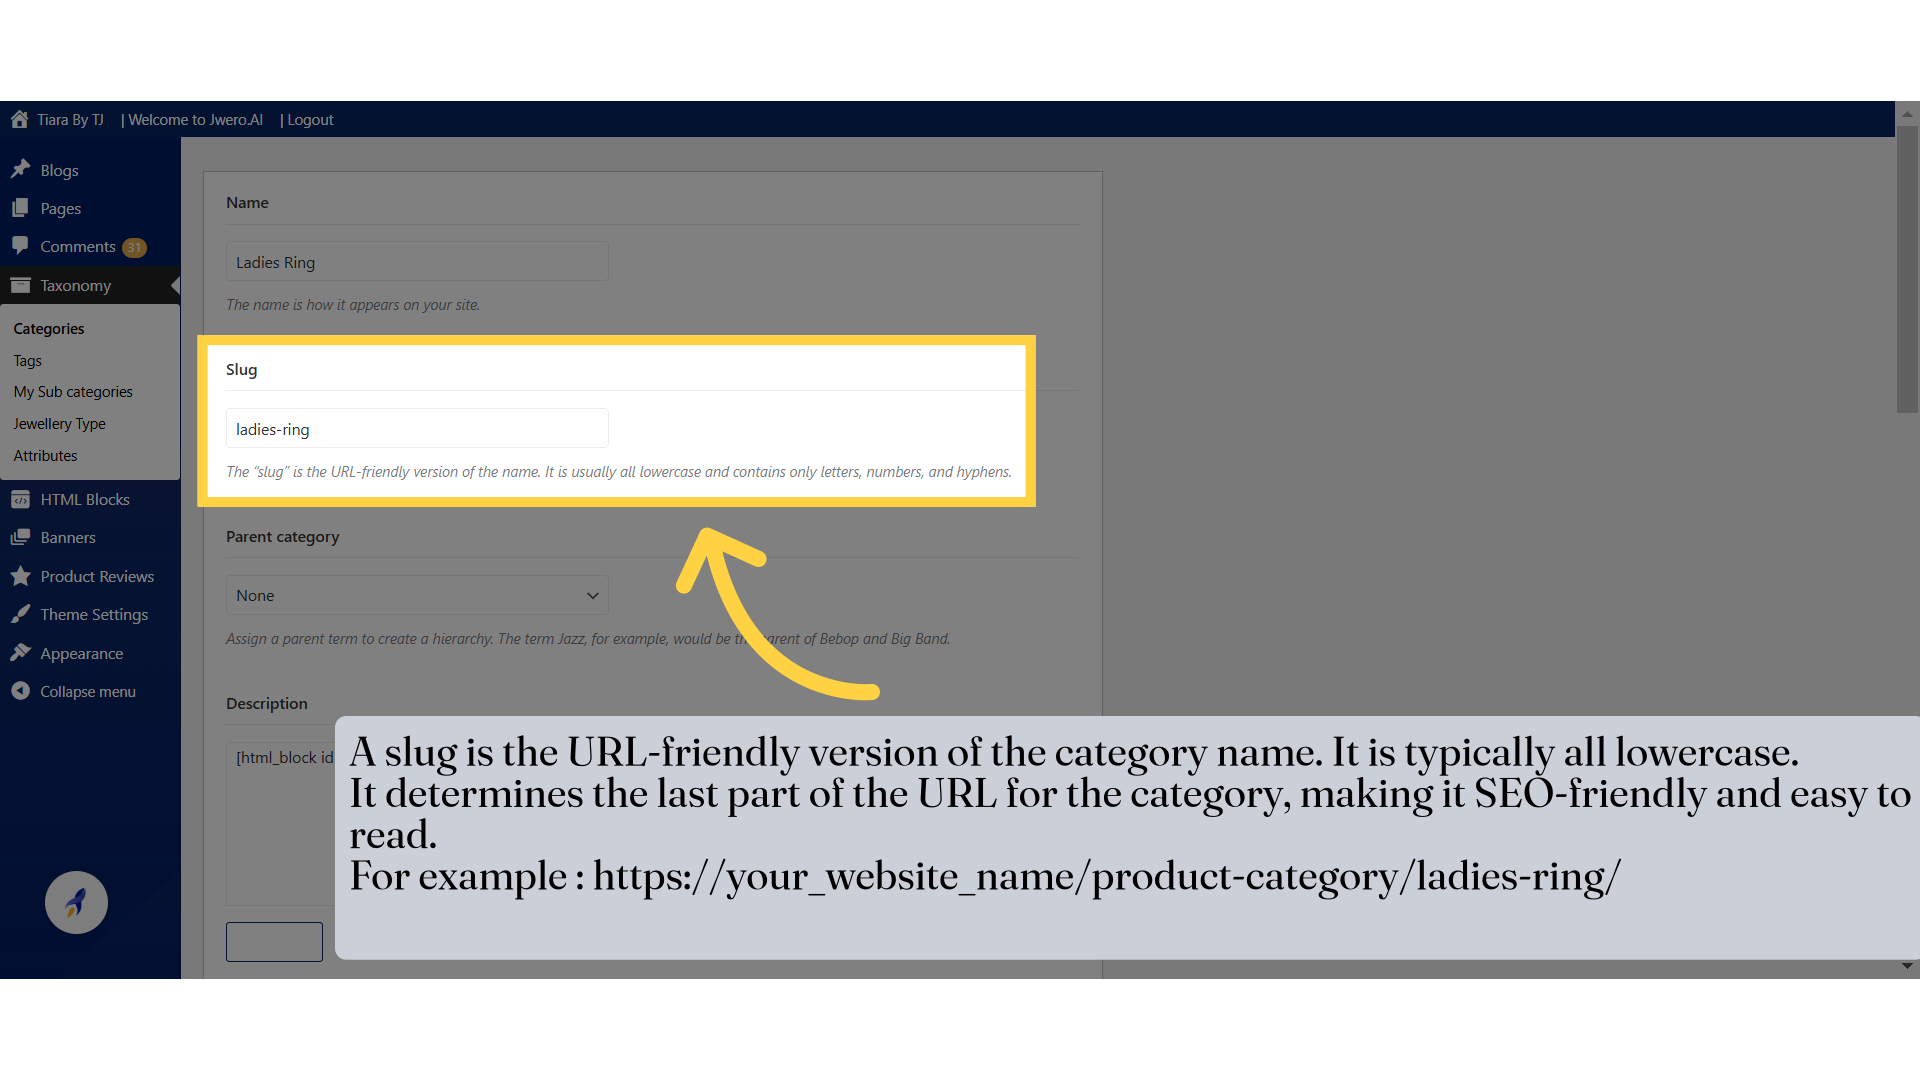
7. A slug is the URL-friendly version of the category name. It is typically all lowercase. It determines the last part of the URL for the category, making it SEO-friendly and easy to read. For example : https://your_website_name/product-category/ladies-ring/
8. It helps organize your categories into subcategories under a broader category, improving navigation and structure. For example : After selecting "Ring" as the parent category, the URL will look like https://tiarabytj.com/product-category/ring/ladies-ring/
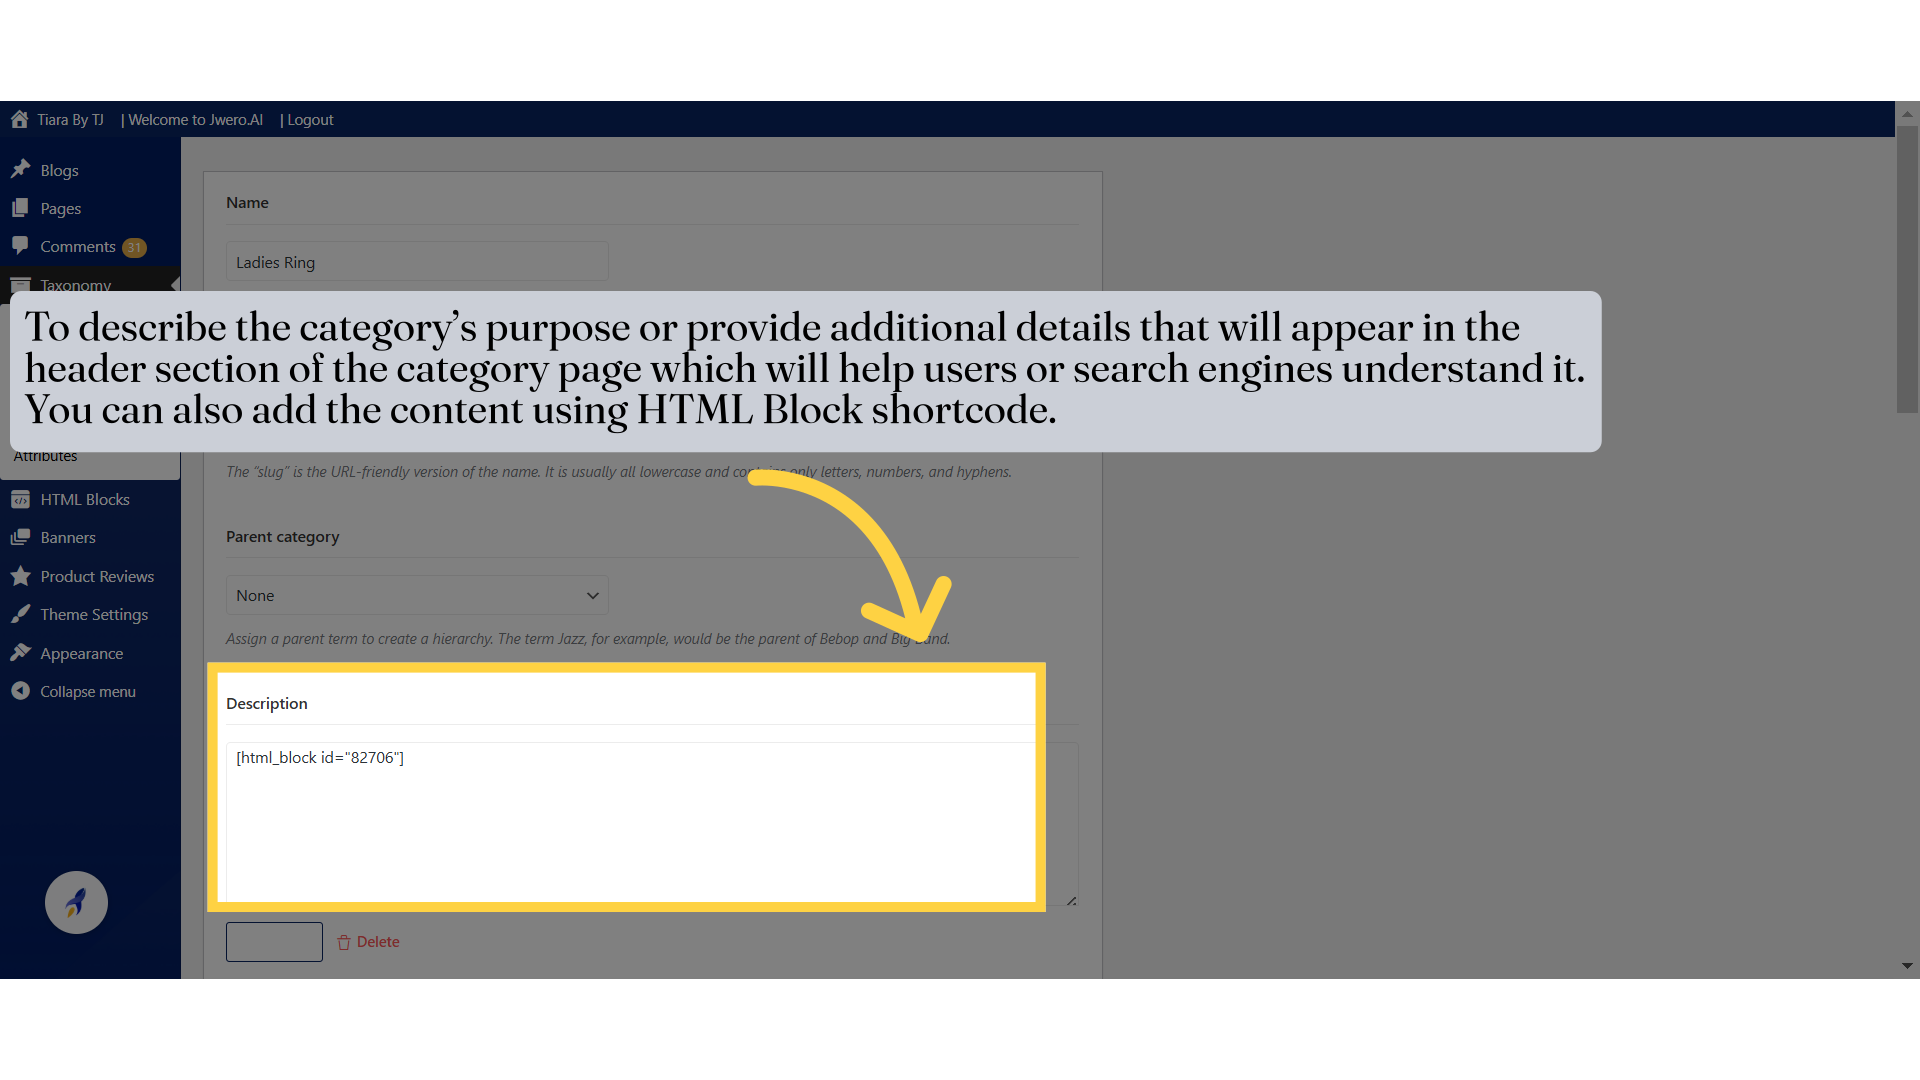
9. To describe the category’s purpose or provide additional details that will appear in the header section of the category page which will help users or search engines understand it. You can also add the content using HTML Block shortcode.
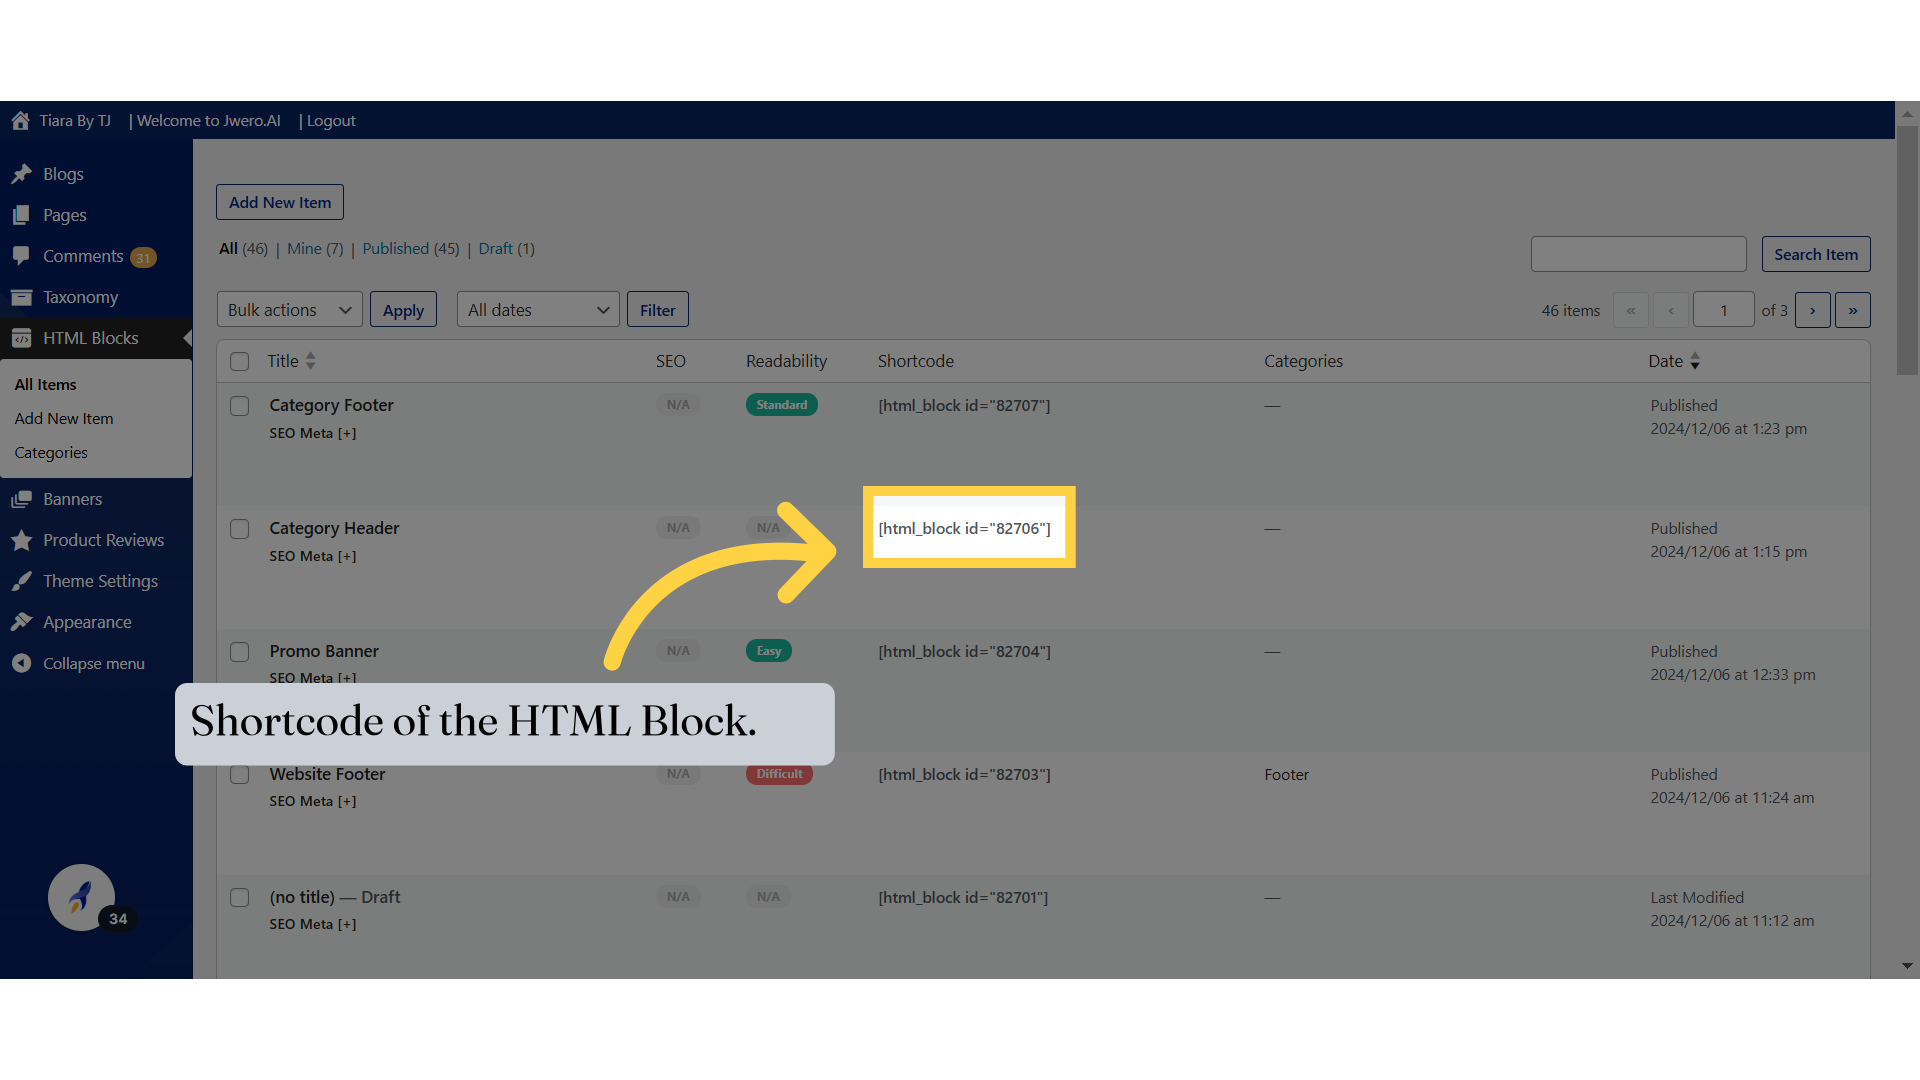
10. Shortcode of the HTML Block.
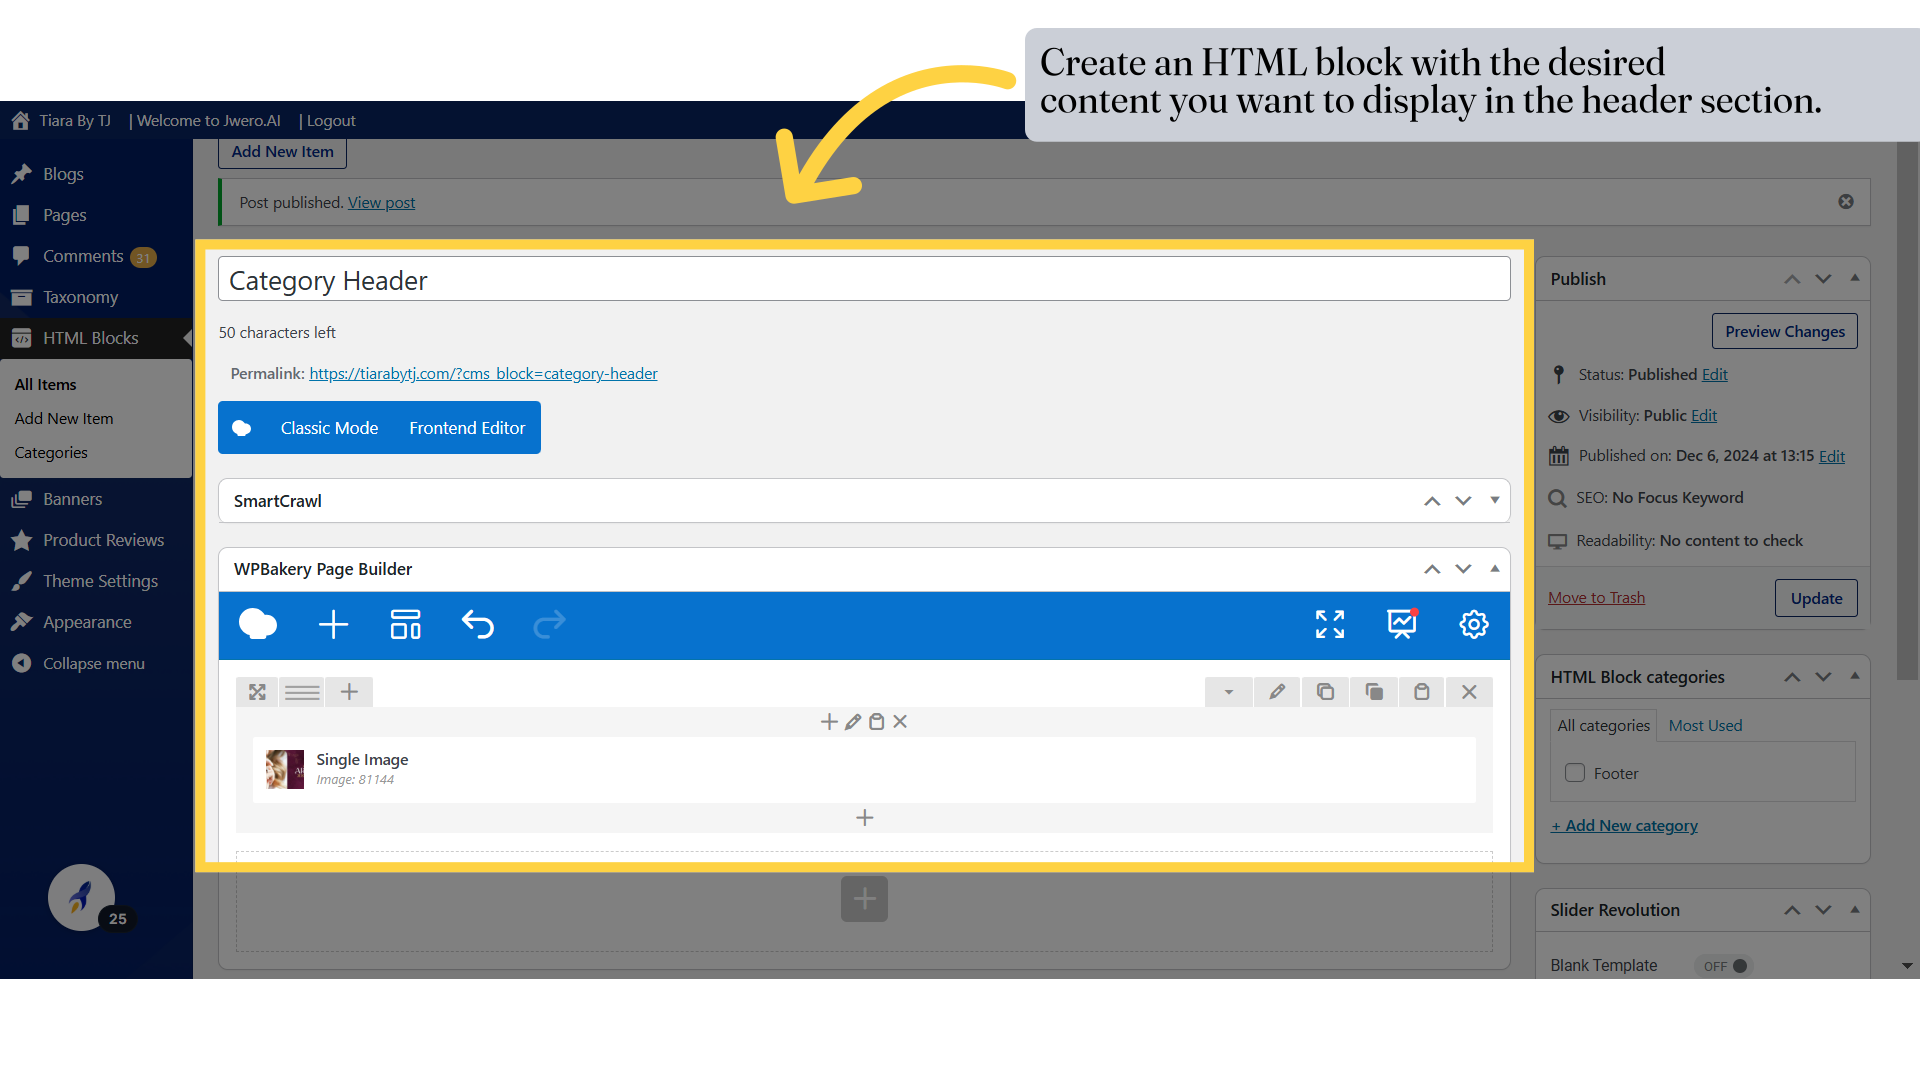
11. Create an HTML block with the desired content you want to display in the header section.
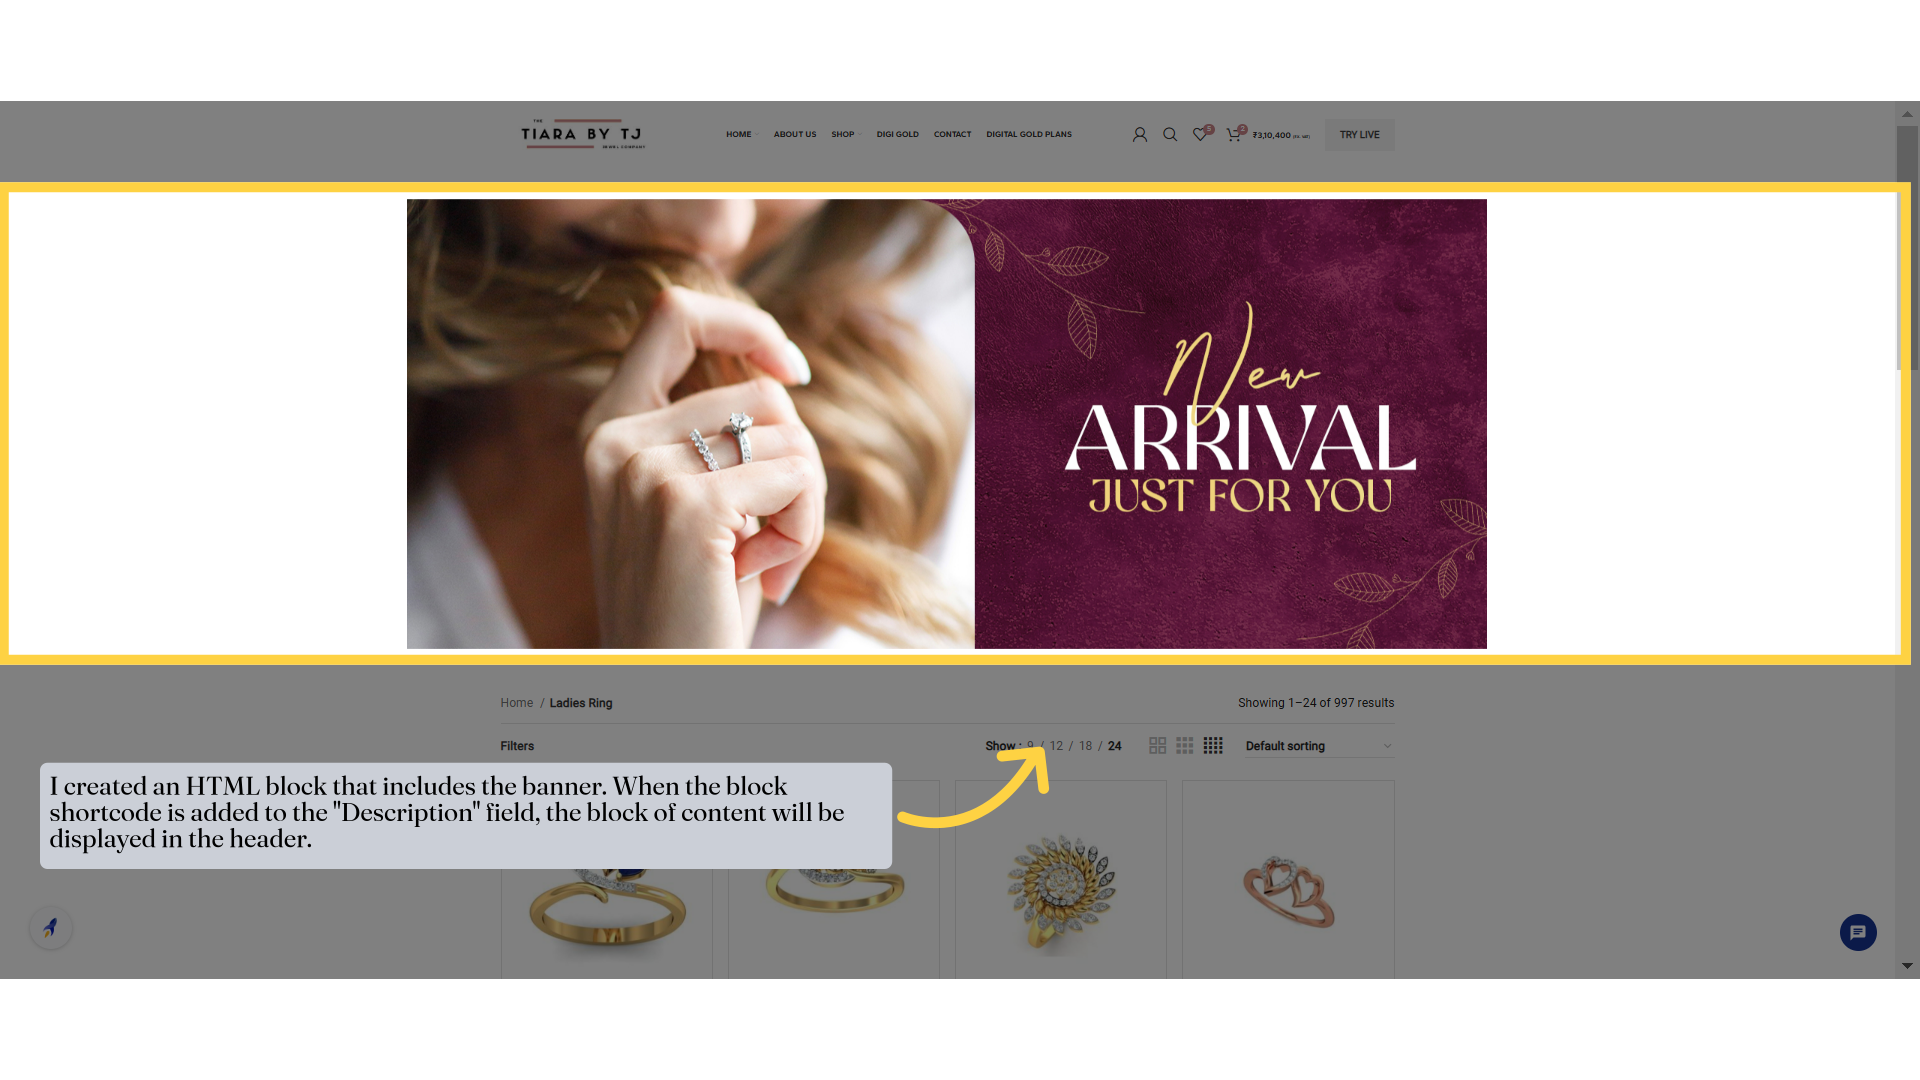
12. I created an HTML block that includes the banner. When the block shortcode is added to the "Description" field, the block of content will be displayed in the header.
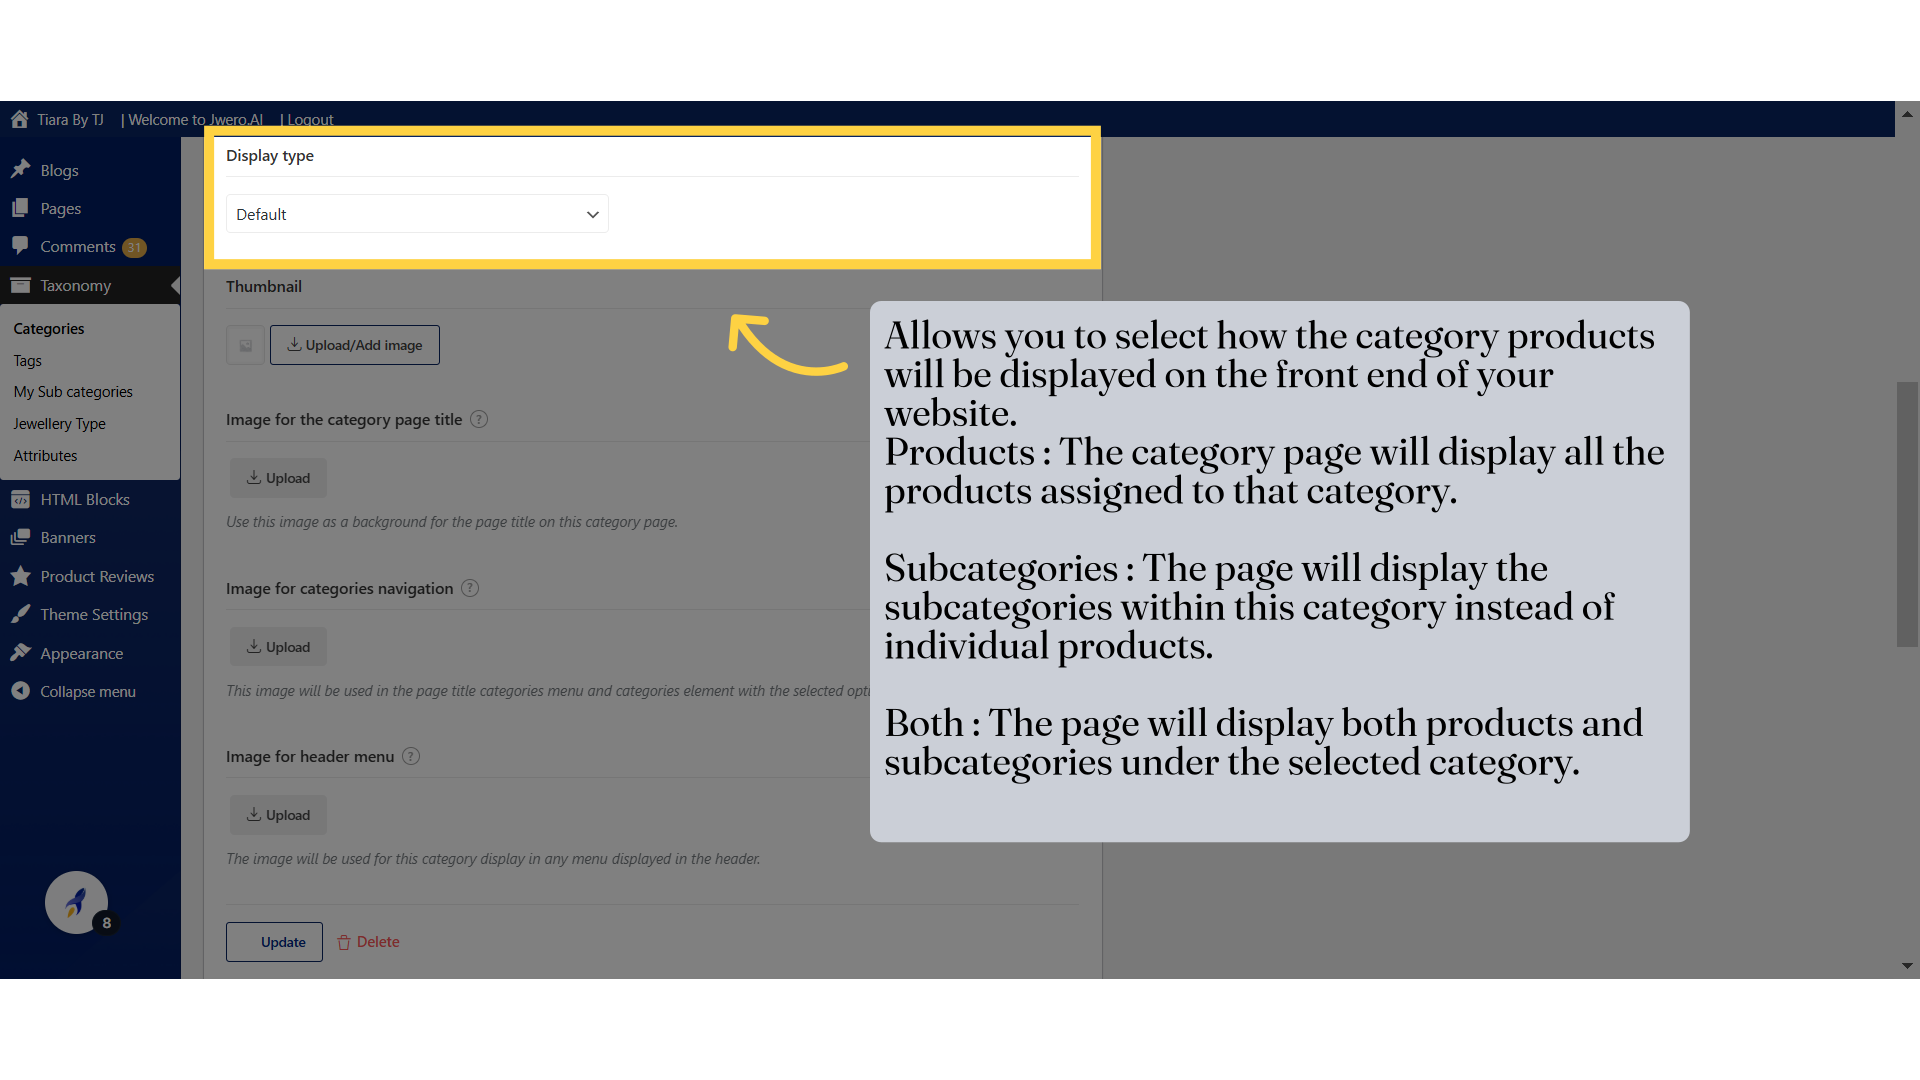
13. Allows you to select how the category products will be displayed on the front end of your website. Products : The category page will display all the products assigned to that category. Subcategories : The page will display the subcategories within this category instead of individual products. Both : The page will display both products and subcategories under the selected category.
14. Click "Name The name is how it appears on your site. Slug The “slug” is the URL-friendly version of the name. It is usually all lowercase and contains only letters, numbers, and..."
Update the name and create a URL-friendly slug for the item on your site
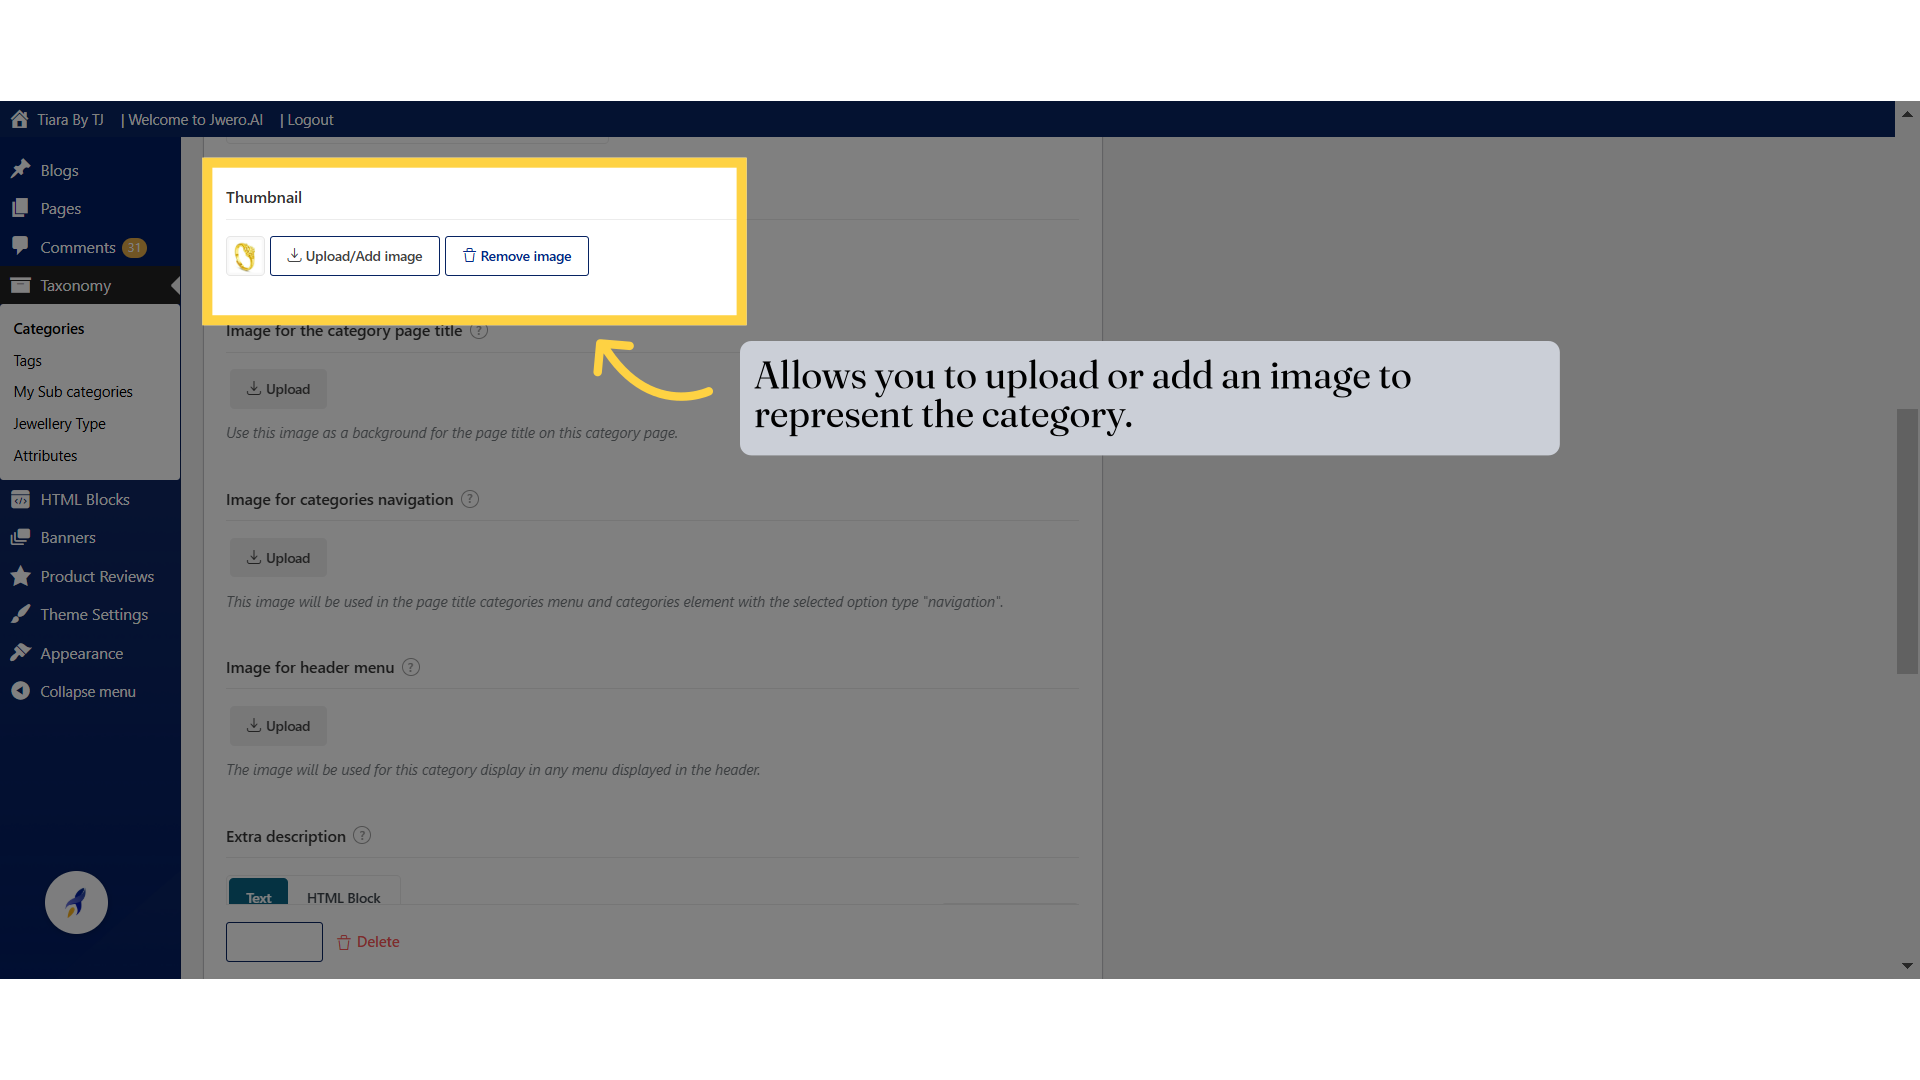
15. Click "Image for the category page title Upload Remove Use..."
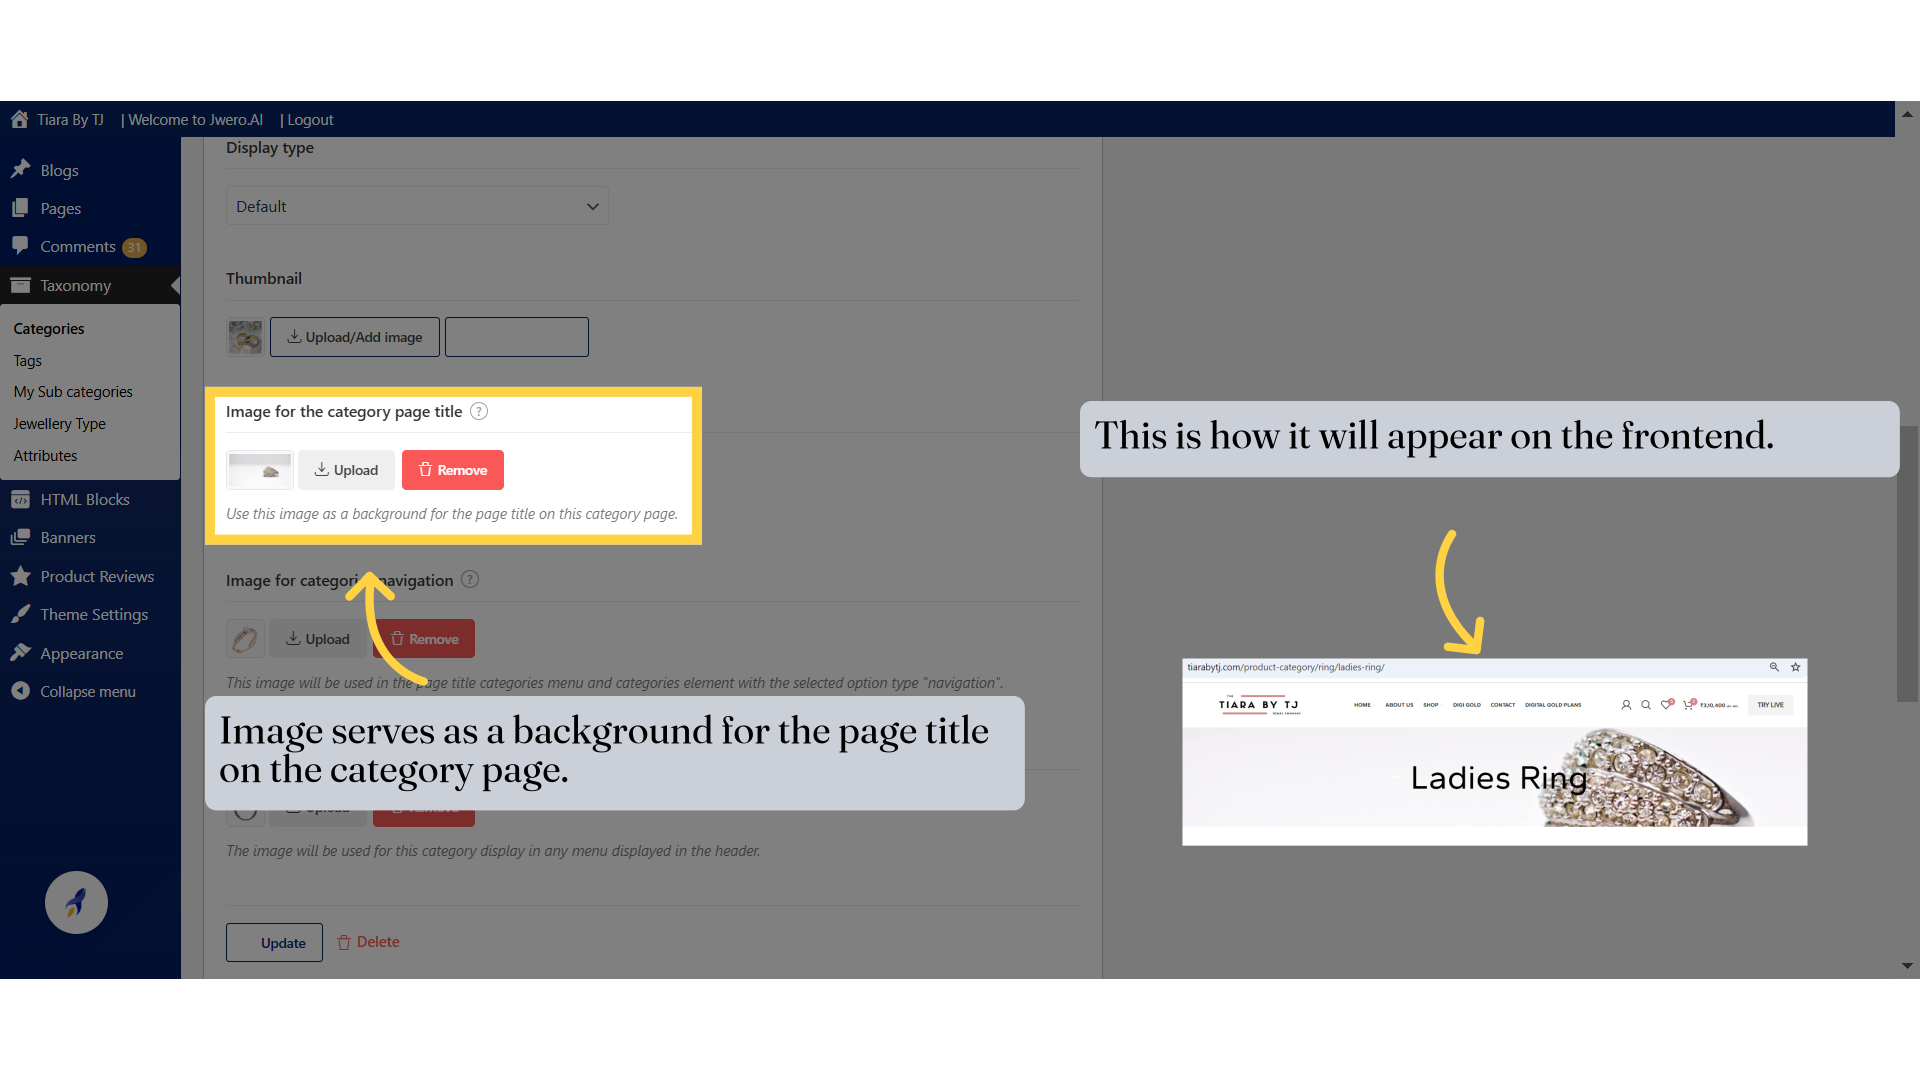
16. Click "Image for the category page title Upload Remove Use..."
17. This section allows you to add an additional description to the category that will be displayed after the product loop on the category page.
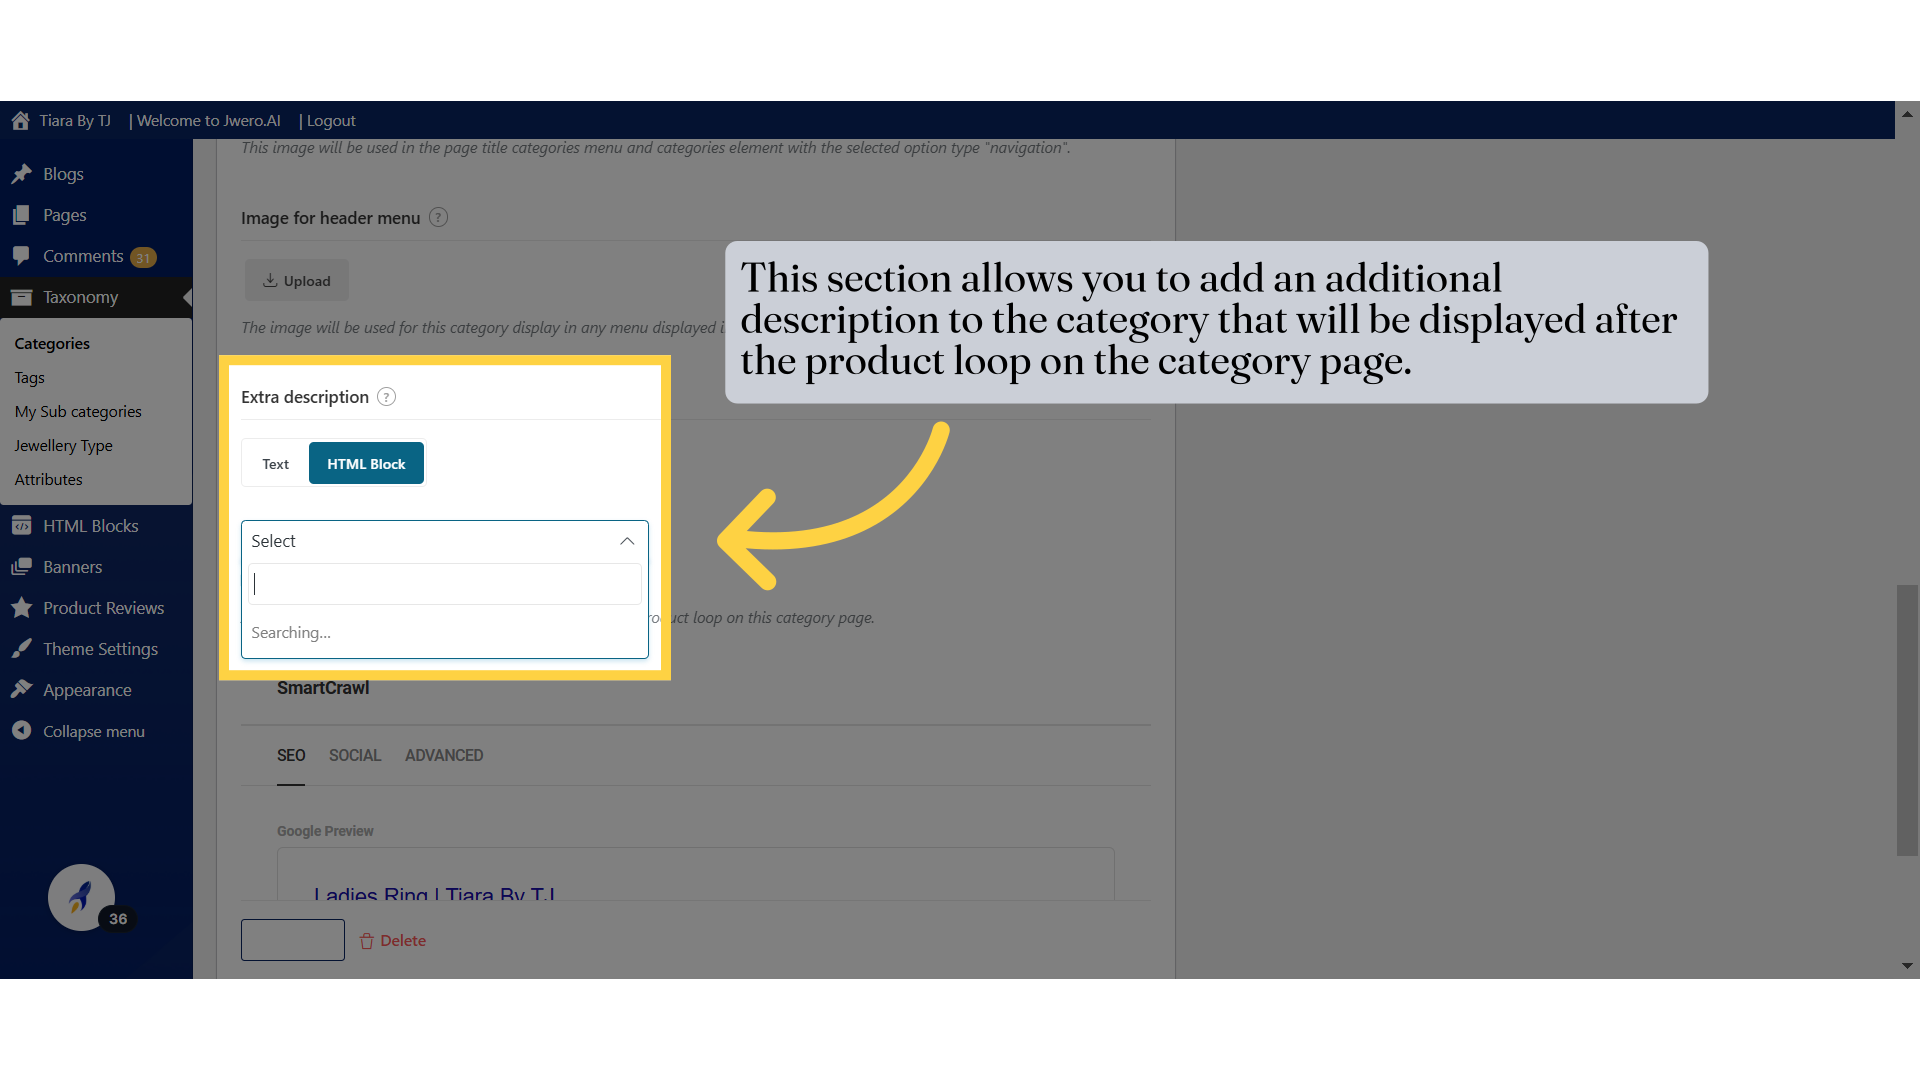
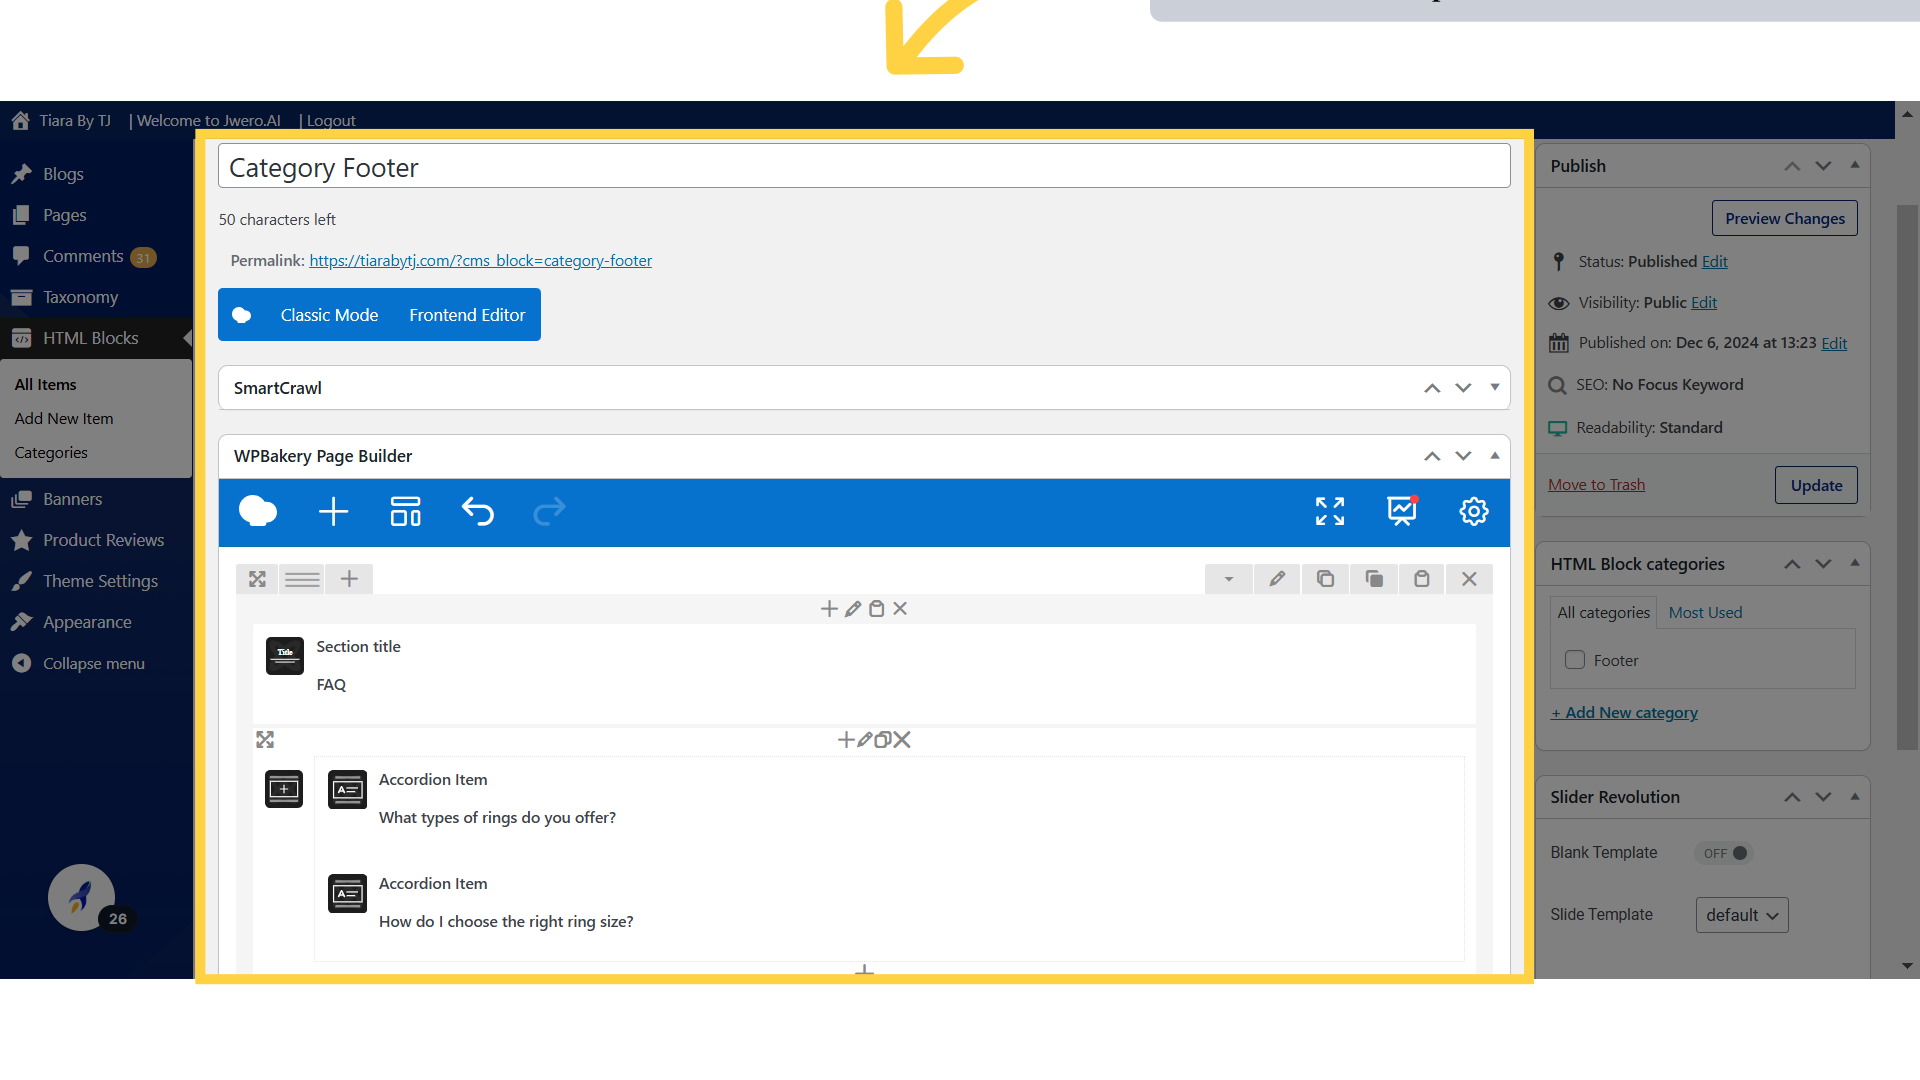
18. Create the content you want to display at the bottom after the product collection.
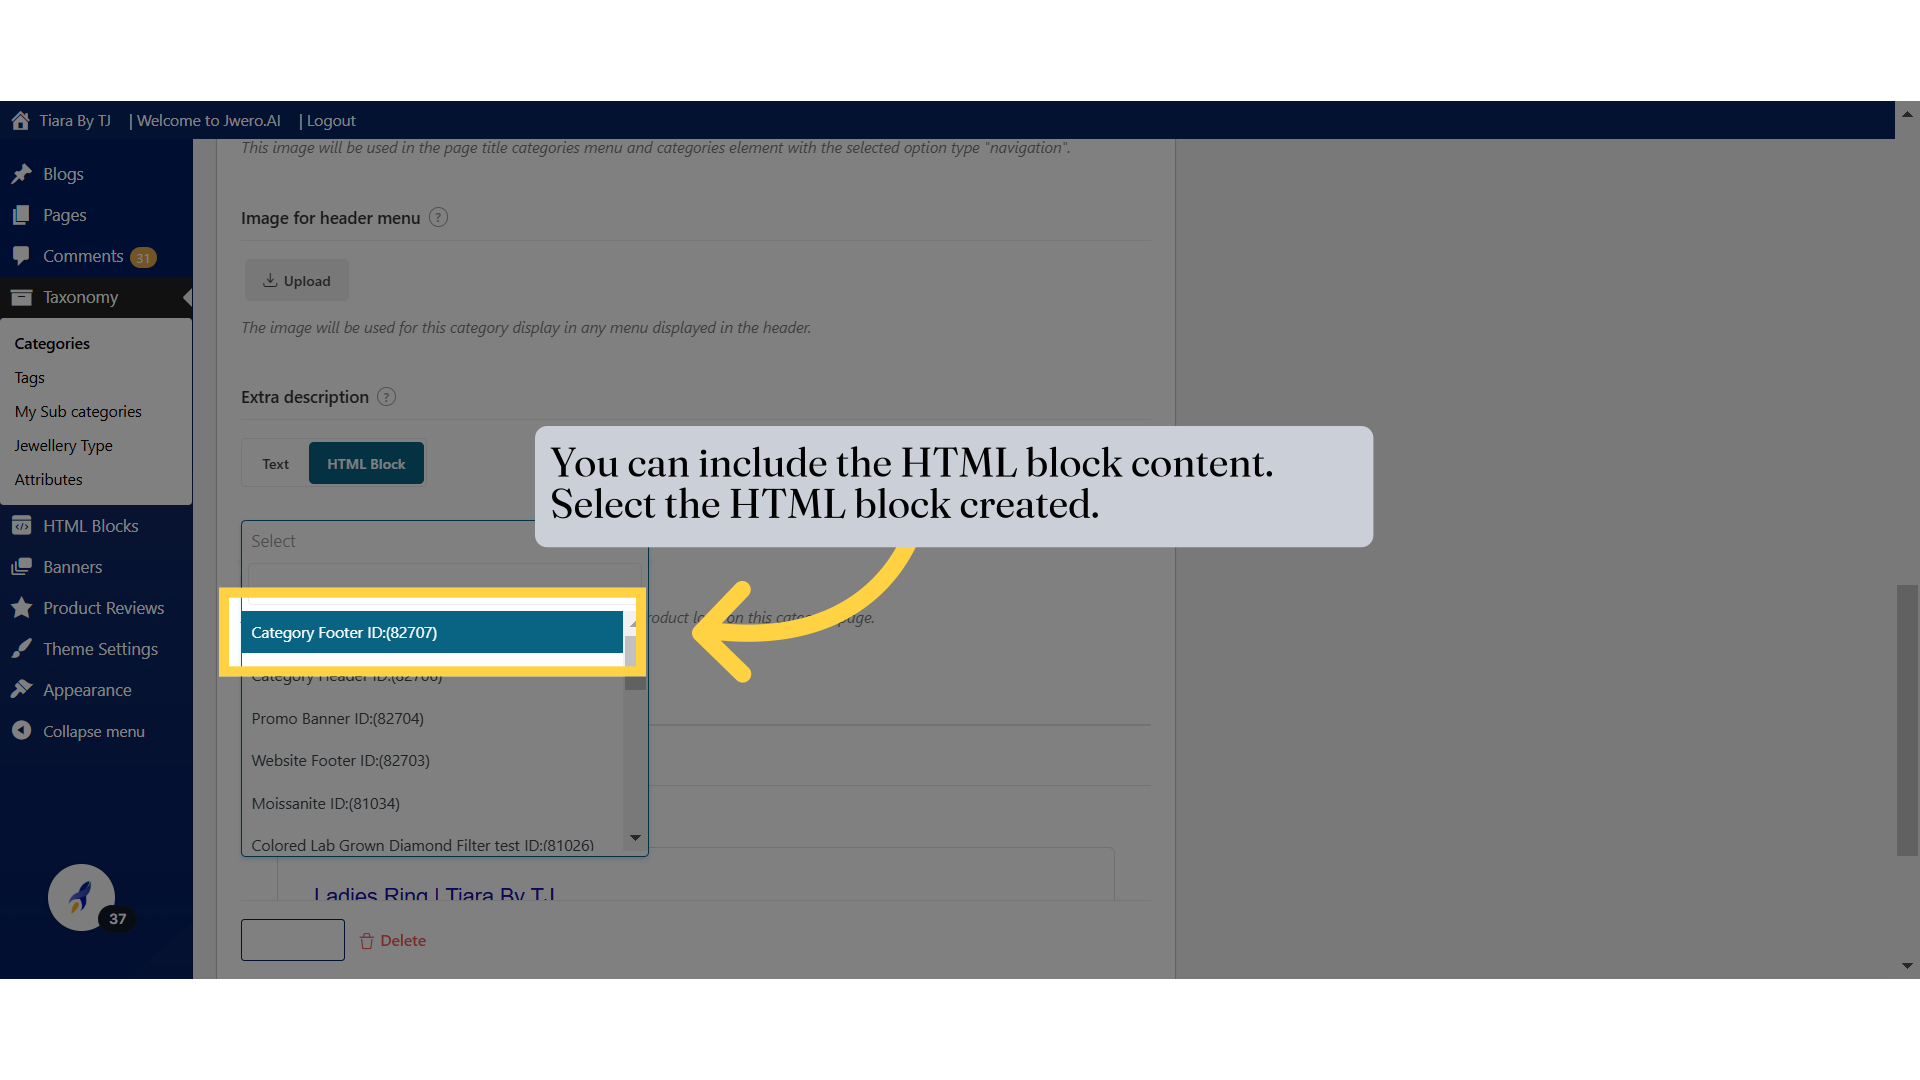
19. You can include the HTML block content. Select the HTML block created.
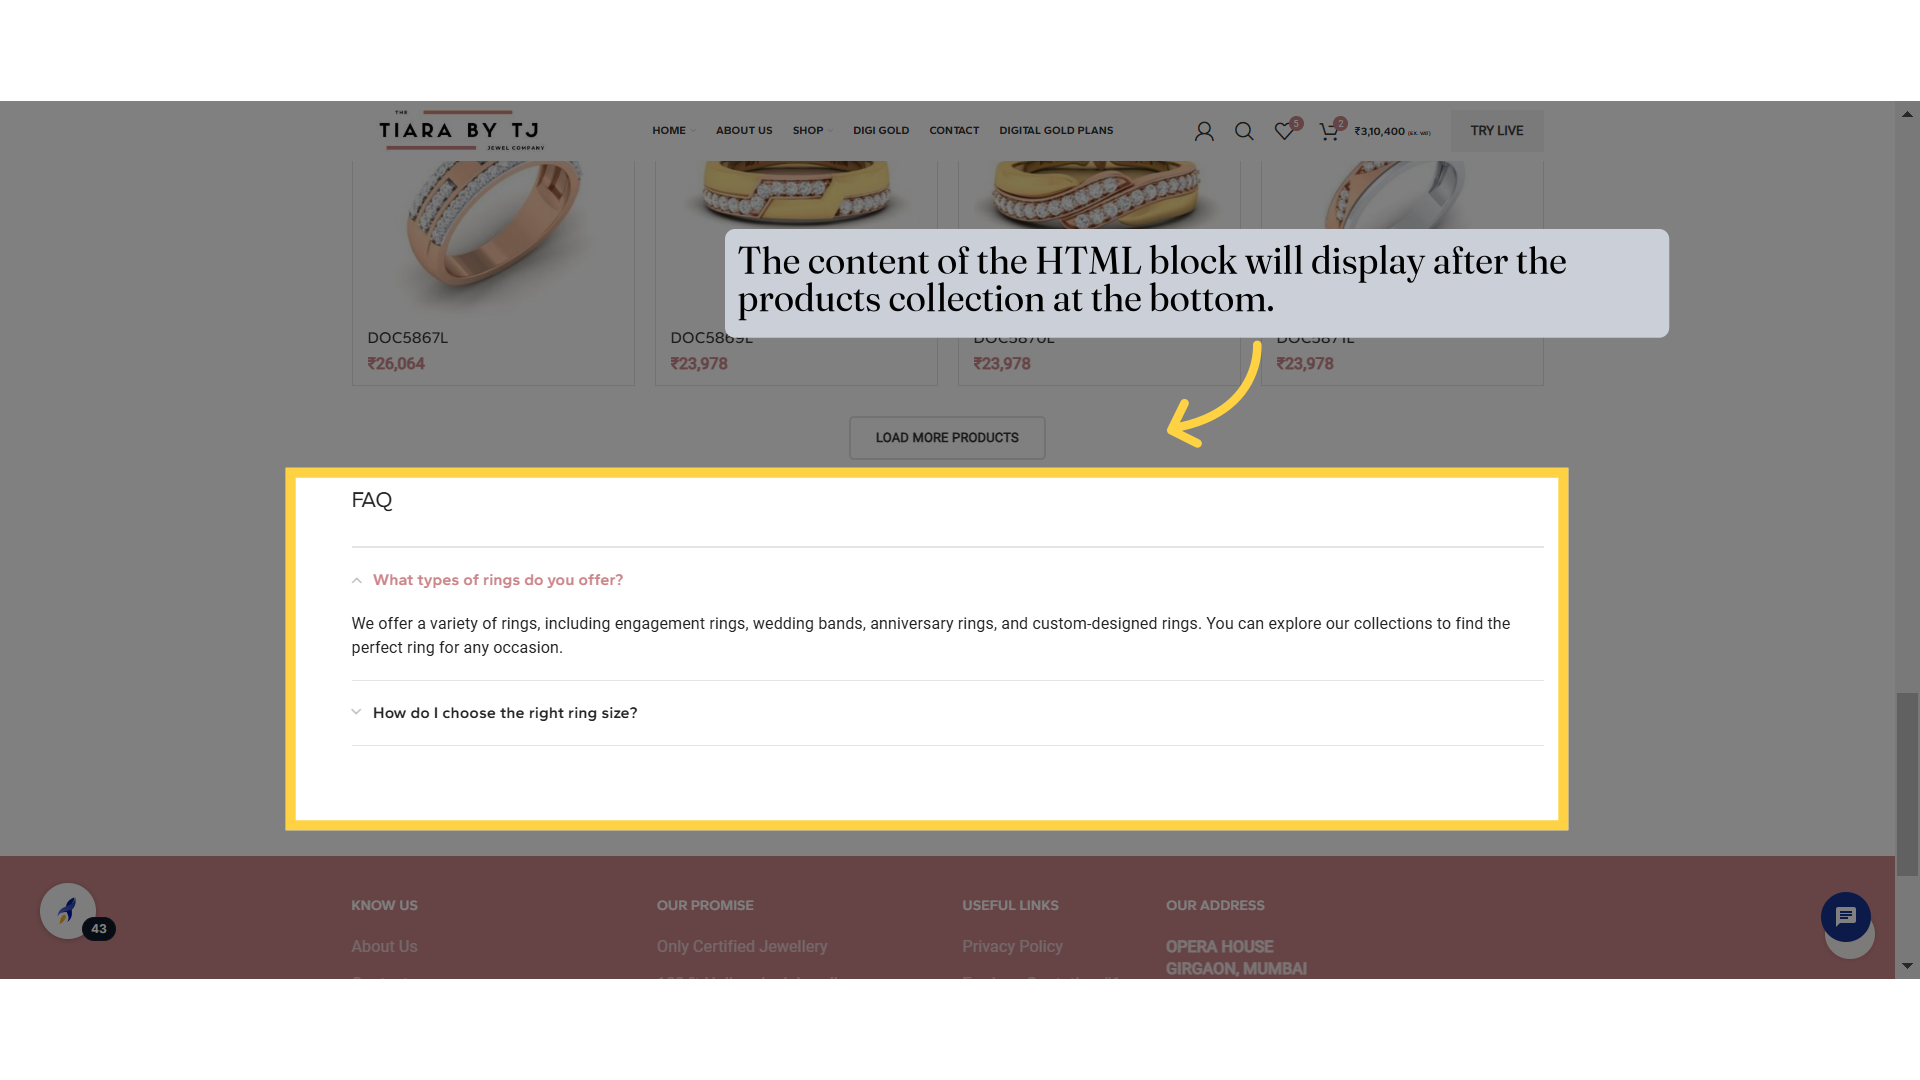
20. The content of the HTML block will display after the products collection at the bottom.
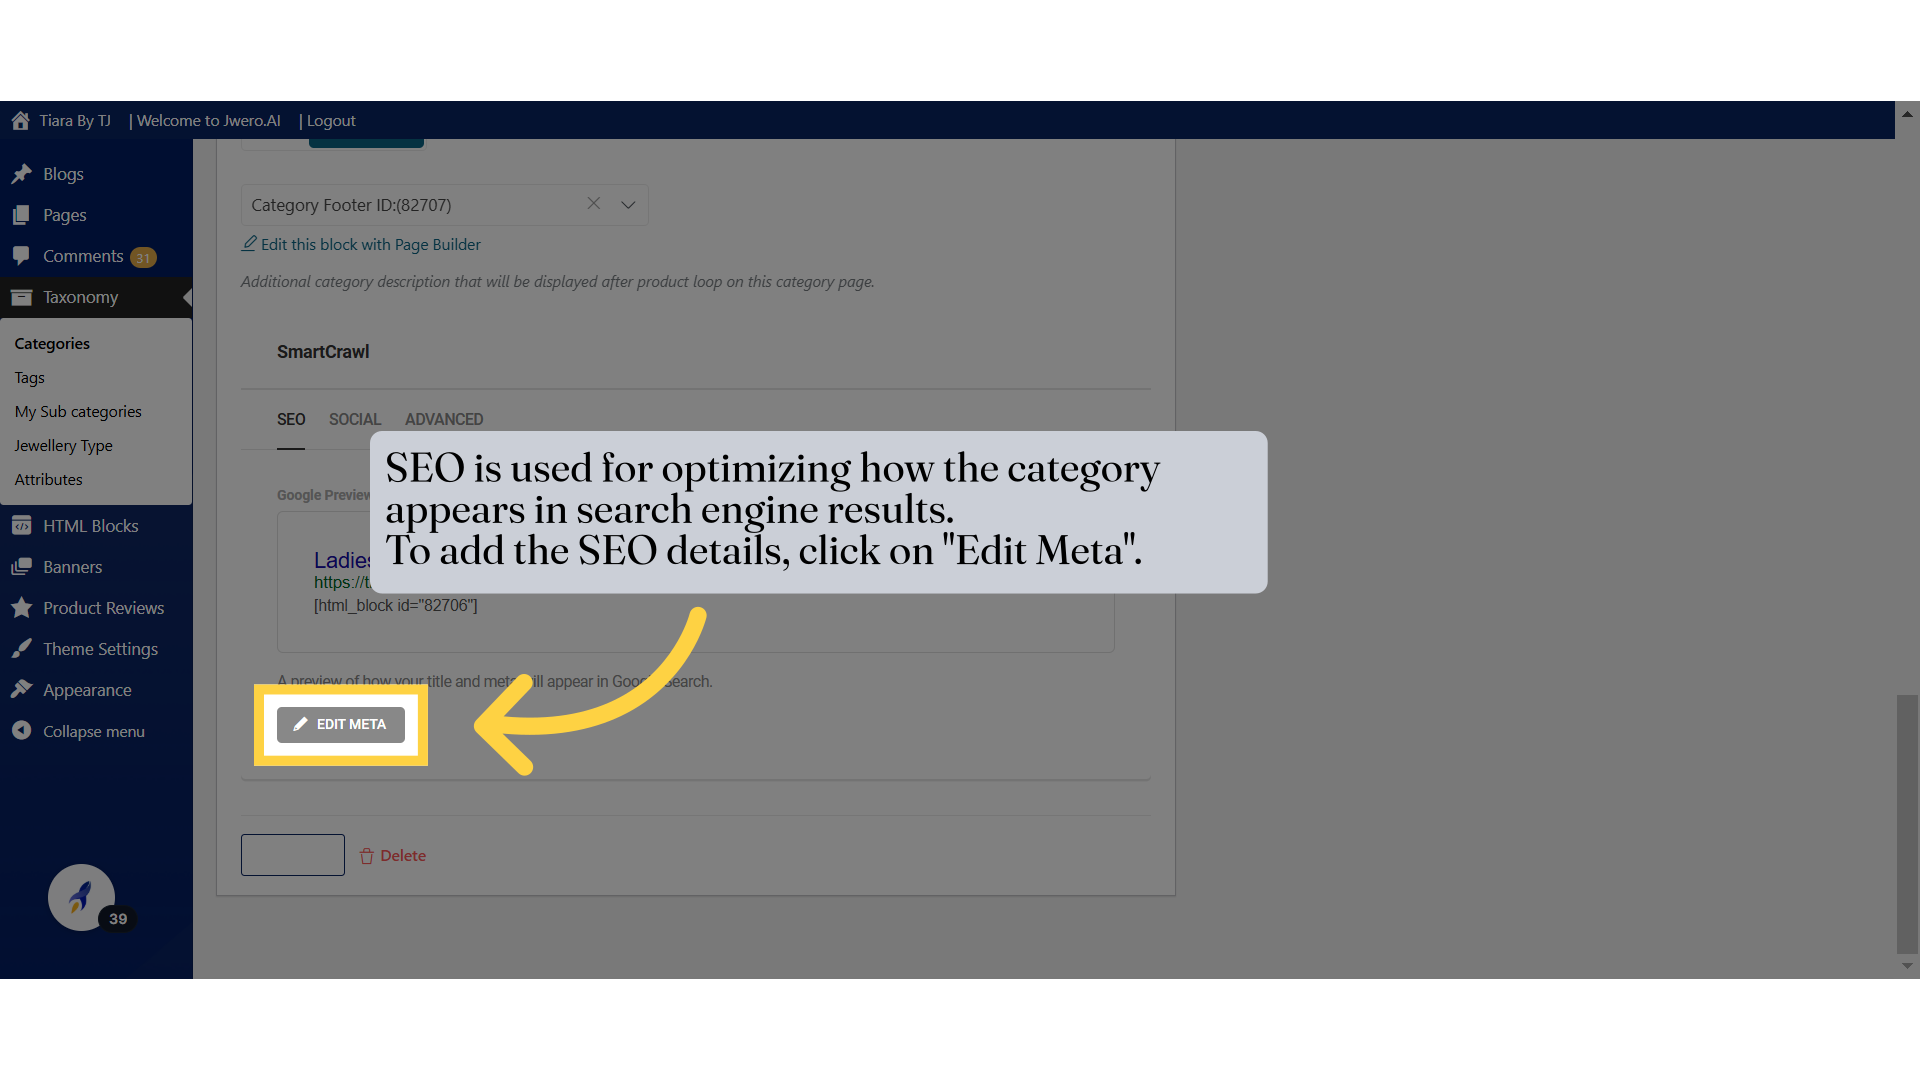
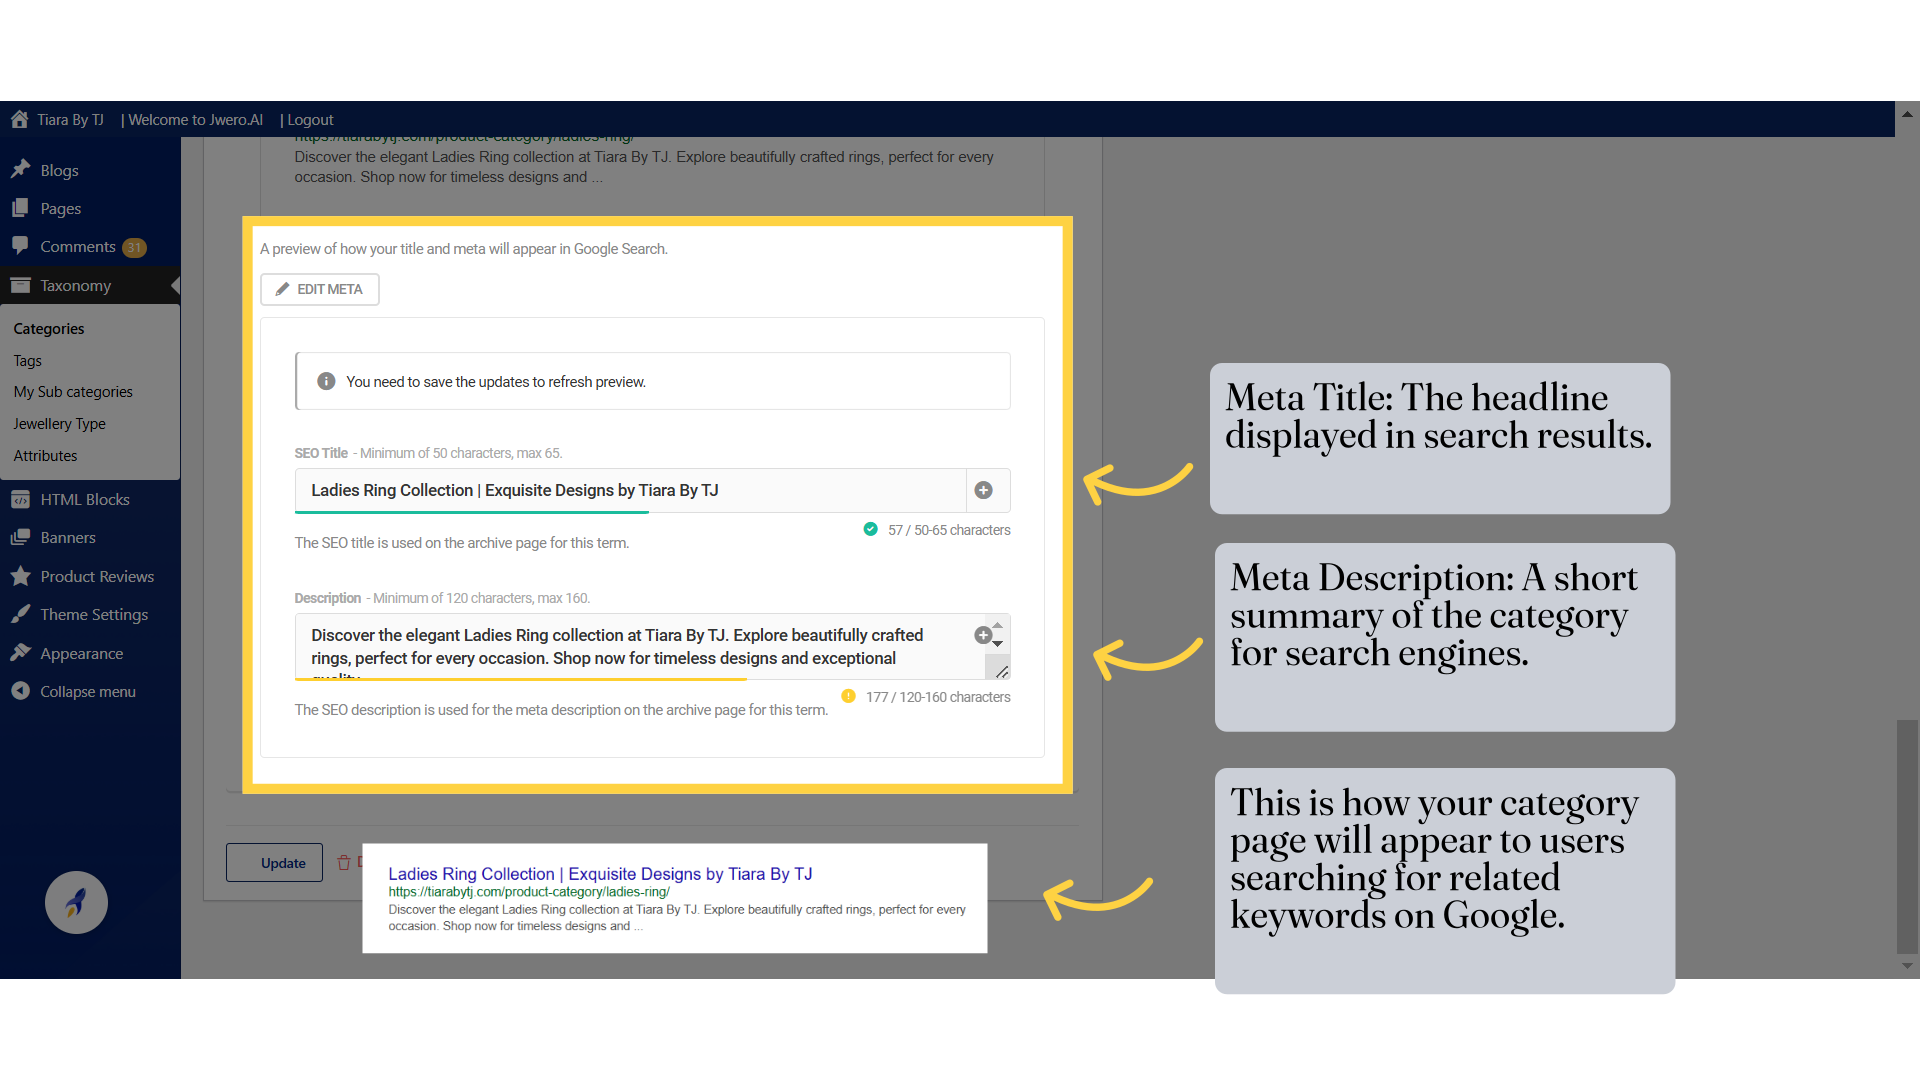
21. SEO is used for optimizing how the category appears in search engine results. To add the SEO details, click on "Edit Meta".
22. Click "Name The name is how it appears on your site. Slug The “slug” is the URL-friendly version of the name. It is usually all lowercase and contains only letters, numbers, and..."
23. Click "Update" to save the changes.

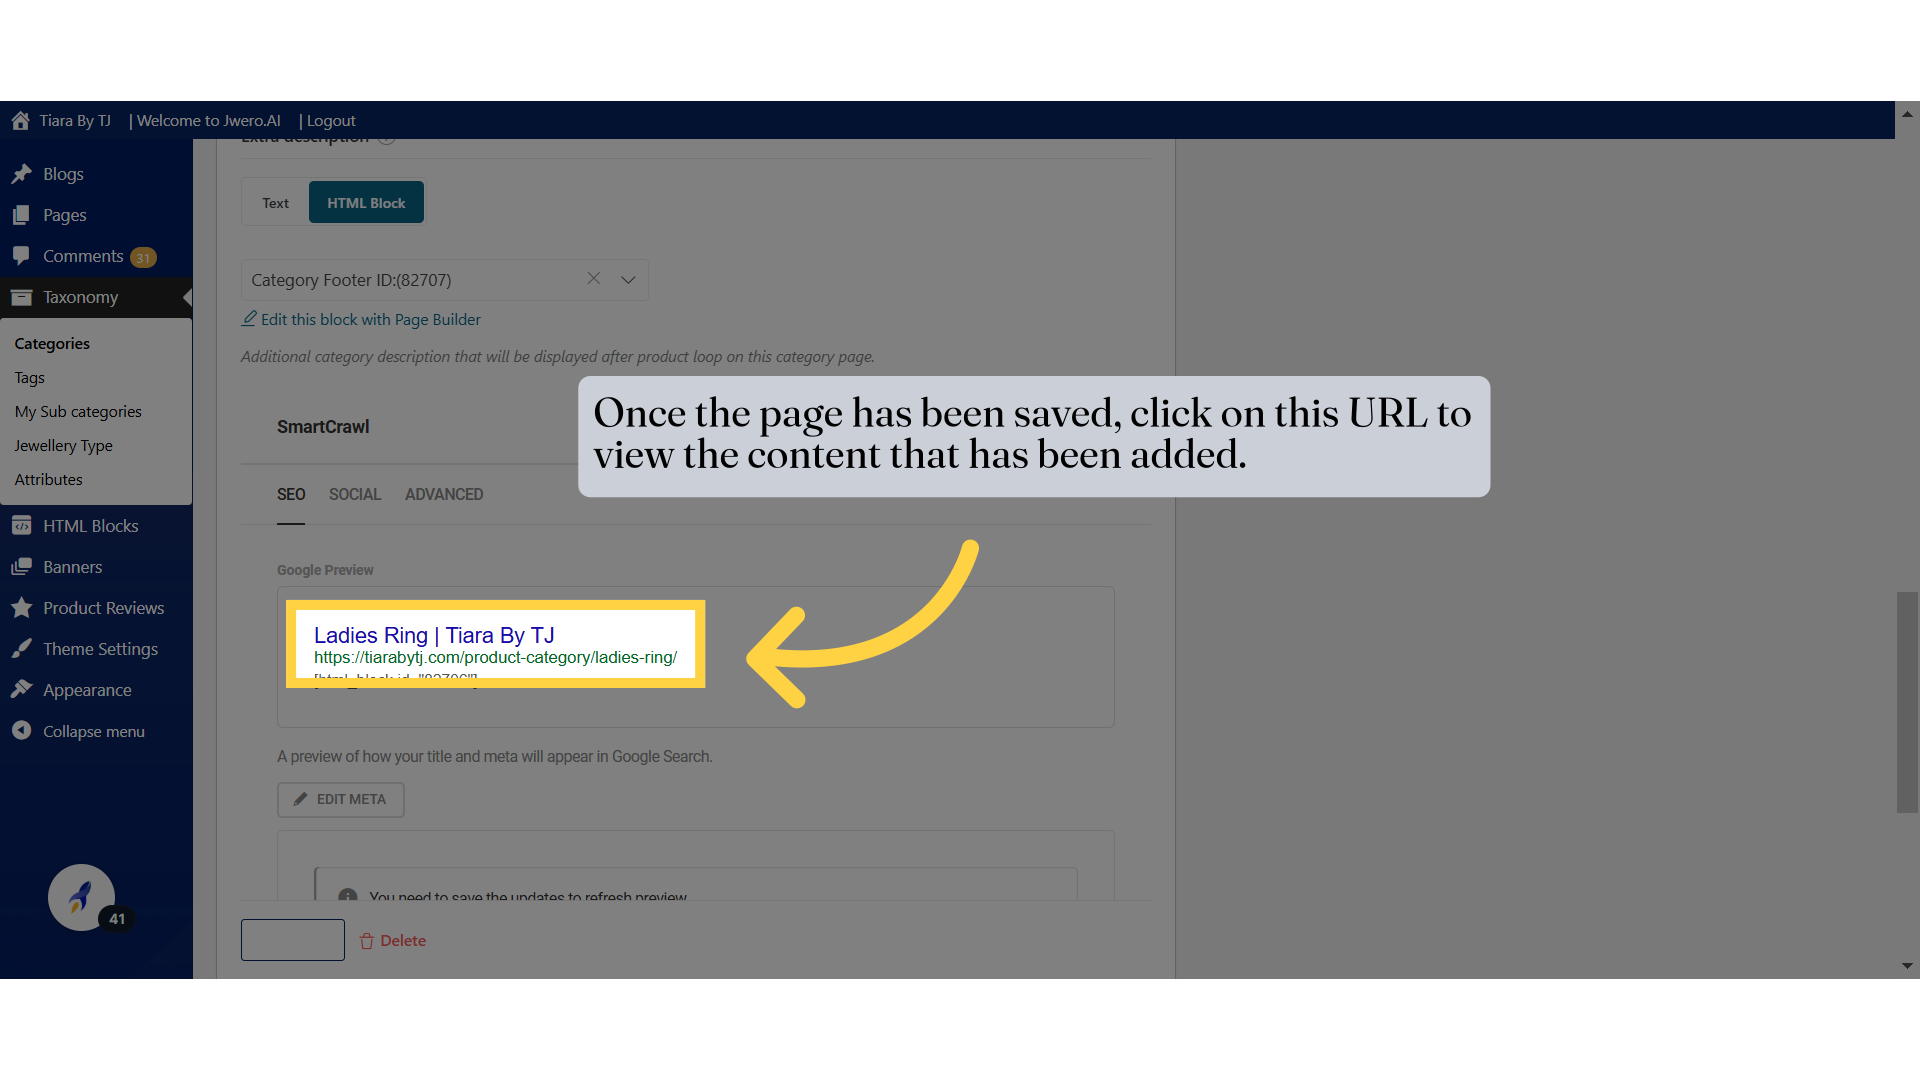
24. Once the page has been saved, click on this URL to view the content that has been added.
Navigate to the specified URL