How To Create Ads Within Jwero
In this guide, we will walk you through the steps to Ads using the Jwero applications.
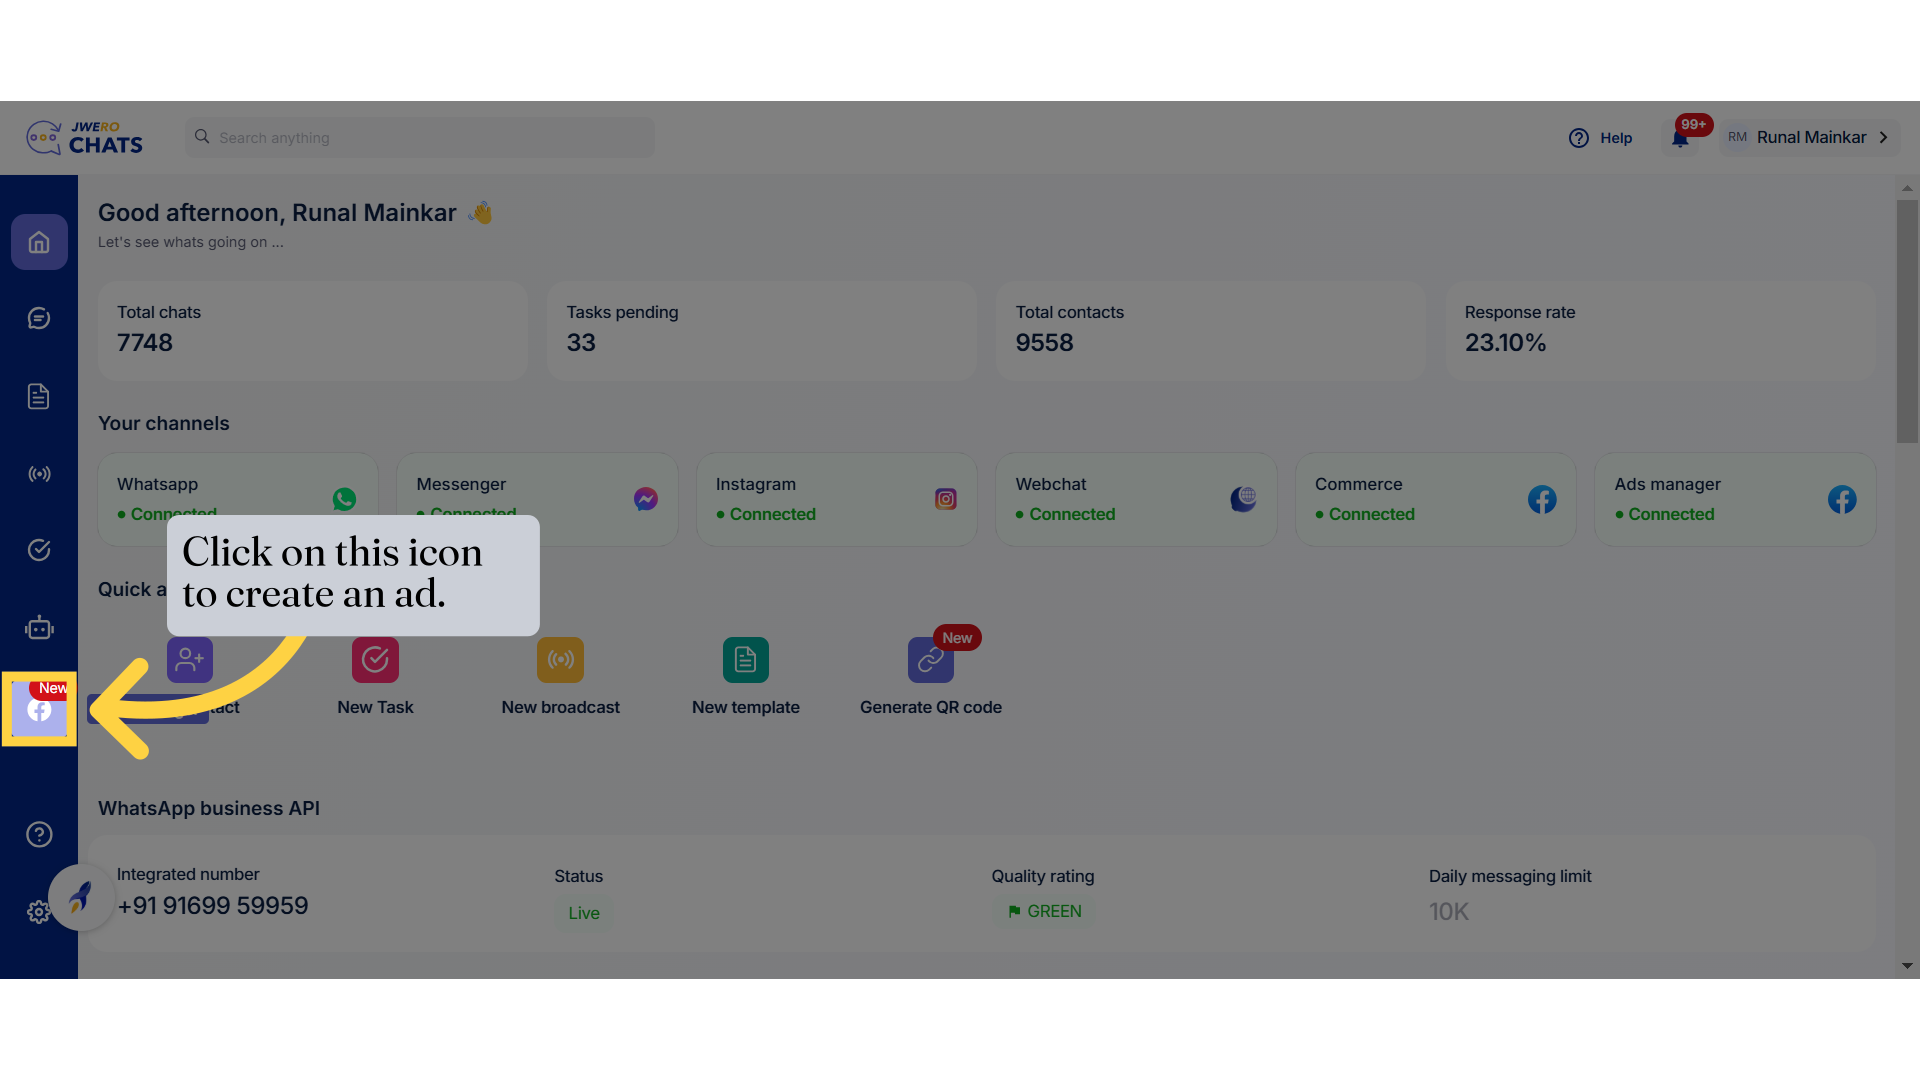
1. Ads
2. Click on this icon to create an ad.
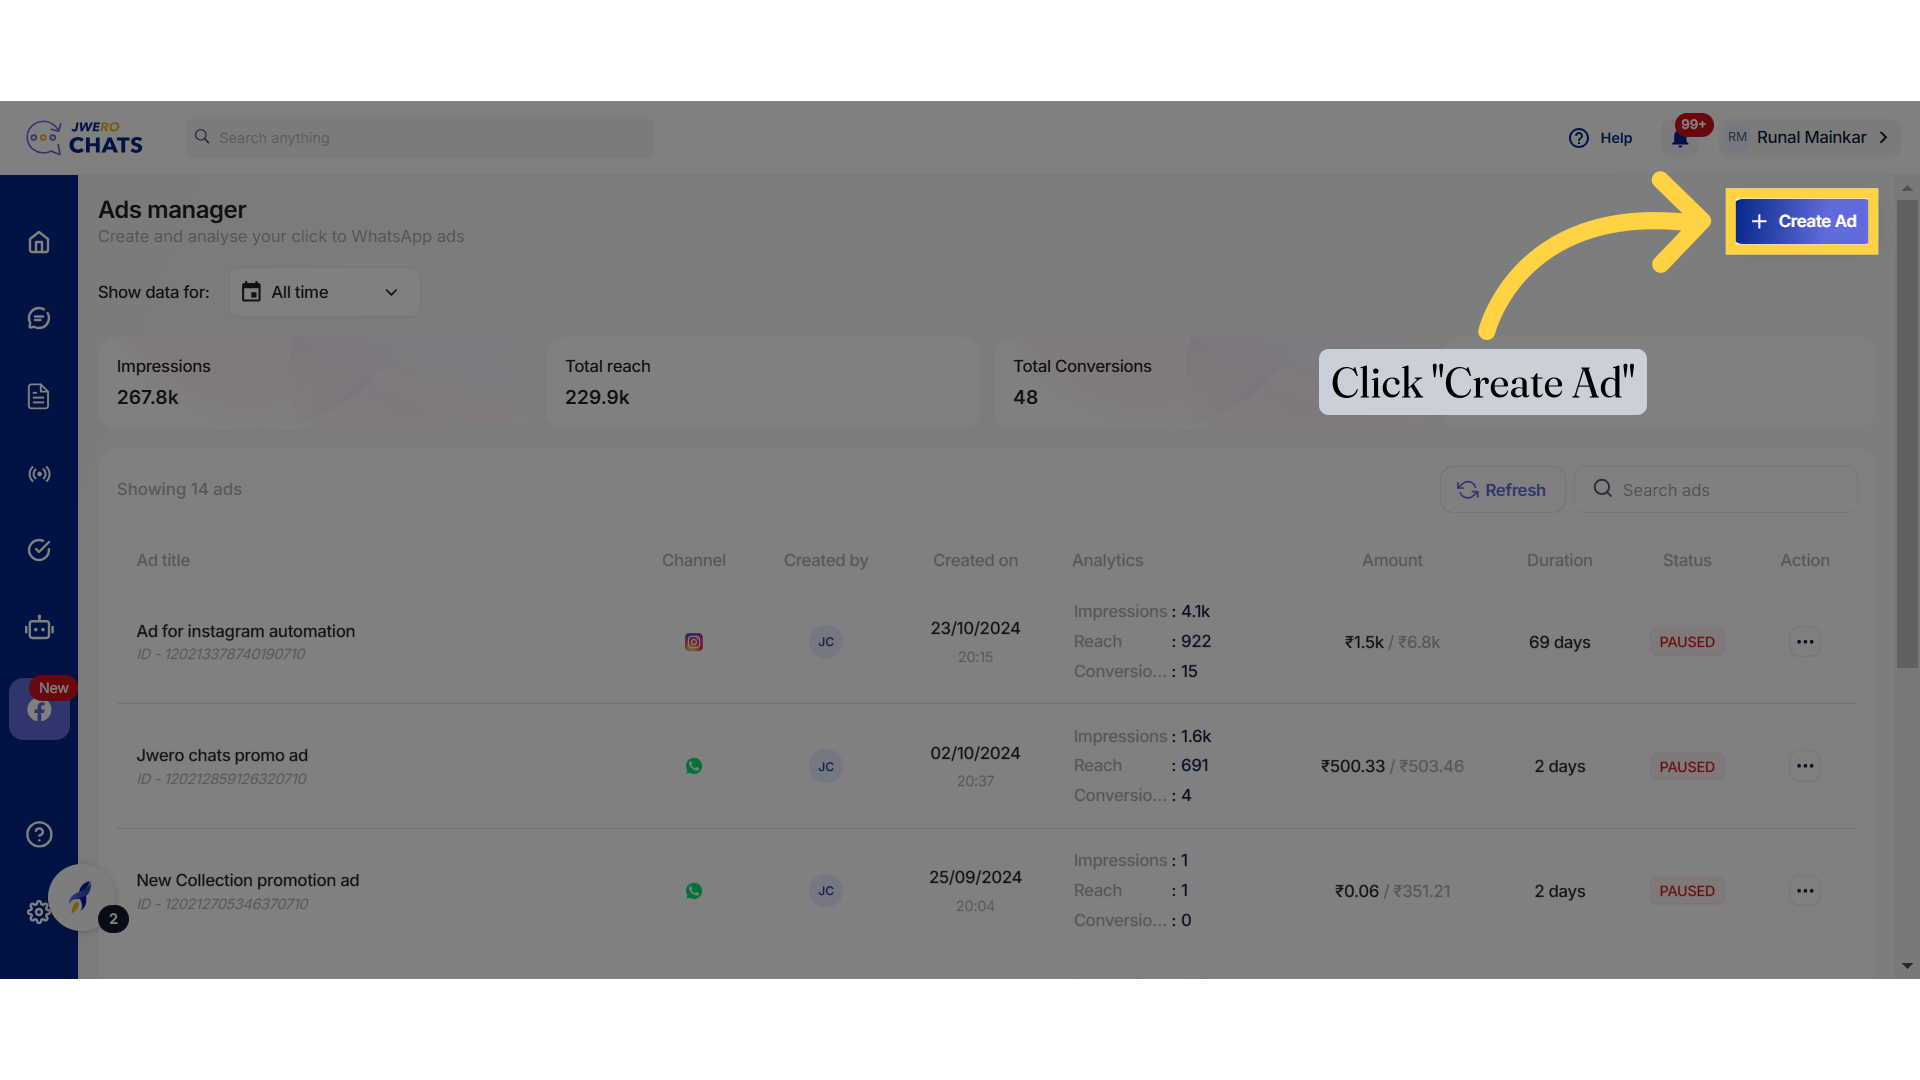
3. Click "Create Ad"
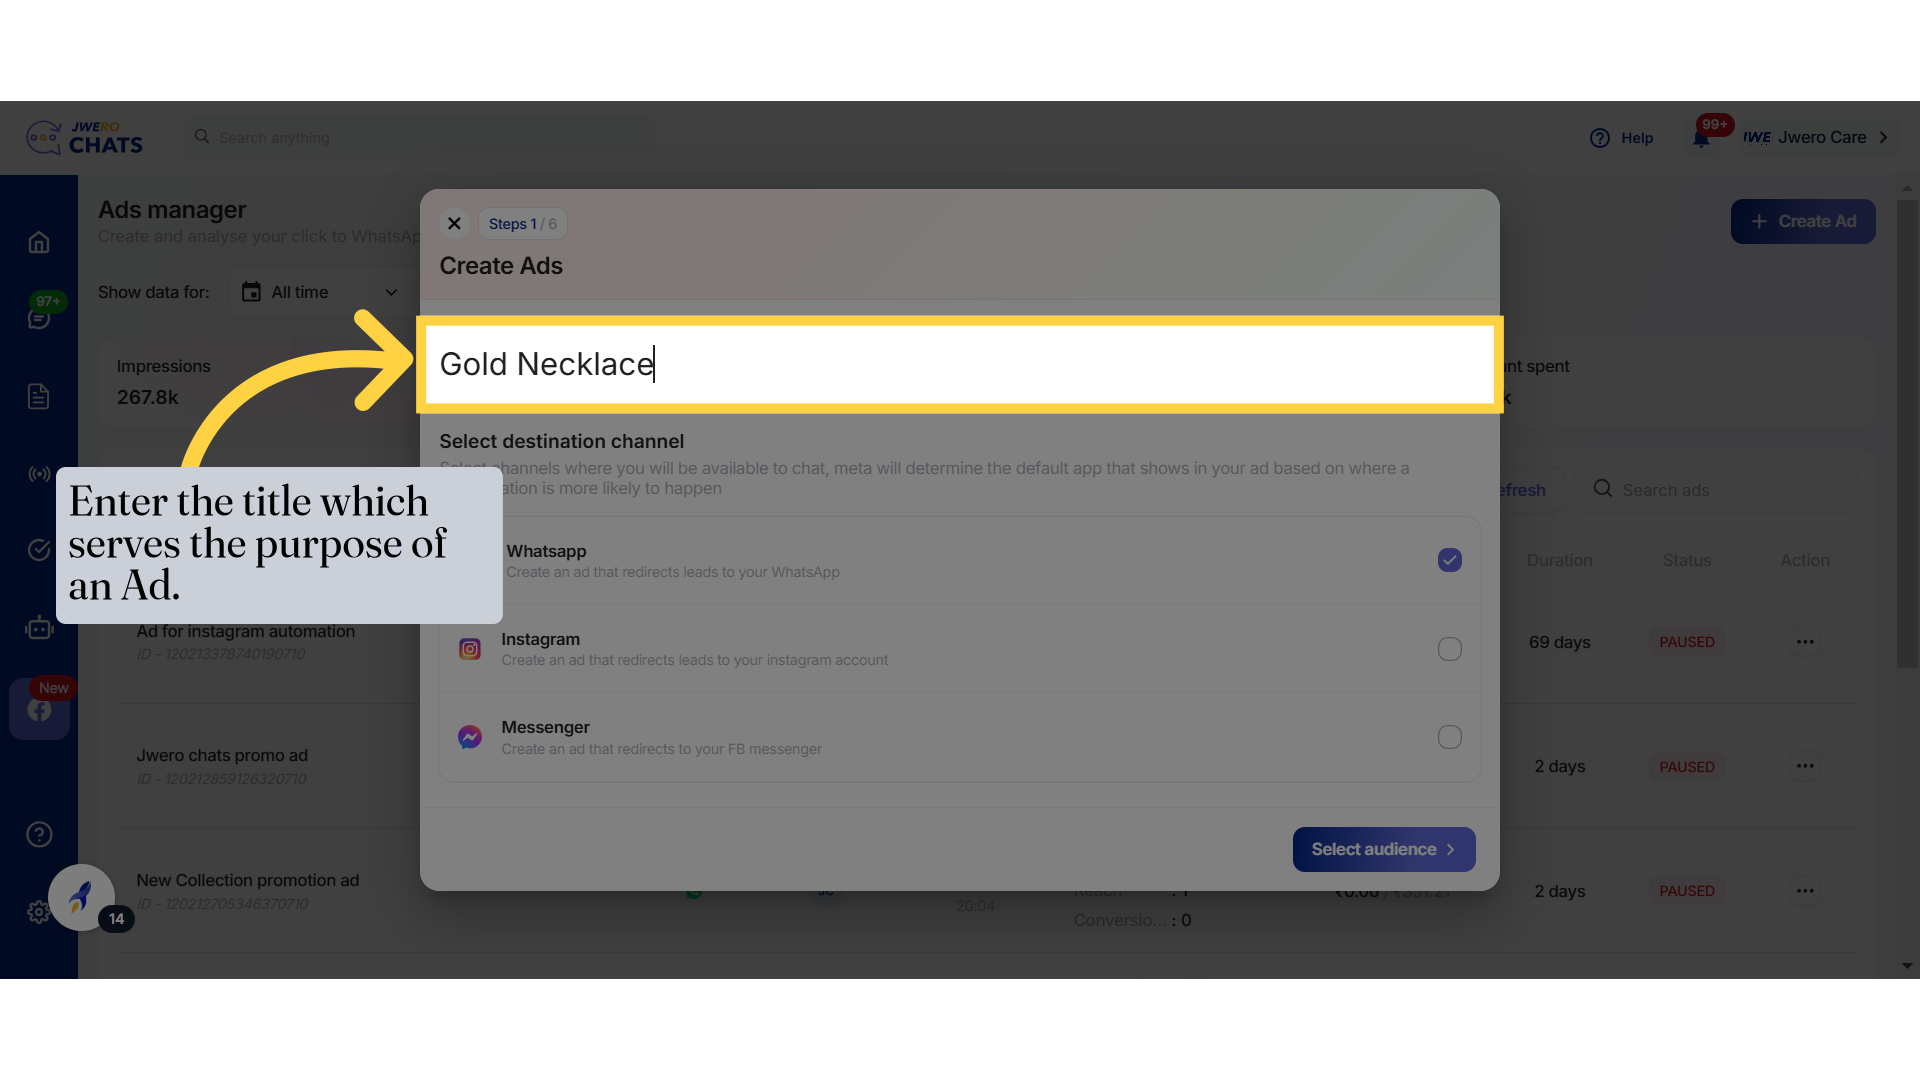
4. Enter the title which serves the purpose of an Ad.
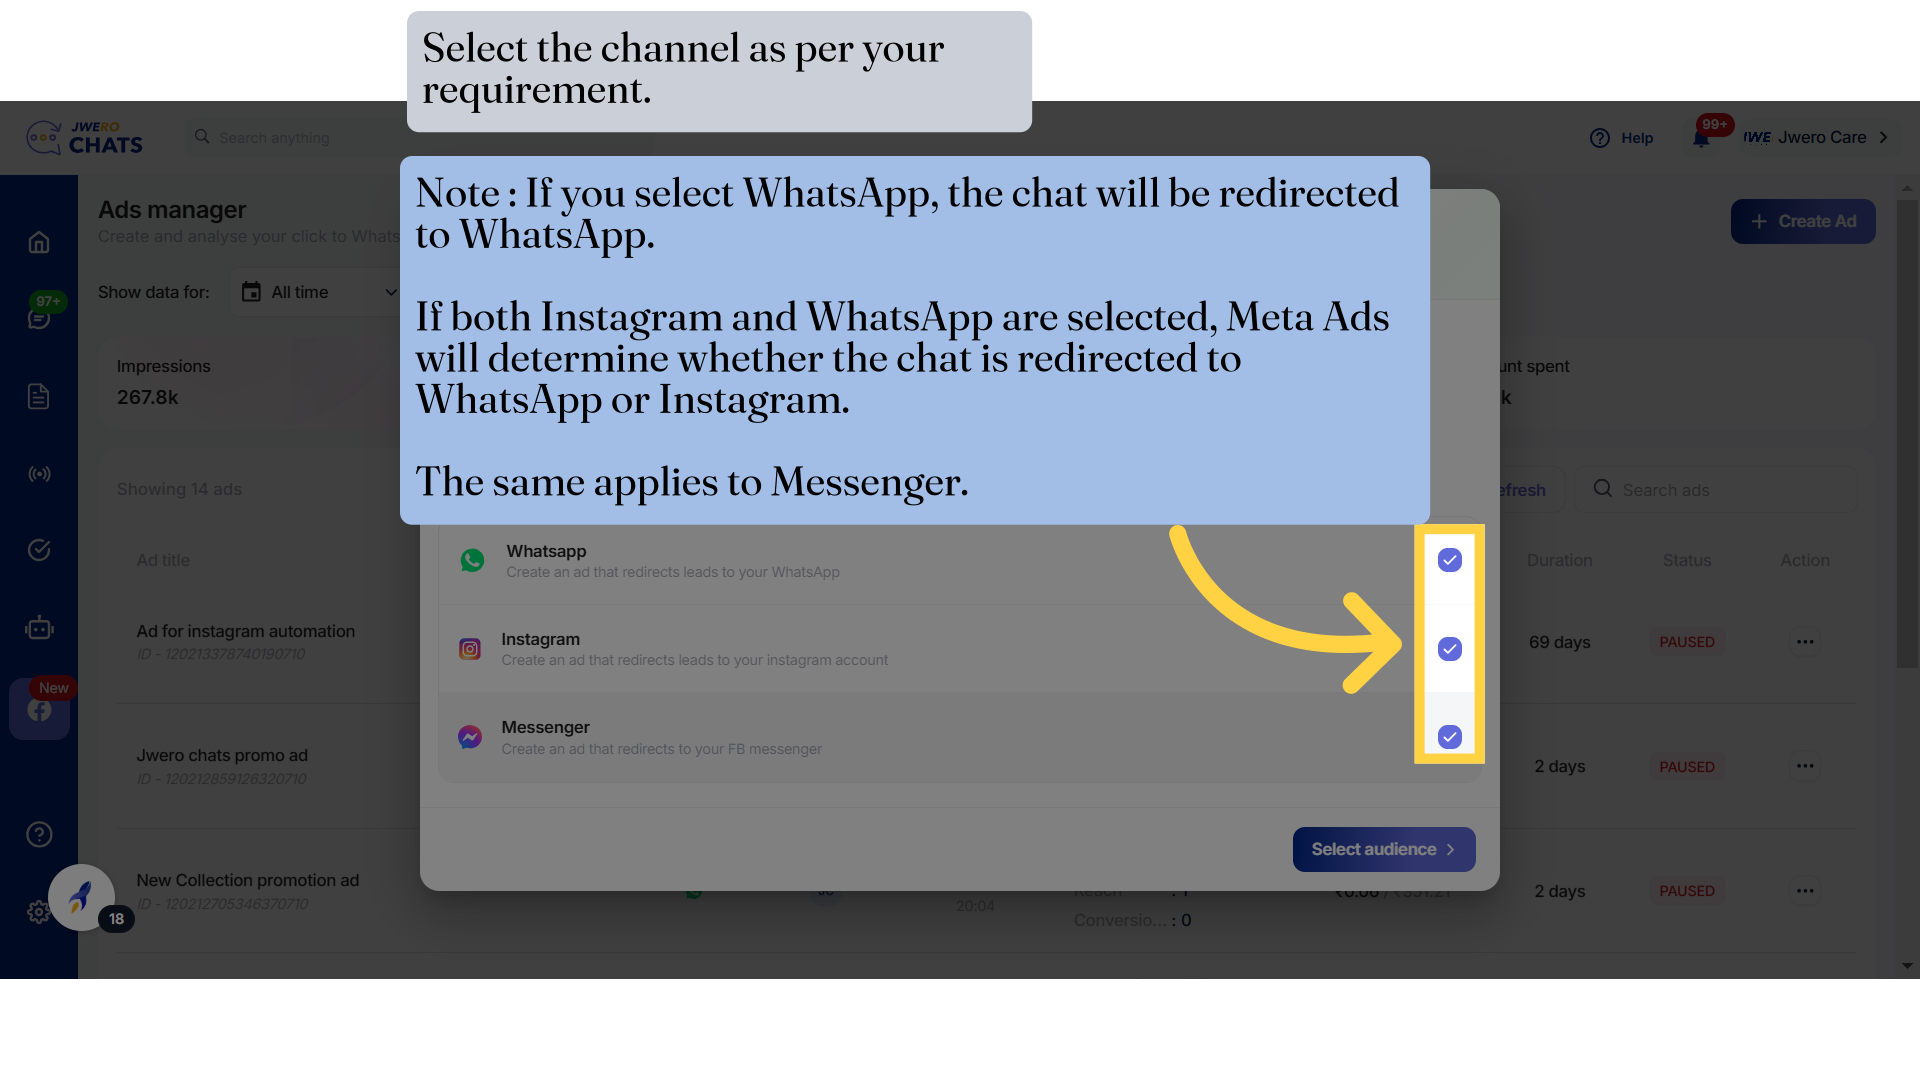
5. Select the channel as per your requirement.
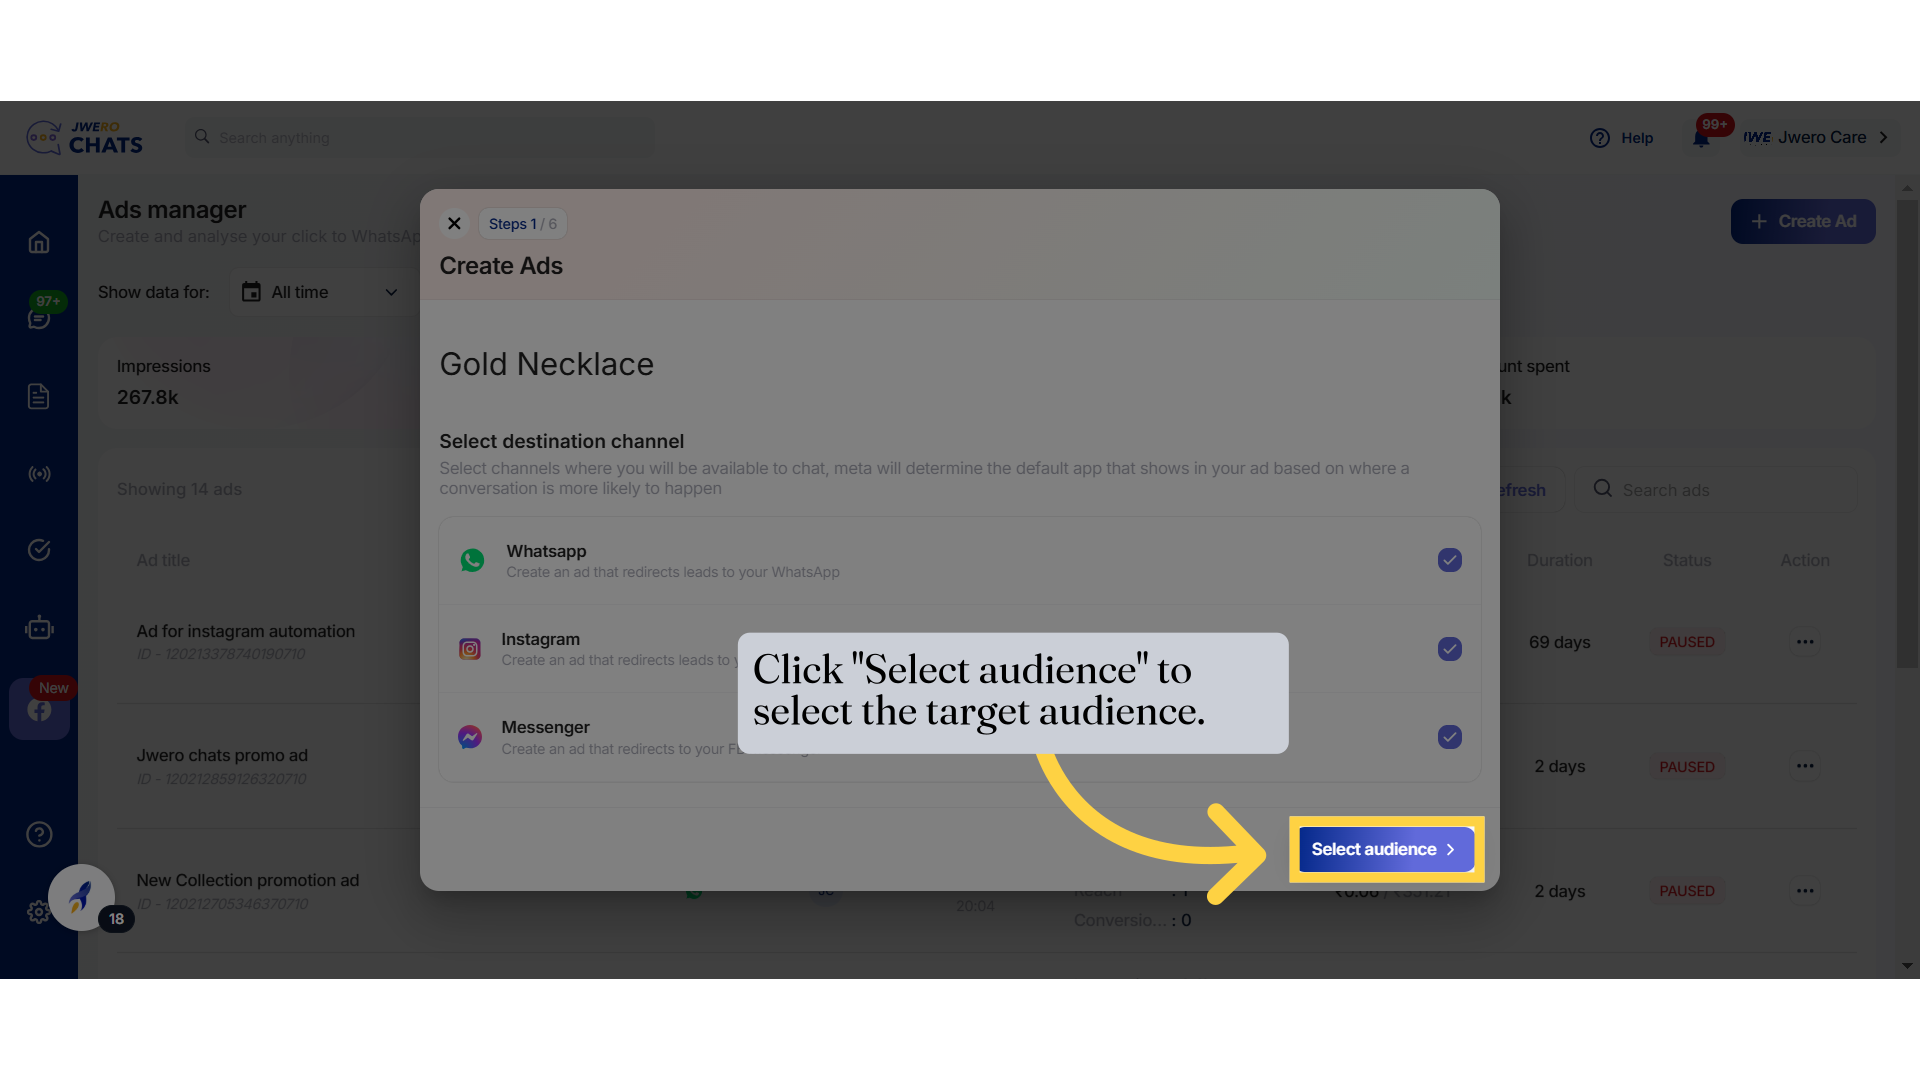
6. Click "Select audience" to select the target audience.
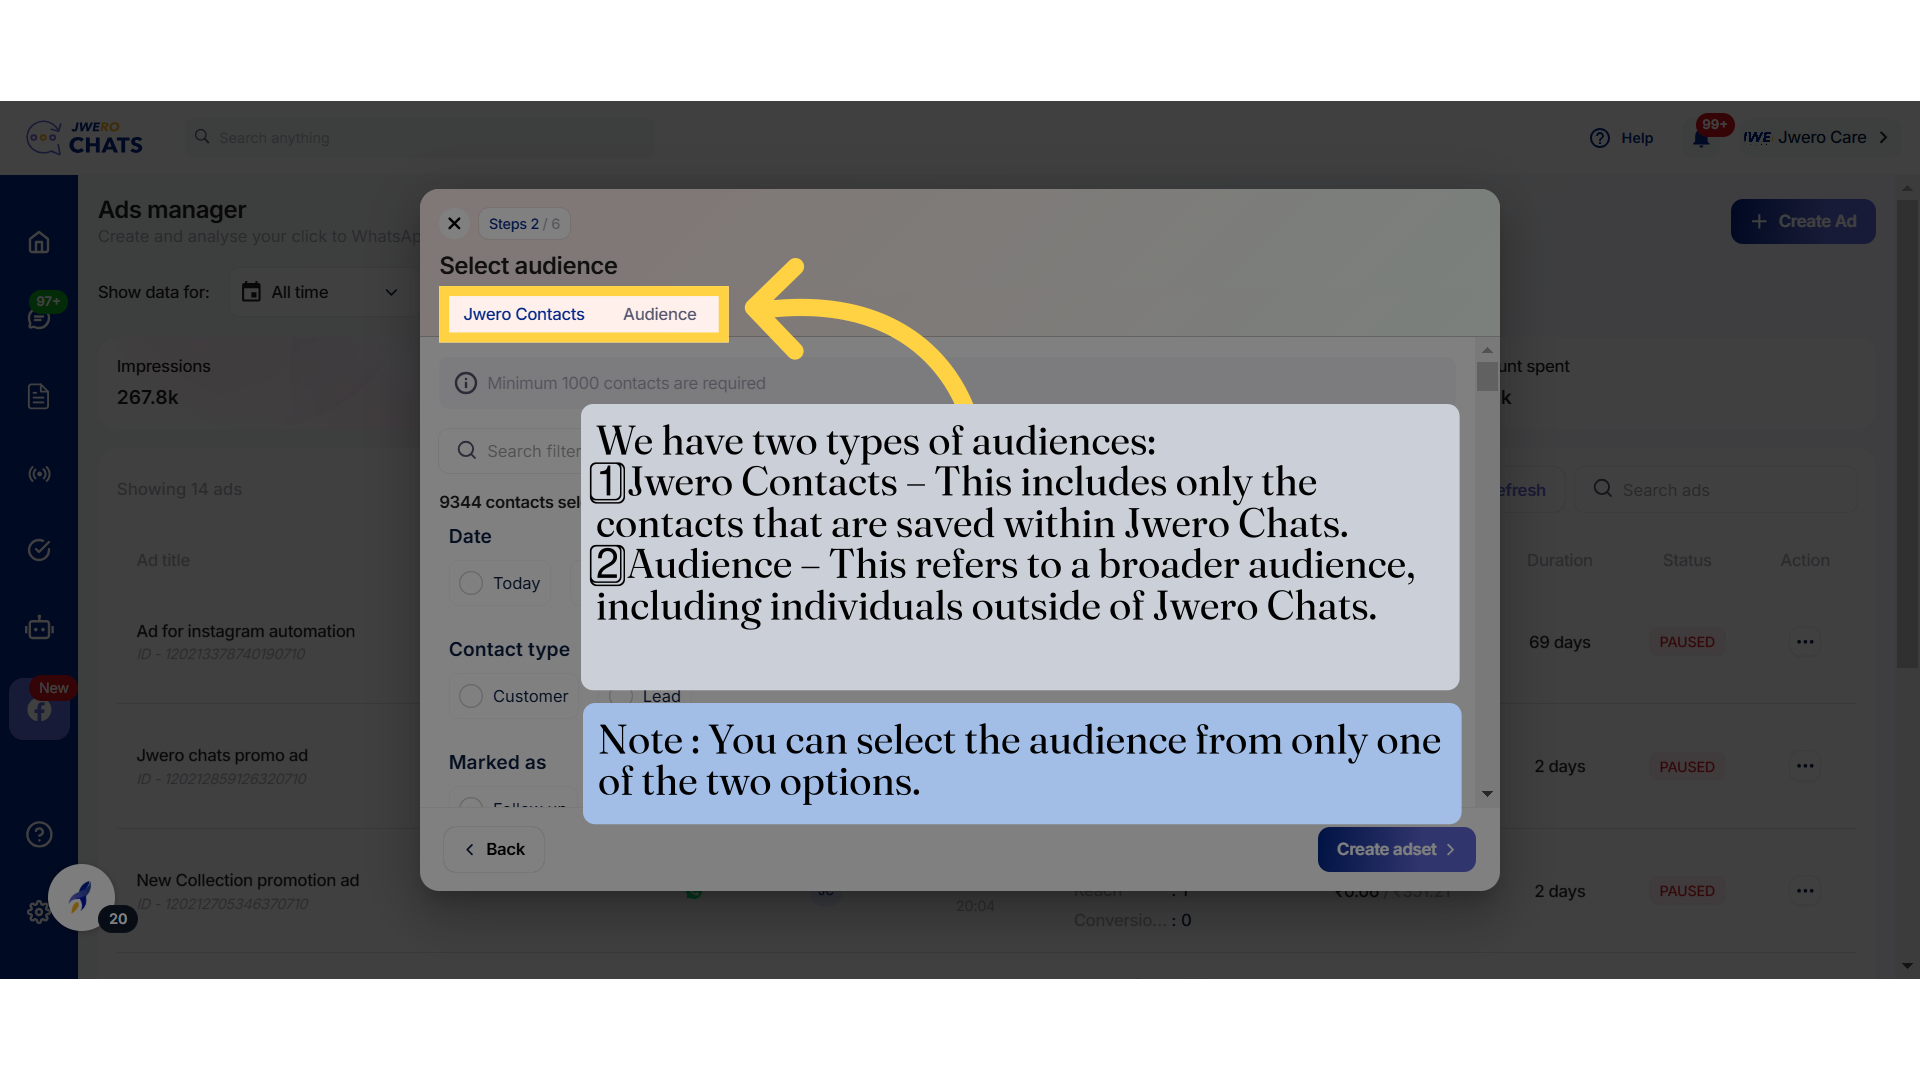
7. We have two types of audiences
1️⃣ Jwero Contacts – This includes only the contacts that are saved within Jwero Chats.
2️⃣ Audience – This refers to a broader audience, including individuals outside of Jwero Chats.
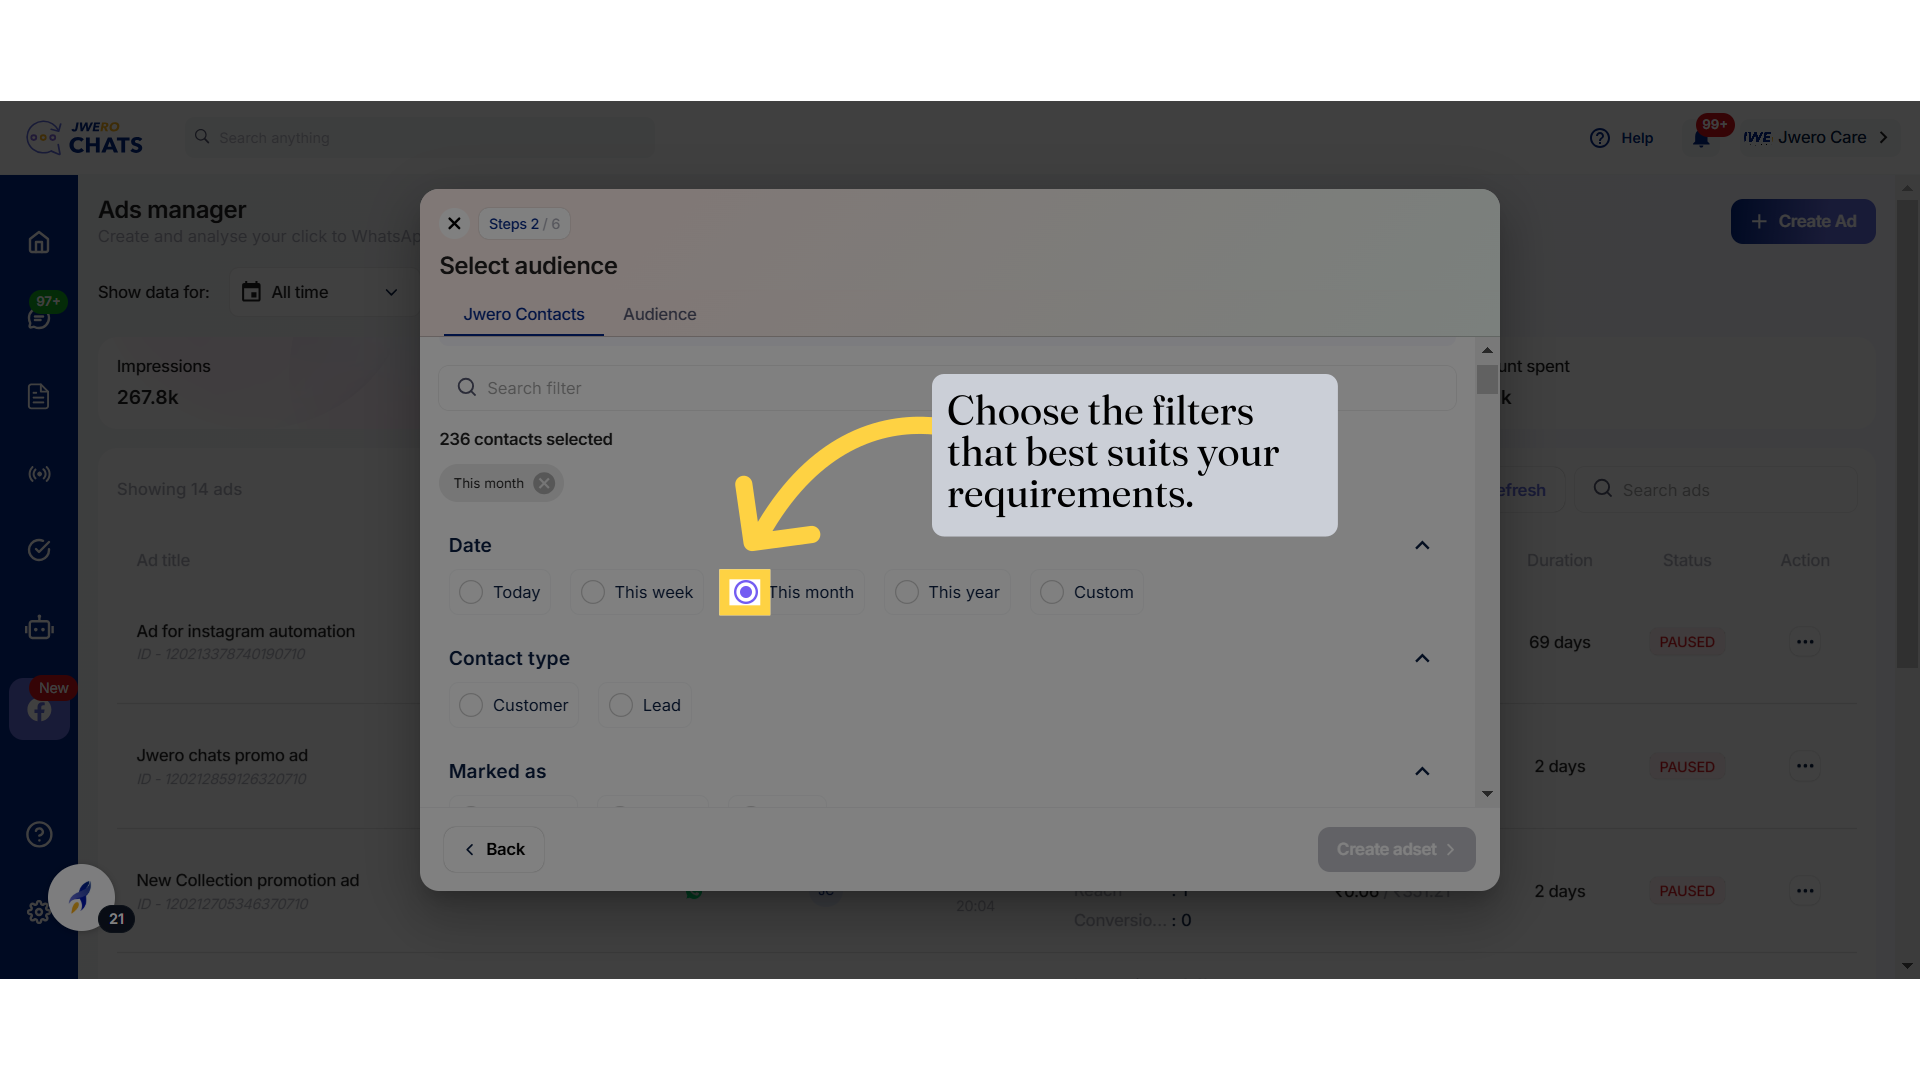
8. Choose the filters that best suits your requirements.
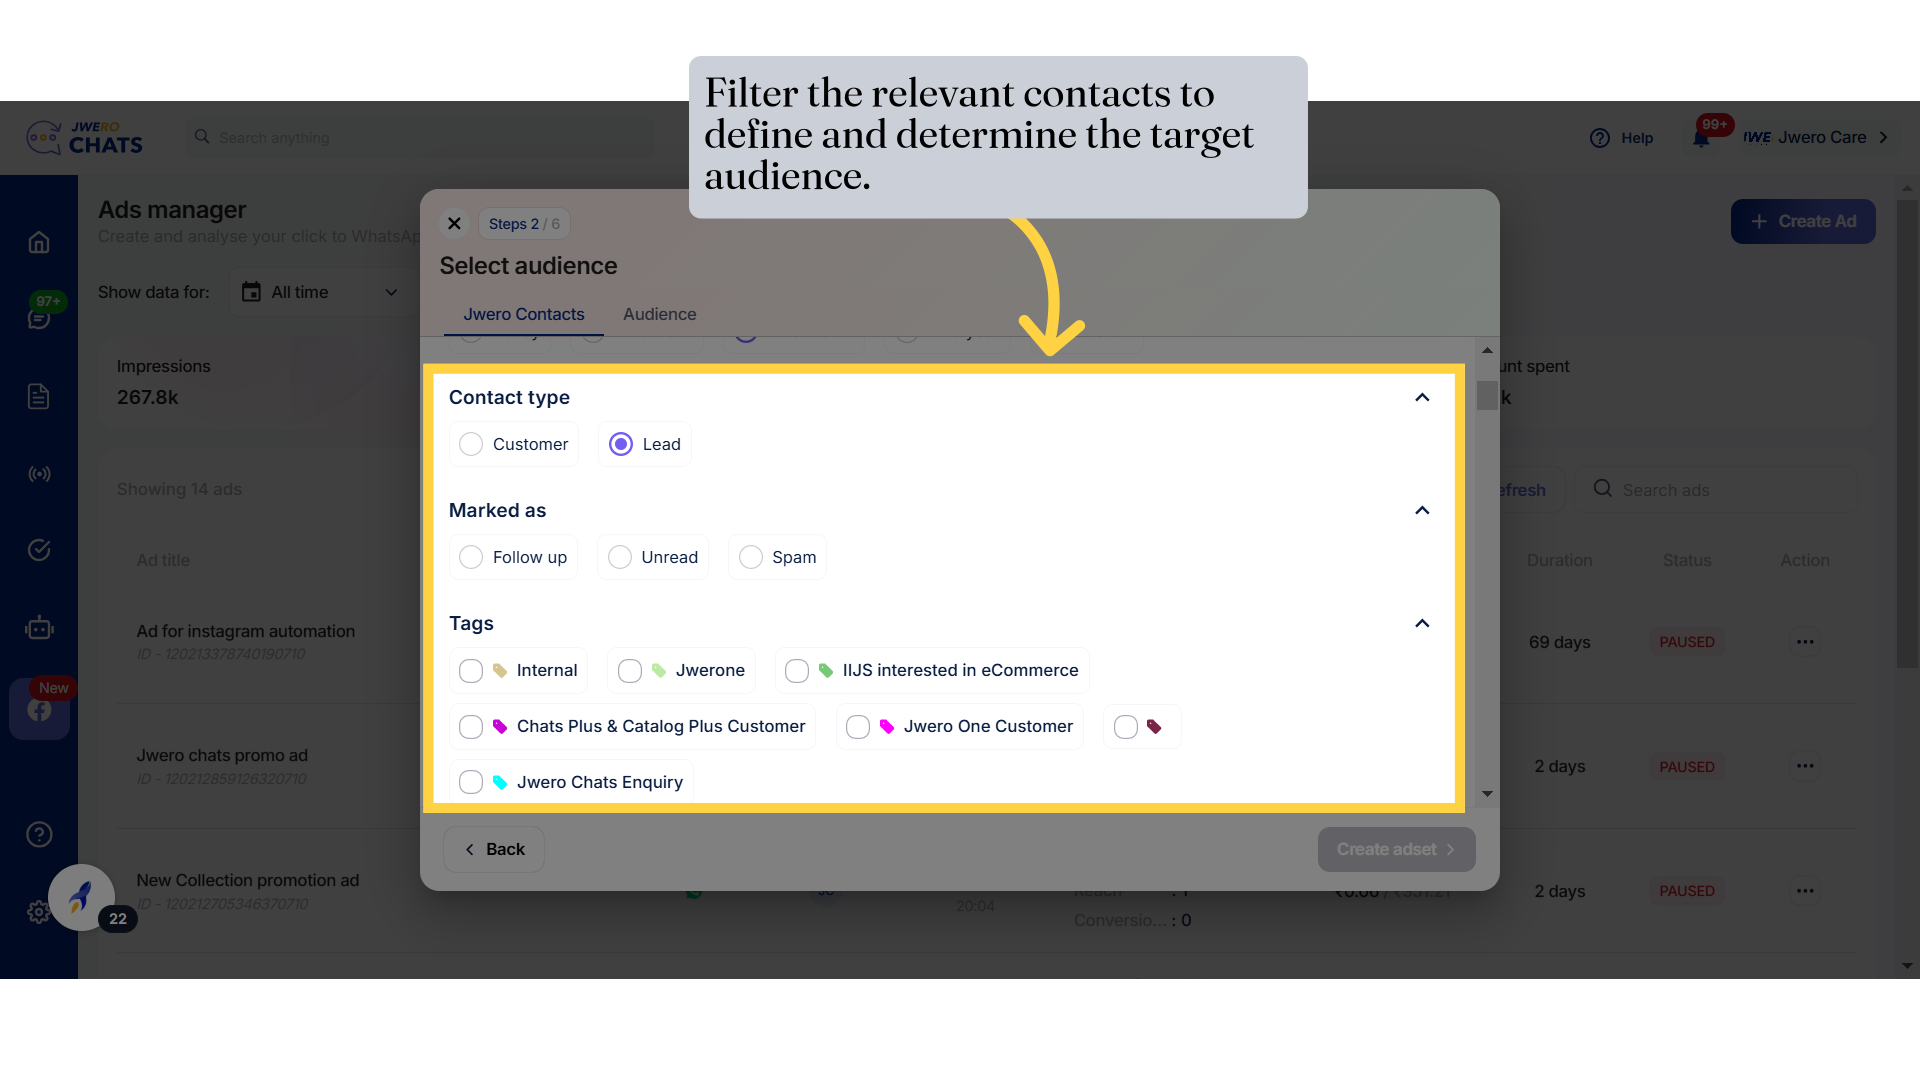
9. Filter the relevant contacts to define and determine the target audience.
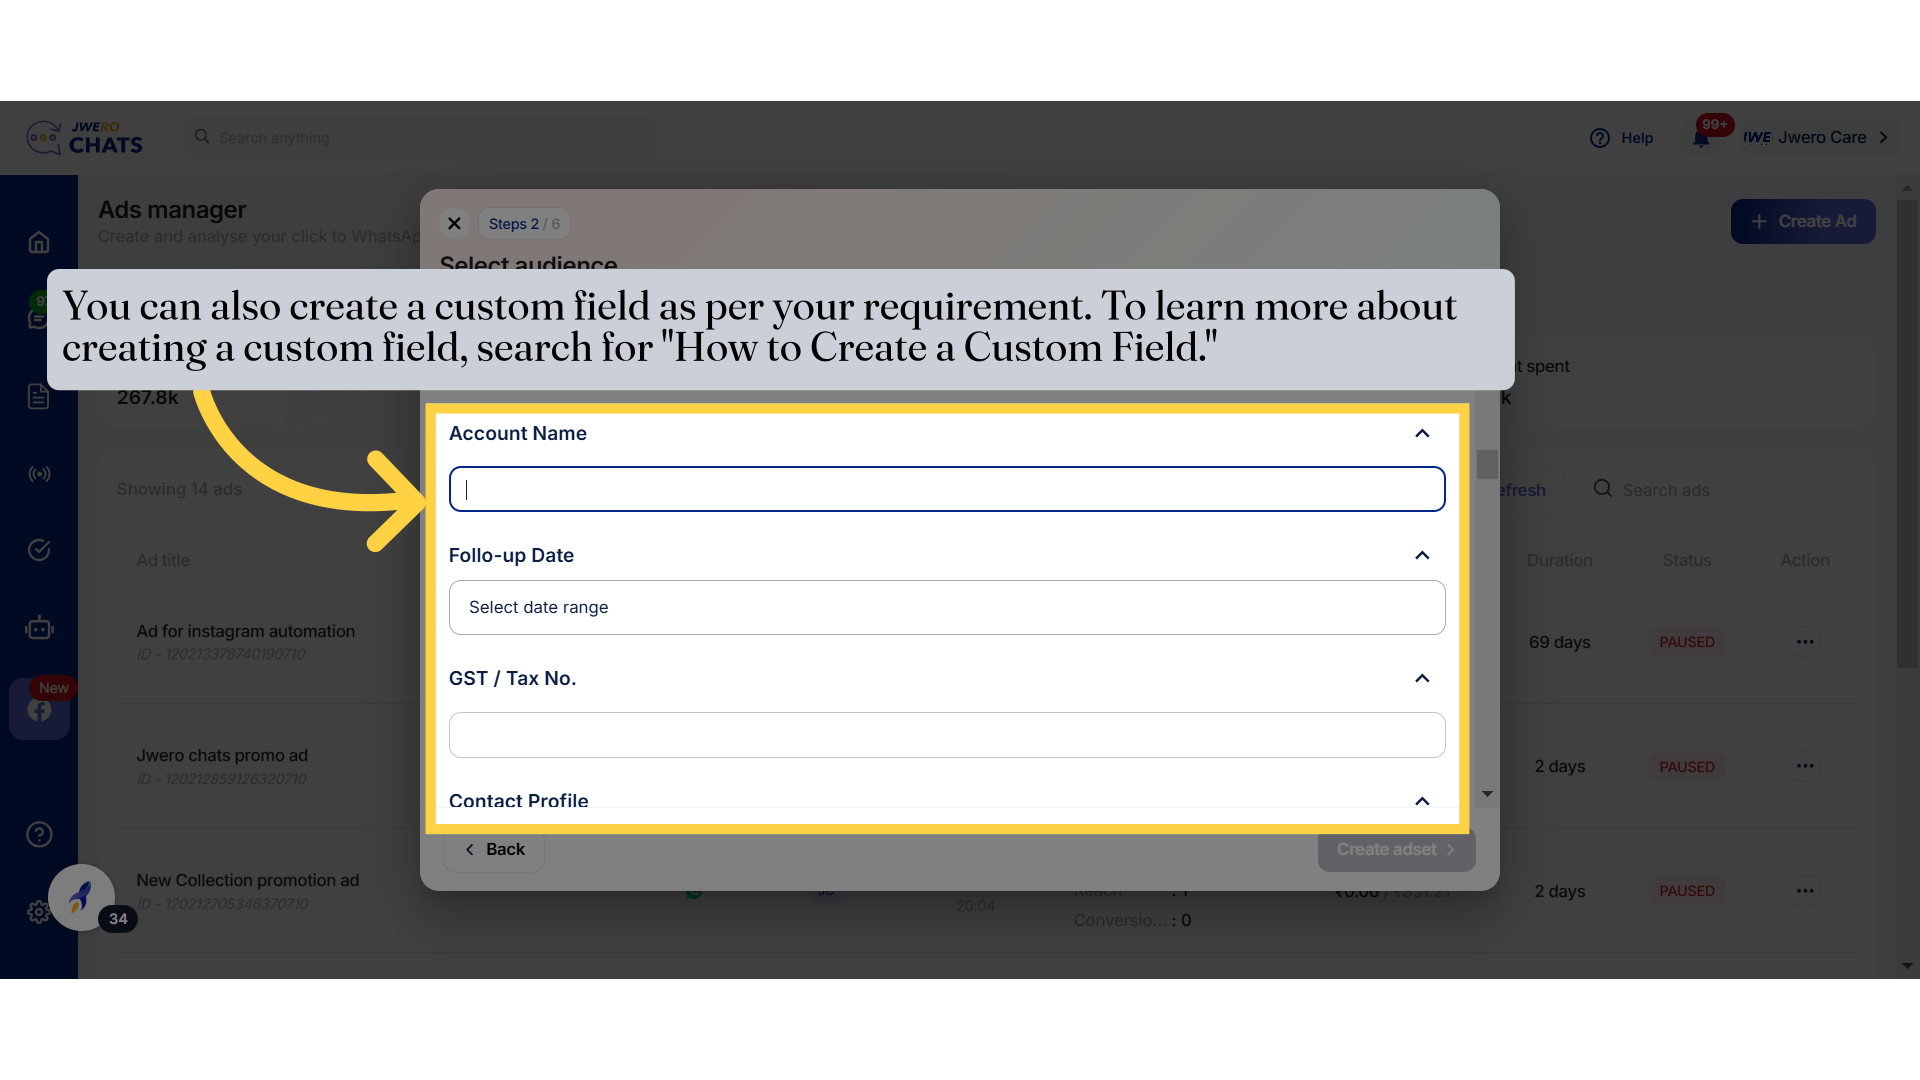
10. Custom field
11. Let's move to "Audience"
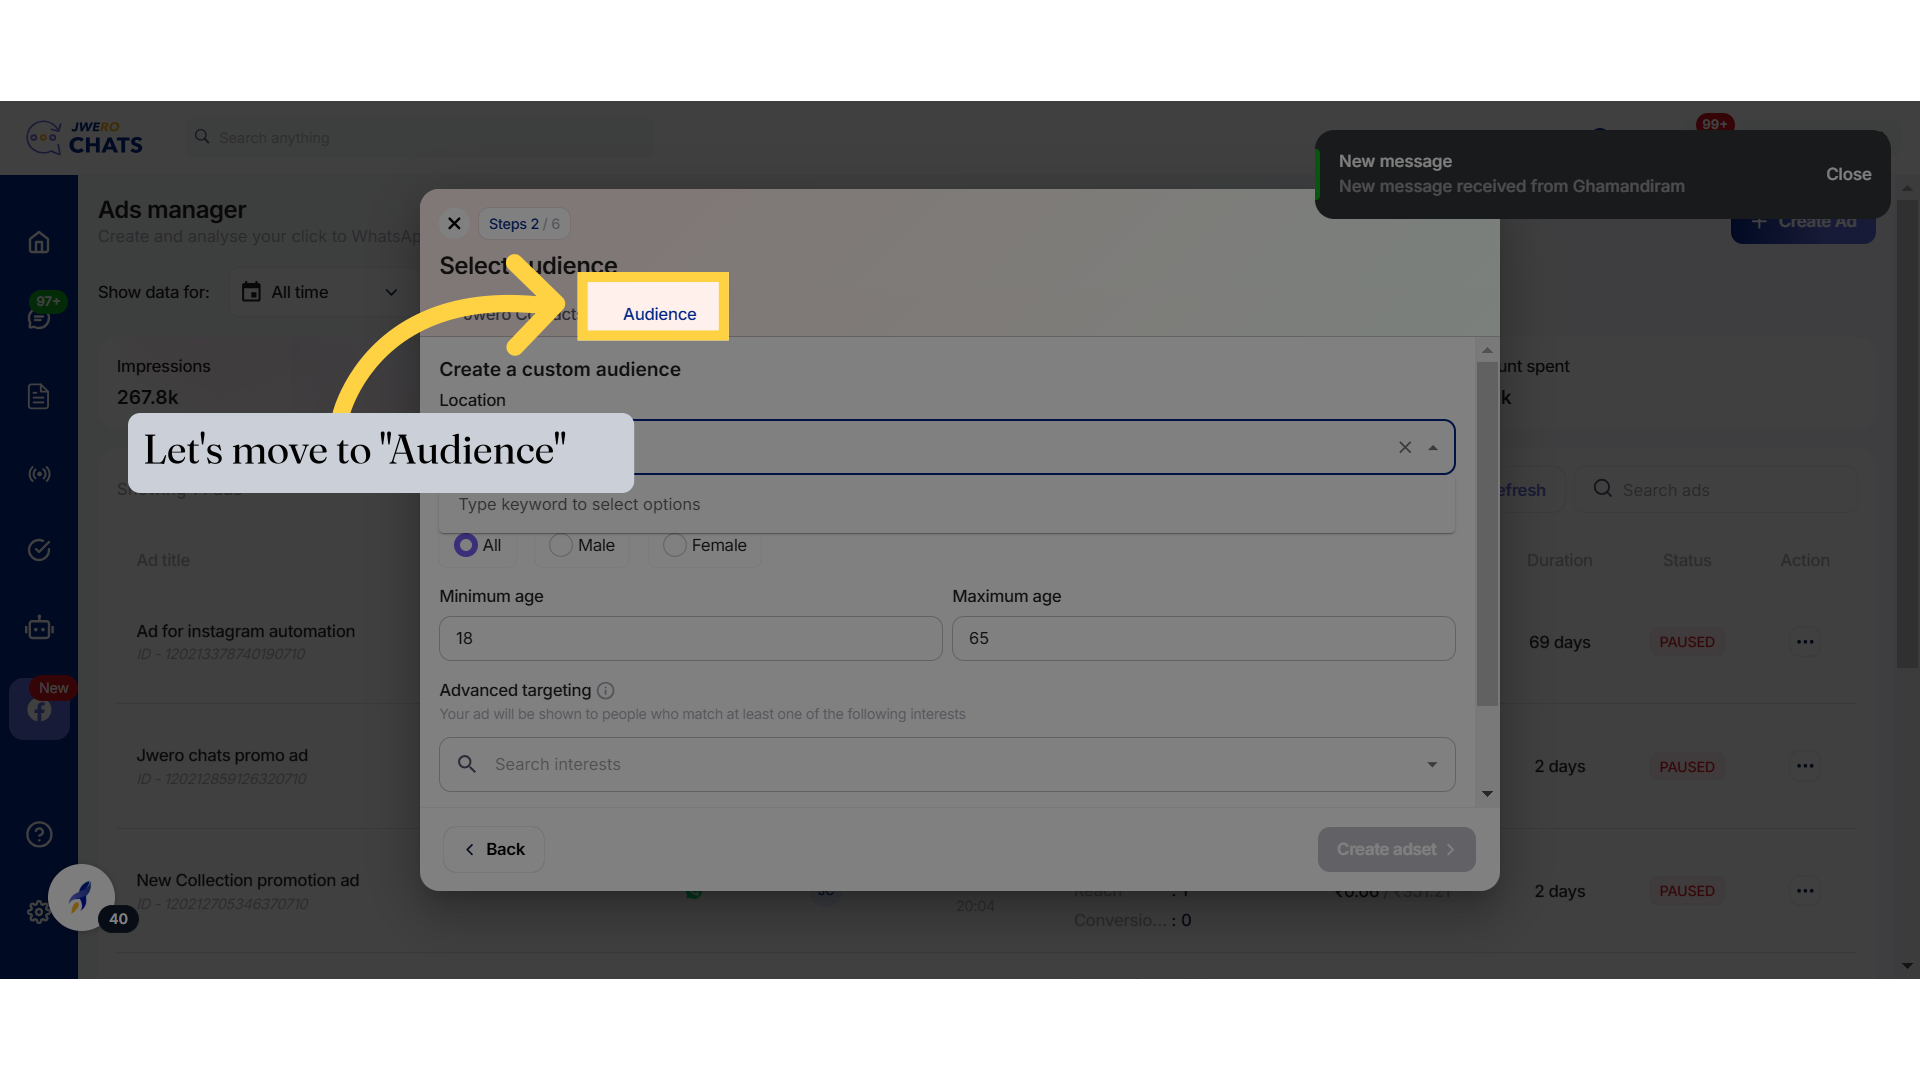
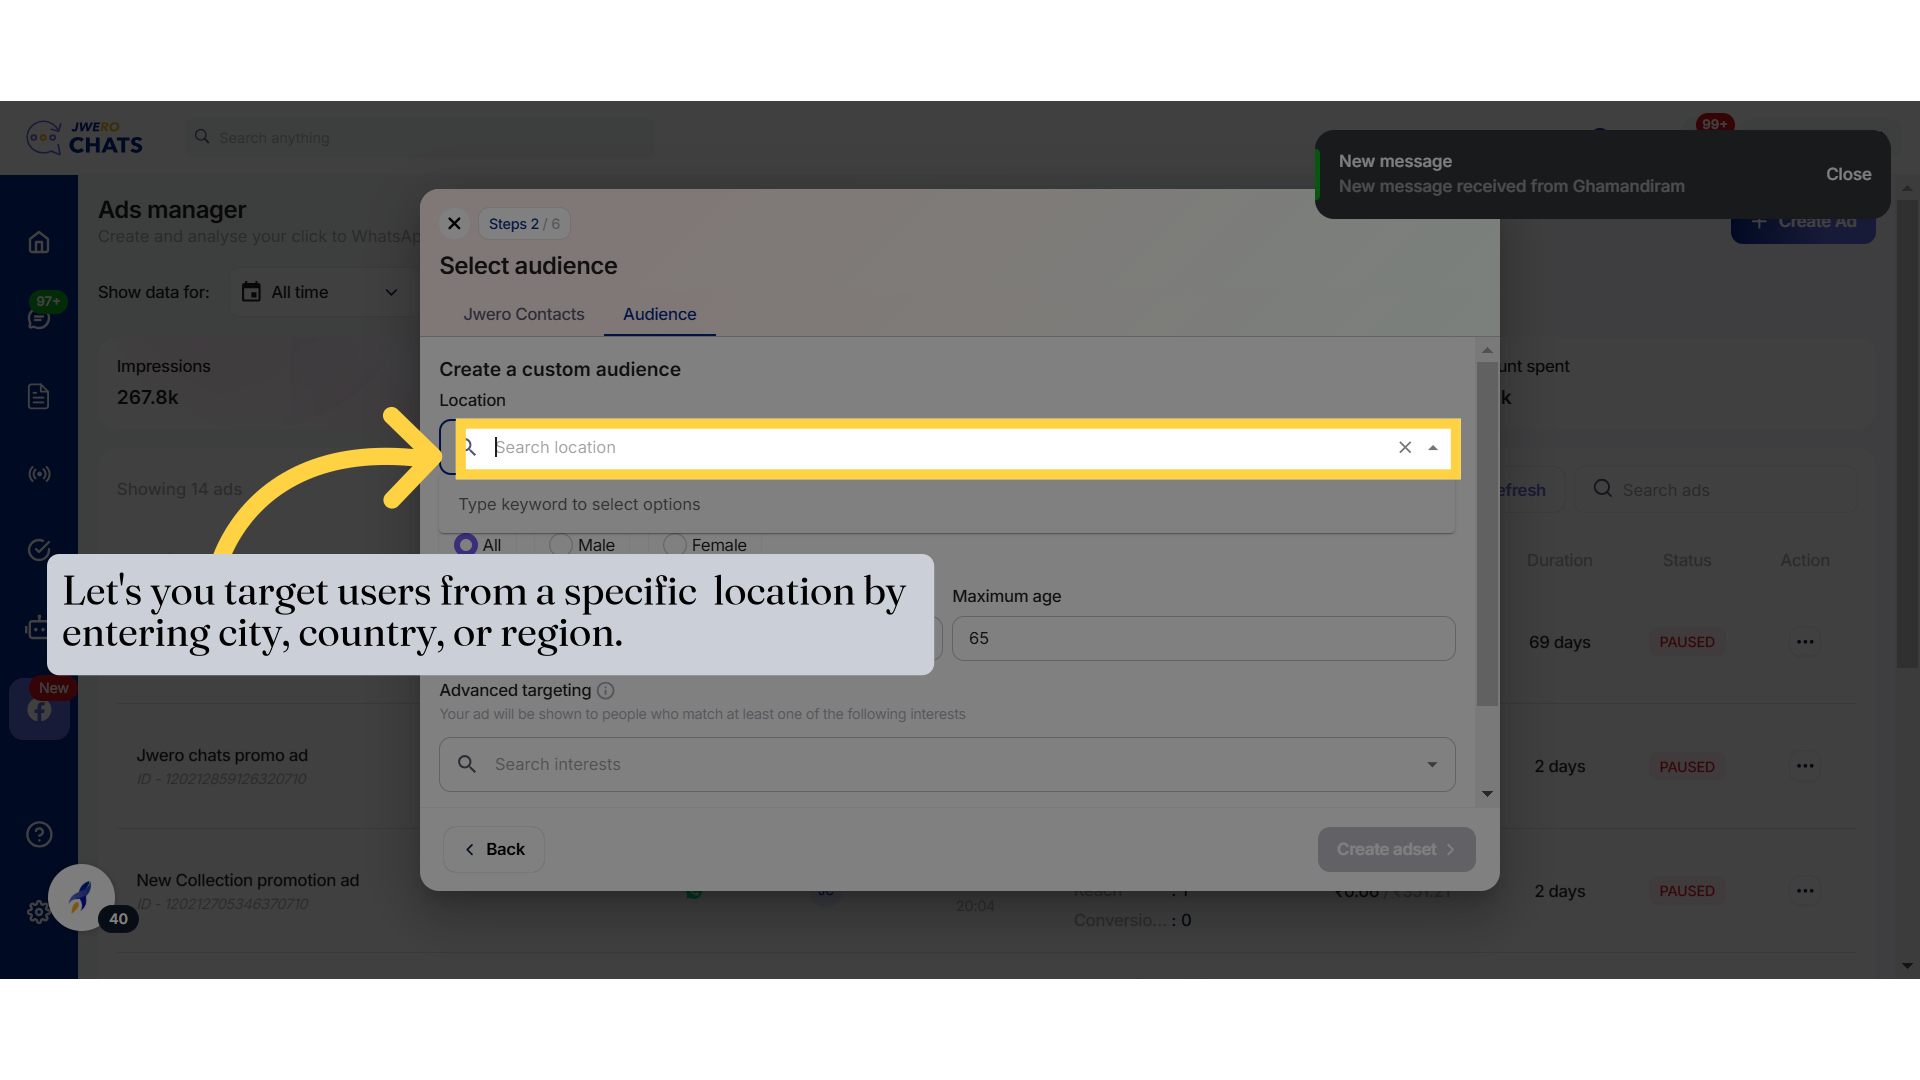
12. Let's you target users from a specific location by entering city, country, or region.
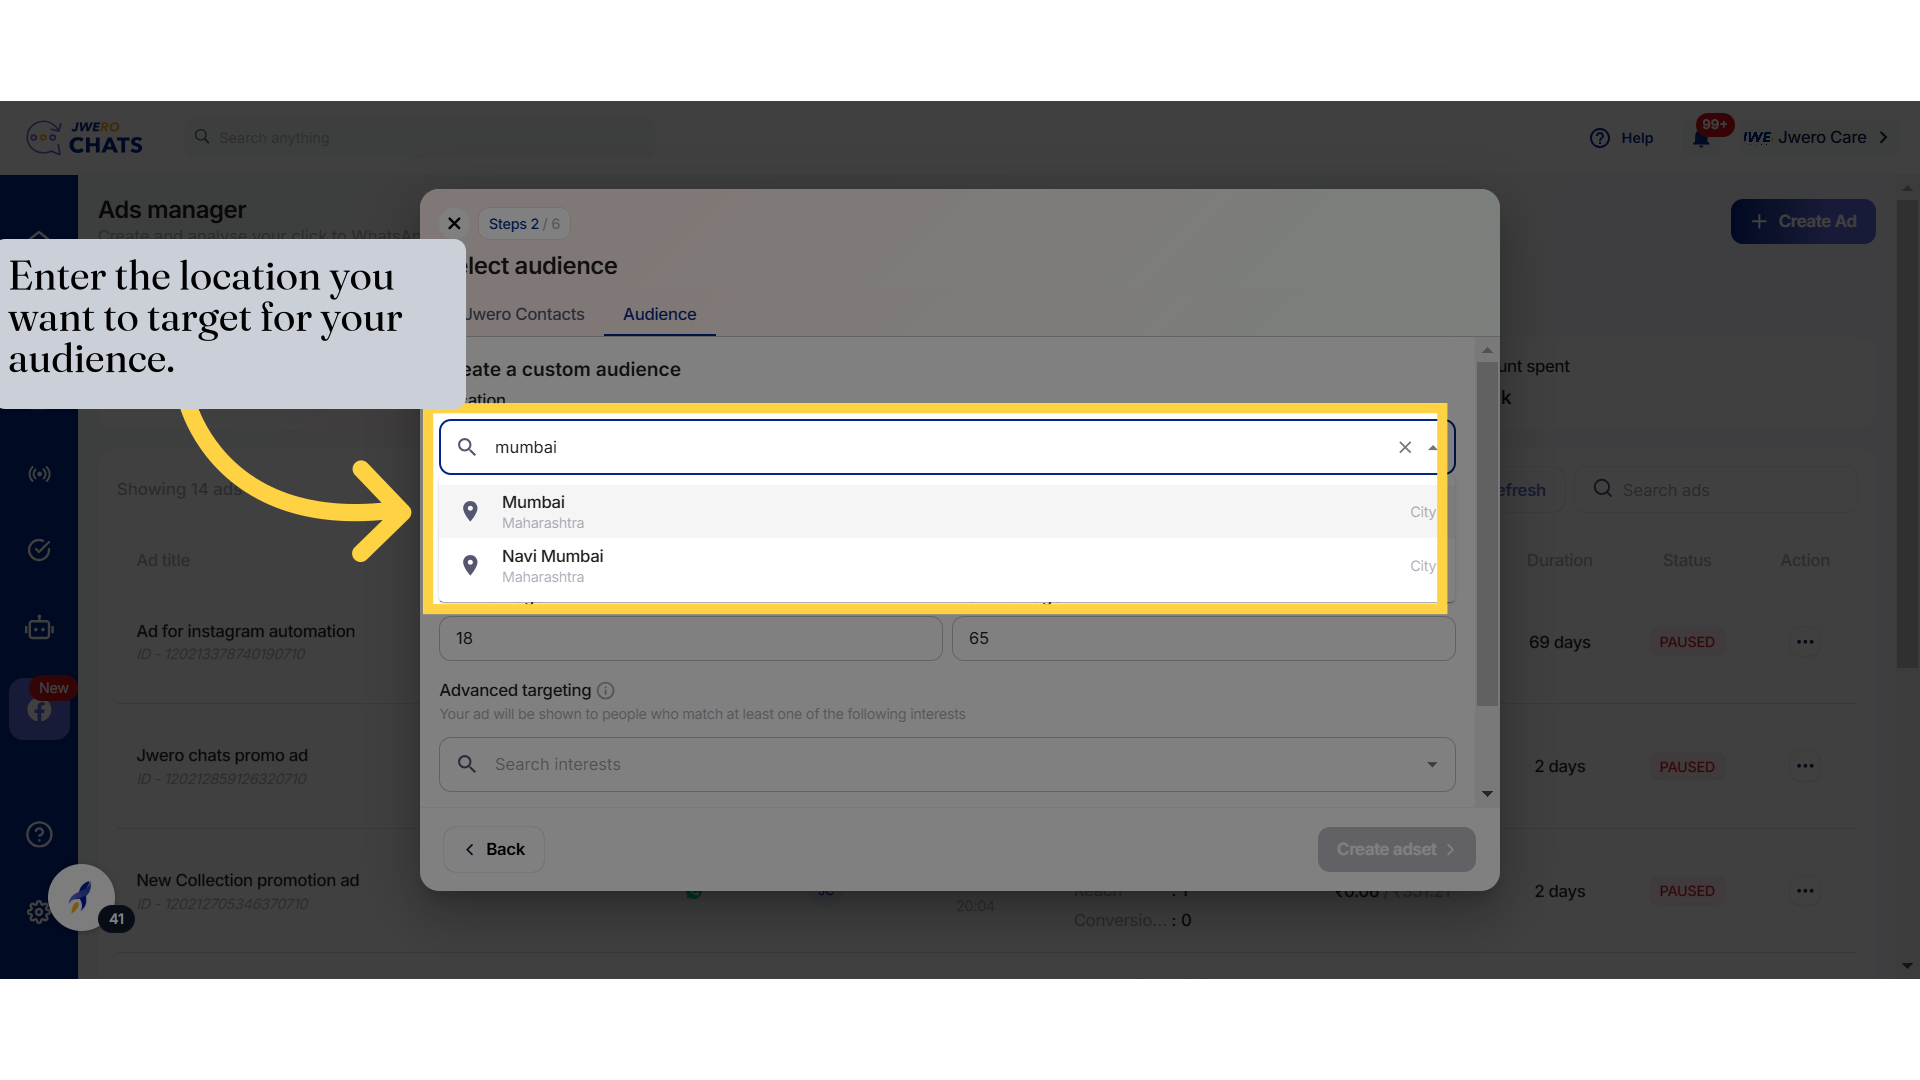
13. Enter the location you want to target for your audience.
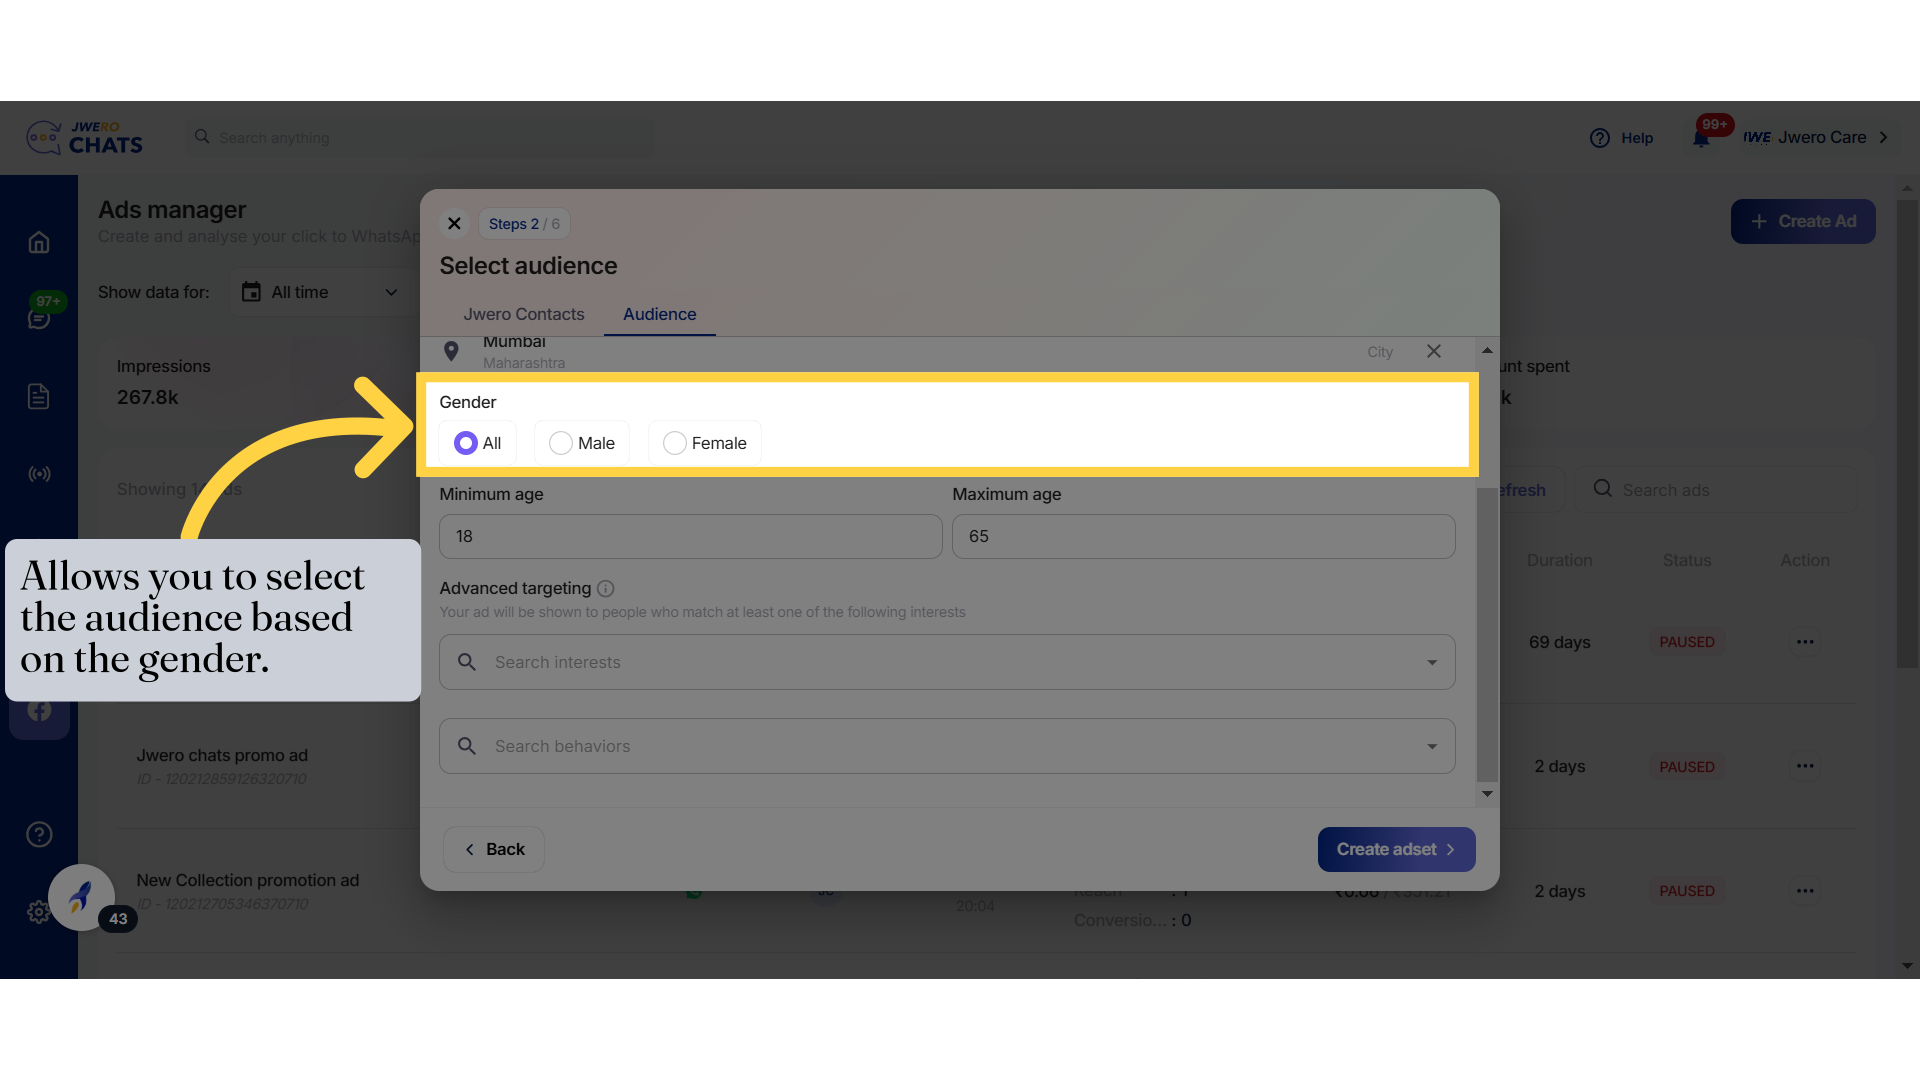
14. Allows you to select the audience based on the gender.
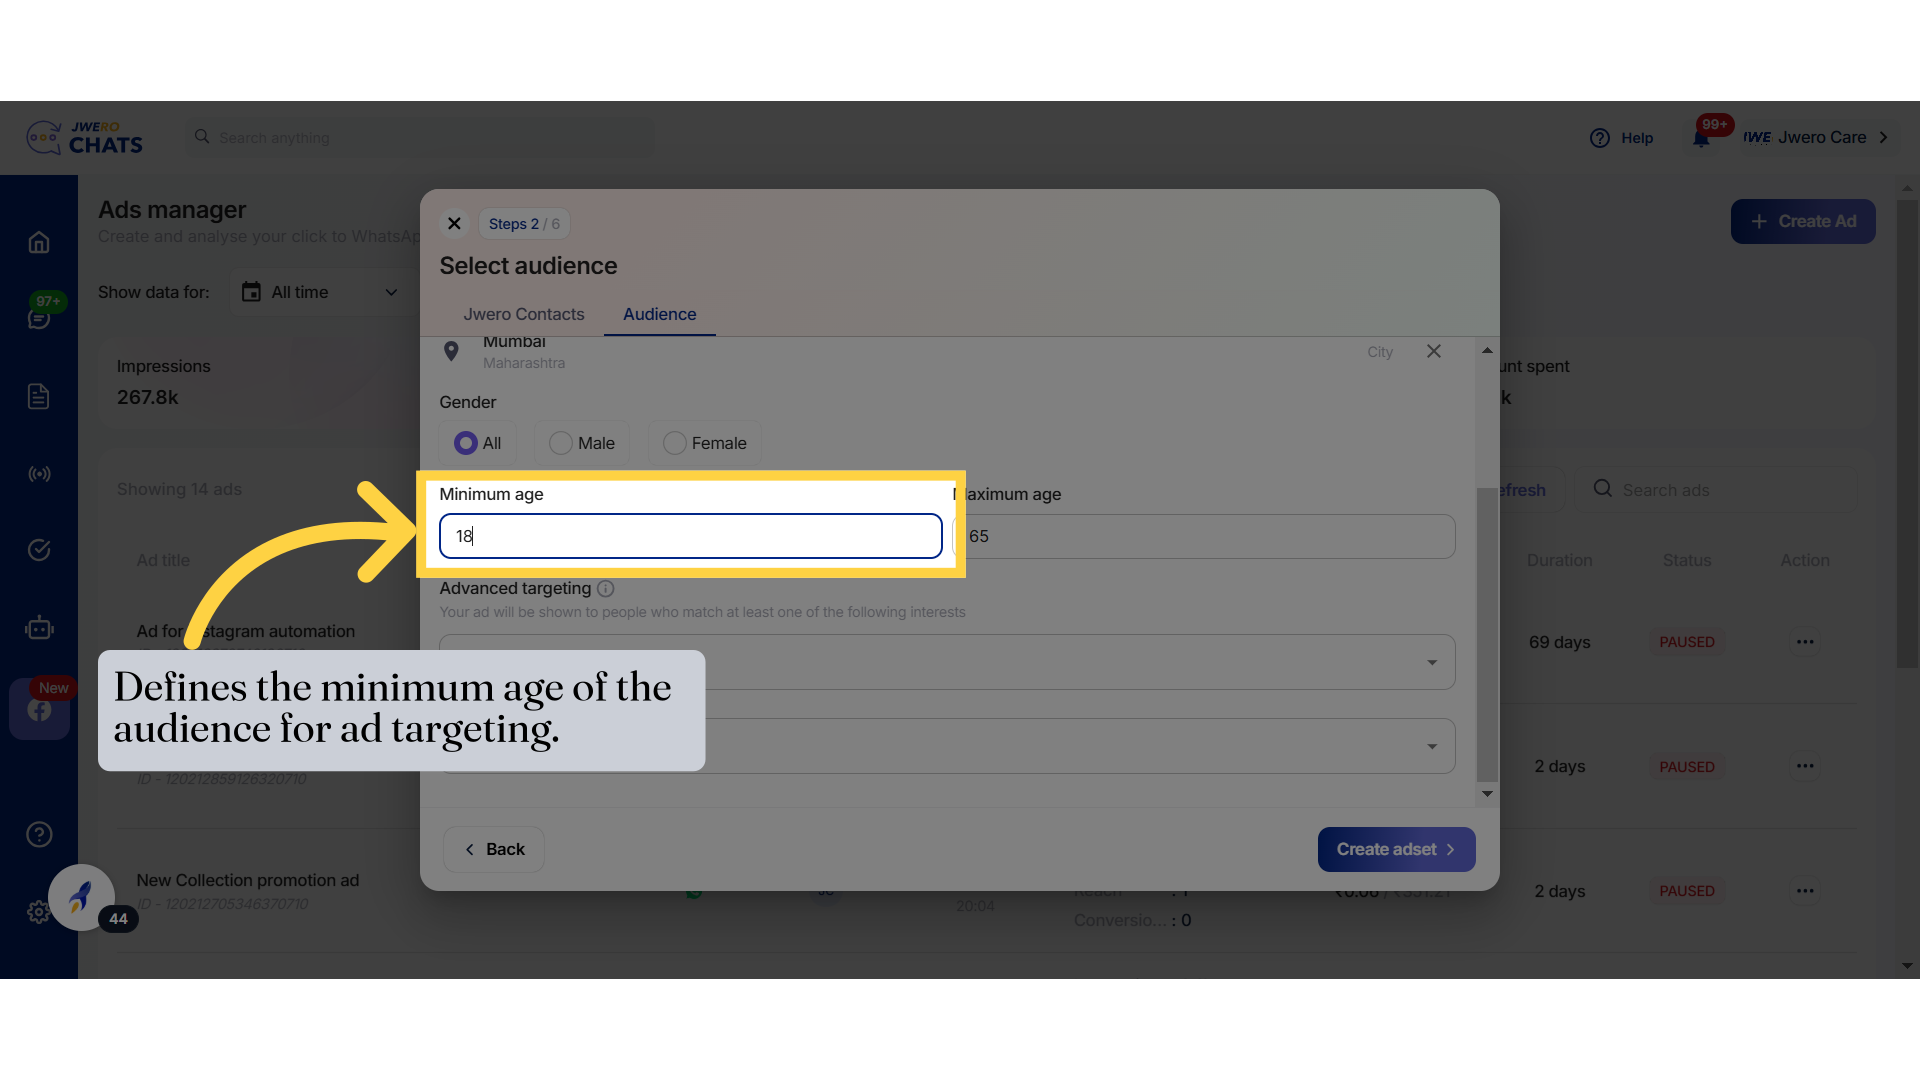
15. Defines the minimum age of the audience for ad targeting.
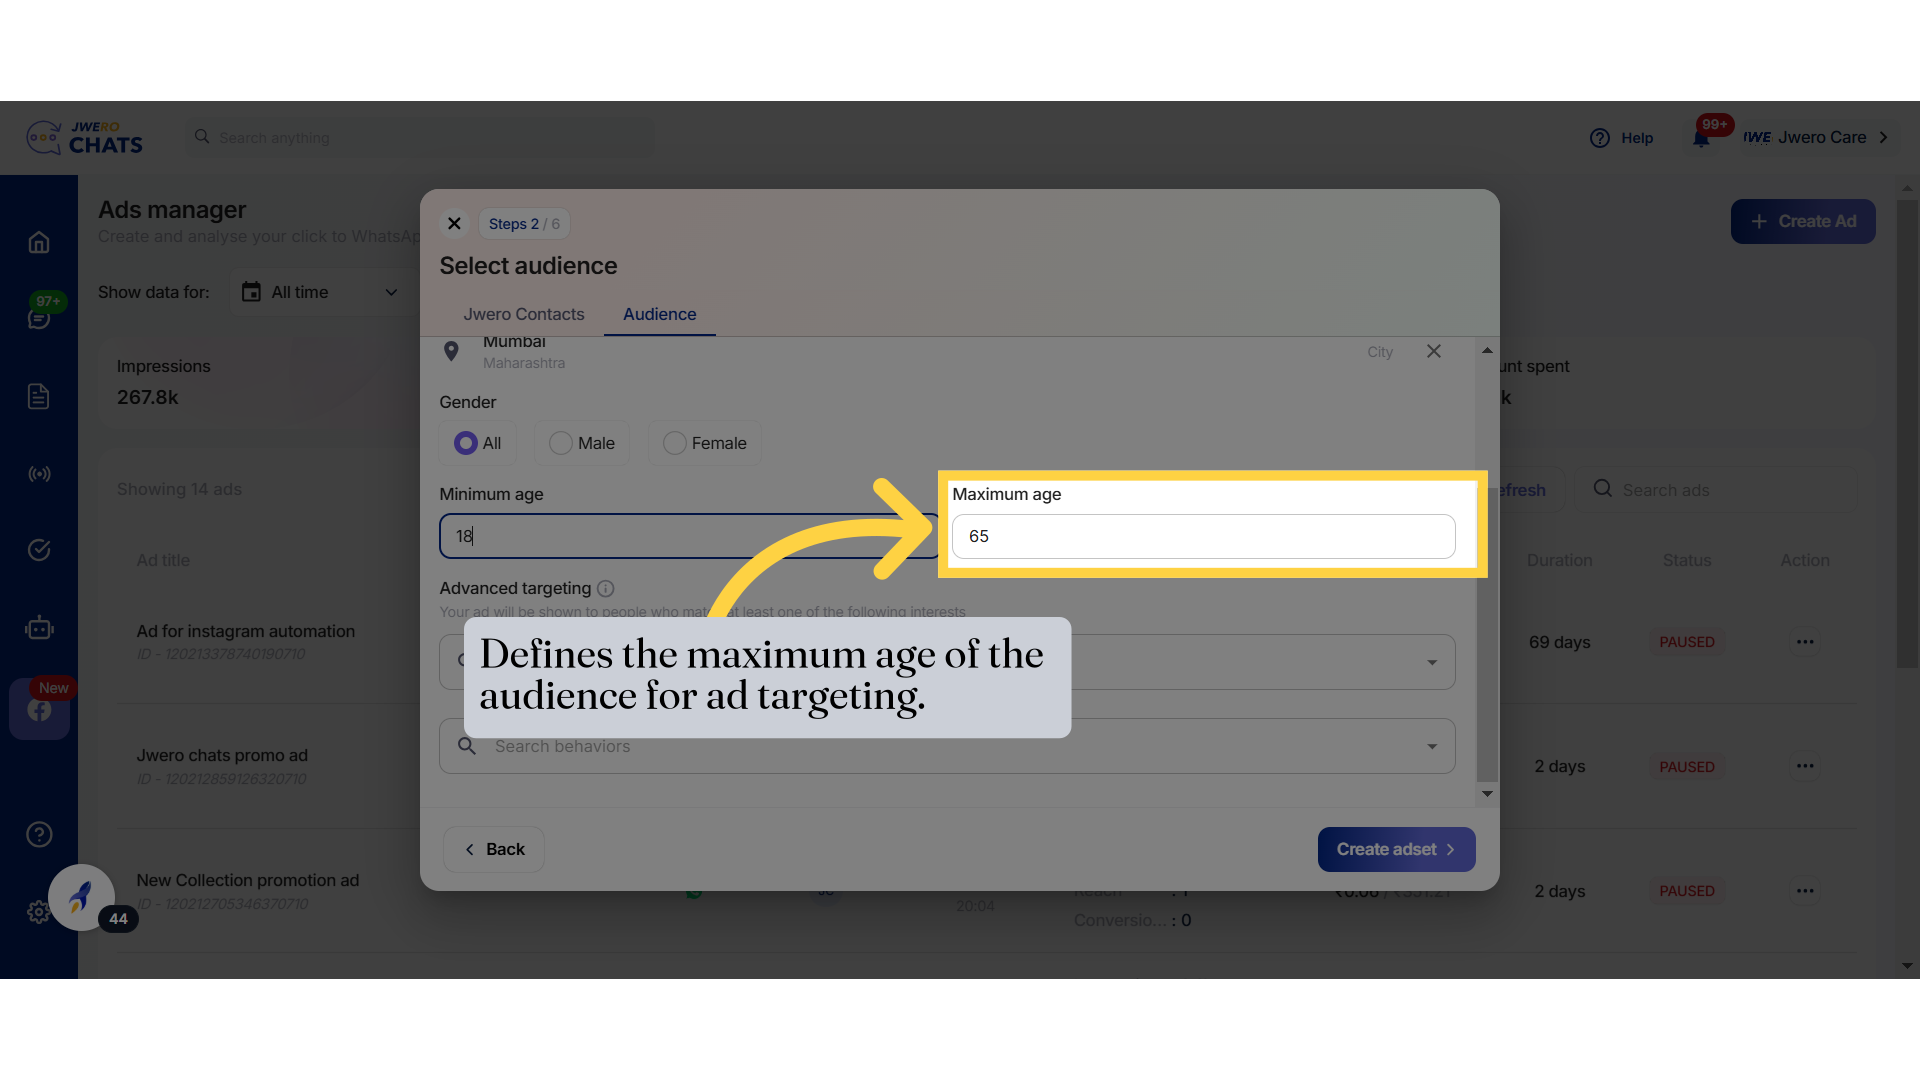
16. Defines the maximum age of the audience for ad targeting.
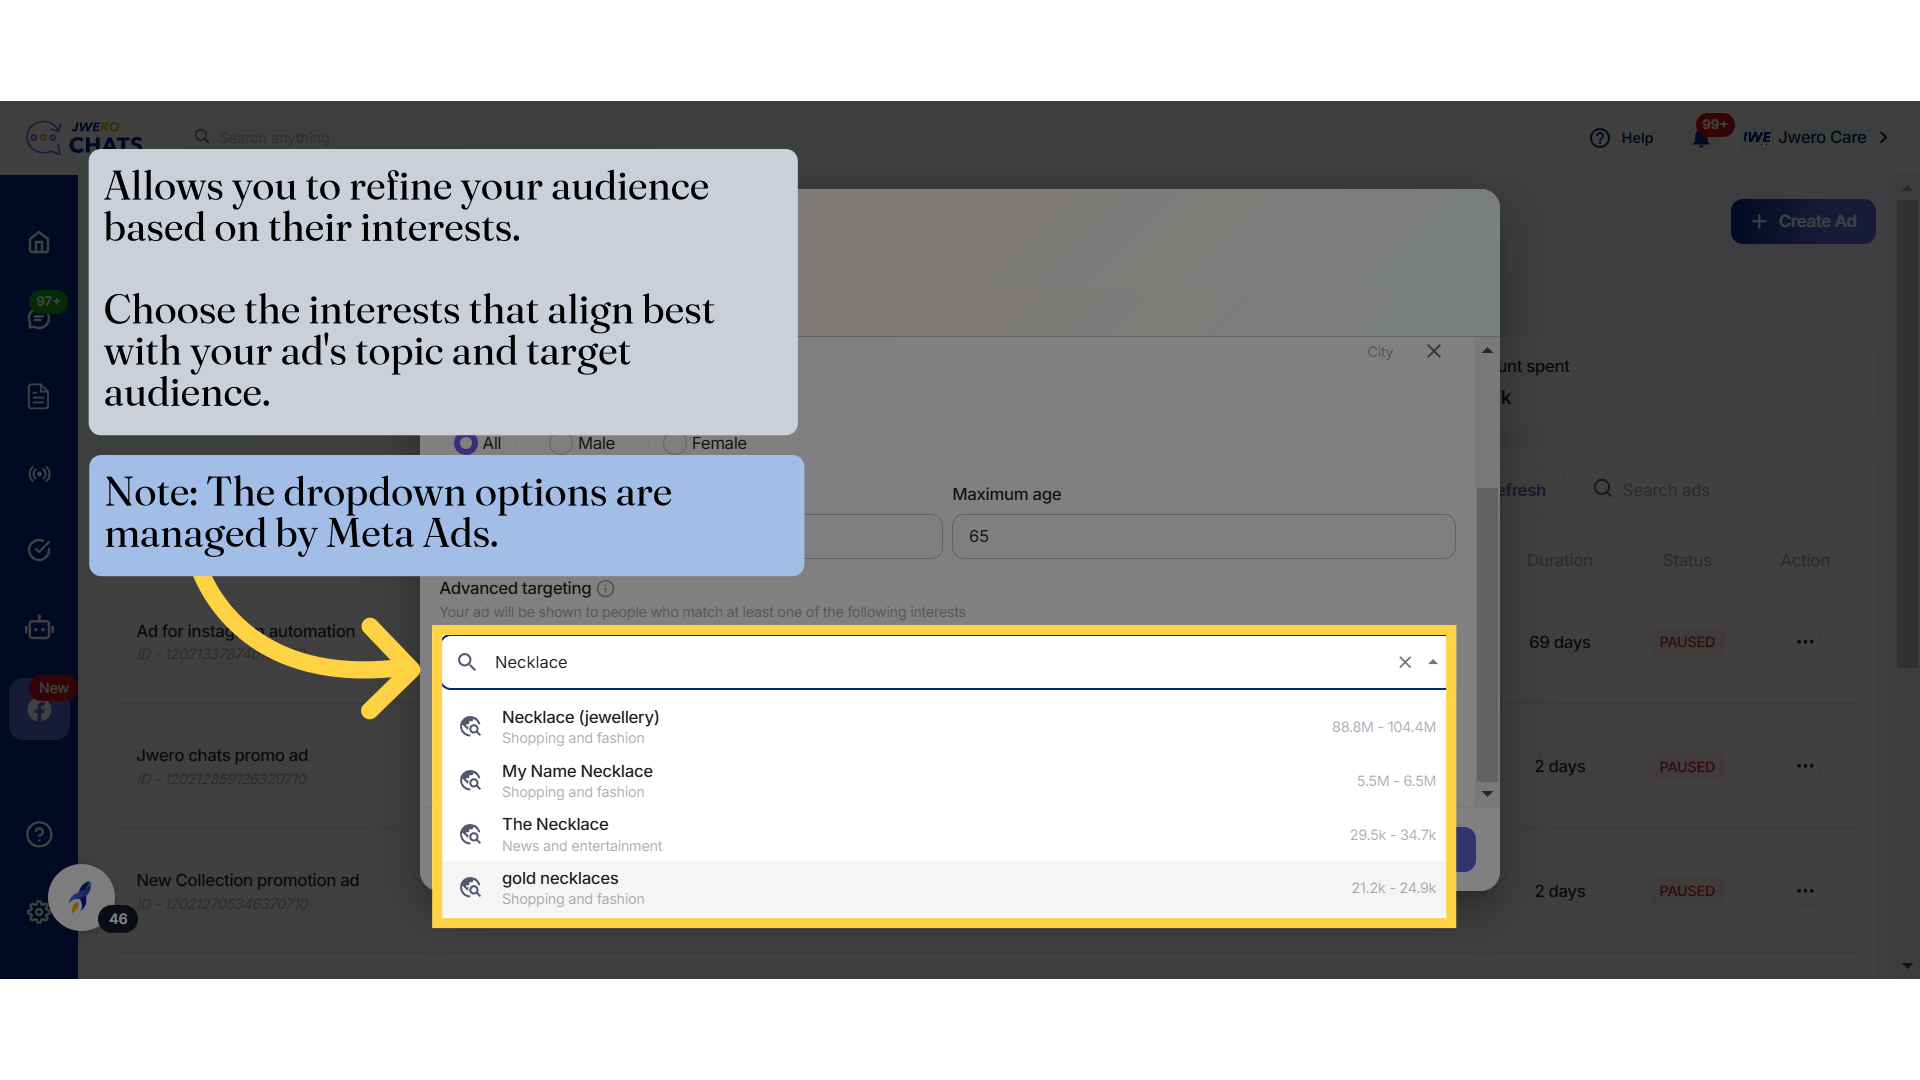
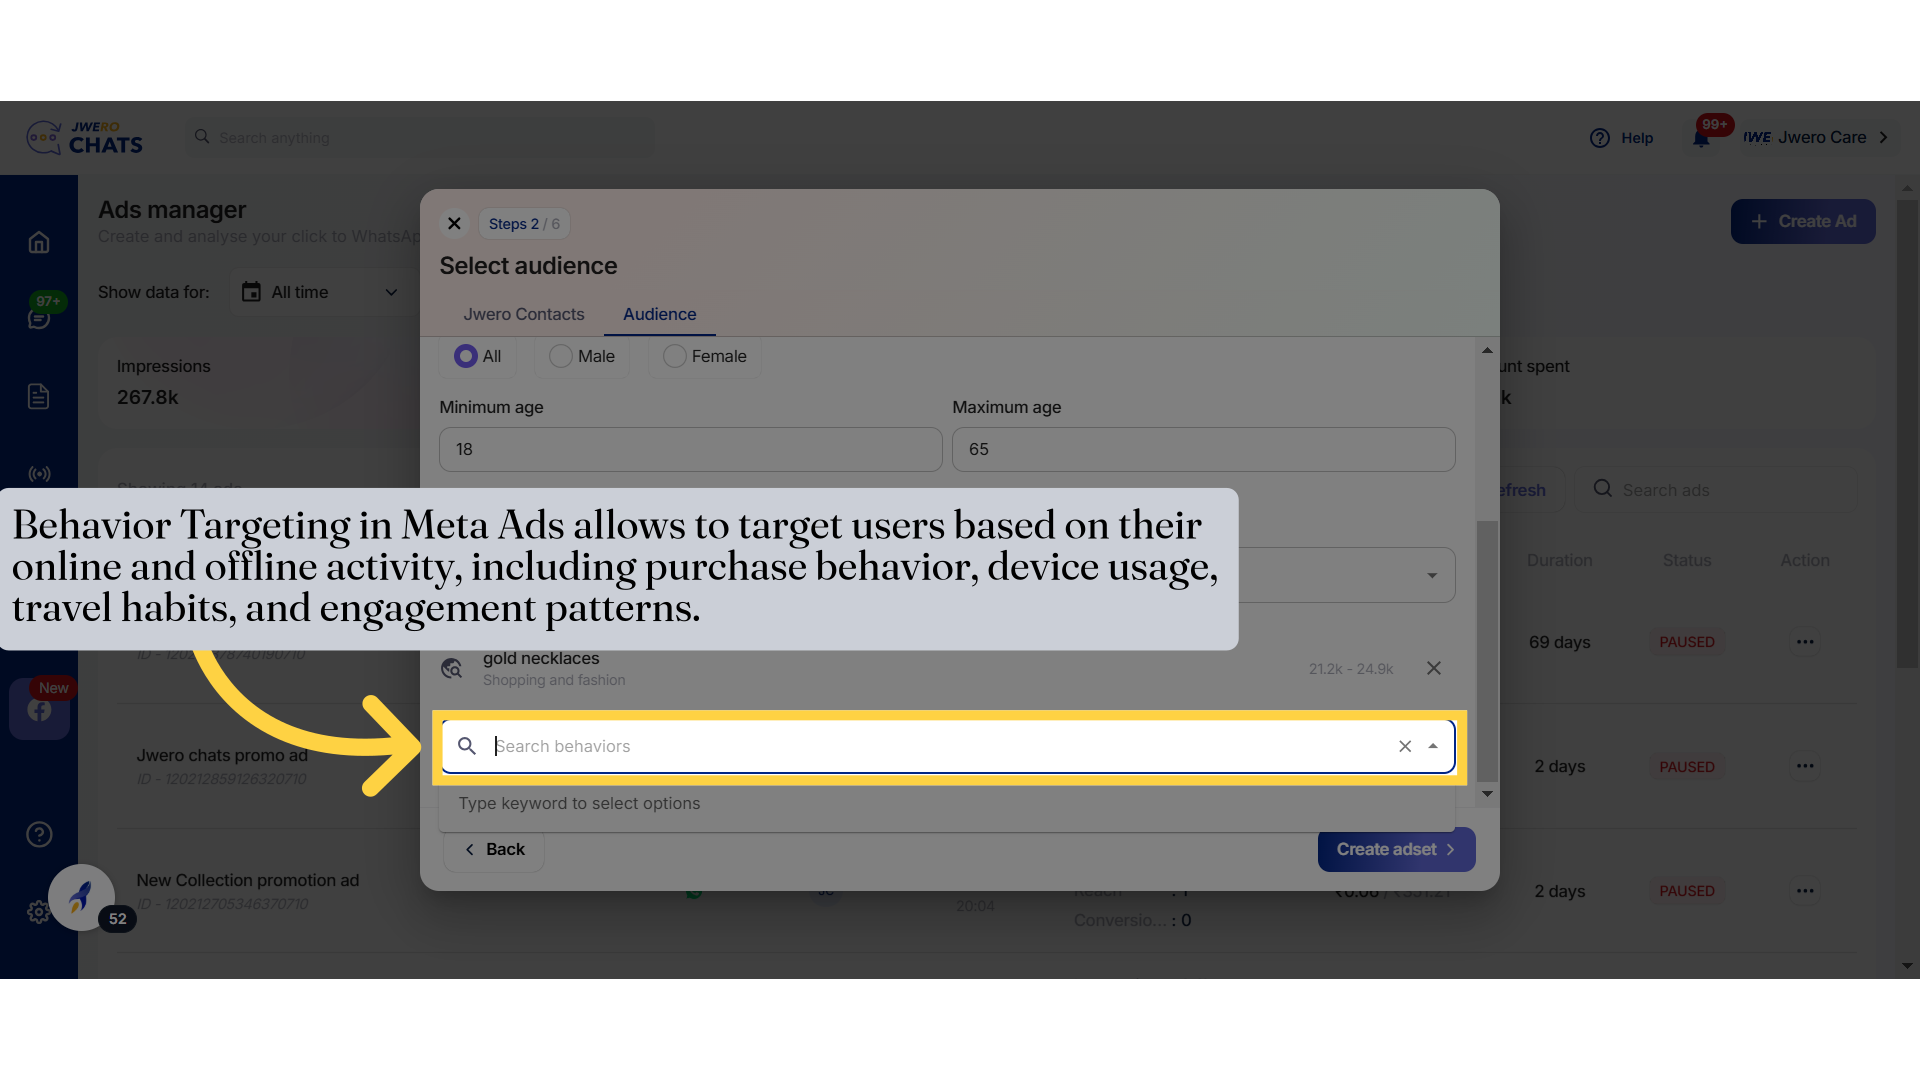
17. Allows you to refine your audience based on their interests. Choose the interests that align best with your ad's topic and target audience.
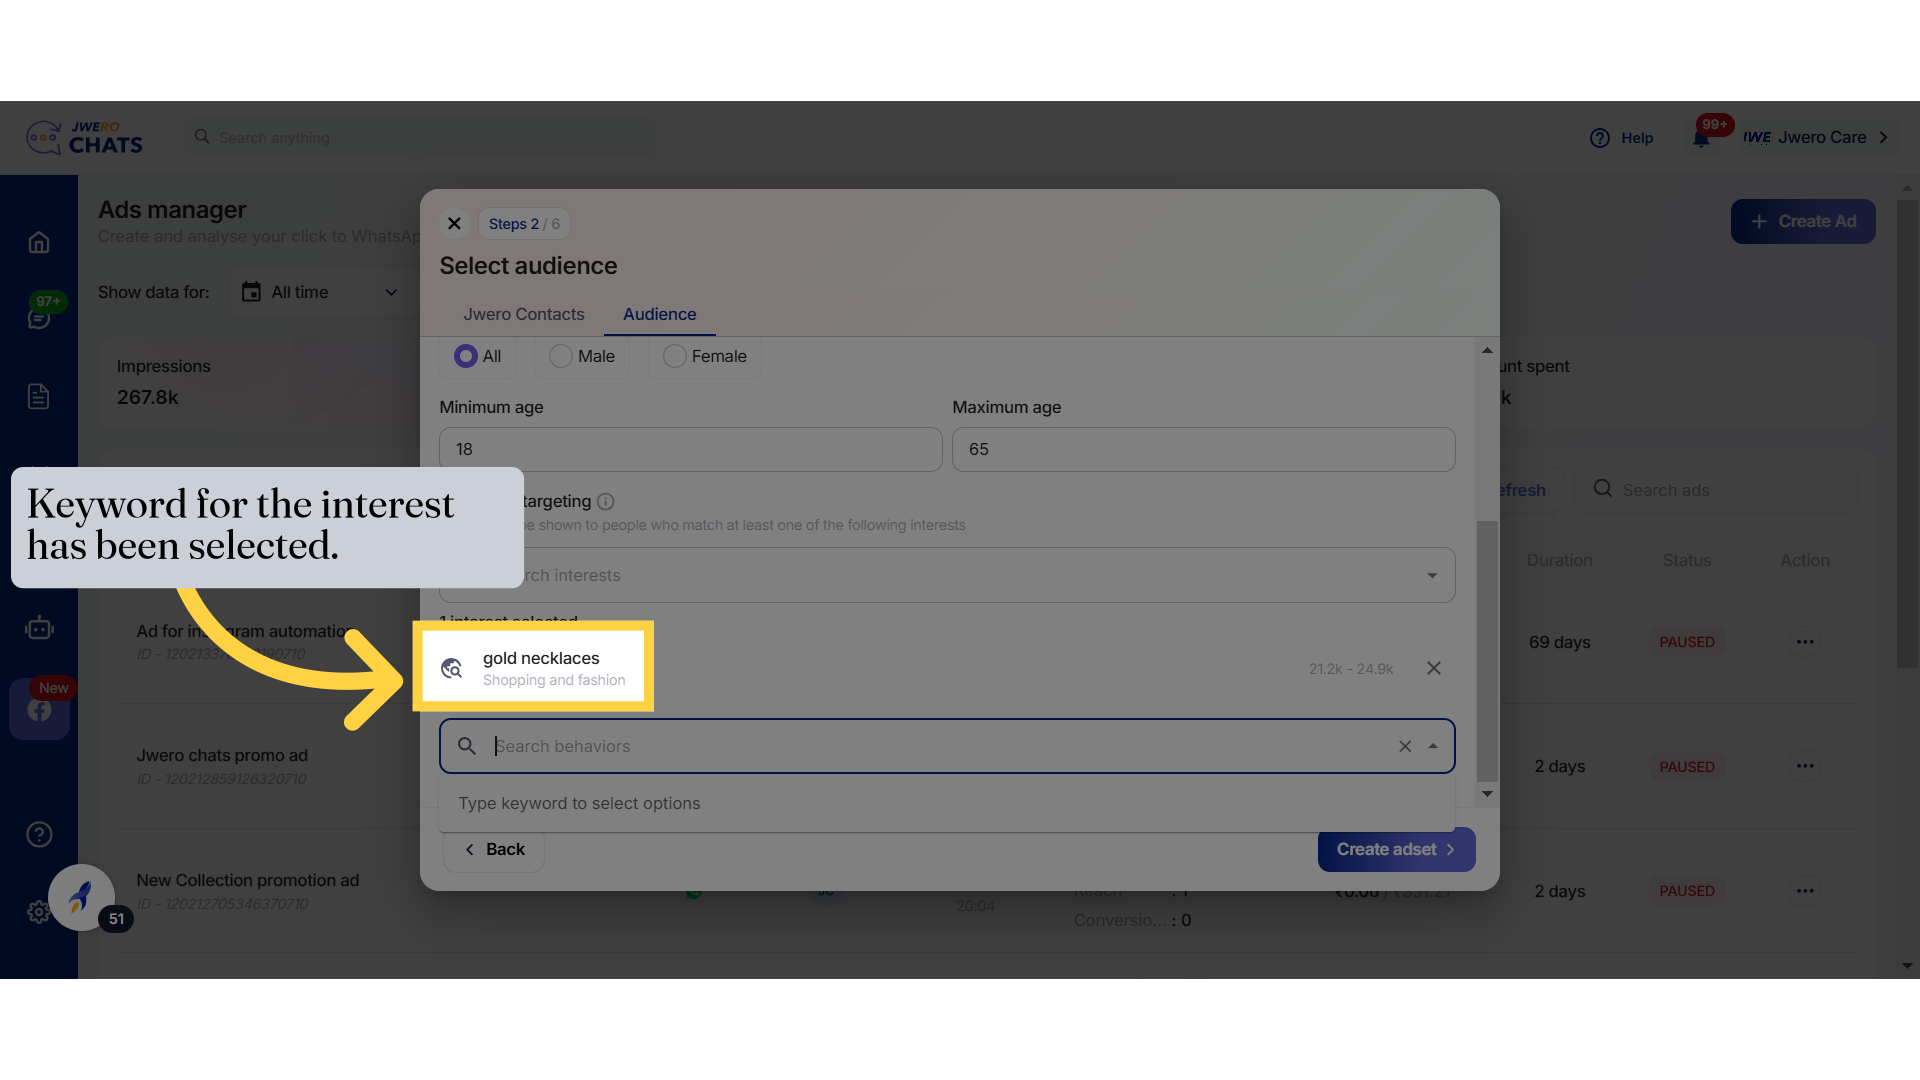
18. Keyword for the interest has been selected.
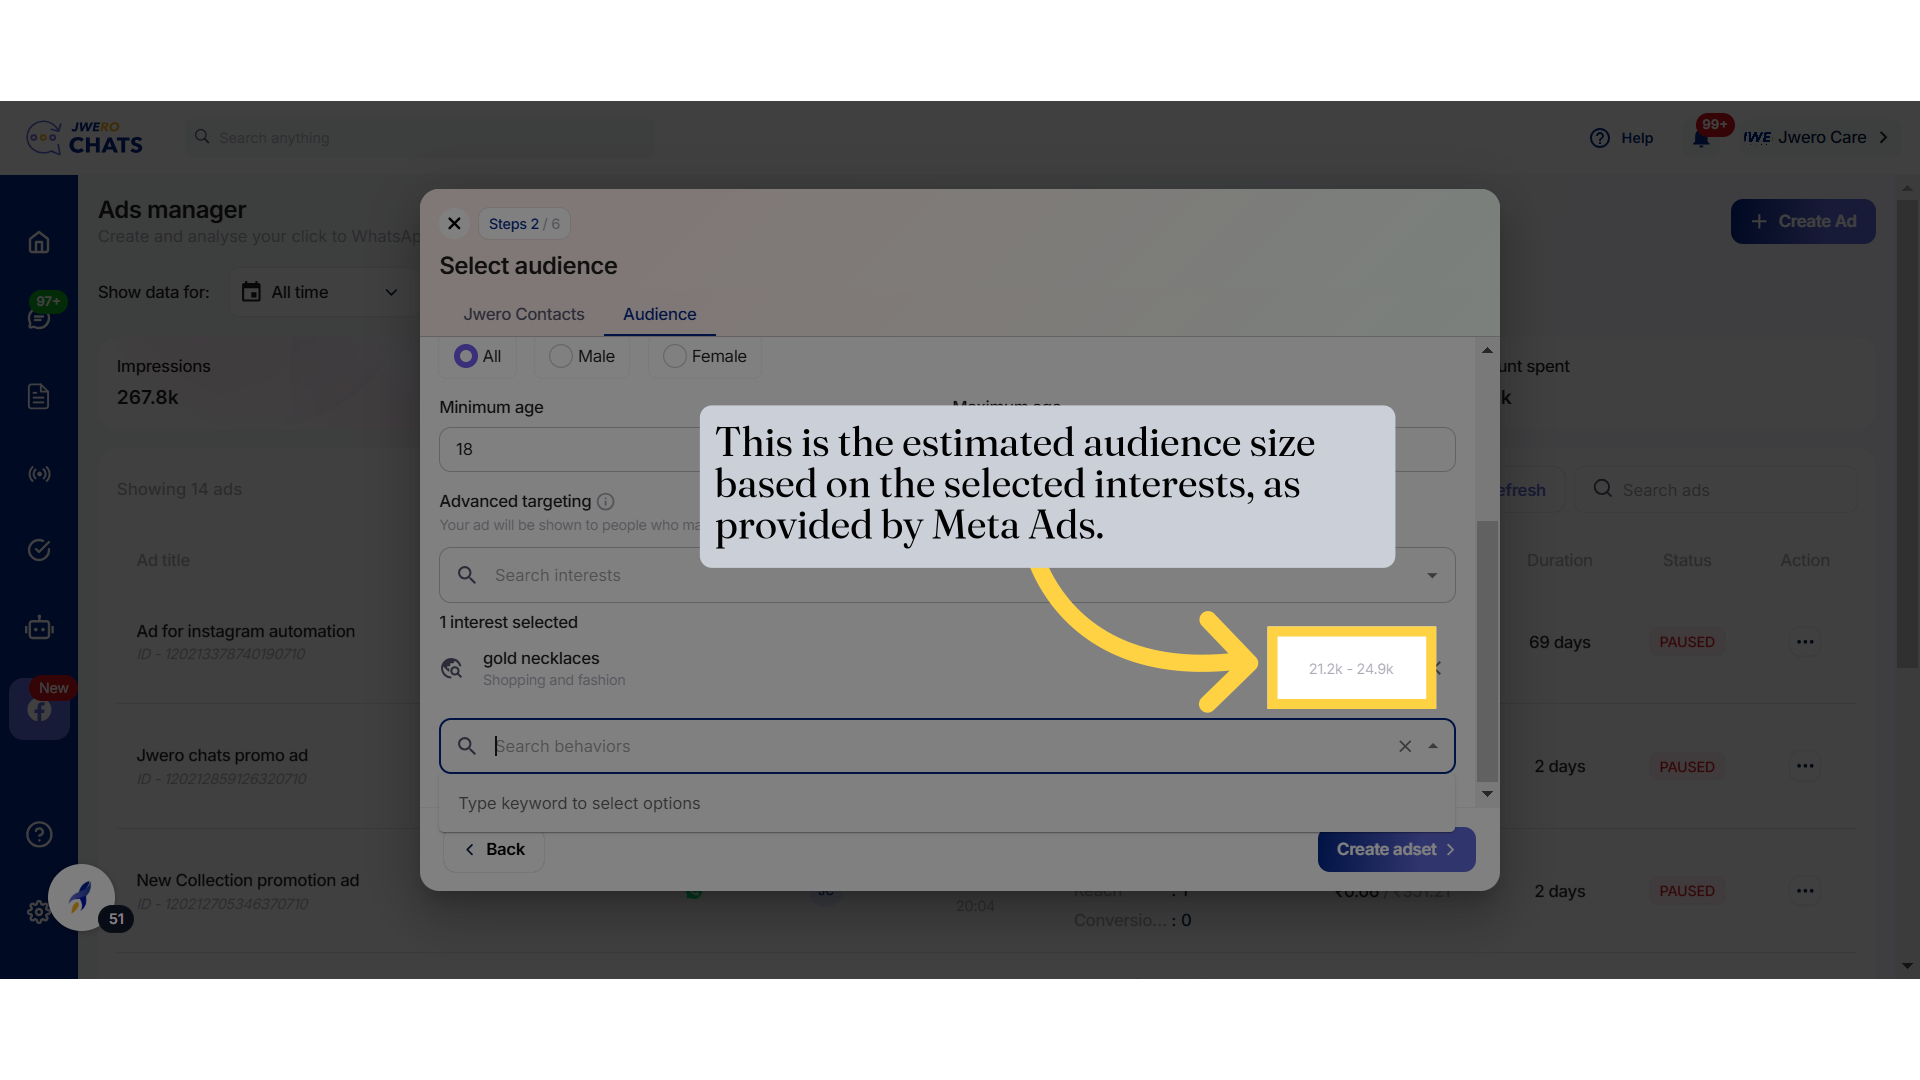
19. This is the estimated audience size based on the selected interests, as provided by Meta Ads.
20. Behavior Targeting in Meta Ads allows to target users based on their online and offline activity, including purchase behavior, device usage, travel habits, and engagement patterns.
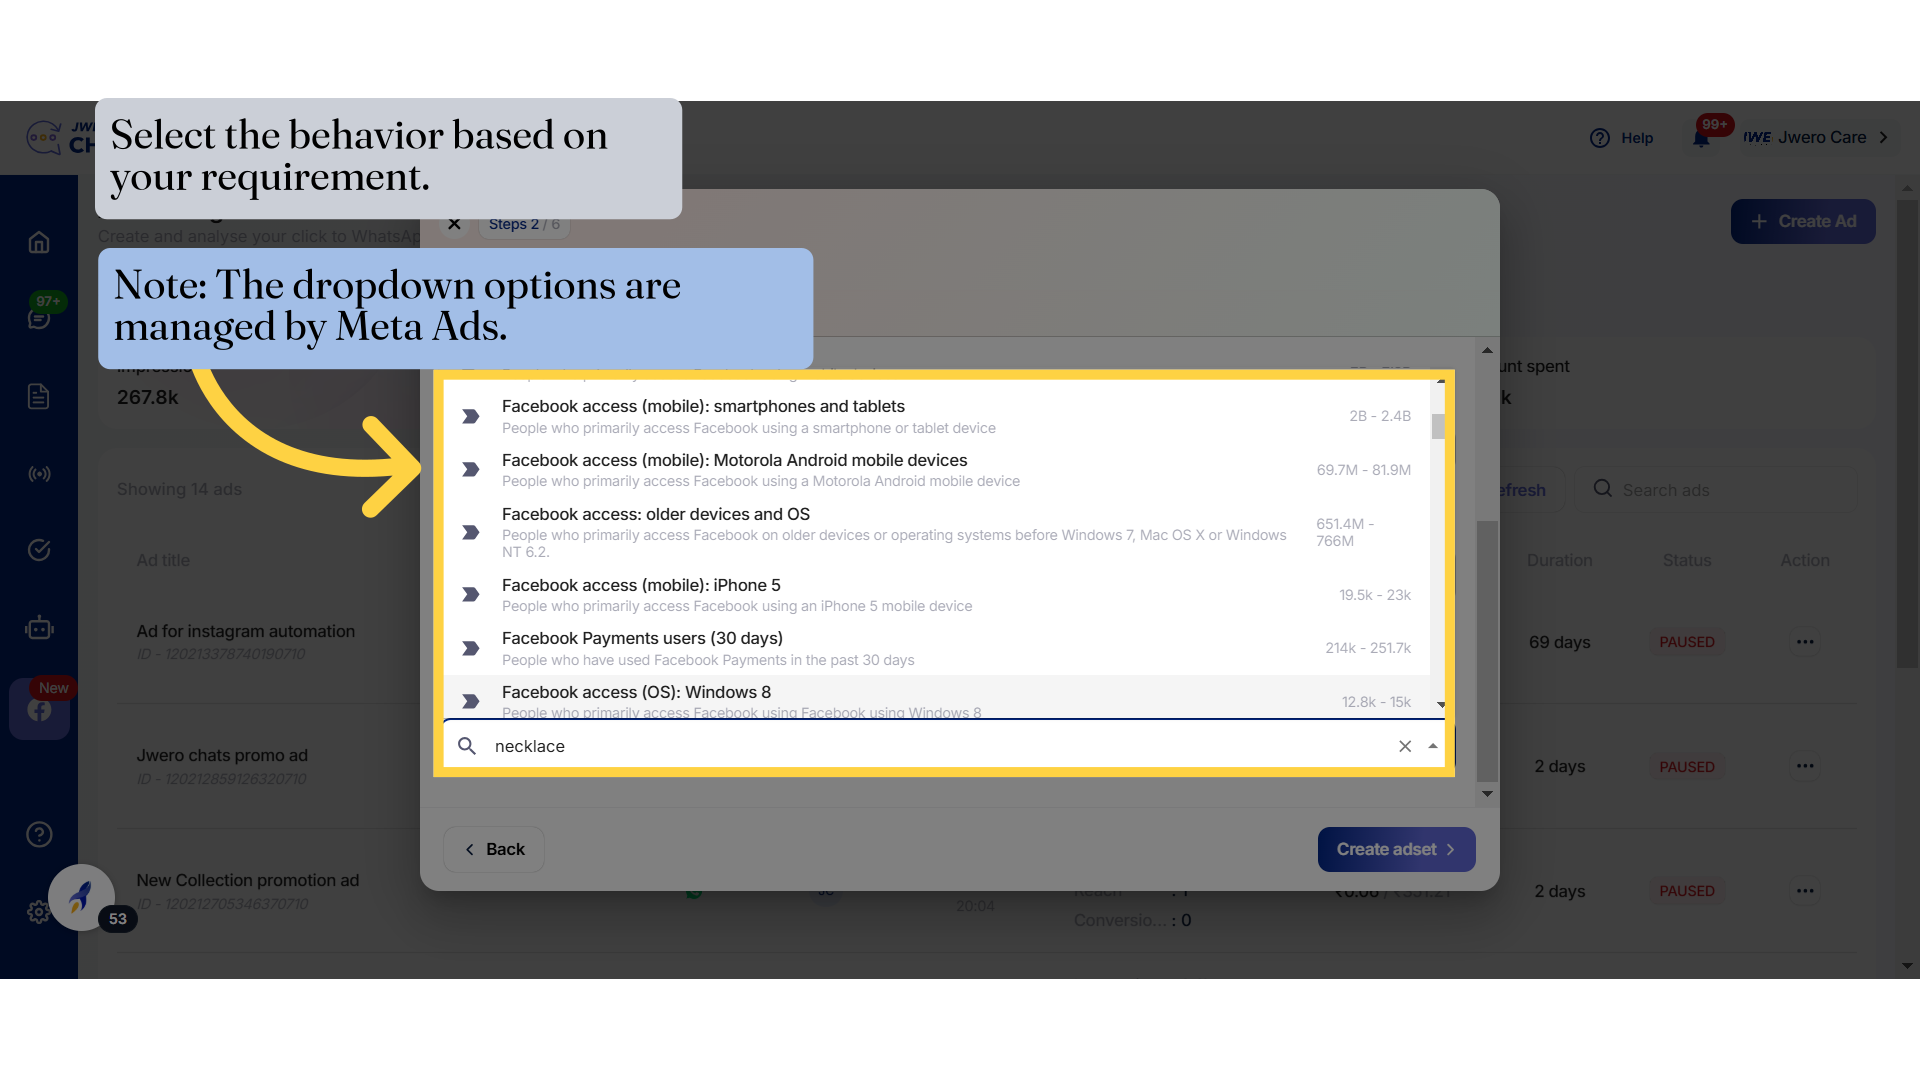
21. Select the behavior based on your requirement.
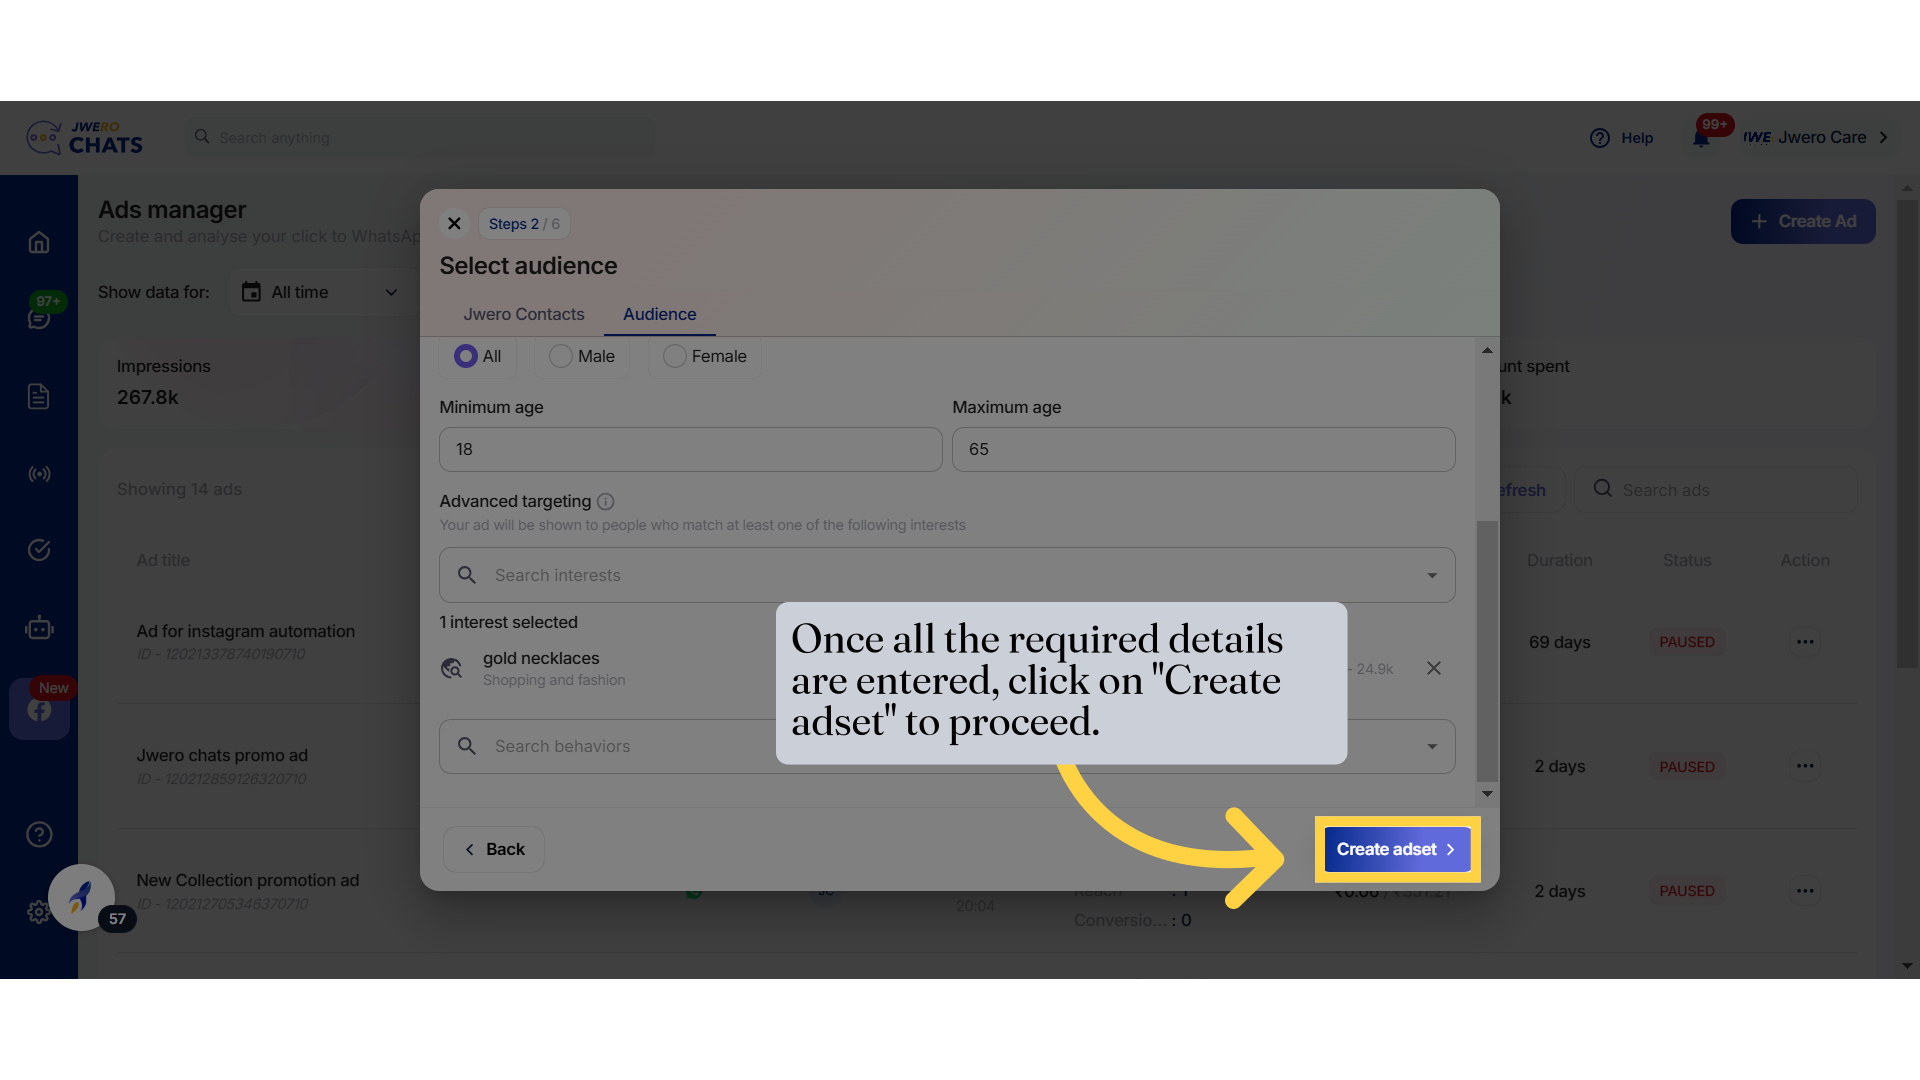
22. Once all the required details are entered, click on "Create adset" to proceed.
23. This is the preview window that displays a preview of the details you have added.
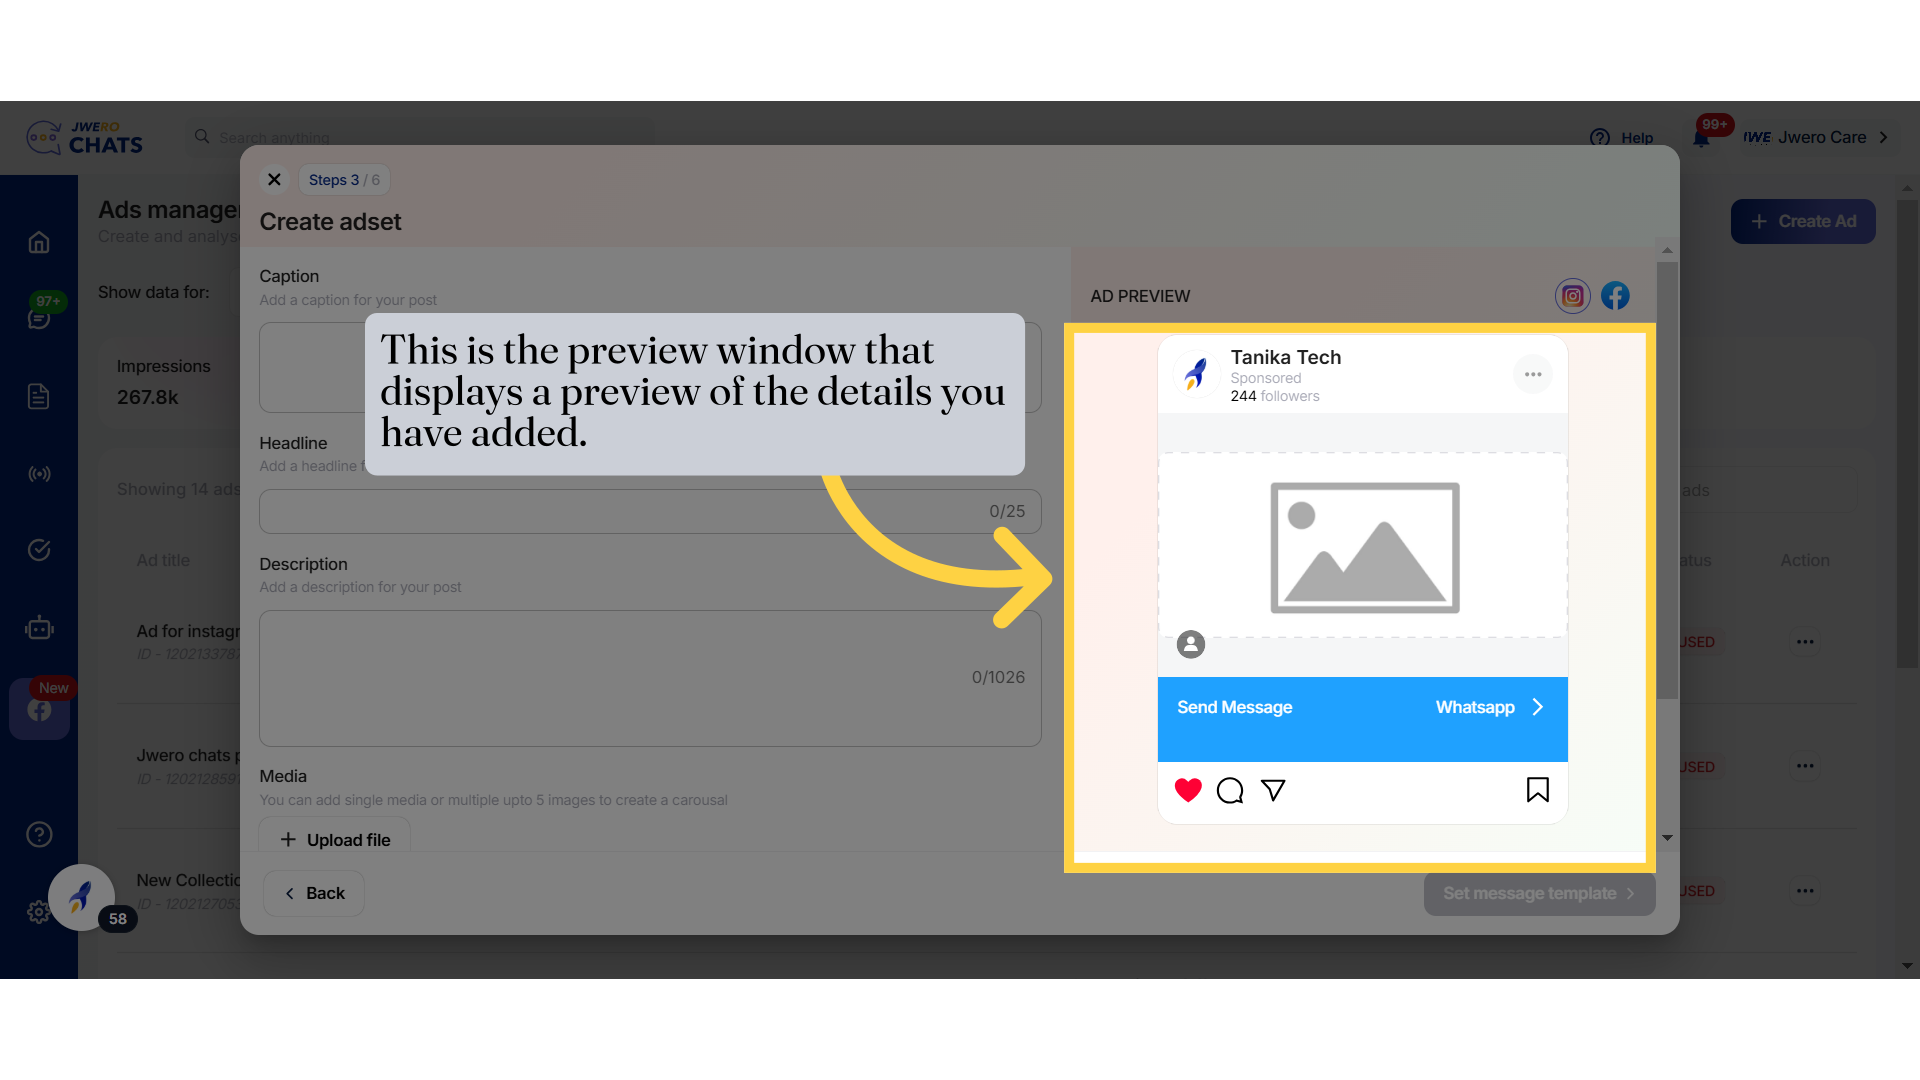
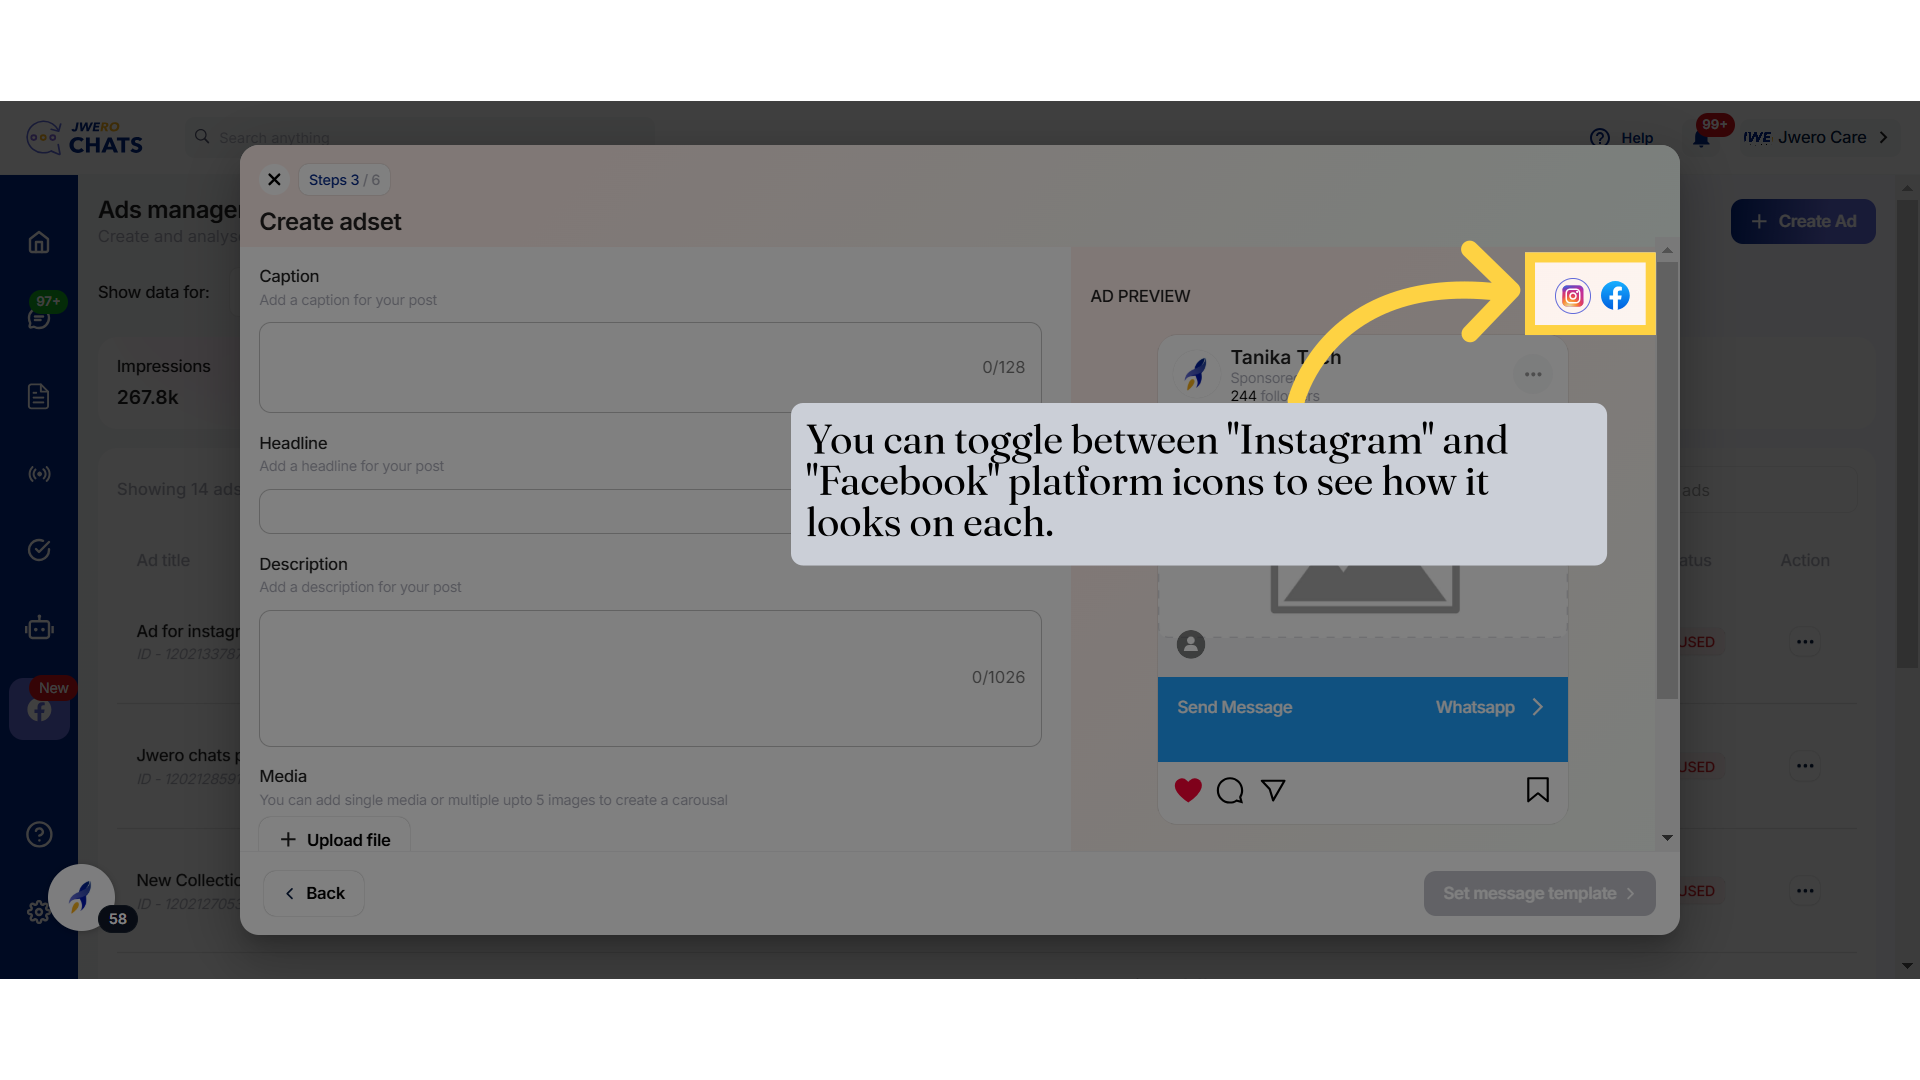
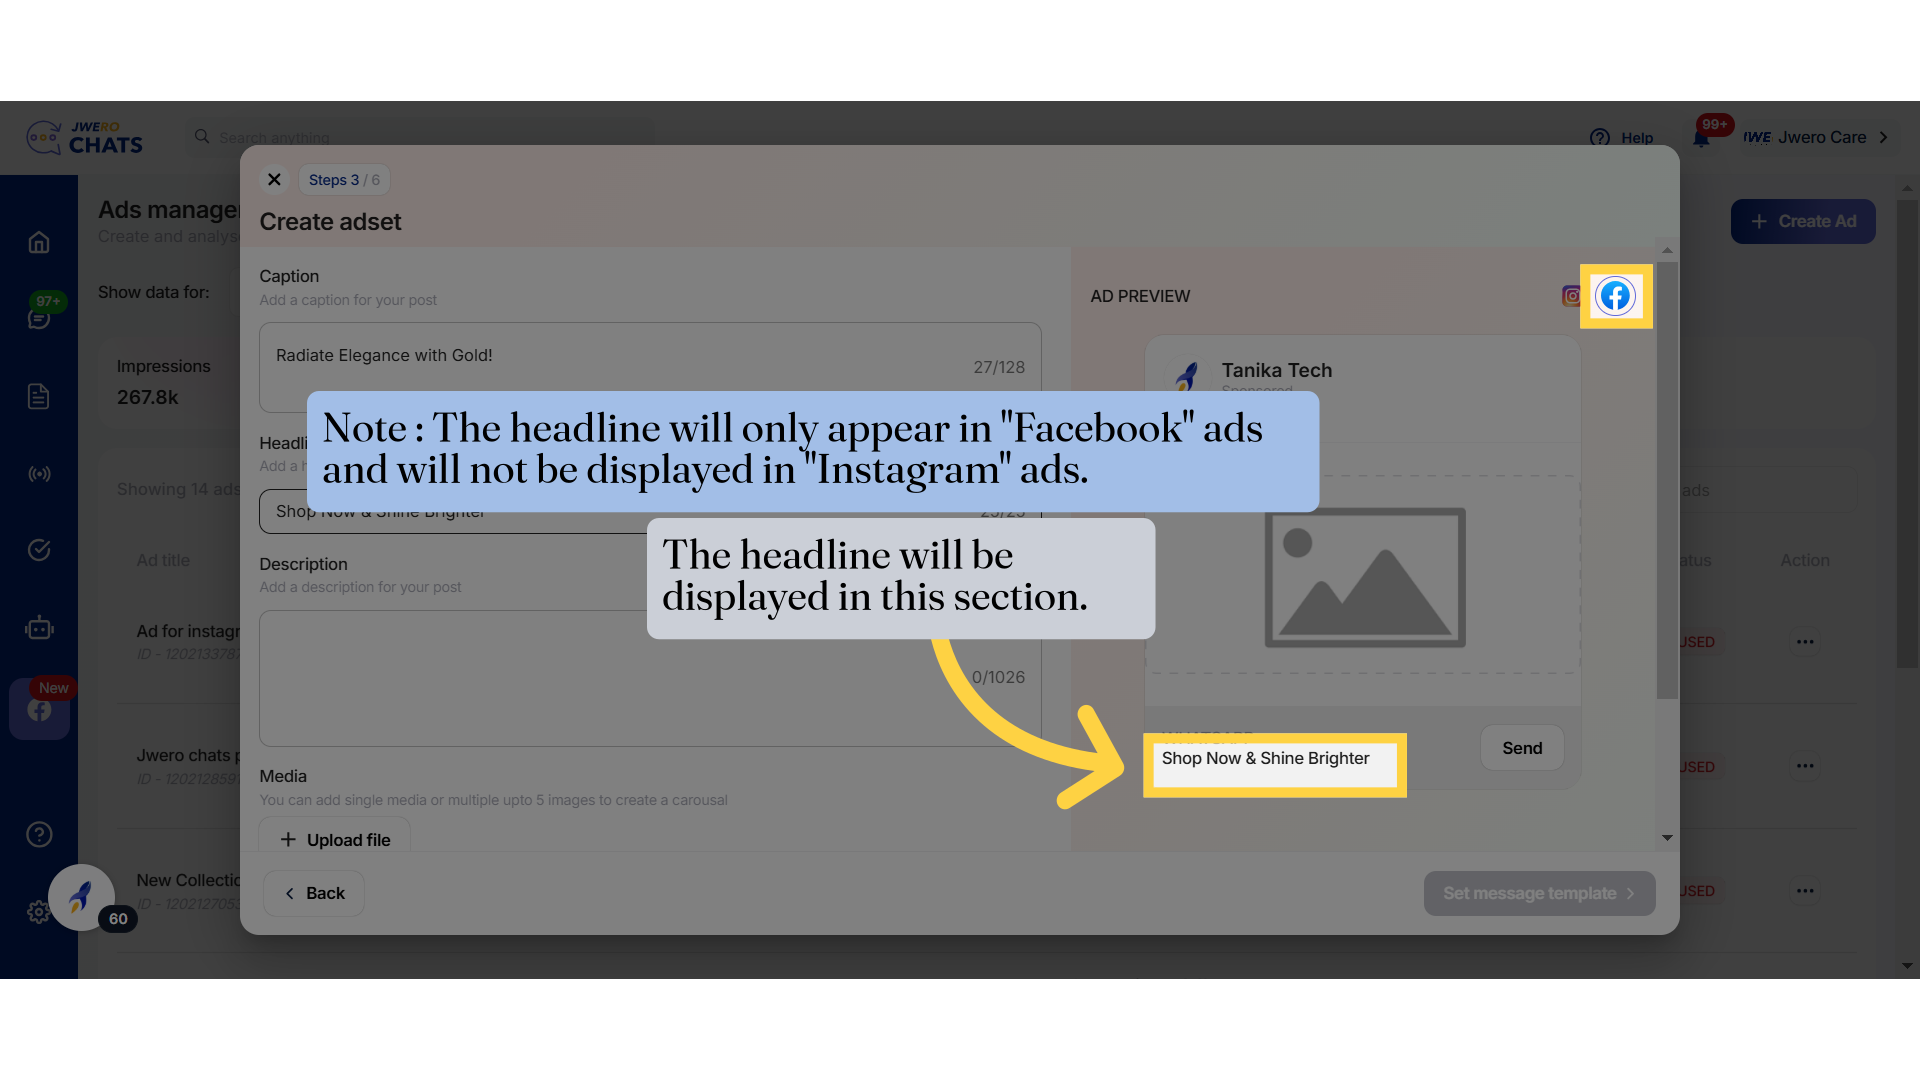
24. You can toggle between "Instagram" and "Facebook" platform icons to see how it looks on each.
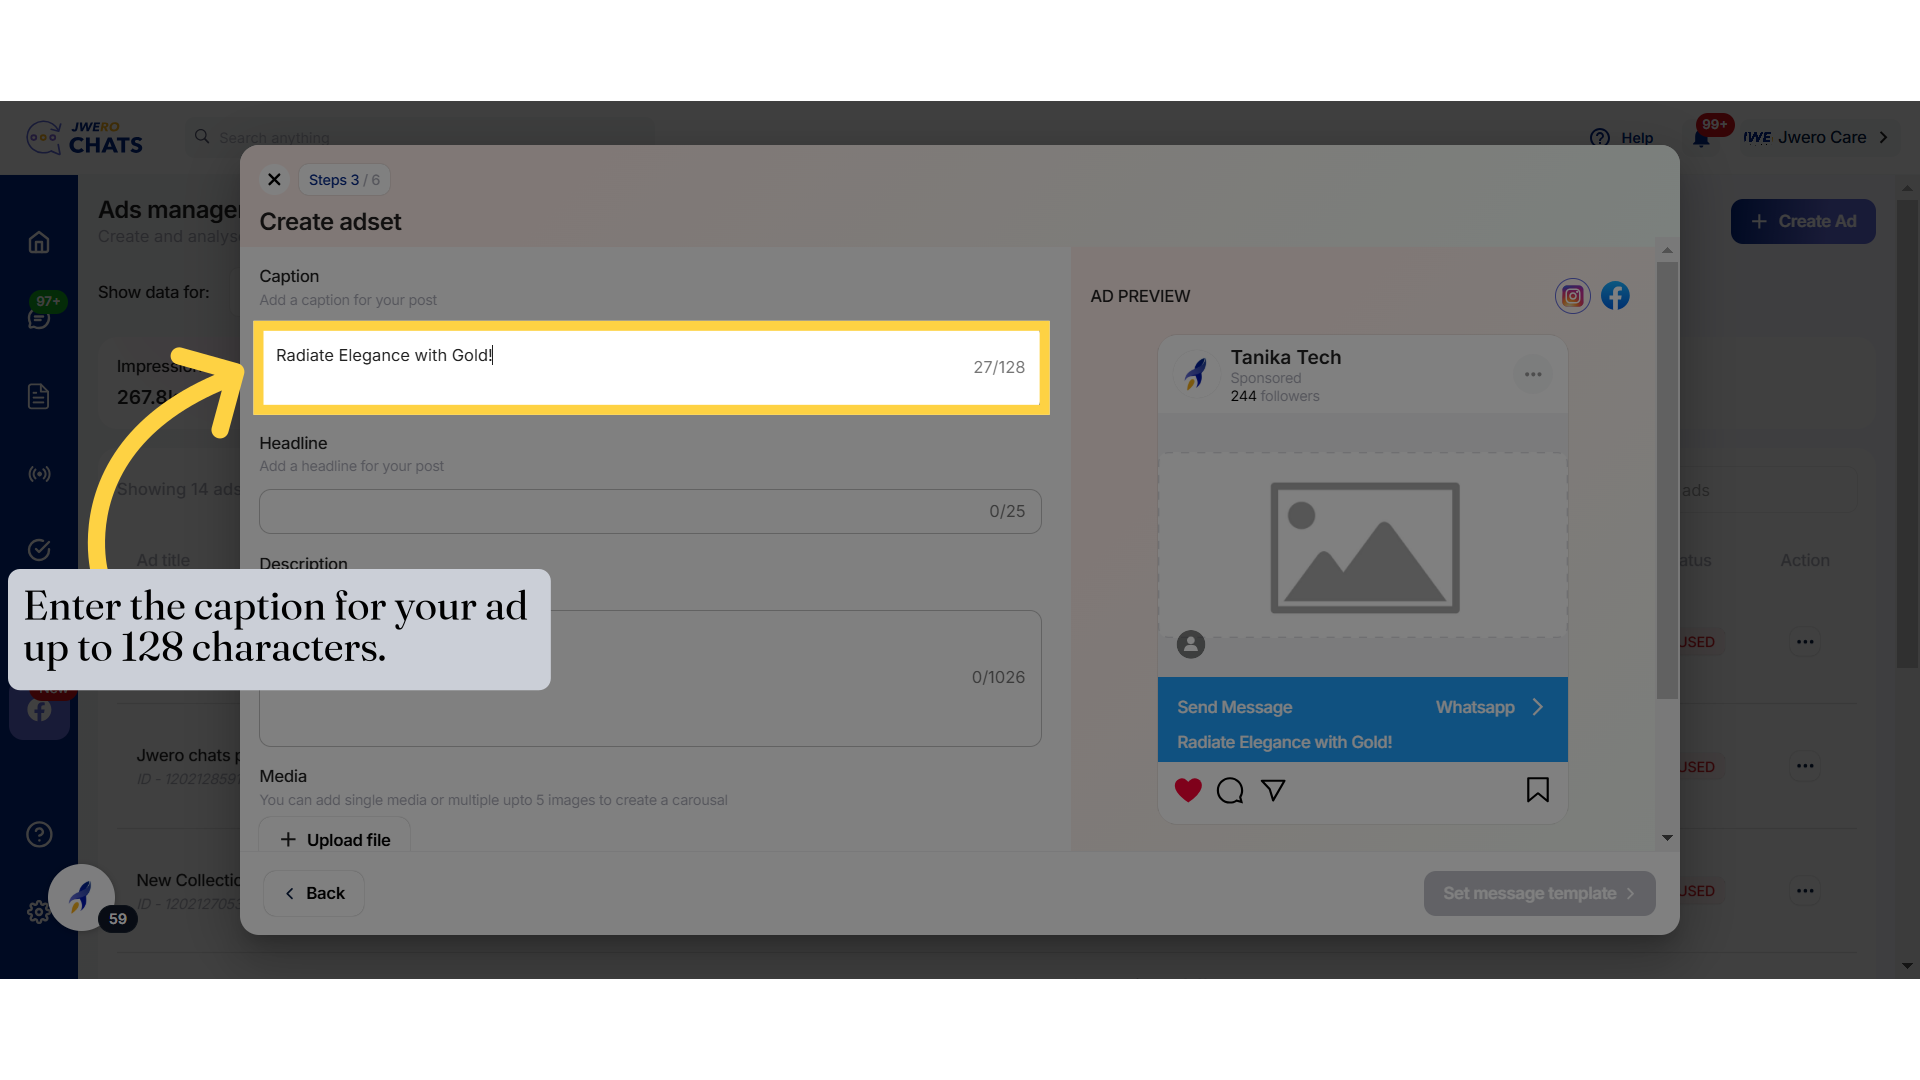
25. Enter the caption for your ad up to 128 characters.
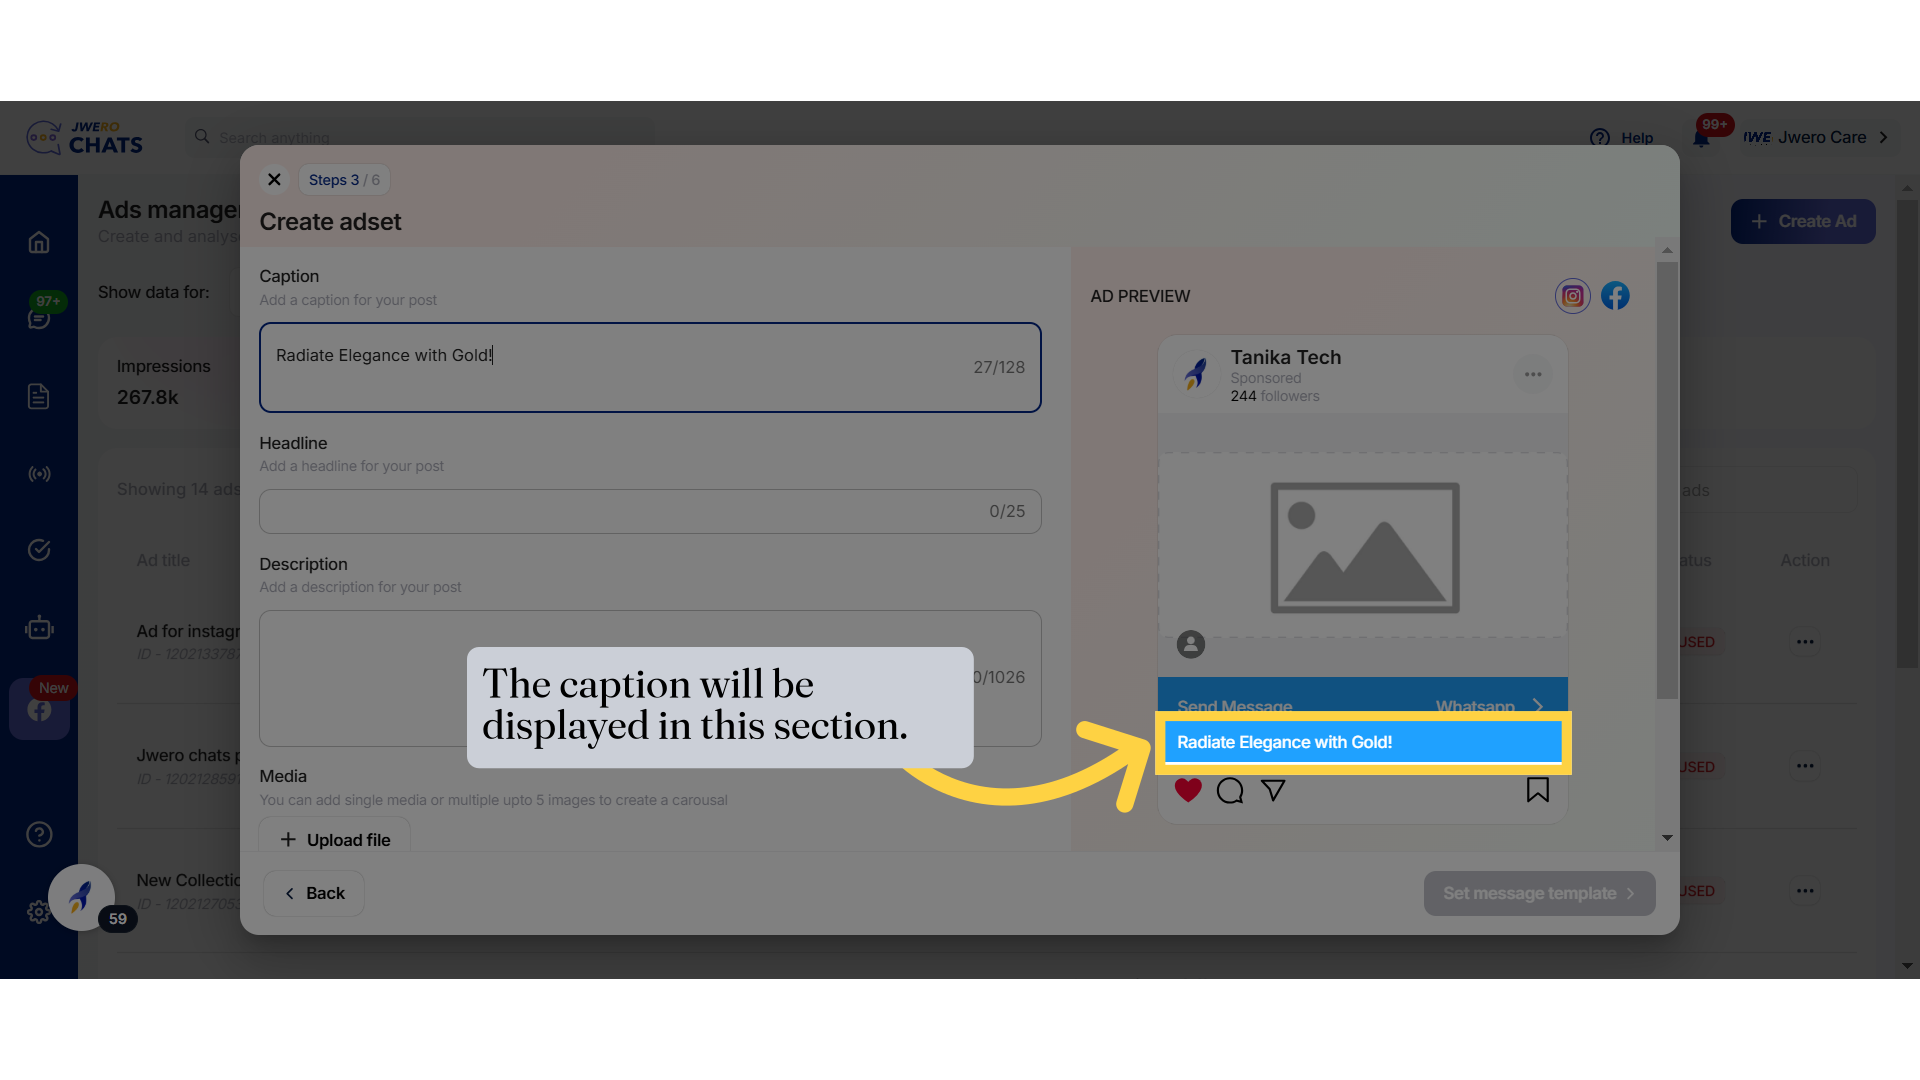
26. The caption will be displayed in this section.
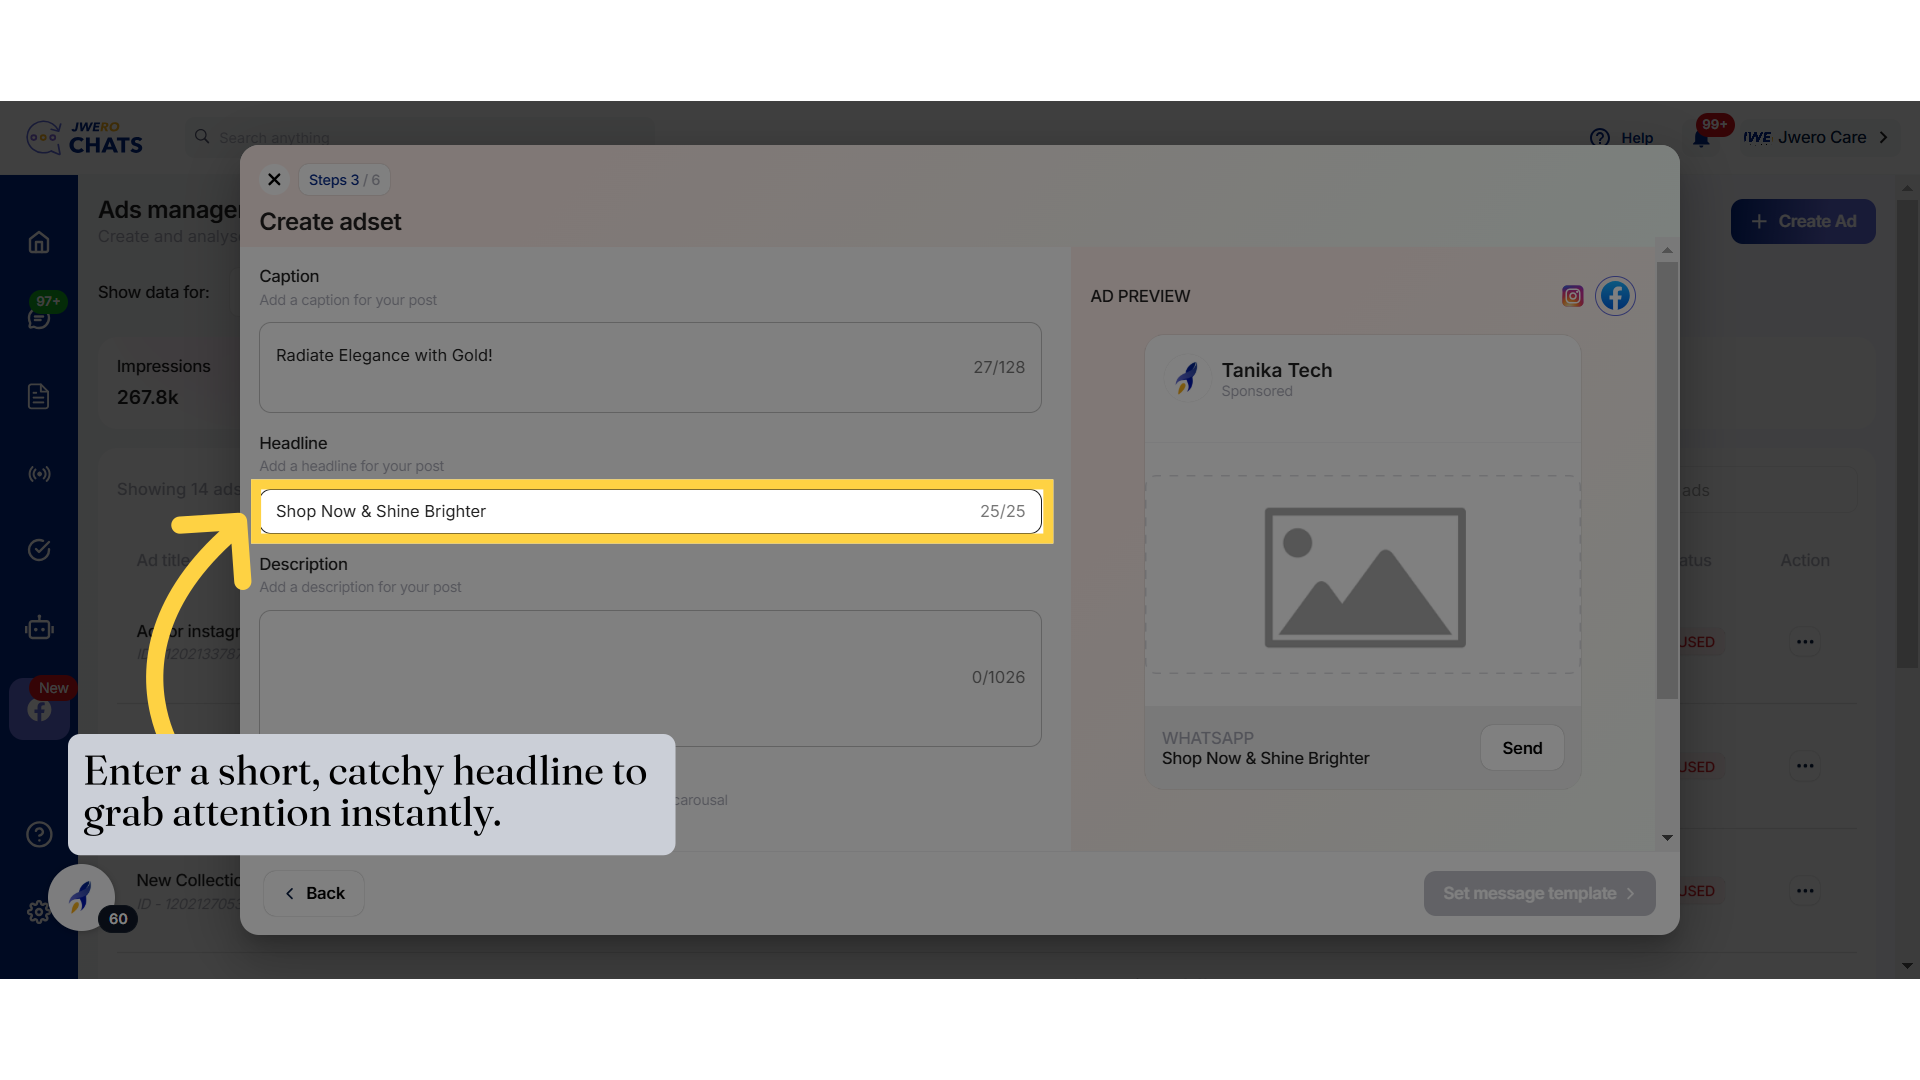
27. Enter a short, catchy headline to grab attention instantly.
28. The headline will be displayed in this section.
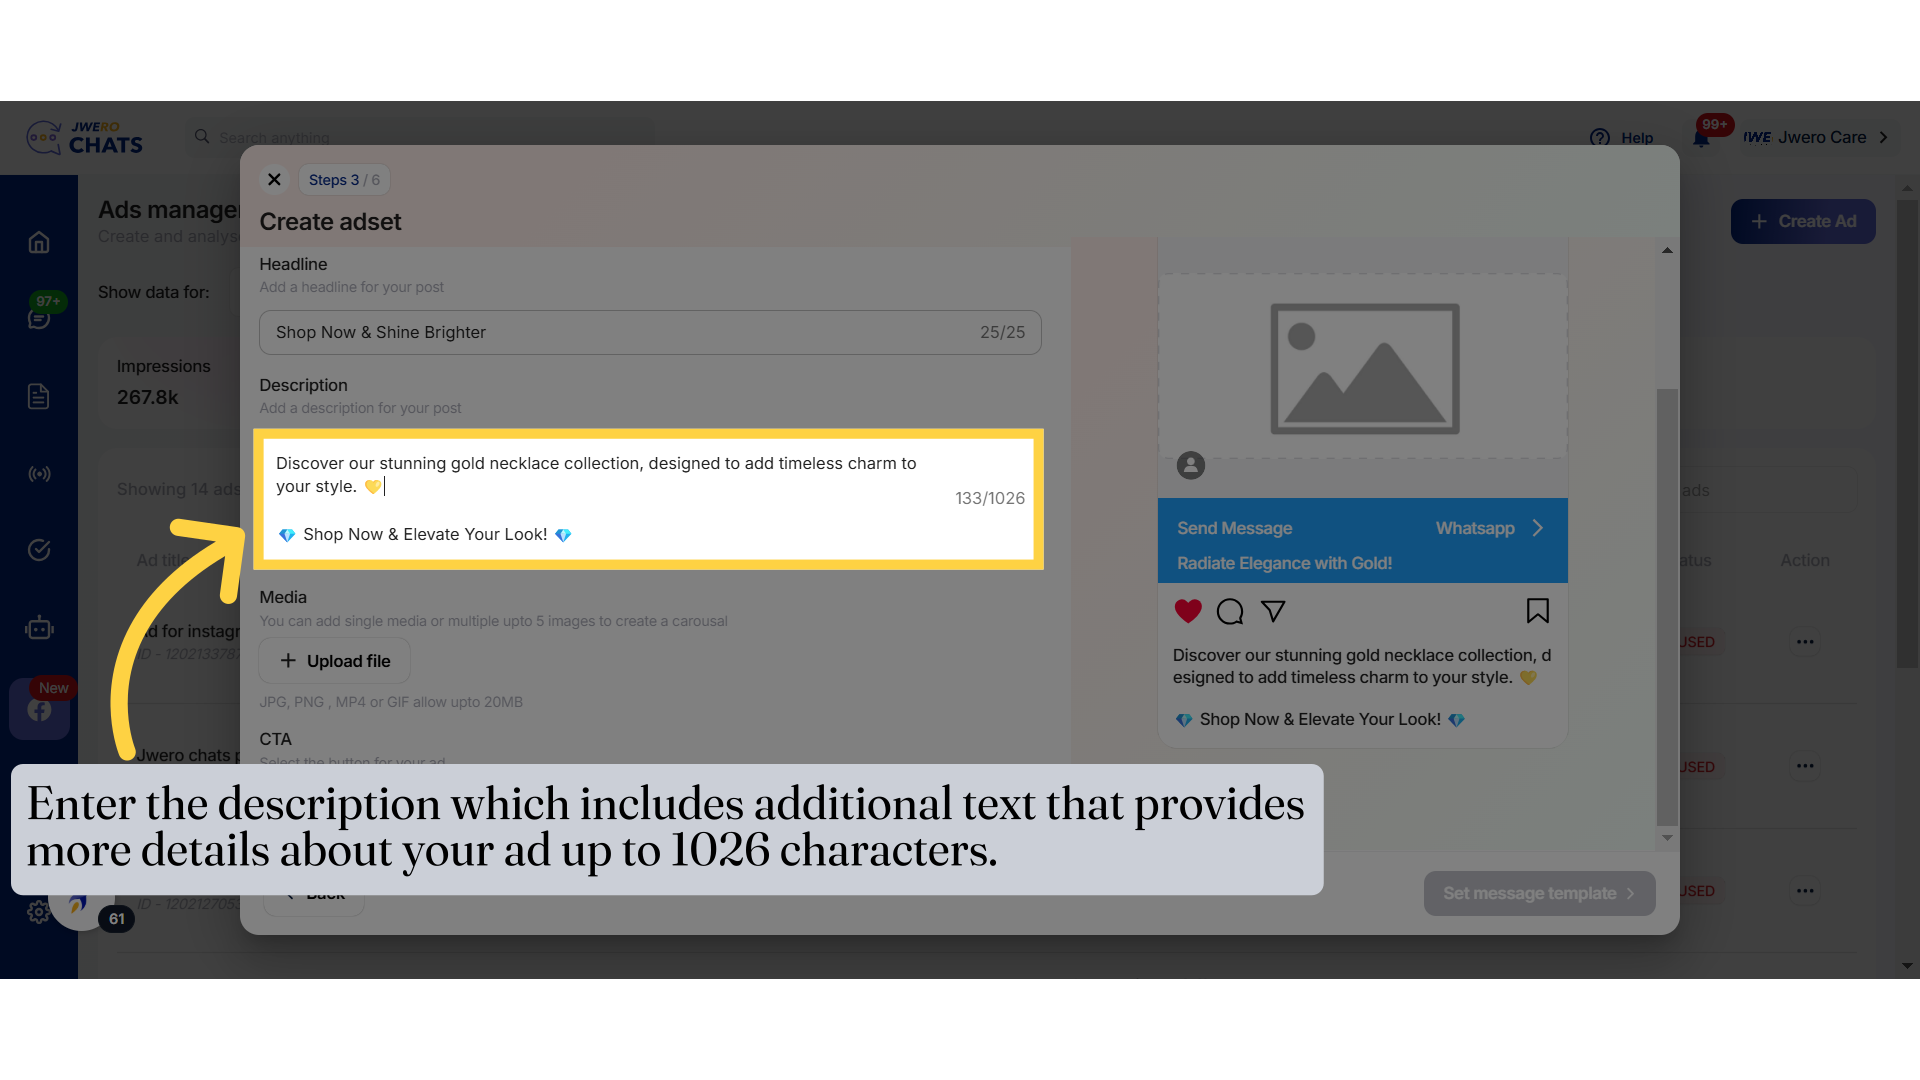
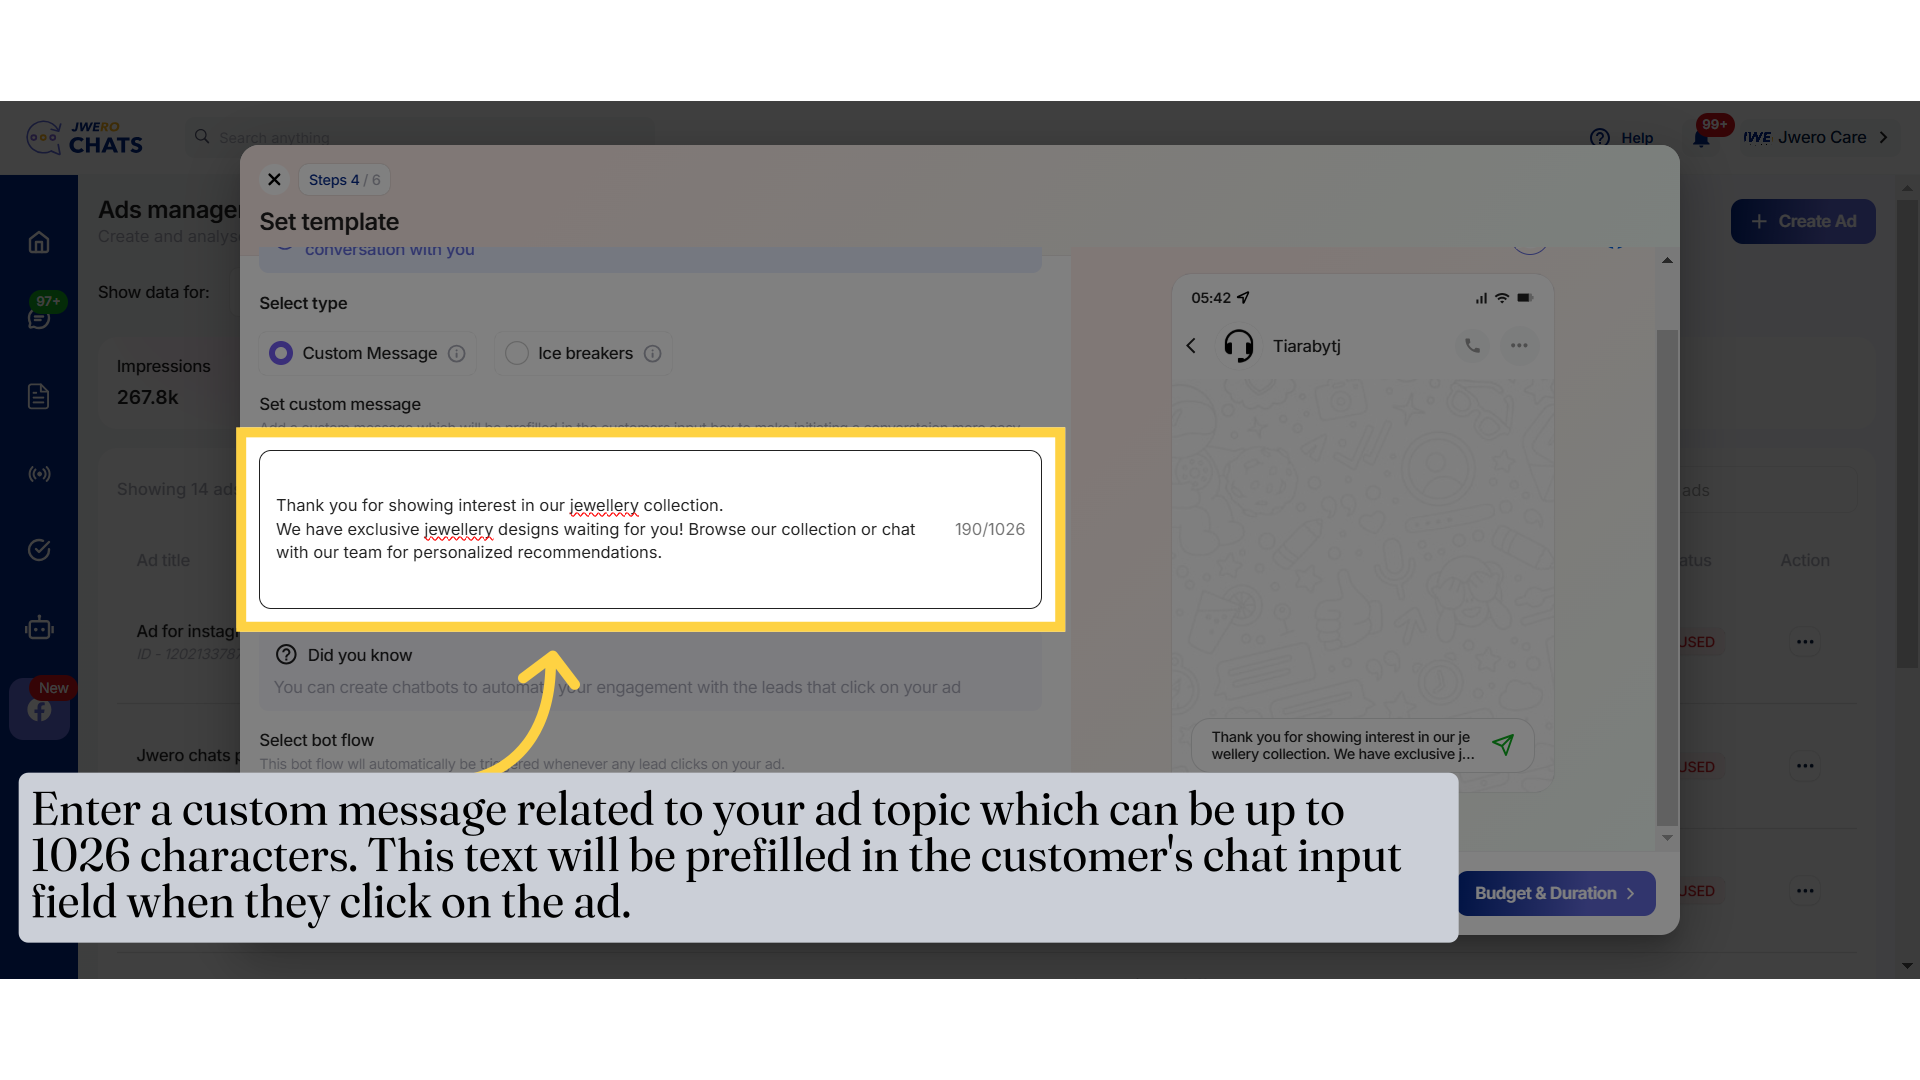
29. Enter the description which includes additional text that provides more details about your ad up to 1026 characters.
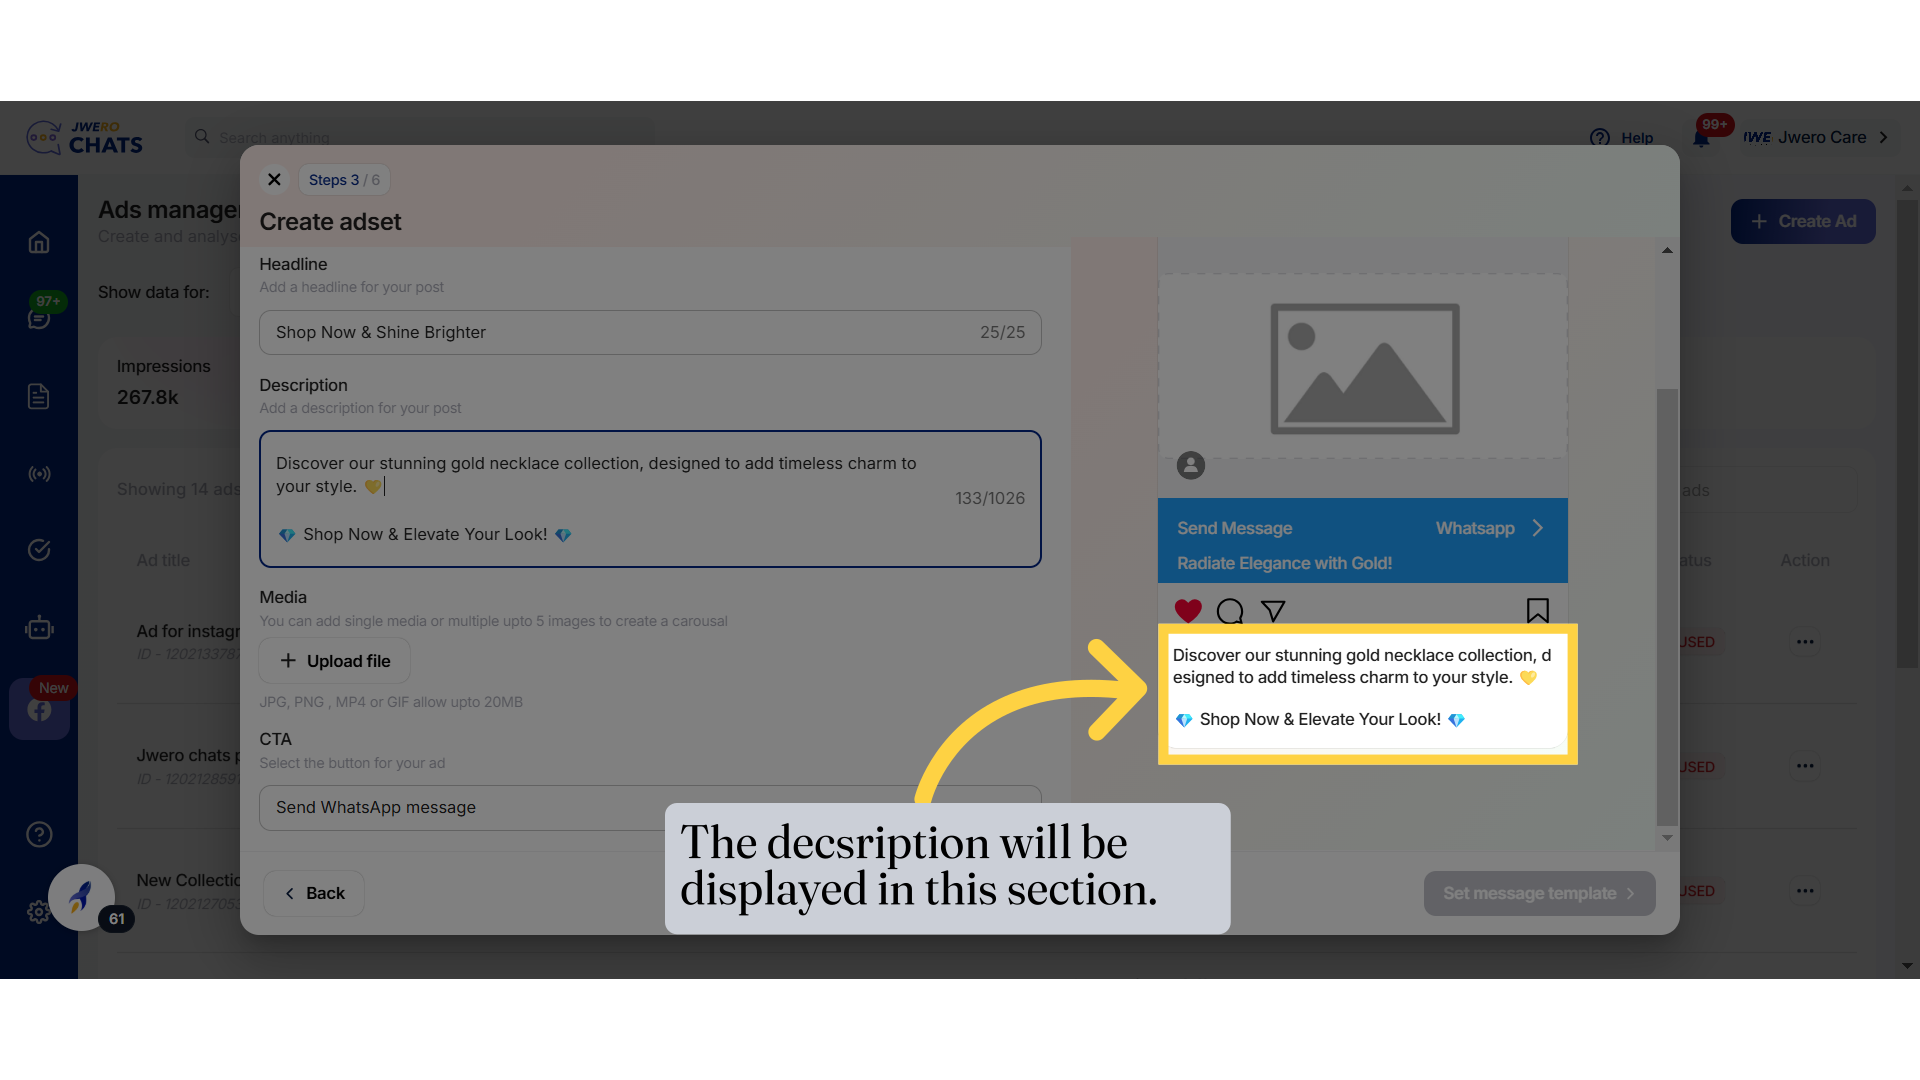
30. The decsription will be displayed in this section.
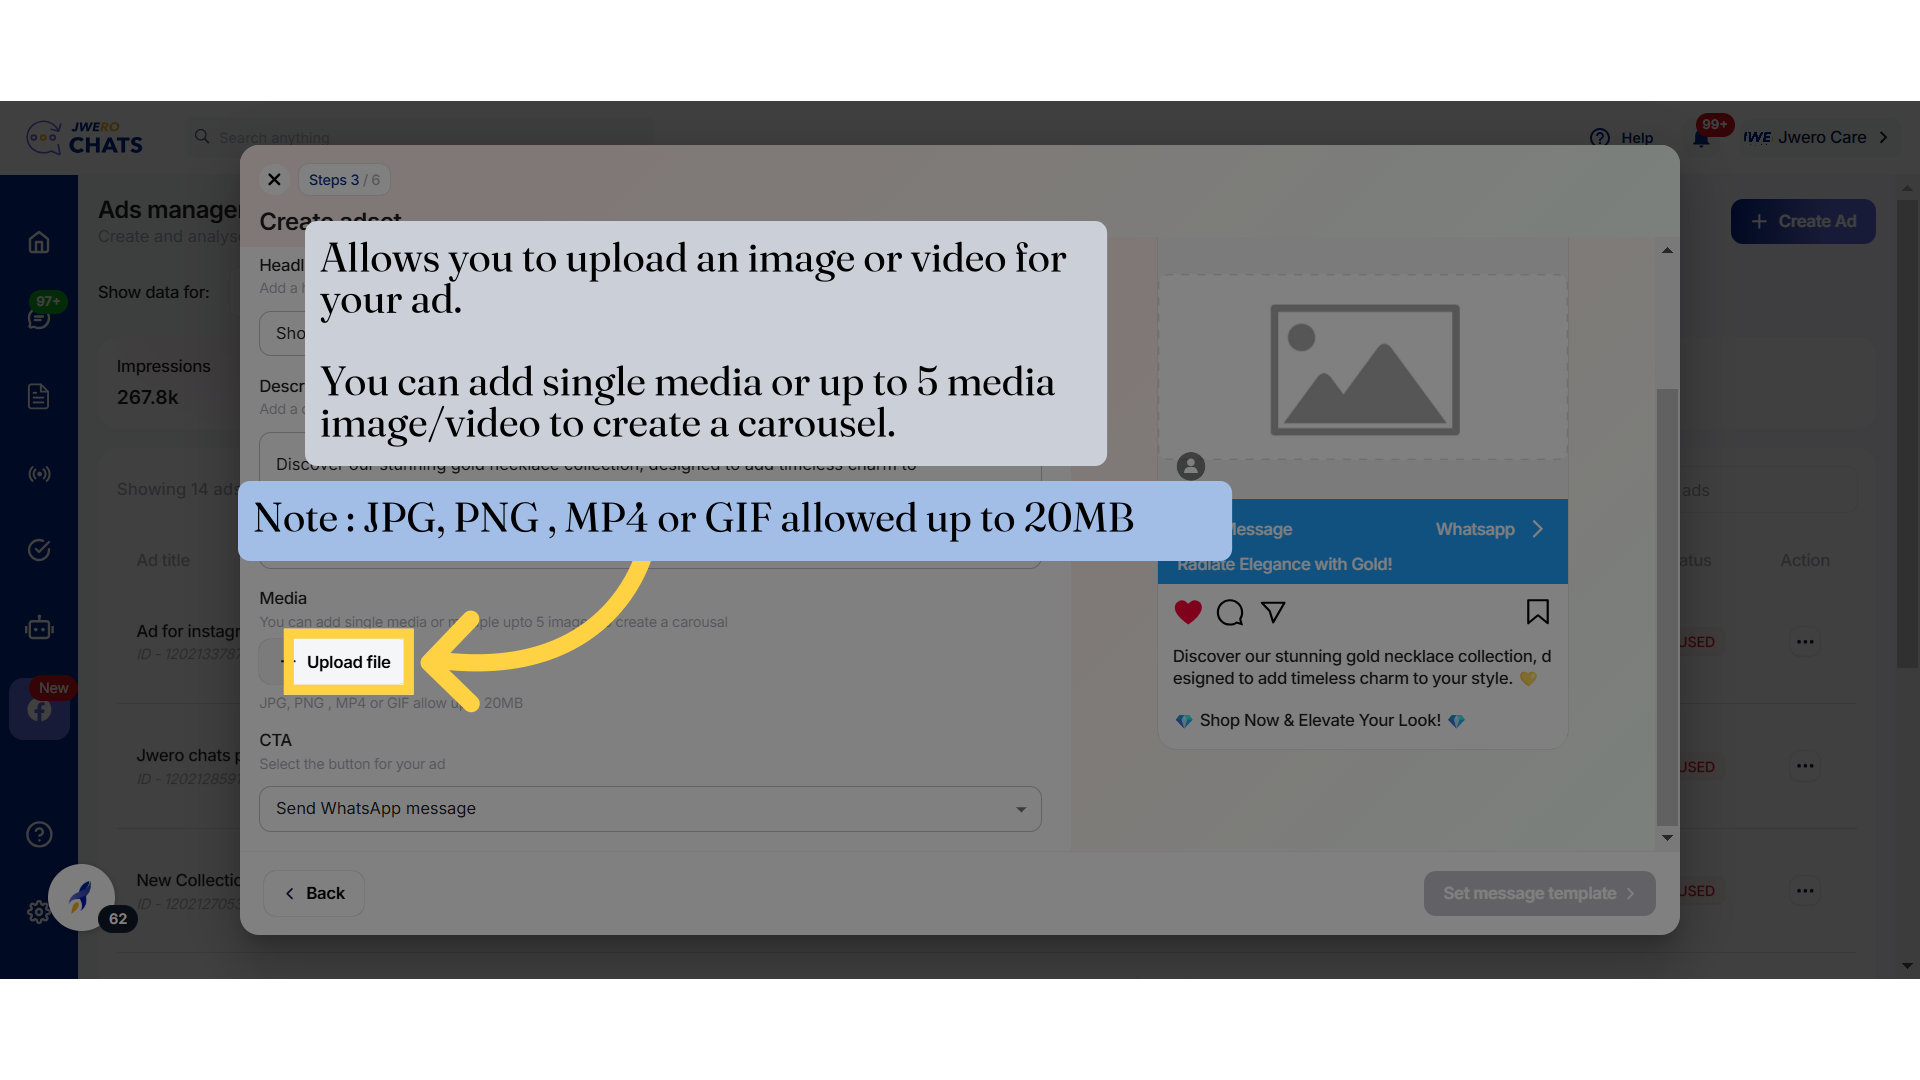
31. Allows you to upload an image or video for your ad. You can add single media or up to 5 media image/video to create a carousel.
32. Video has been uploaded.
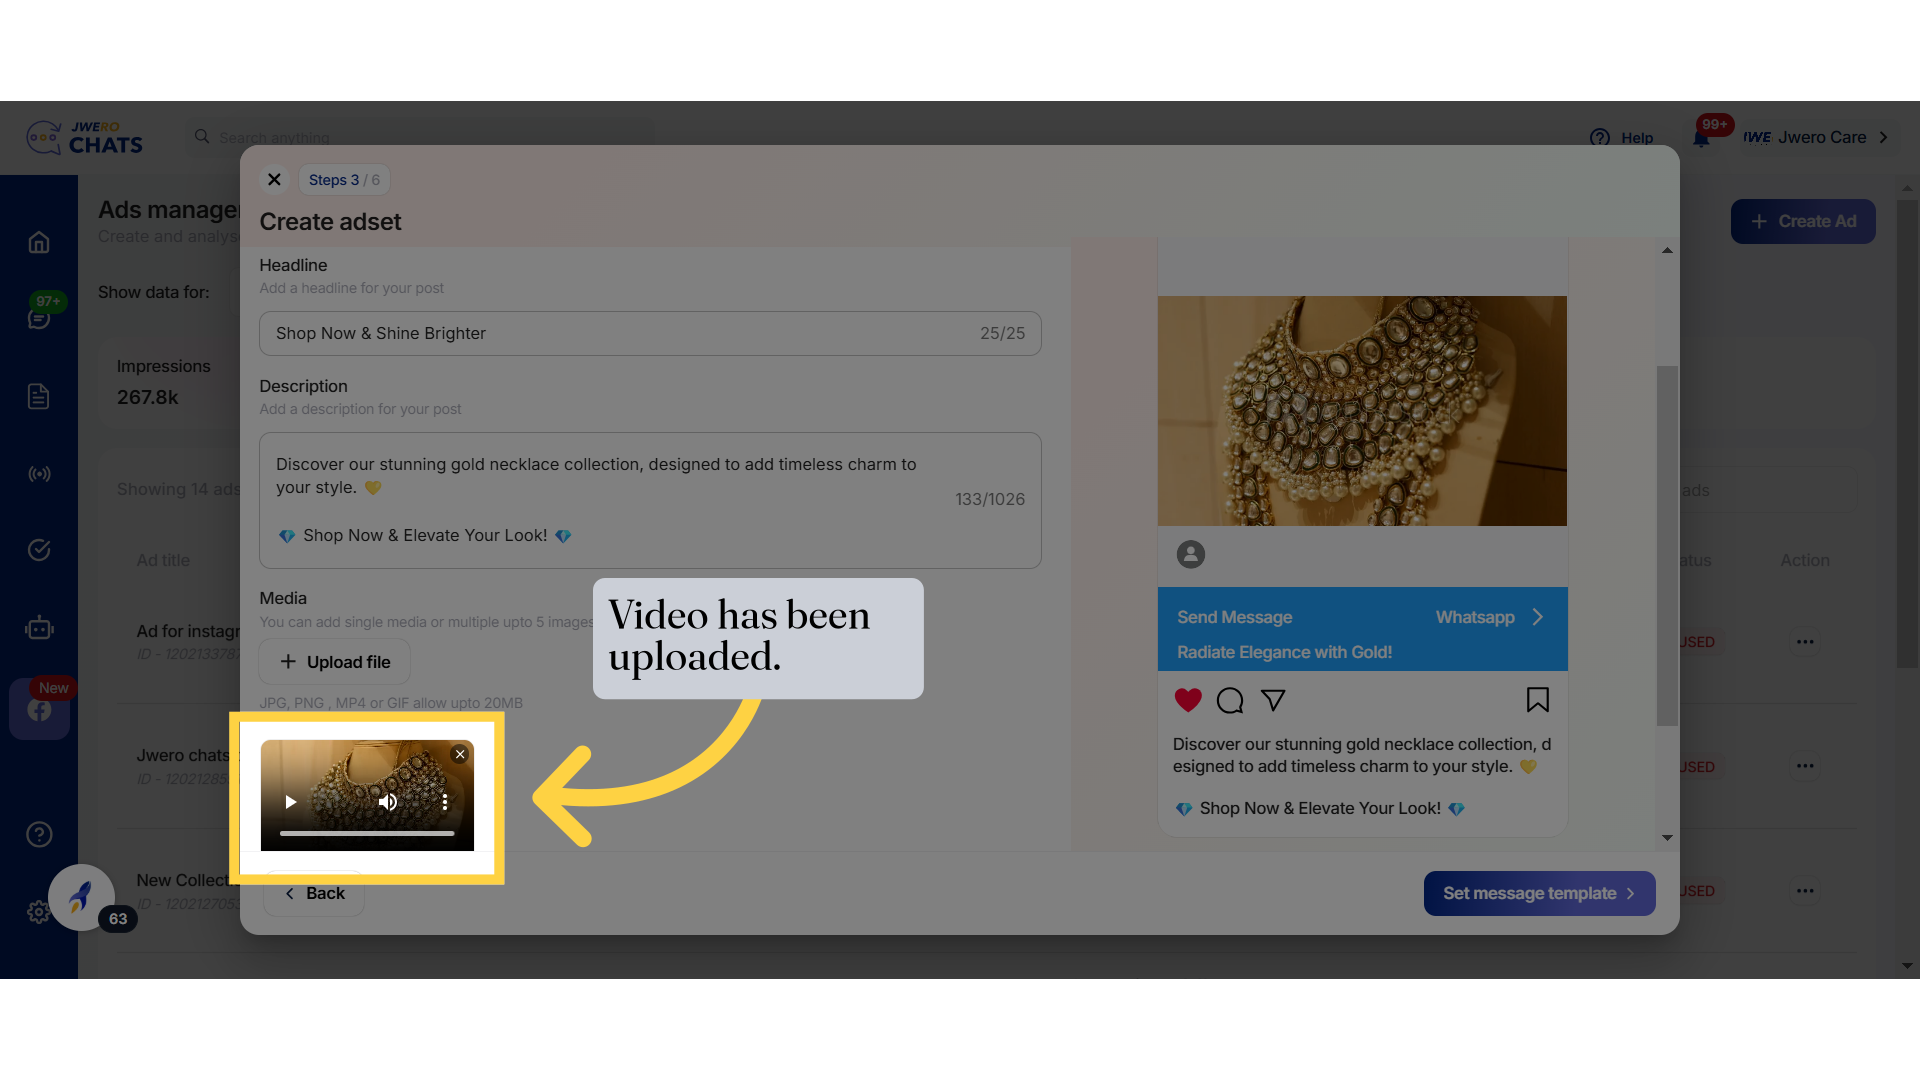
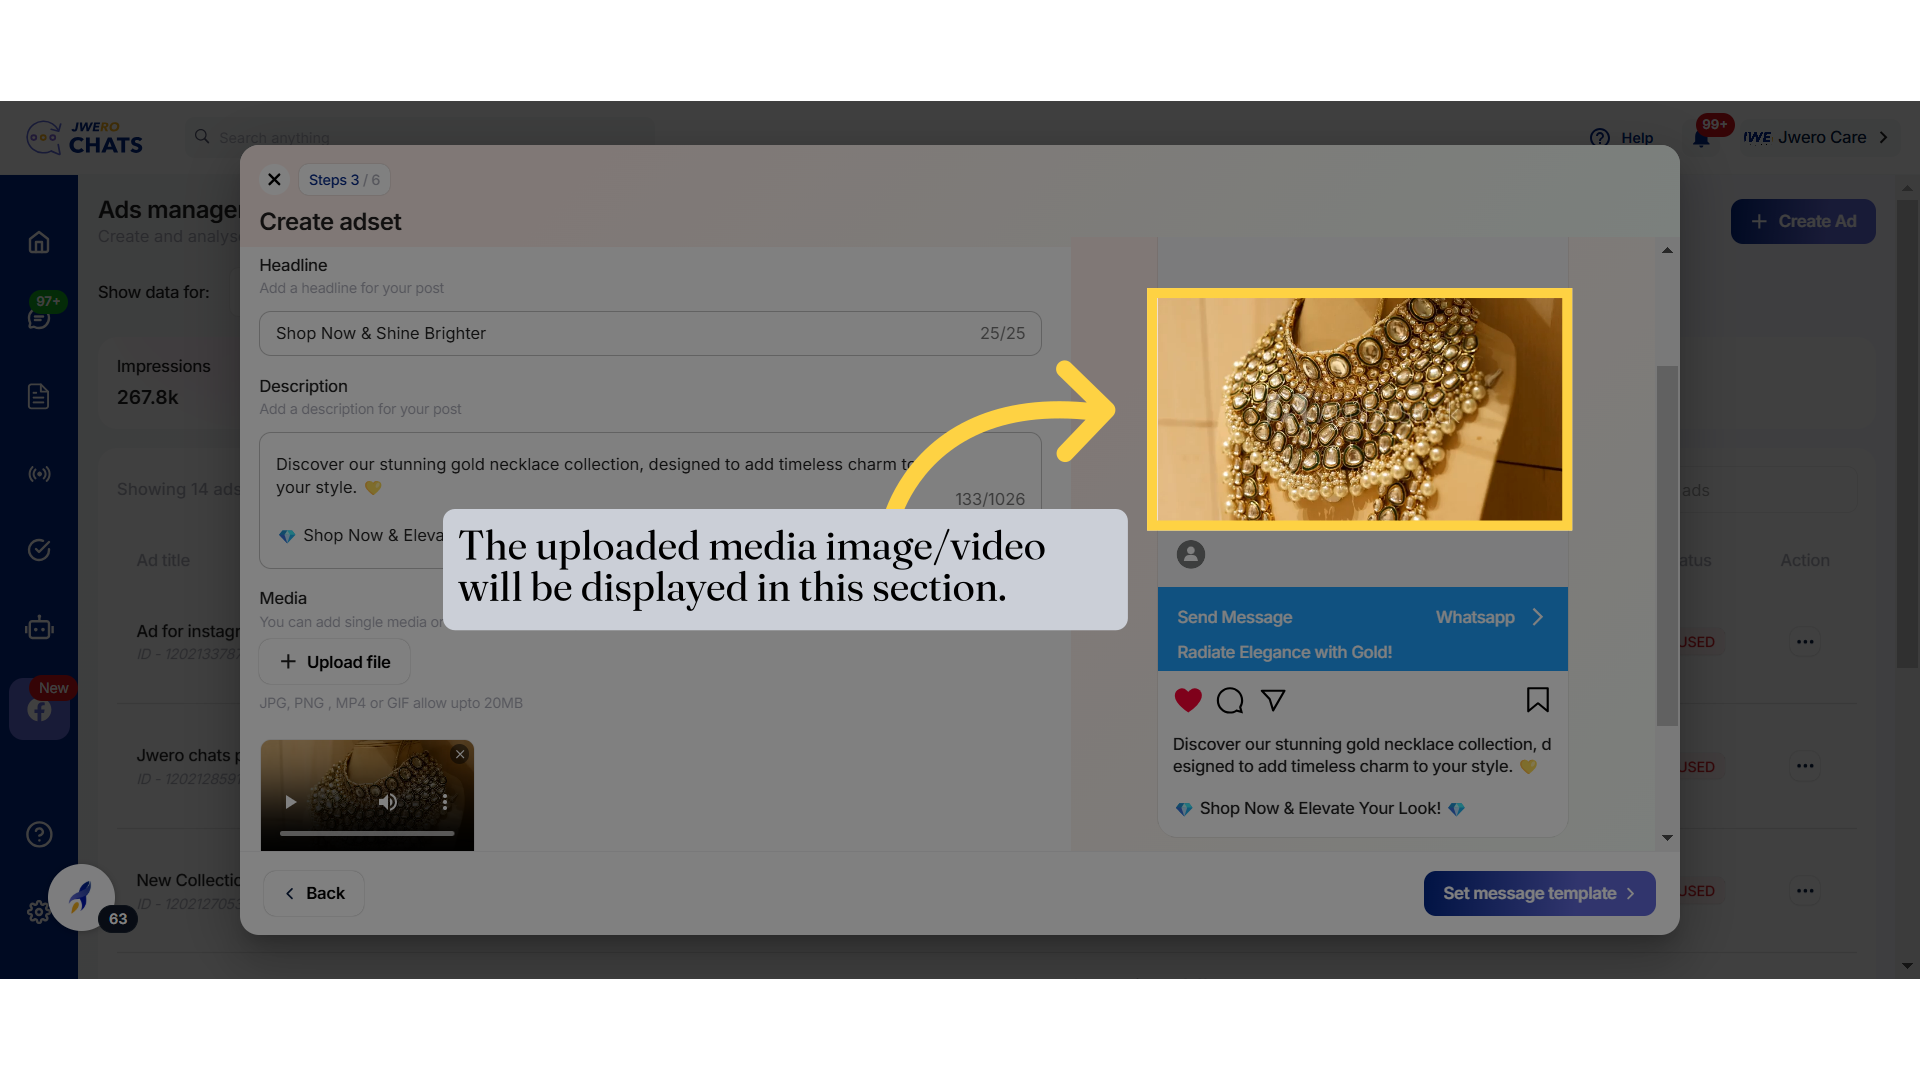
33. The uploaded media image/video will be displayed in this section.
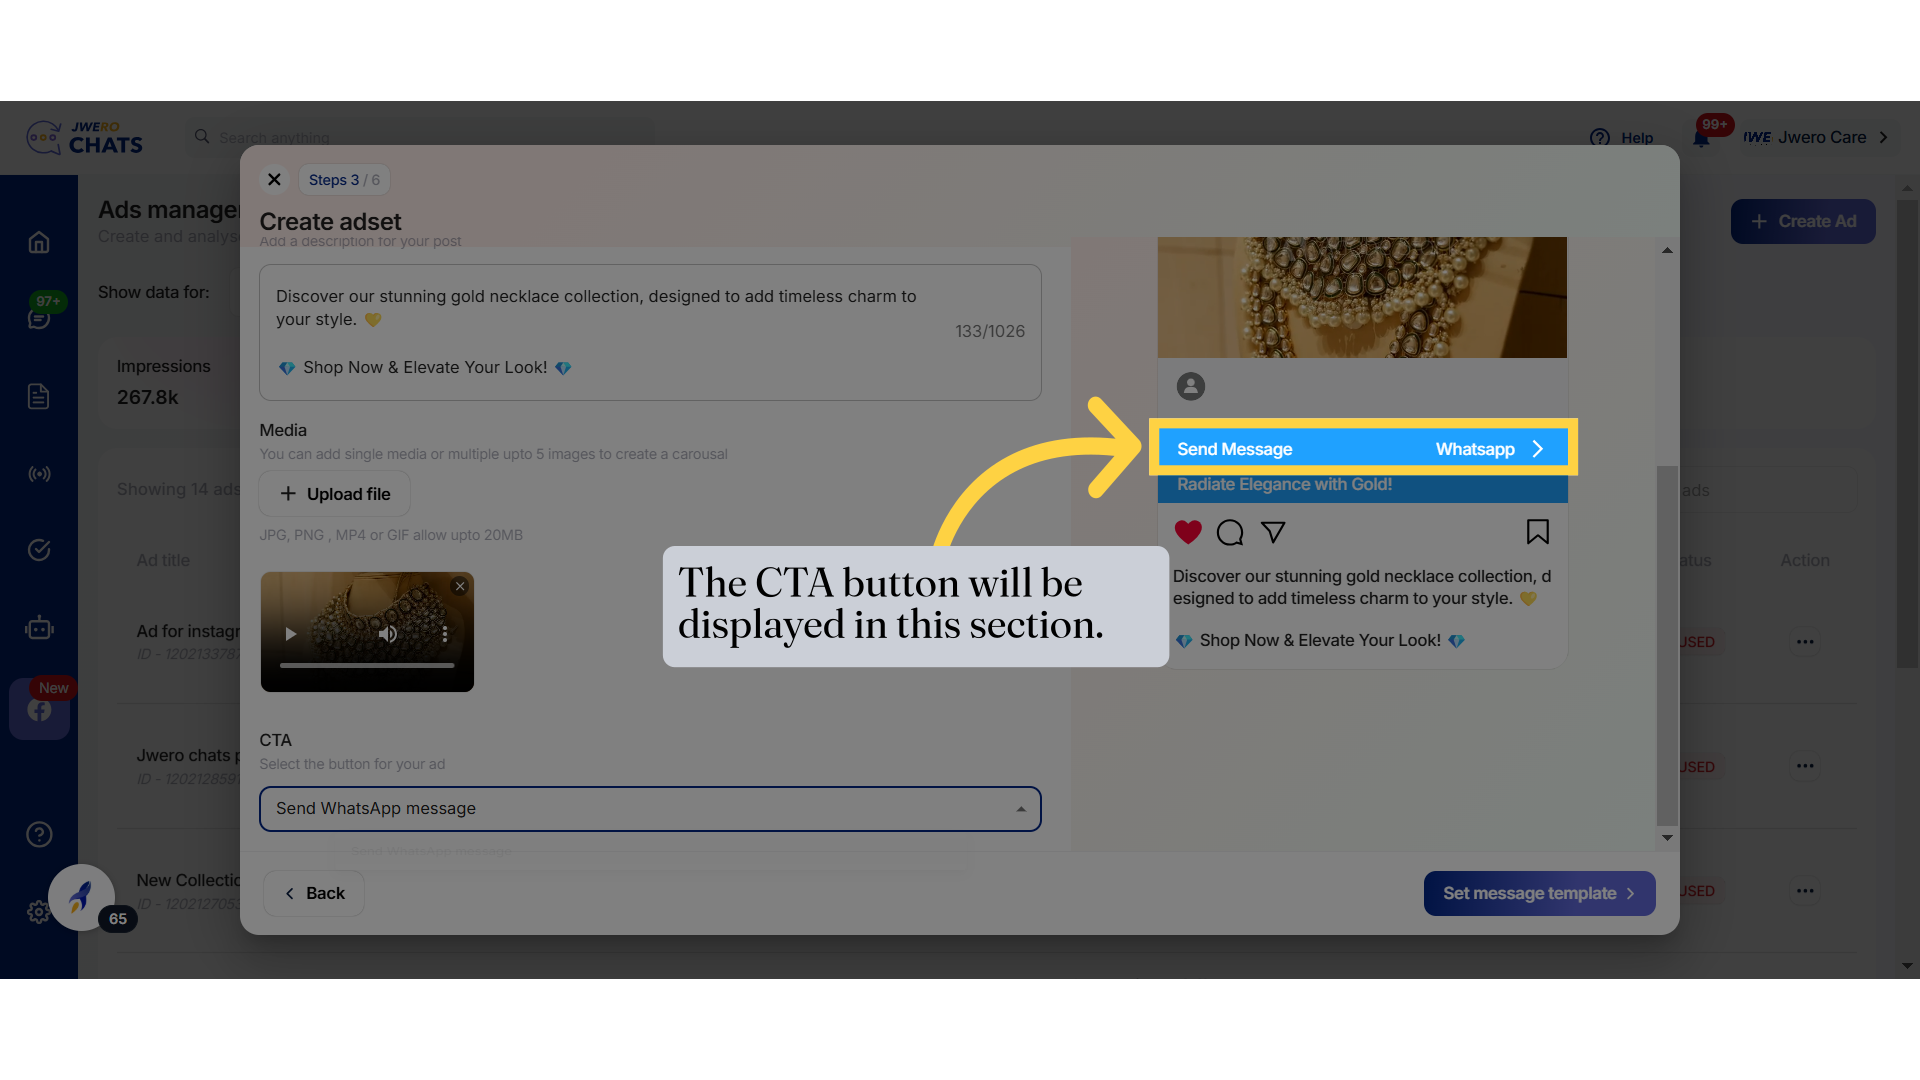
34. Select "Send WhatsApp message"

35. The CTA button will be displayed in this section.
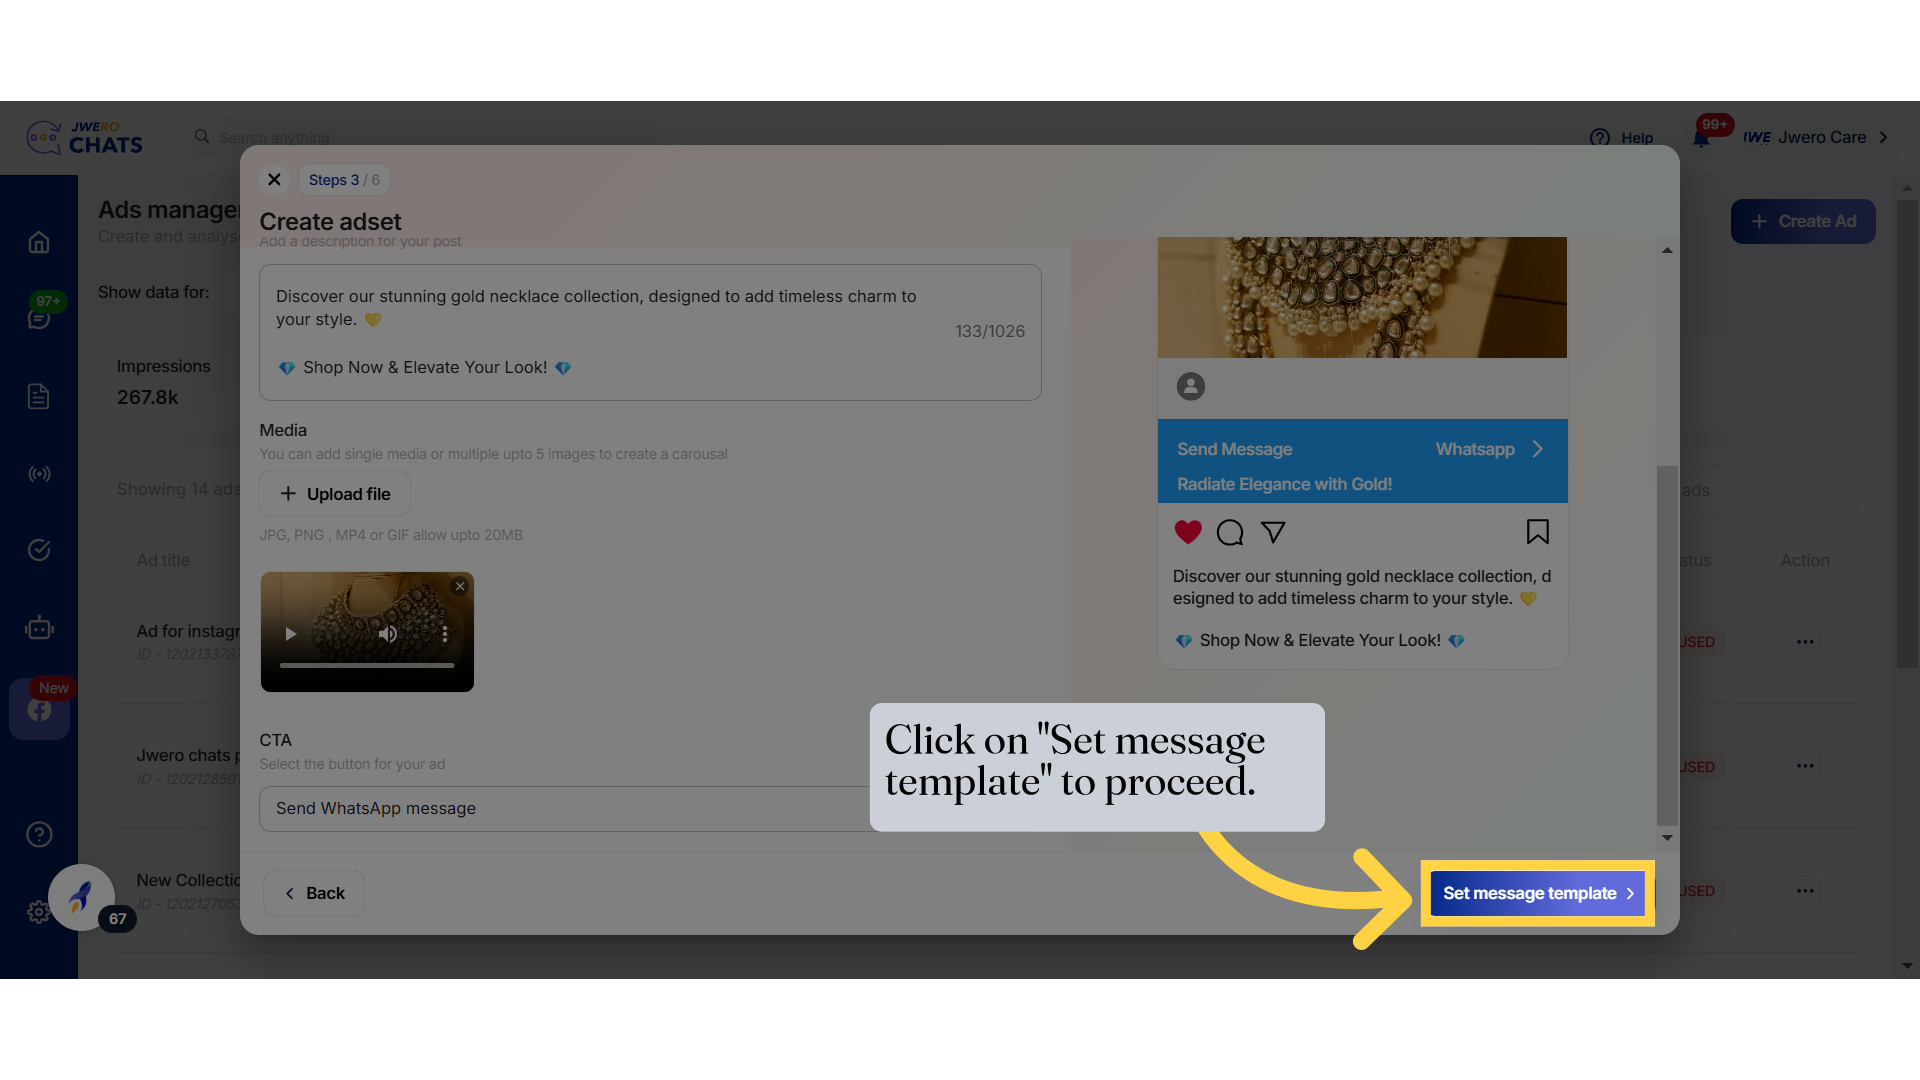
36. Click on "Set message template" to proceed.
37. There are two ways for messaging.

38. Custom Message
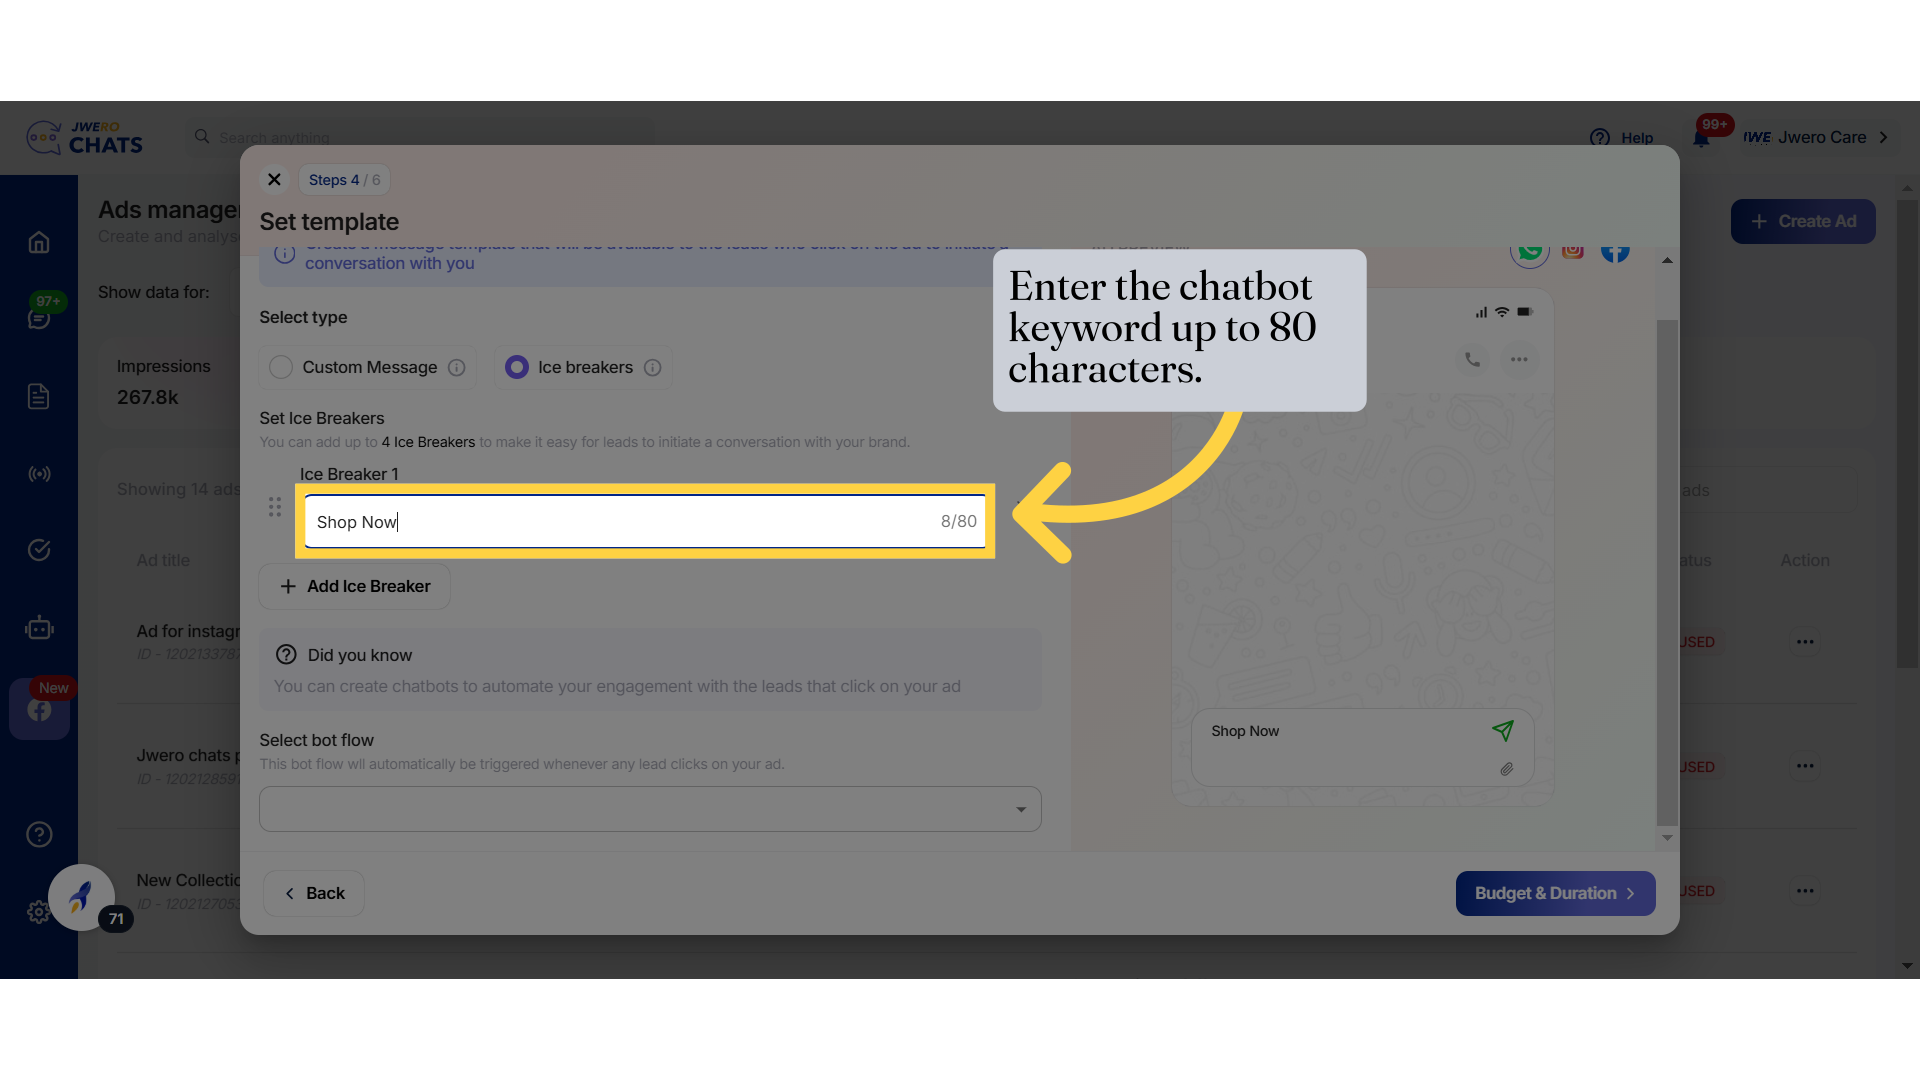
39. Enter the chatbot keyword up to 80 characters.
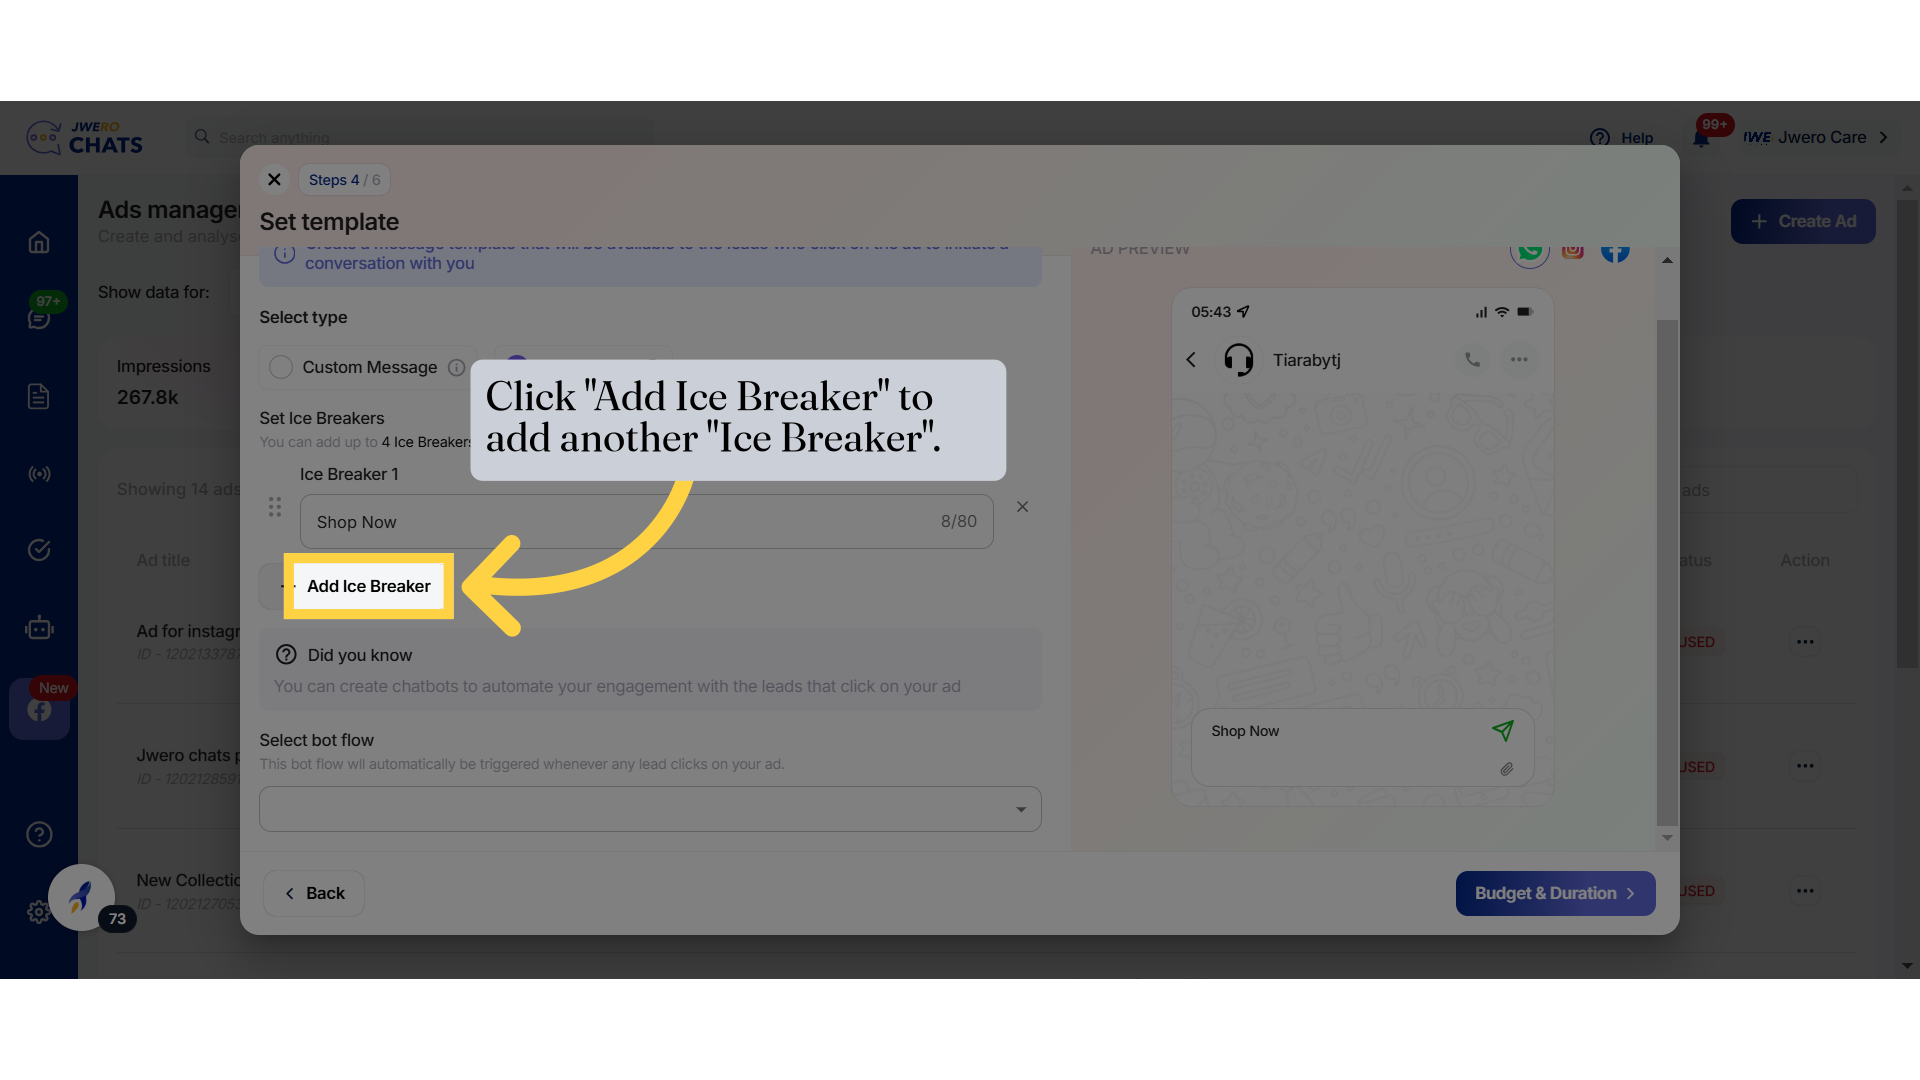
40. Click "Add Ice Breaker" to add another "Ice Breaker".
41. Similarly, I have added three more Ice Breakers.
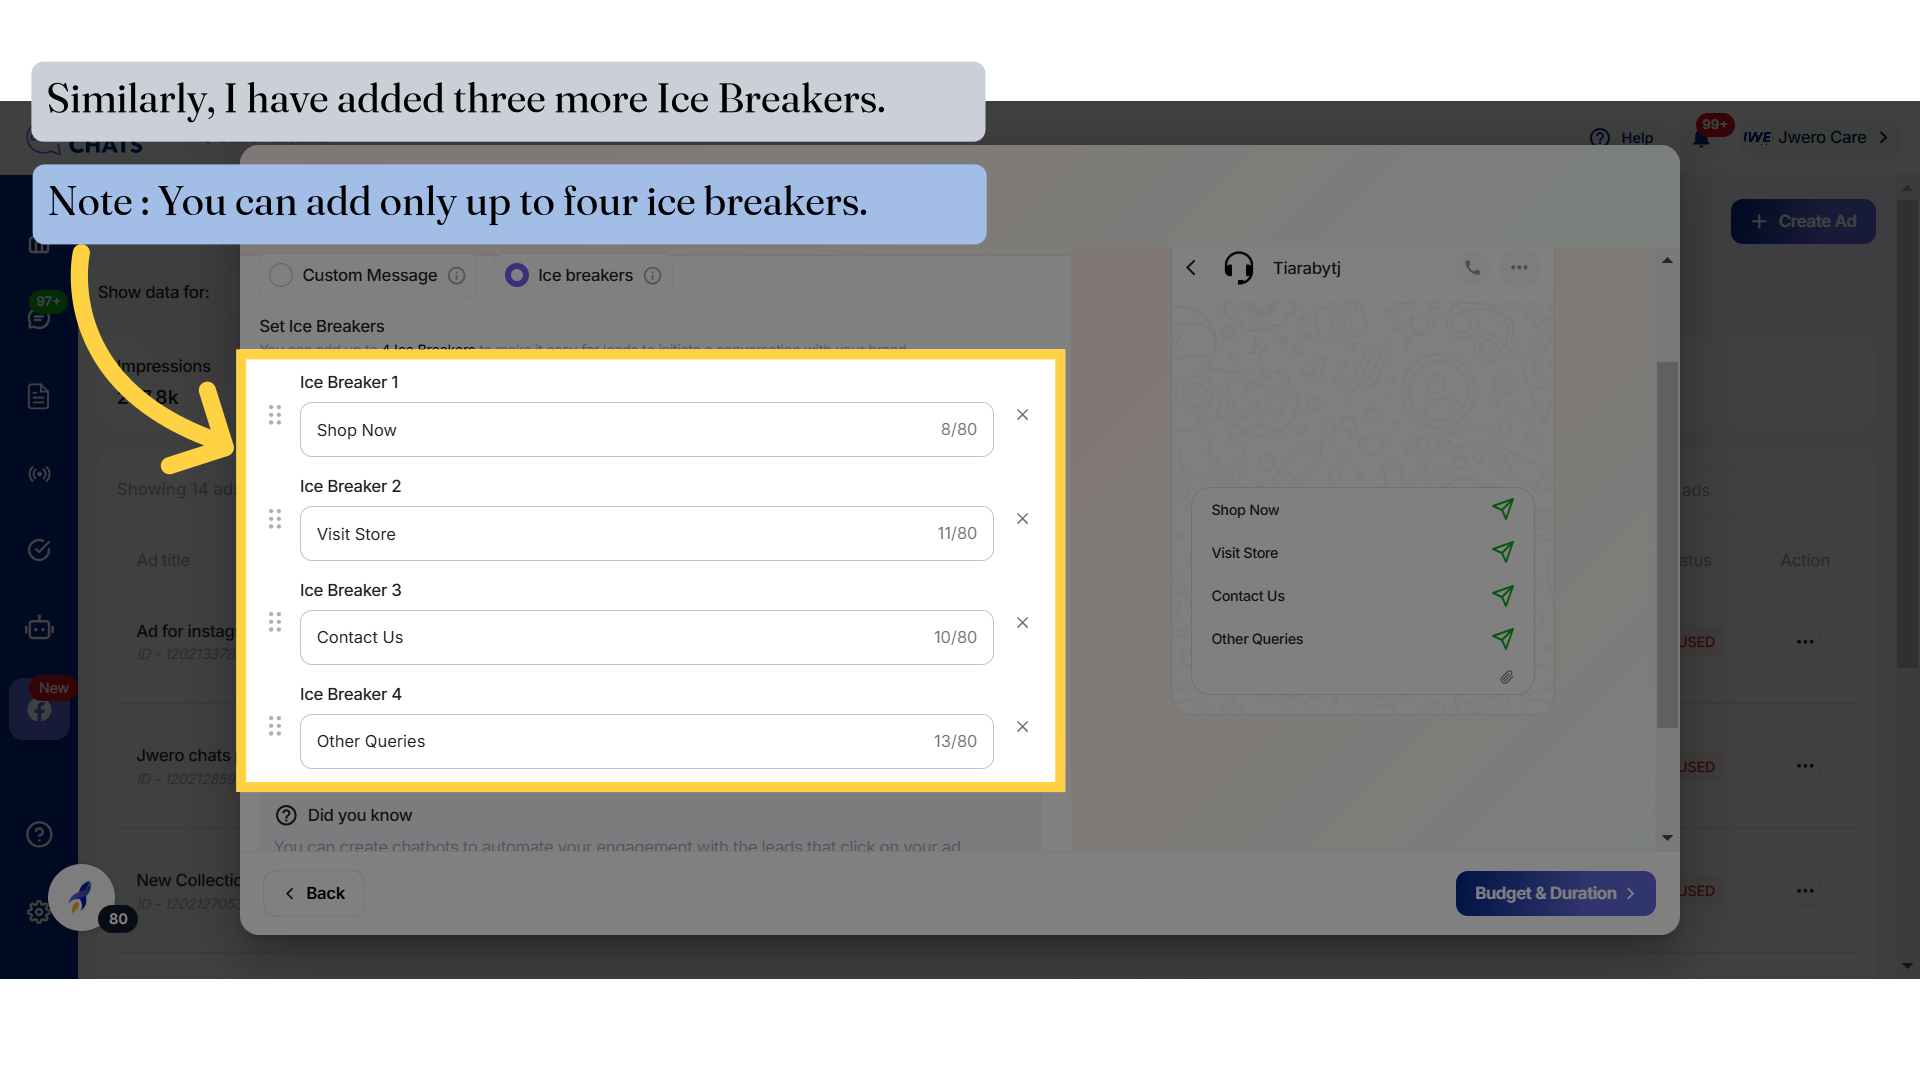
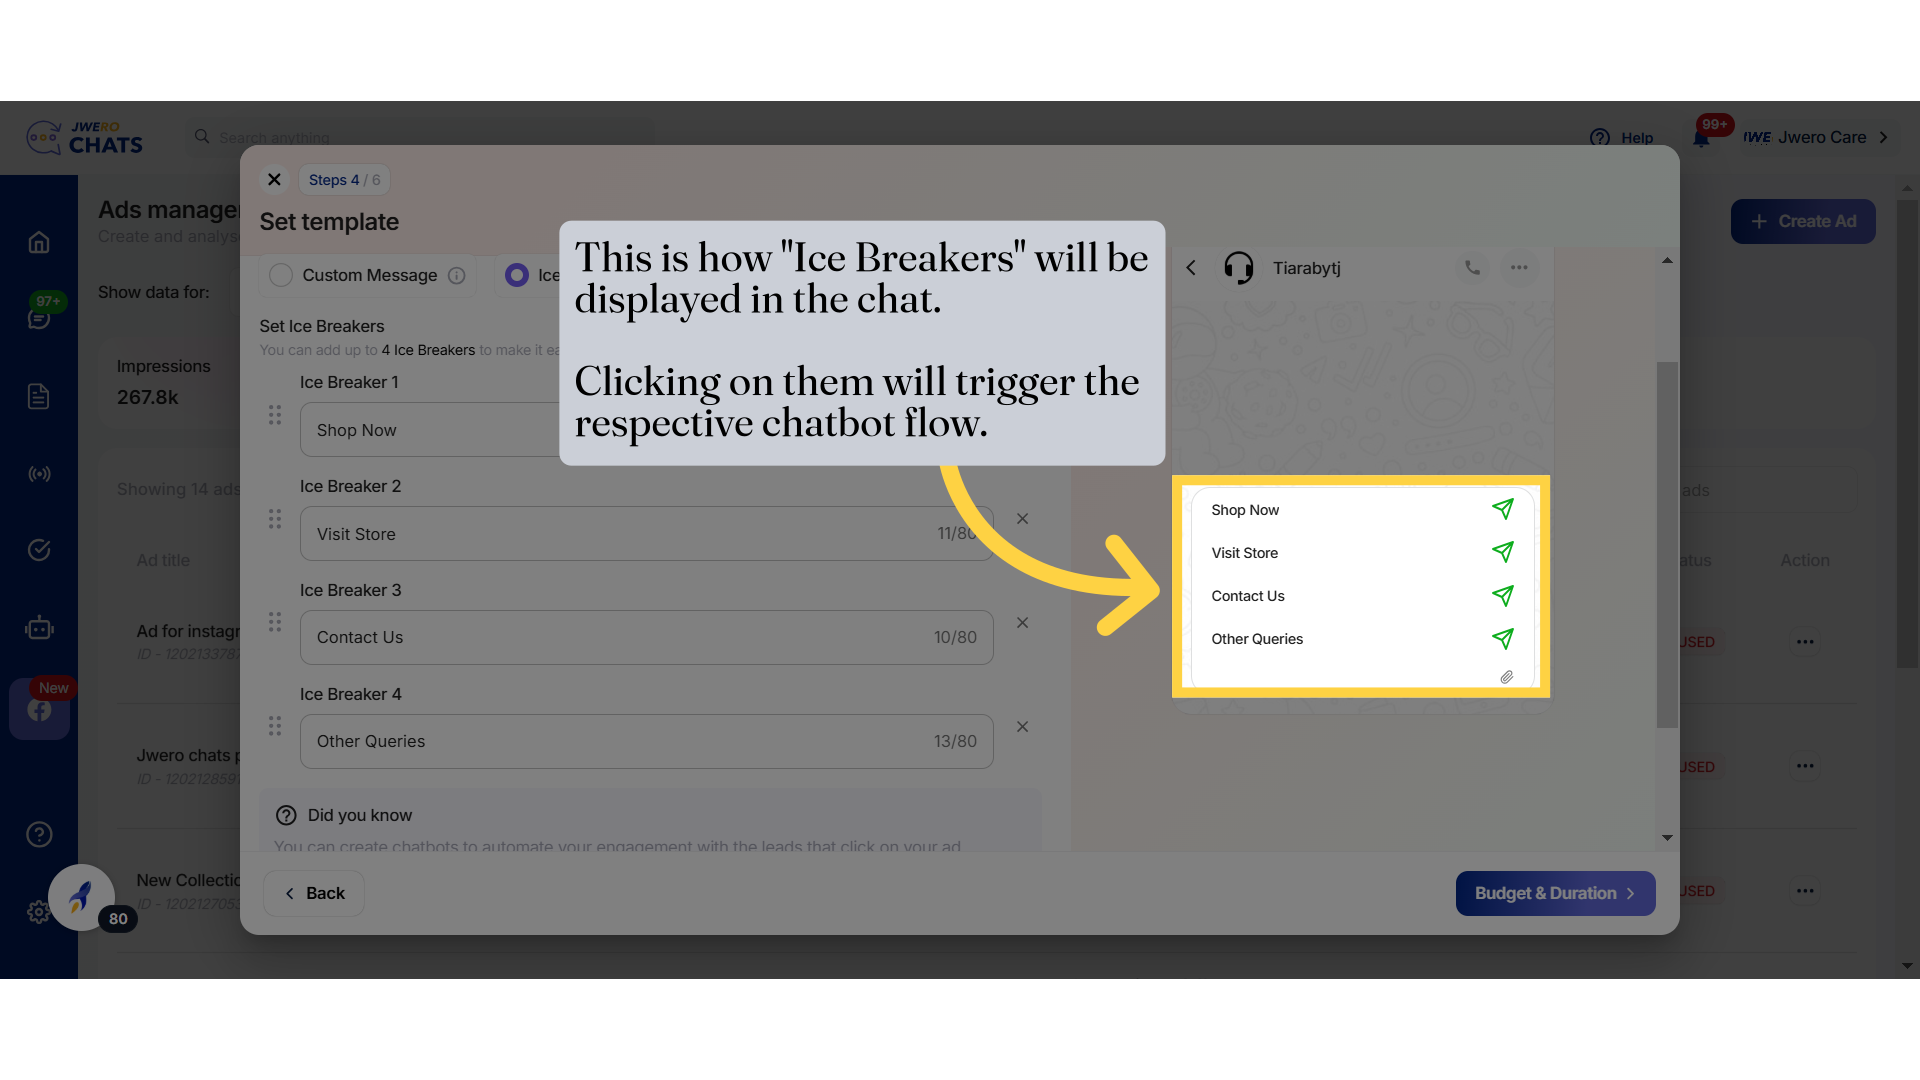
42. This is how "Ice Breakers" will be displayed in the chat. Clicking on them will trigger the respective chatbot flow.
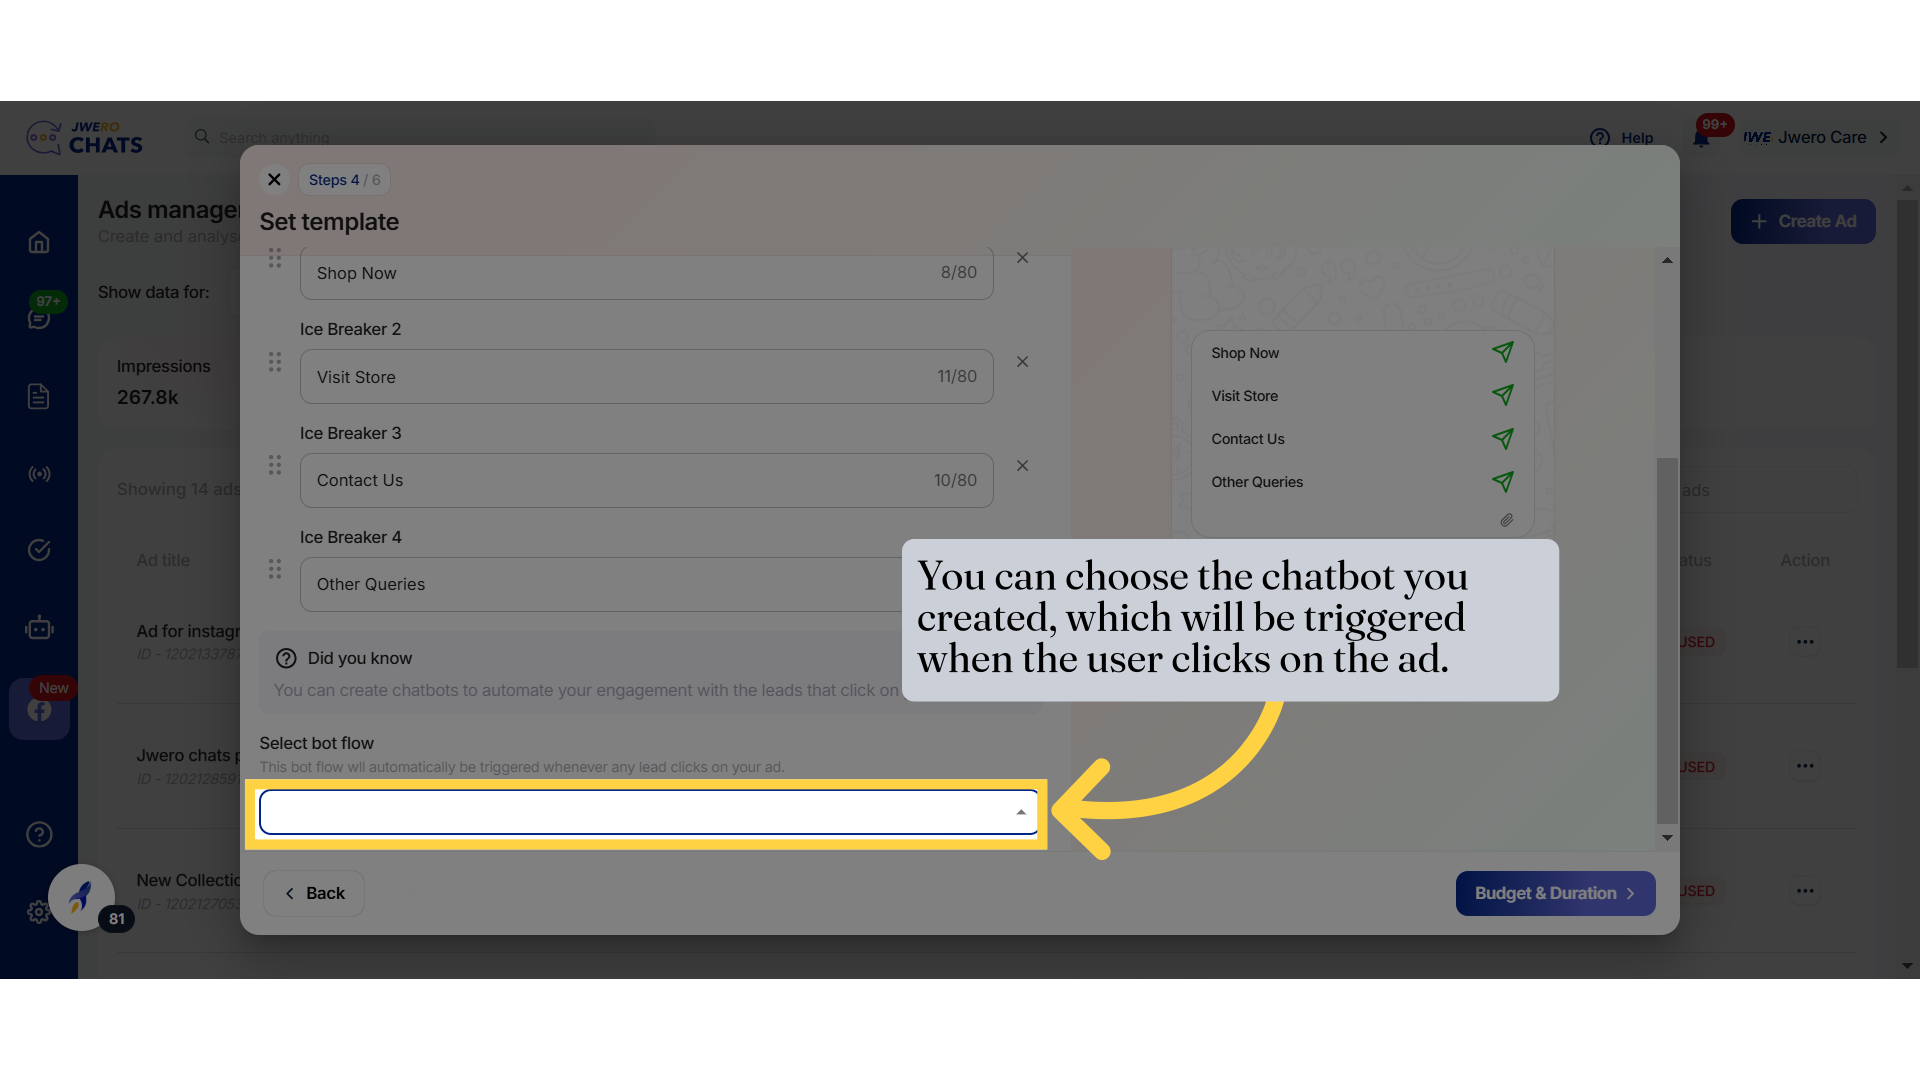
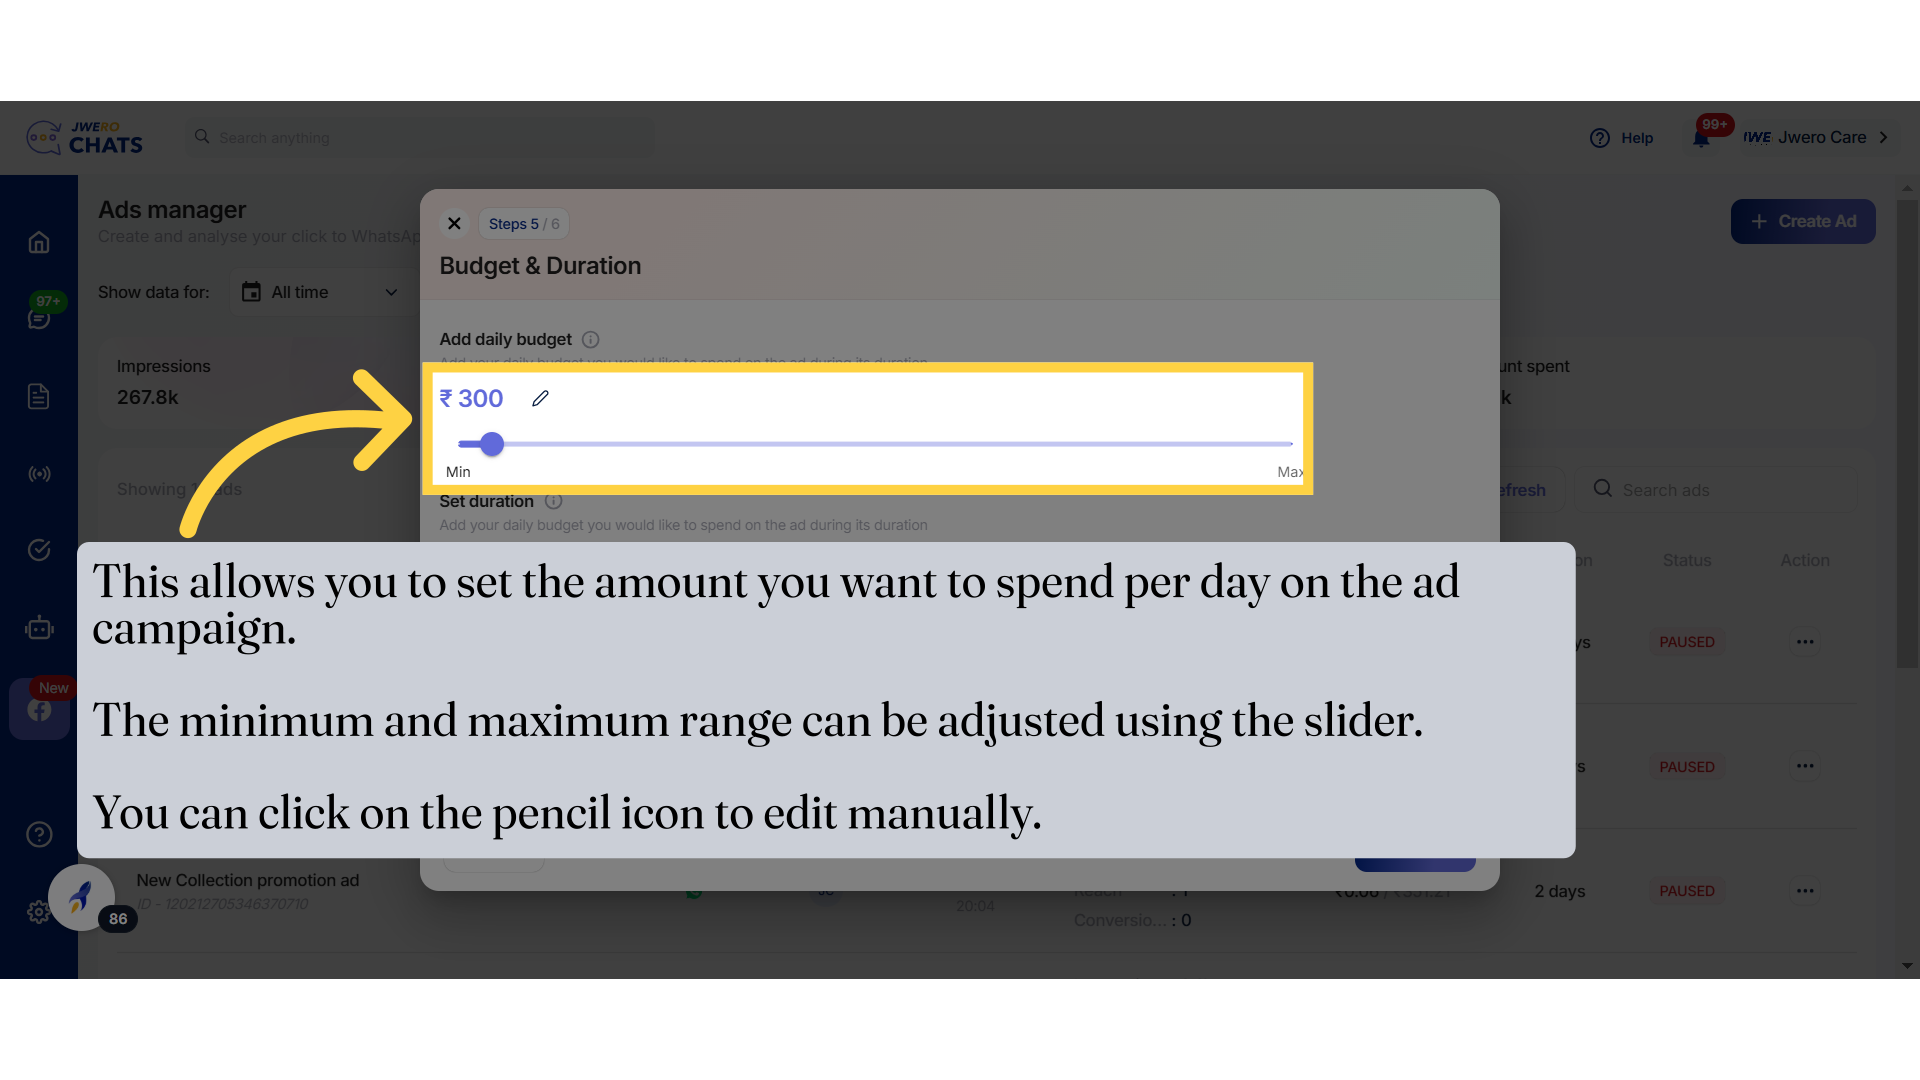
43. You can choose the chatbot you created, which will be triggered when the user clicks on the ad.
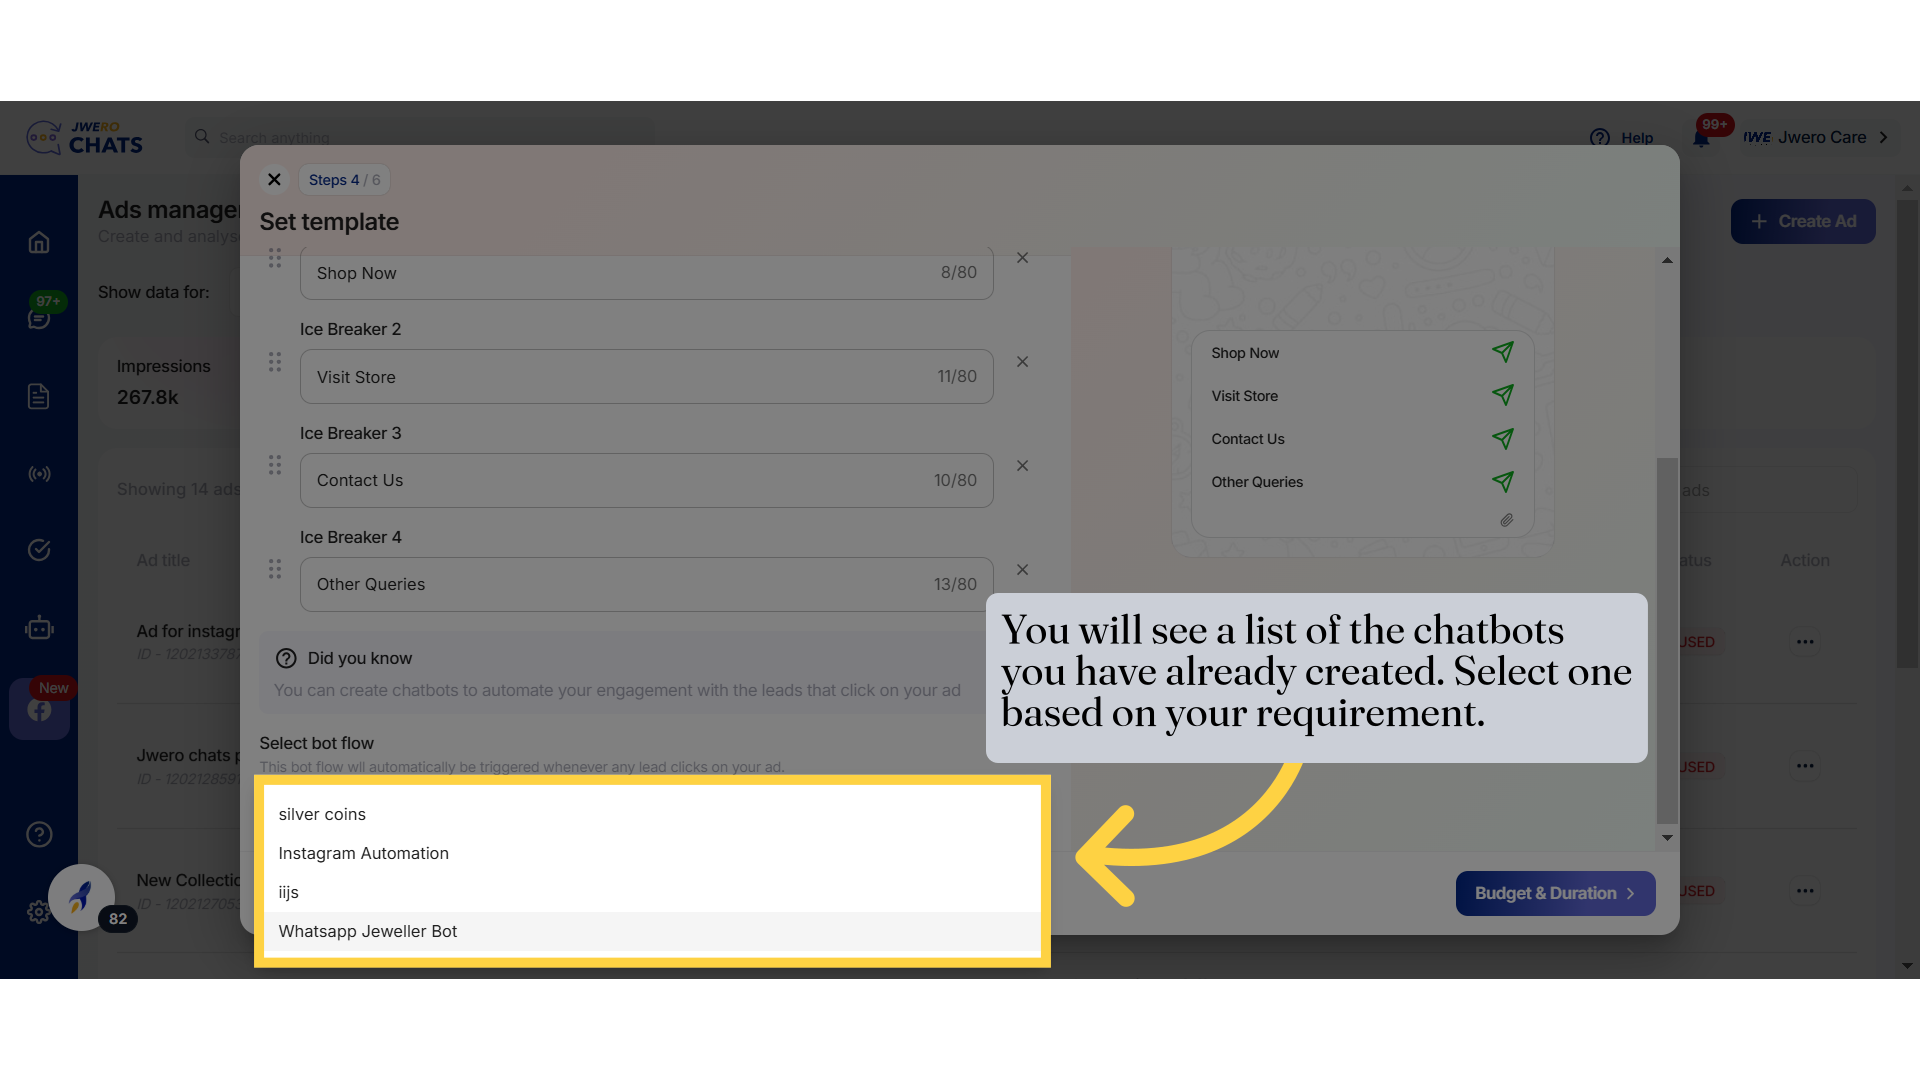
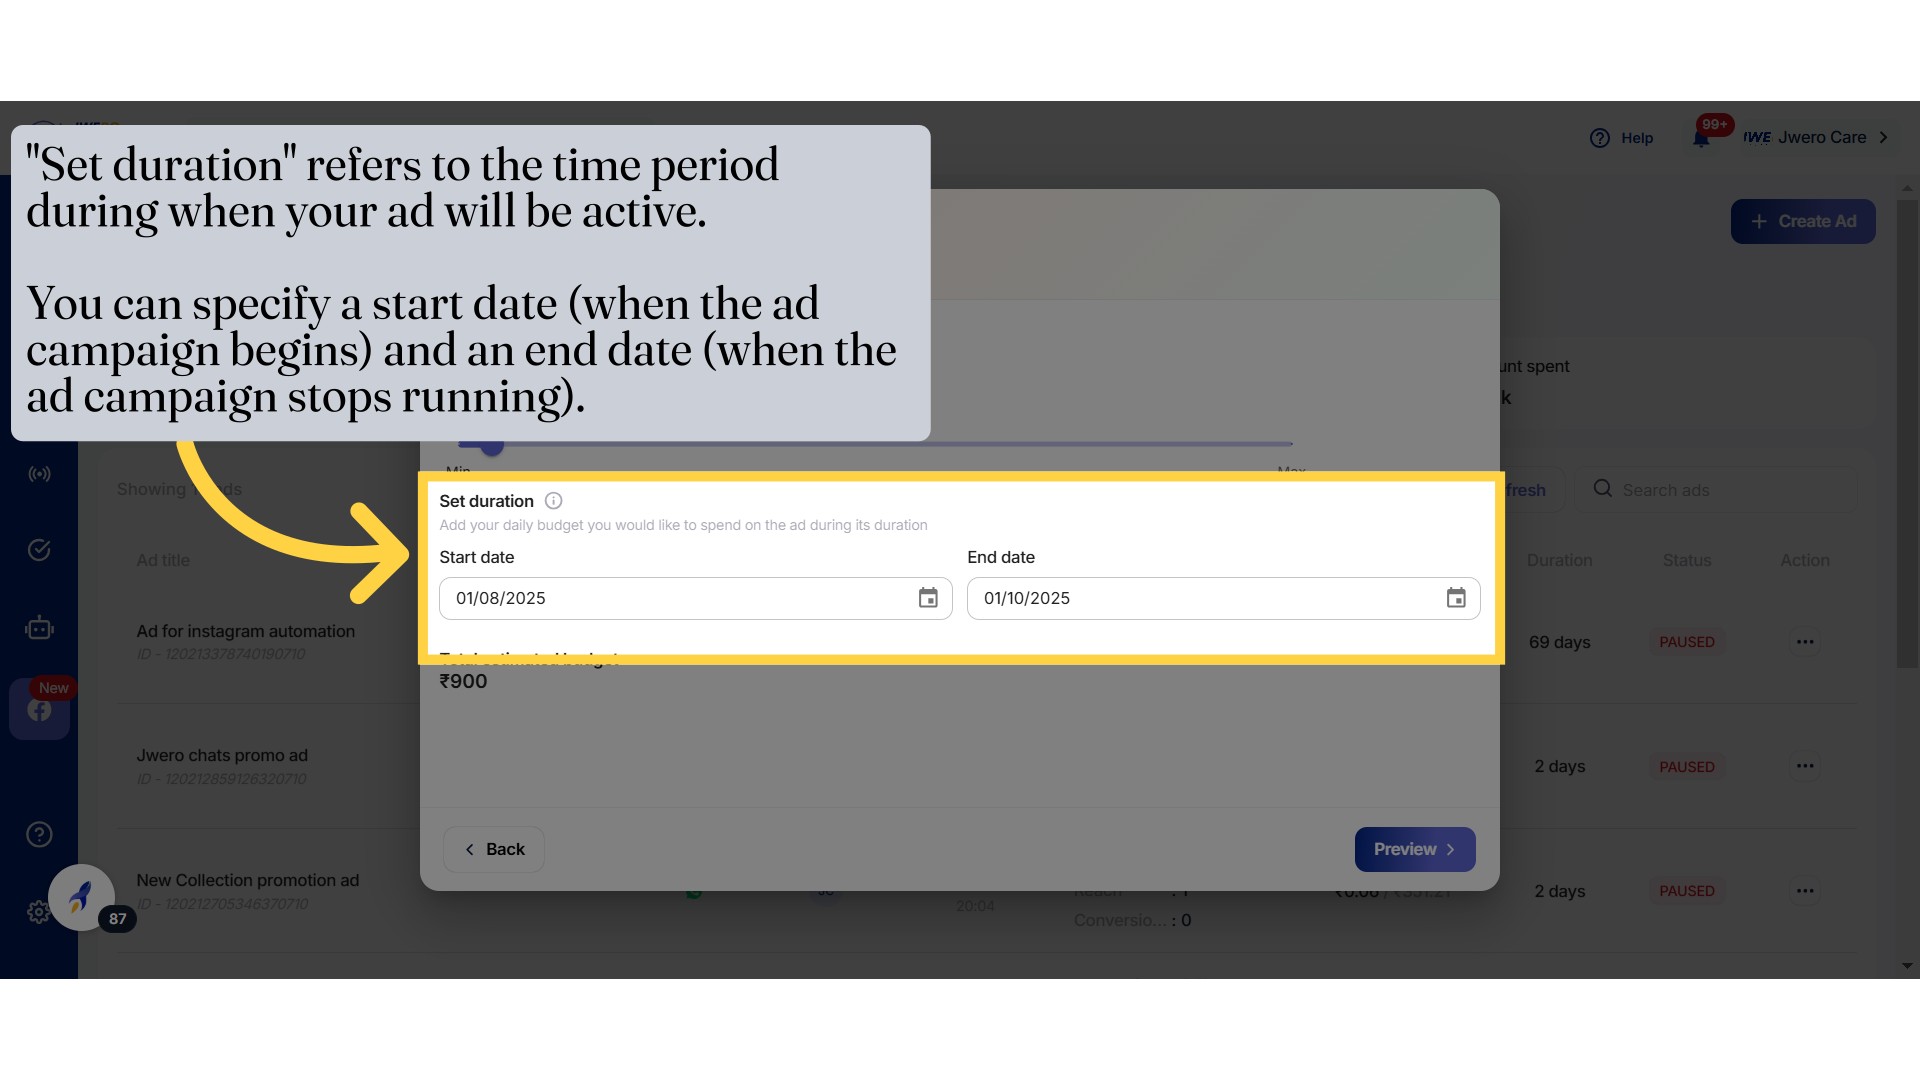
44. You will see a list of the chatbots you have already created. Select one based on your requirement.
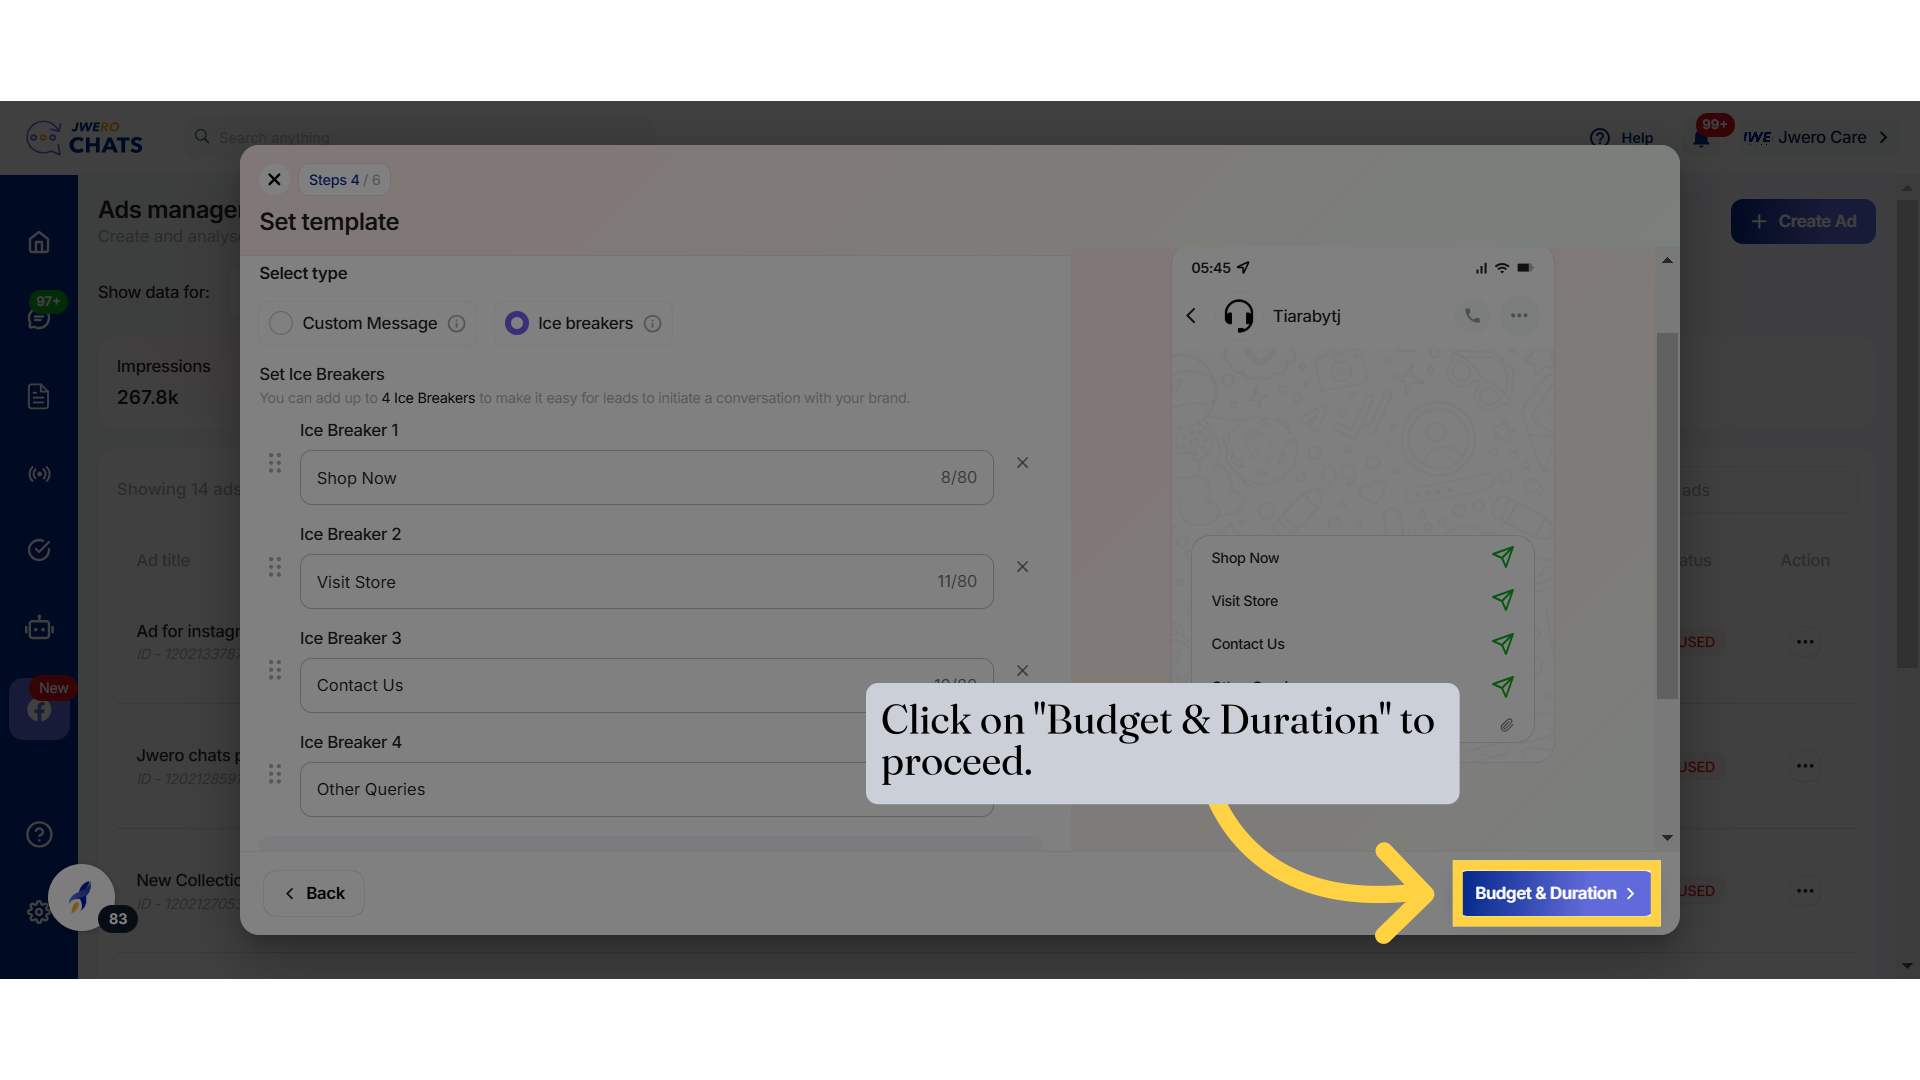
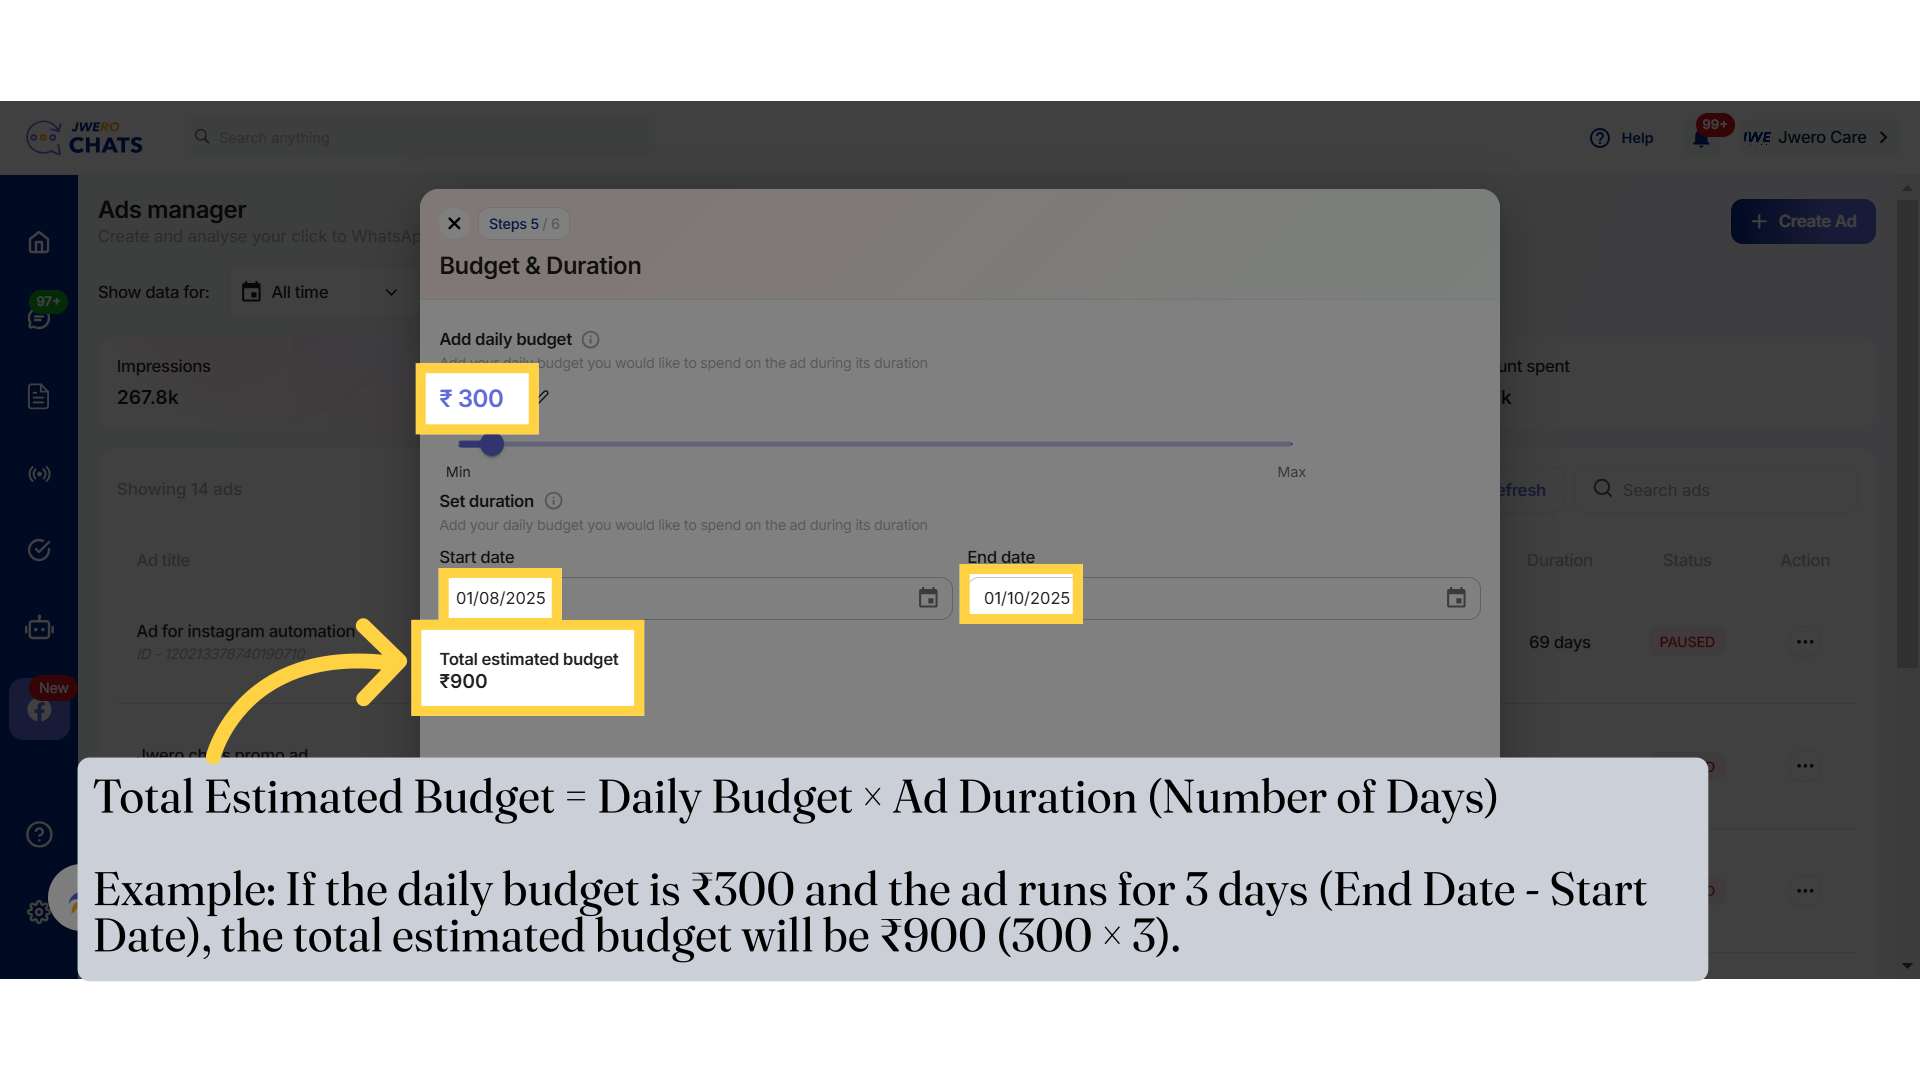
45. Click on "Budget & Duration" to proceed.
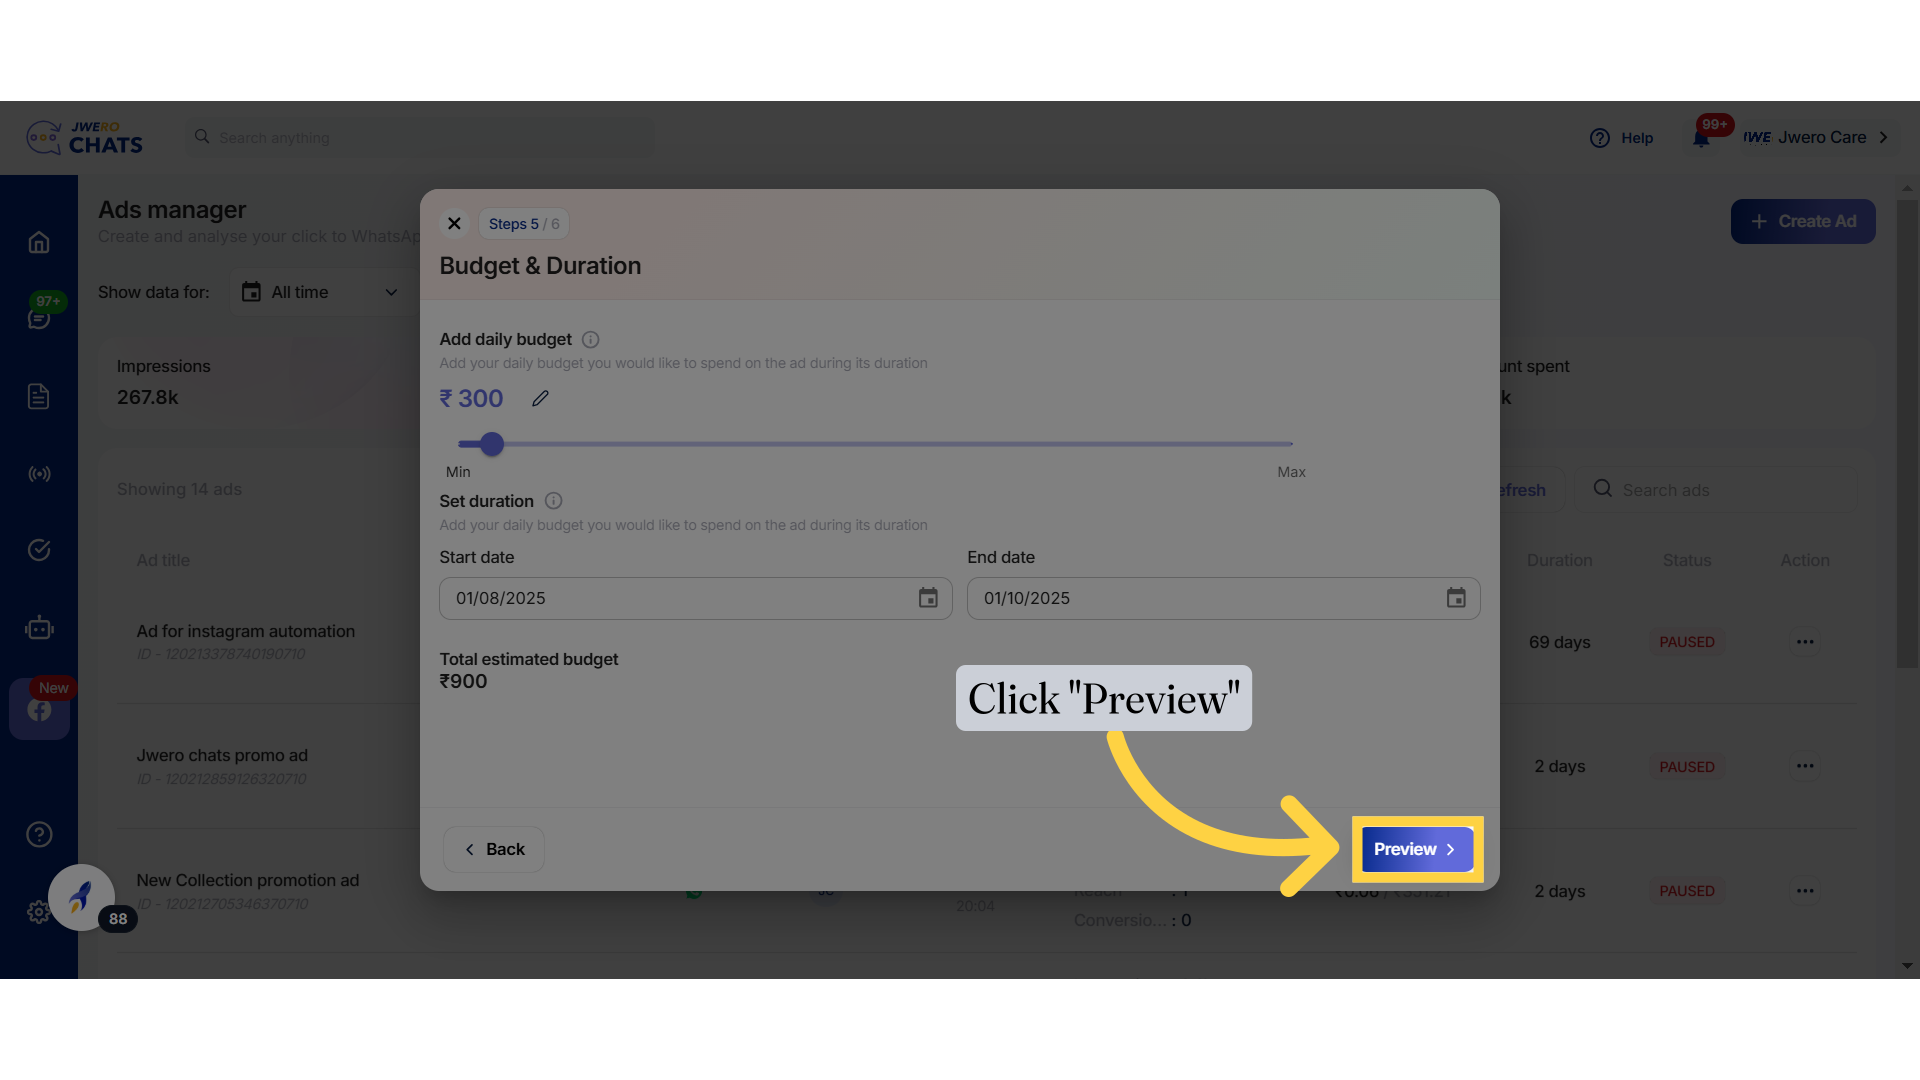
46. Add daily budget
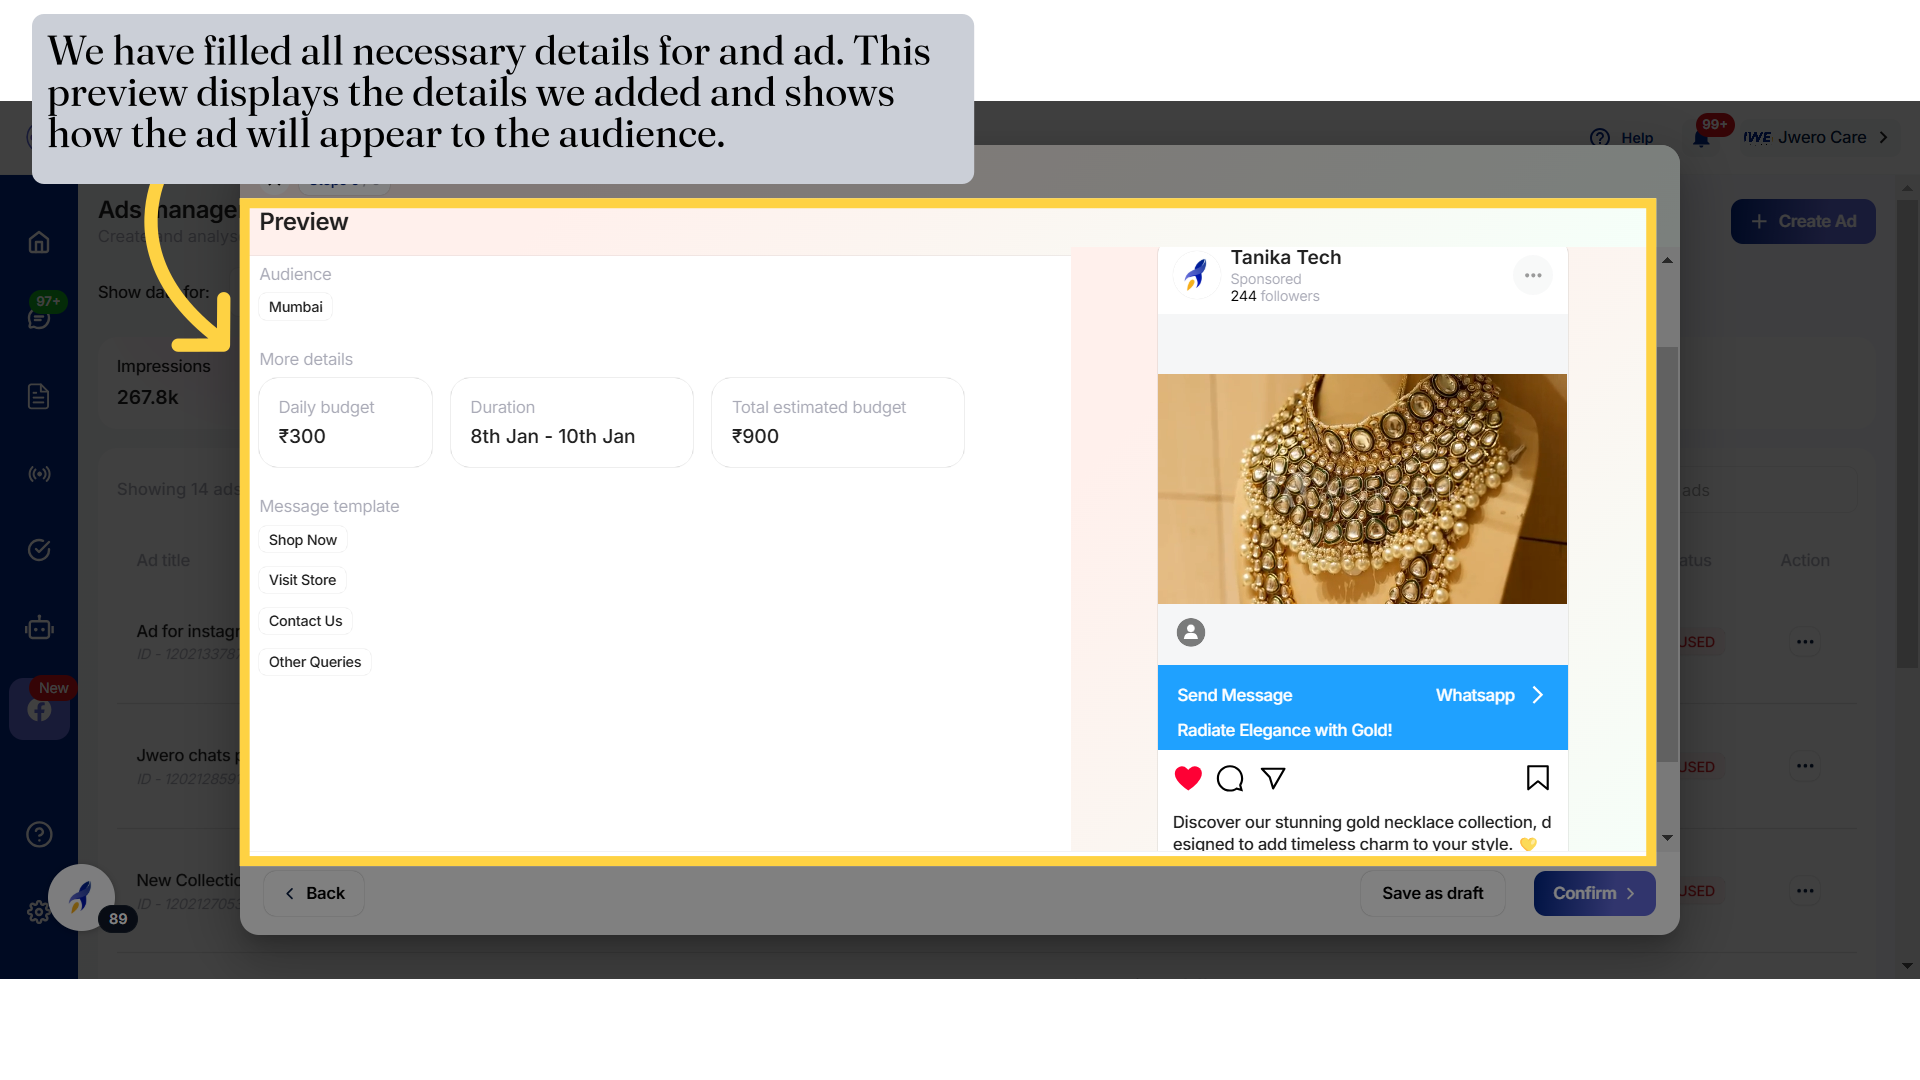
47. Set duration
48. Total Estimated Budget
49. Click "Preview"
50. Preview
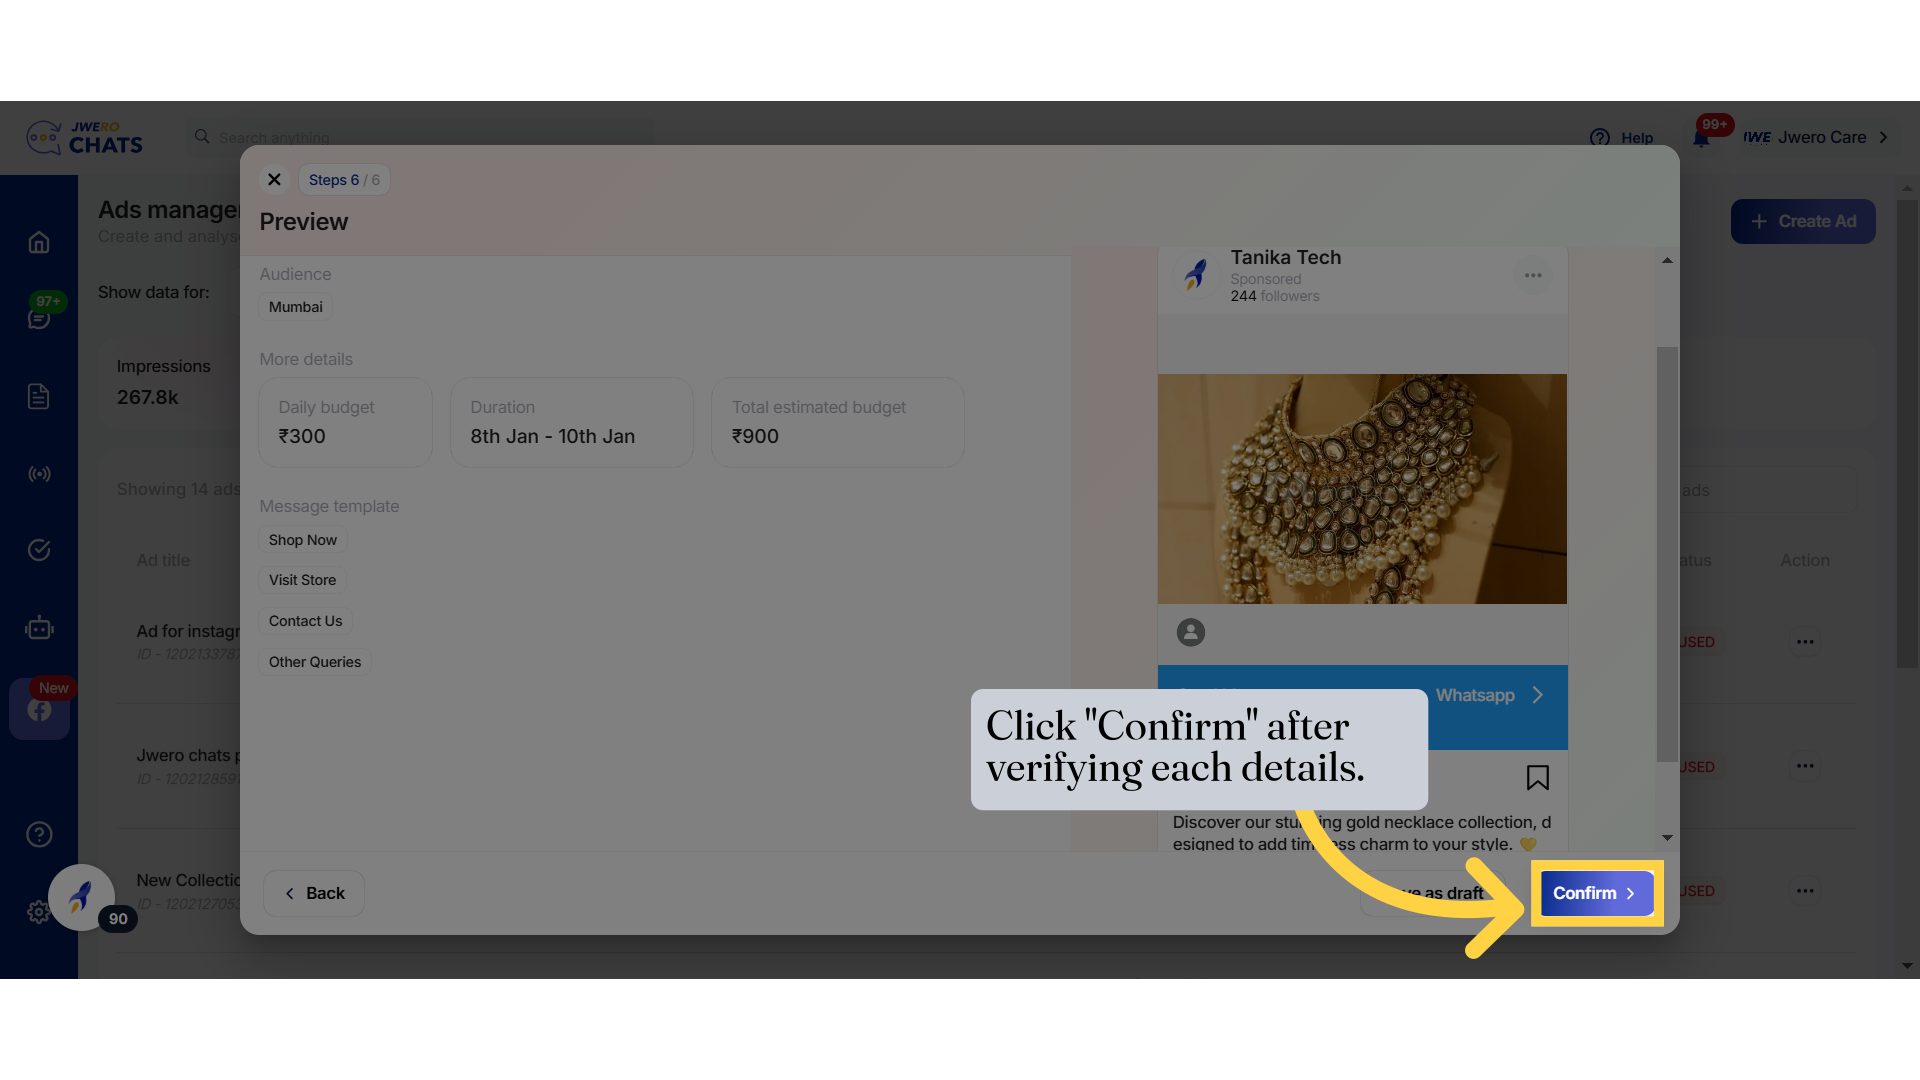
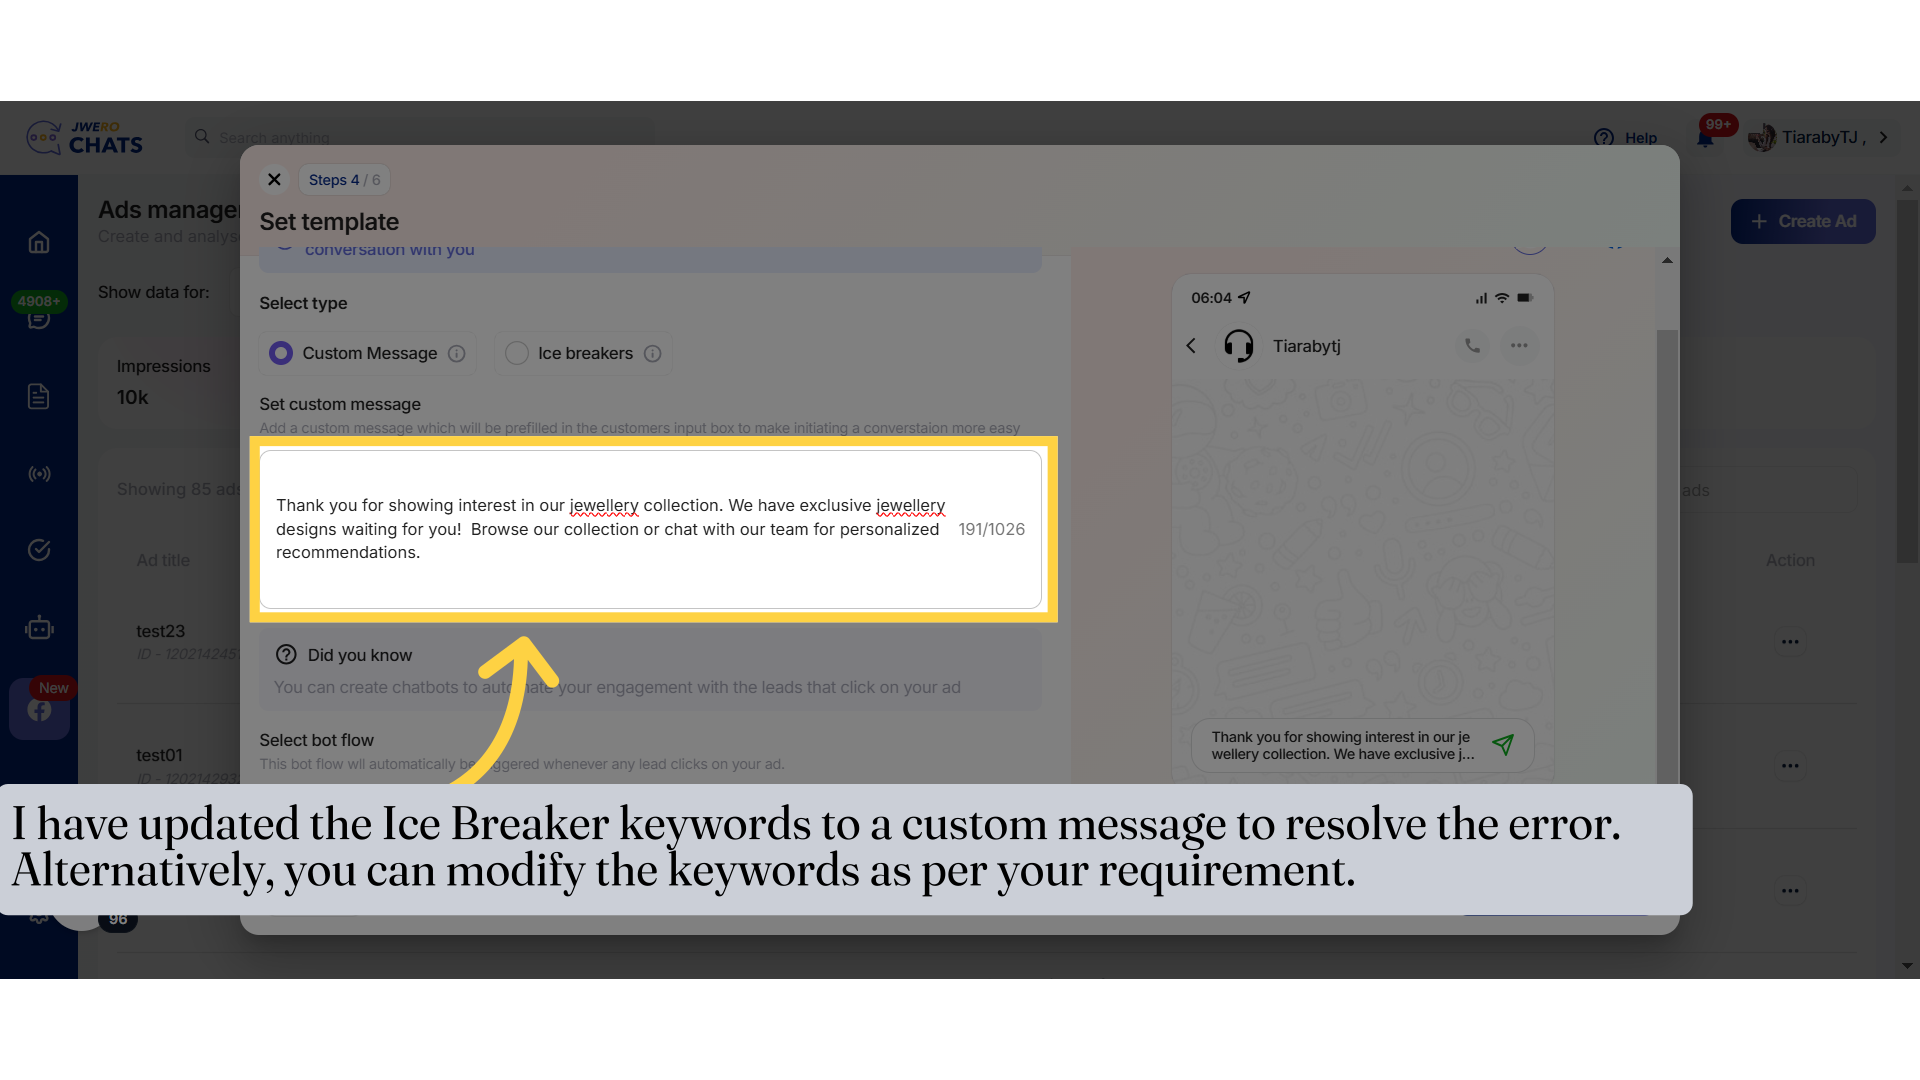
51. Click "Confirm" after verifying each details.
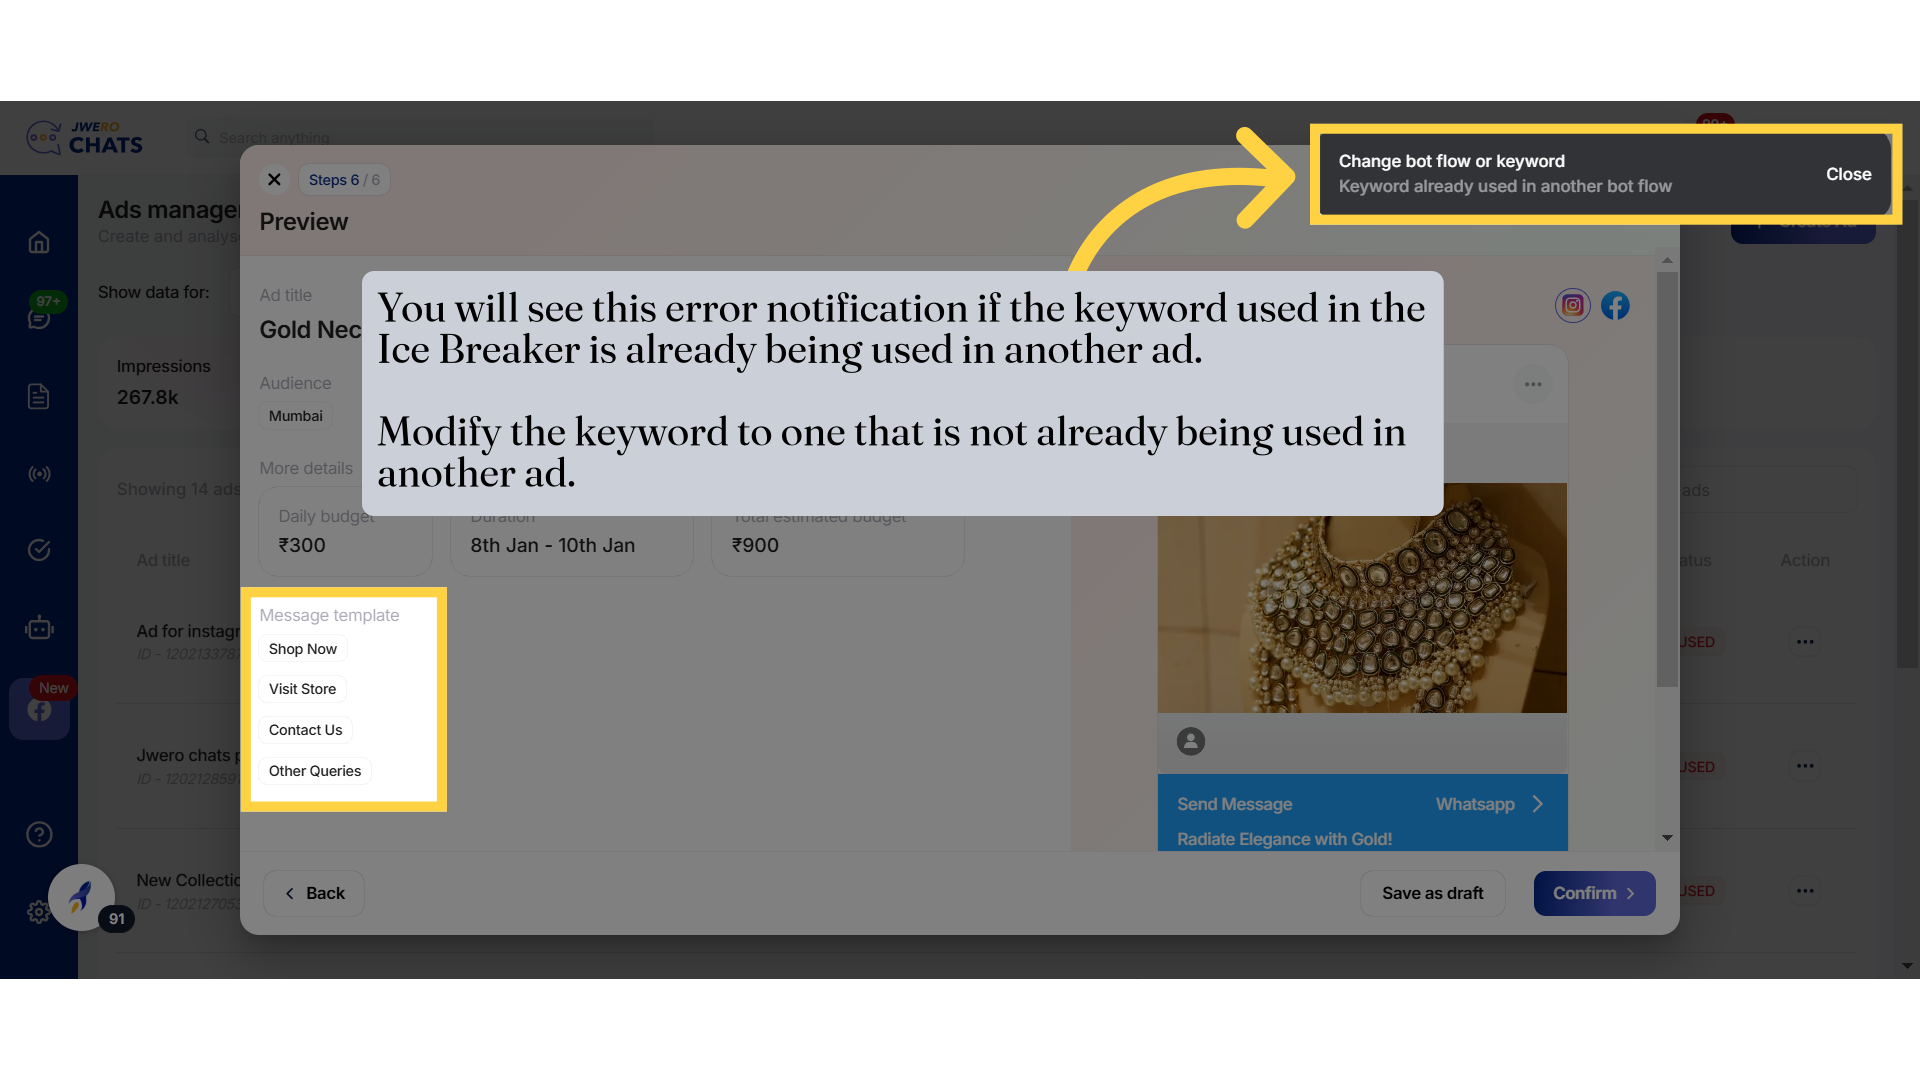
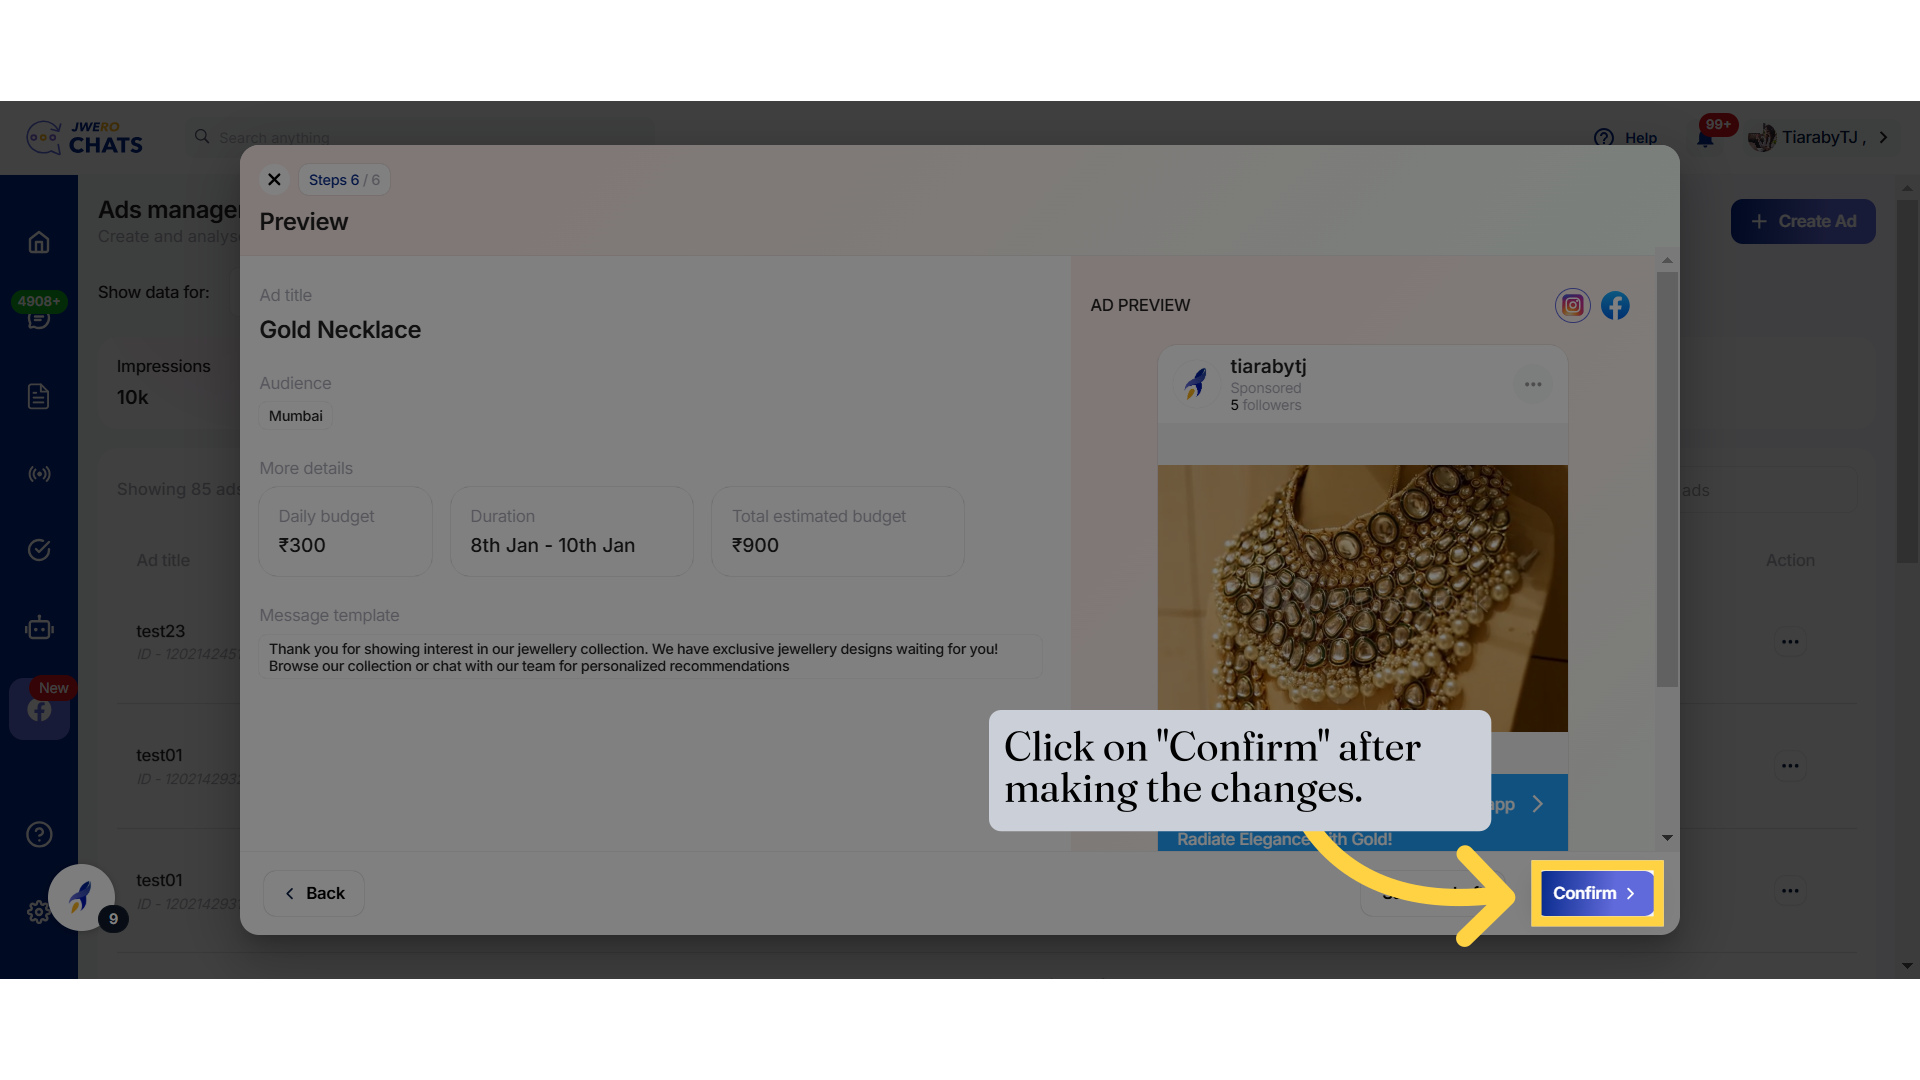
52. Error notification
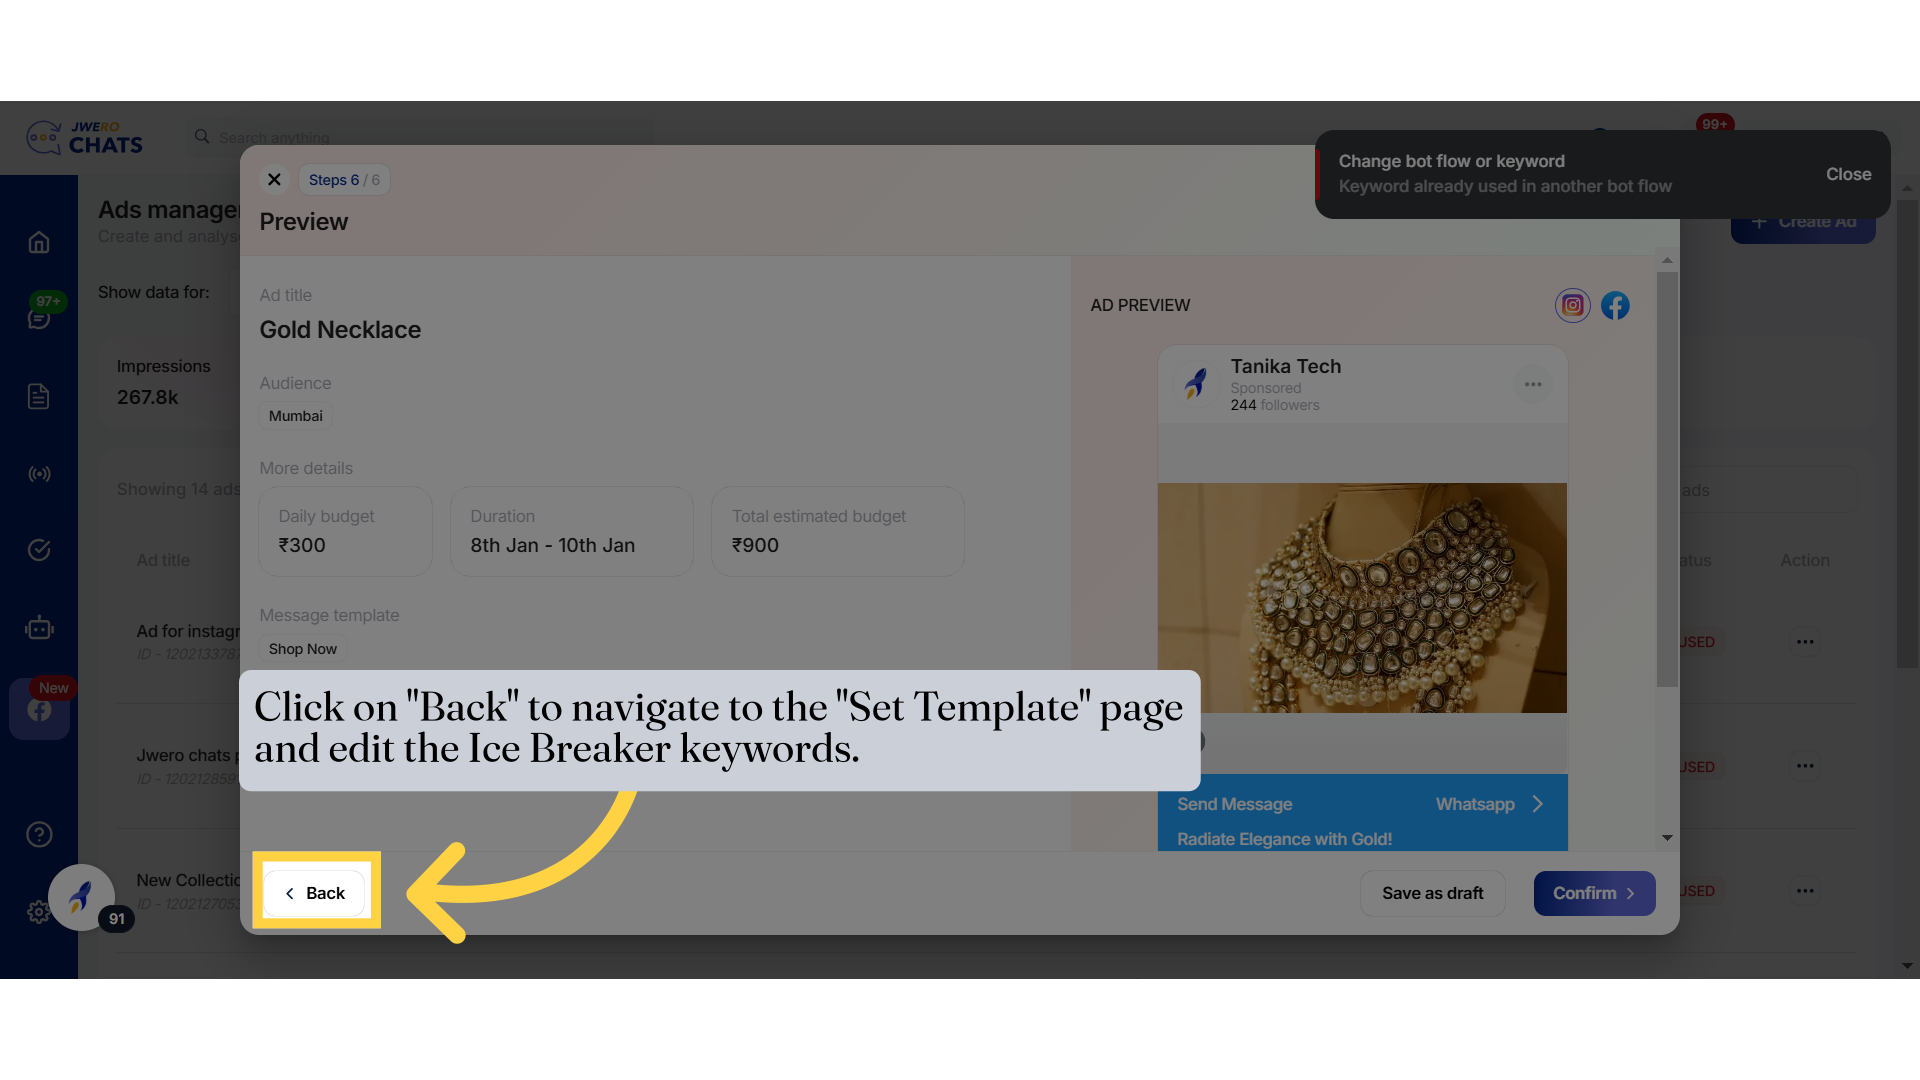
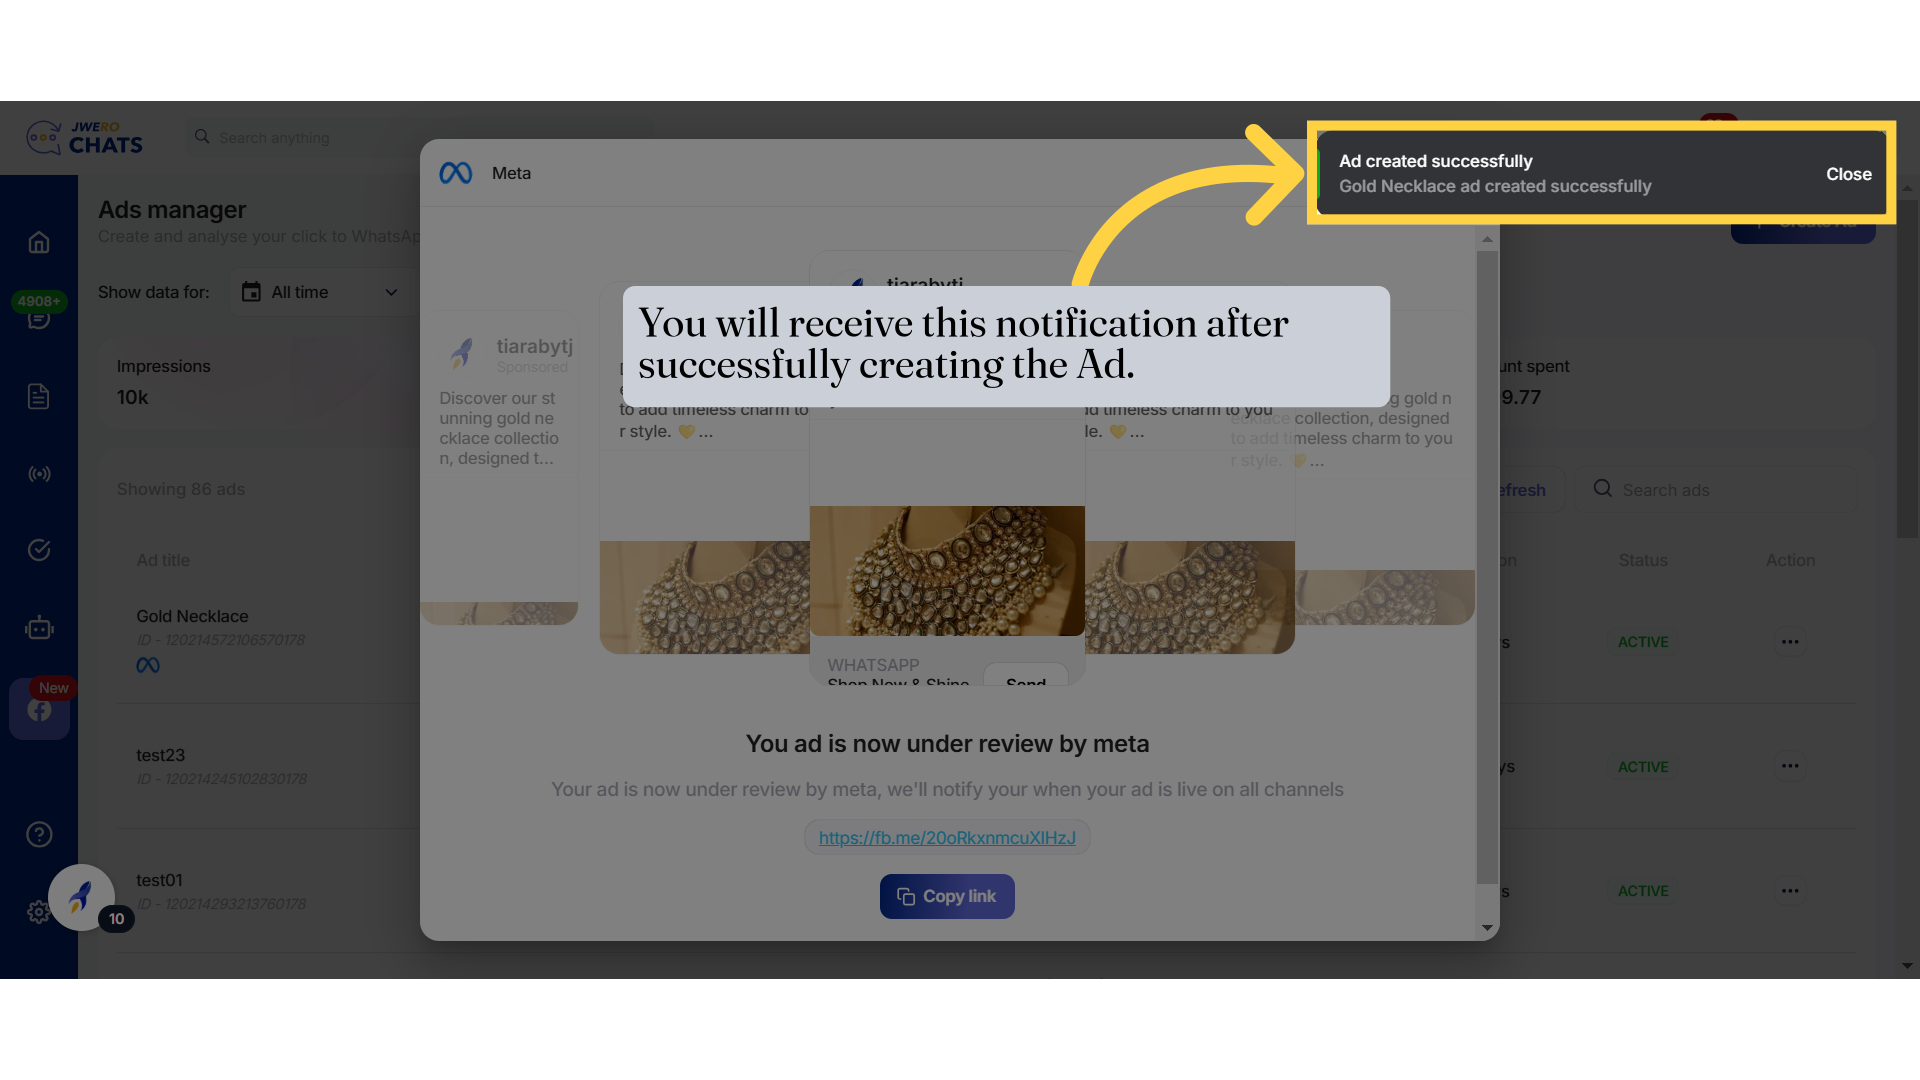
53. Click on "Back" to navigate to the "Set Template" page and edit the Ice Breaker keywords.
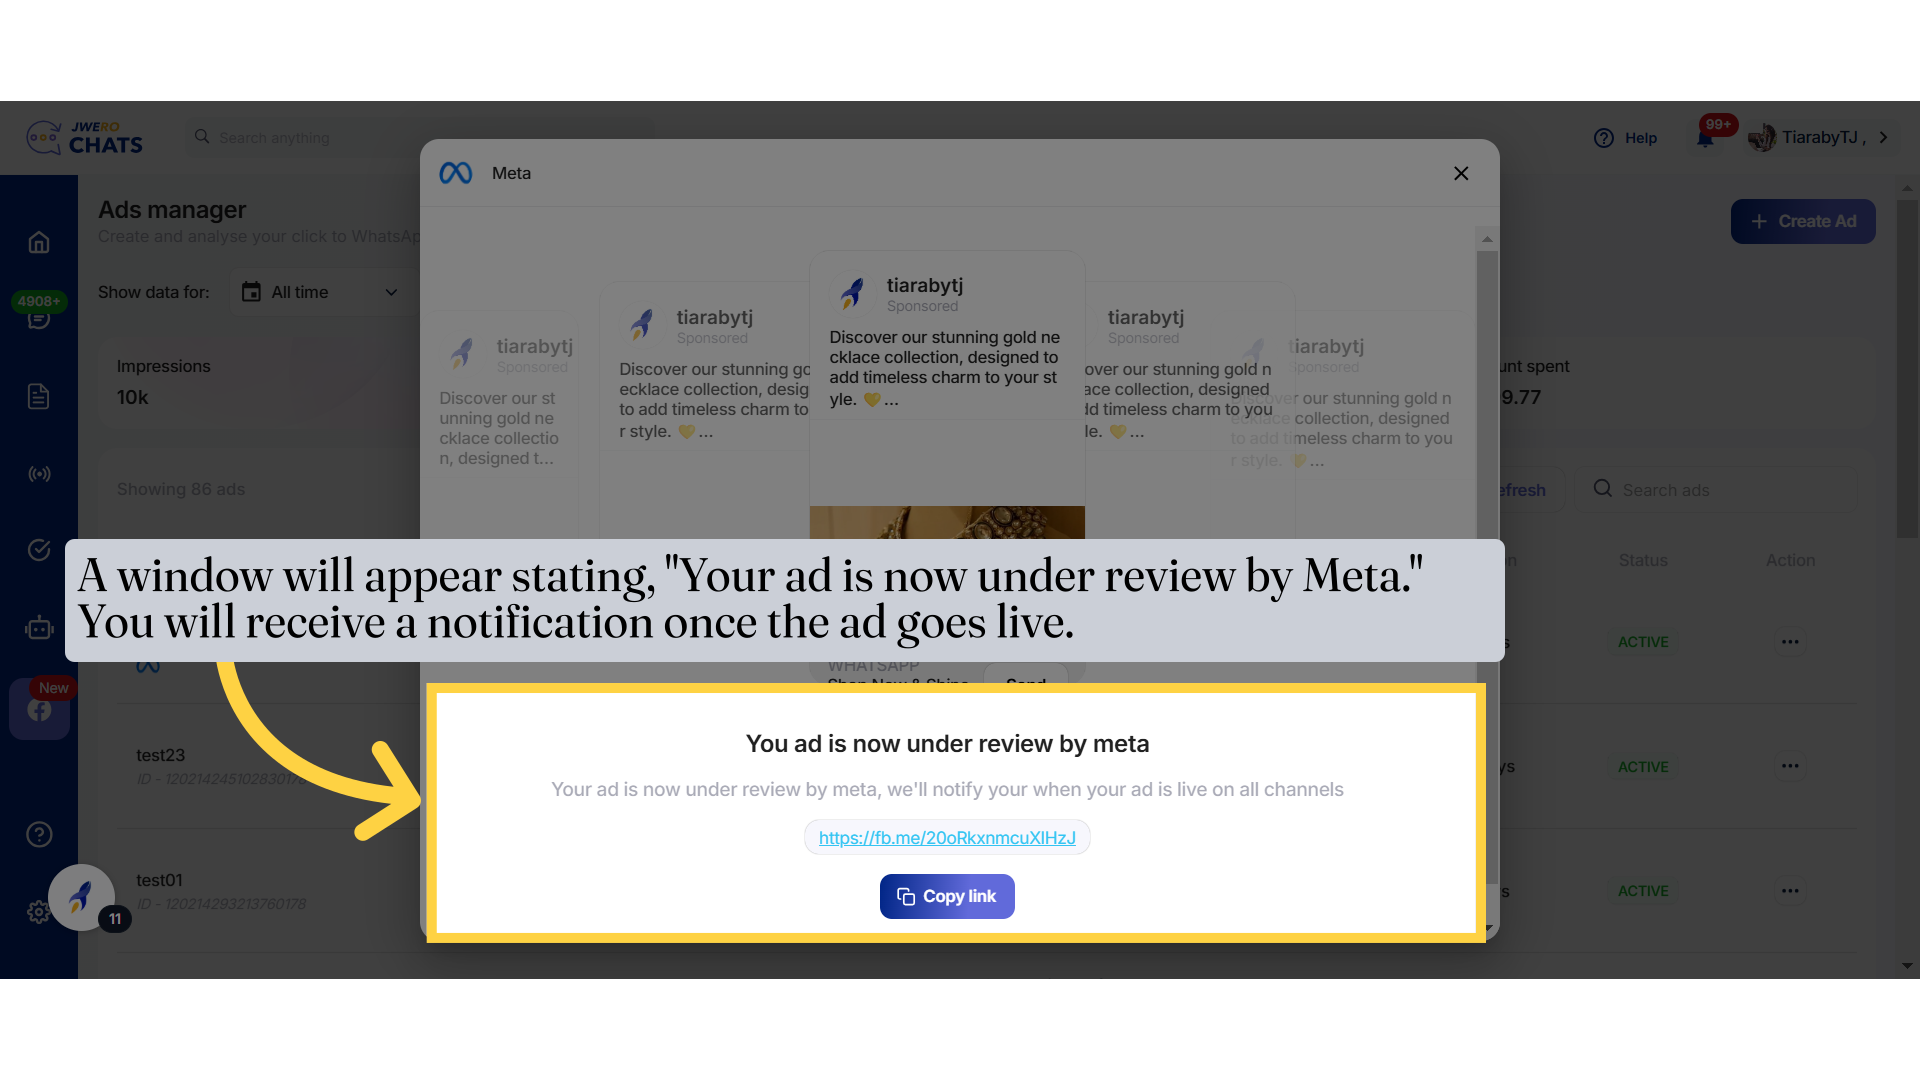
54. I have updated the Ice Breaker keywords to a custom message to resolve the error. Alternatively, you can modify the keywords as per your requirement.
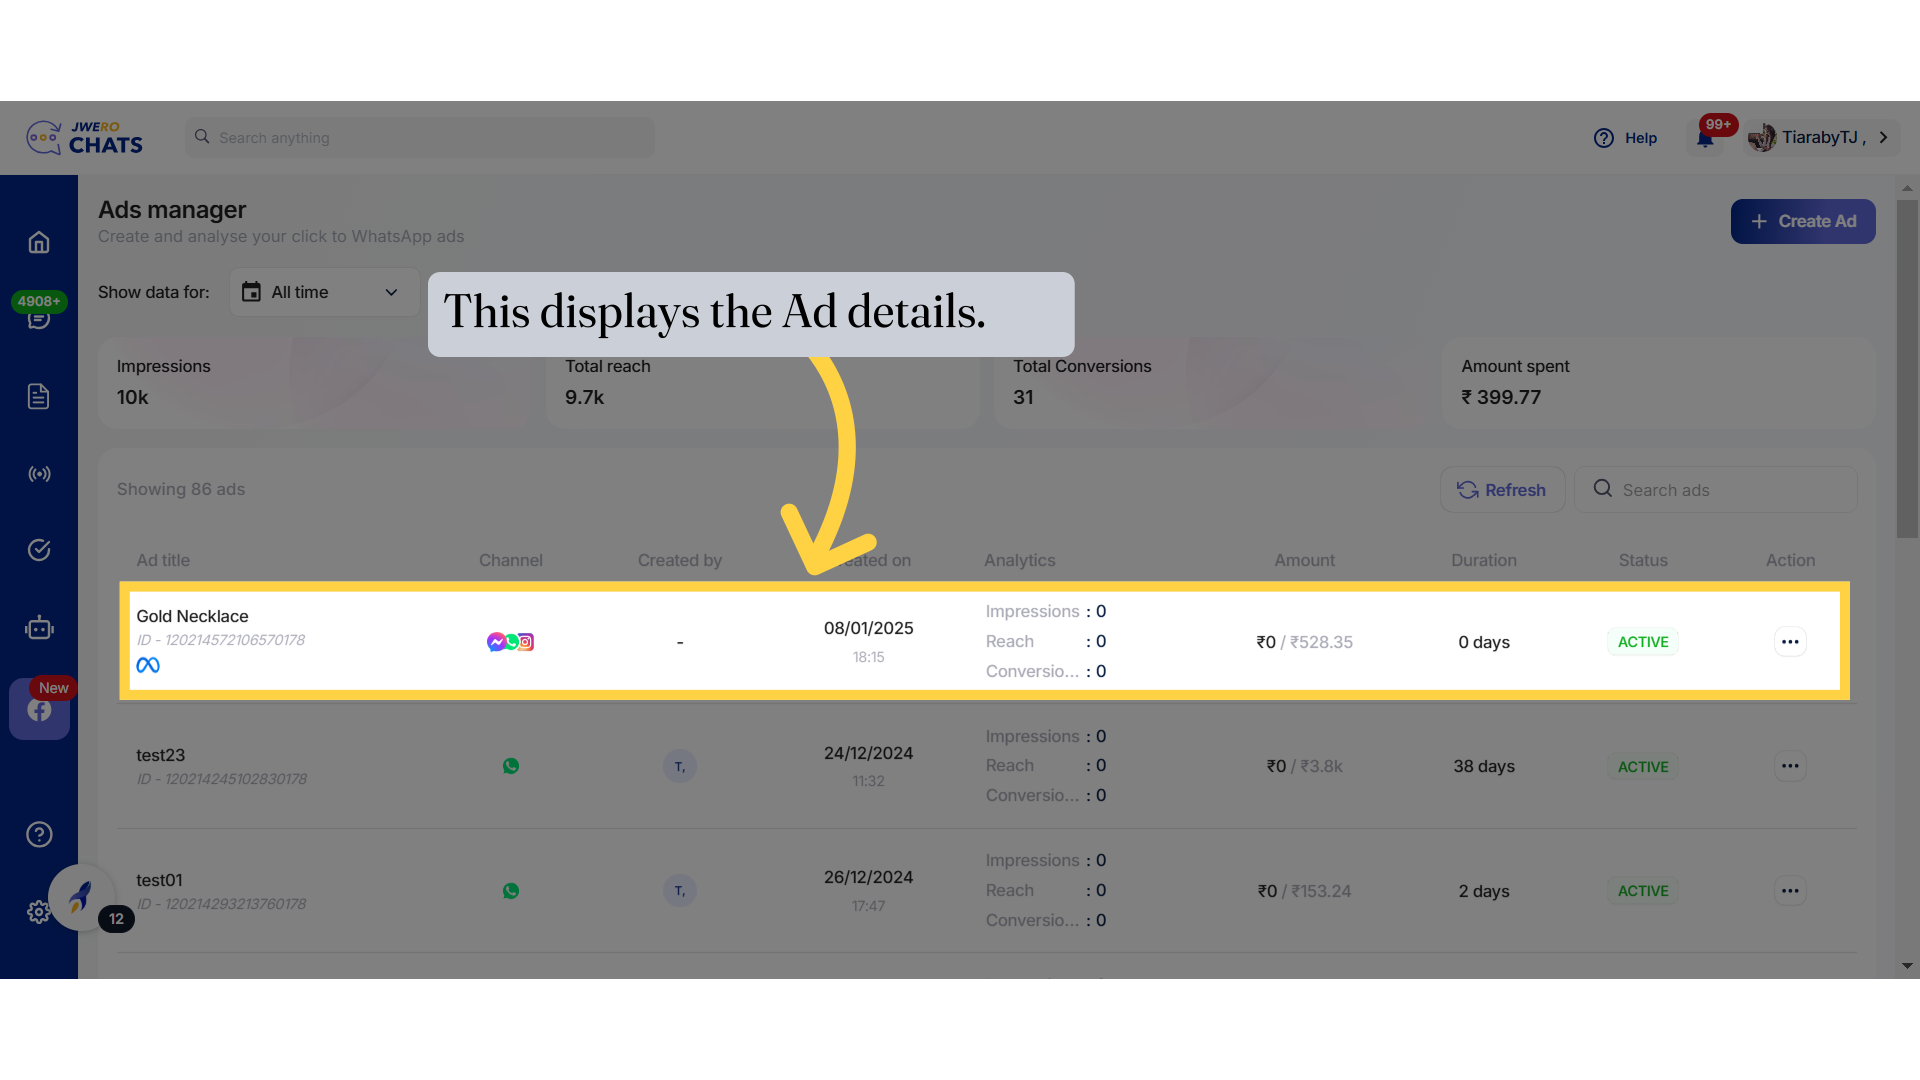
55. Click on "Confirm" after making the changes.
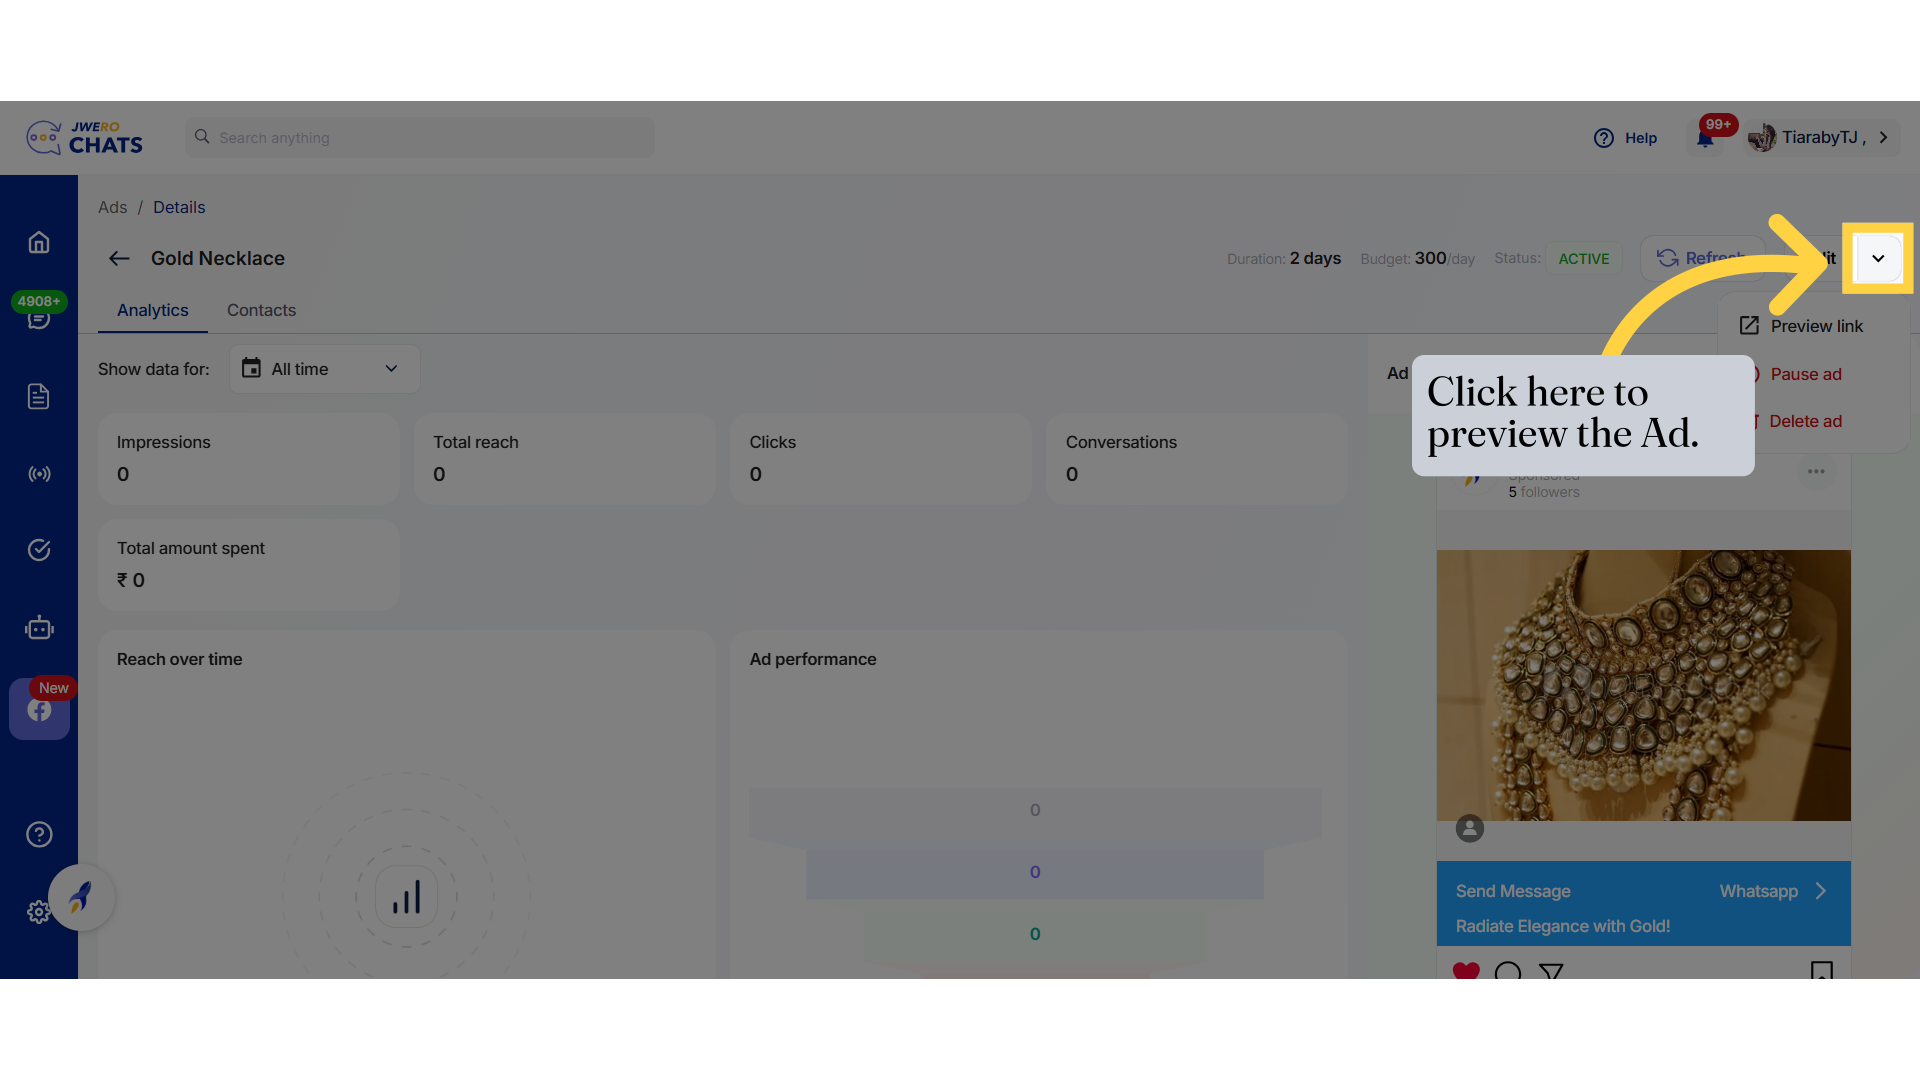
56. You will receive this notification after successfully creating the Ad.
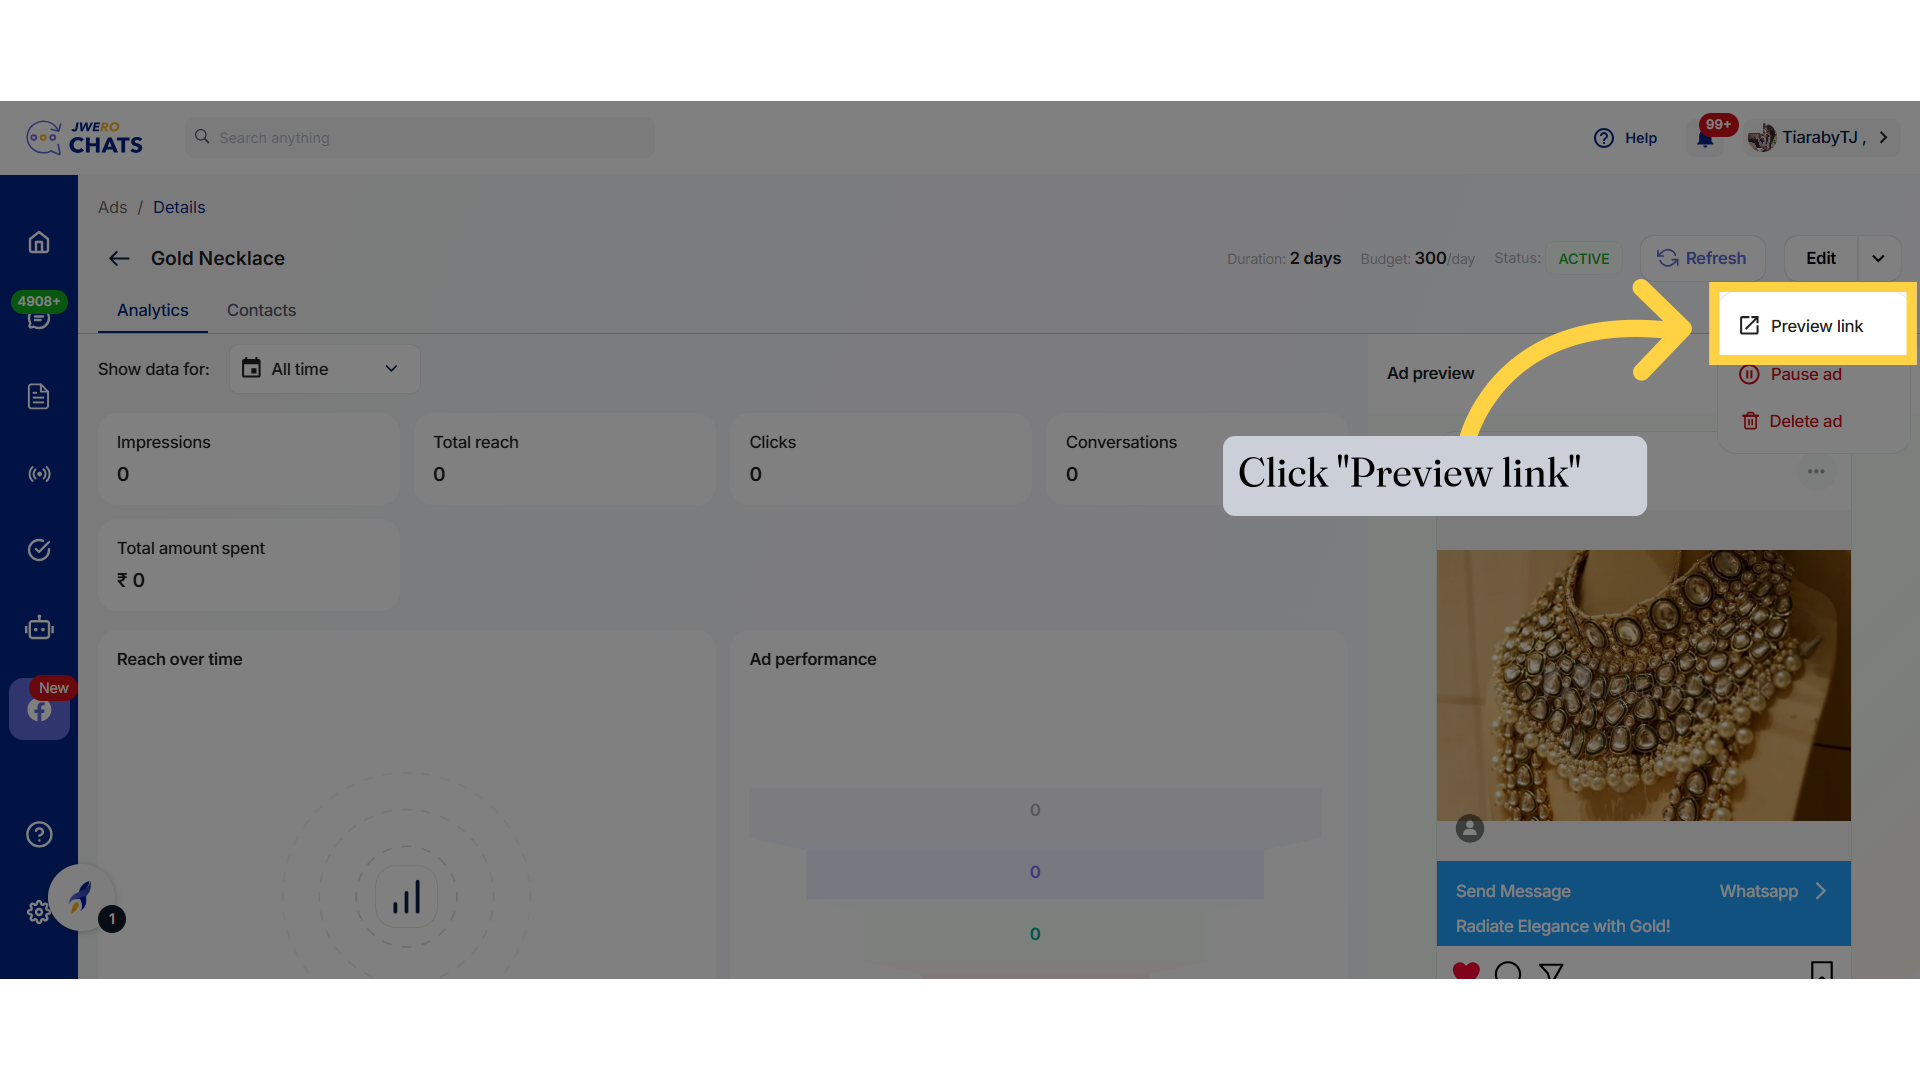
57. A window will appear stating, "Your ad is now under review by Meta." You will receive a notification once the ad goes live.
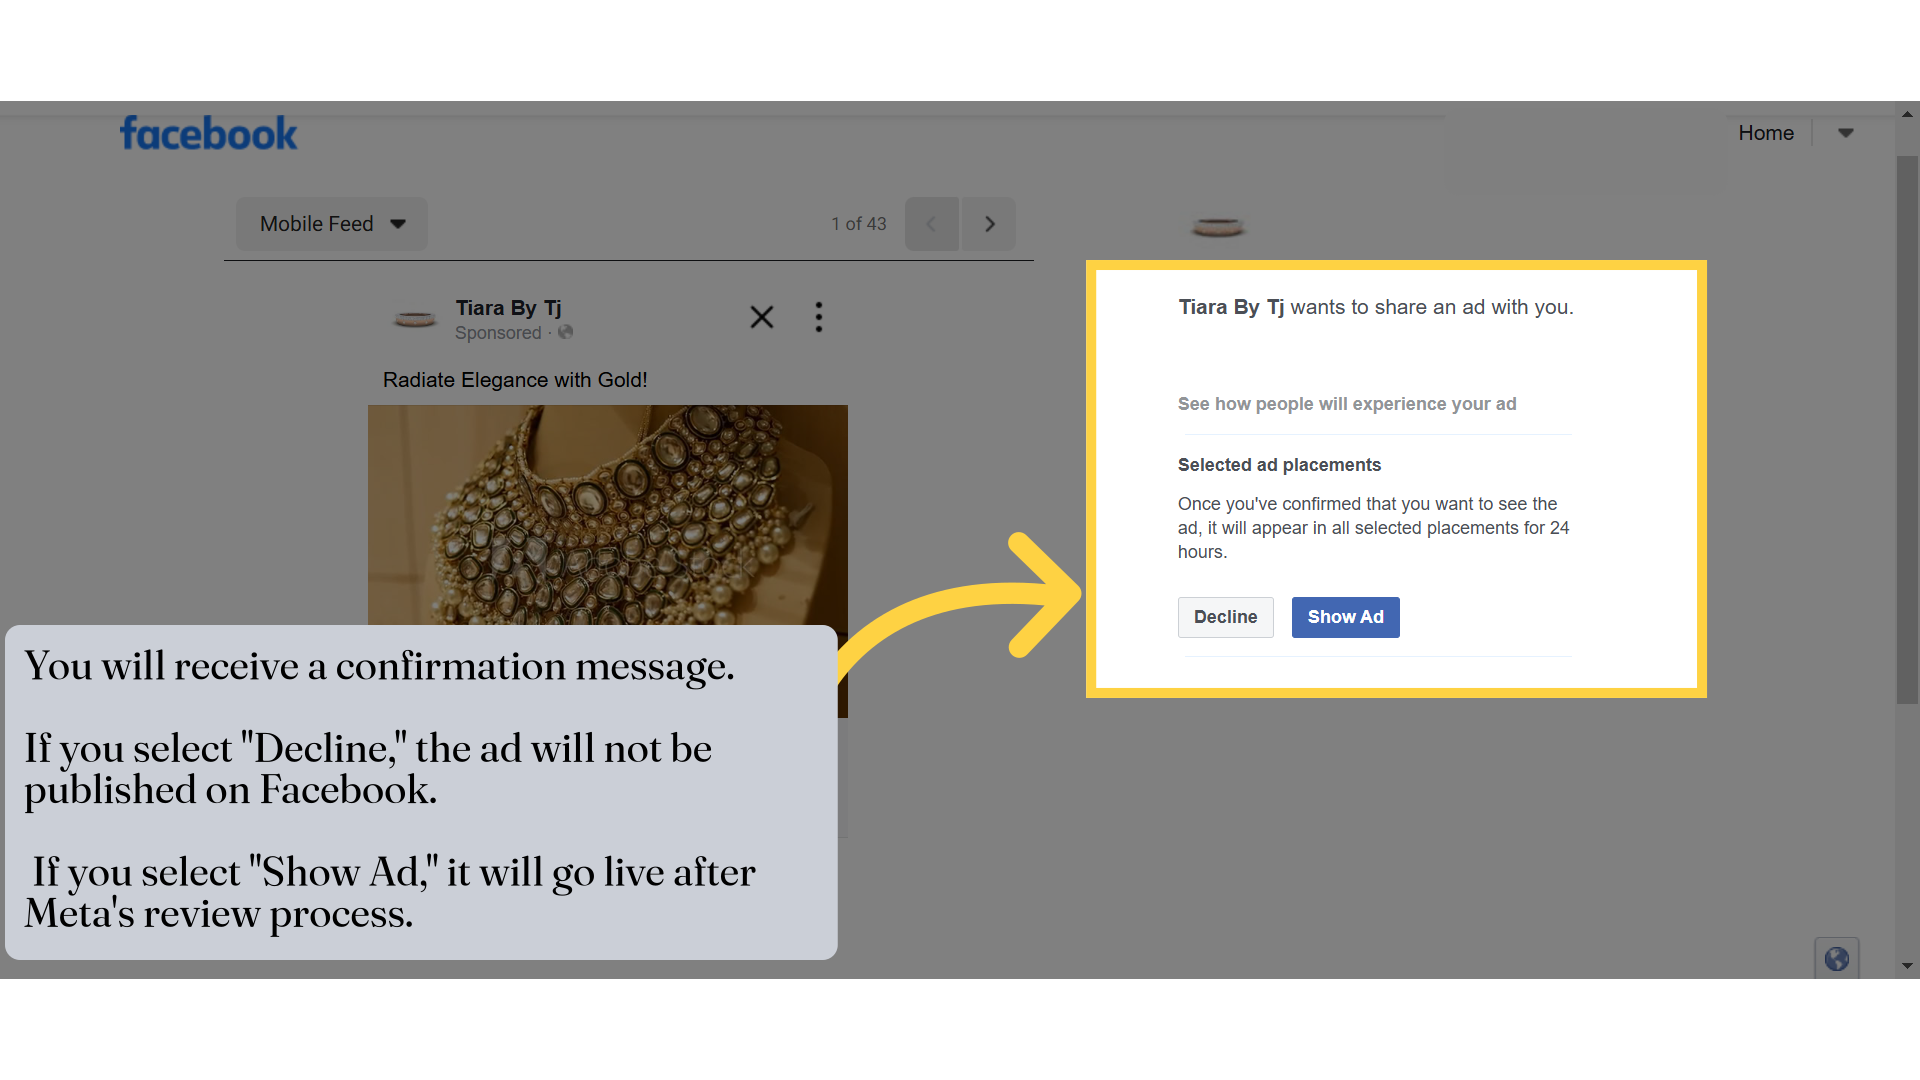
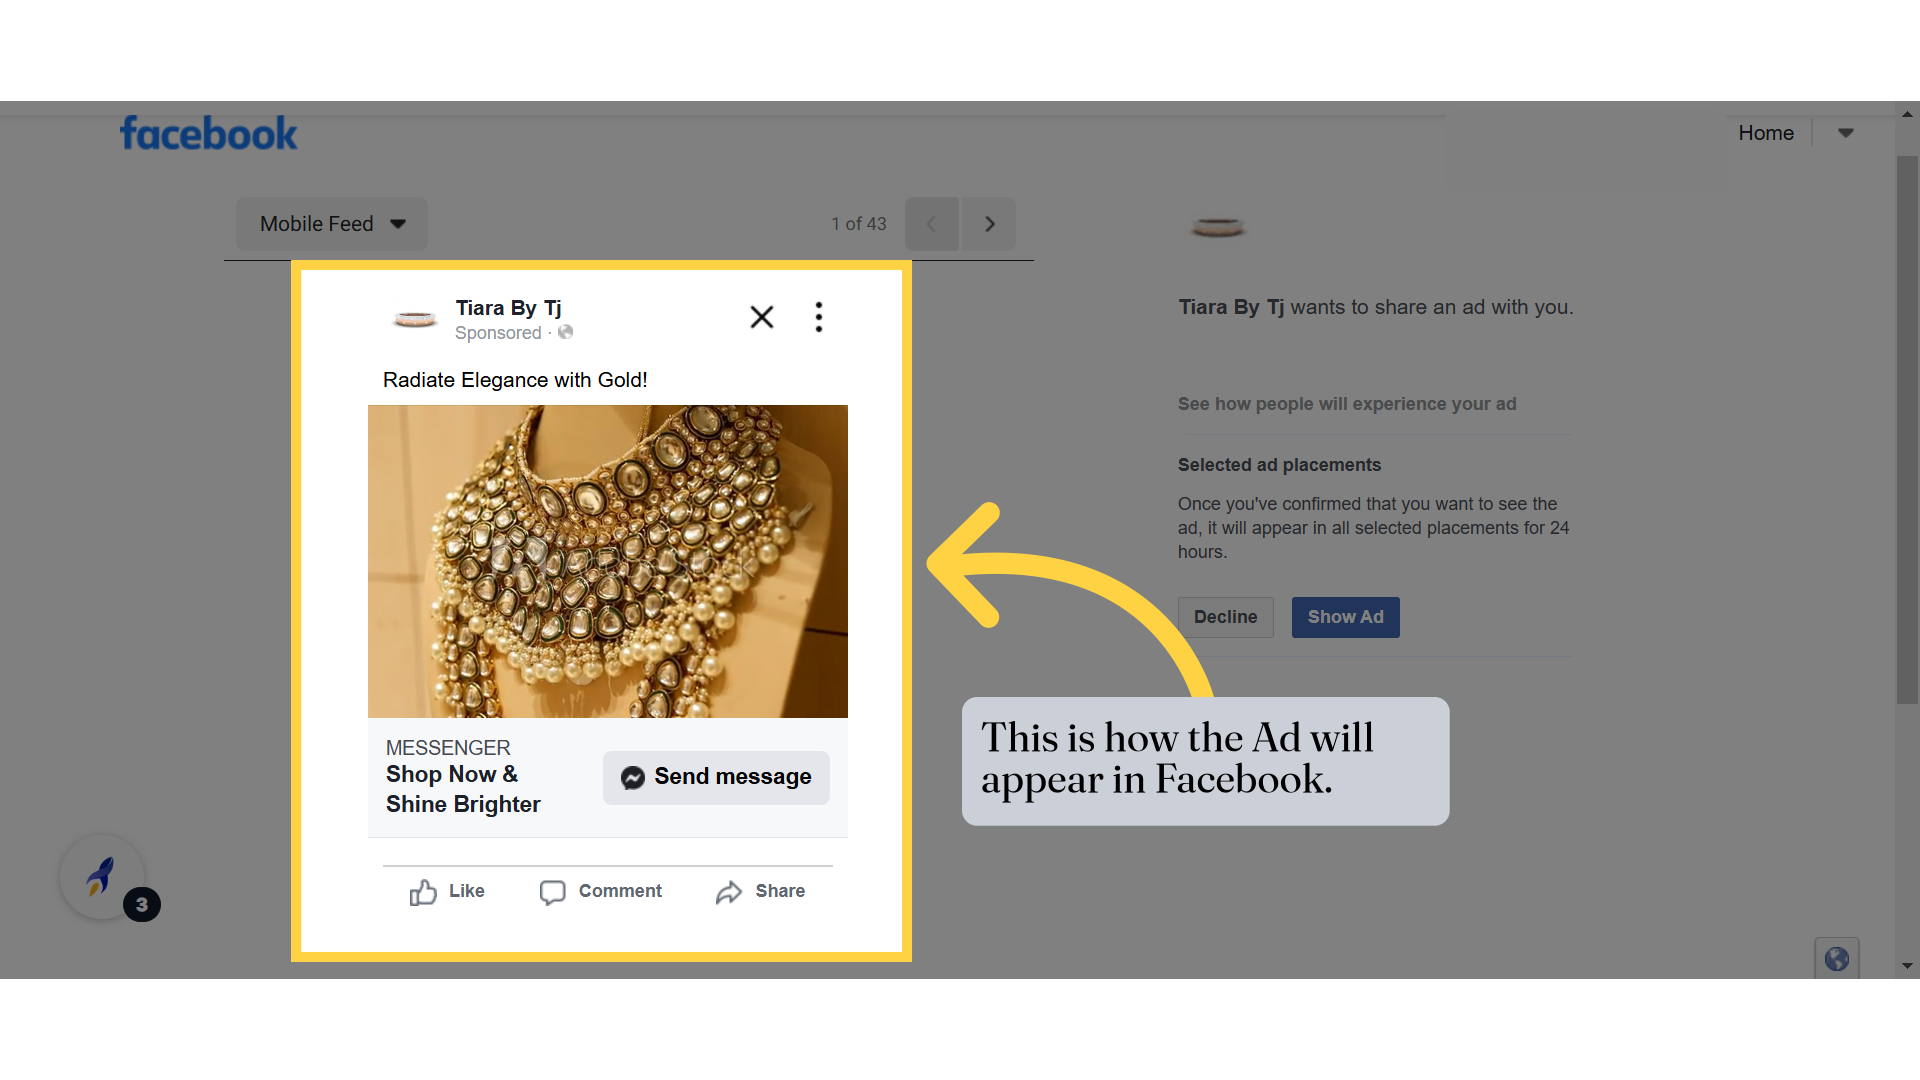
58. This displays the Ad details.
59. Click here to preview the Ad.
60. Click "Preview link"
61. This is how the Ad will appear in Facebook.
62. You will receive a confirmation message. If you select "Decline," the ad will not be published on Facebook. If you select "Show Ad," it will go live after Meta's review process.