How To Add A New Page
This guide walks you through adding a new page to your website, including setting up the layout, adding elements, saving drafts, and publishing the page
Go to app.jwero.ai
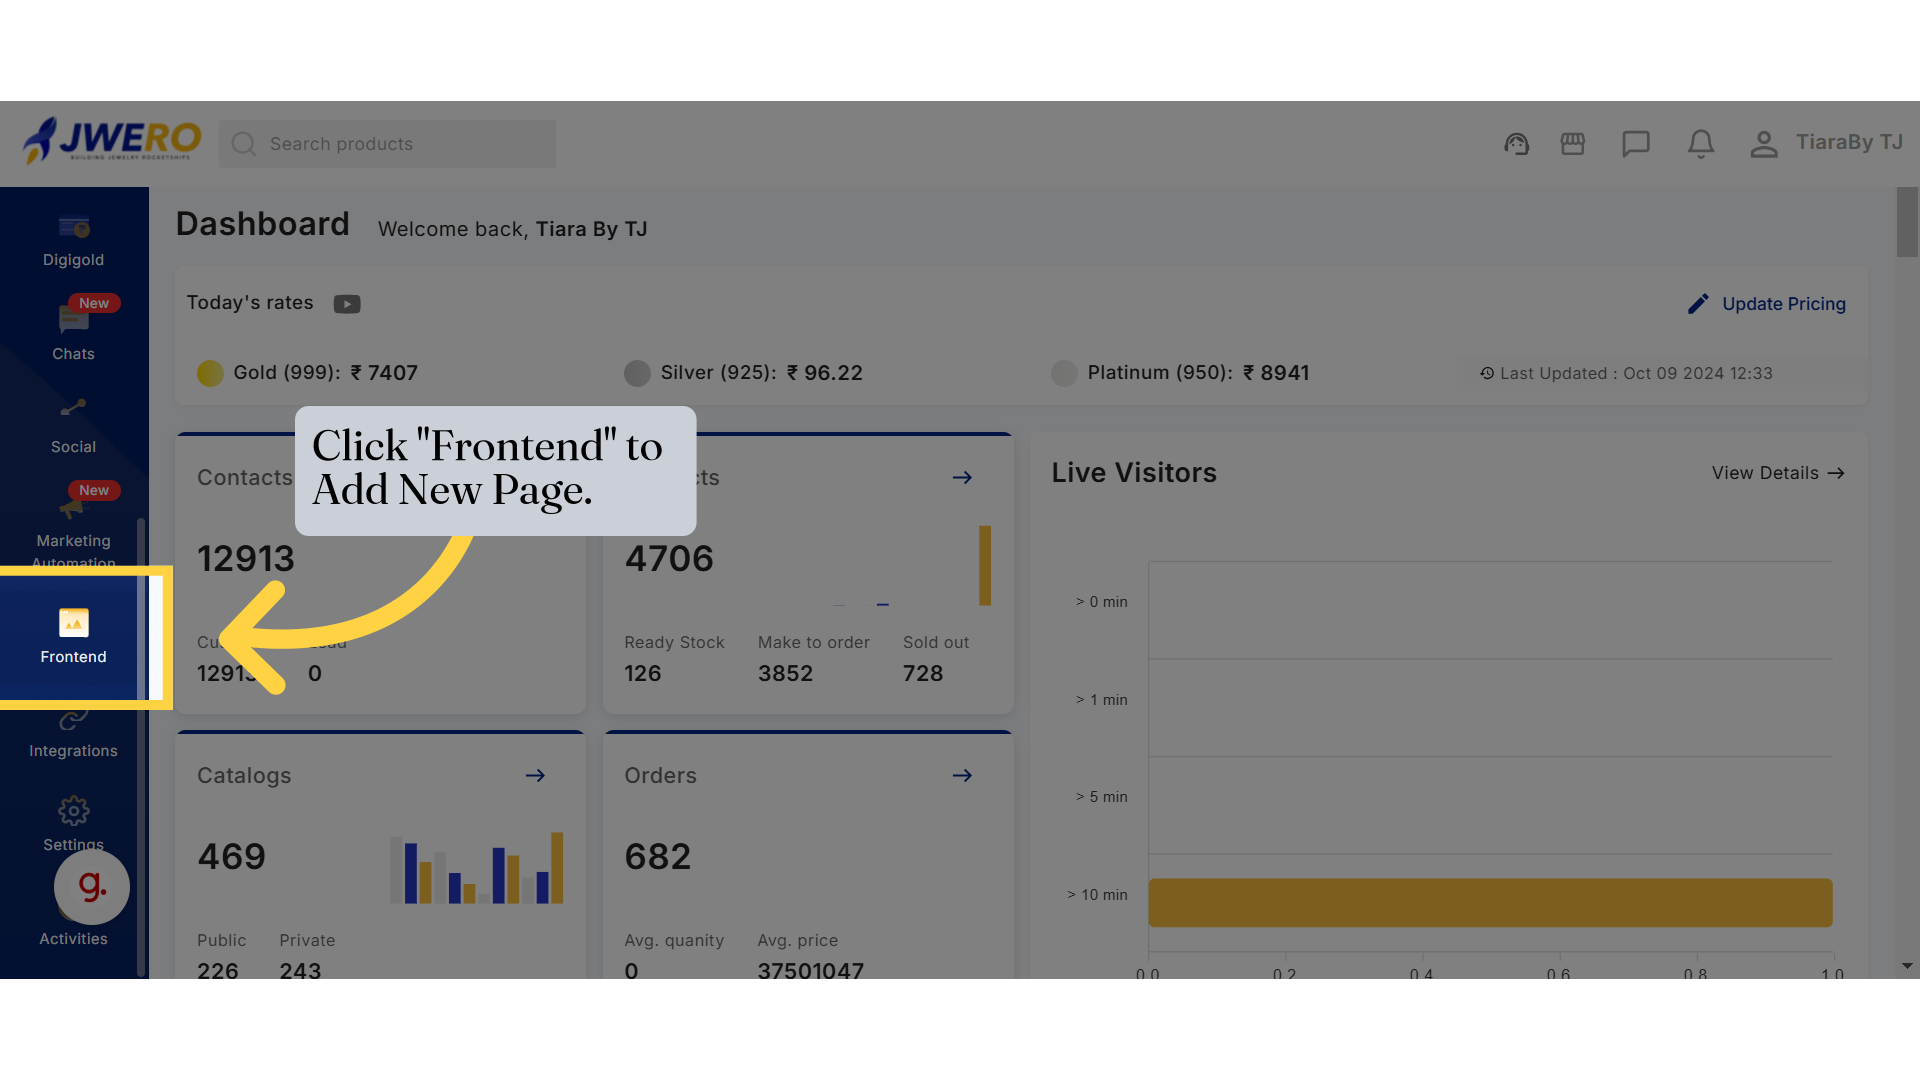
1. Click "Frontend" to Add New Page.
Access the "Frontend" to make the required changes to the website.
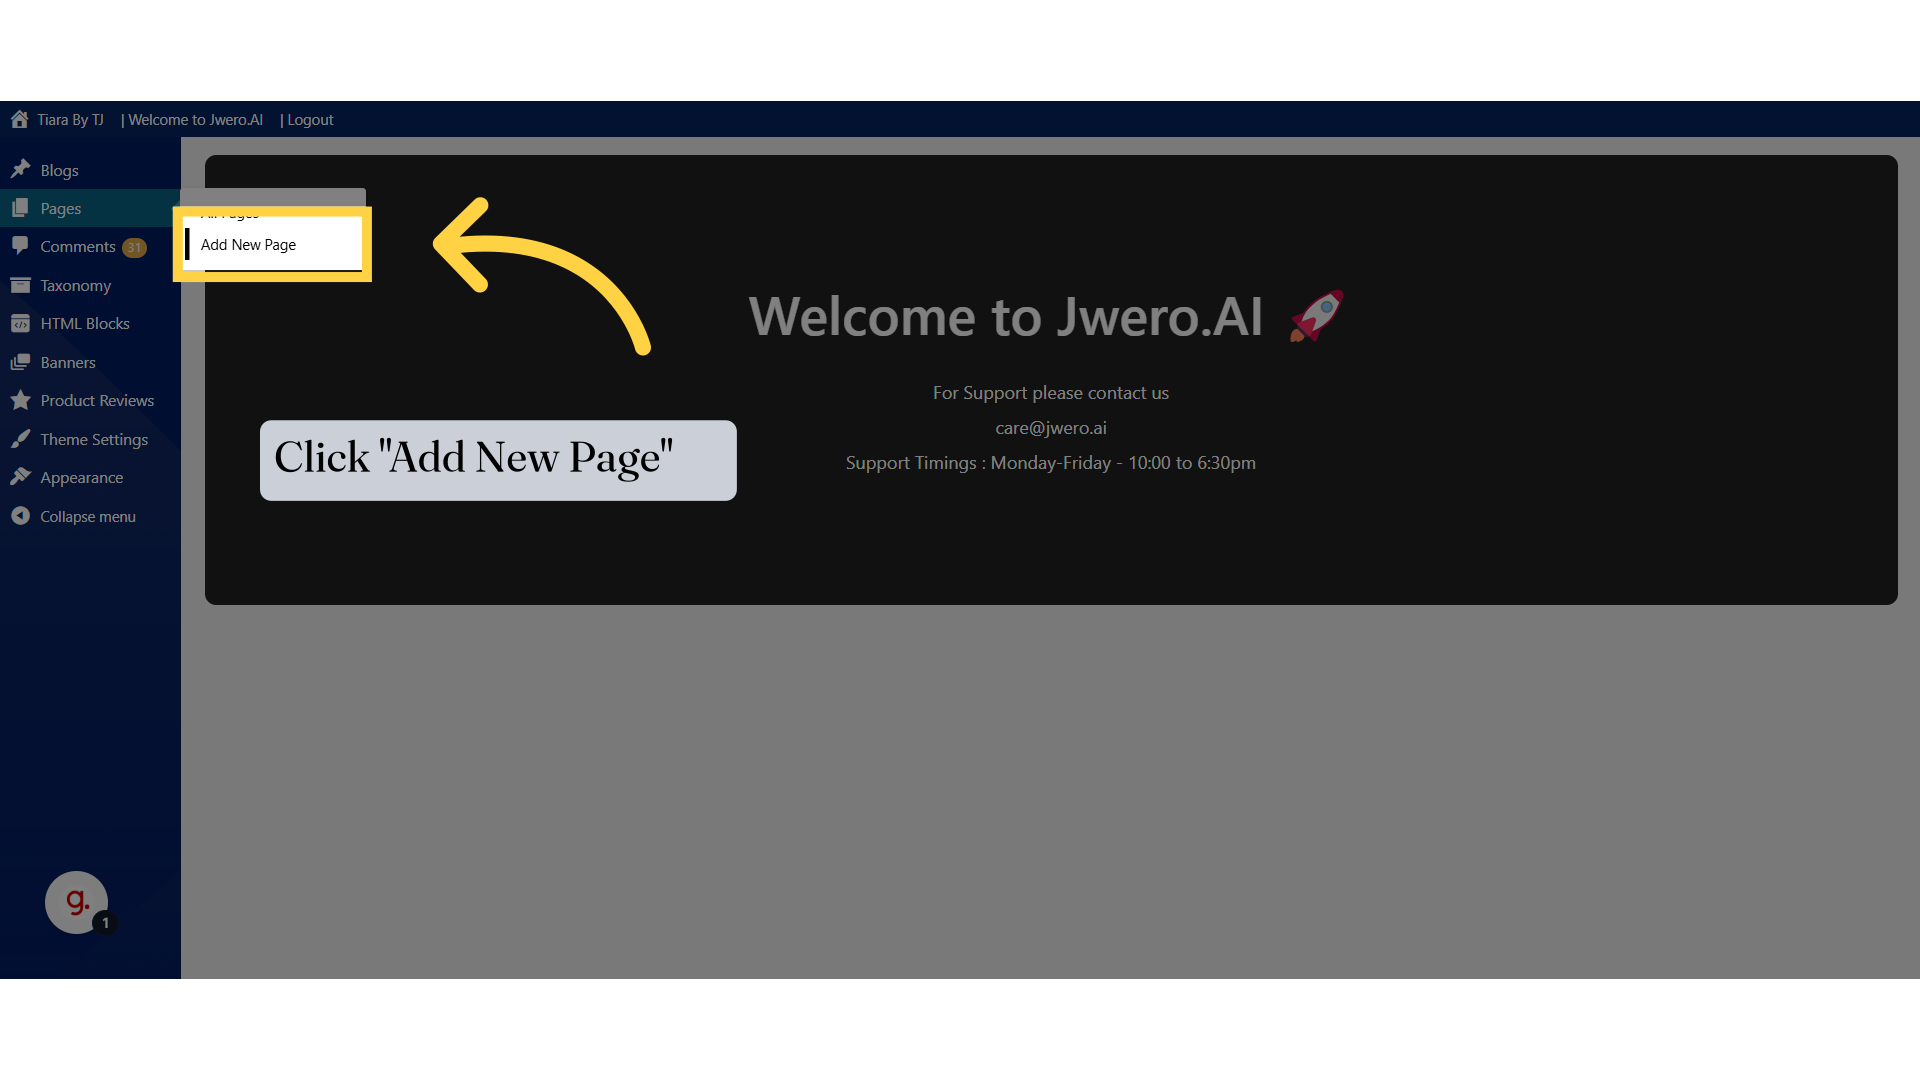
2. Click "Add New Page"
Initiate the process to add a new page.
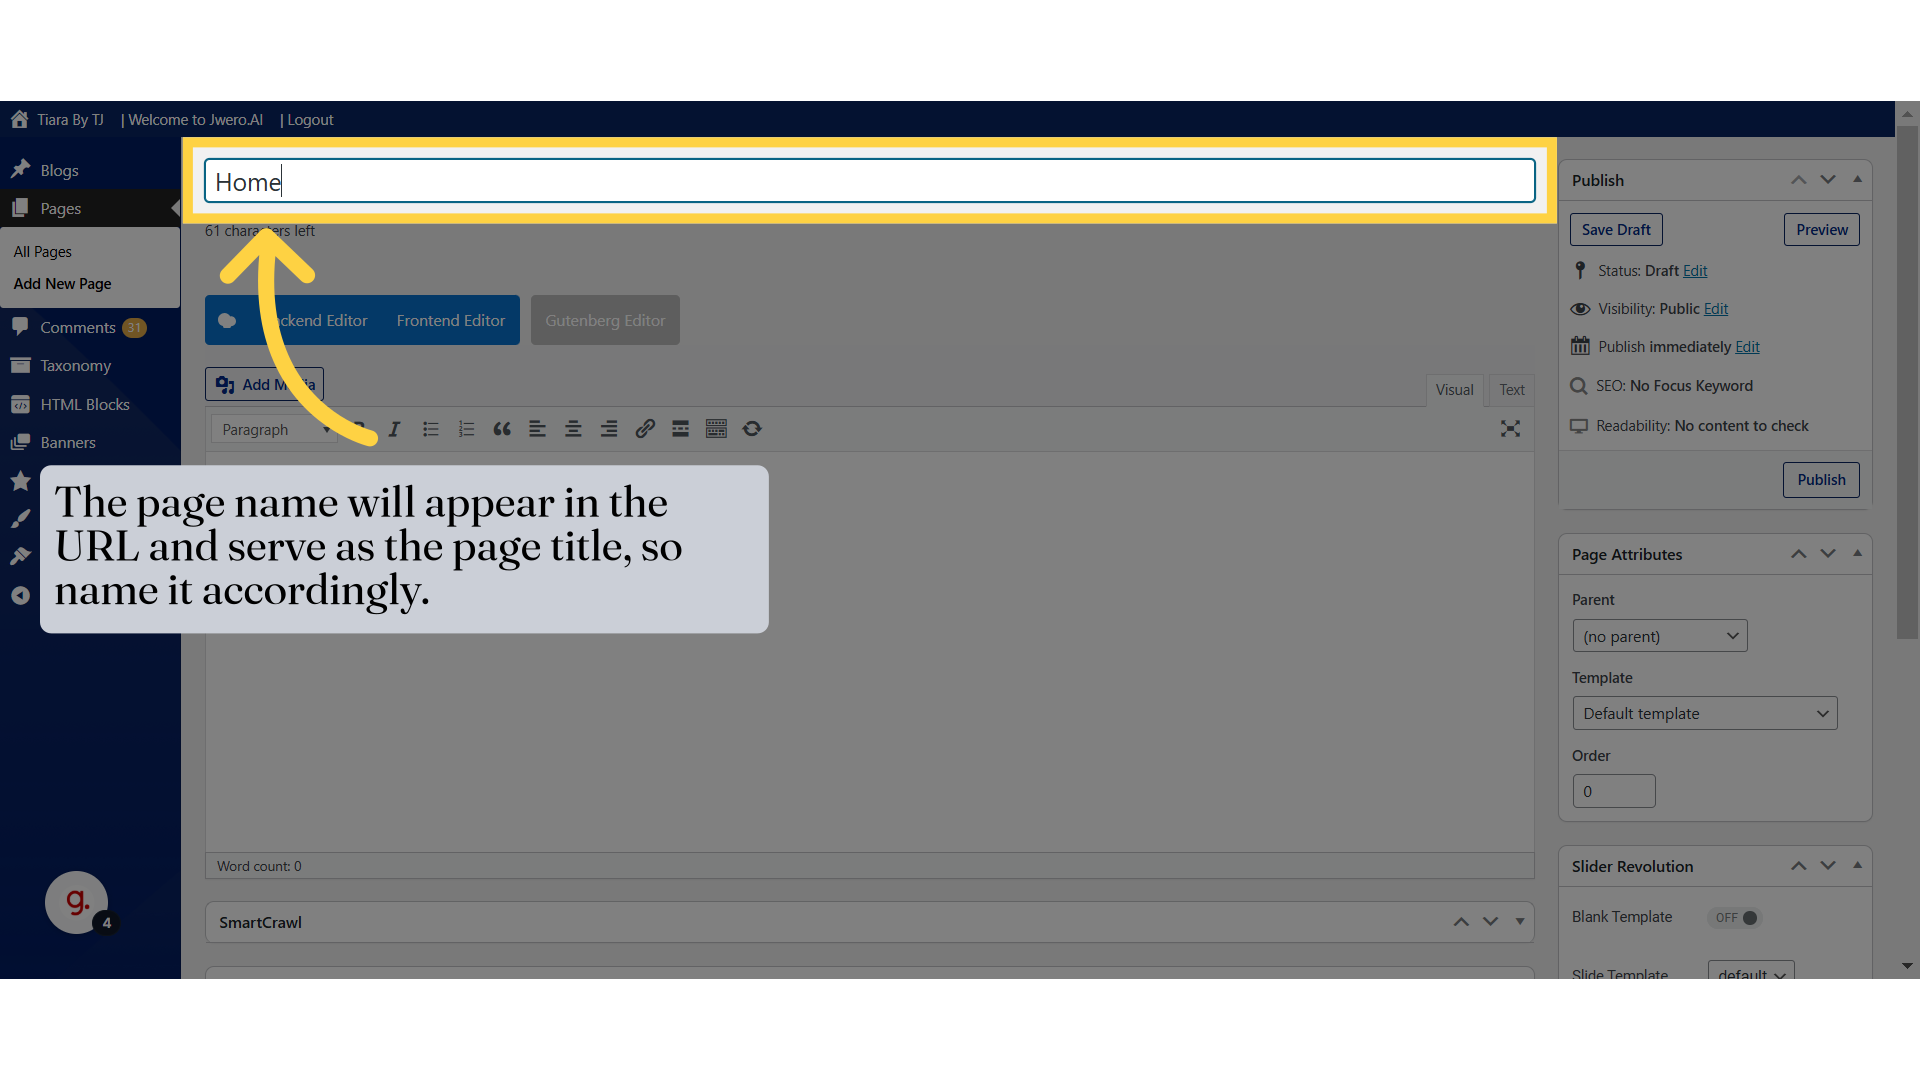
3. The page name will appear in the URL and serve as the page title, so name it accordingly.
Enter a title that will appear in the page URL, based on the content or purpose of the page.
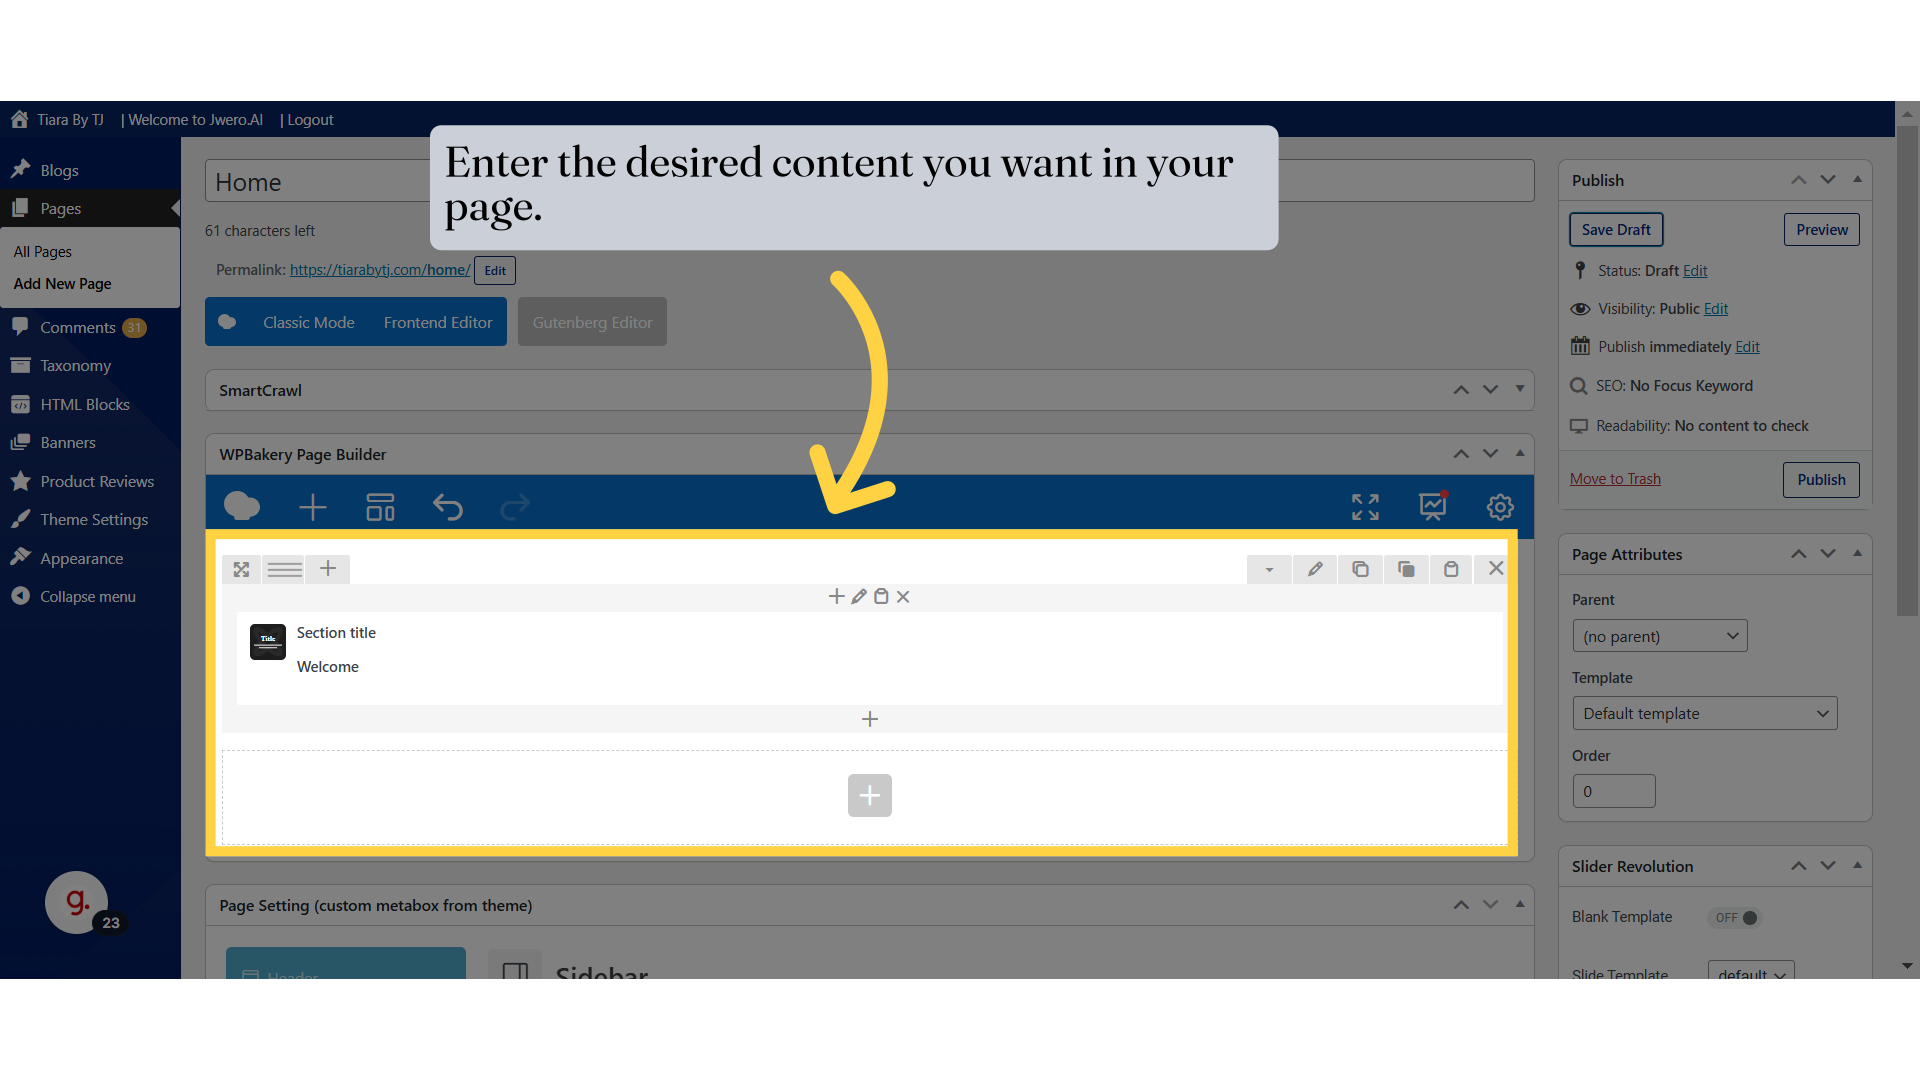
4. Enter the desired content you want in your page.
Design and add the content into the page as per your requirement.
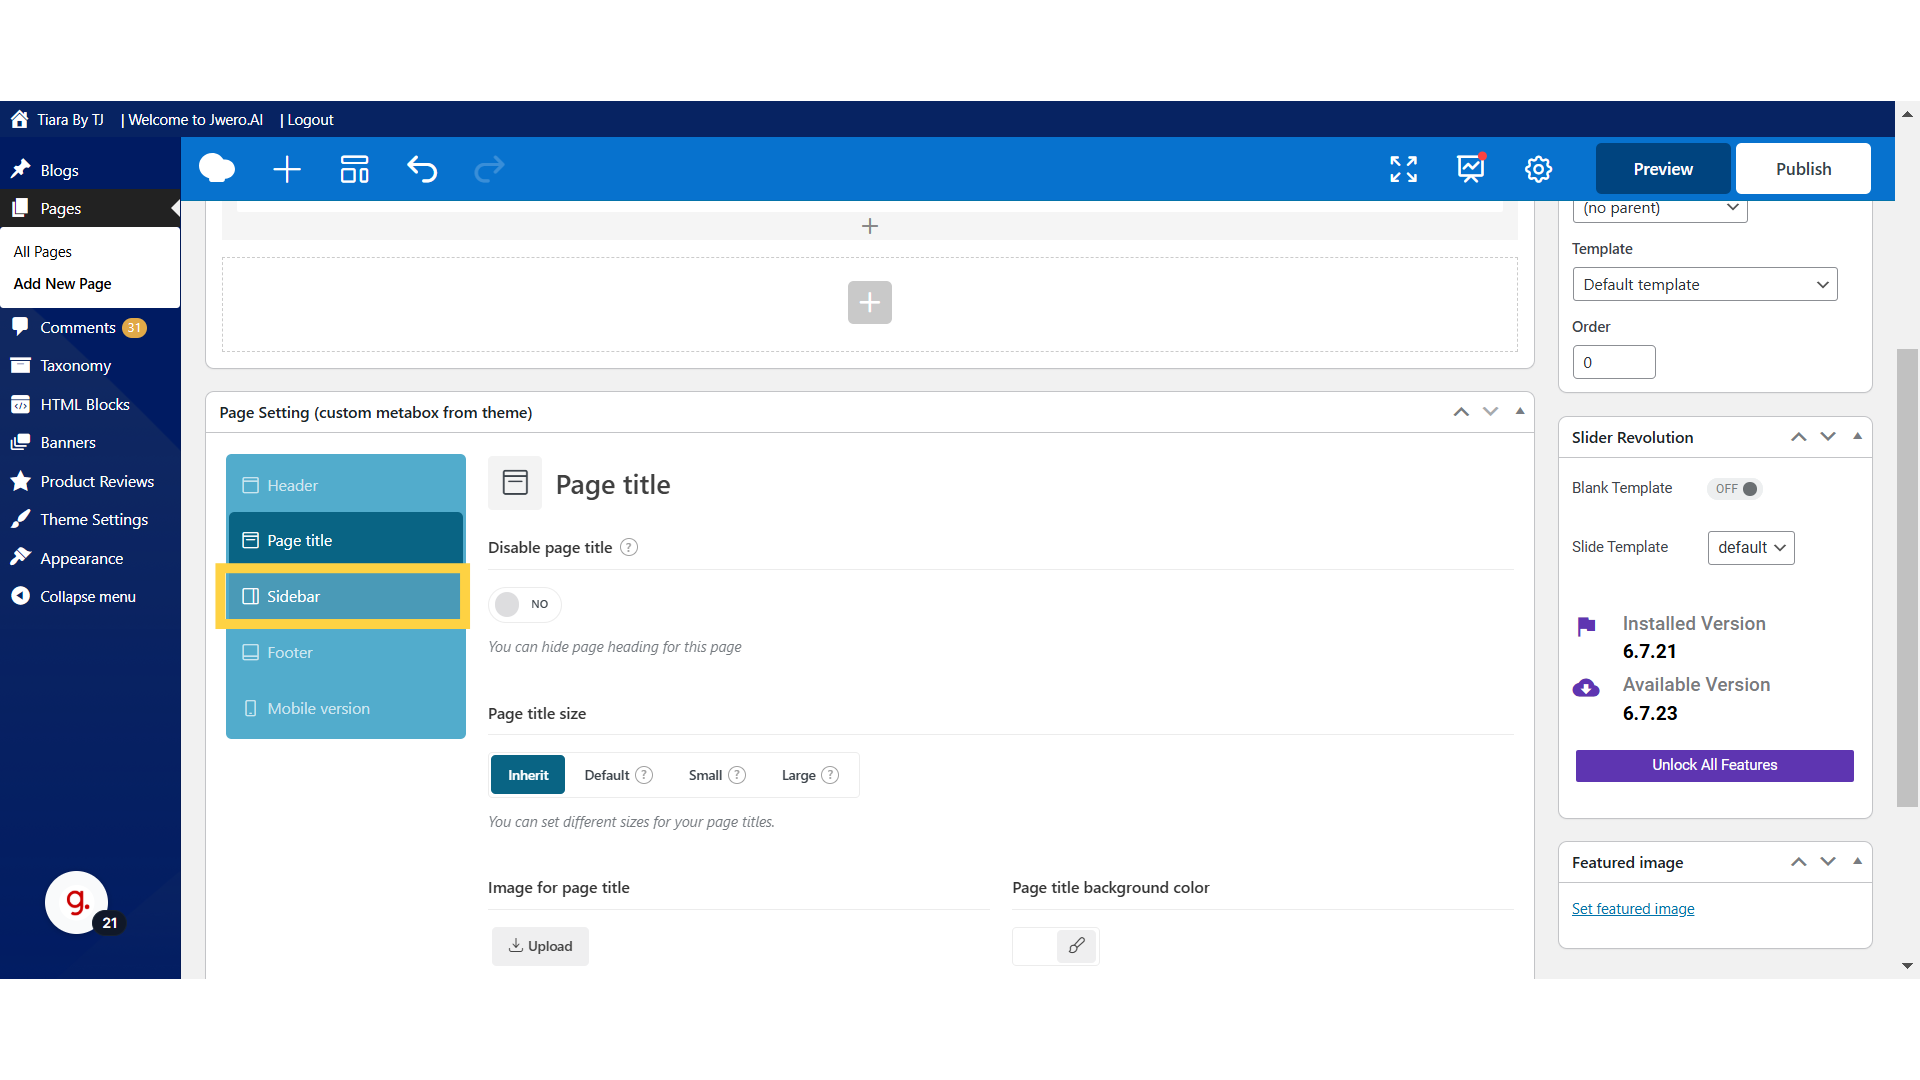
5. Click "Sidebar"
A sidebar is a vertical section on the side of a webpage, often used to display additional content like recent posts, links, advertisements, or other widgets.
Sidebar options typically allow you to:
Sidebar Position: This option lets you choose where the sidebar will appear on the page. You can place it depending on your preferred layout.
Sidebar Size: This option allows you to adjust the width of the sidebar. You can make it narrower or wider based on how much content you want to display in the sidebar without affecting the main content too much.
Custom Sidebar for This Page: With this option, you can create and assign a specific sidebar layout for individual pages. This allows you to show different sidebar content on different pages, making the layout more personalized and relevant to the page’s purpose.
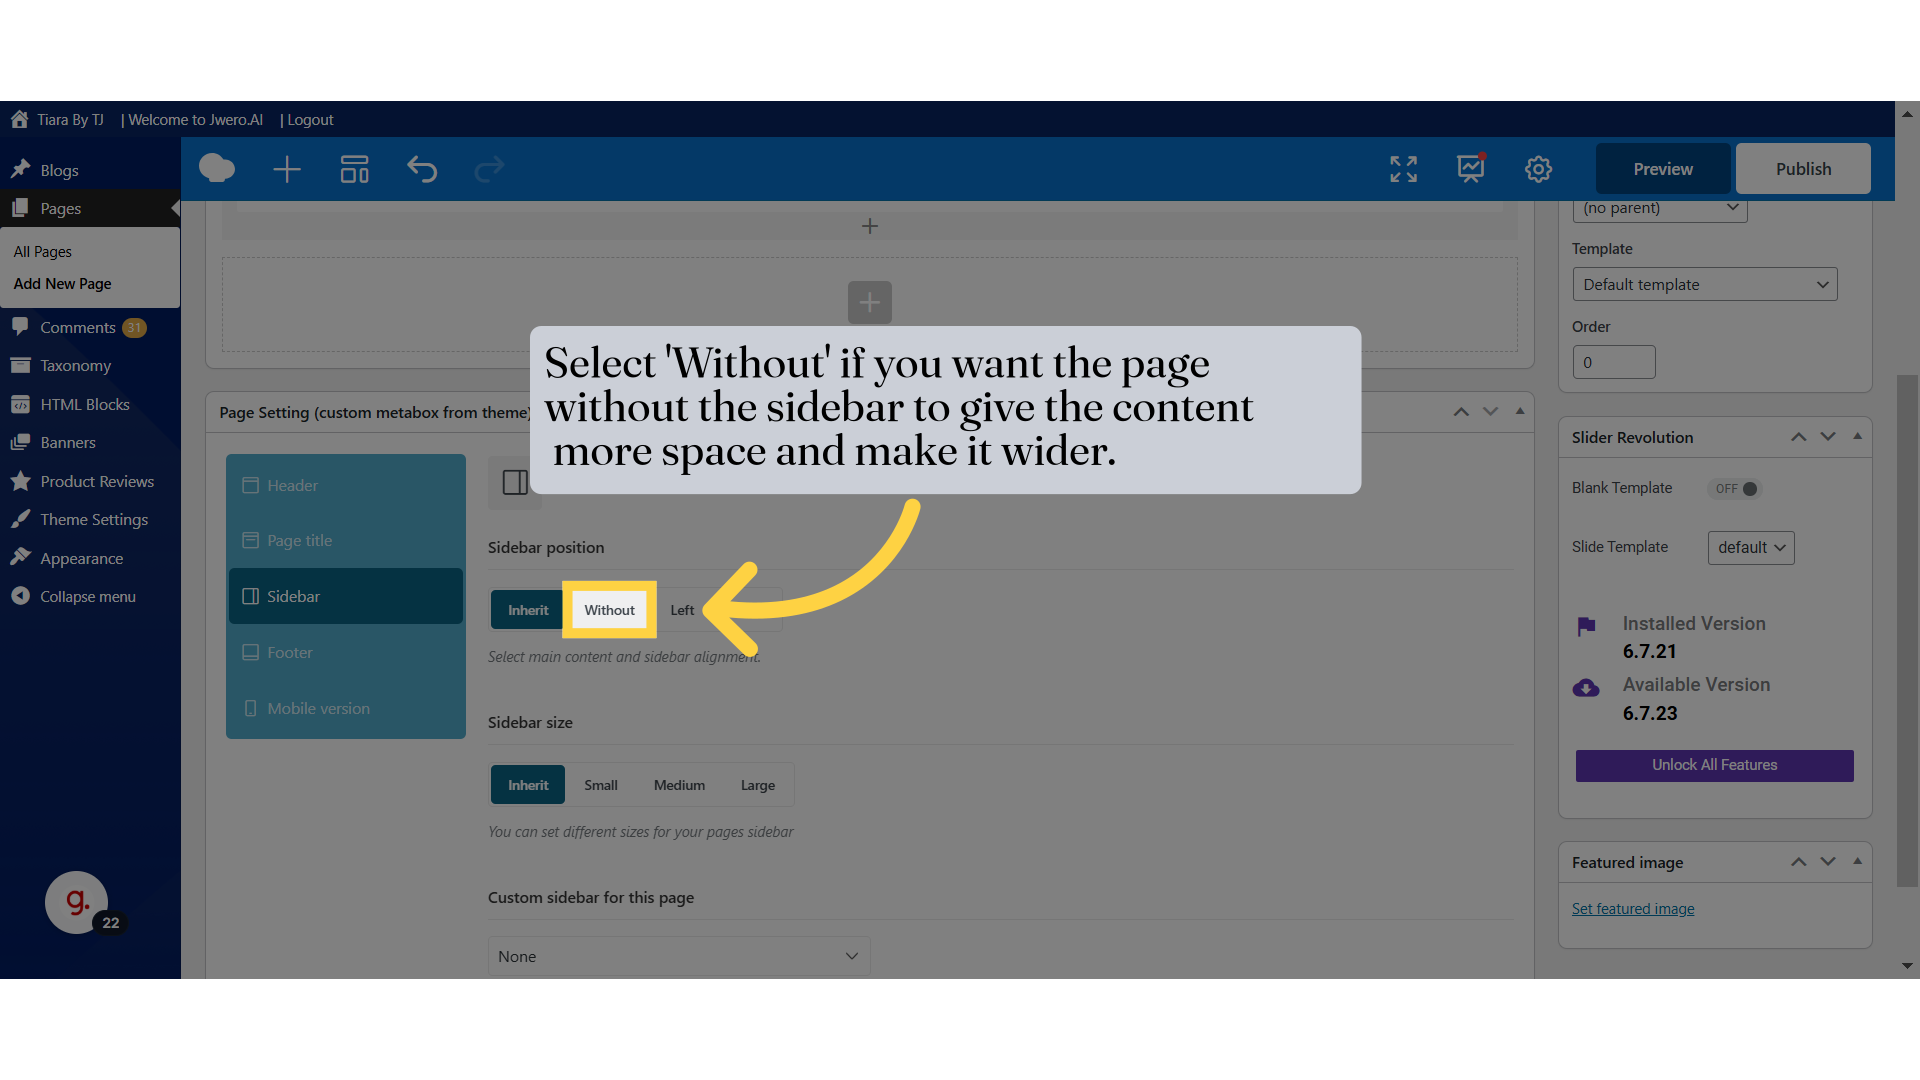
6. Select 'Without' if you want the page without the sidebar to give the content more space and make it wider.
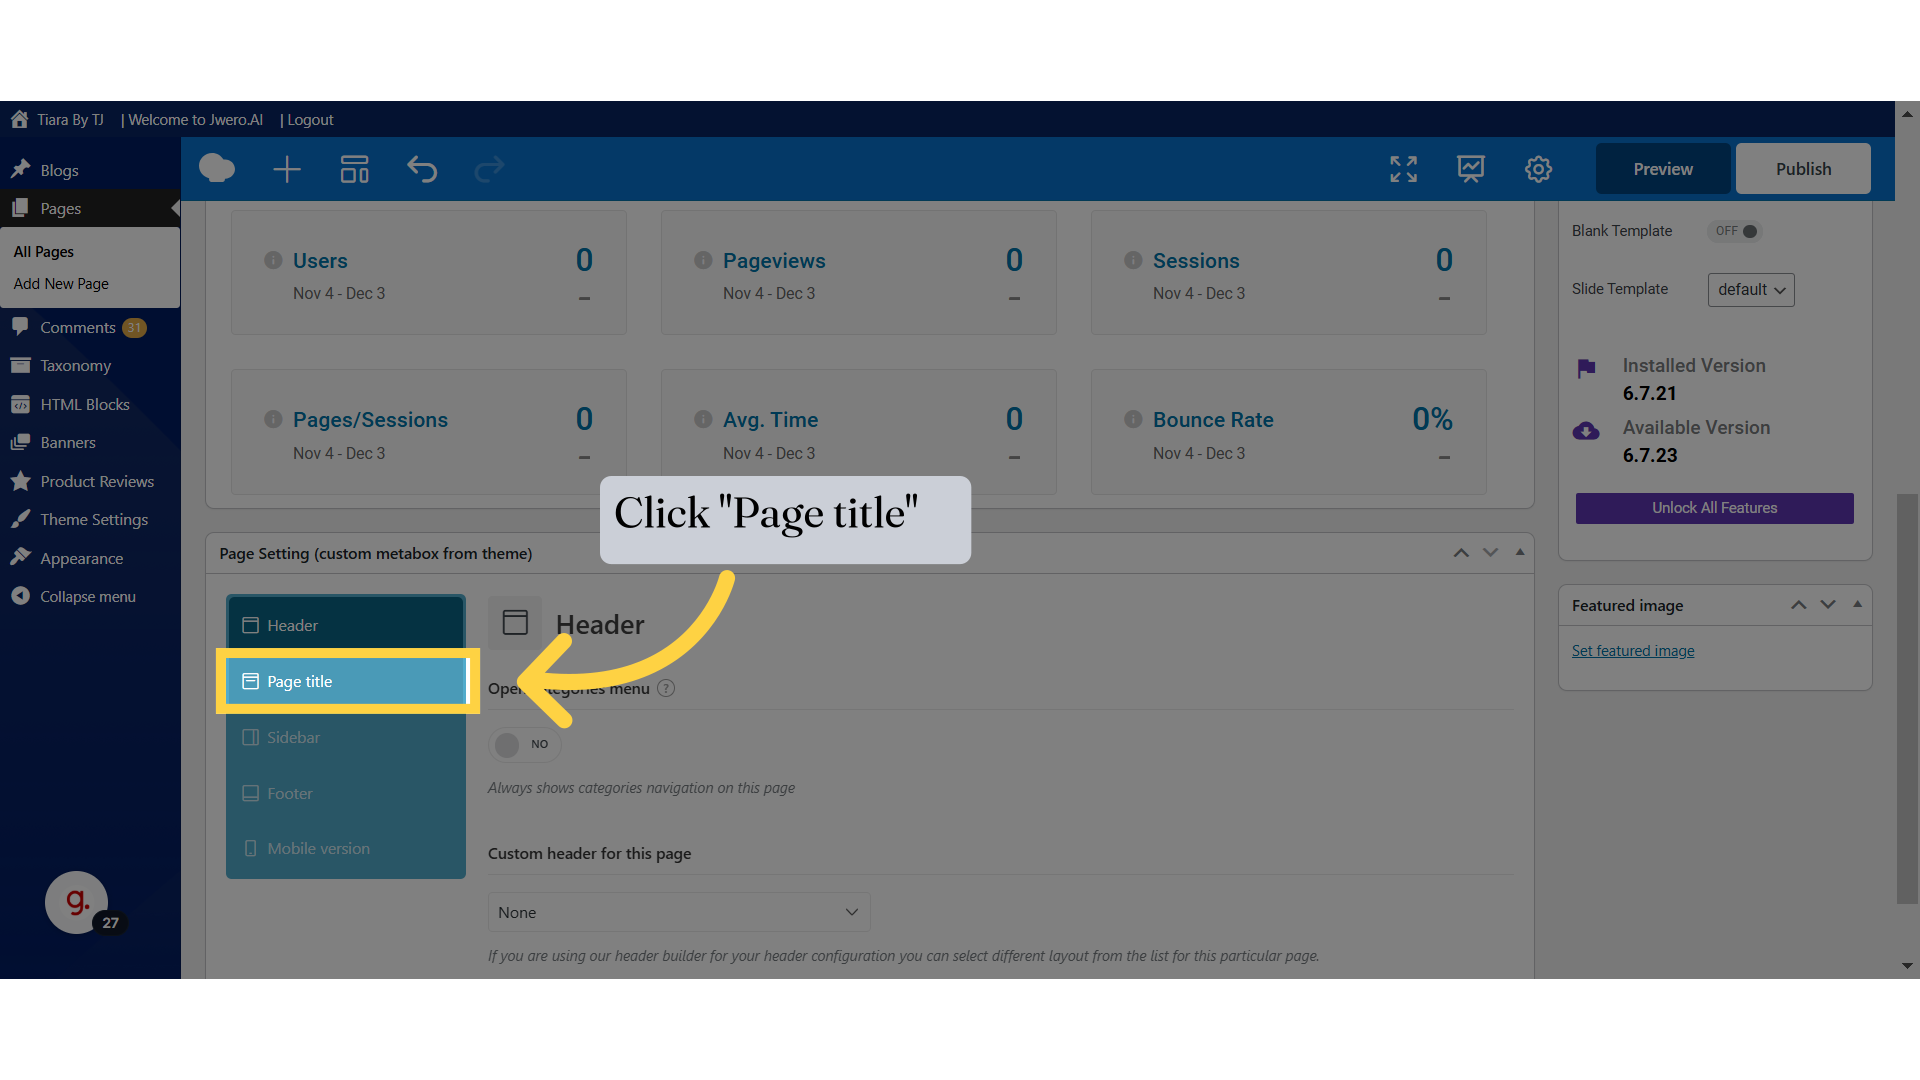
7. Click "Page title"
Access the page title setting.
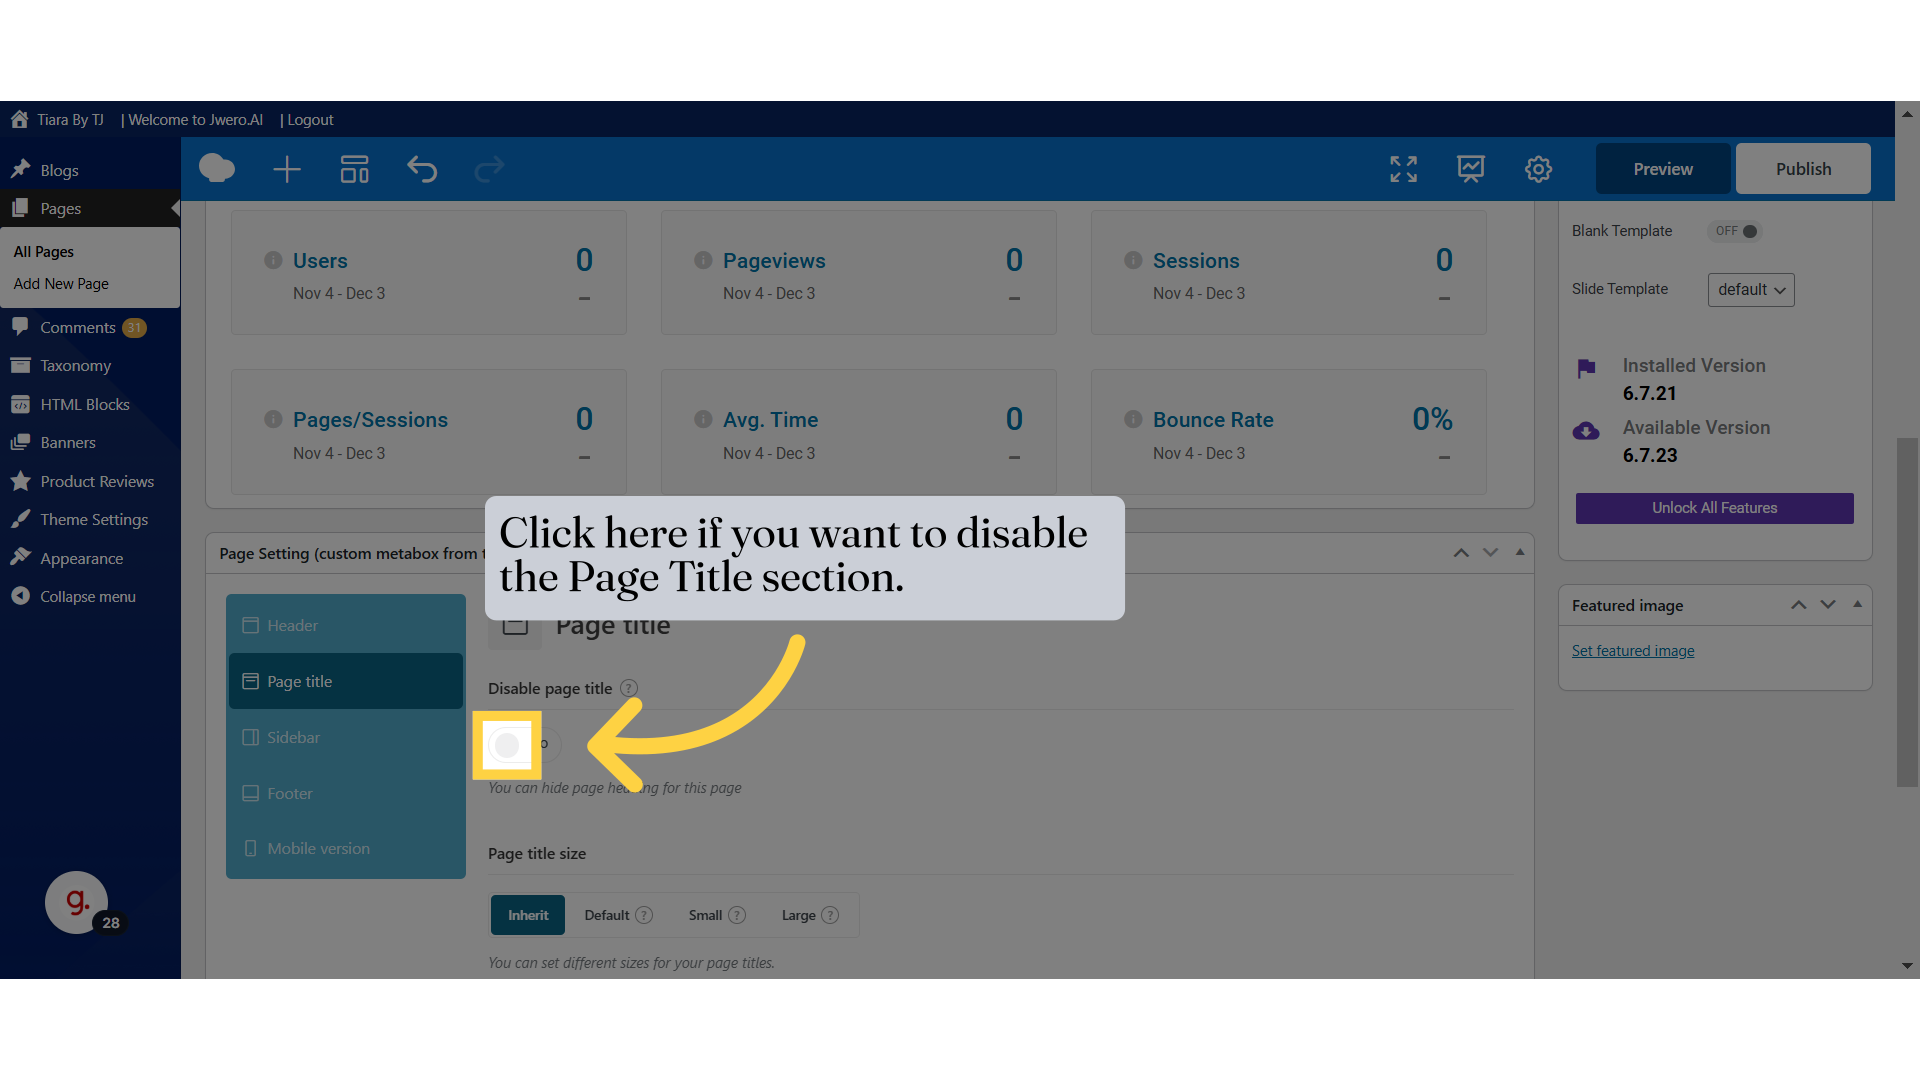
8. Click here if you want to disable the Page Title section.
The Page Title Disable option allows you to hide or disable the default page title that appears at the top of a page. This is useful if you want a clean design without showing the title.
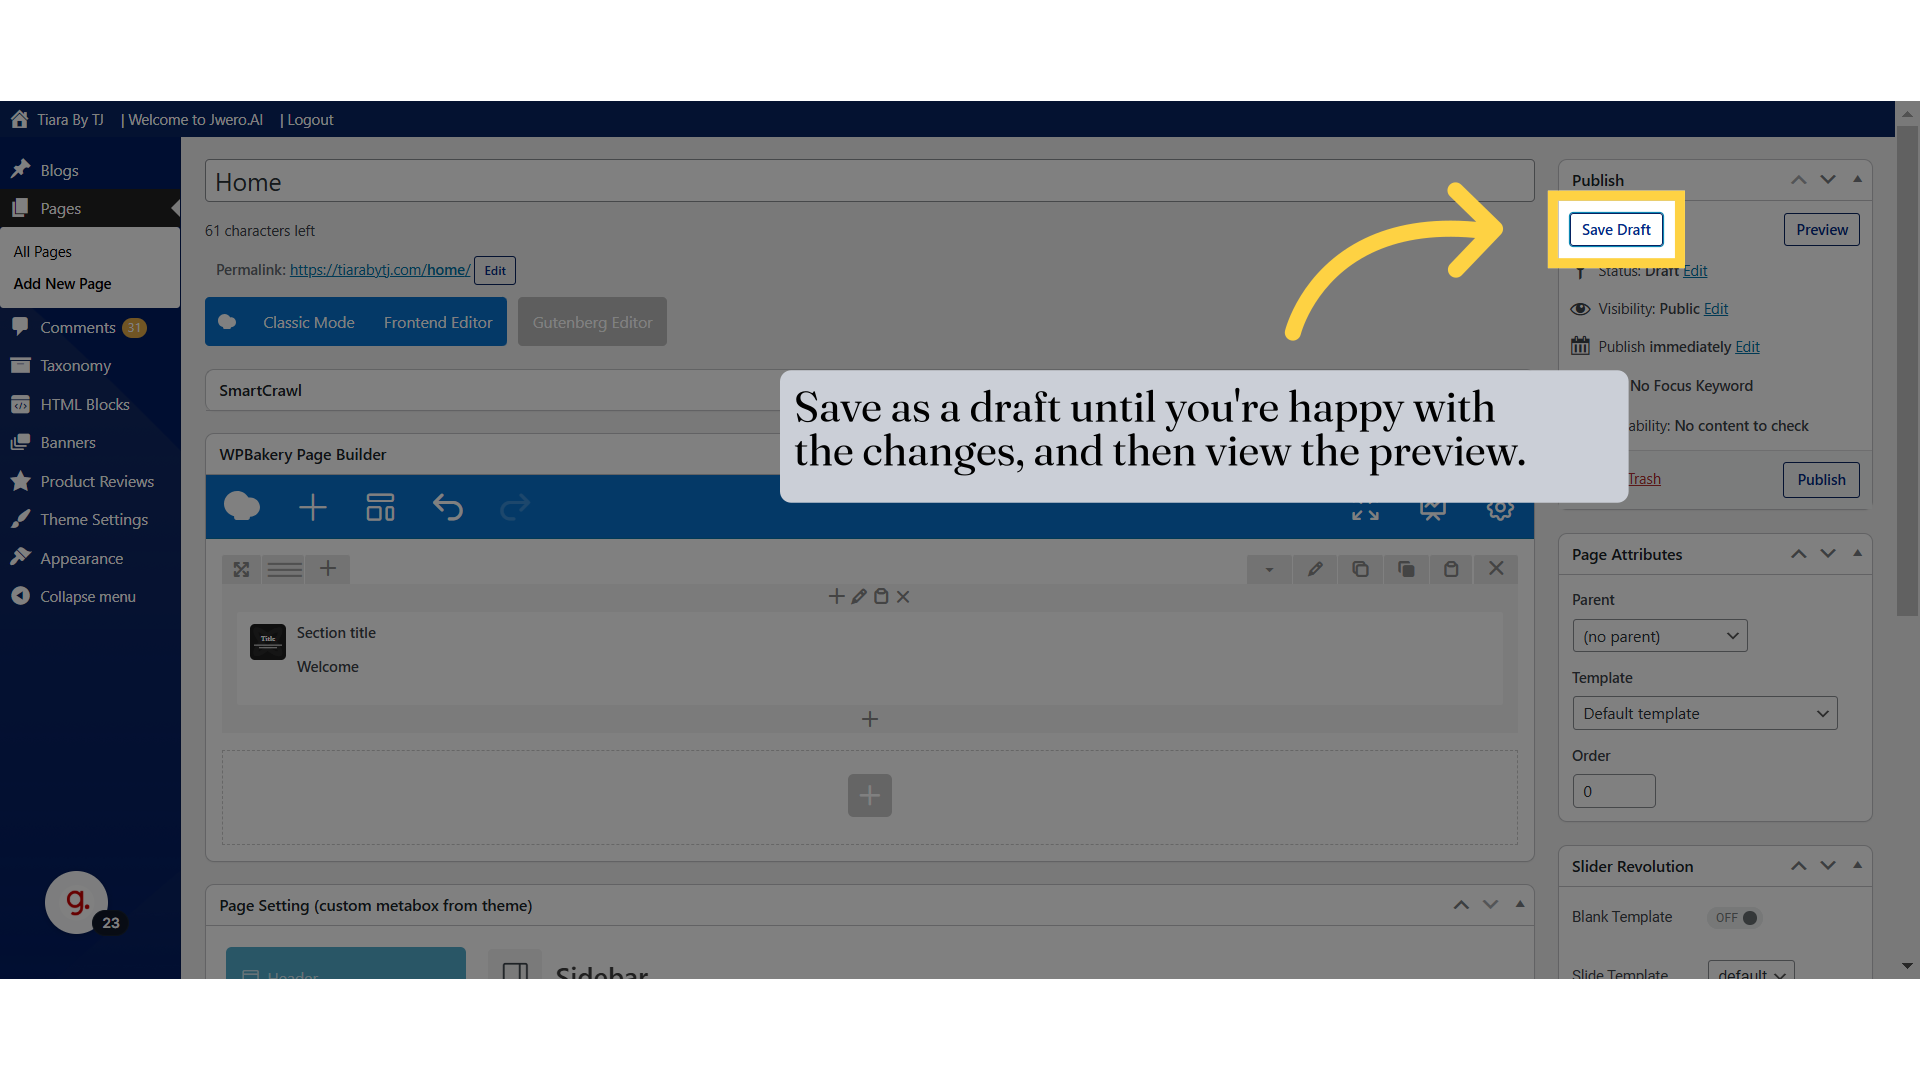
9. Save as a draft until you're happy with the changes, and then view the preview.
Save the page as a draft before making it live, so you can finalize all changes. You can then preview the page to review the updates.
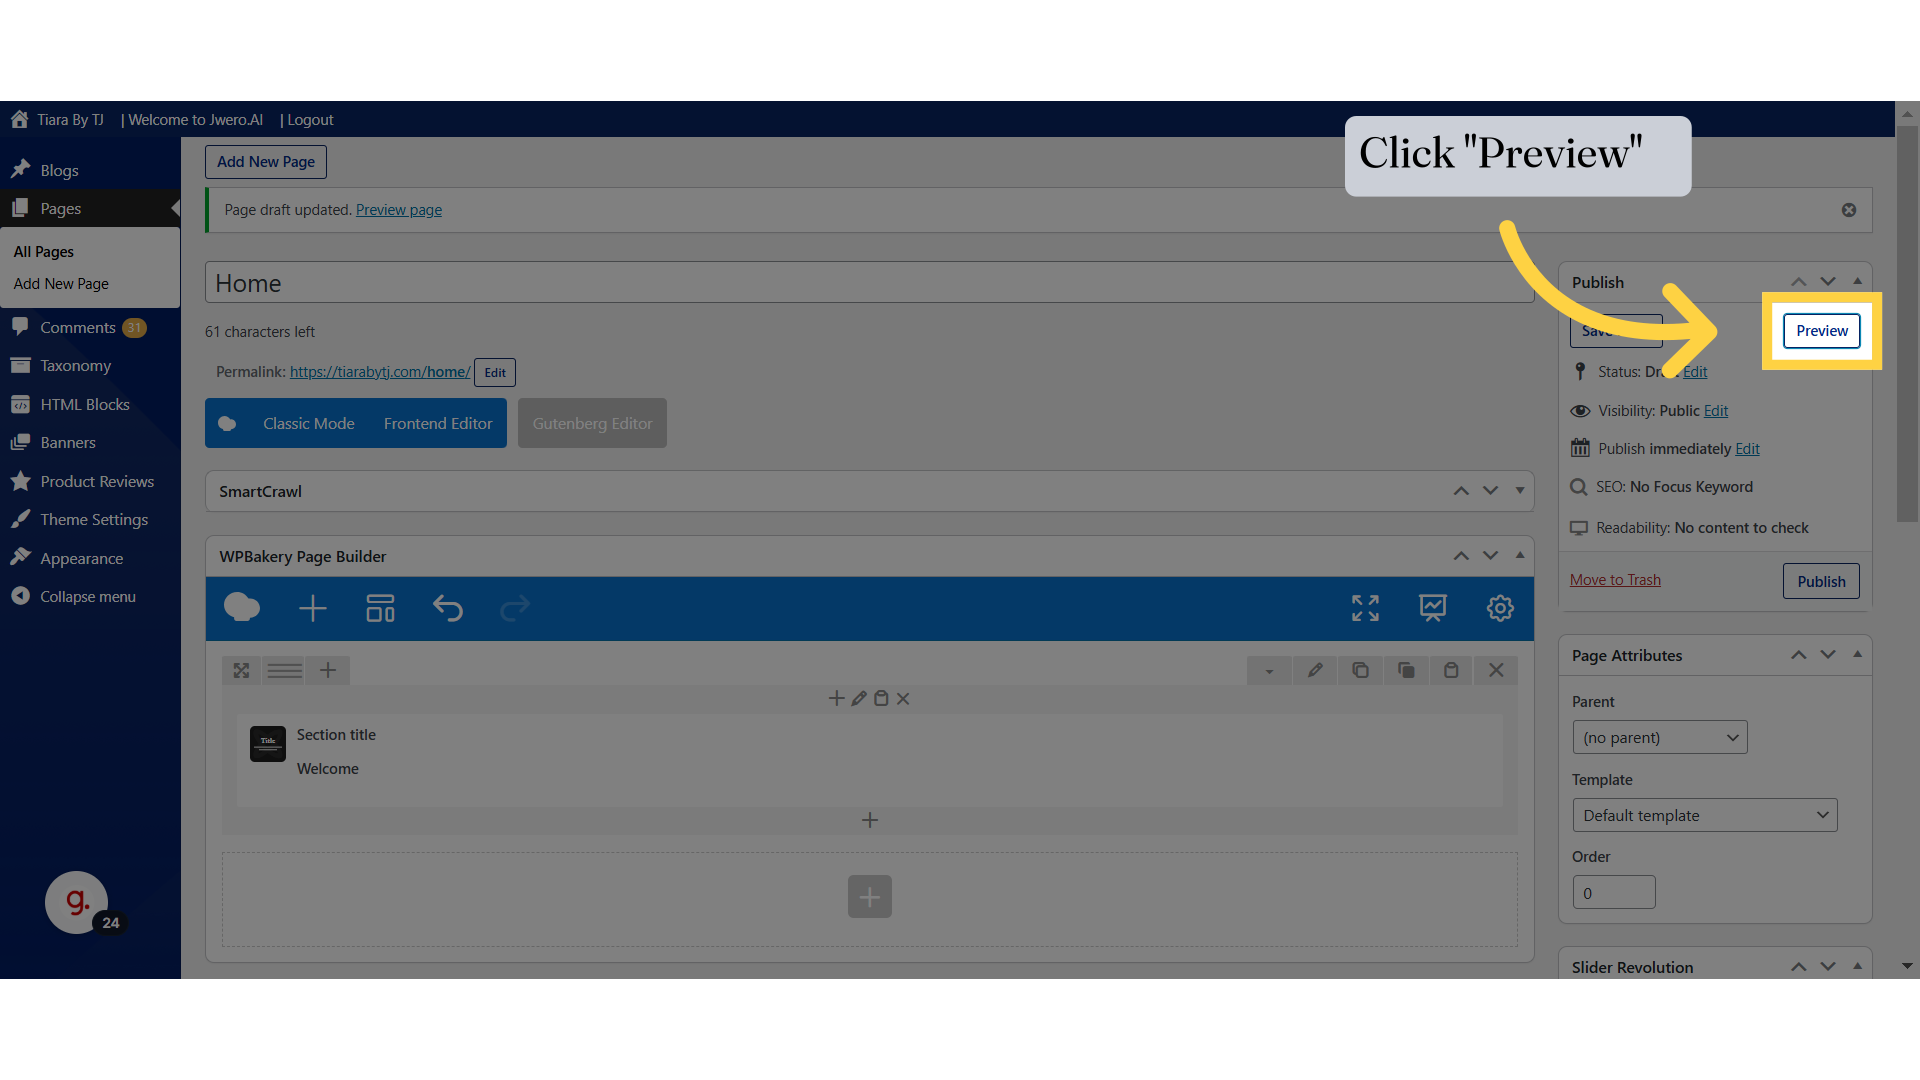
10. Click "Preview"
Preview the page before publishing it.
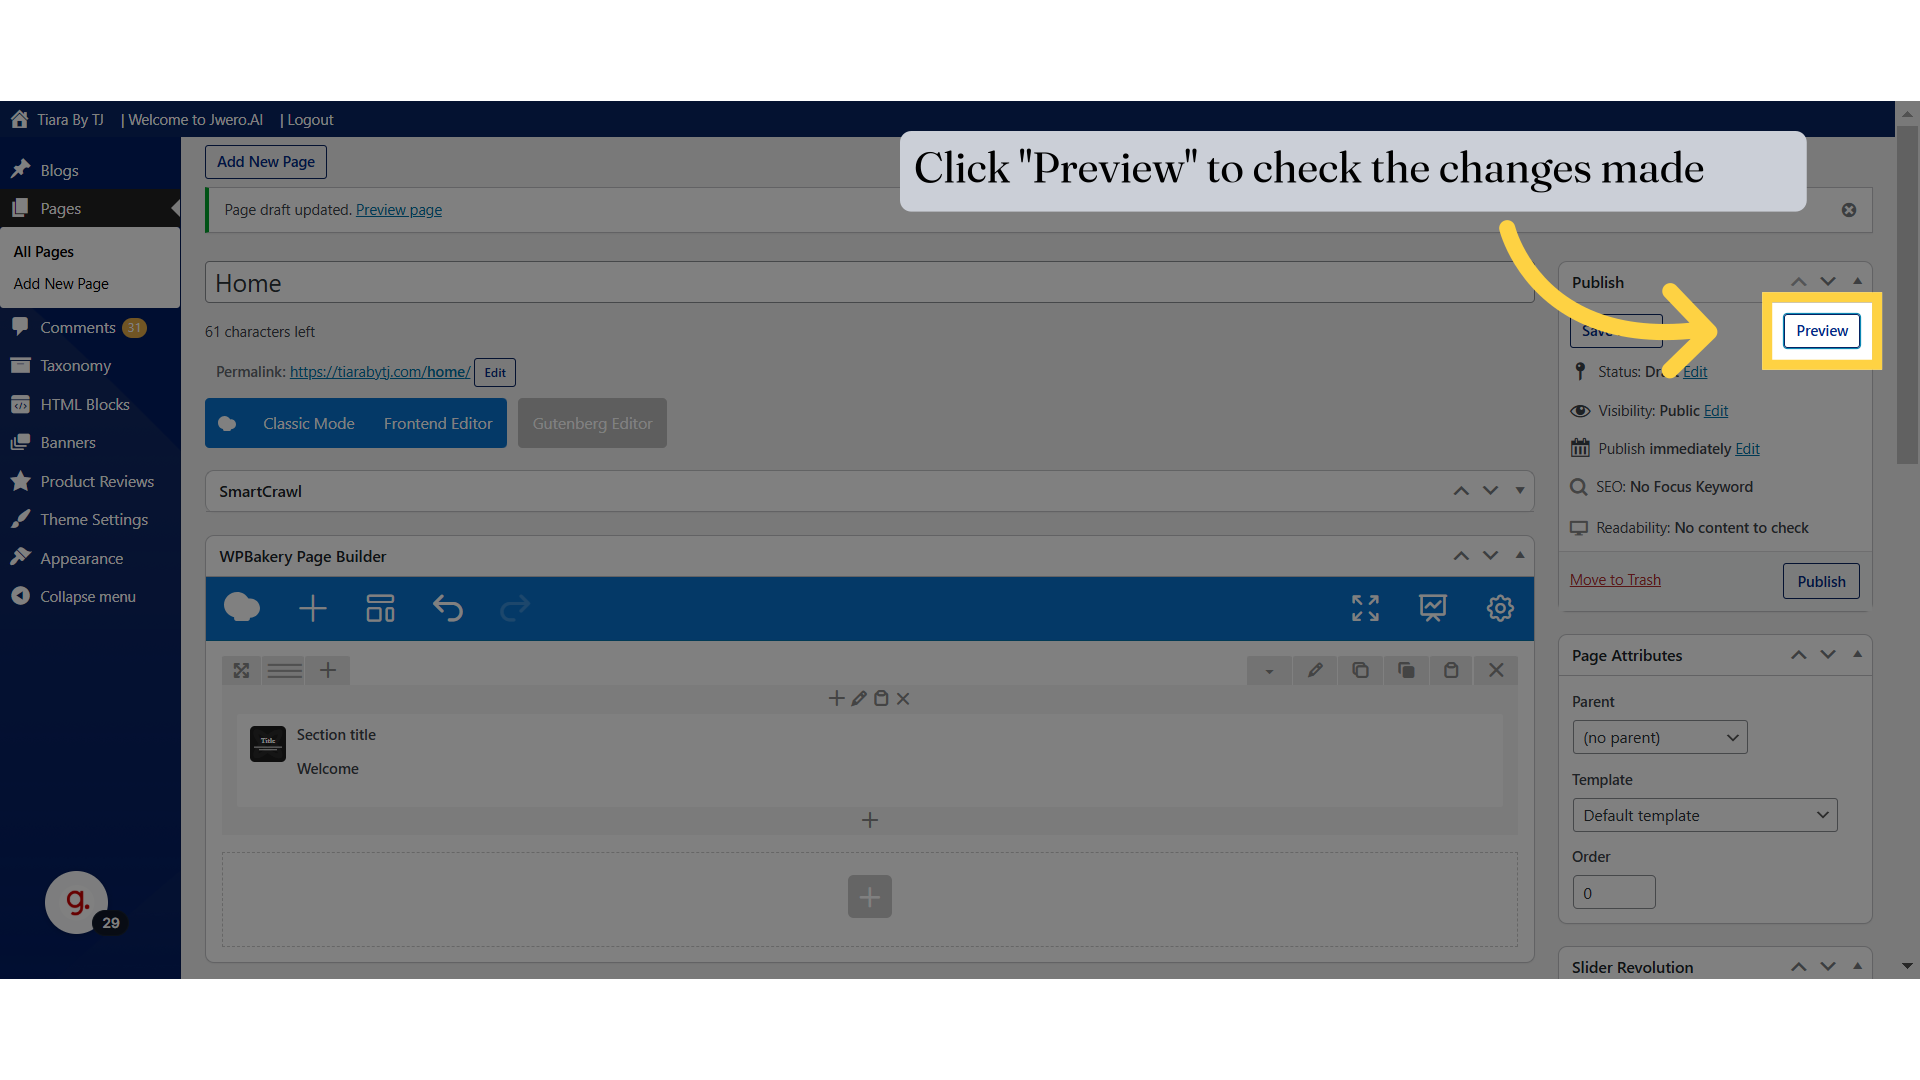
11. Click "Preview" to check the changes made
Preview the changes to ensure everything looks correct.
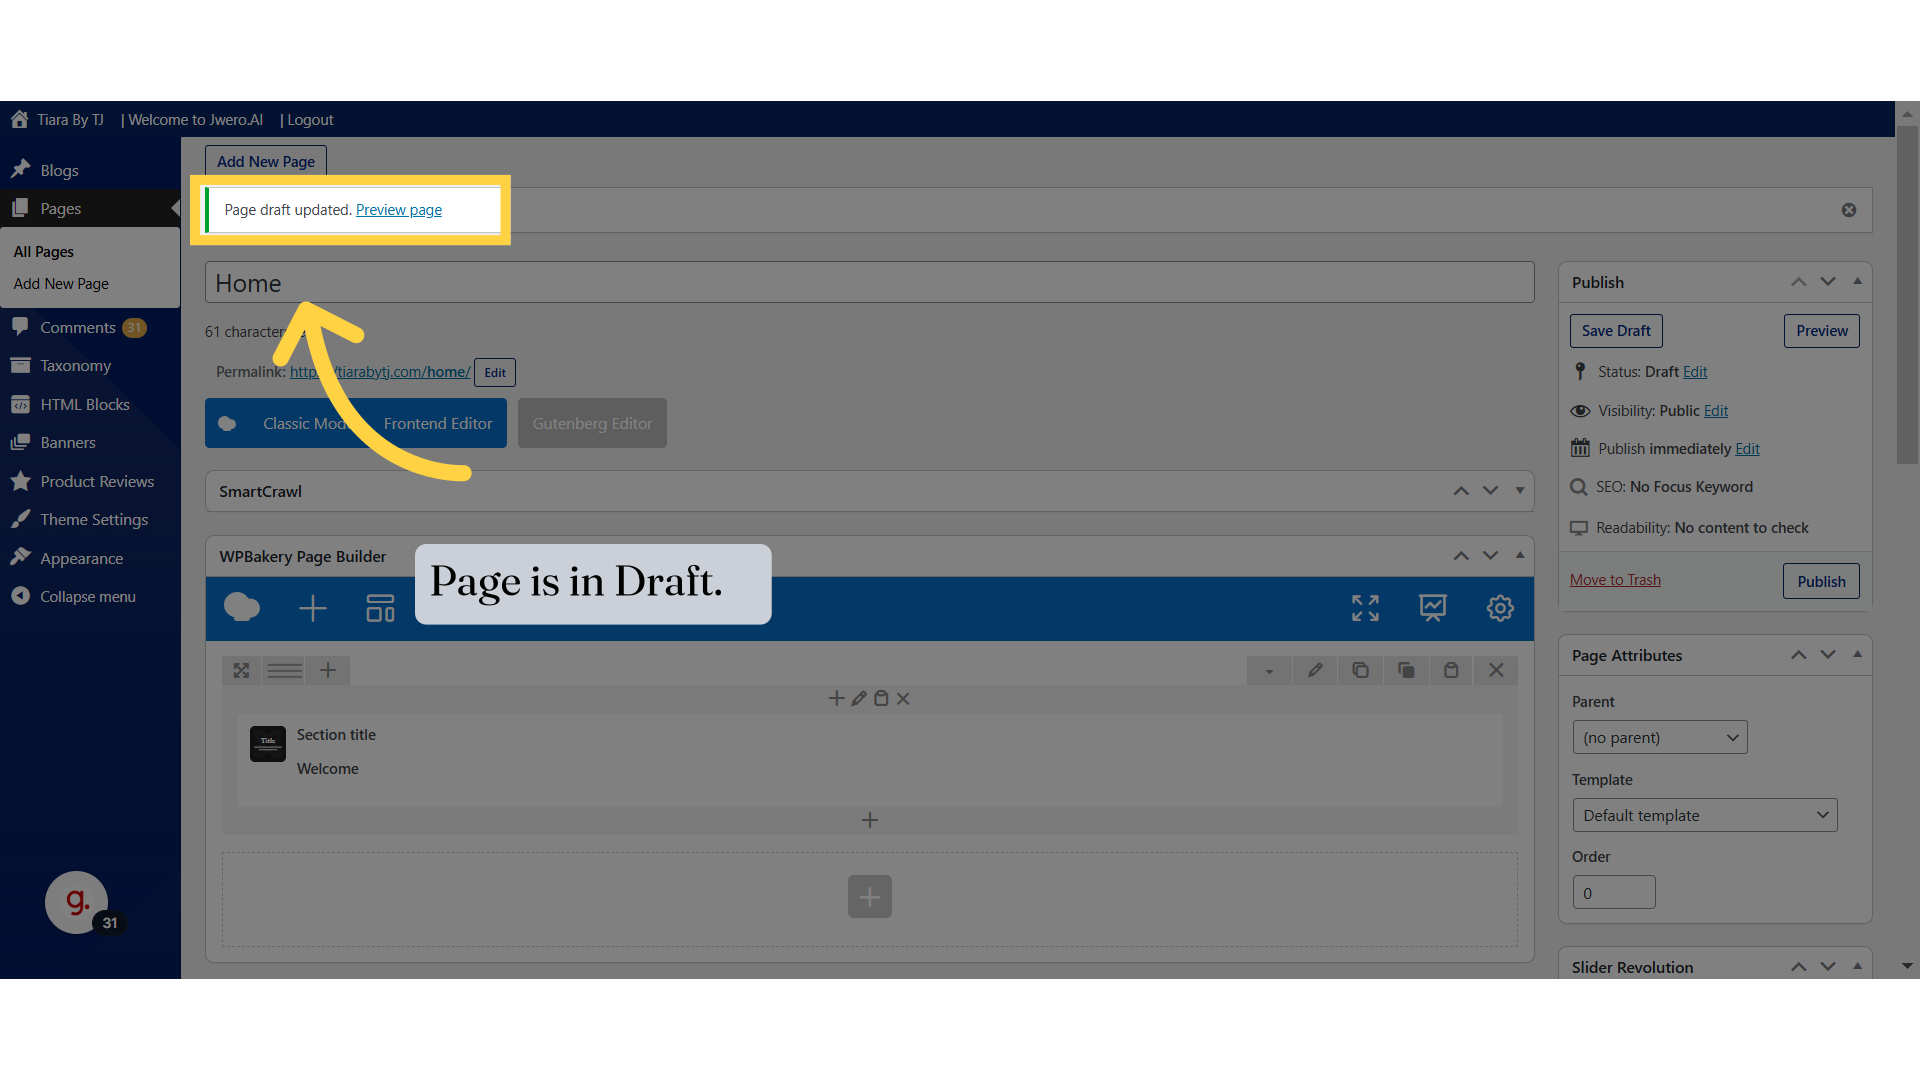
12. Page is in Draft.
Save your page as a draft before making the final edits.
When you view the page as a draft, the link will include 'preview=true,' indicating that the page is not yet live.
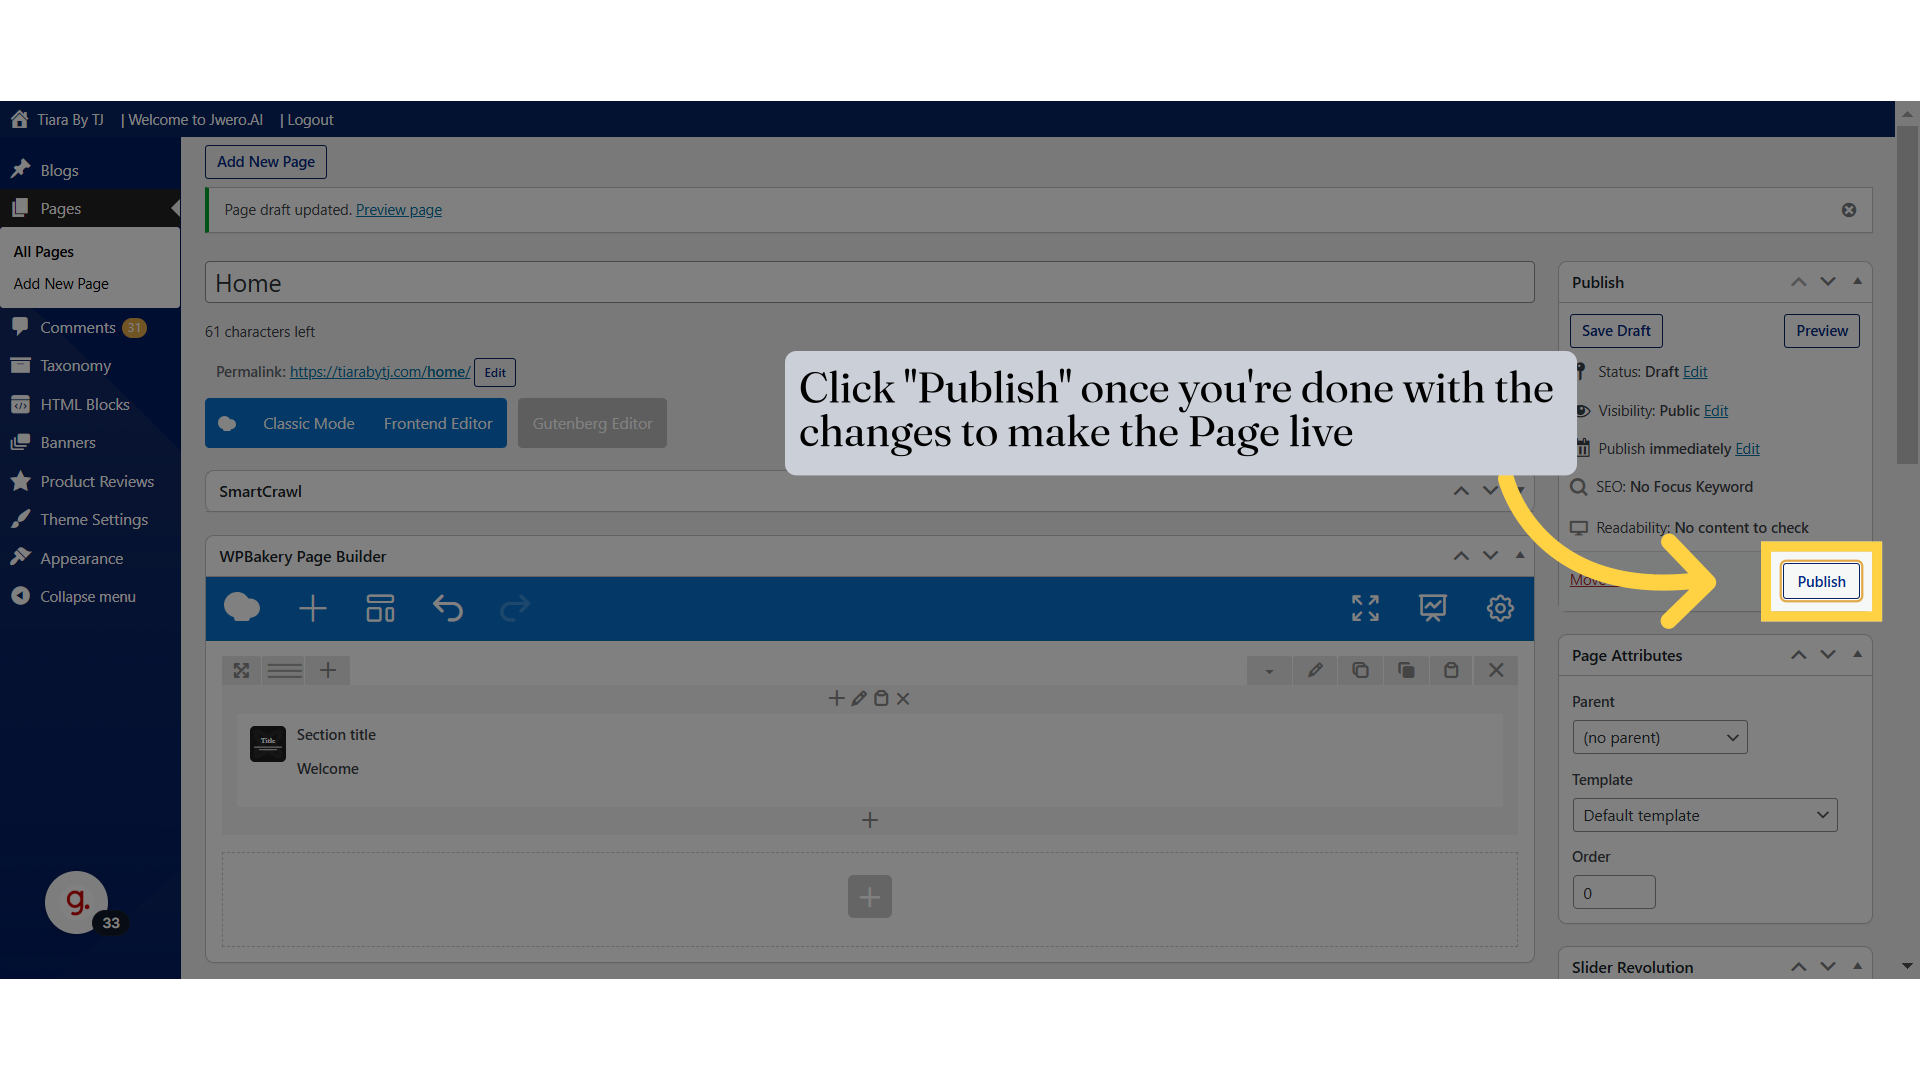
13. Click "Publish" once you're done with the changes to make the Page live
After completing the final edits, click 'Publish' to make your page live on the website.
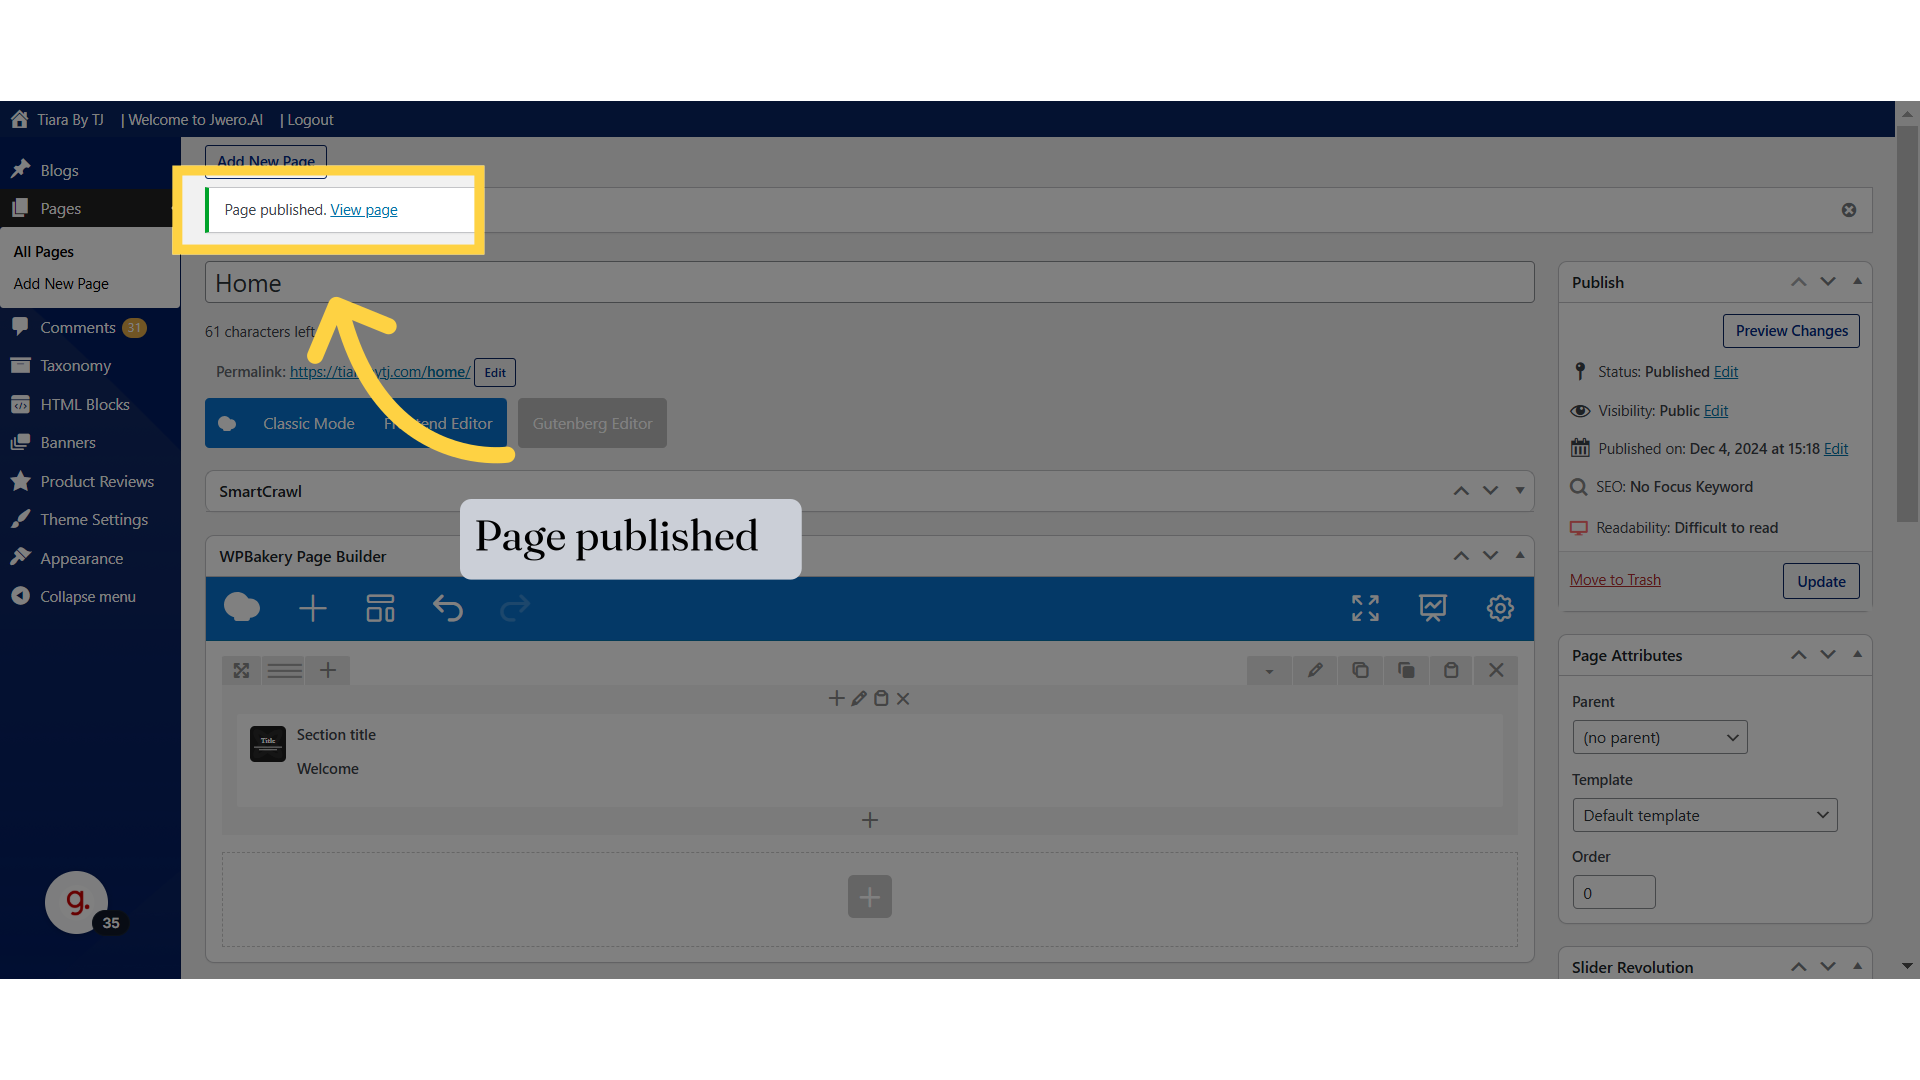
14. Page published
As you can see, the page is now live.
Once the page is live, you will see the page title in the URL.
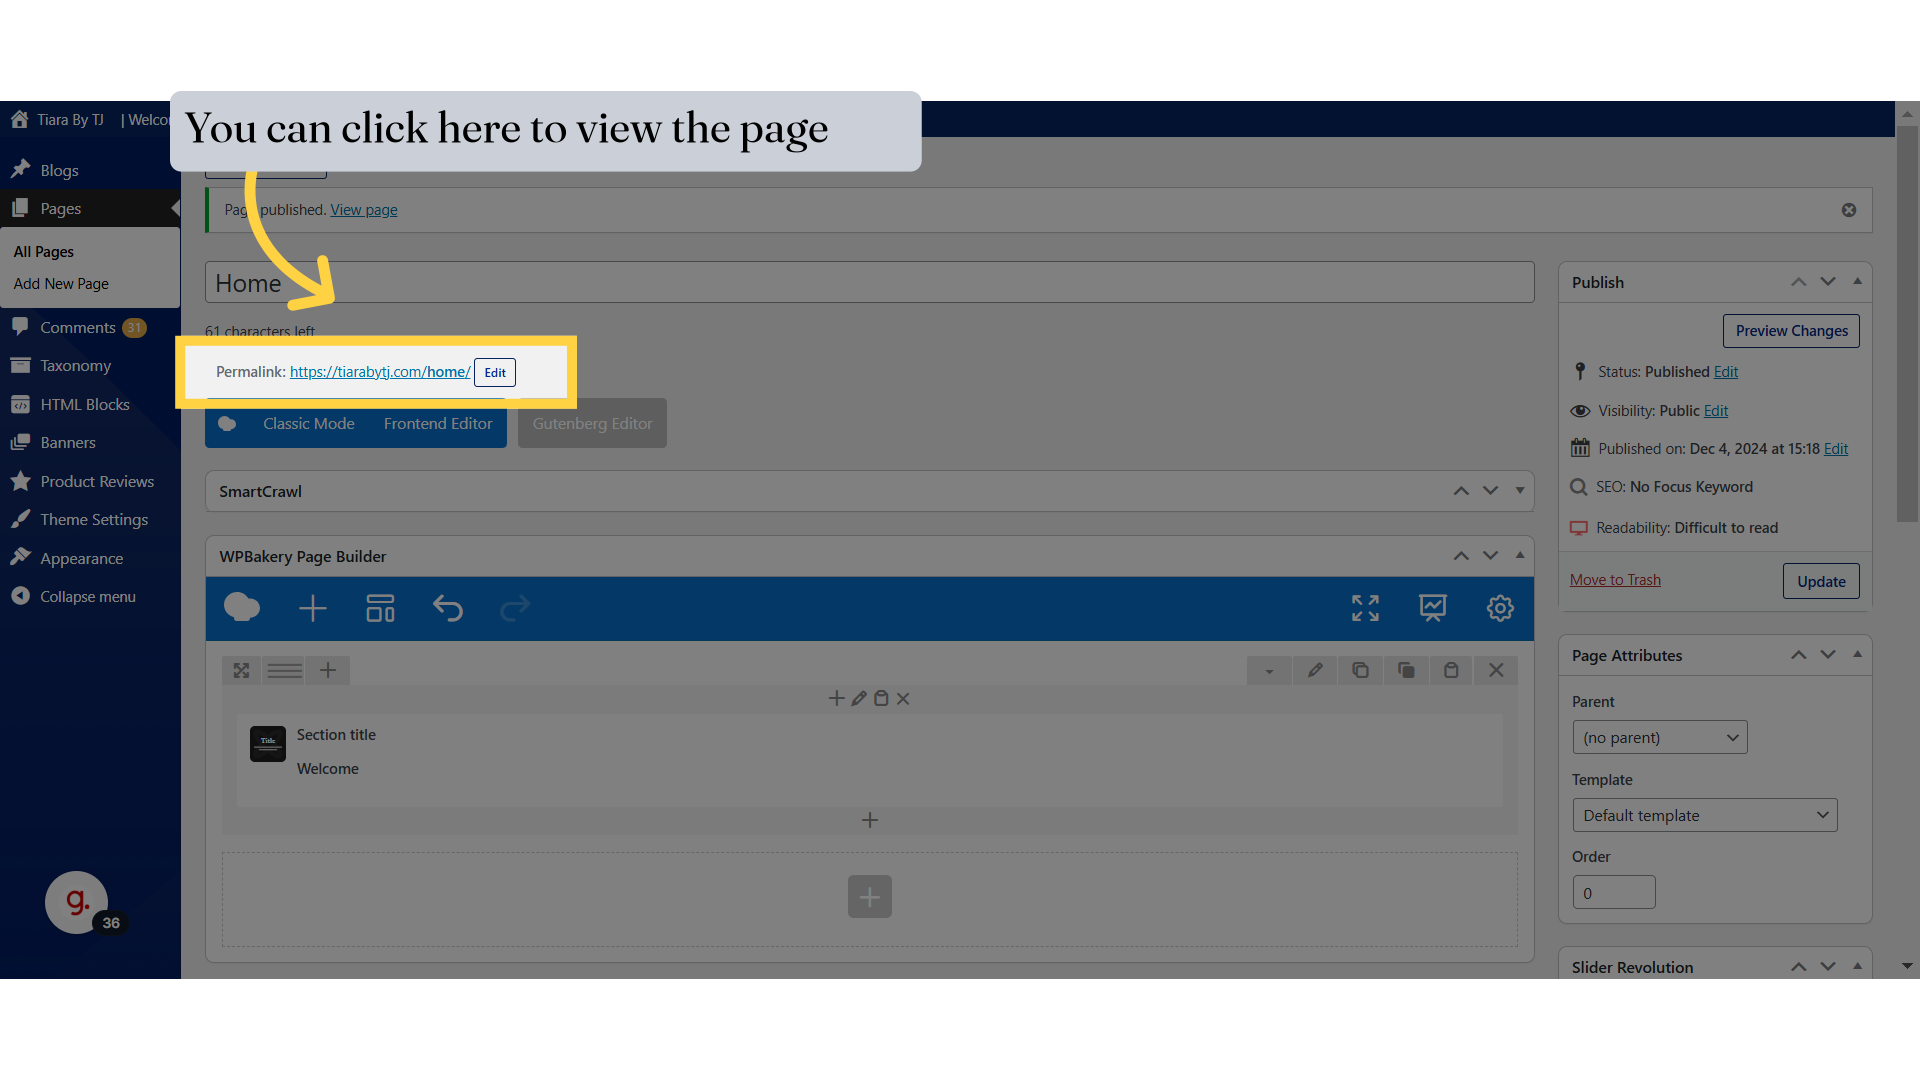
15. You can click here to view the page
View the published page.
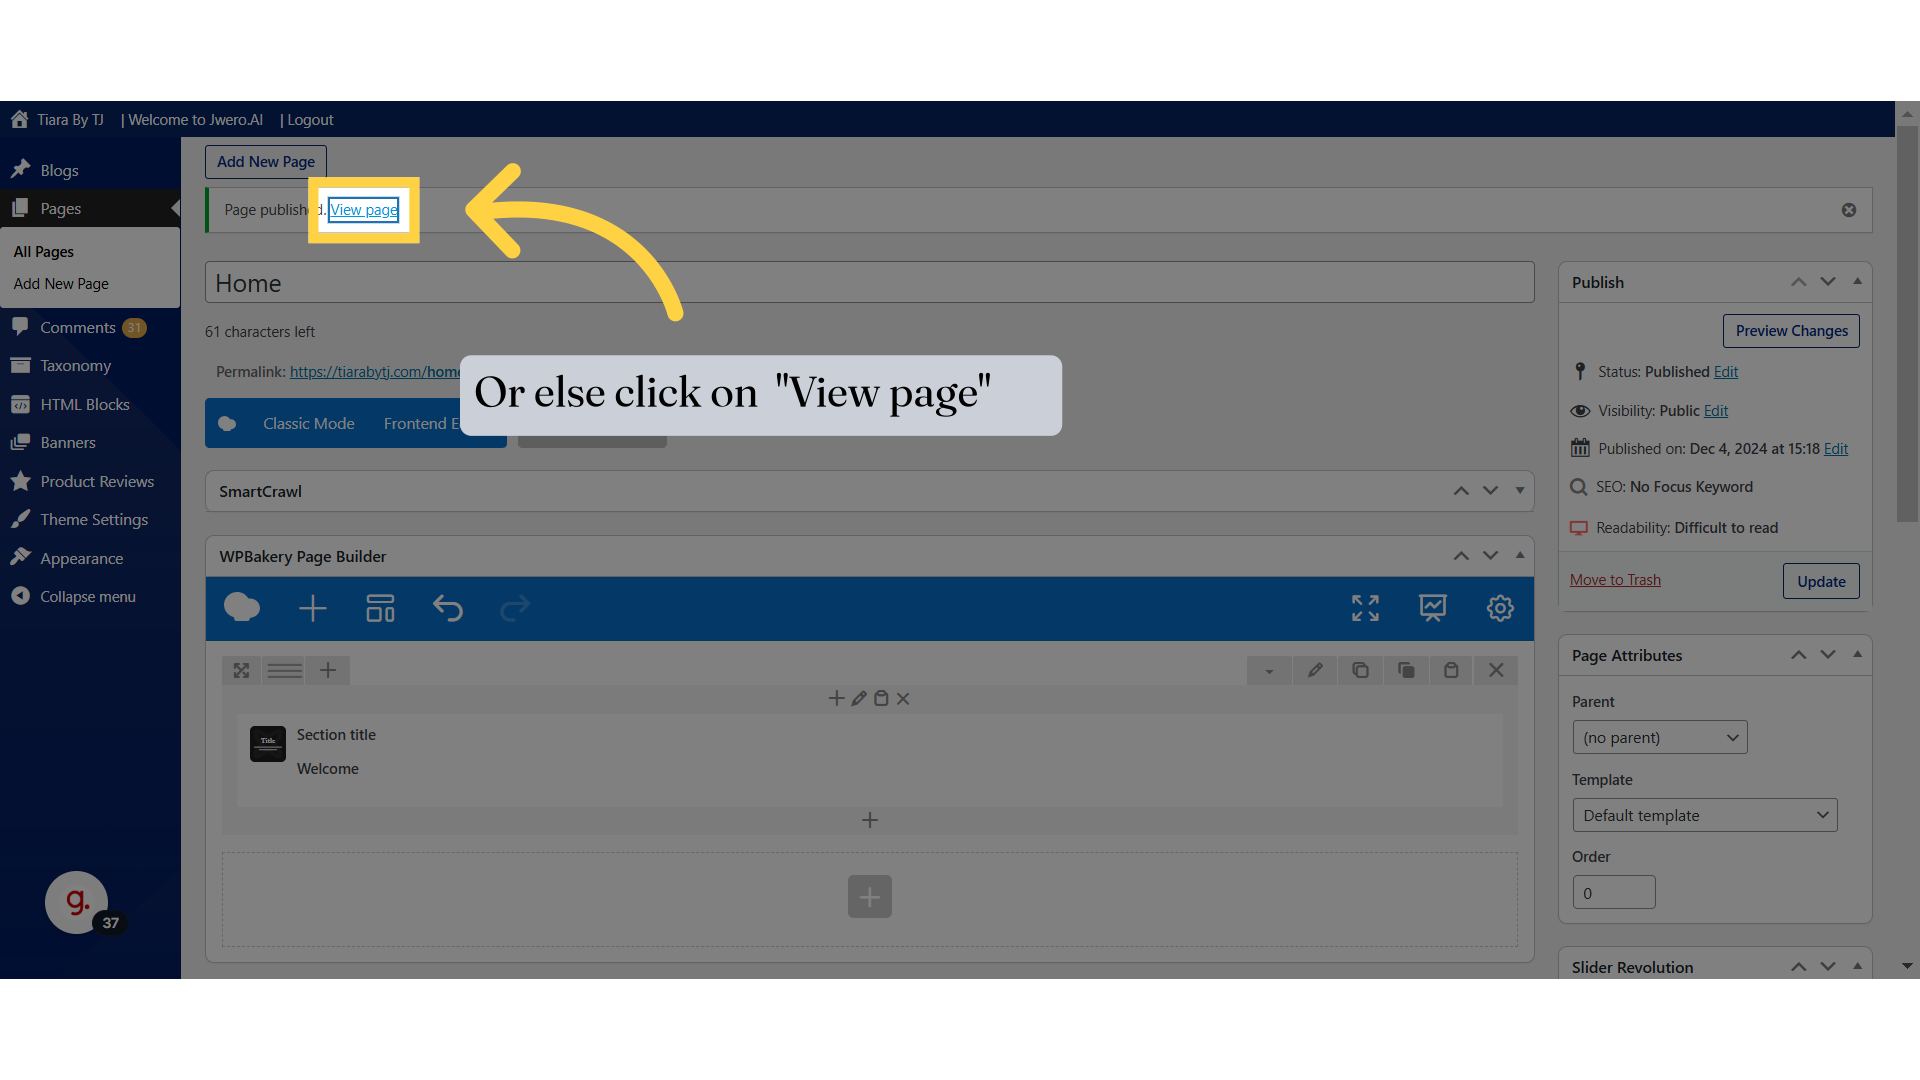
16. Or else click on "View page"
You can also view the page by clicking here.
17. Page is live
The page has been successfully published and live.

This guide covered the process of adding a new page, configuring layout, adding elements, saving drafts, and publishing.