How To Create Navigation Menus
Go to app.jwero.ai
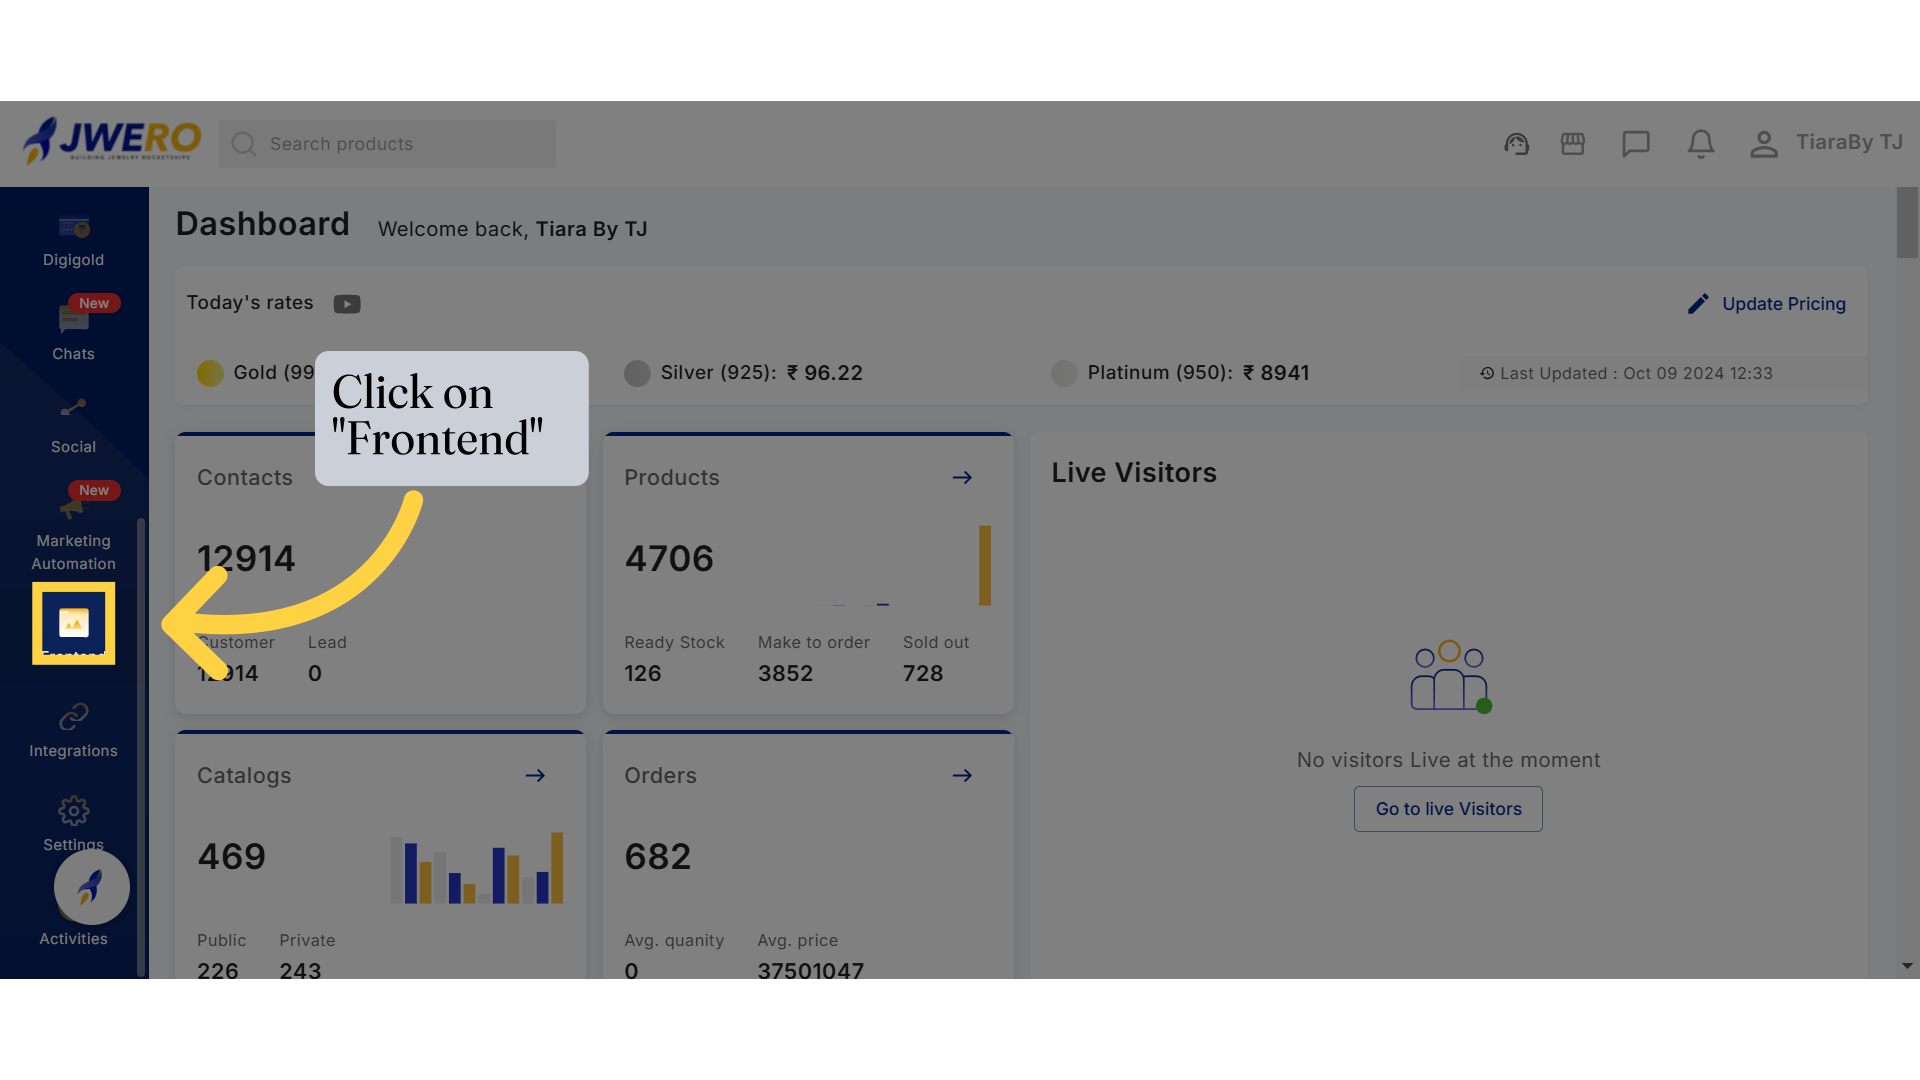
1. Click on "Frontend"
Access the backend of the website to do the required changes.
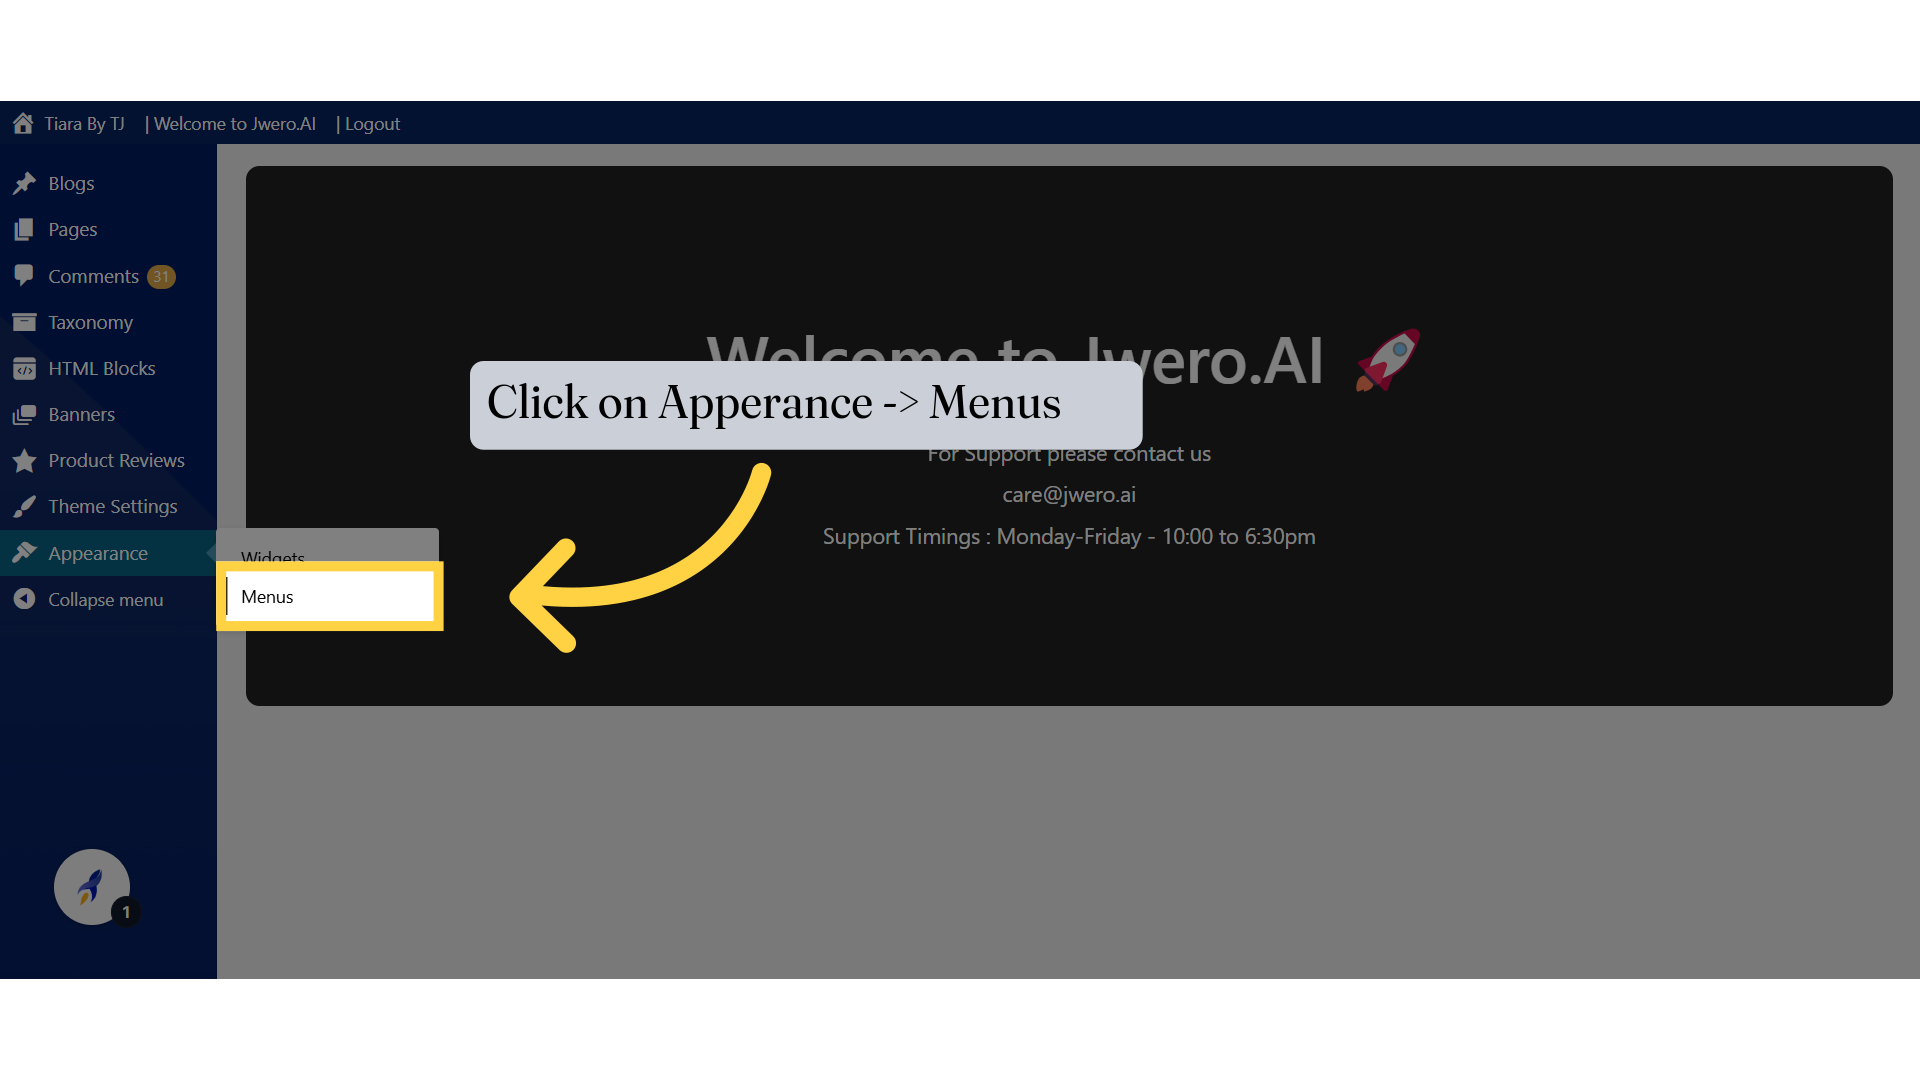
2. Click on Apperance -> Menus
Locate and select the "Menus" option
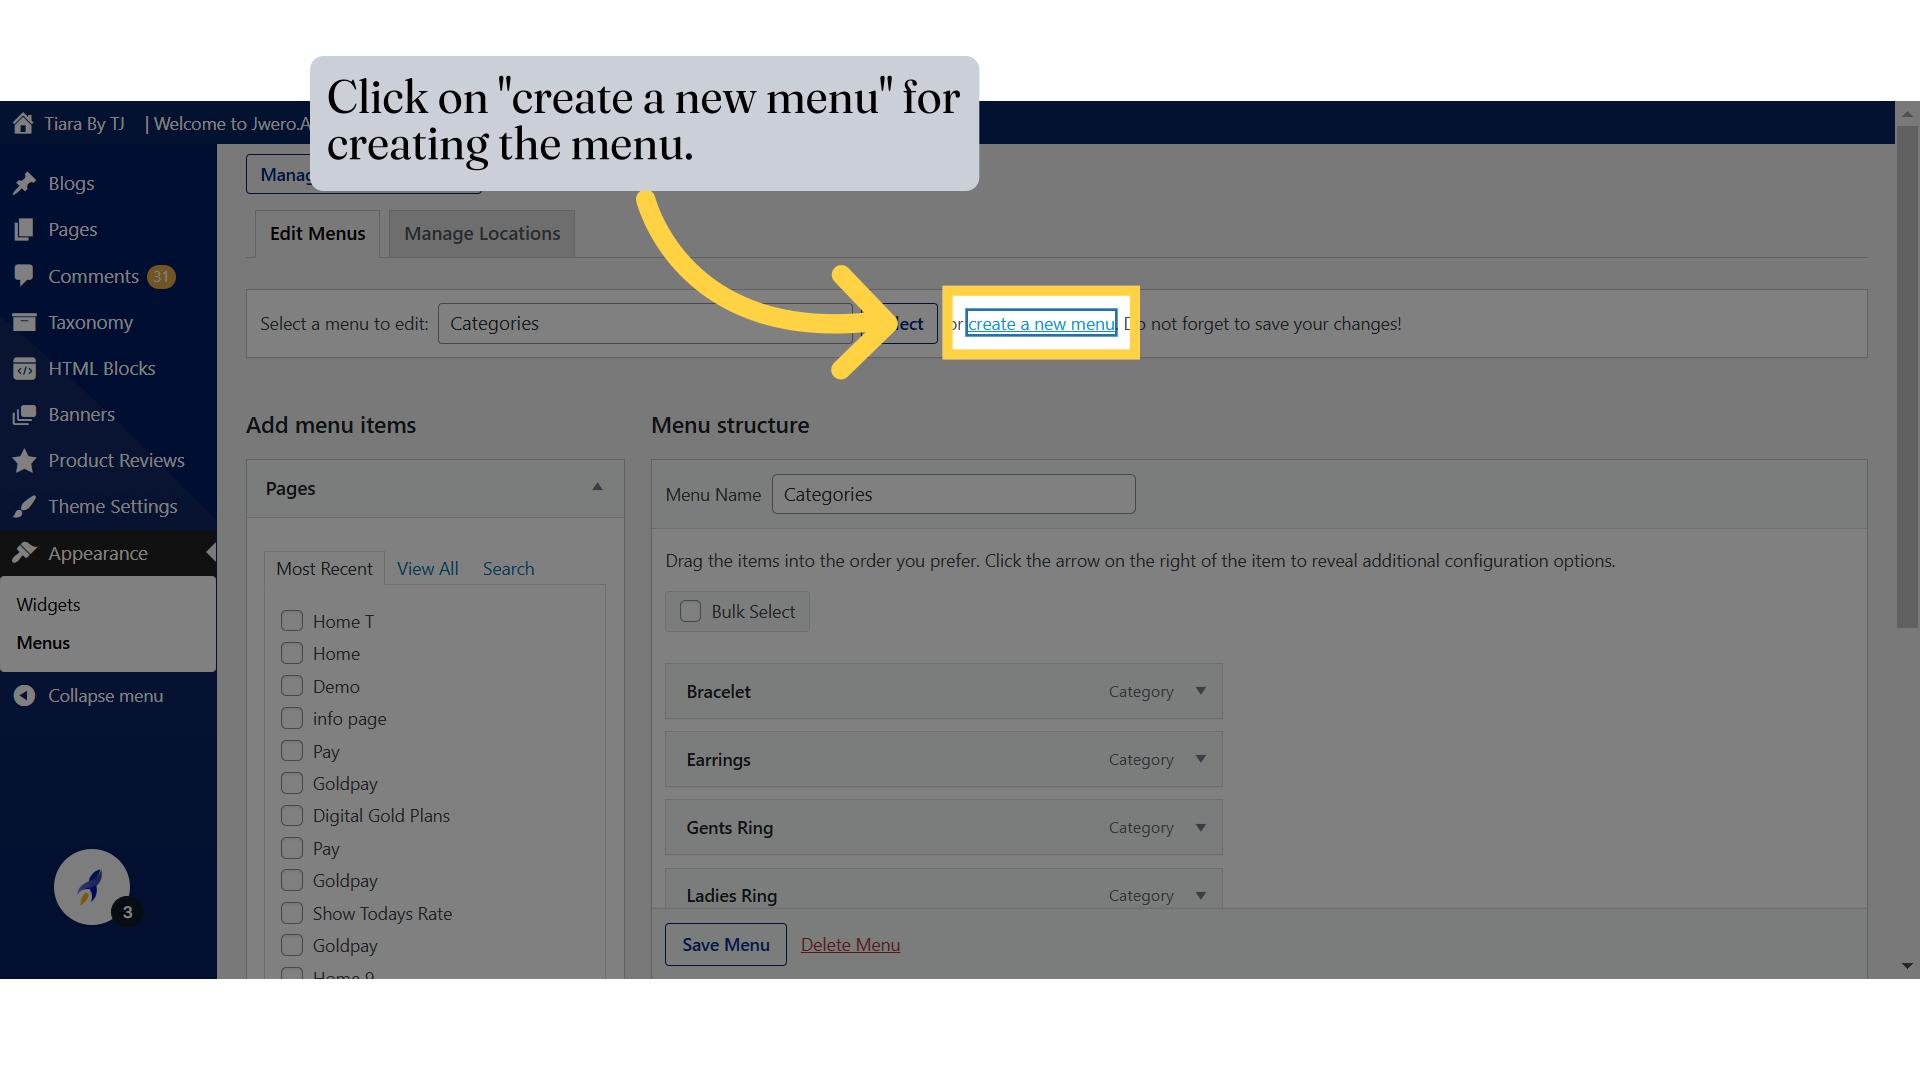
3. Click on "create a new menu" for creating the menu.
Initiate the creation of a new menu.
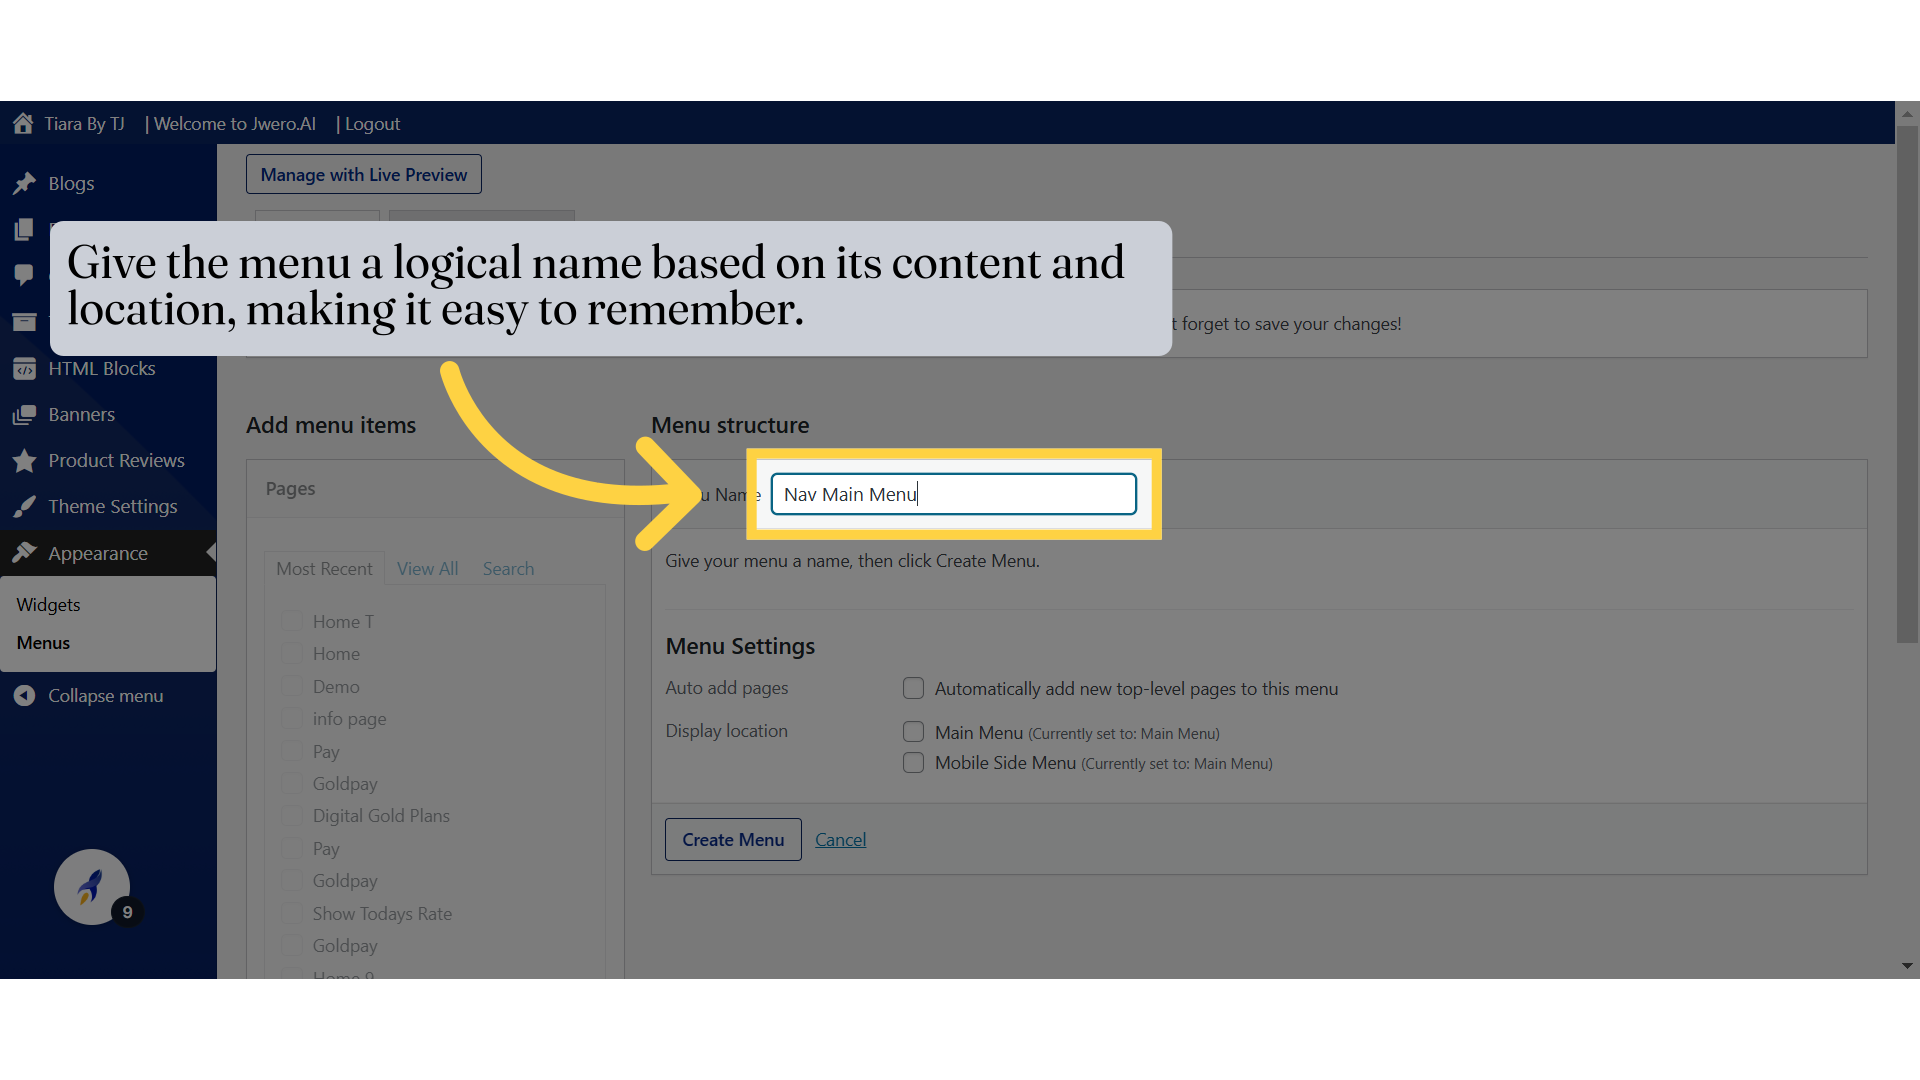
4. Enter the Menu Name
Choose some logical name for the menu which will help you to remember.
5. 1) Auto Add Pages: When checked, any new top-level pages (pages without a parent) you create will automatically be added to this menu. 2) Main Menu: Sets this menu to display as the primary navigation menu (currently active in this example). 3) Mobile Side Menu: Sets this menu to display in the mobile side navigation.

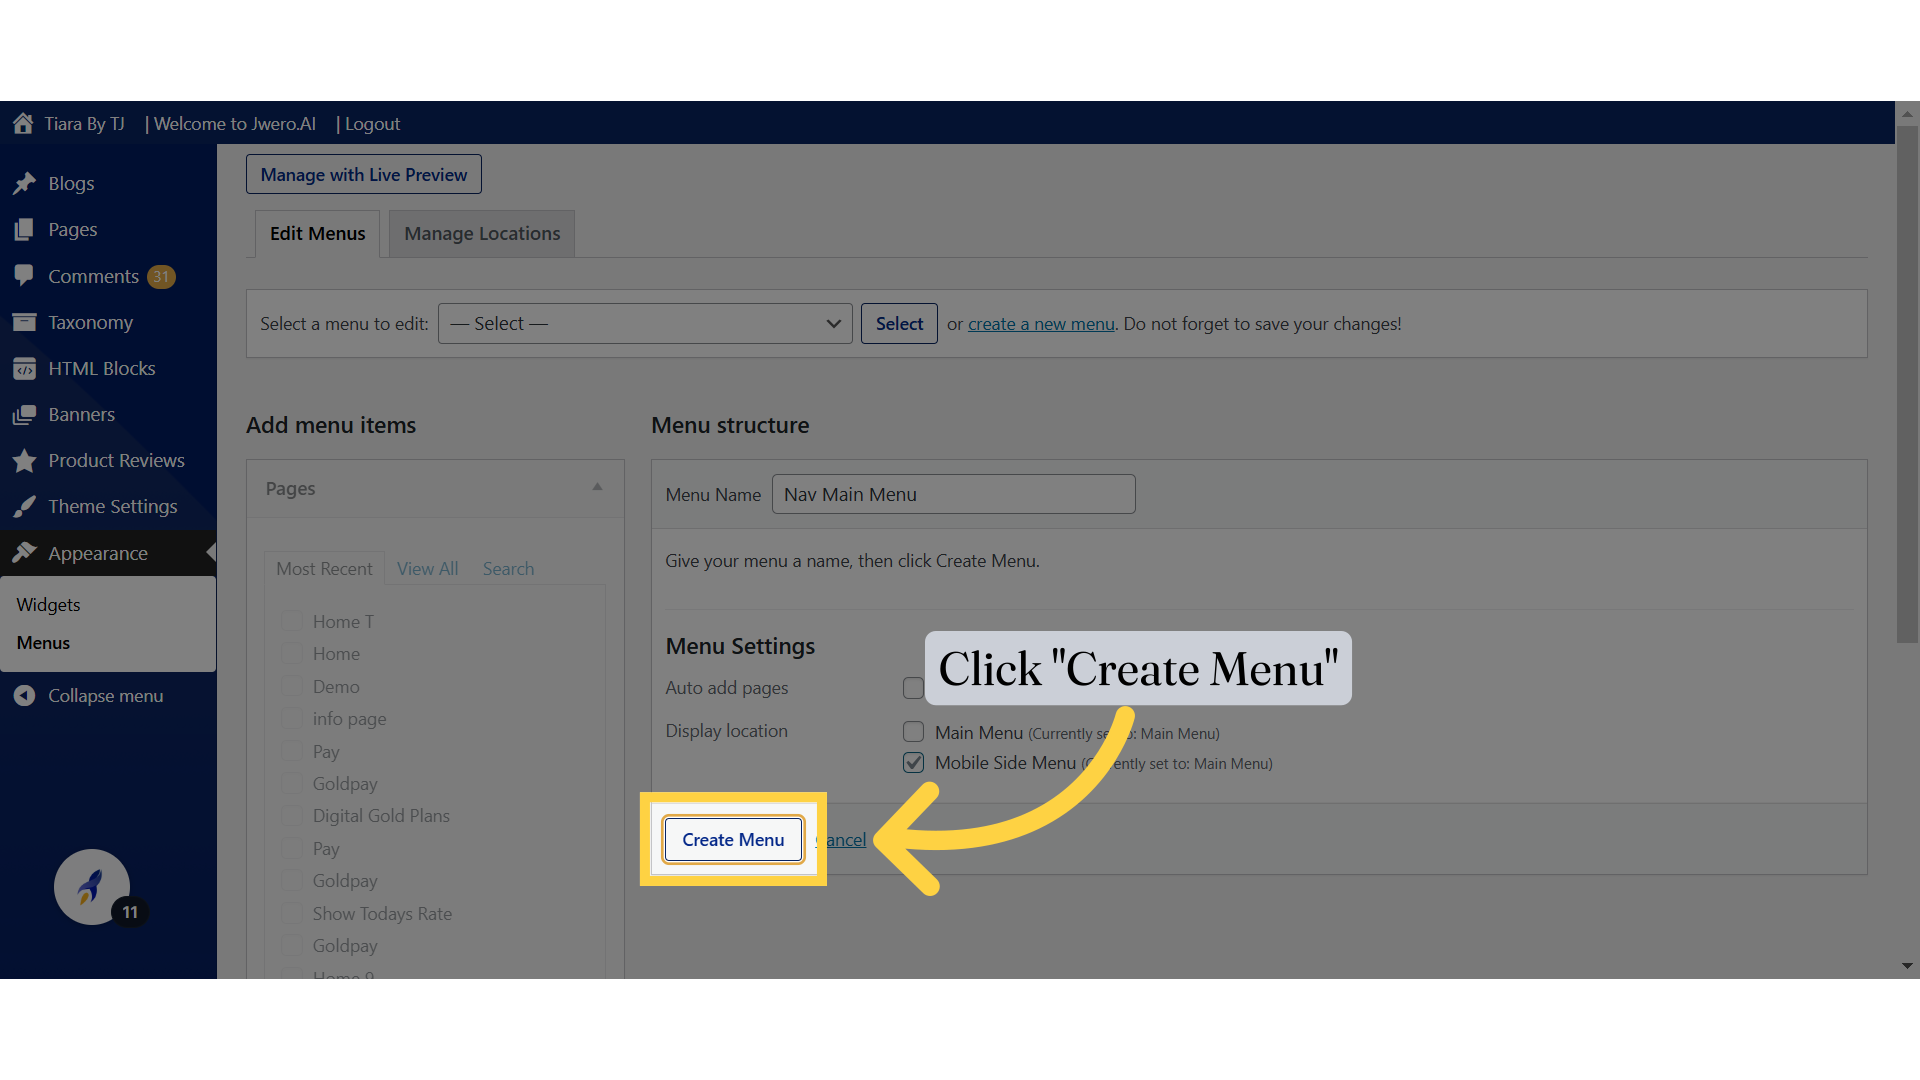
6. Click "Create Menu"
Proceed to create the menu.
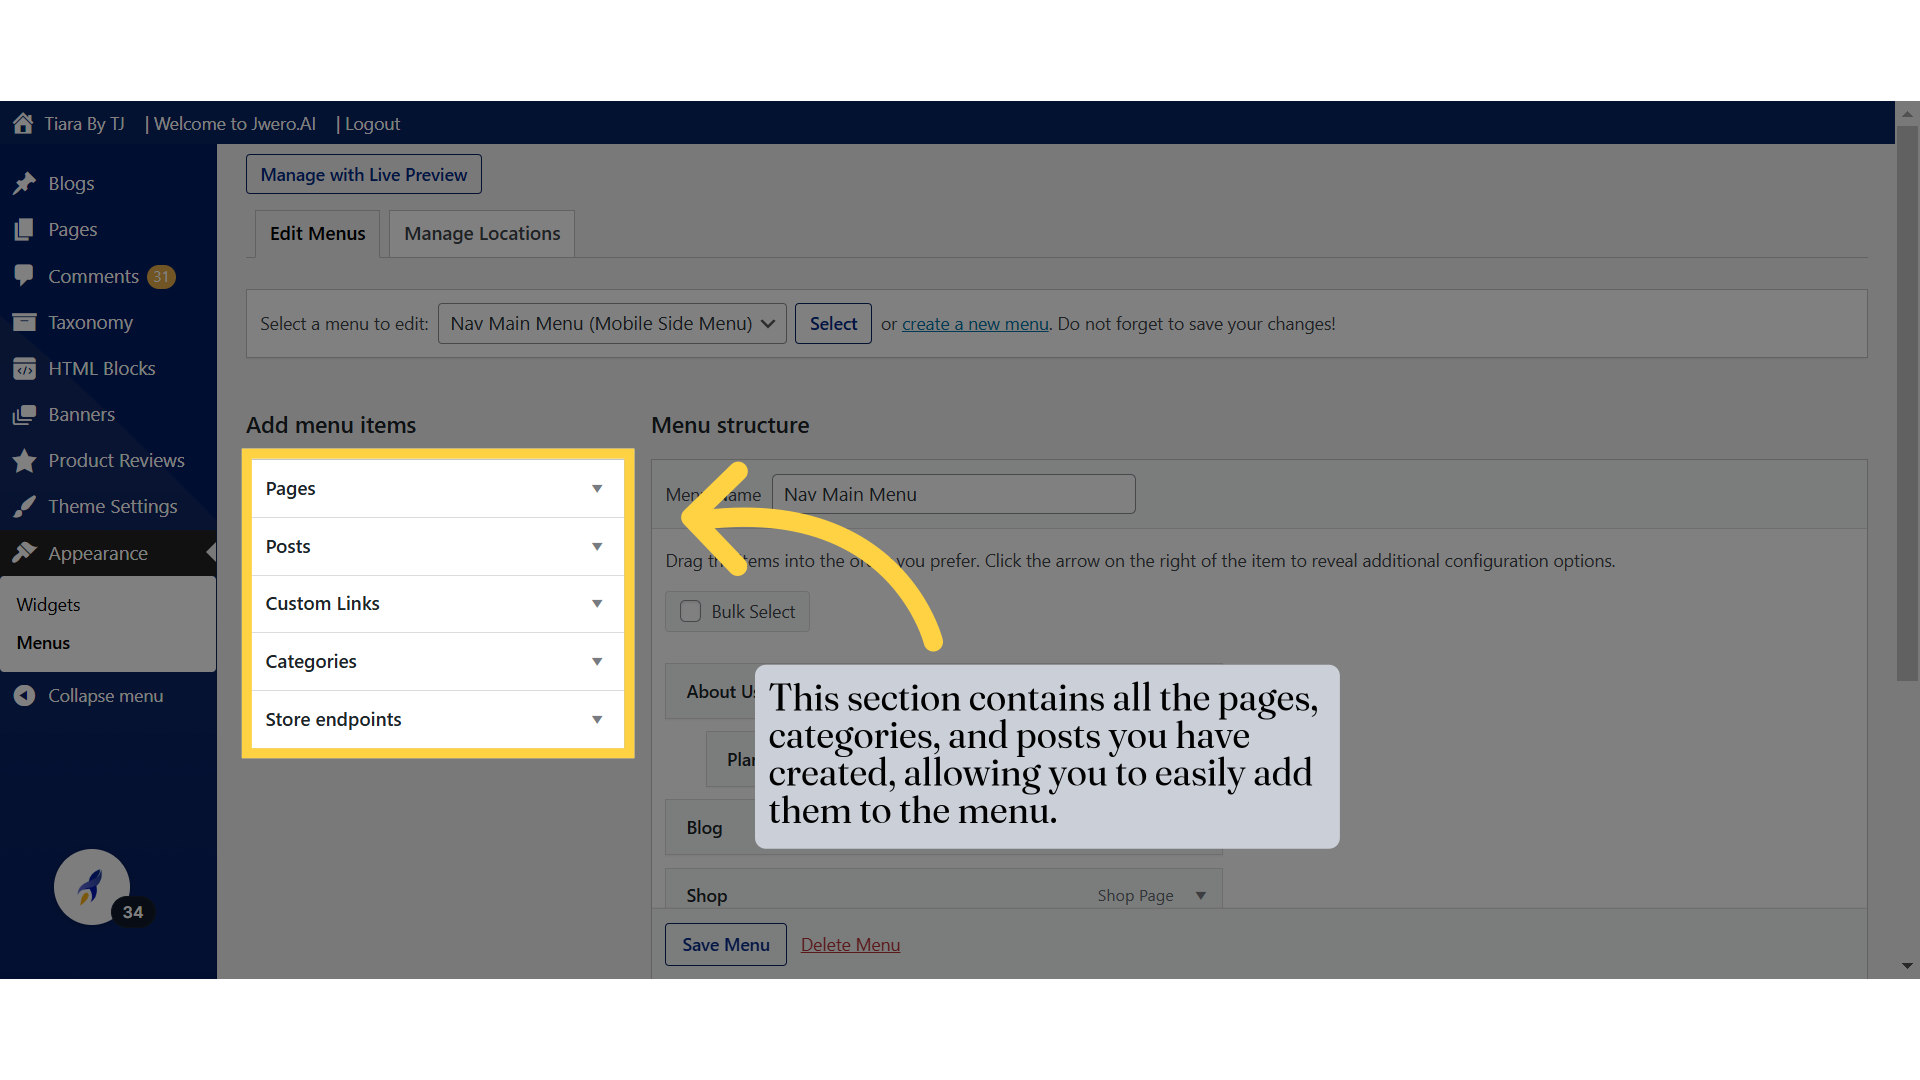
7. This section contains all the pages, categories, and posts you have created, allowing you to easily add them to the menu.
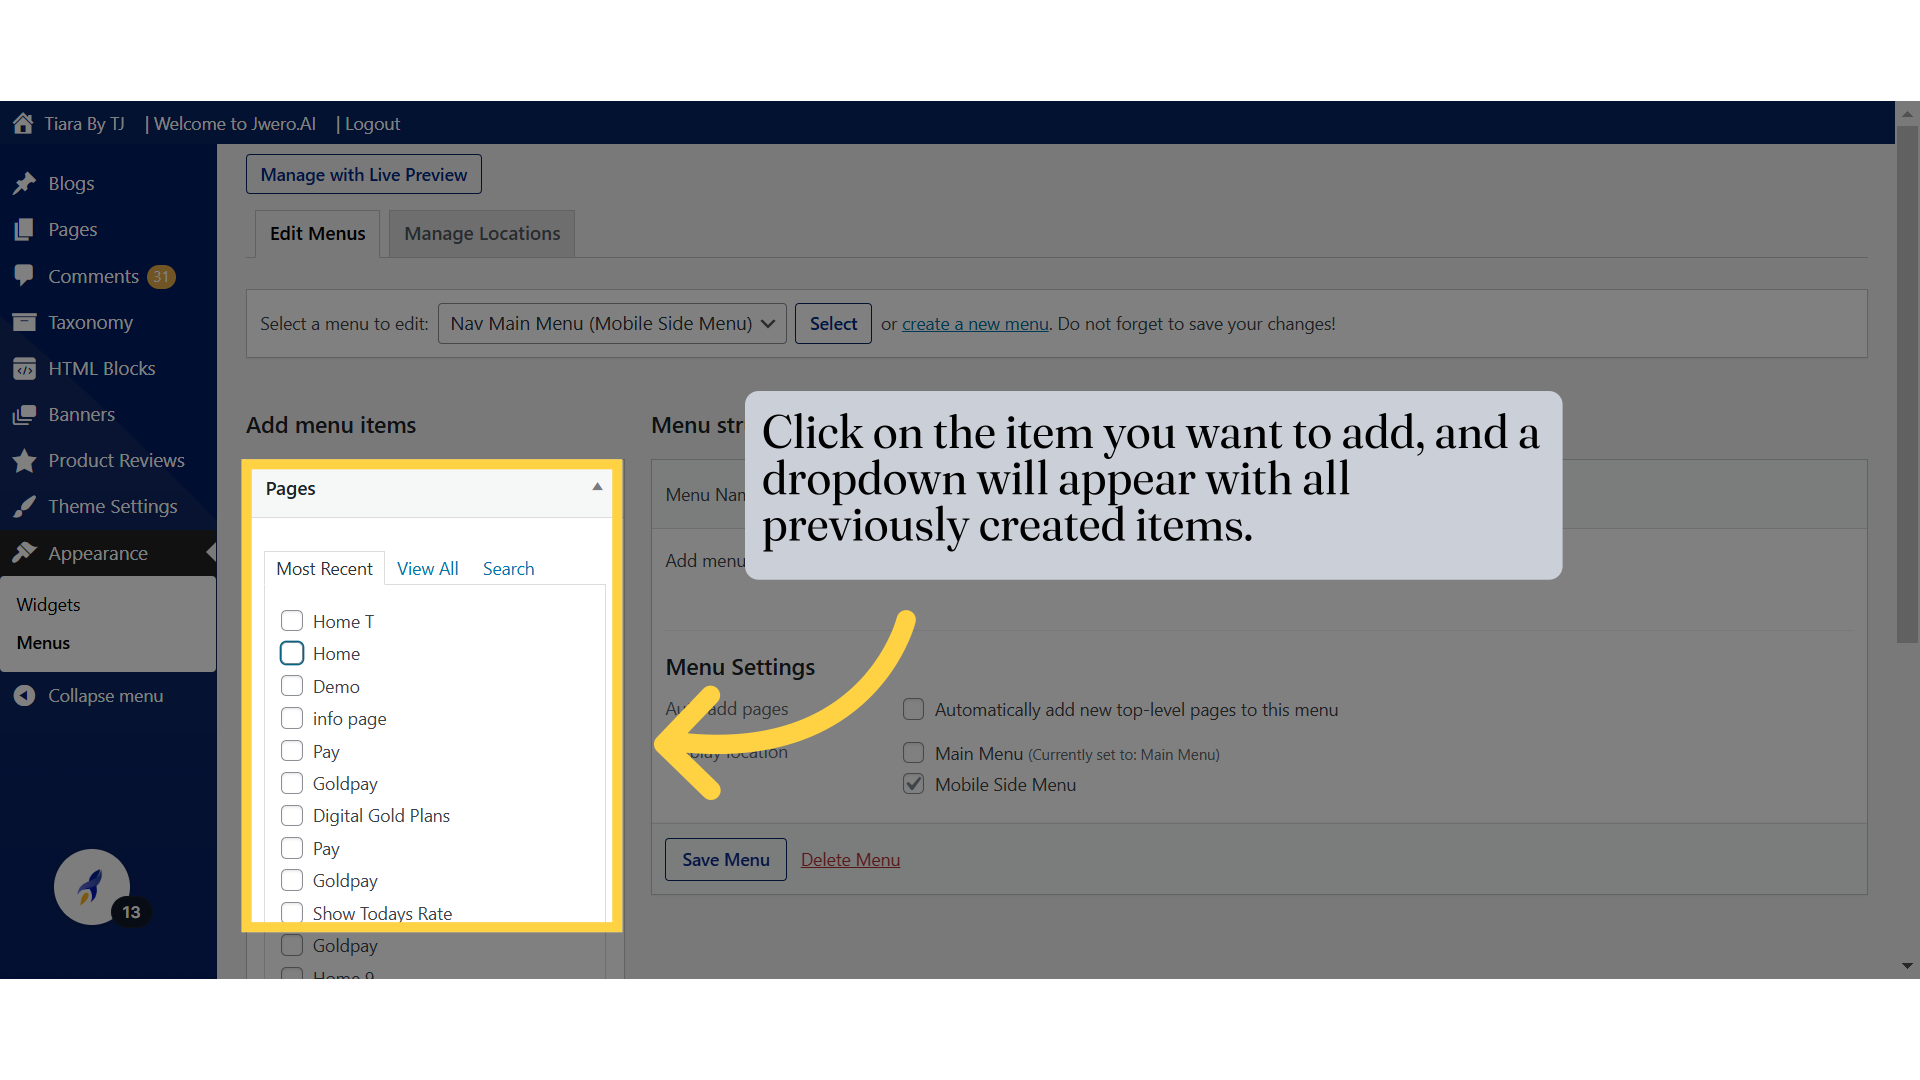
8. Click on the item you want to add, and a dropdown will appear with all previously created items.
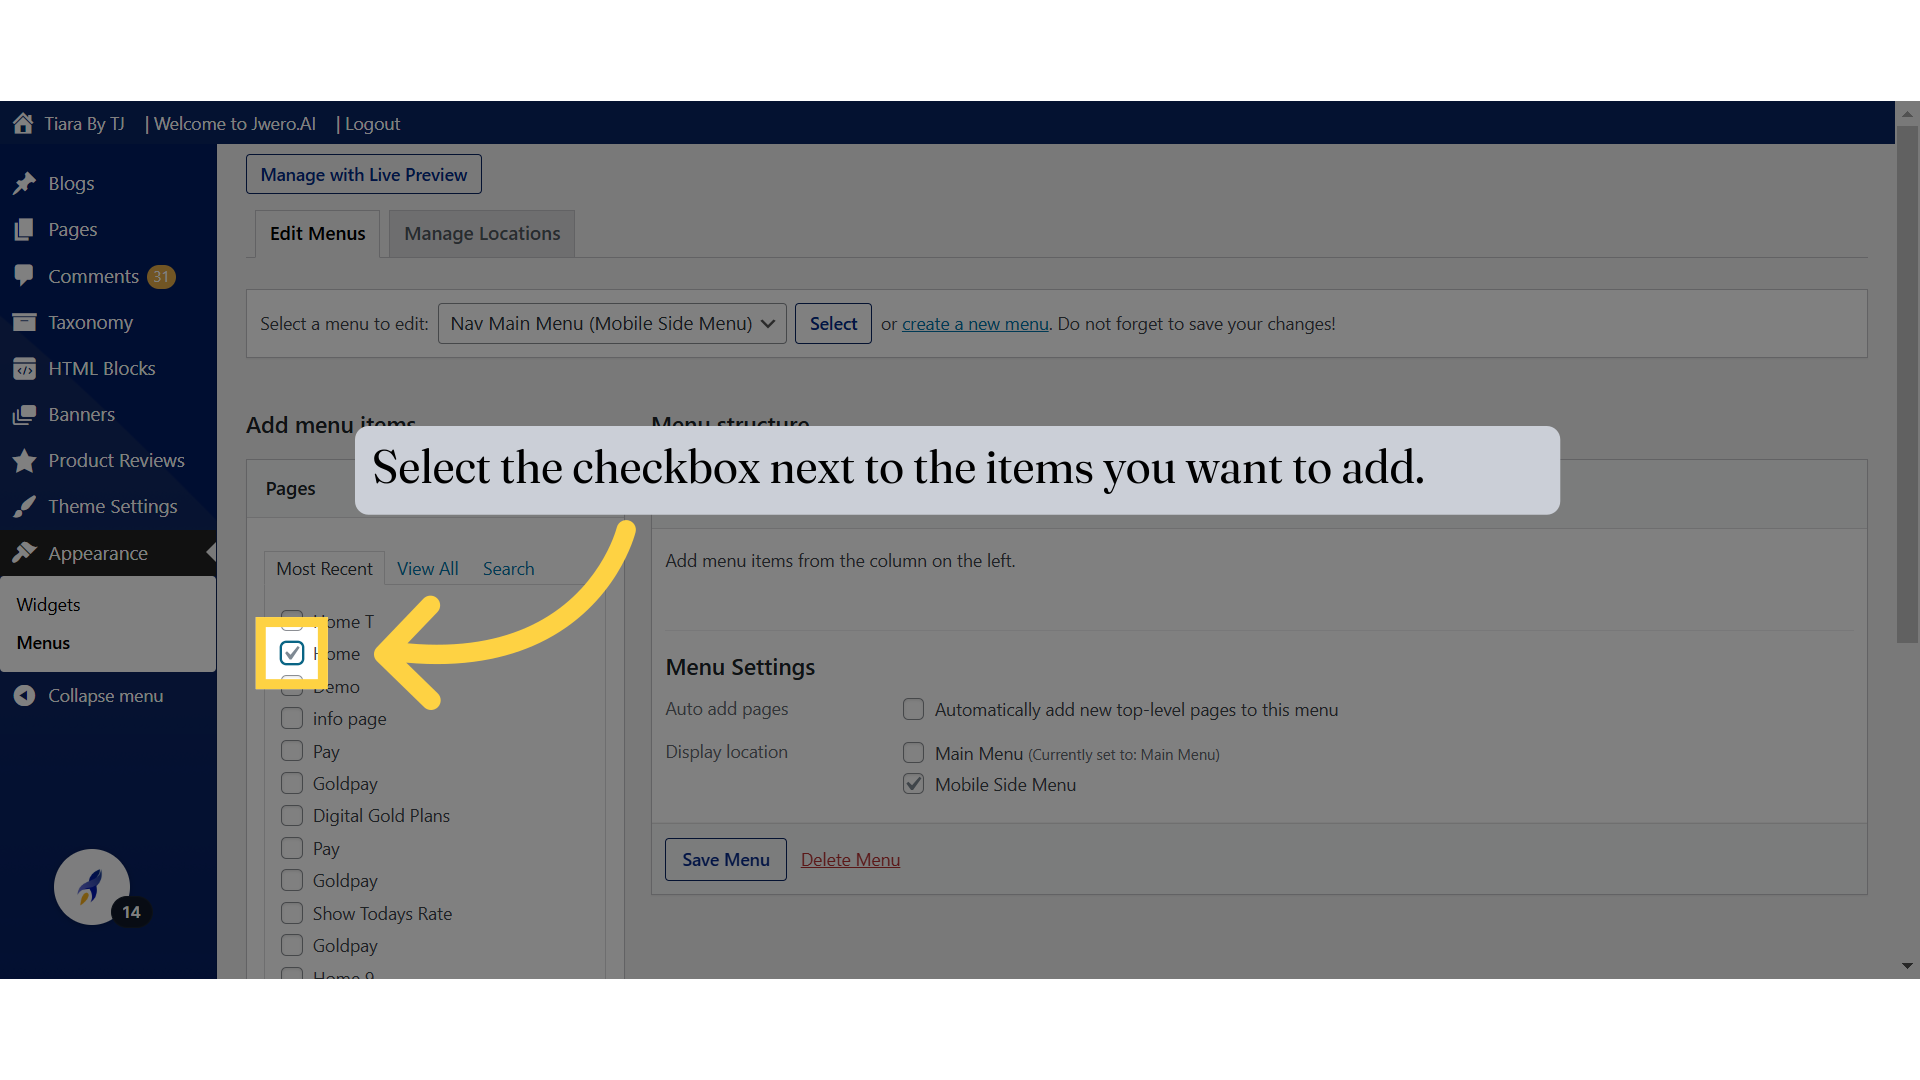
9. Select the checkbox next to the items you want to add.
Select as many items you want to add into the menu. You can click on "Select All" to add all the items of the section.
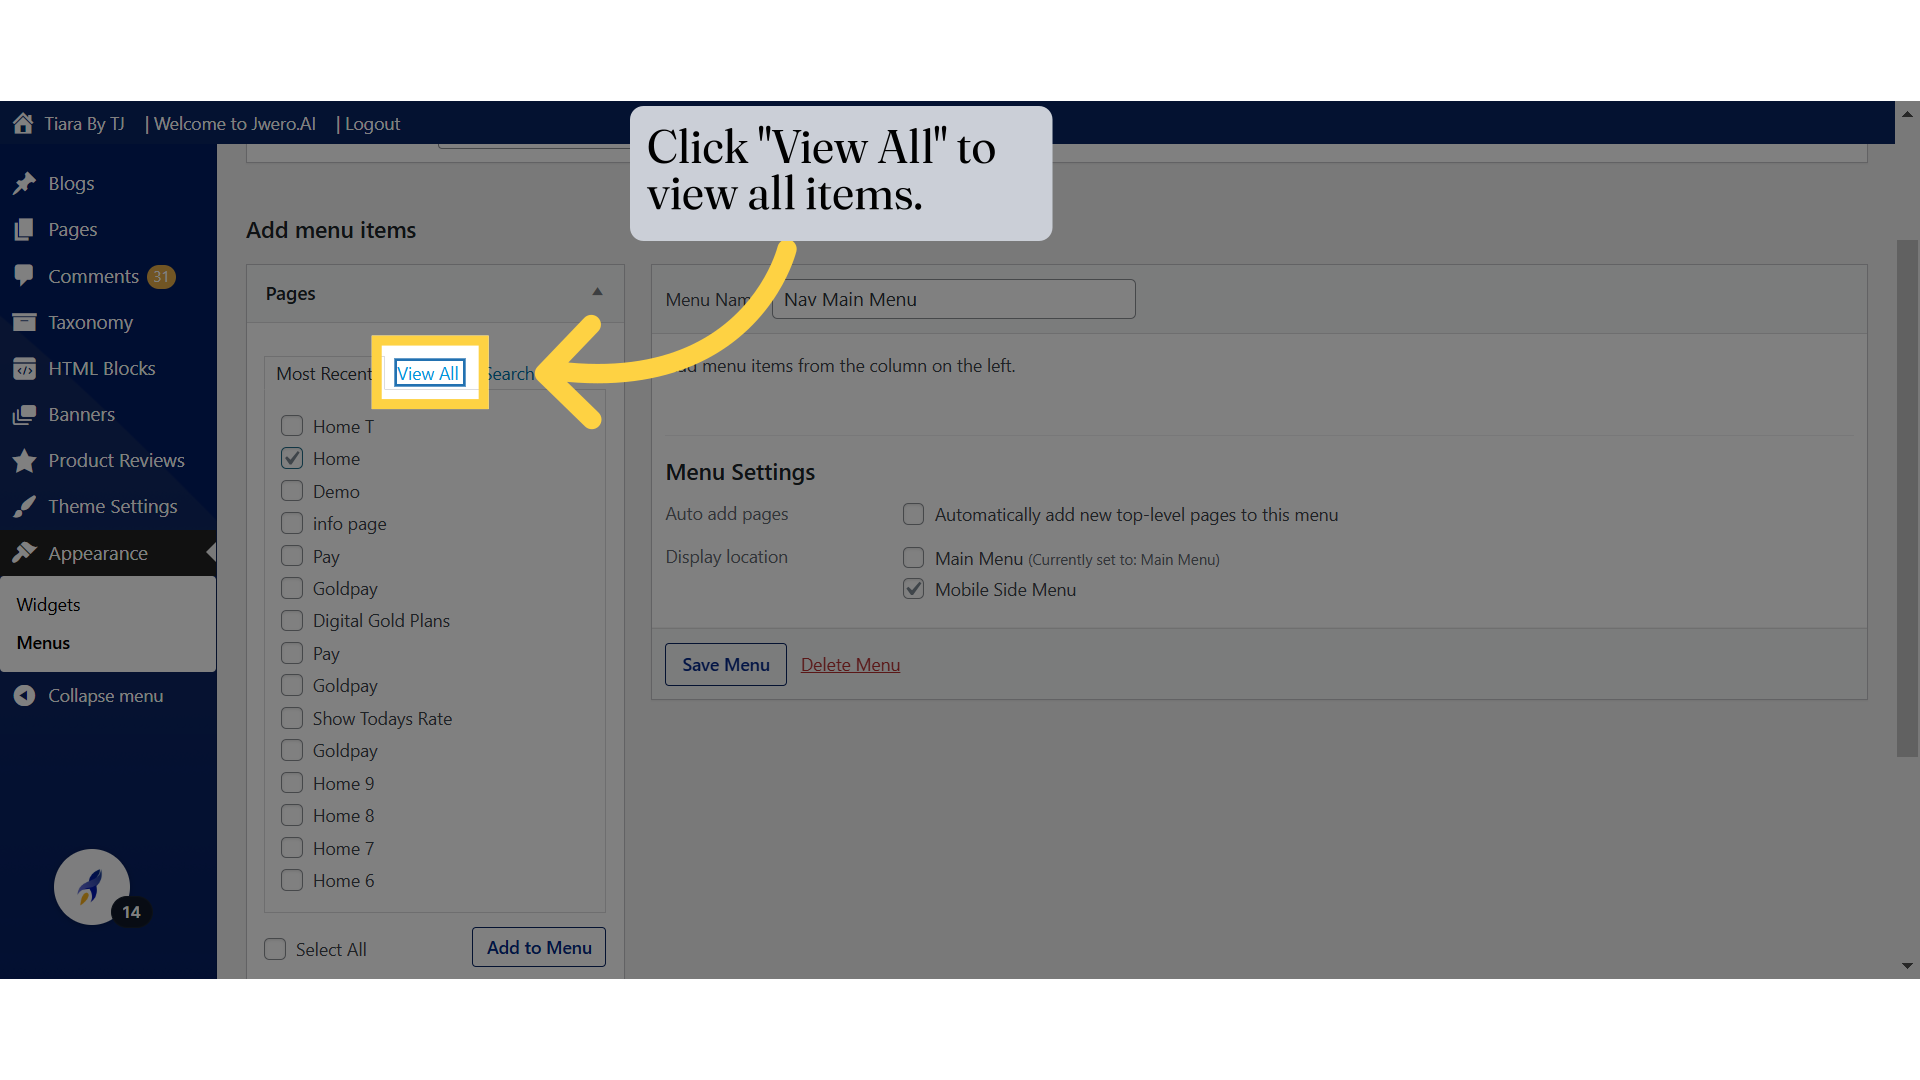
10. Click "View All" to view all items.
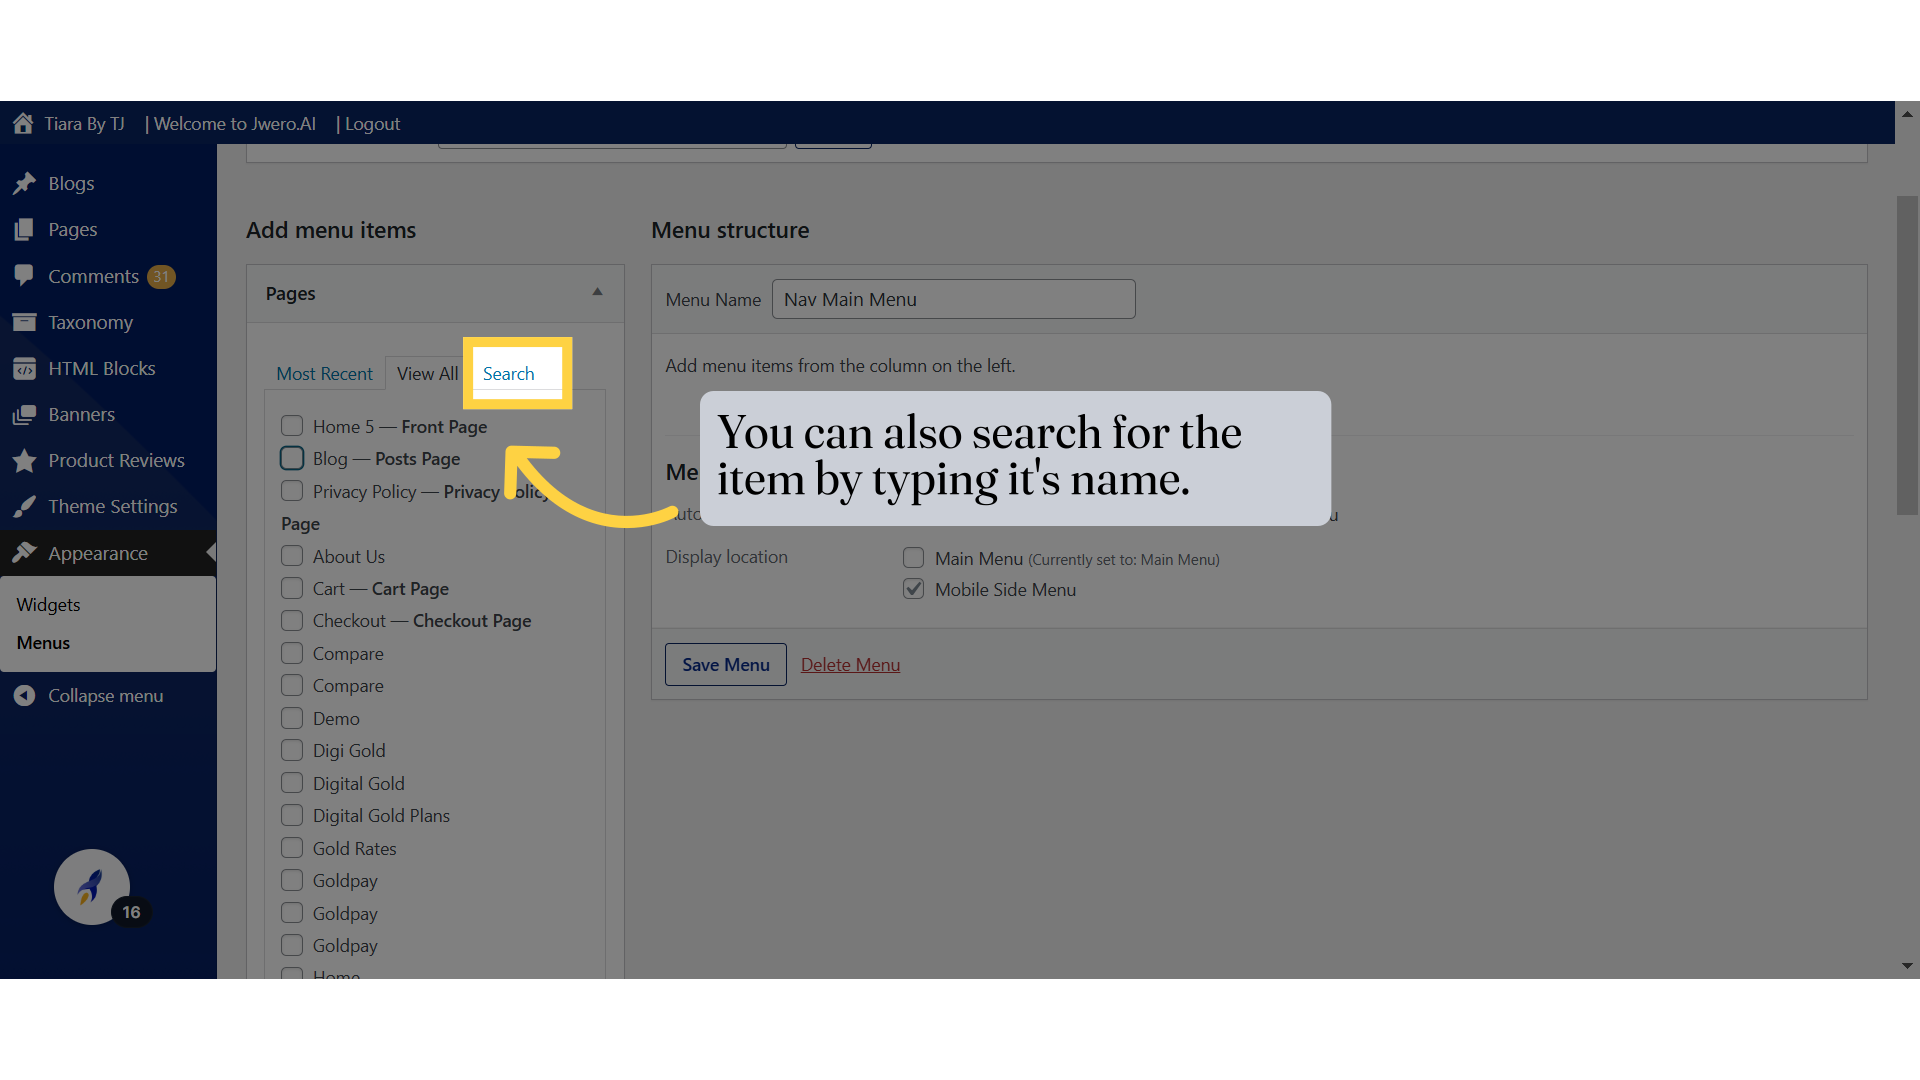
11. You can also search for the item by typing it's name.
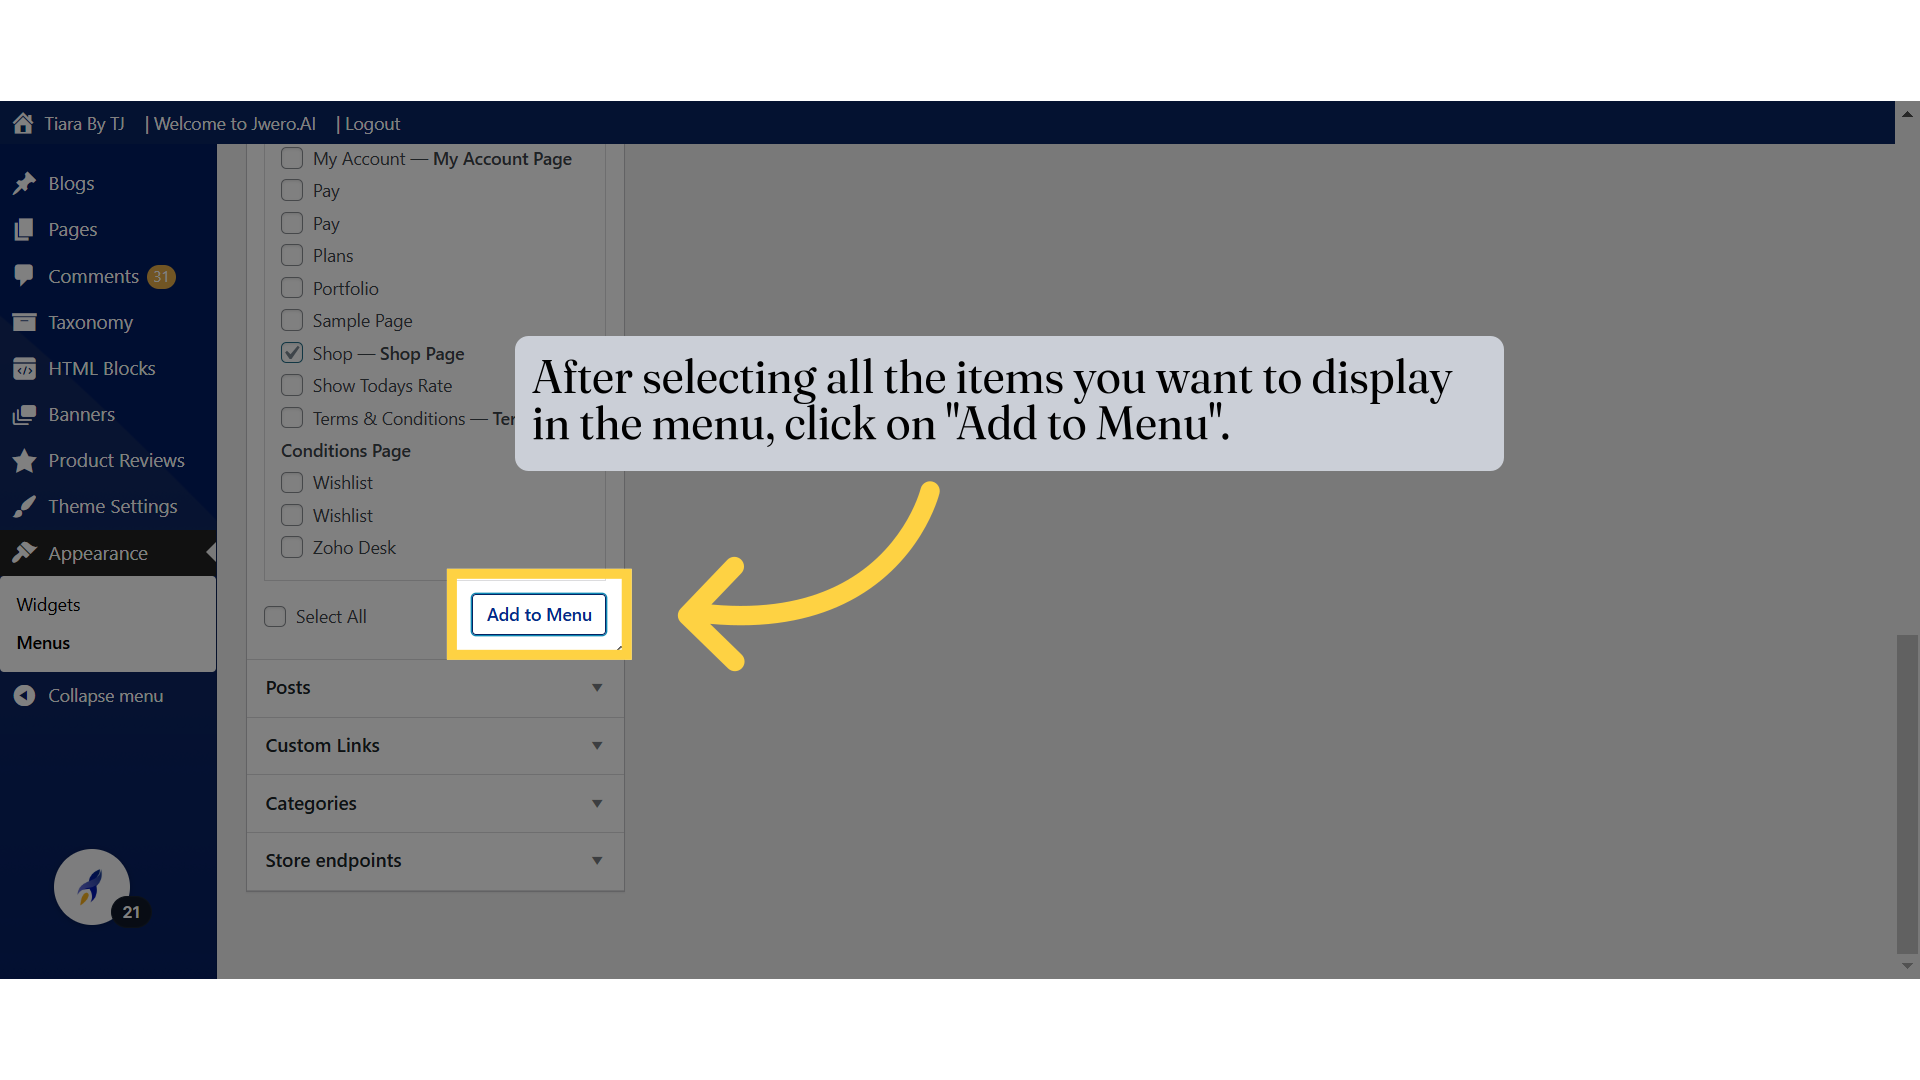
12. After selecting all the items you want to display in the menu, click on "Add to Menu".
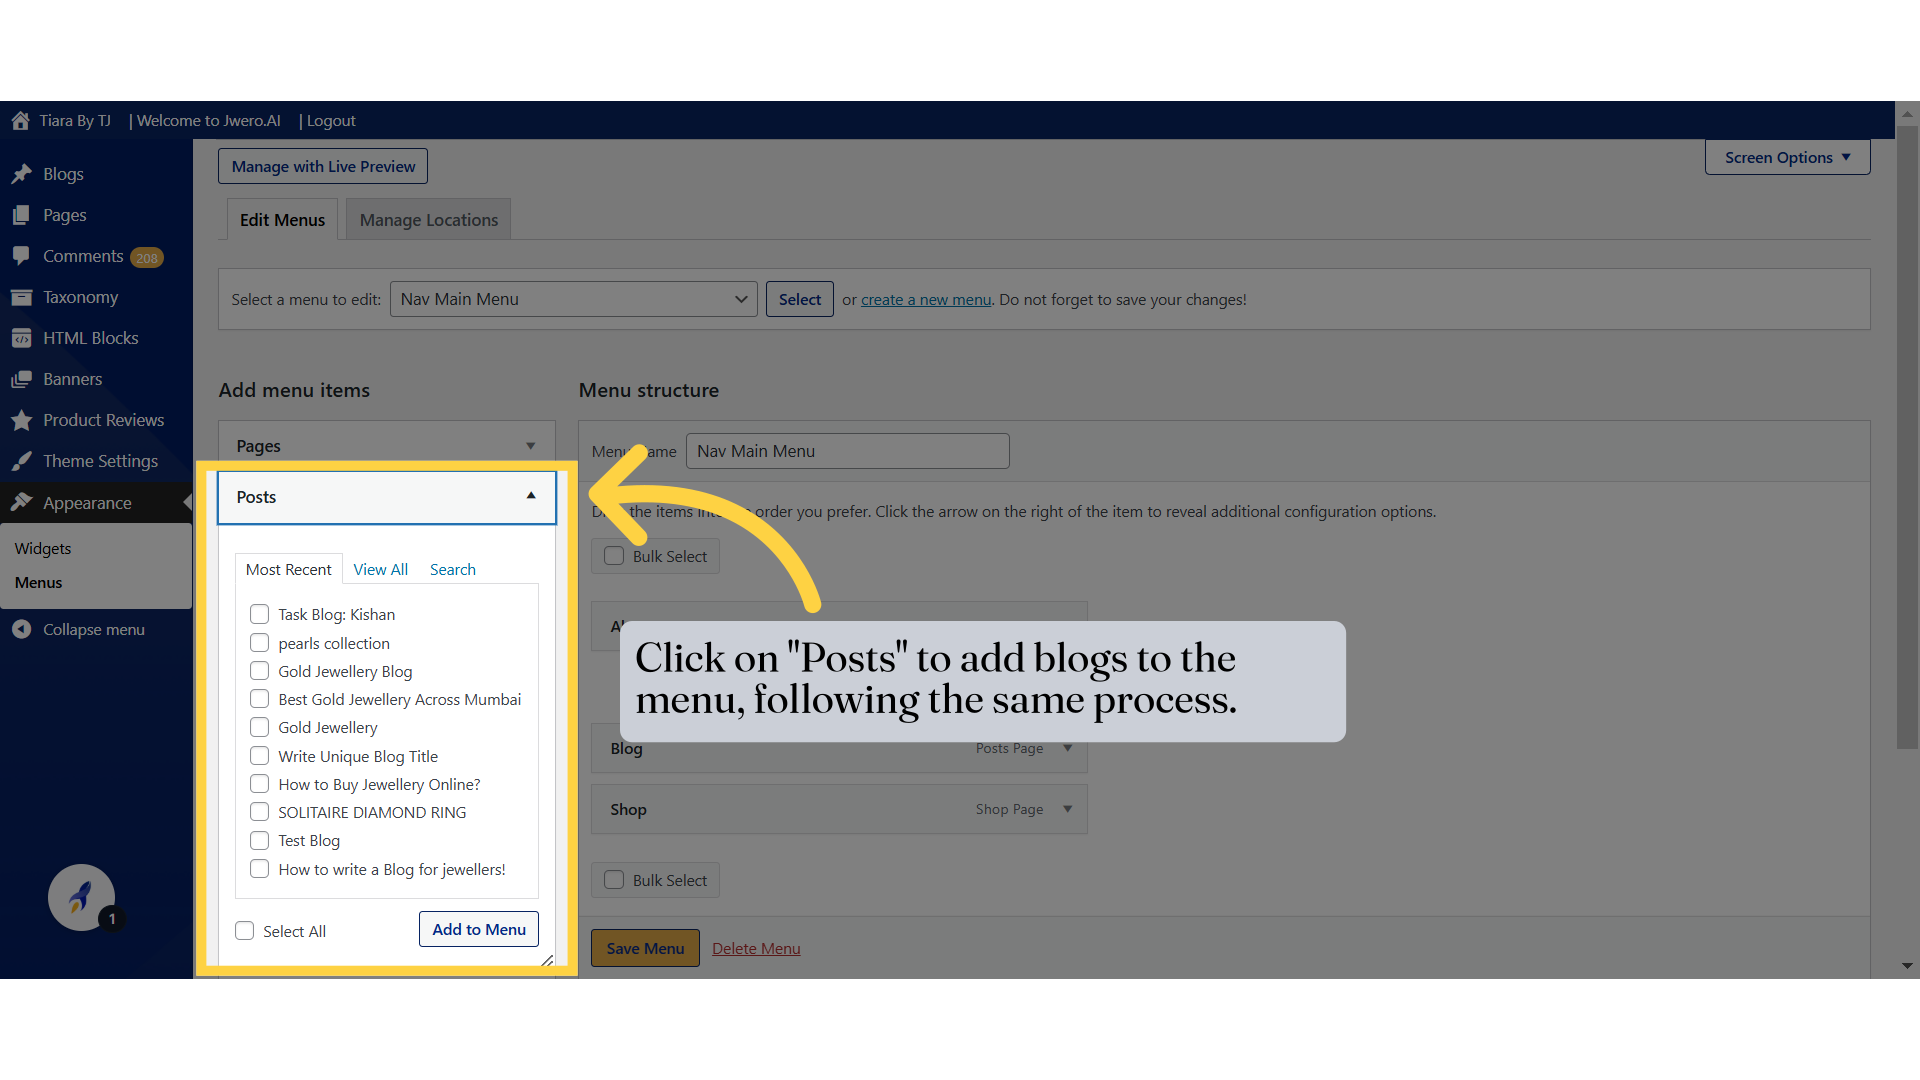
13. Click on "Posts" to add blogs to the menu, following the same process.
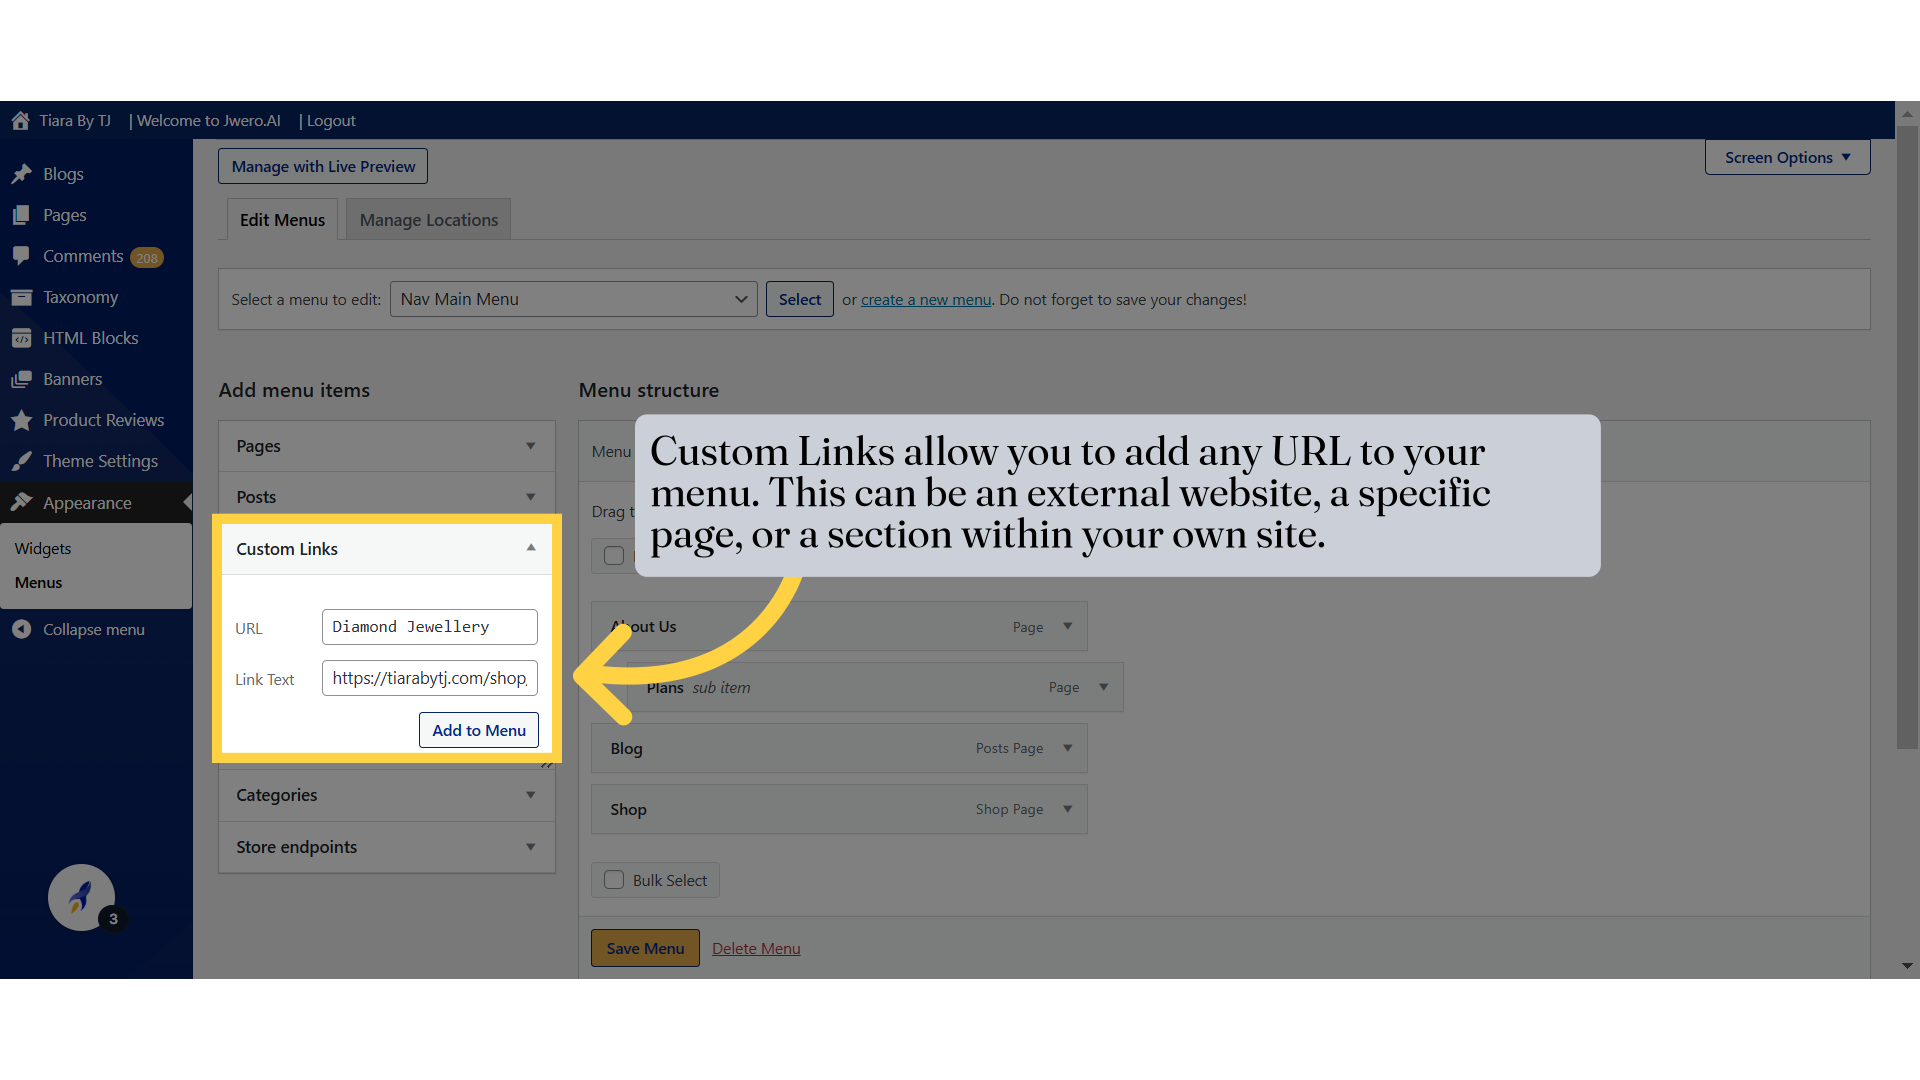
14. Custom Links allow you to add any URL to your menu. This can be an external website, a specific page, or a section within your own site.
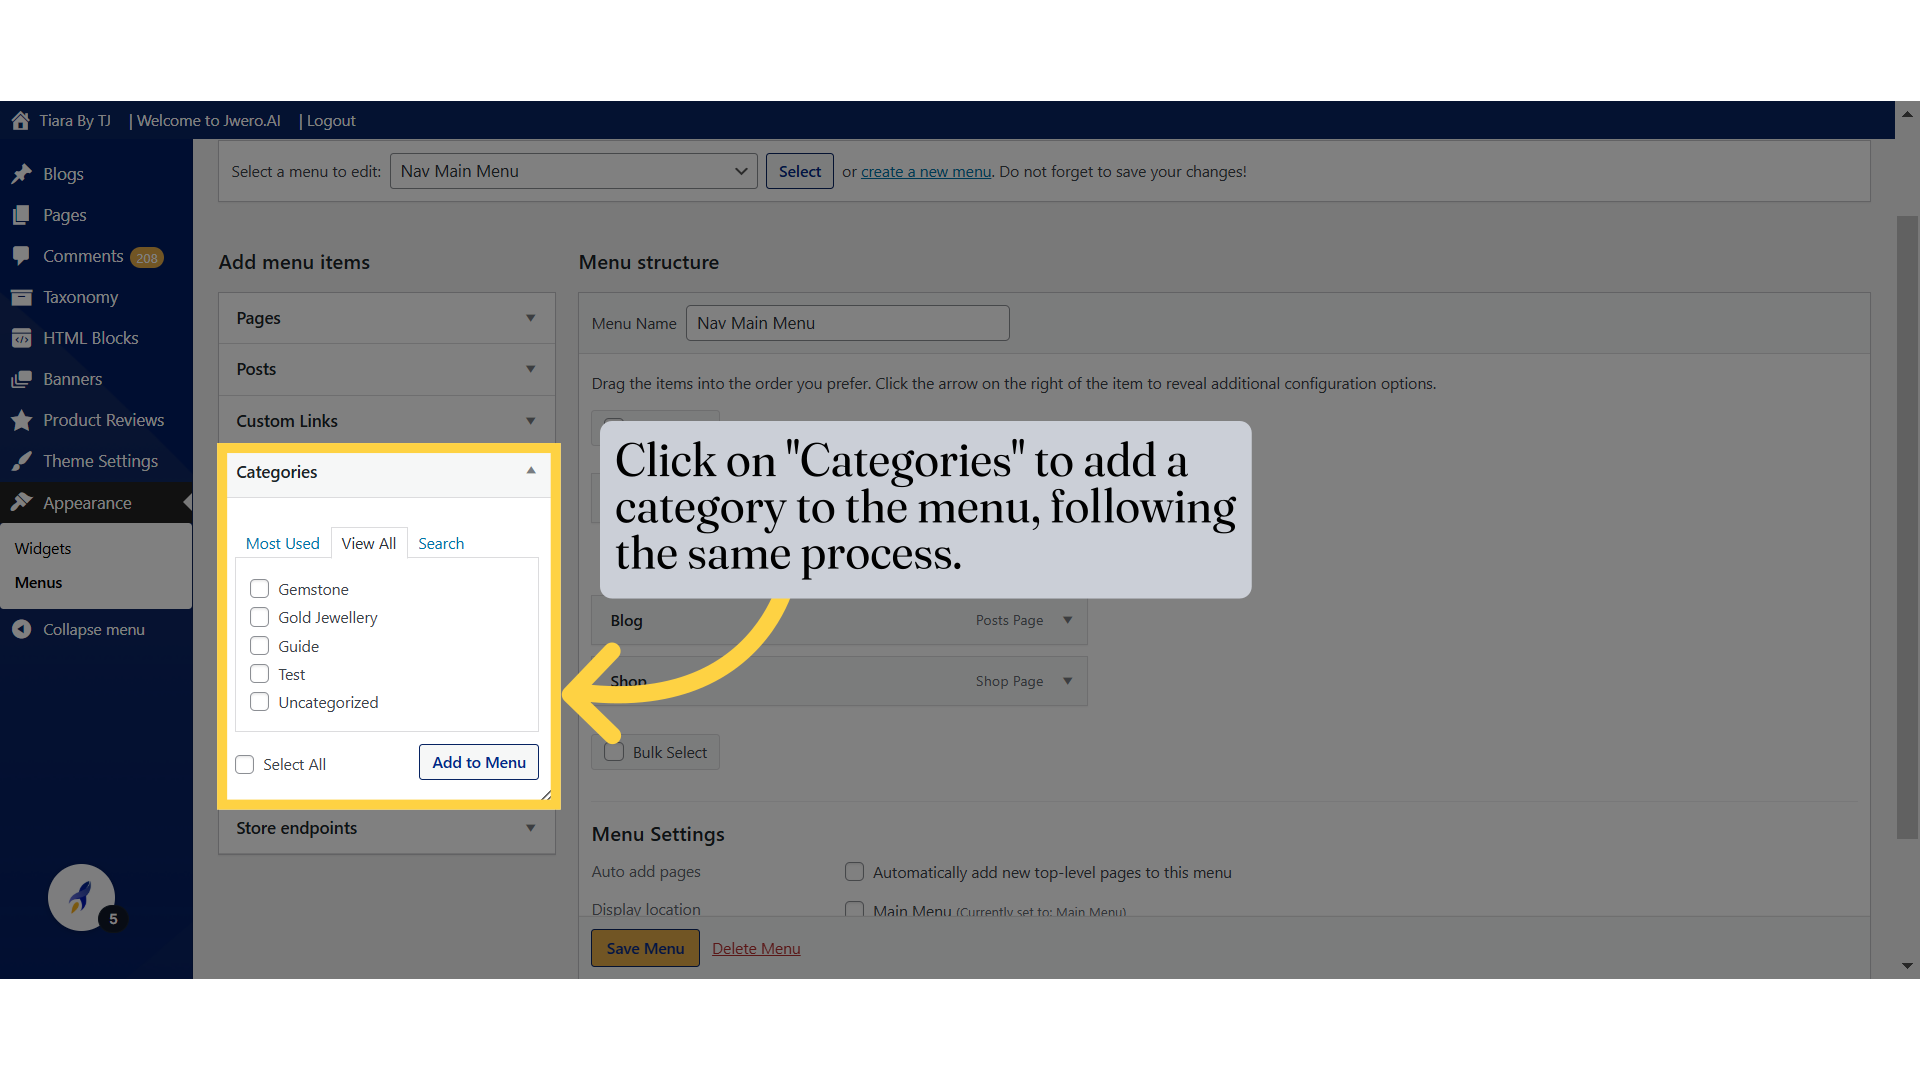
15. Click on "Categories" to add a category to the menu, following the same process.
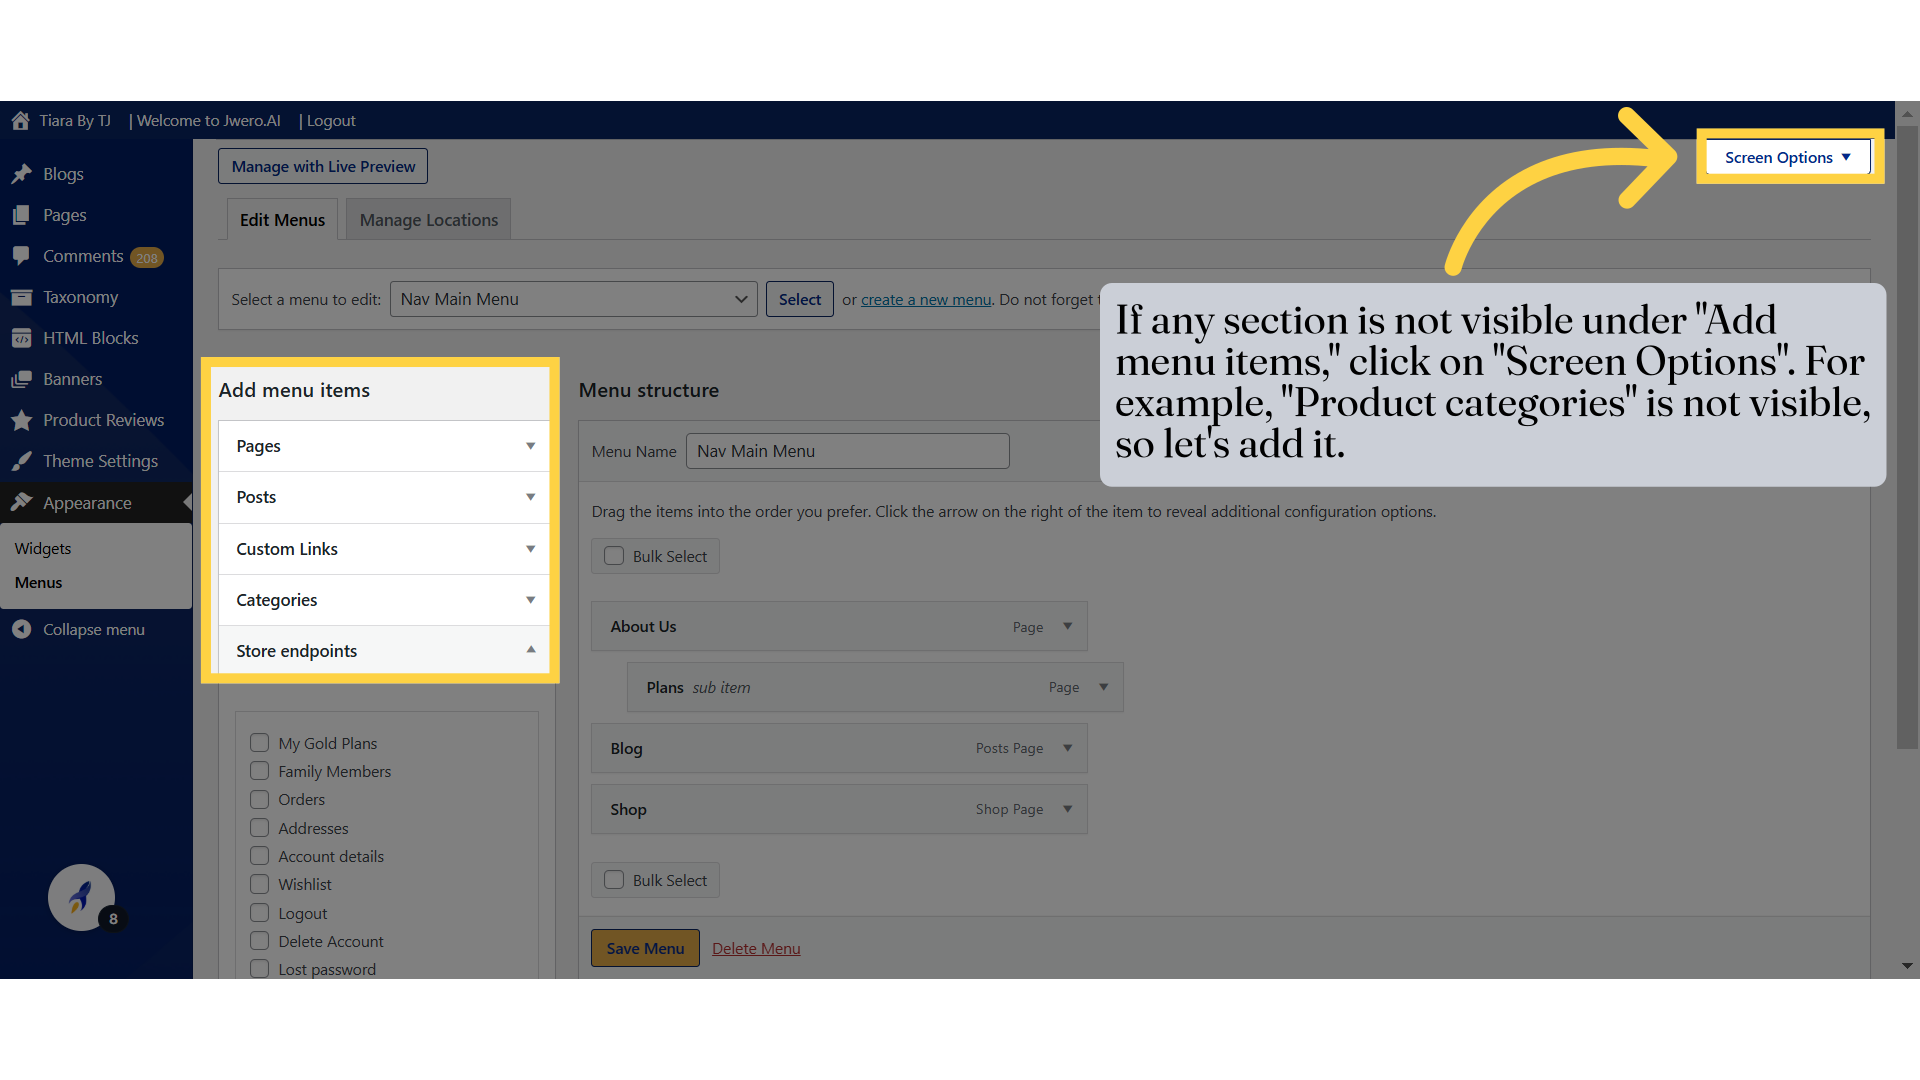
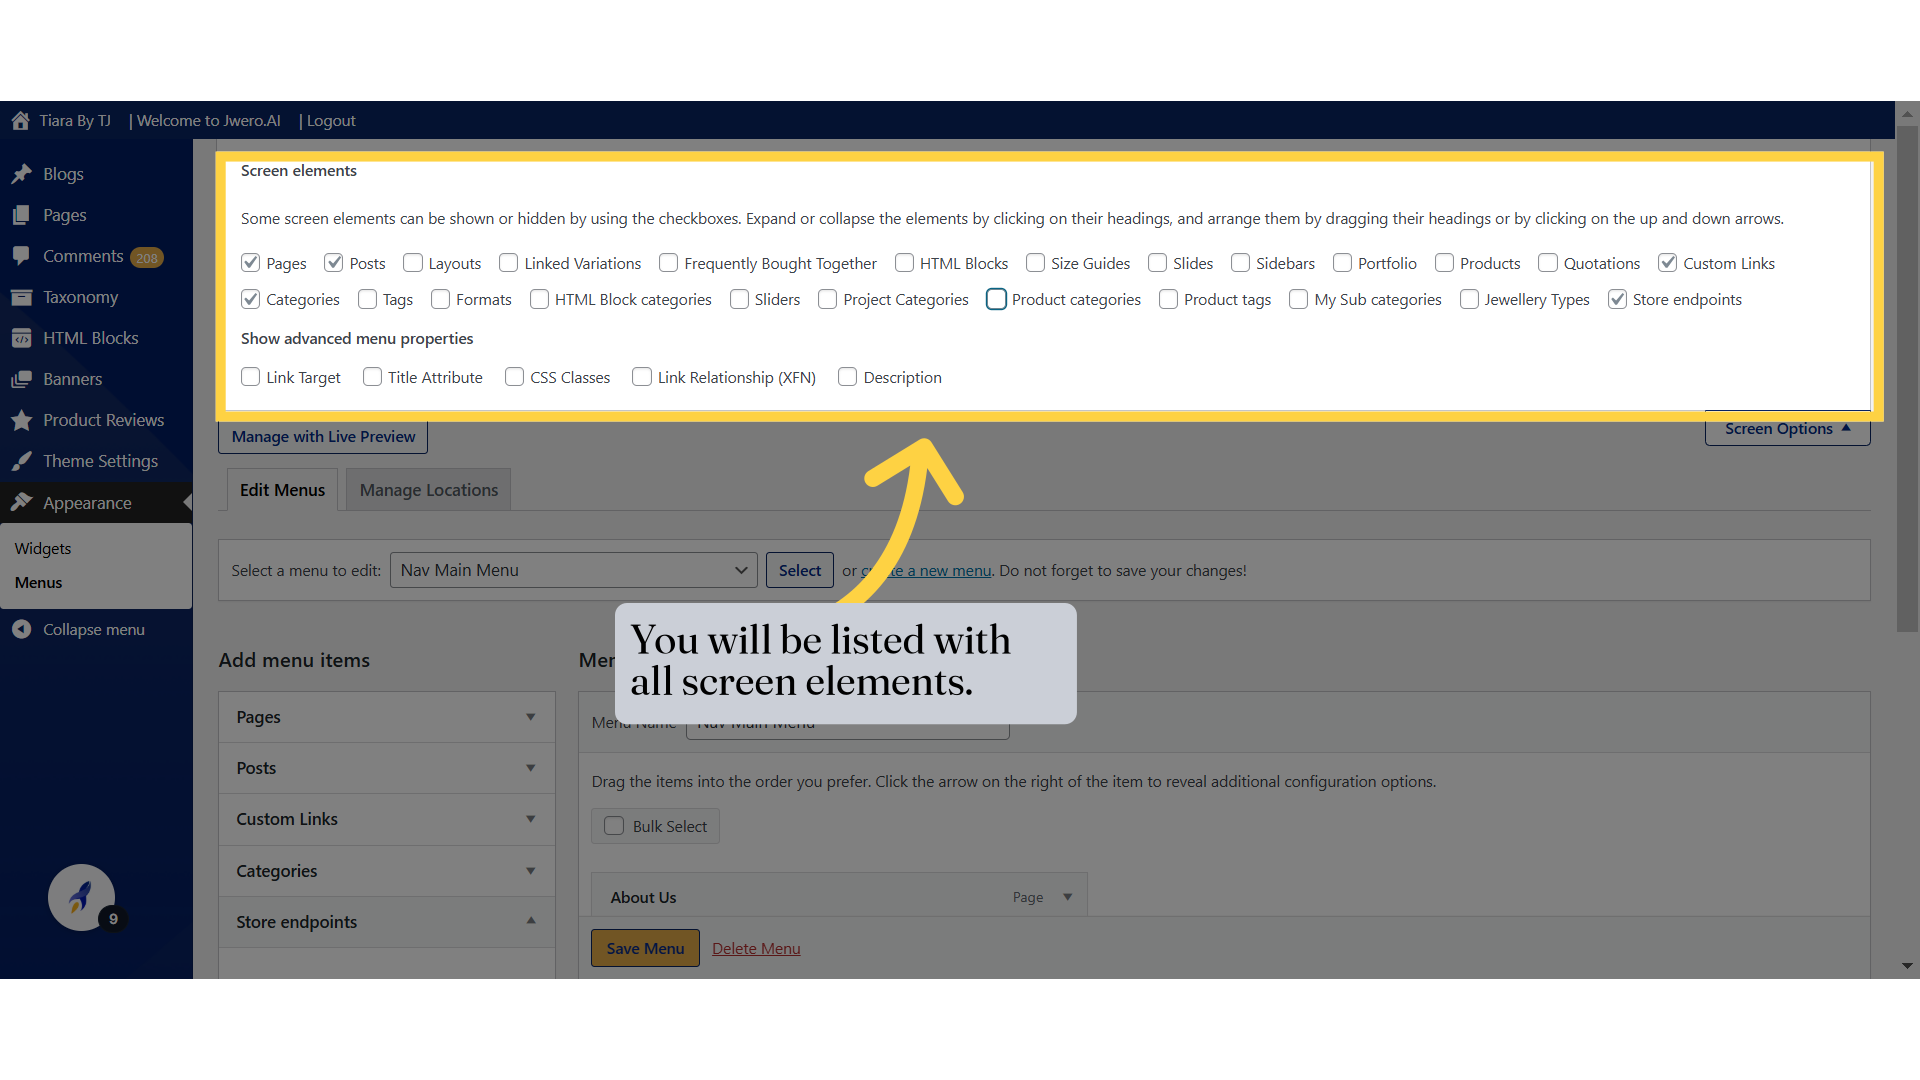
16. If any section is not visible under "Add menu items," click on "Screen Options". For example, "Product categories" is not visible, so let's add it.
17. You will be listed with all screen elements.
18. Click "Show advanced menu properties Link Target Title Attribute CSS Classes Link Relationship (XFN) Description"
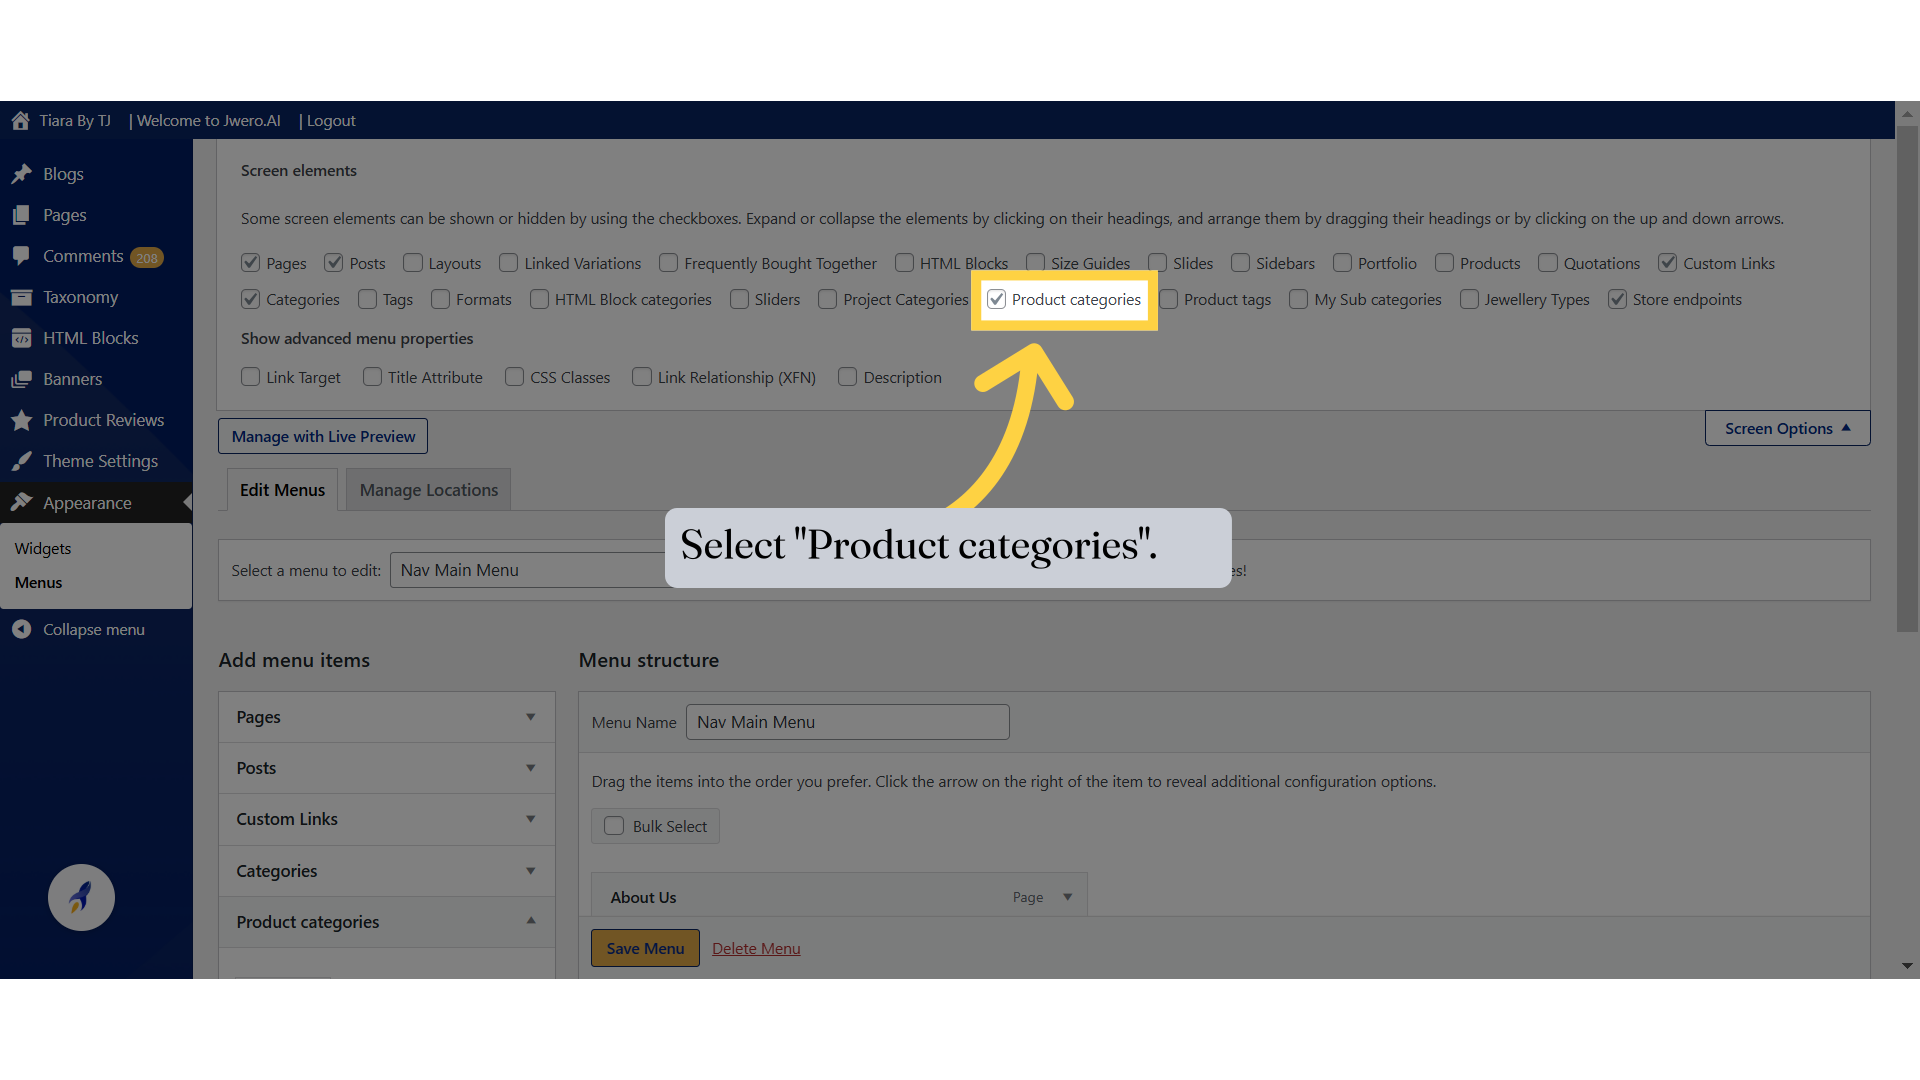
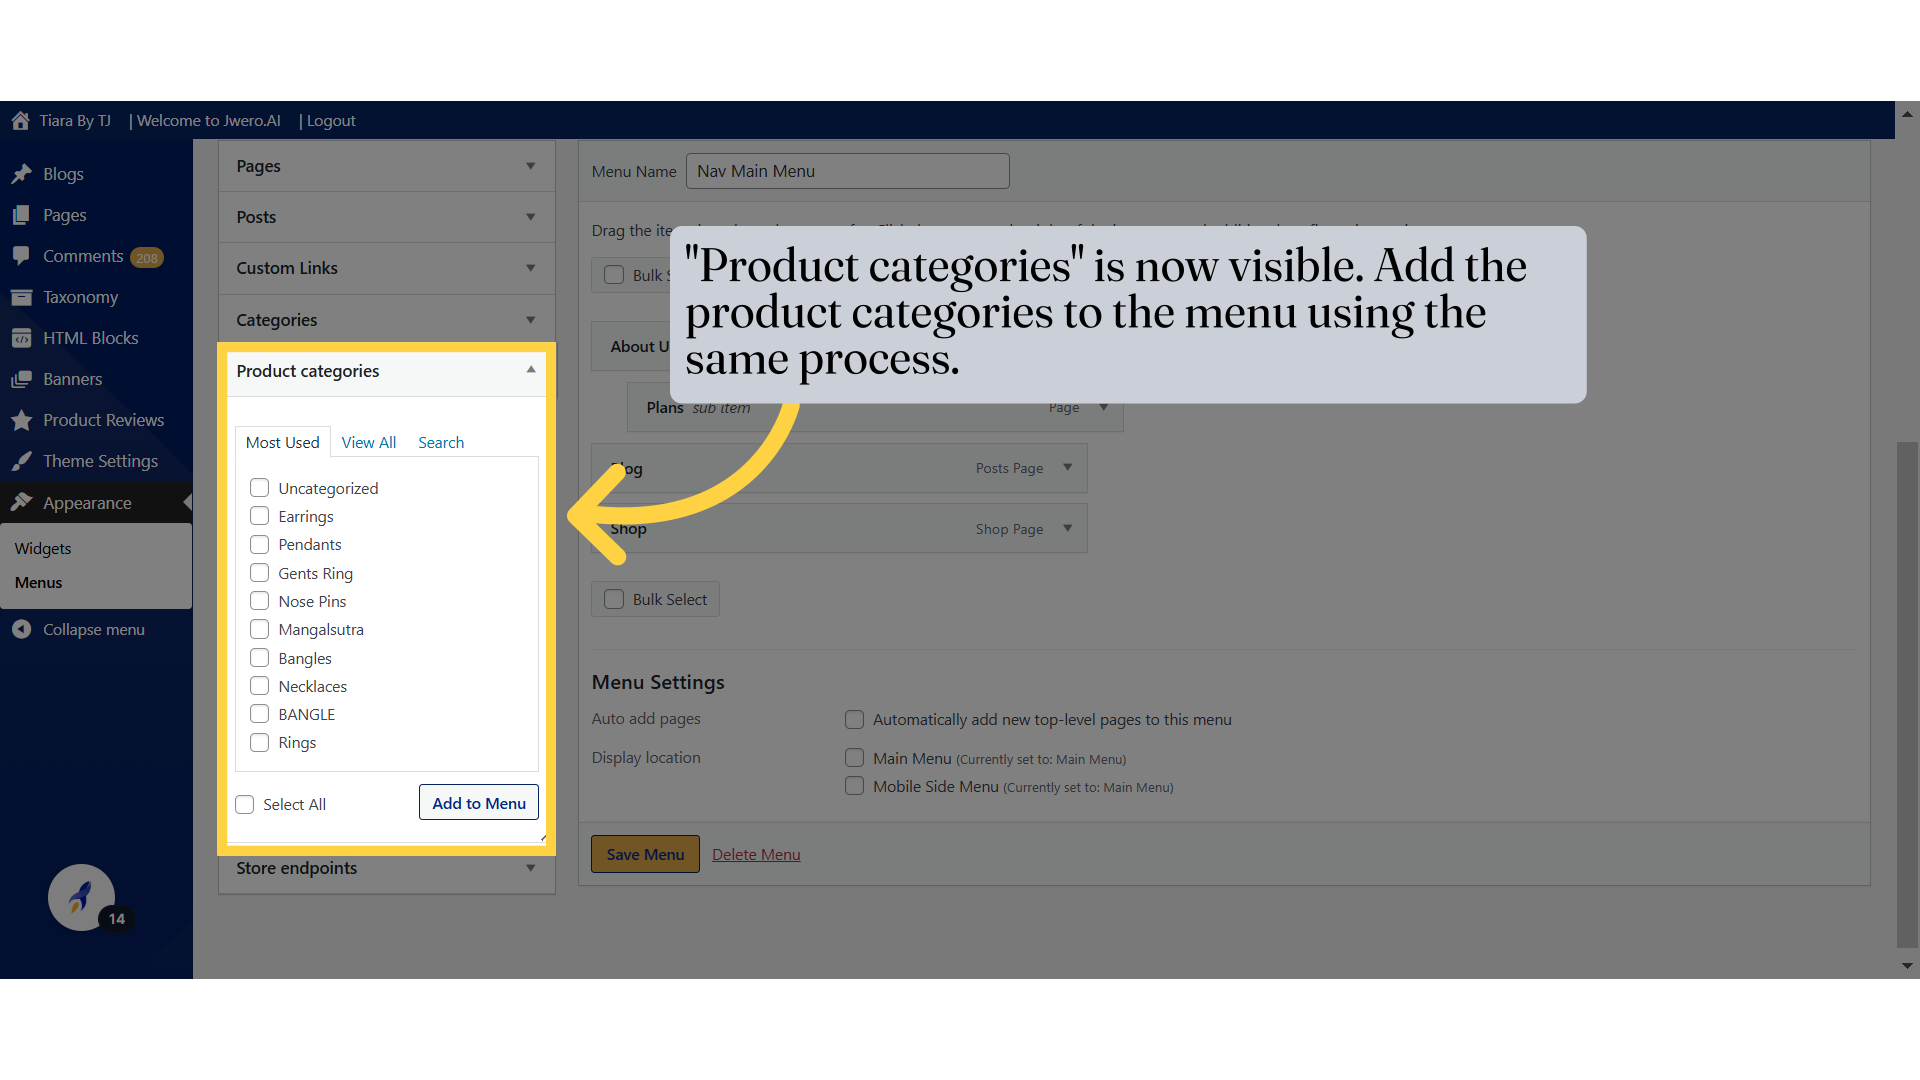
19. "Product categories" is now visible. Add the product categories to the menu using the same process.
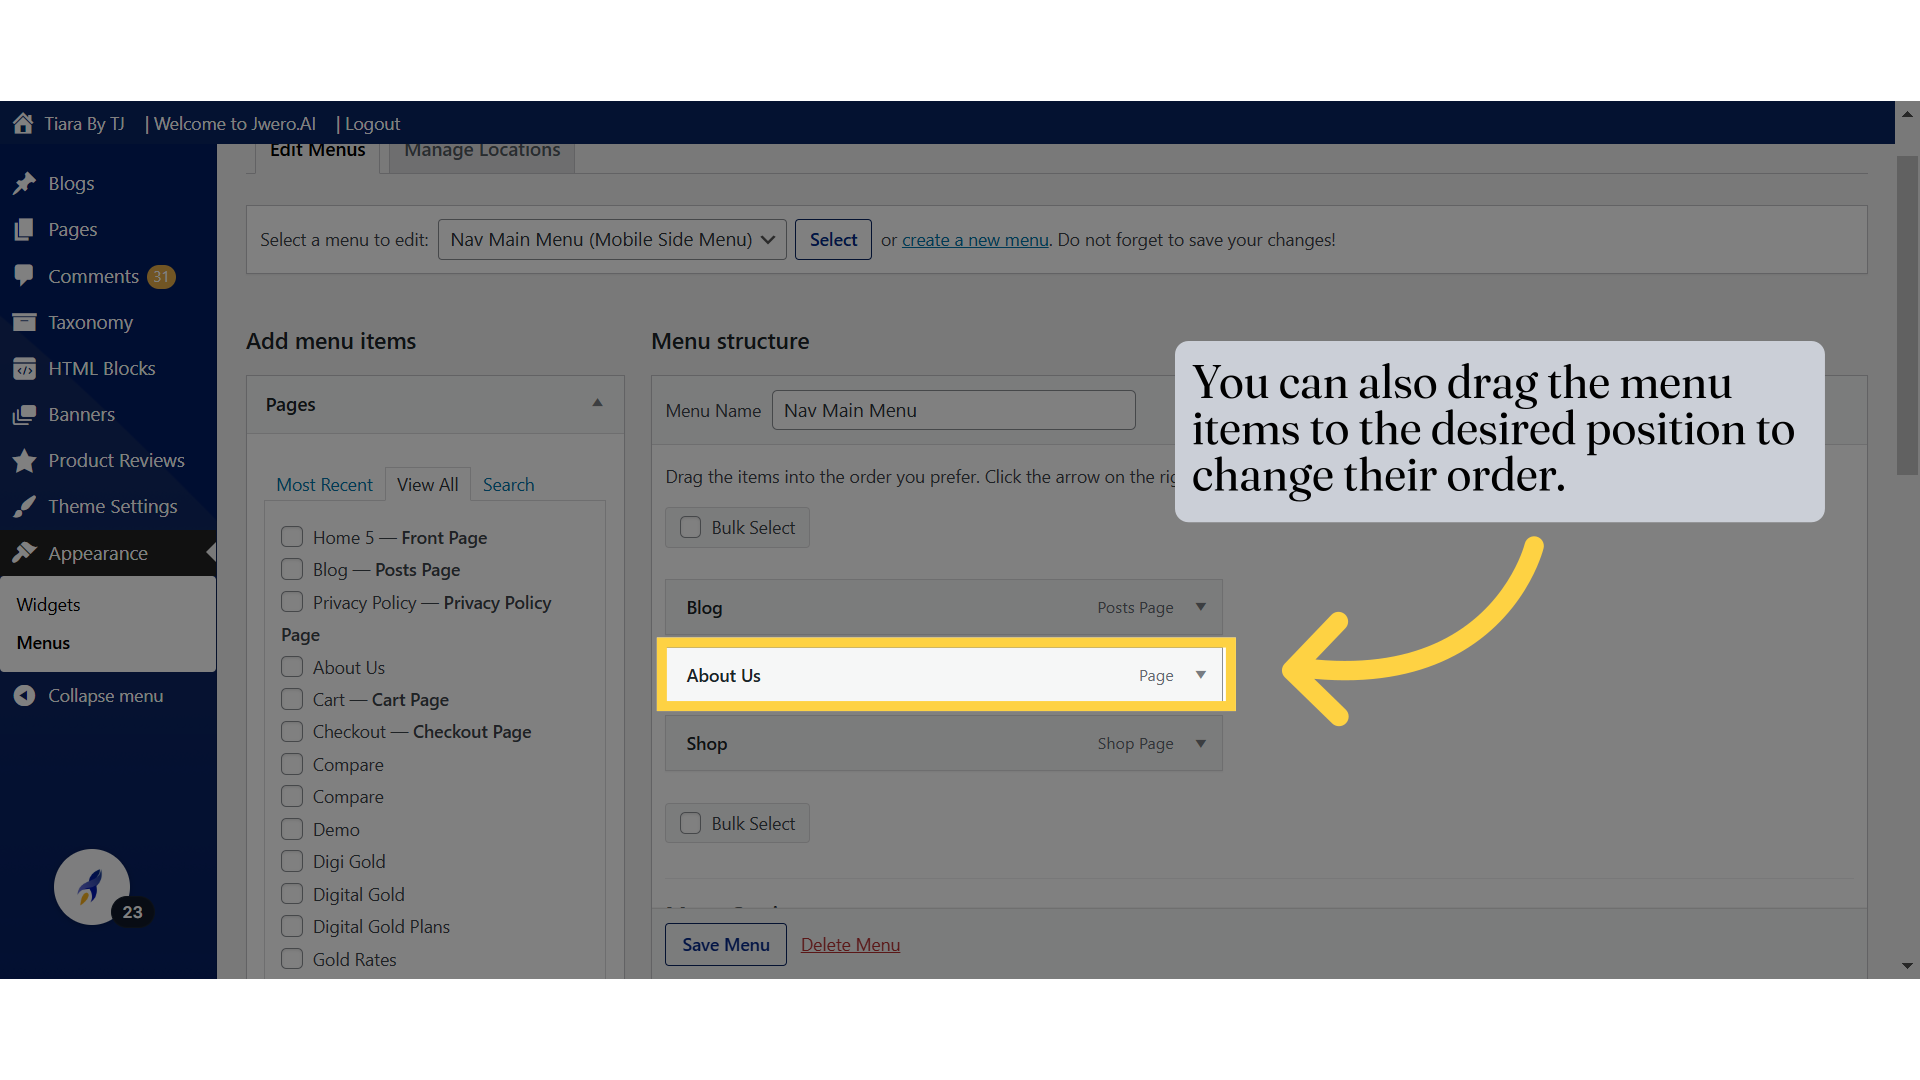
20. You can also drag the menu items to the desired position to change their order.
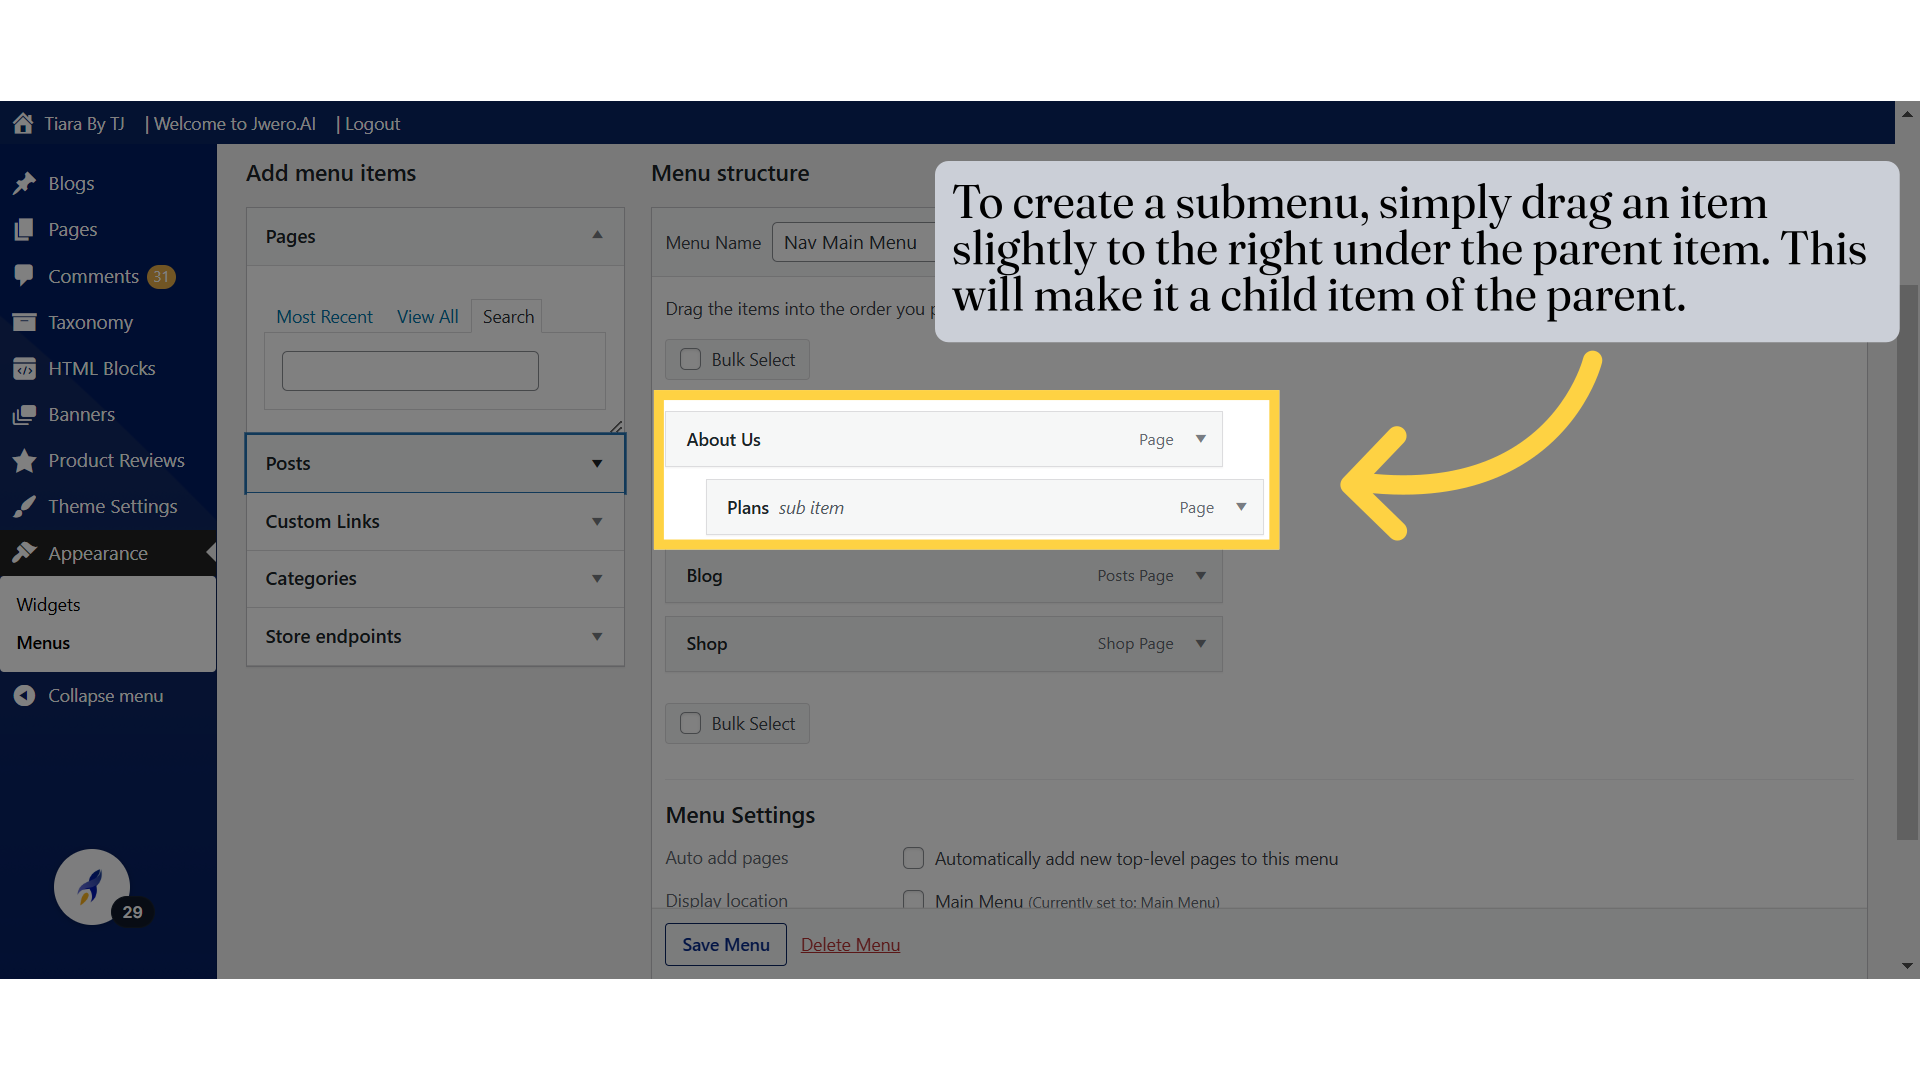
21. To create a submenu, simply drag an item slightly to the right under the parent item. This will make it a child item of the parent.
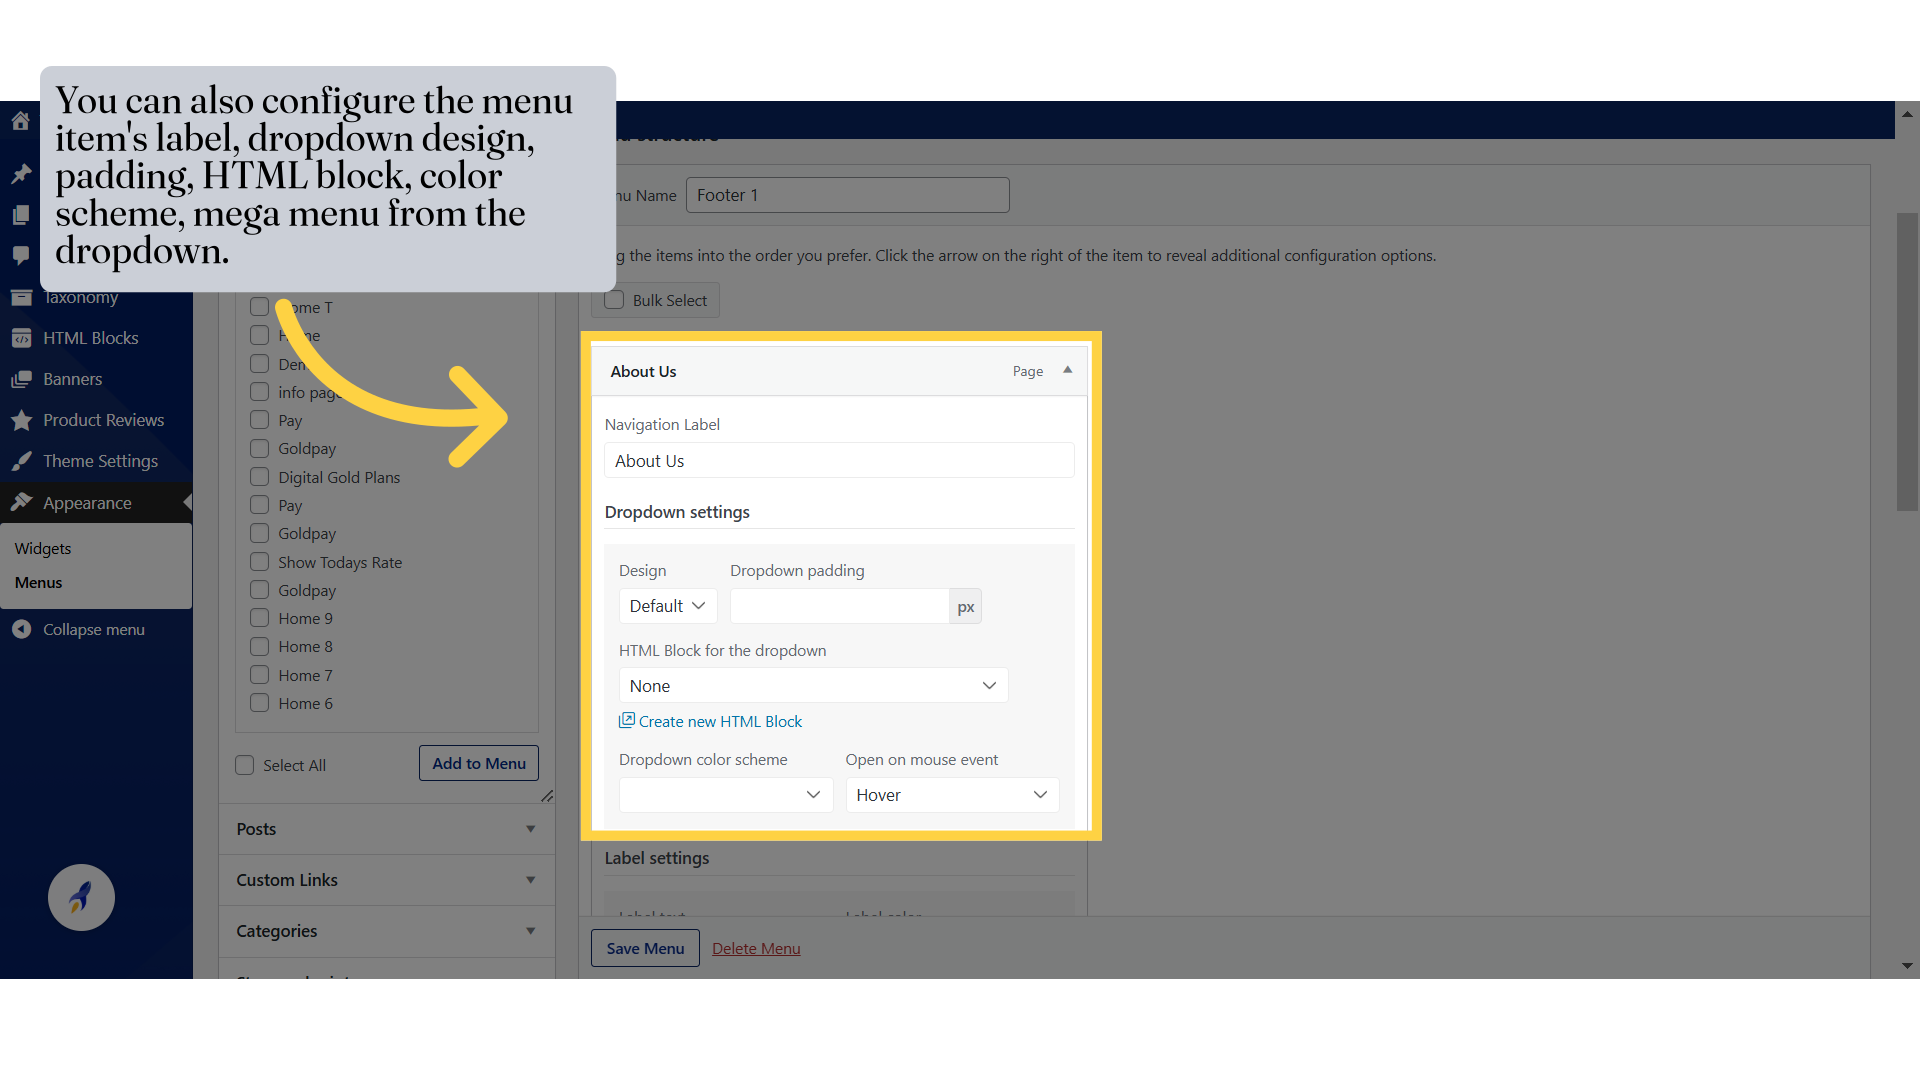
22. You can also configure the menu item's label, dropdown design, padding, HTML block, color scheme, mega menu from the dropdown.
Customize the menu to your preference using the options available in the dropdown.
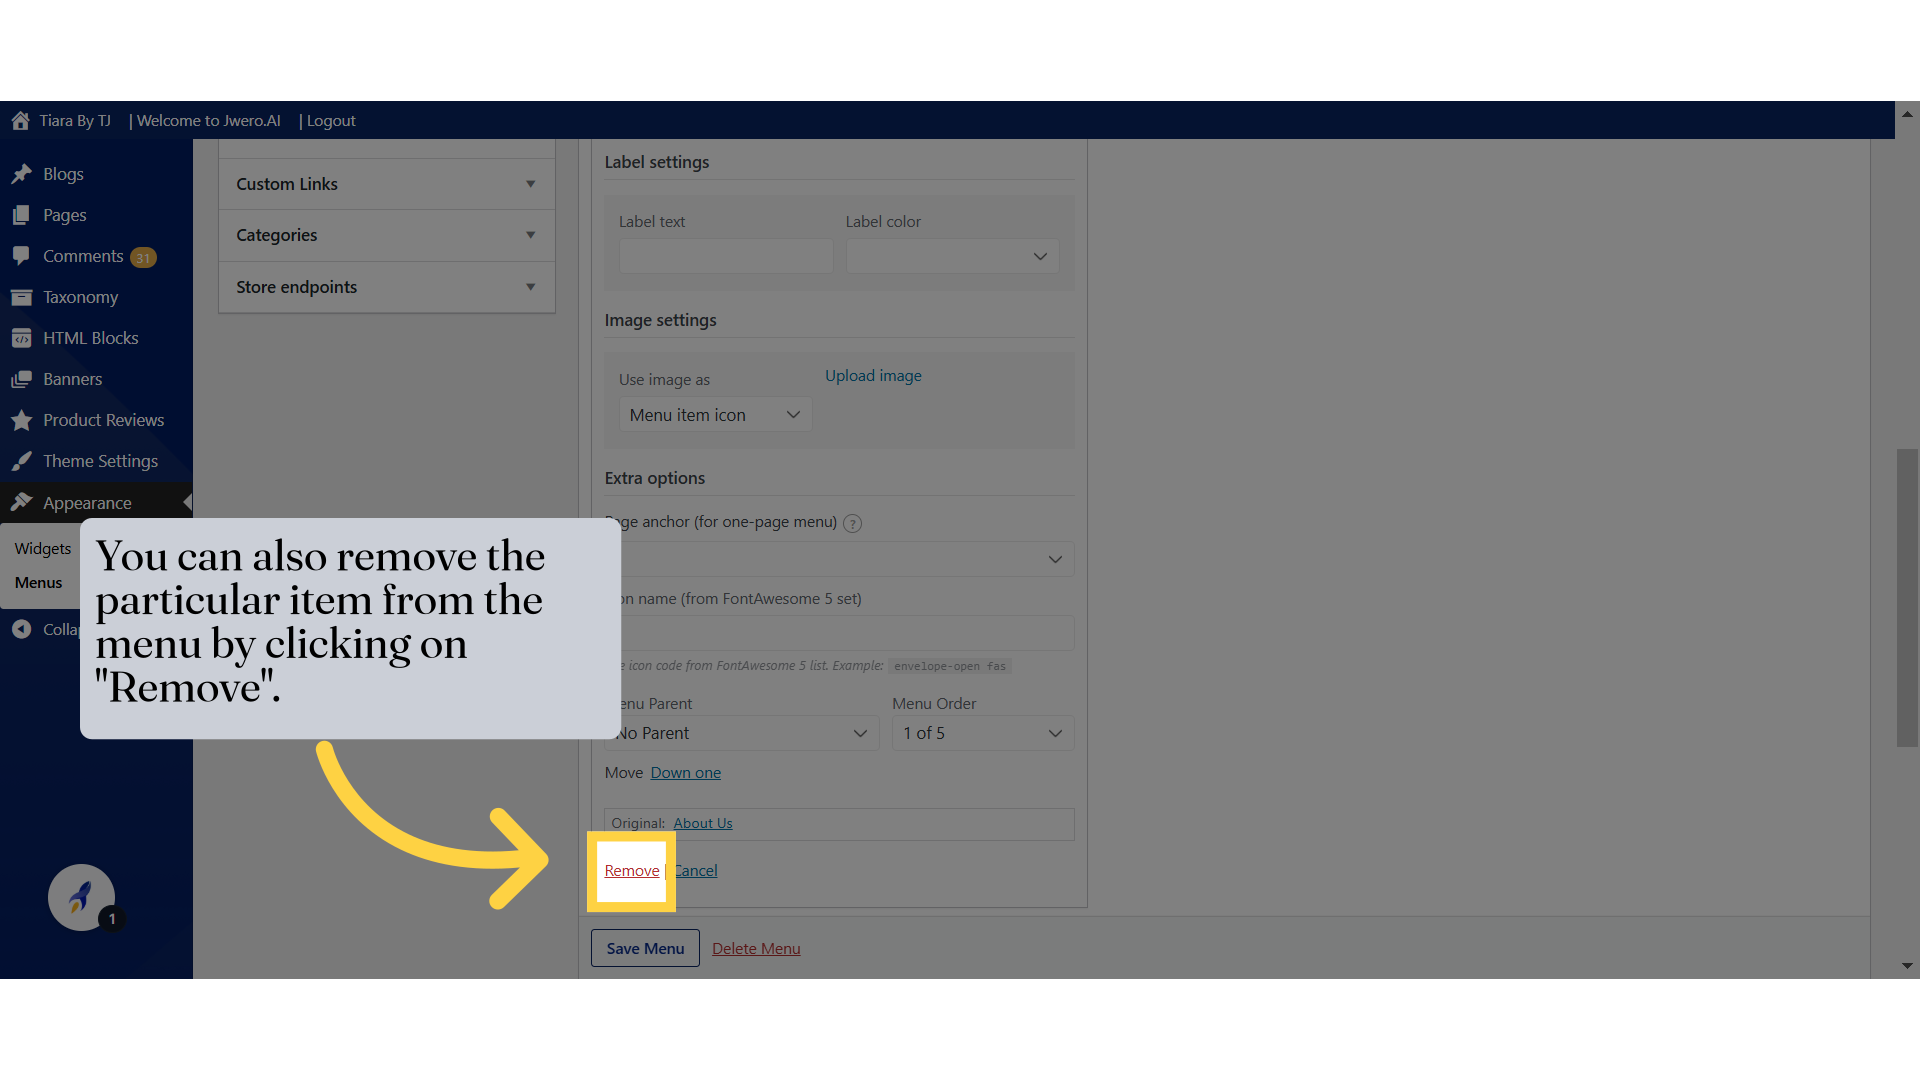
23. You can also remove the particular item from the menu by clicking on "Remove".
Easily remove an item from the menu by clicking "Remove" whenever it's no longer needed.
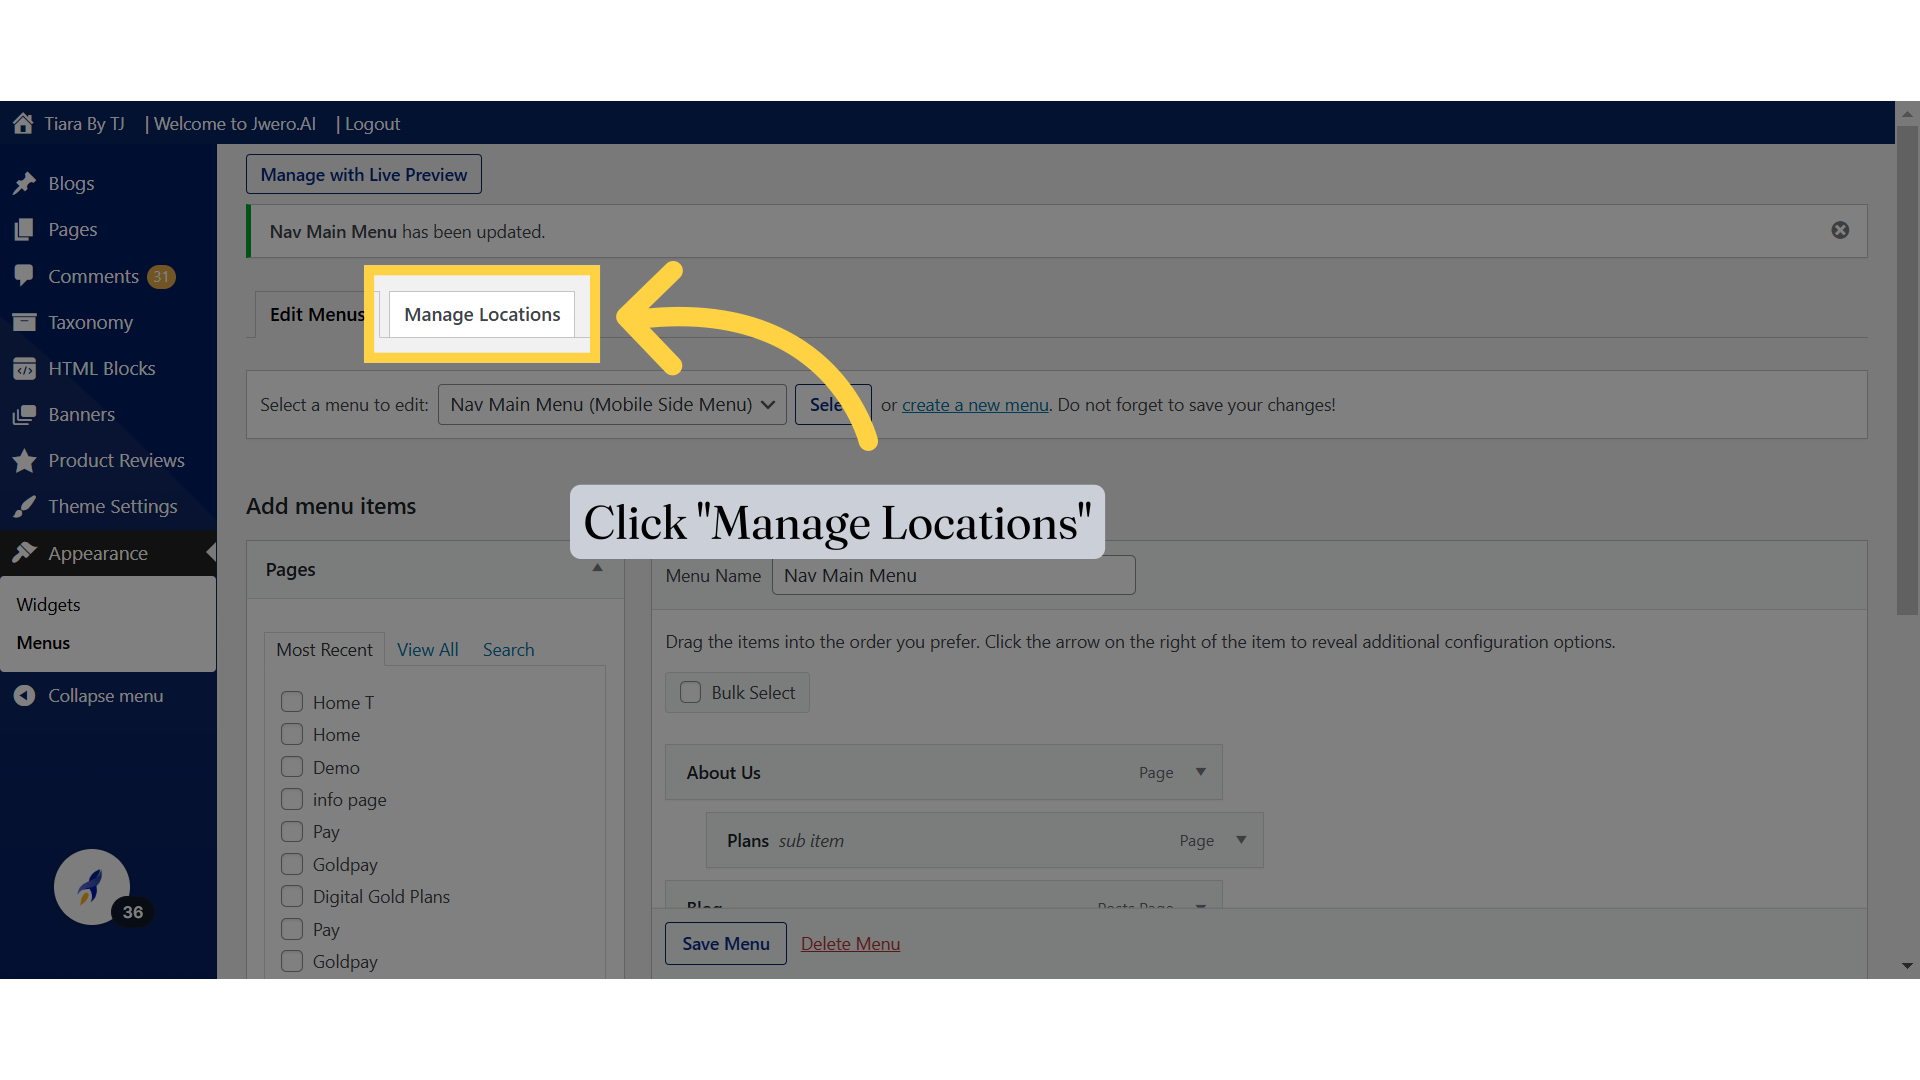
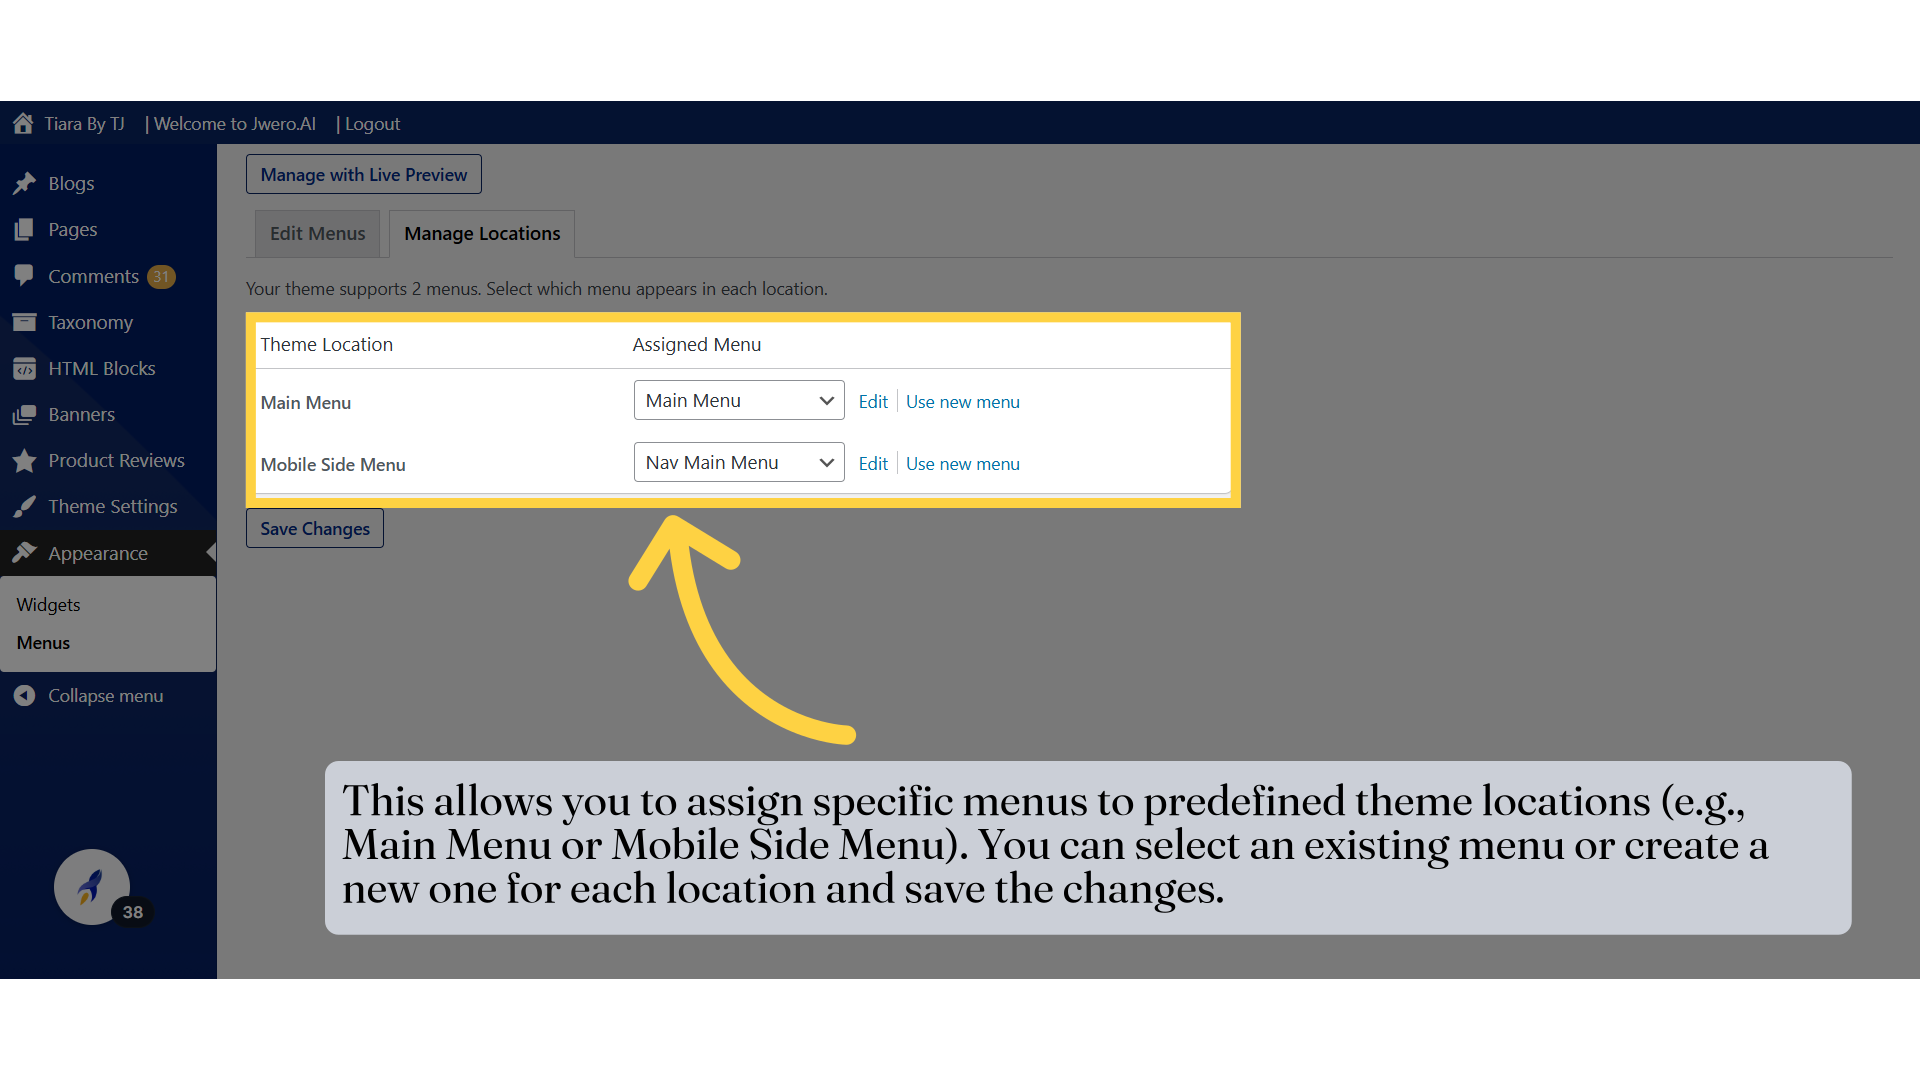
24. Click "Manage Locations"
The Manage Locations ensures the selected menus appear in the desired areas of your site.
25. This allows you to assign specific menus to predefined theme locations (e.g., Main Menu or Mobile Side Menu). You can select an existing menu or create a new one for each location and save the changes.
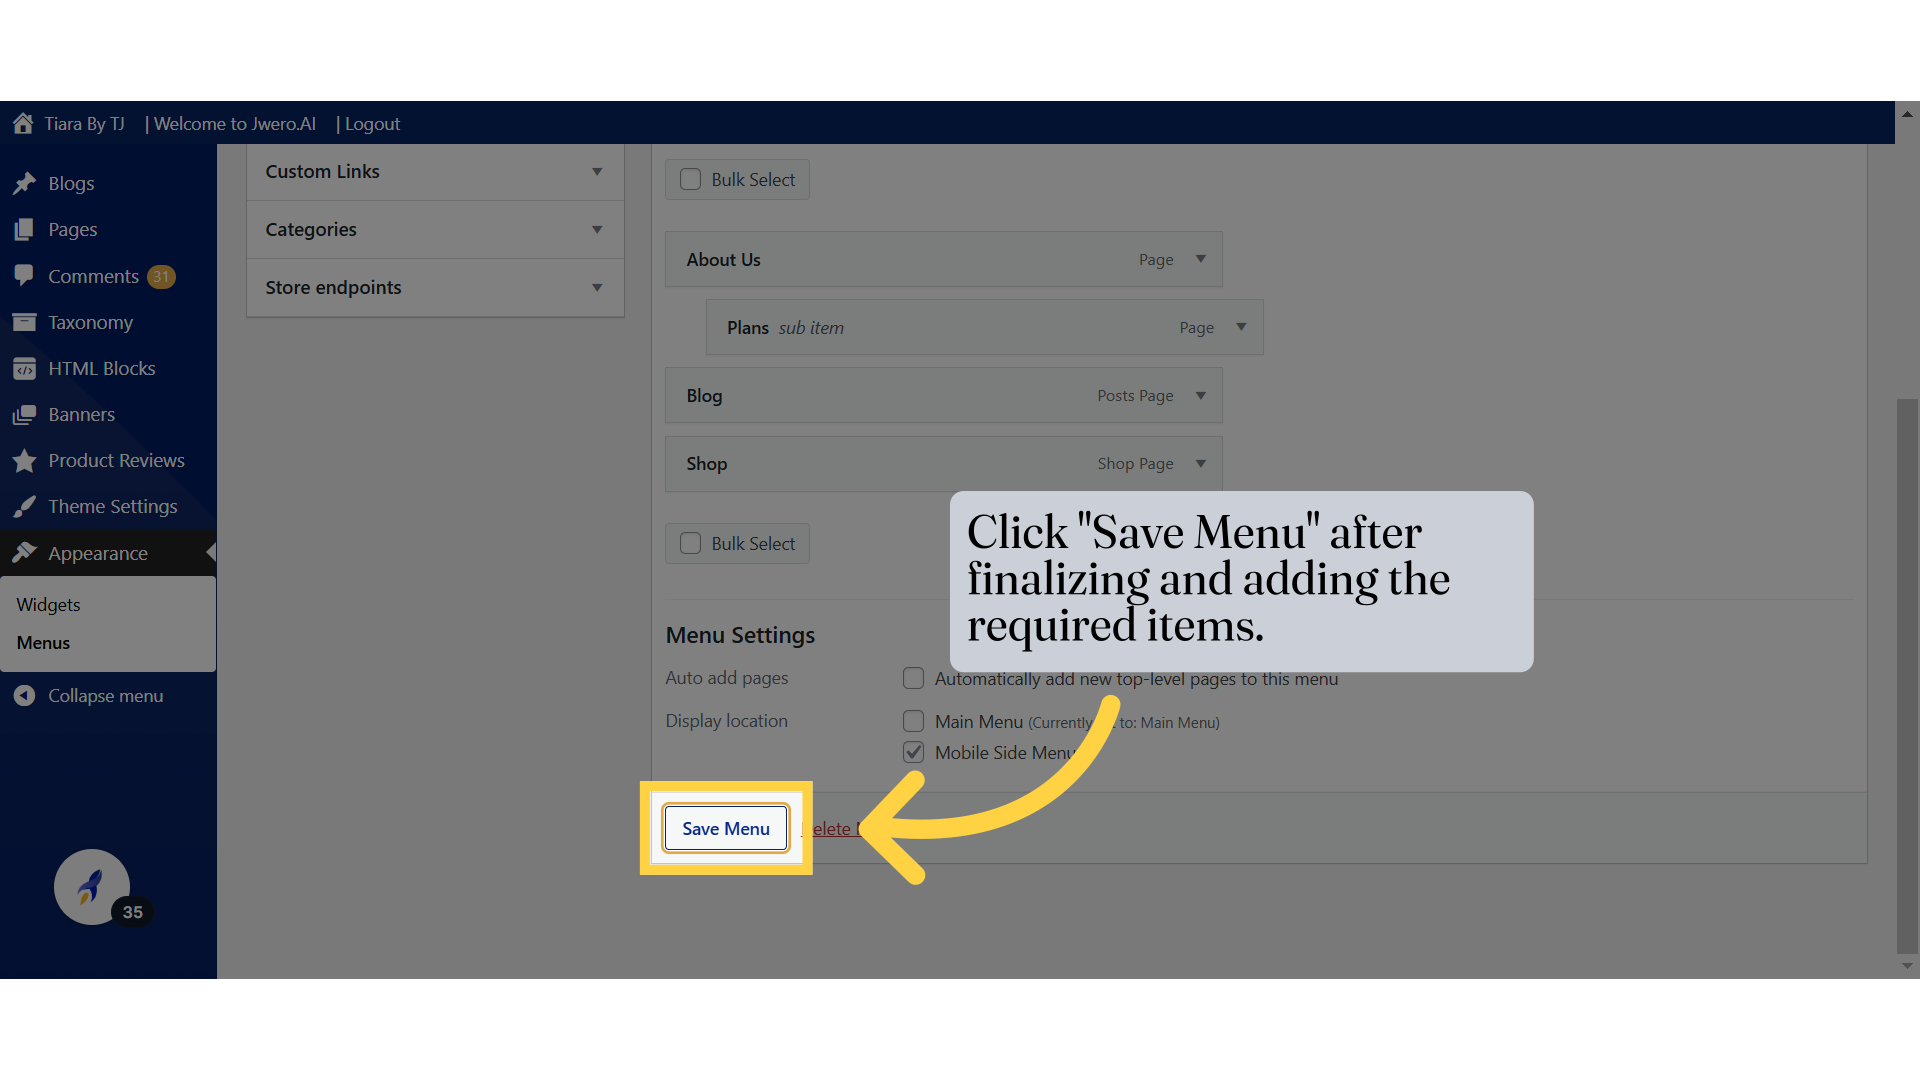
26. Click "Save Menu" after finalizing and adding the required items.
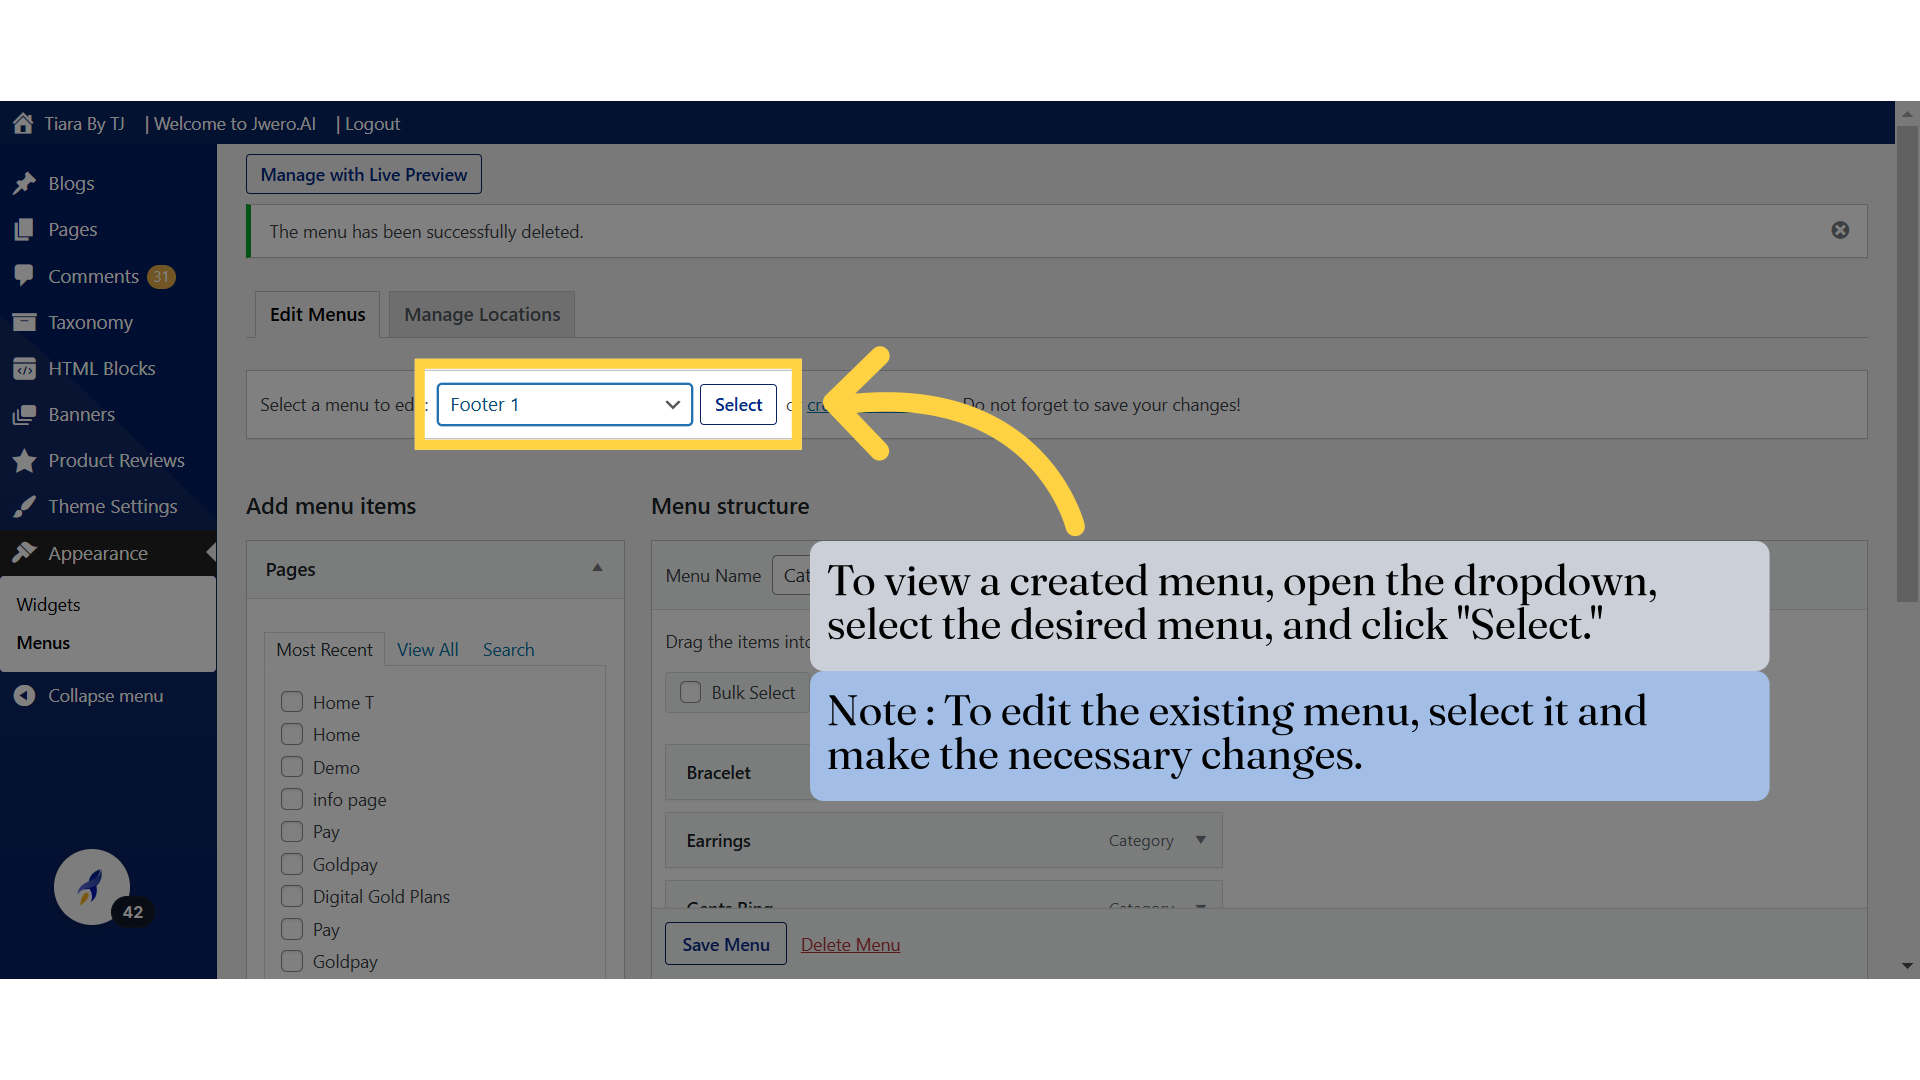
27. To view a created menu, open the dropdown, select the desired menu, and click "Select."
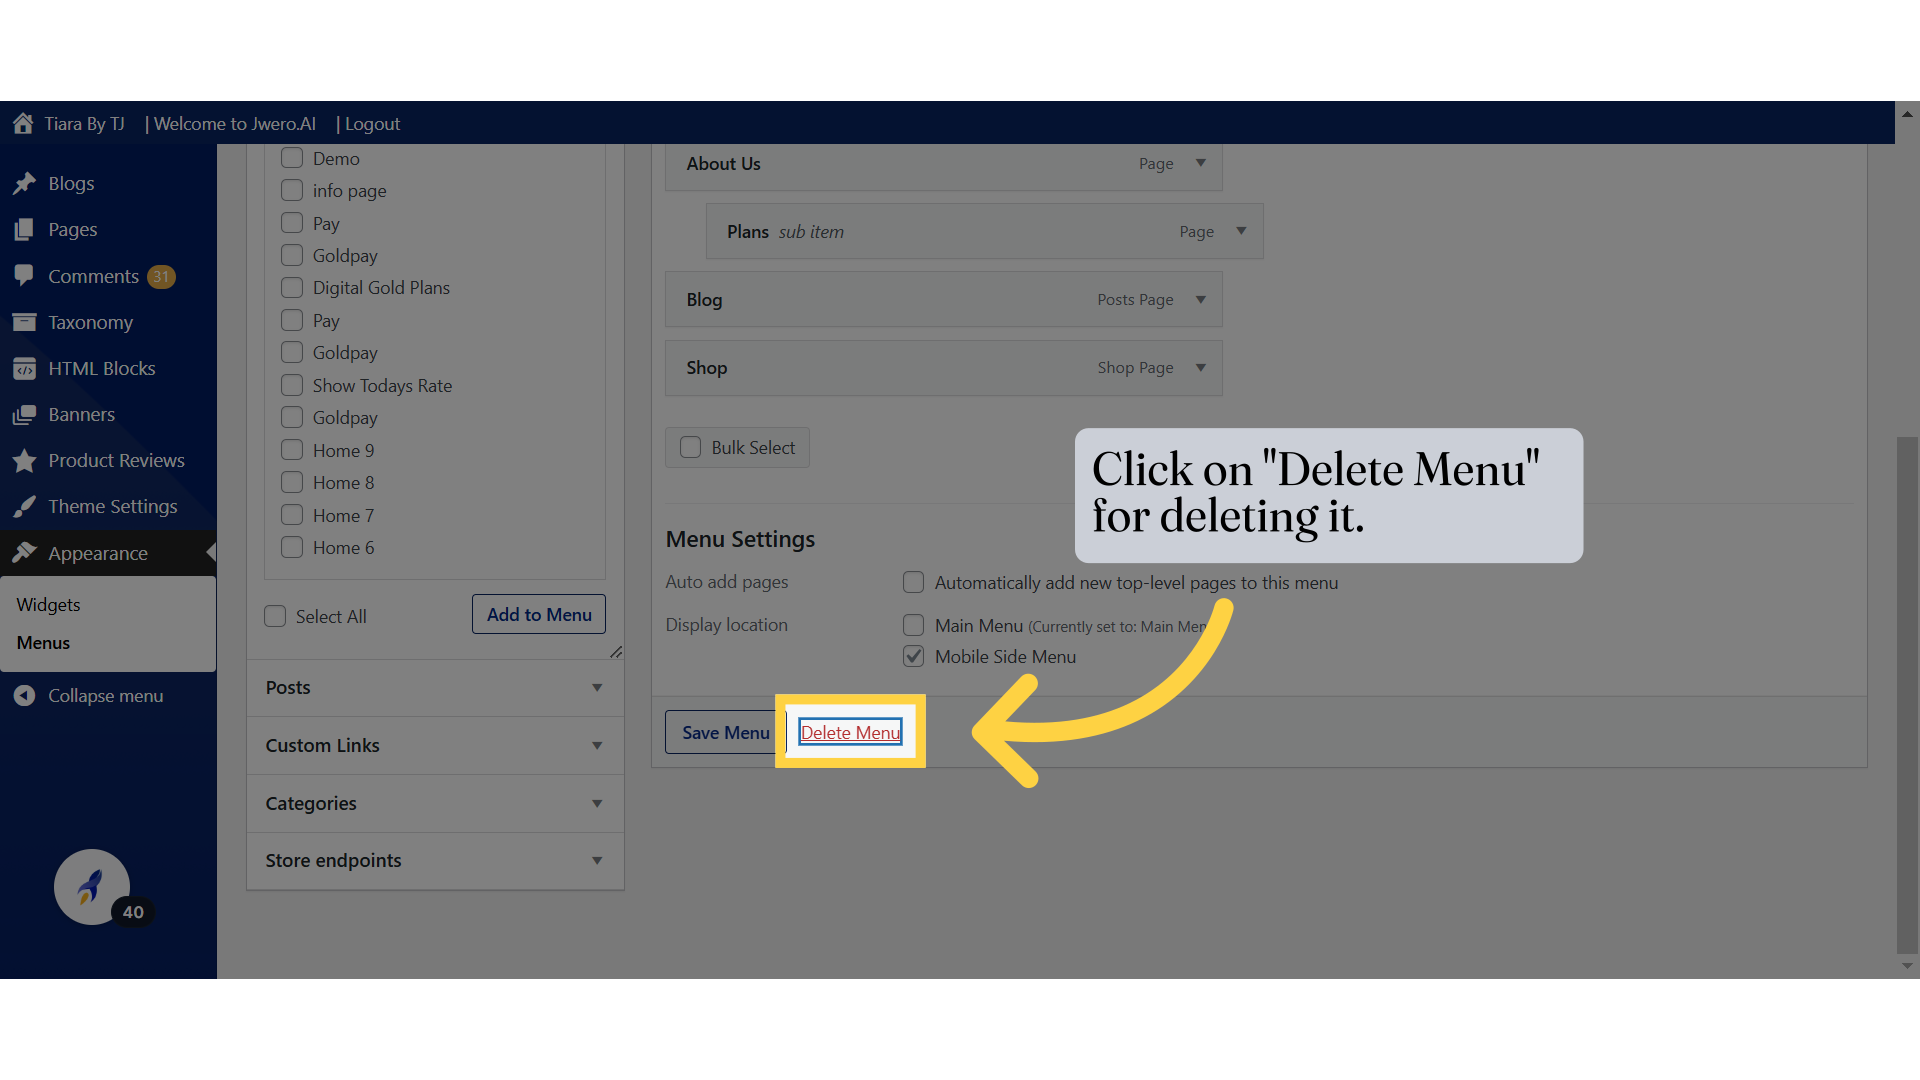
28. Click on "Delete Menu" for deleting it.
This will remove the menu from the list and delete it from the page if it has been added elsewhere.
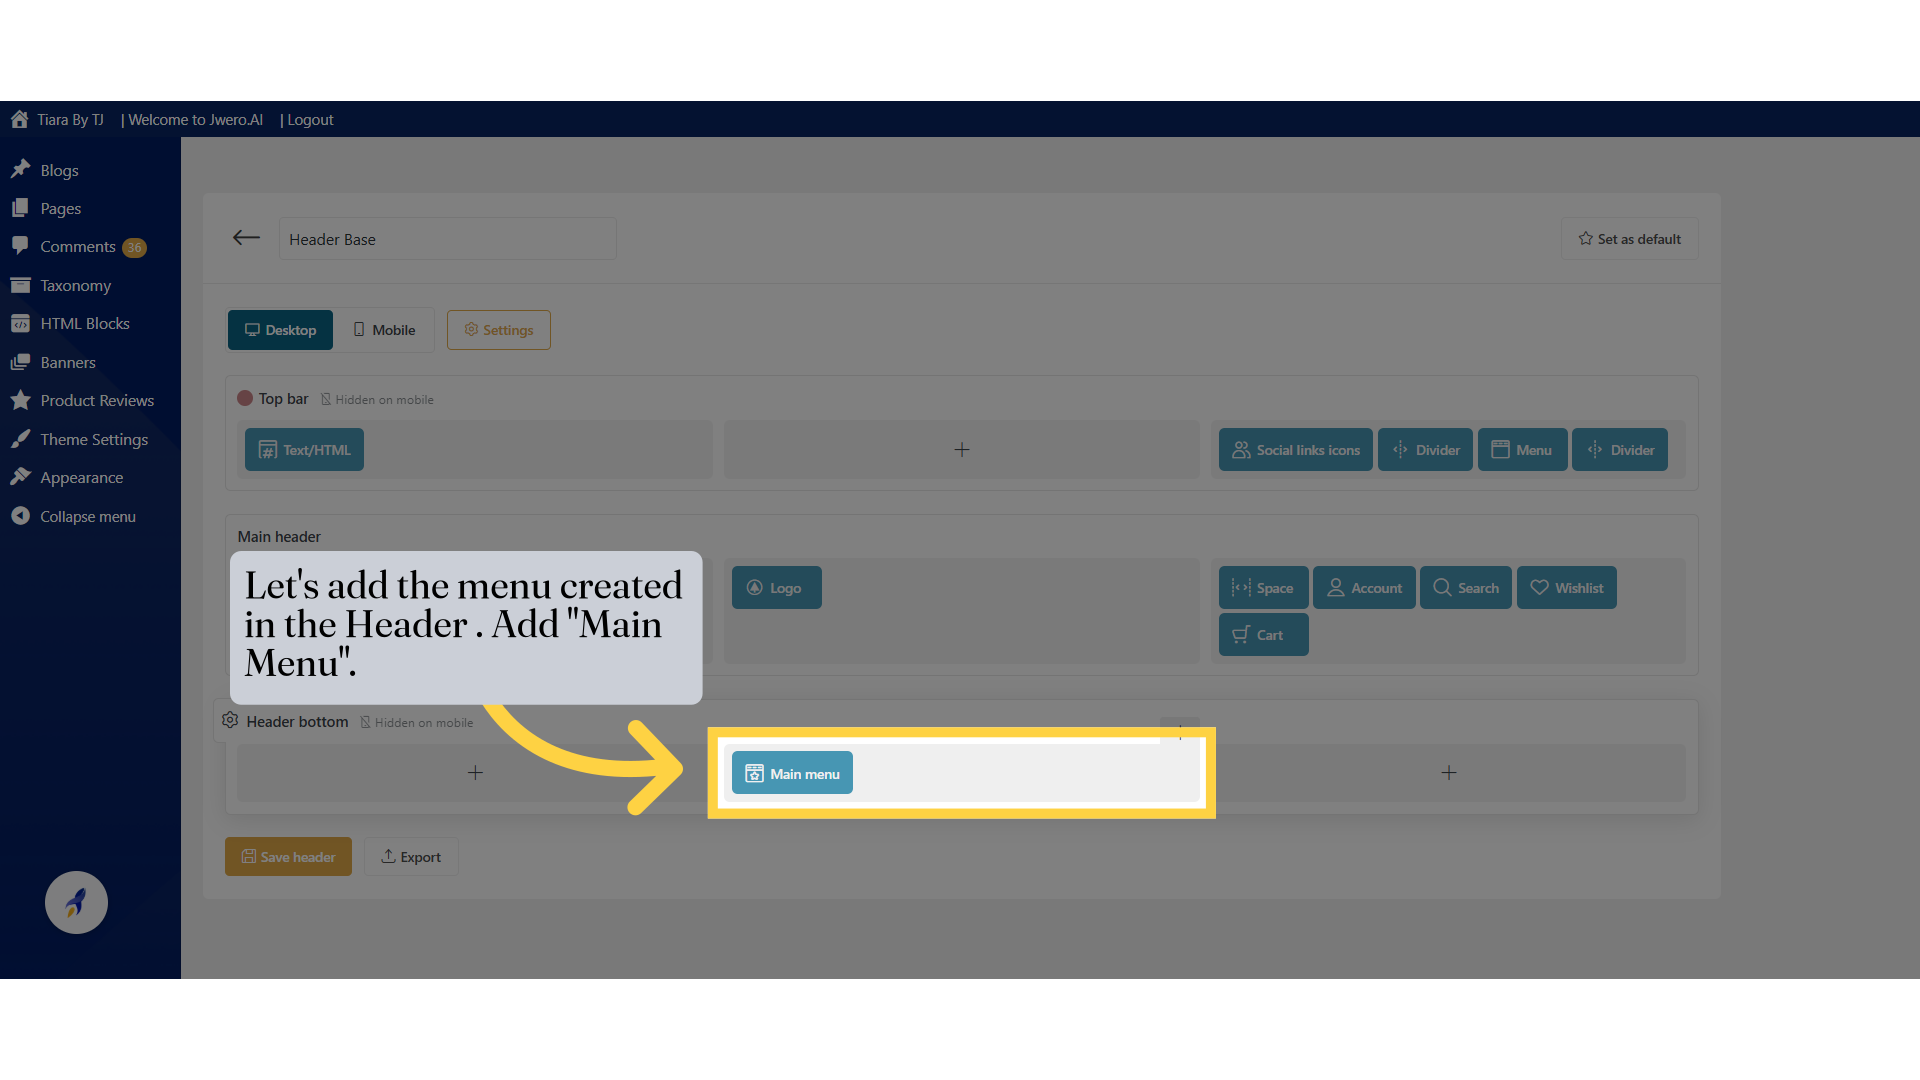
29. Let's add the menu created in the Header . Add "Main Menu".
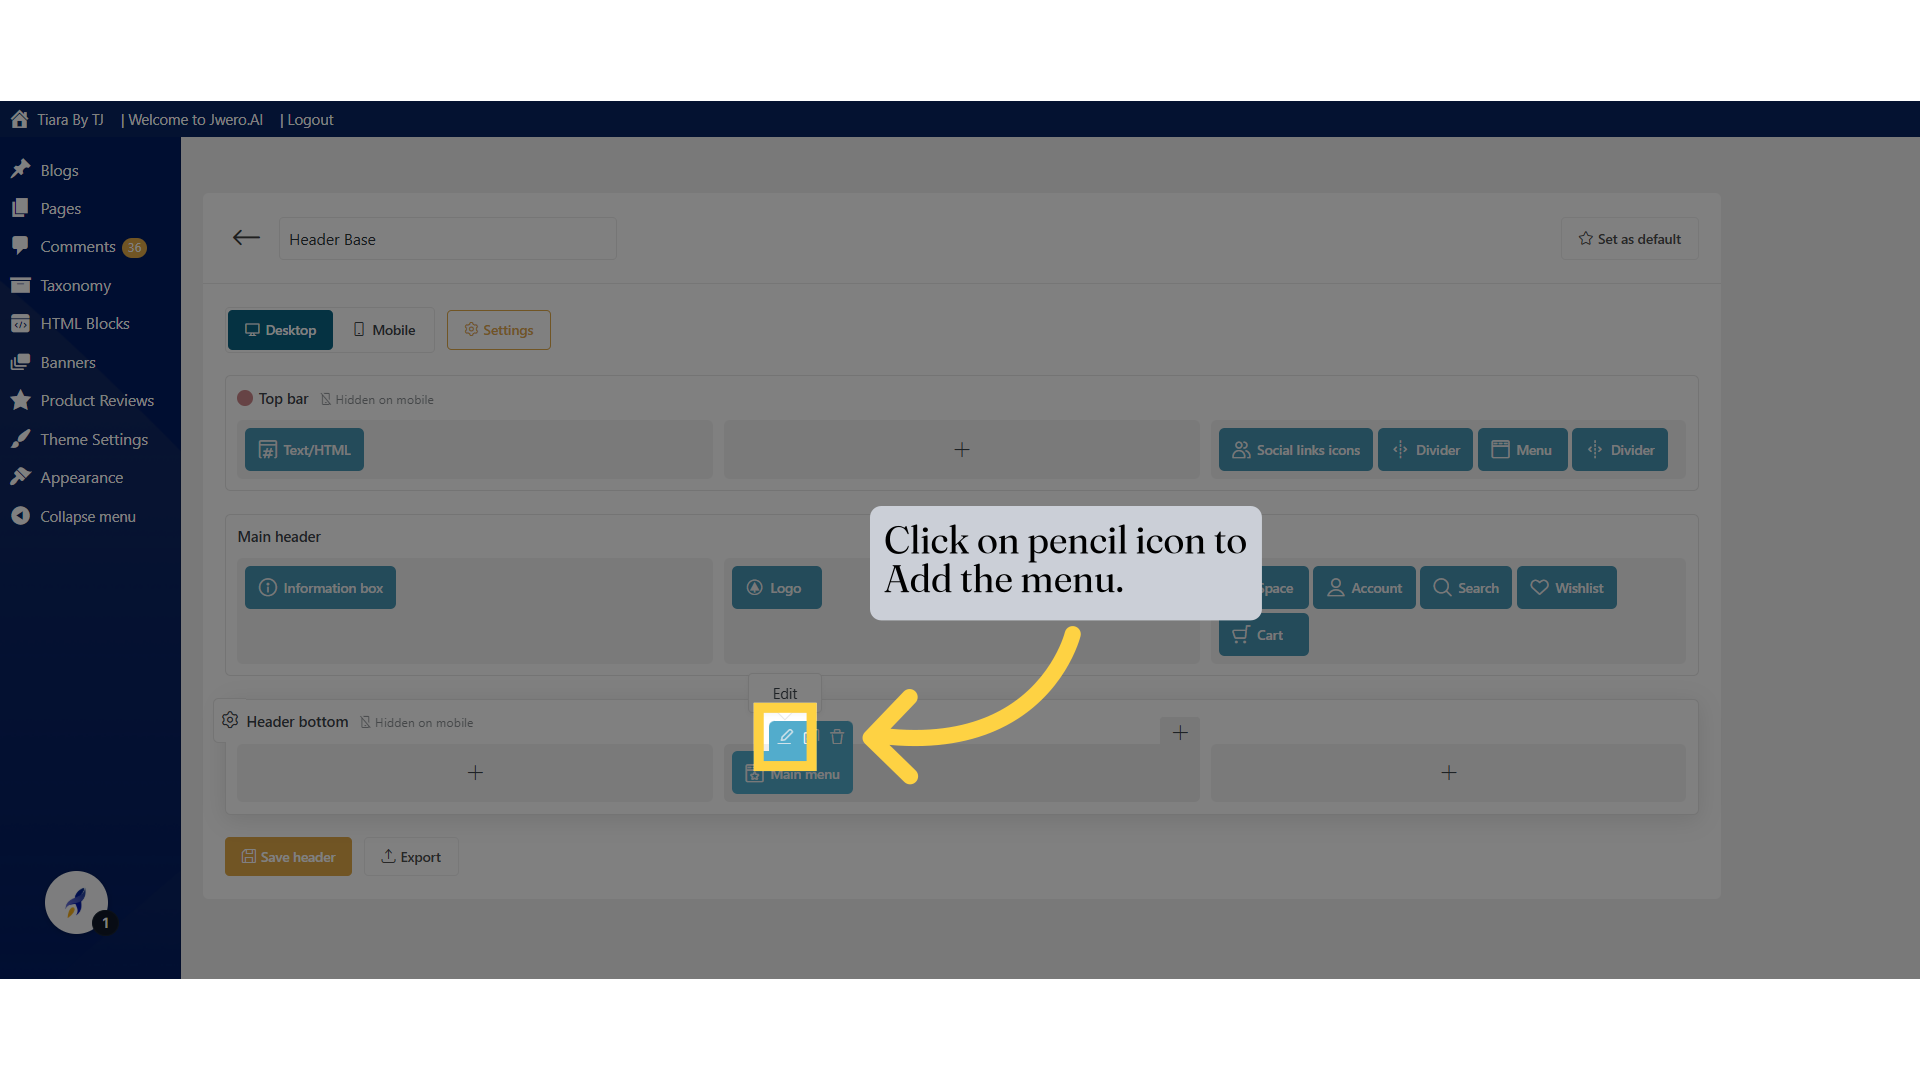
30. Click on pencil icon to Add the menu.
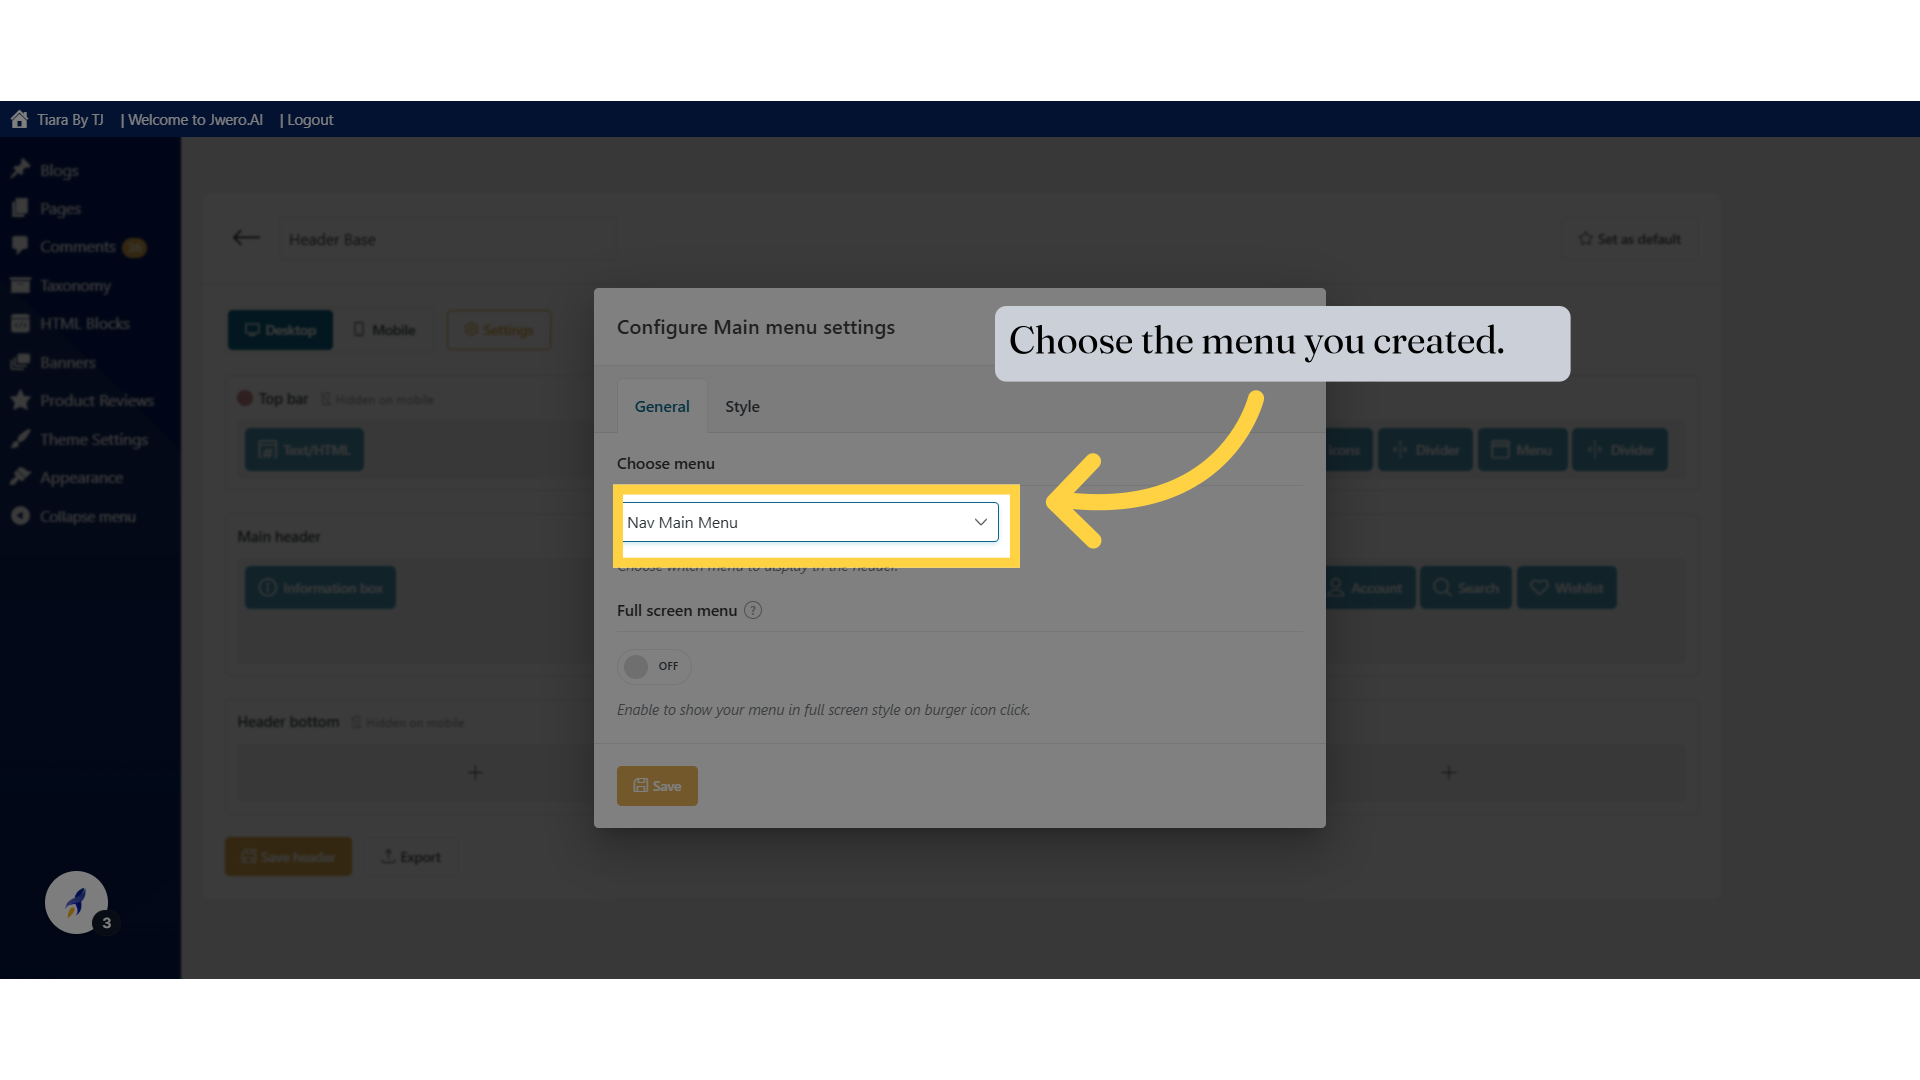
31. Choose the menu you created.
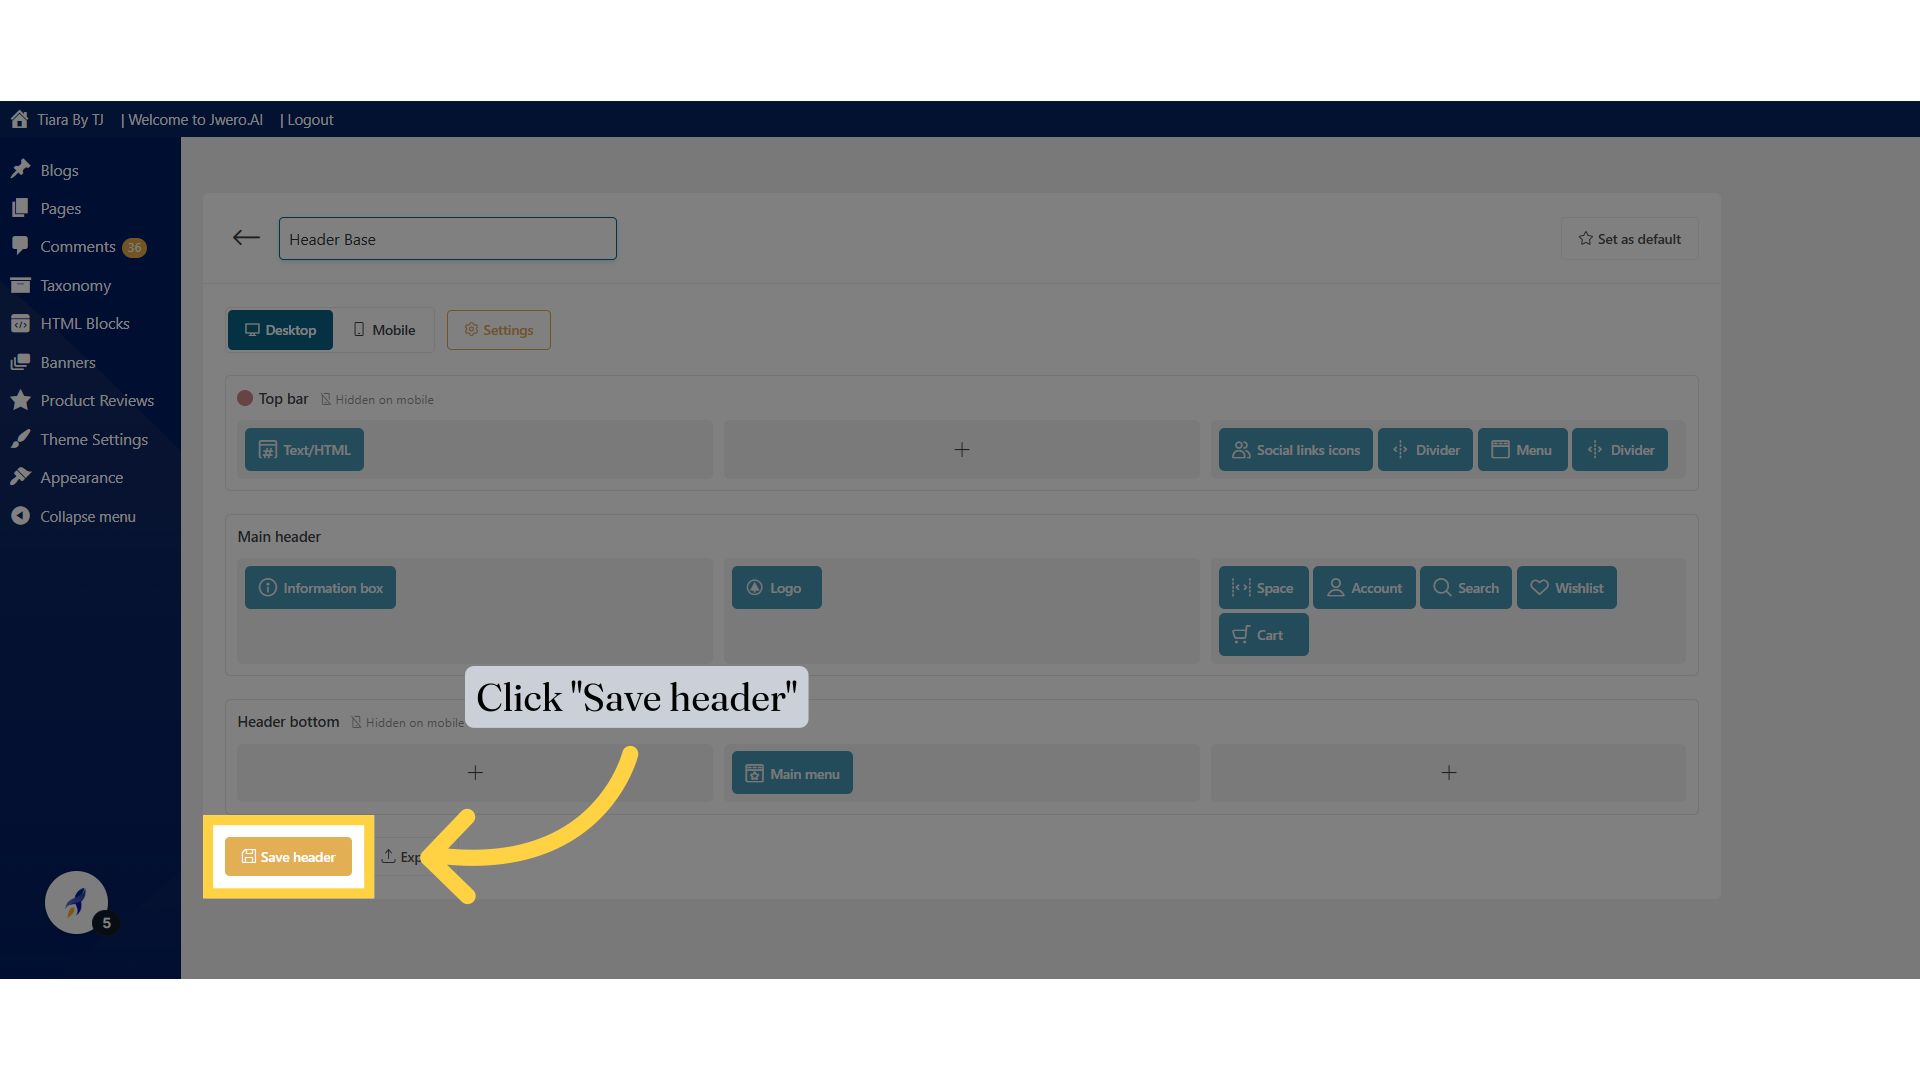
32. Click "Save header"
Save the header modifications.
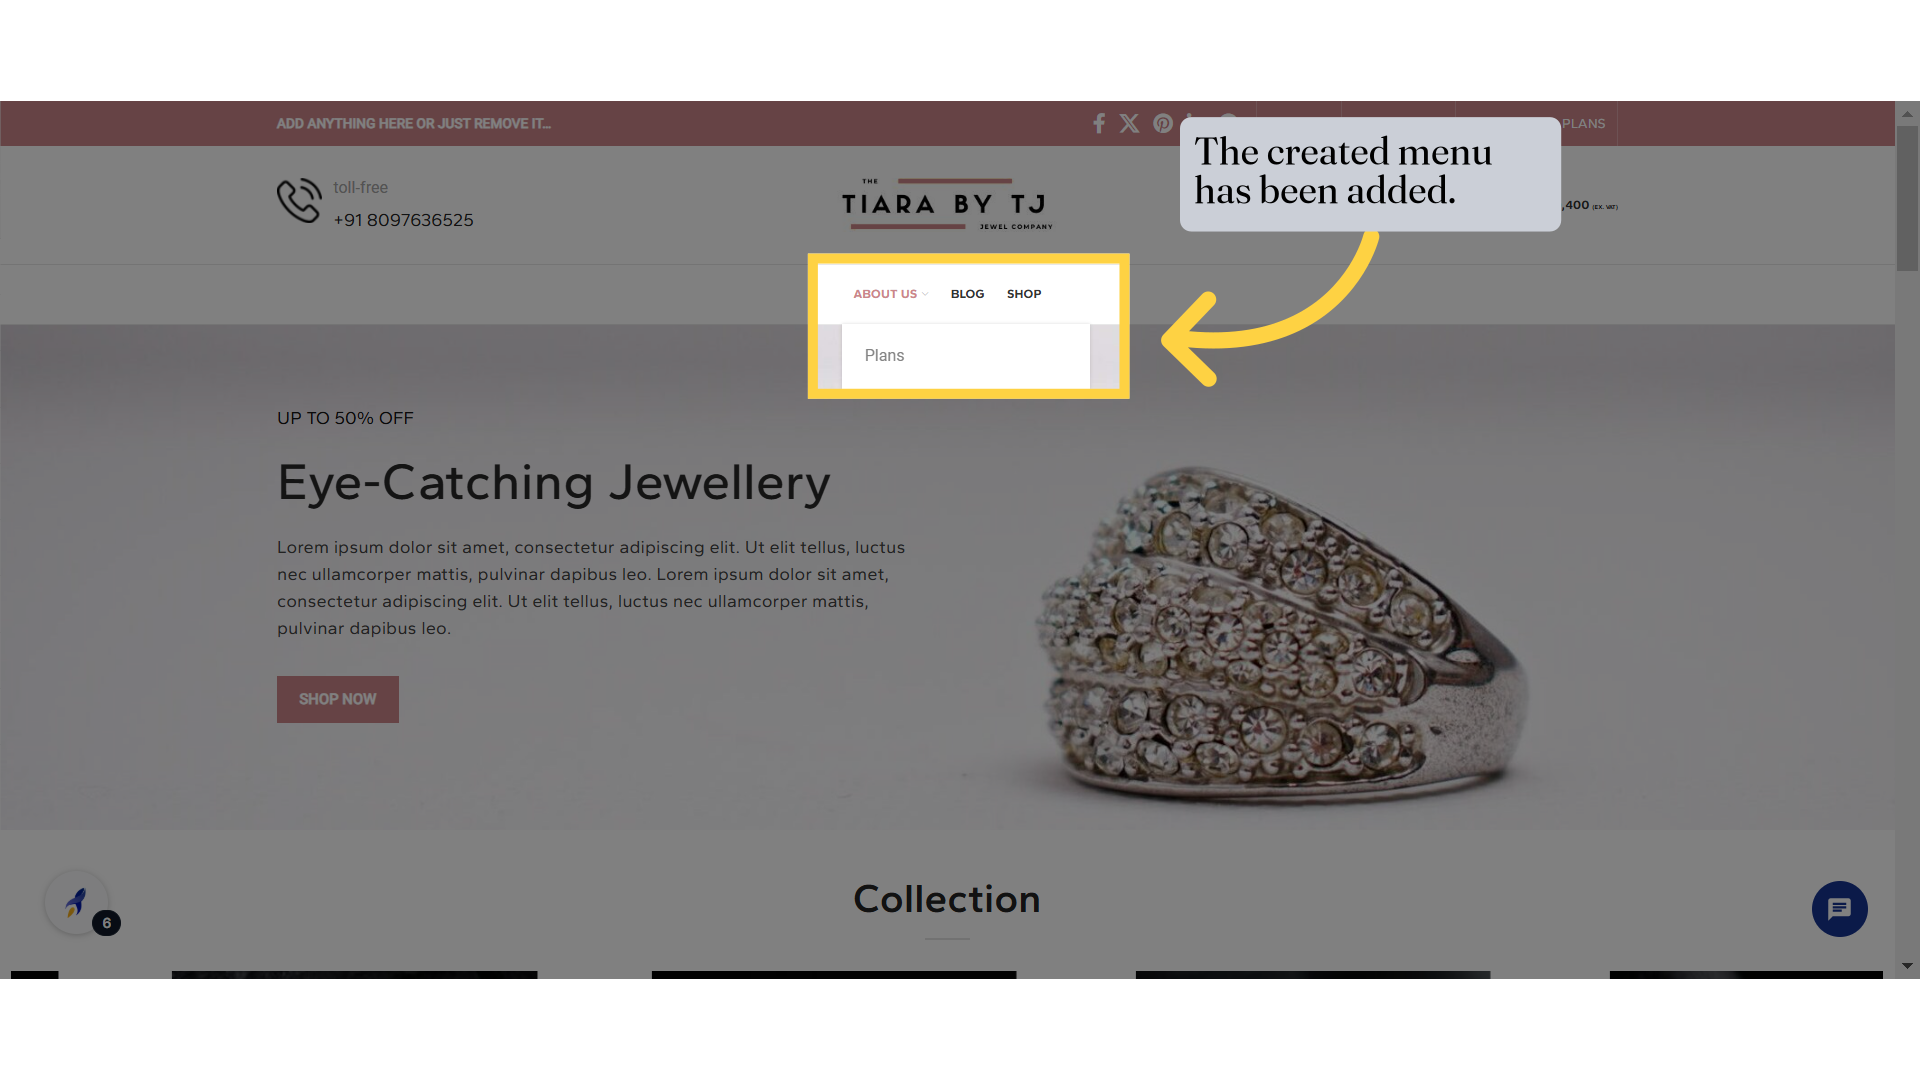
33. The created menu has been added.