How to create a Custom Field in CRM
How to create Custom Field in CRM
Go to crm.jwero.ai
1. Log in to your CRM system with valid credentials
You'll be able to add, label, and enable a new text field tailored to your needs.

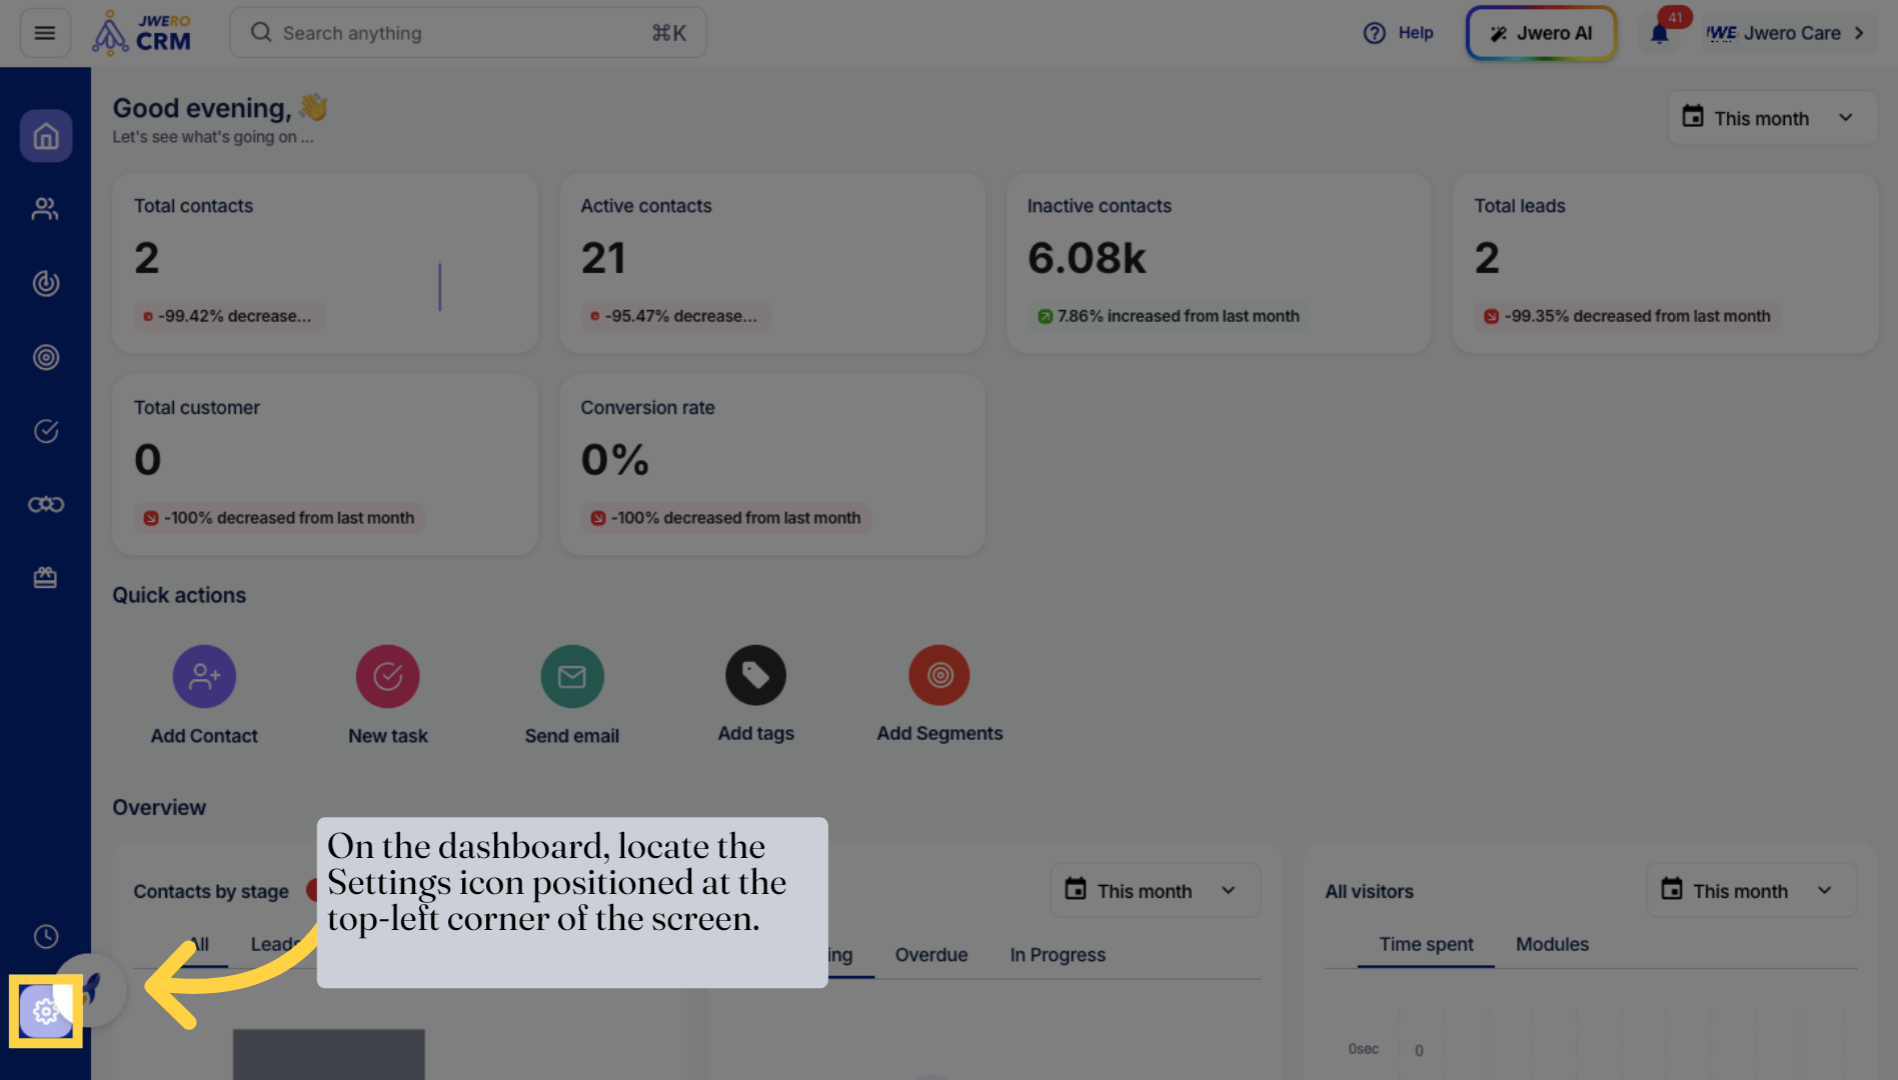
2. On the dashboard, locate the Settings icon positioned at the top-left corner of the screen.
Navigate to the main menu to access your account settings.
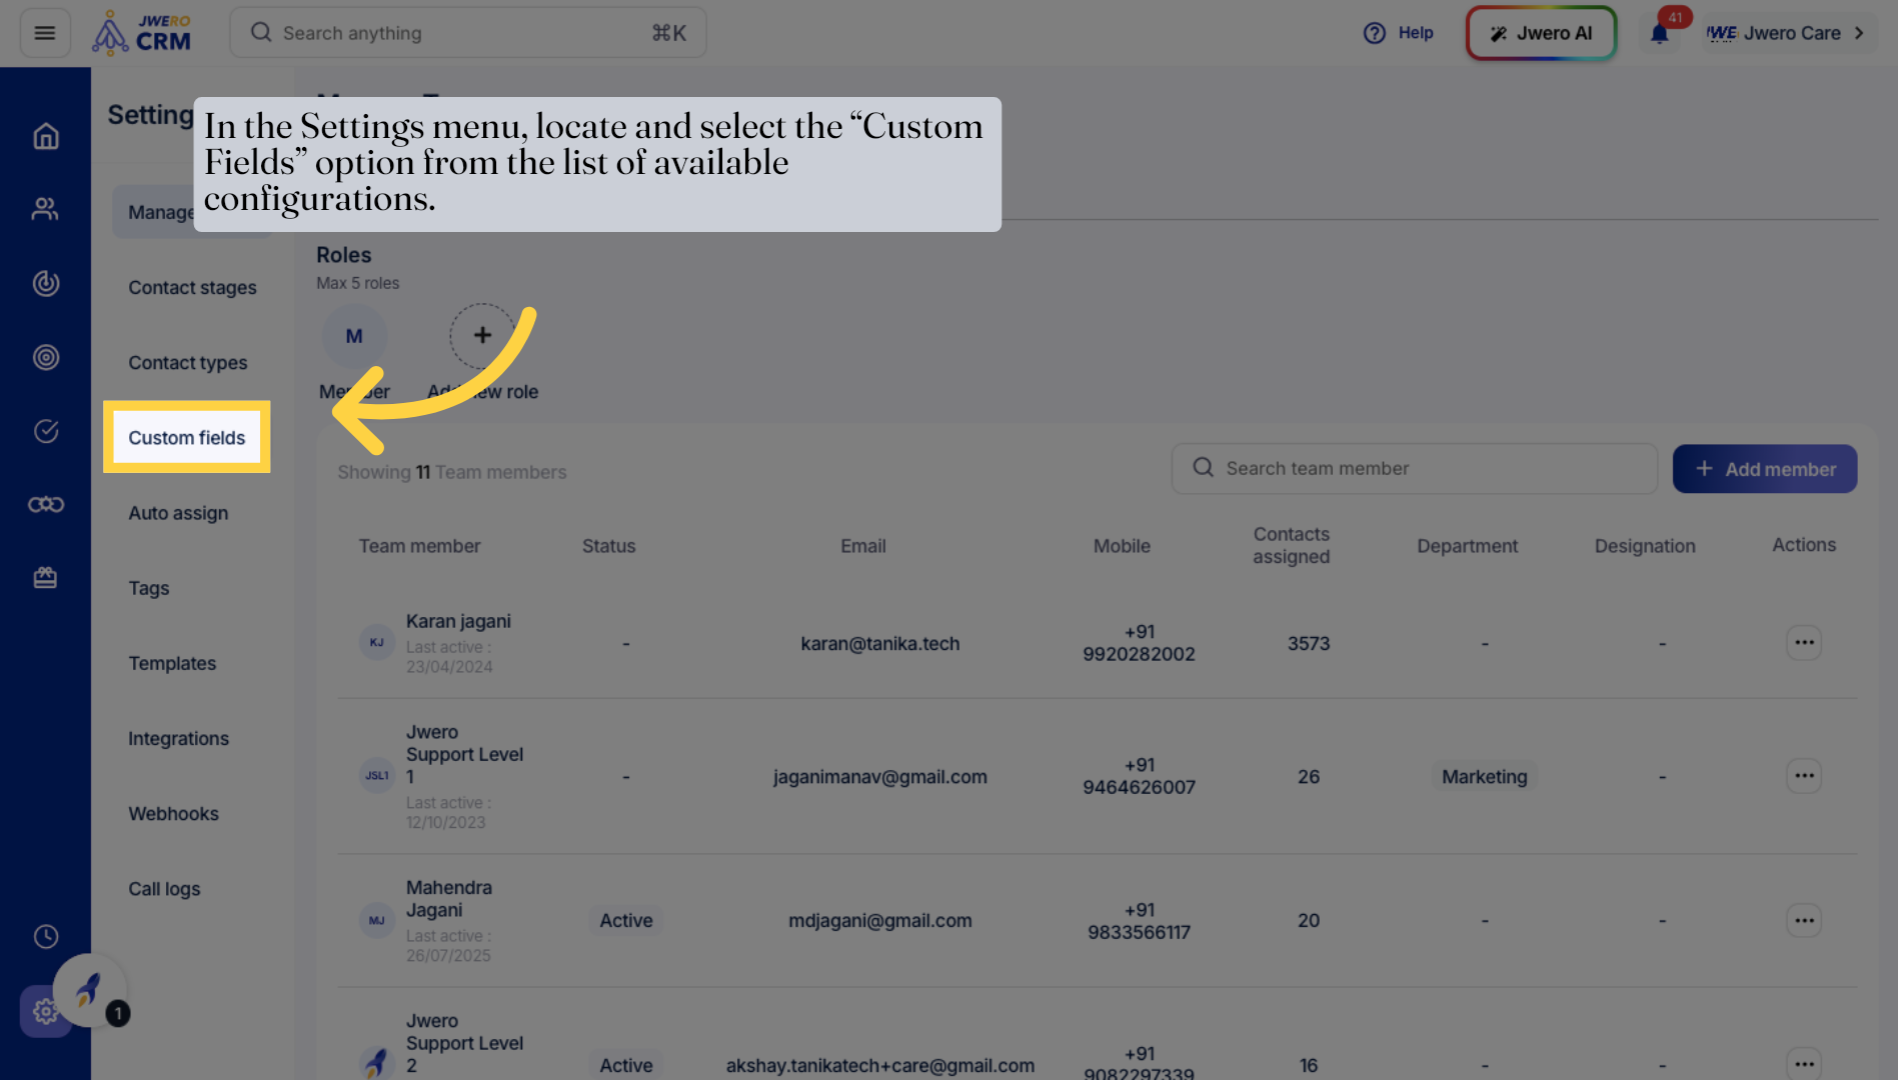
3. In the Settings menu, locate and select the “Custom Fields” option from the list of available configurations.
Select the 'Custom fields' option to manage your data fields.
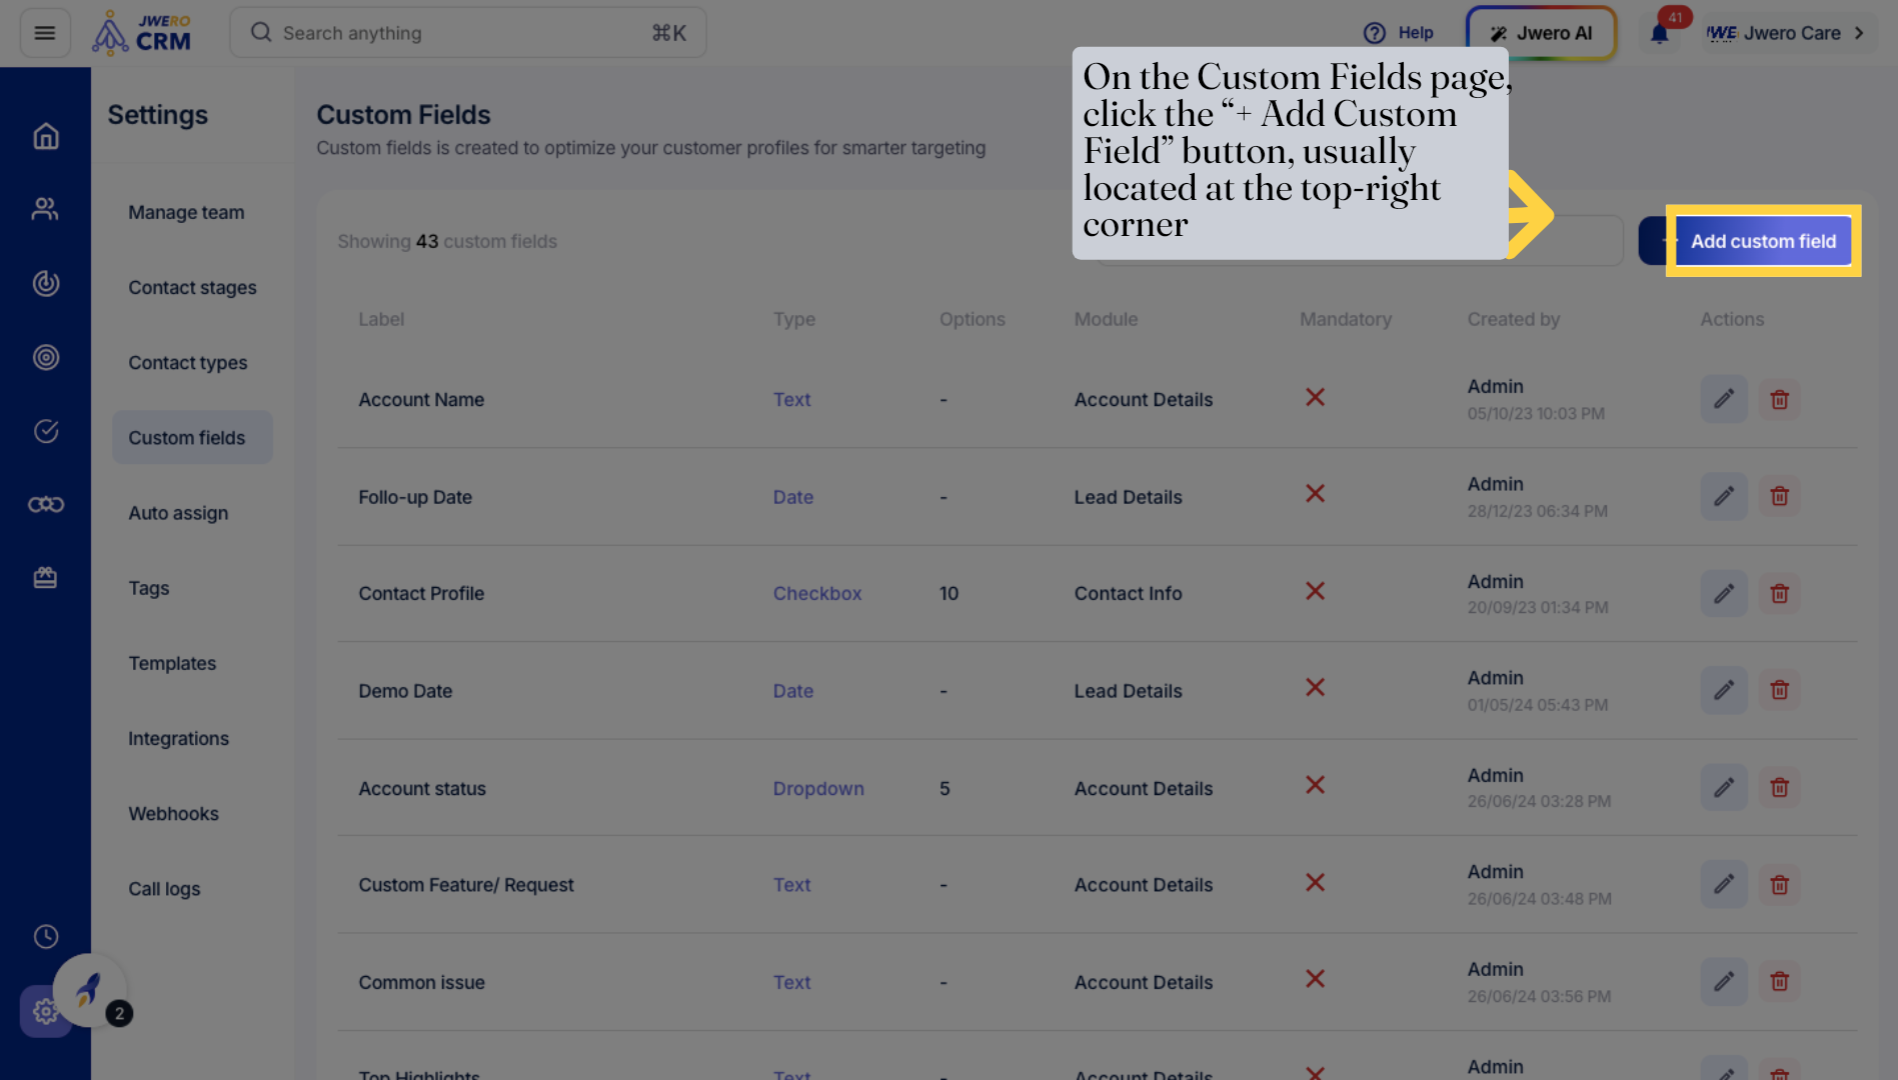
4. On the Custom Fields page, click the “+ Add Custom Field” button, usually located at the top-right corner
Initiate the creation of a new custom field by clicking 'Add custom field'.
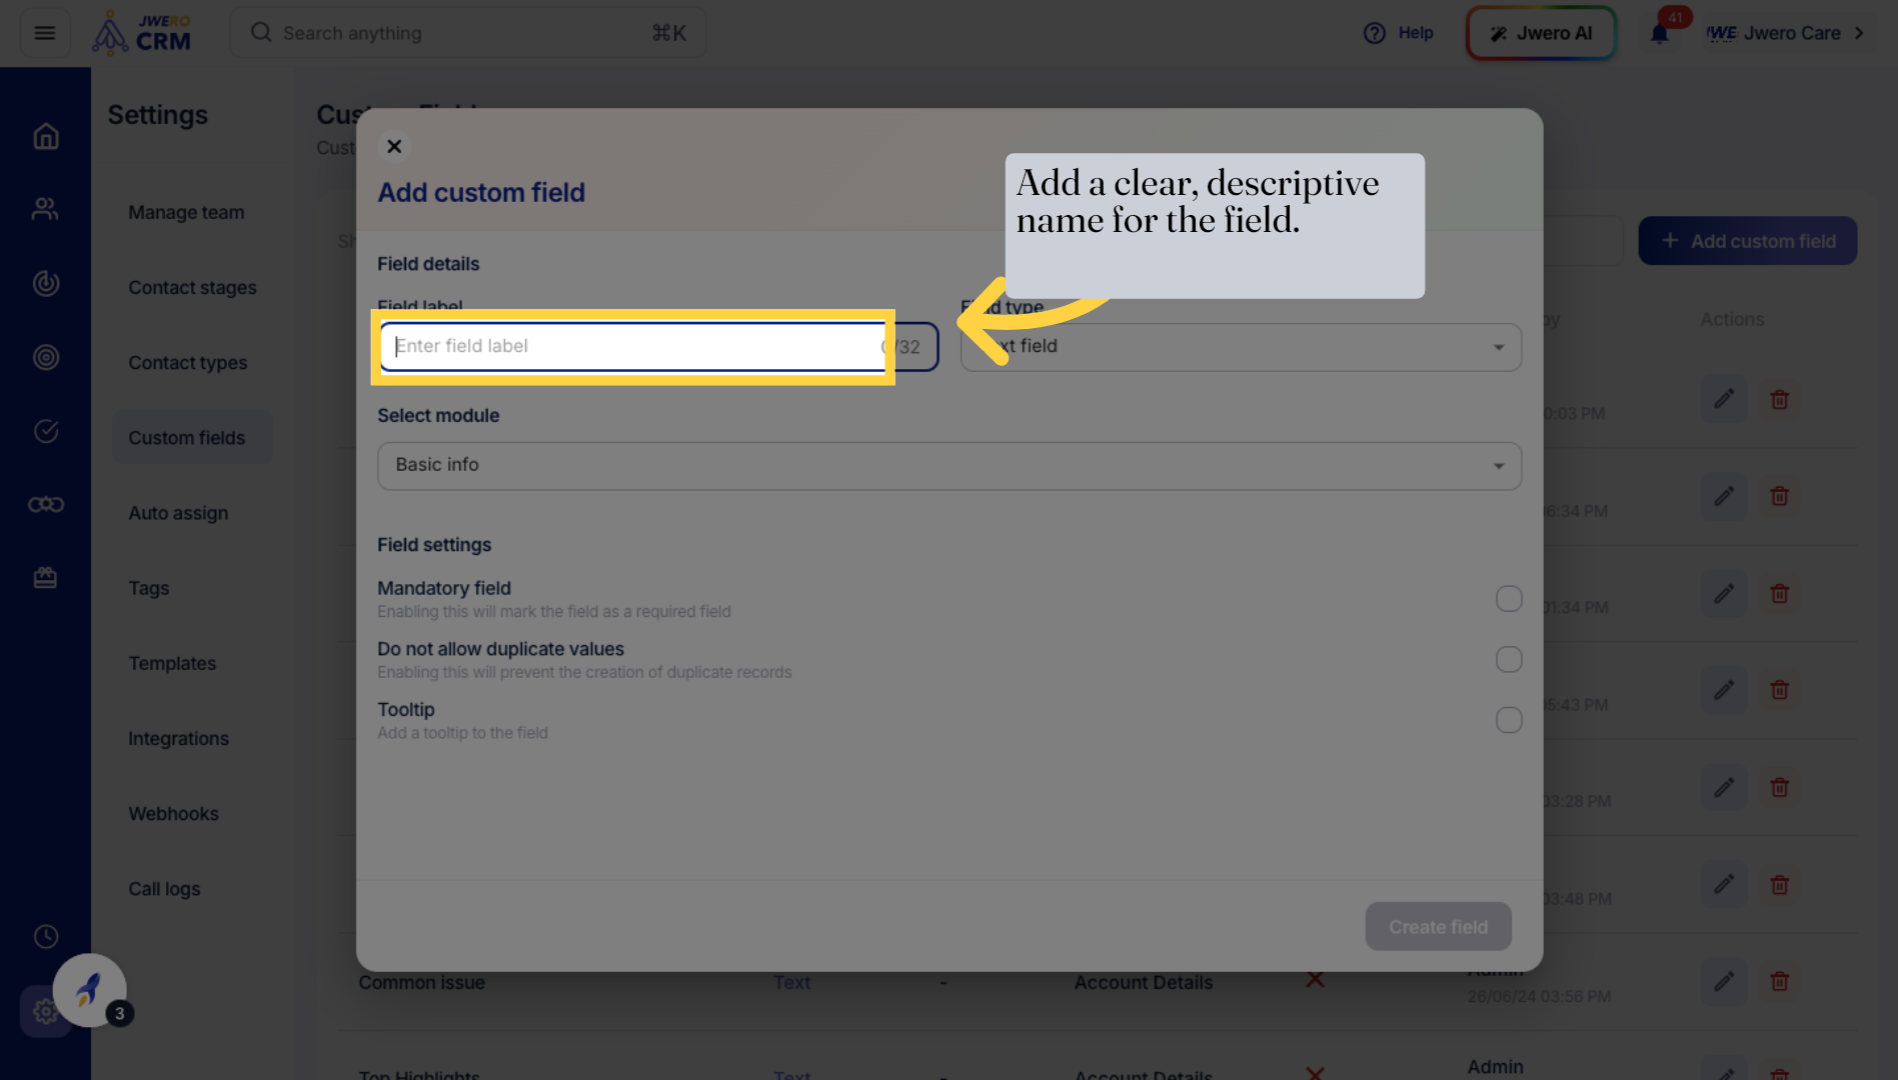
5. Add a clear, descriptive name for the field.
Click on the input area labeled 'Enter field label' to name your new field.
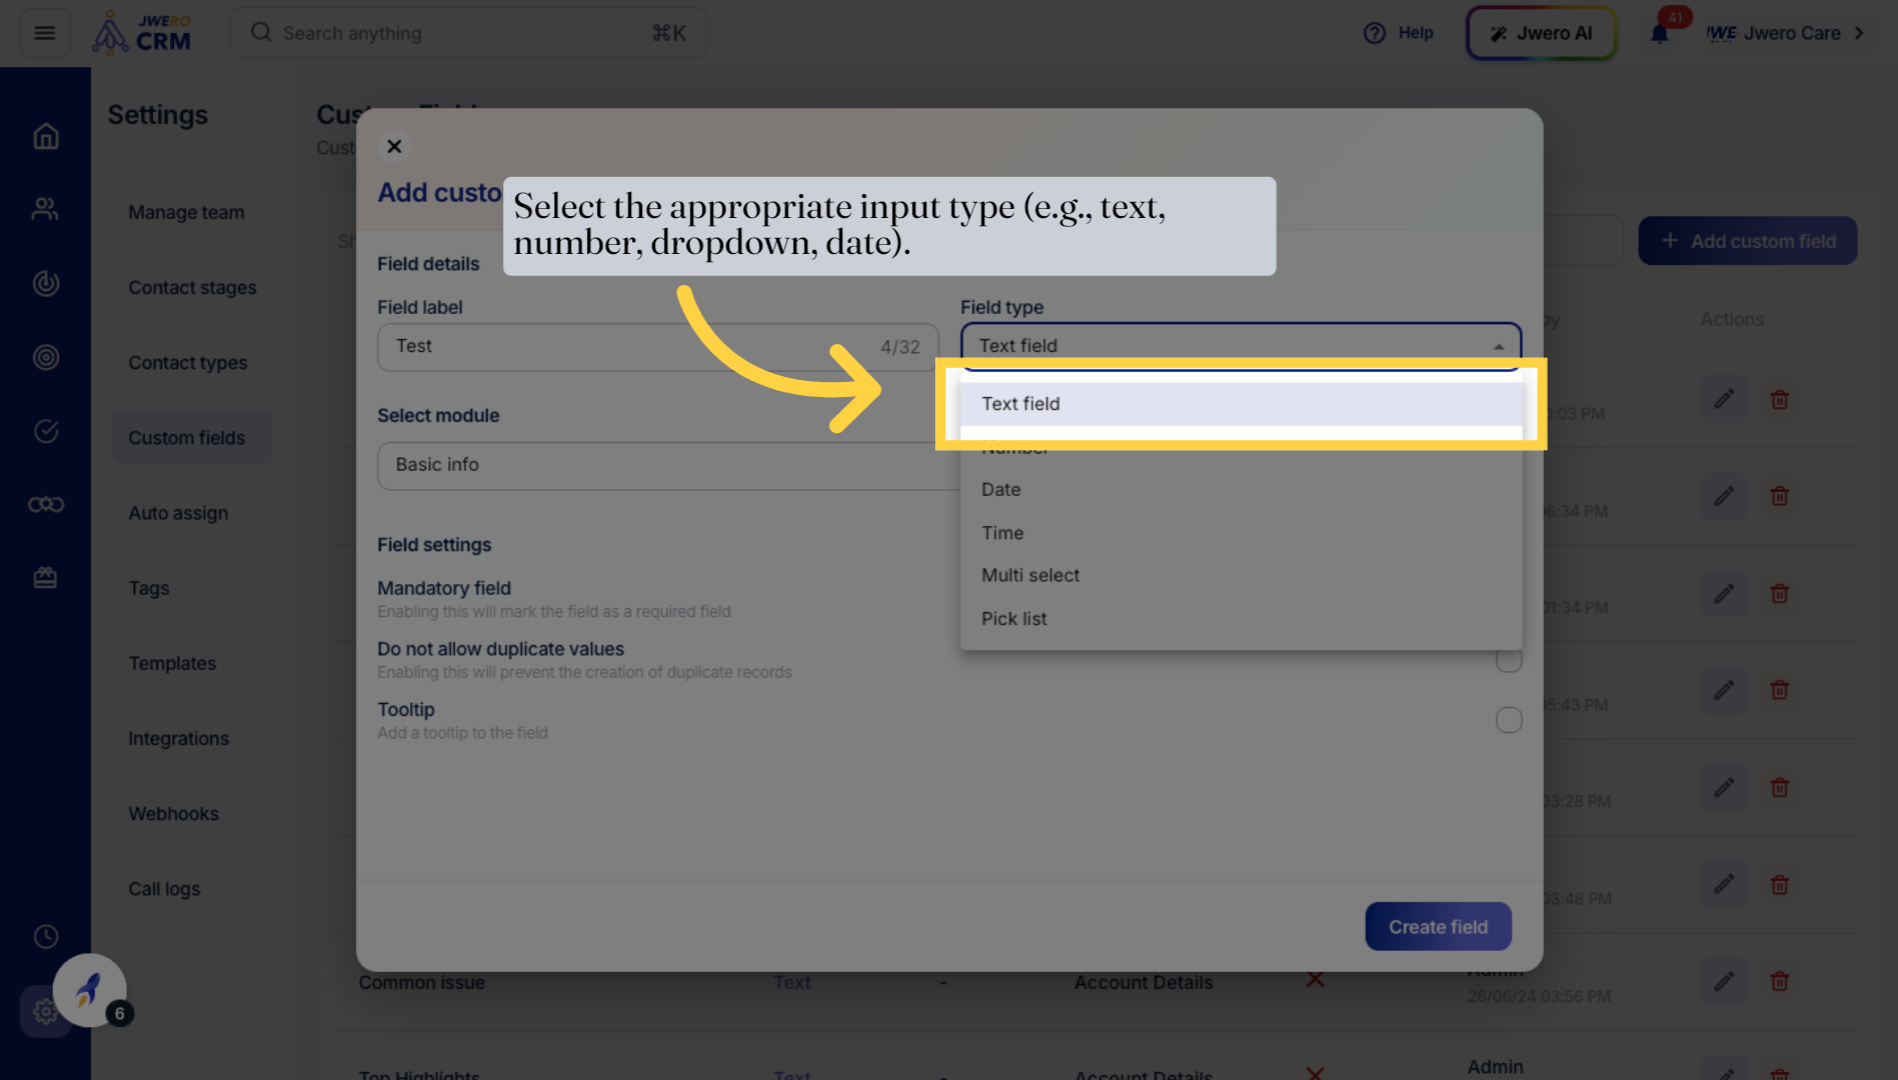
6. Select the appropriate input type (e.g., text, number, dropdown, date).
Choose the field type by selecting 'Text field' from the available options.
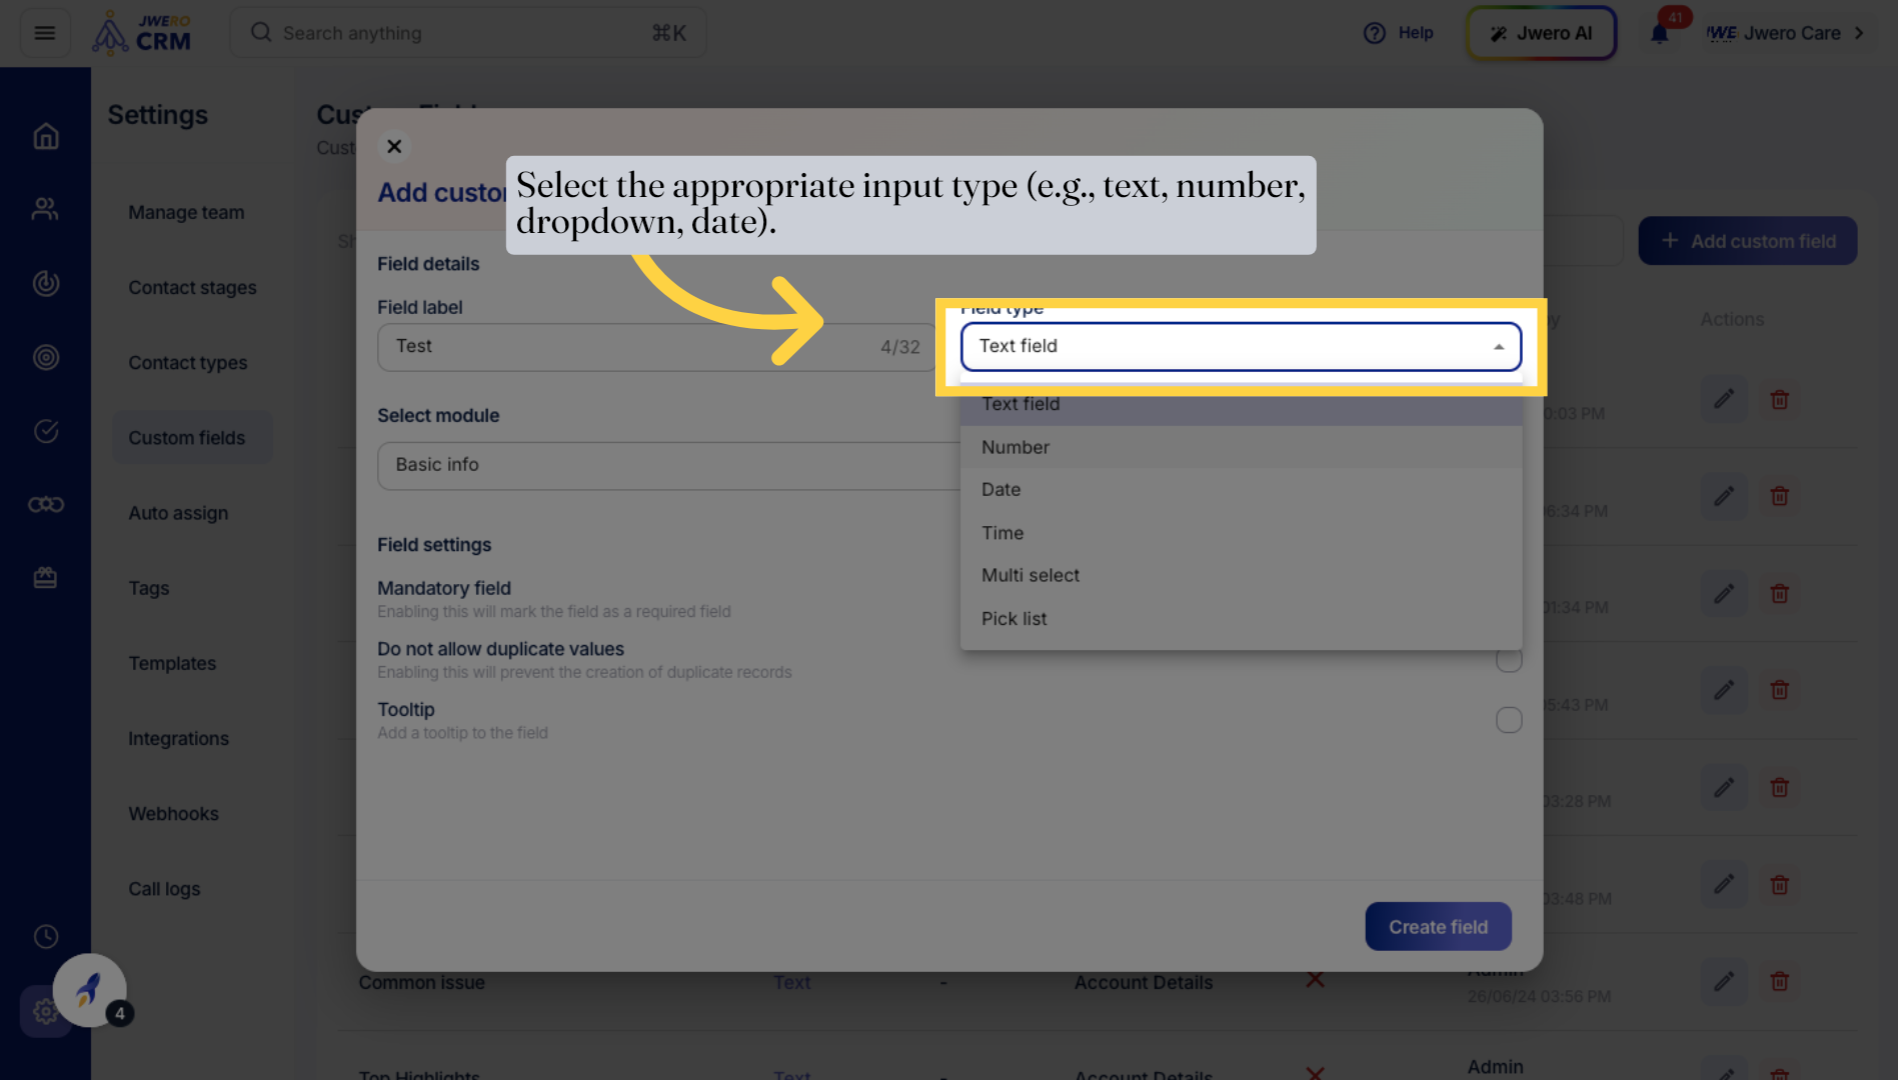
7. Select the appropriate input type (e.g., text, number, dropdown, date).
Confirm your selection of the 'Text field' type to proceed.
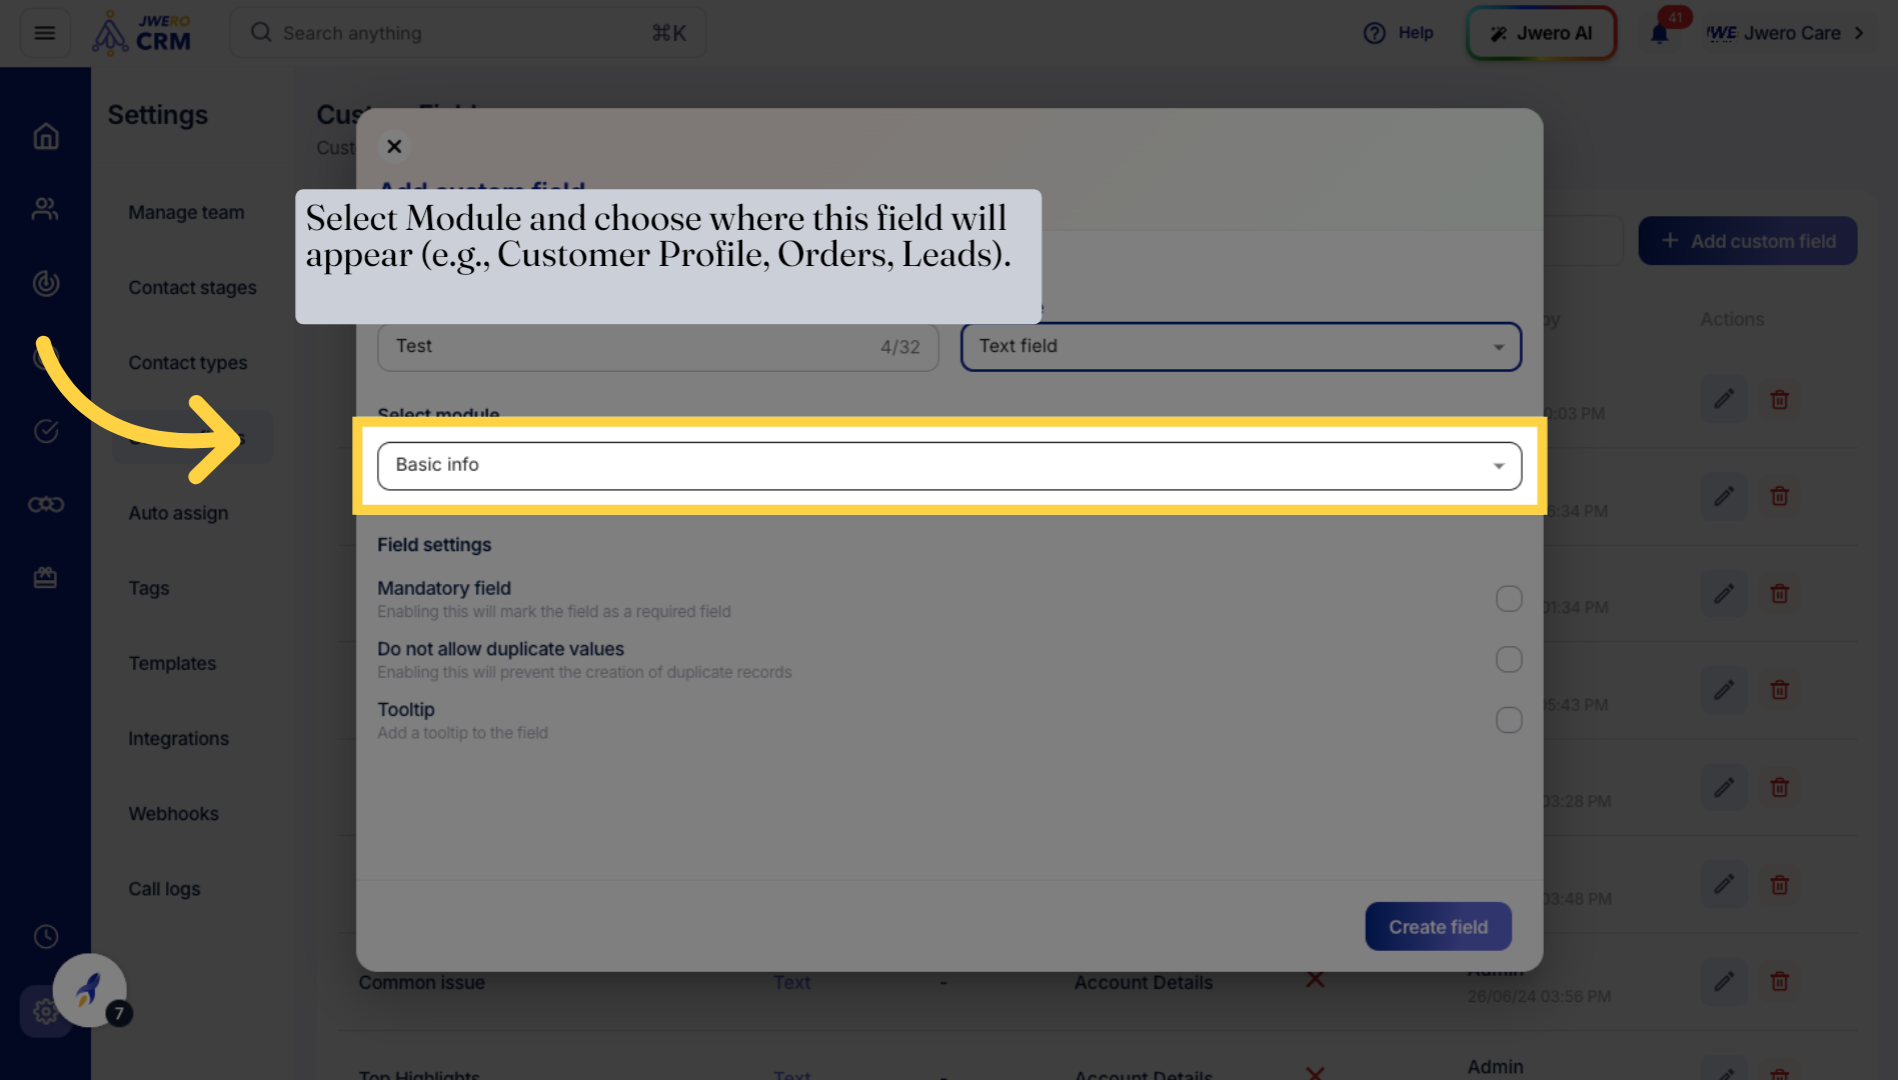
8. Select Module and choose where this field will appear (e.g., Customer Profile, Orders, Leads).
Return to the 'Basic info' section to associate the custom field with relevant data.
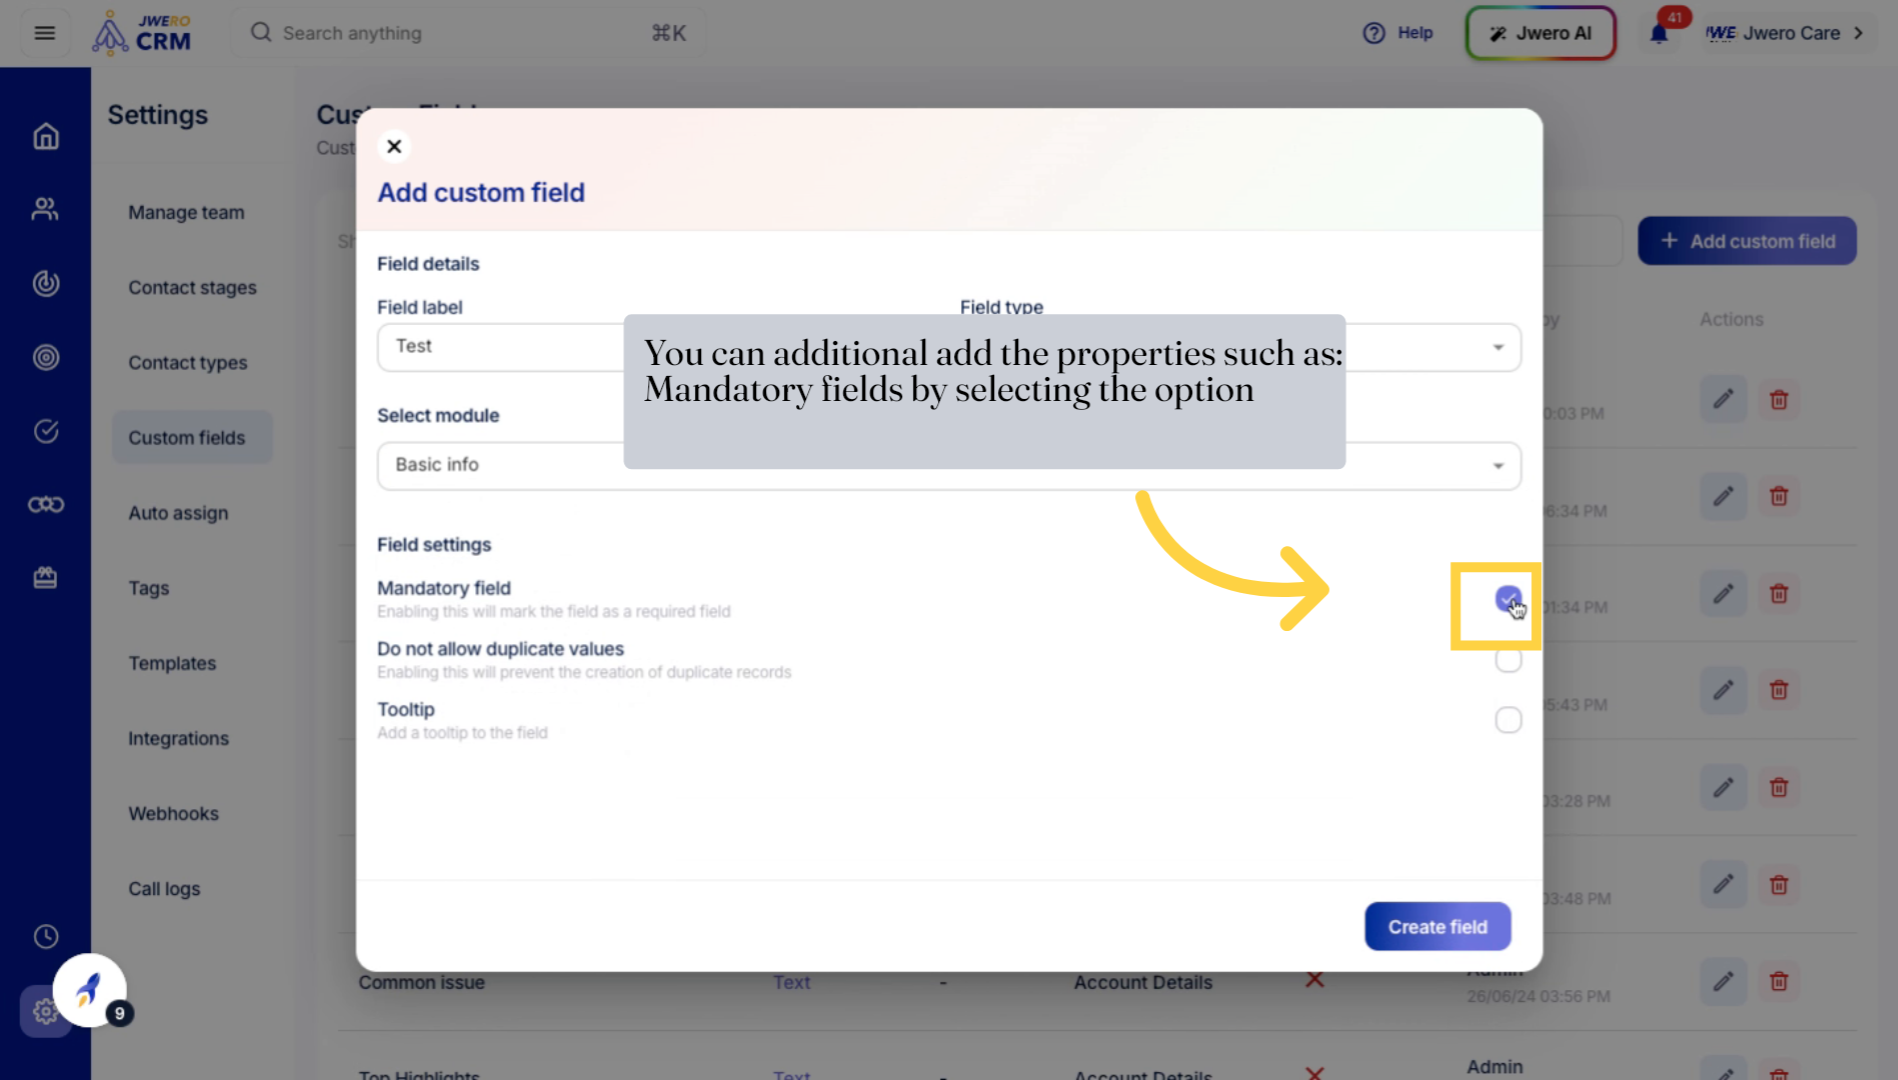
9. You can additional add the properties such as: Mandatory fields by selecting the option
Provide any additional required information or settings for the custom field.
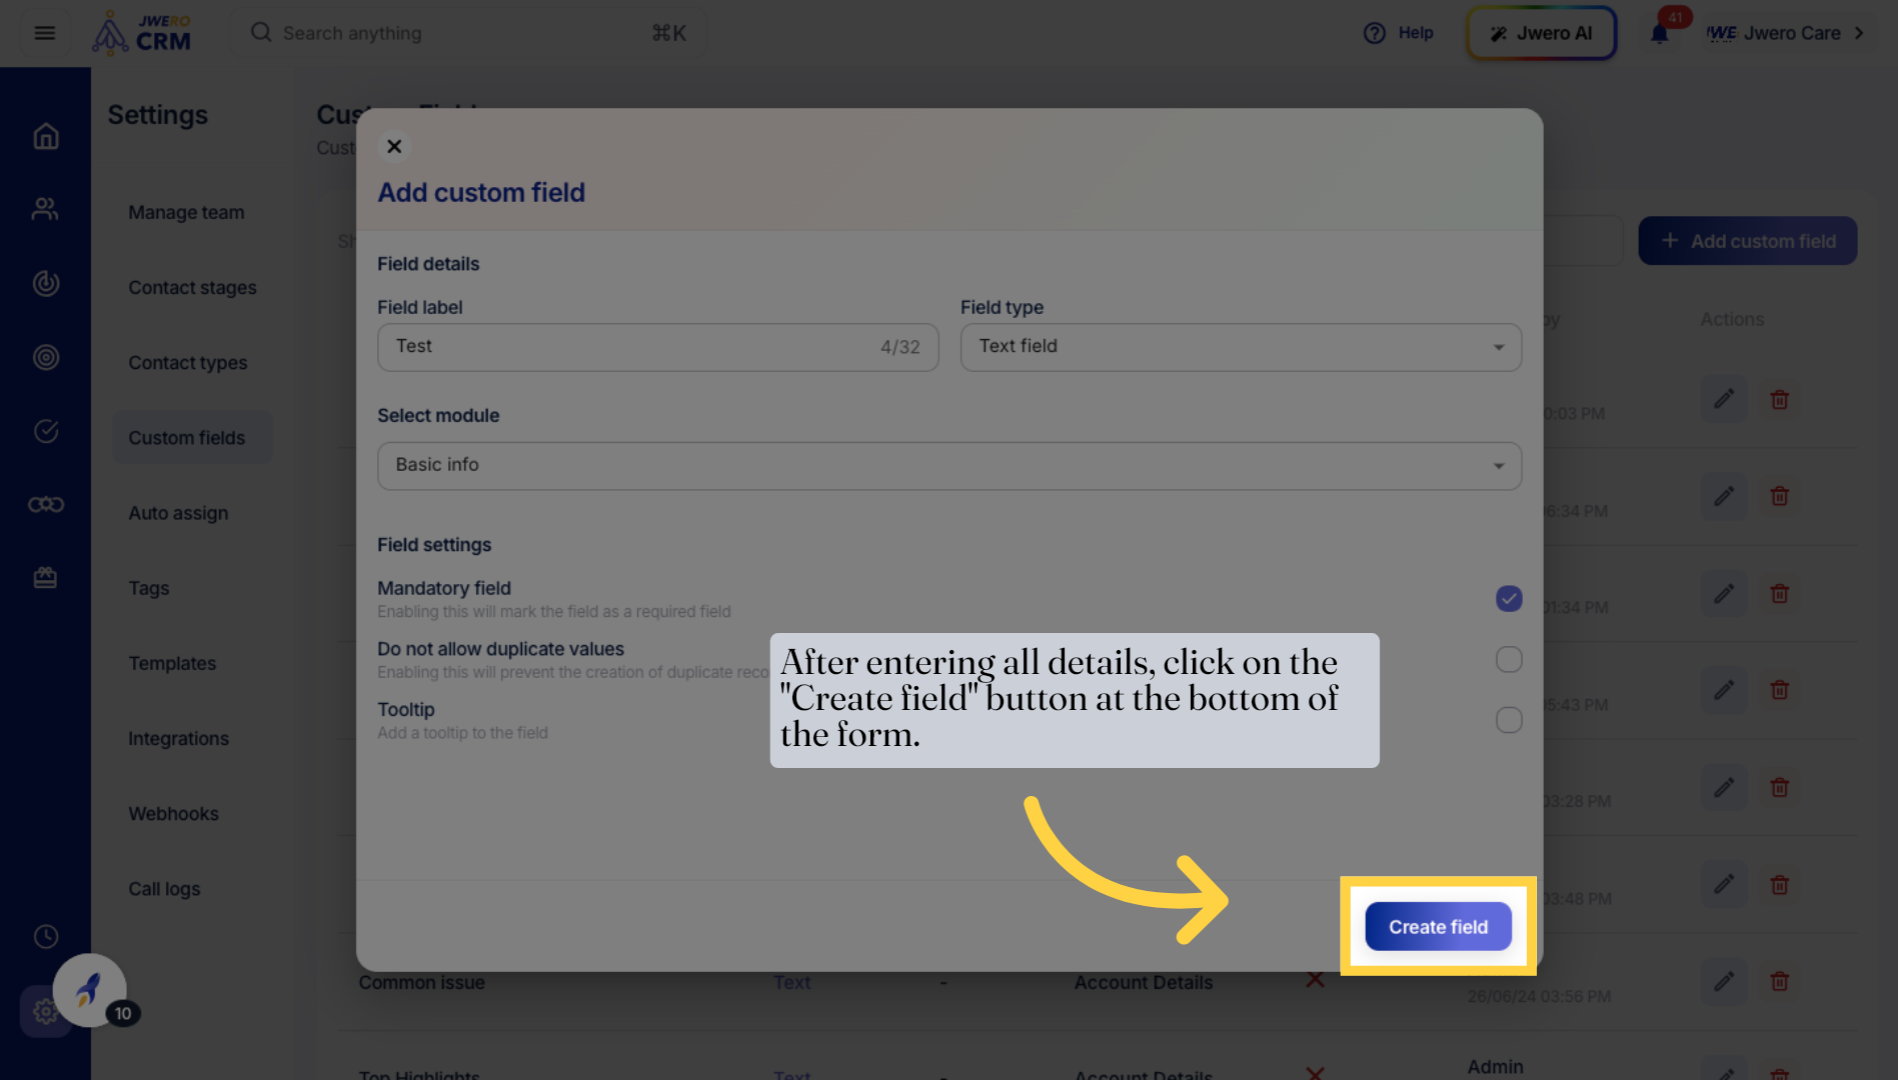
10. After entering all details, click on the "Create field" button at the bottom of the form.
Finalize the creation process by clicking the 'Create field' button.
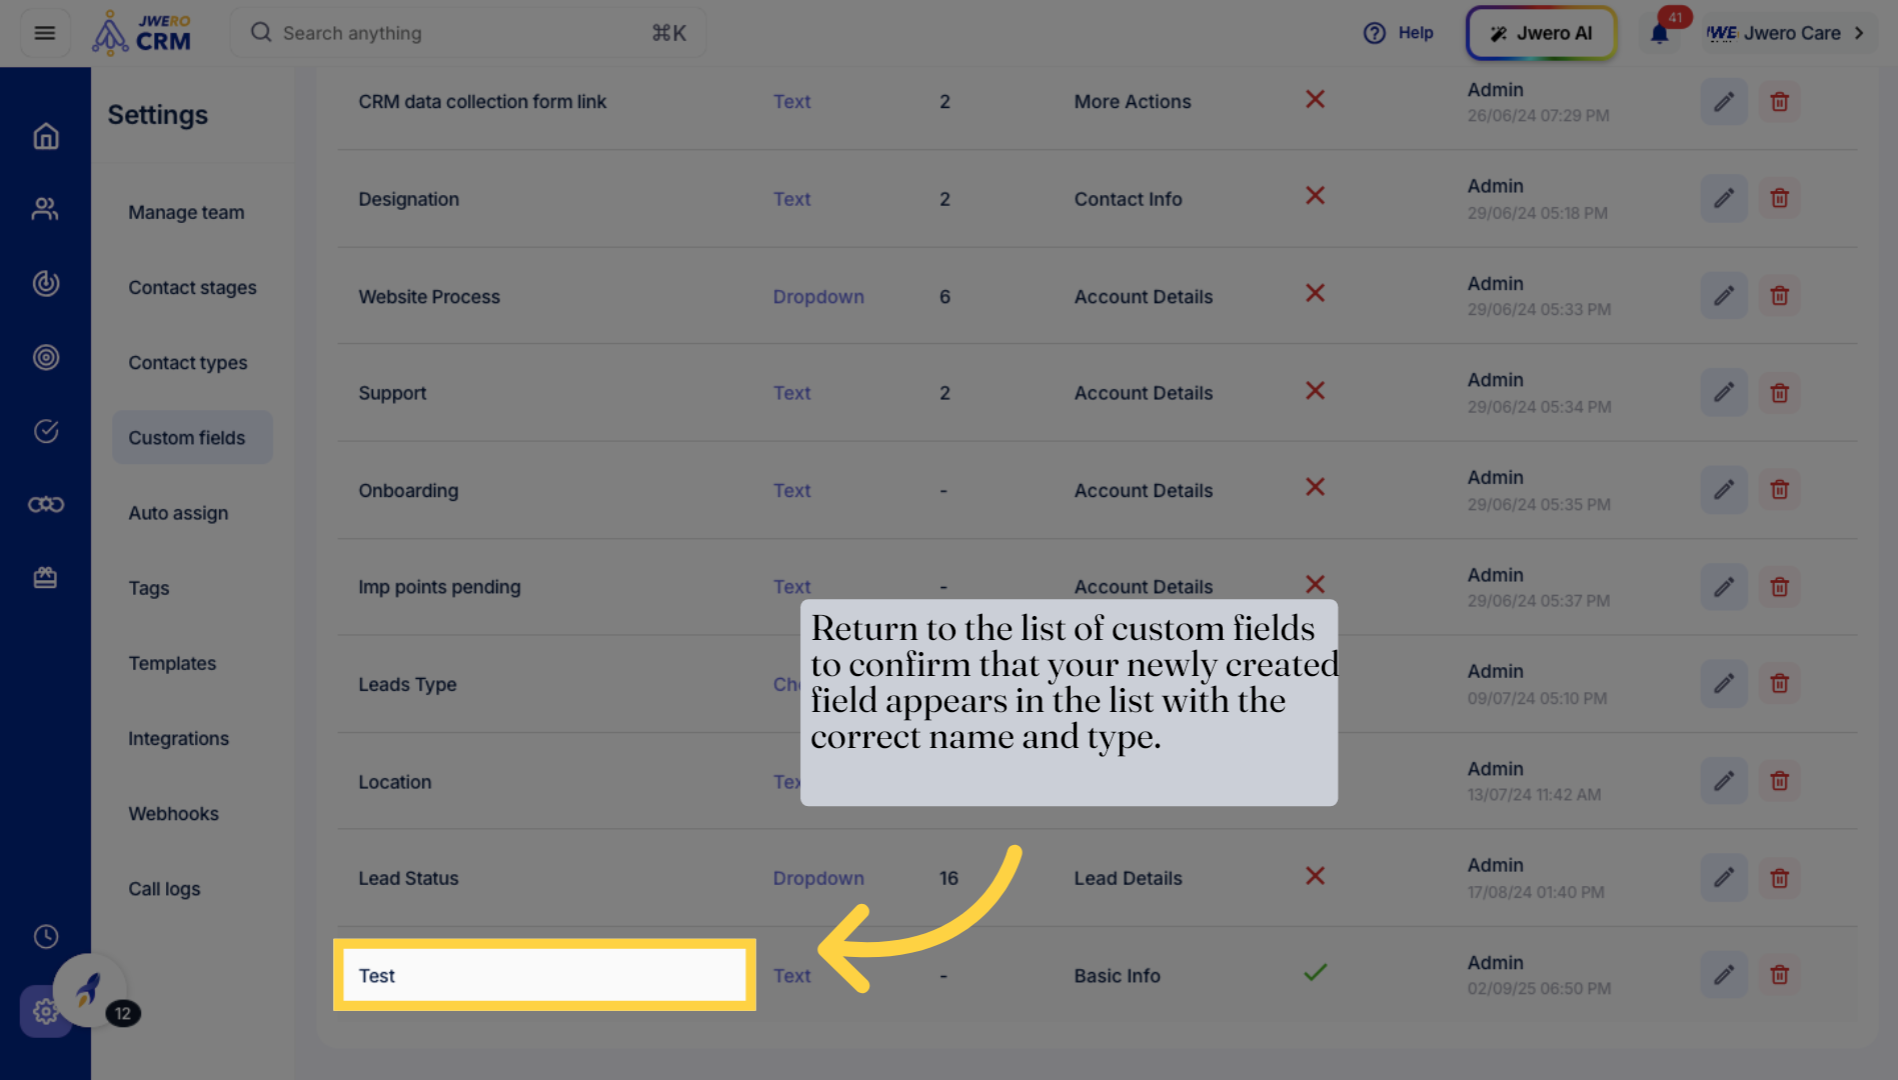
11. Return to the list of custom fields to confirm that your newly created field appears in the list with the correct name and type.
Locate and select your newly created custom field labeled 'Test' to review it.
This guide walked you through creating and configuring a custom text field within your account settings, ensuring it is properly labeled, enabled, and integrated with your basic information.