How to create a new role and assign permission in CRM
How to create a new role and assign permission in CRM
Learn how to create a new role and assign permissions within your CRM system.
Go to crm.jwero.ai
1. Open your CRM platform and log in using administrator credentials.
This guide provides clear steps to help you set up roles tailored to your organizational needs.

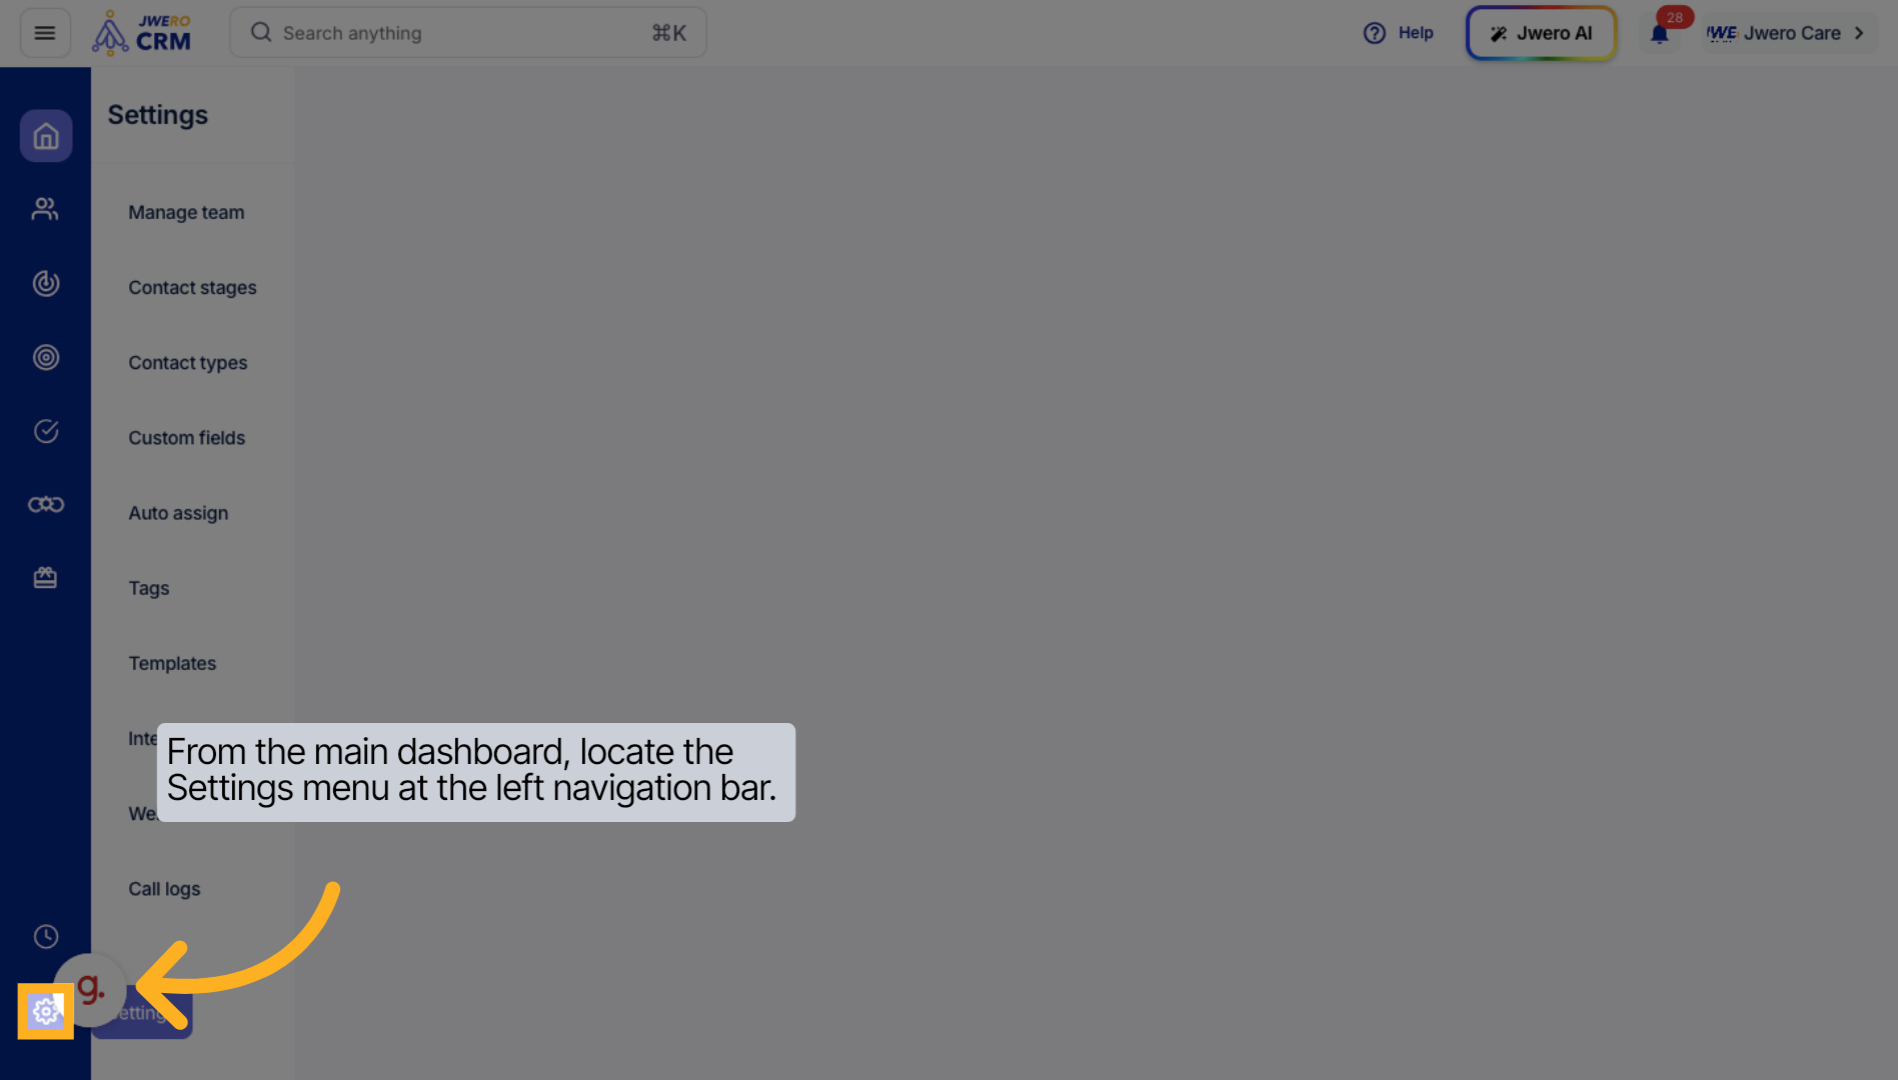
2. From the main dashboard, locate the Settings menu at the left navigation bar.
Navigate to the Roles section within your CRM dashboard to begin managing user roles.
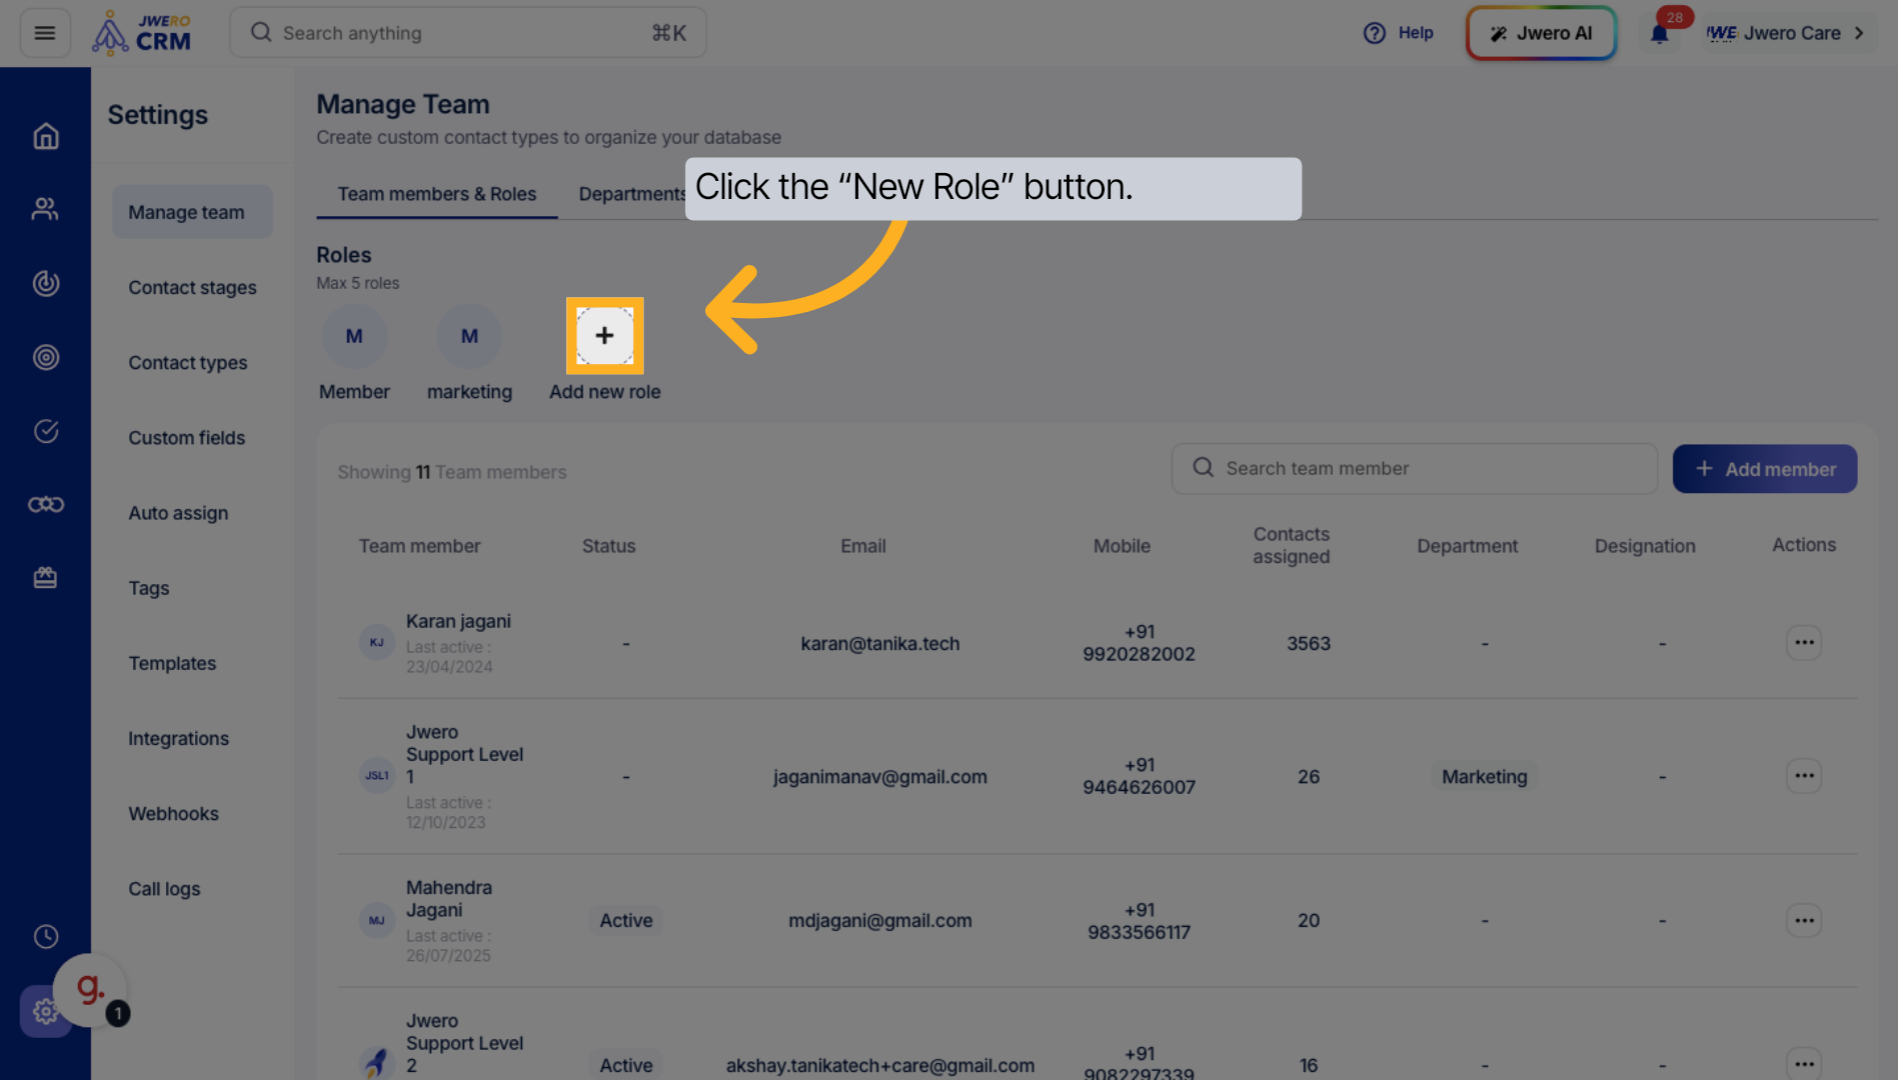
3. Click the “New Role” button.
Initiate the creation of a new role by selecting the option to add or create a role.
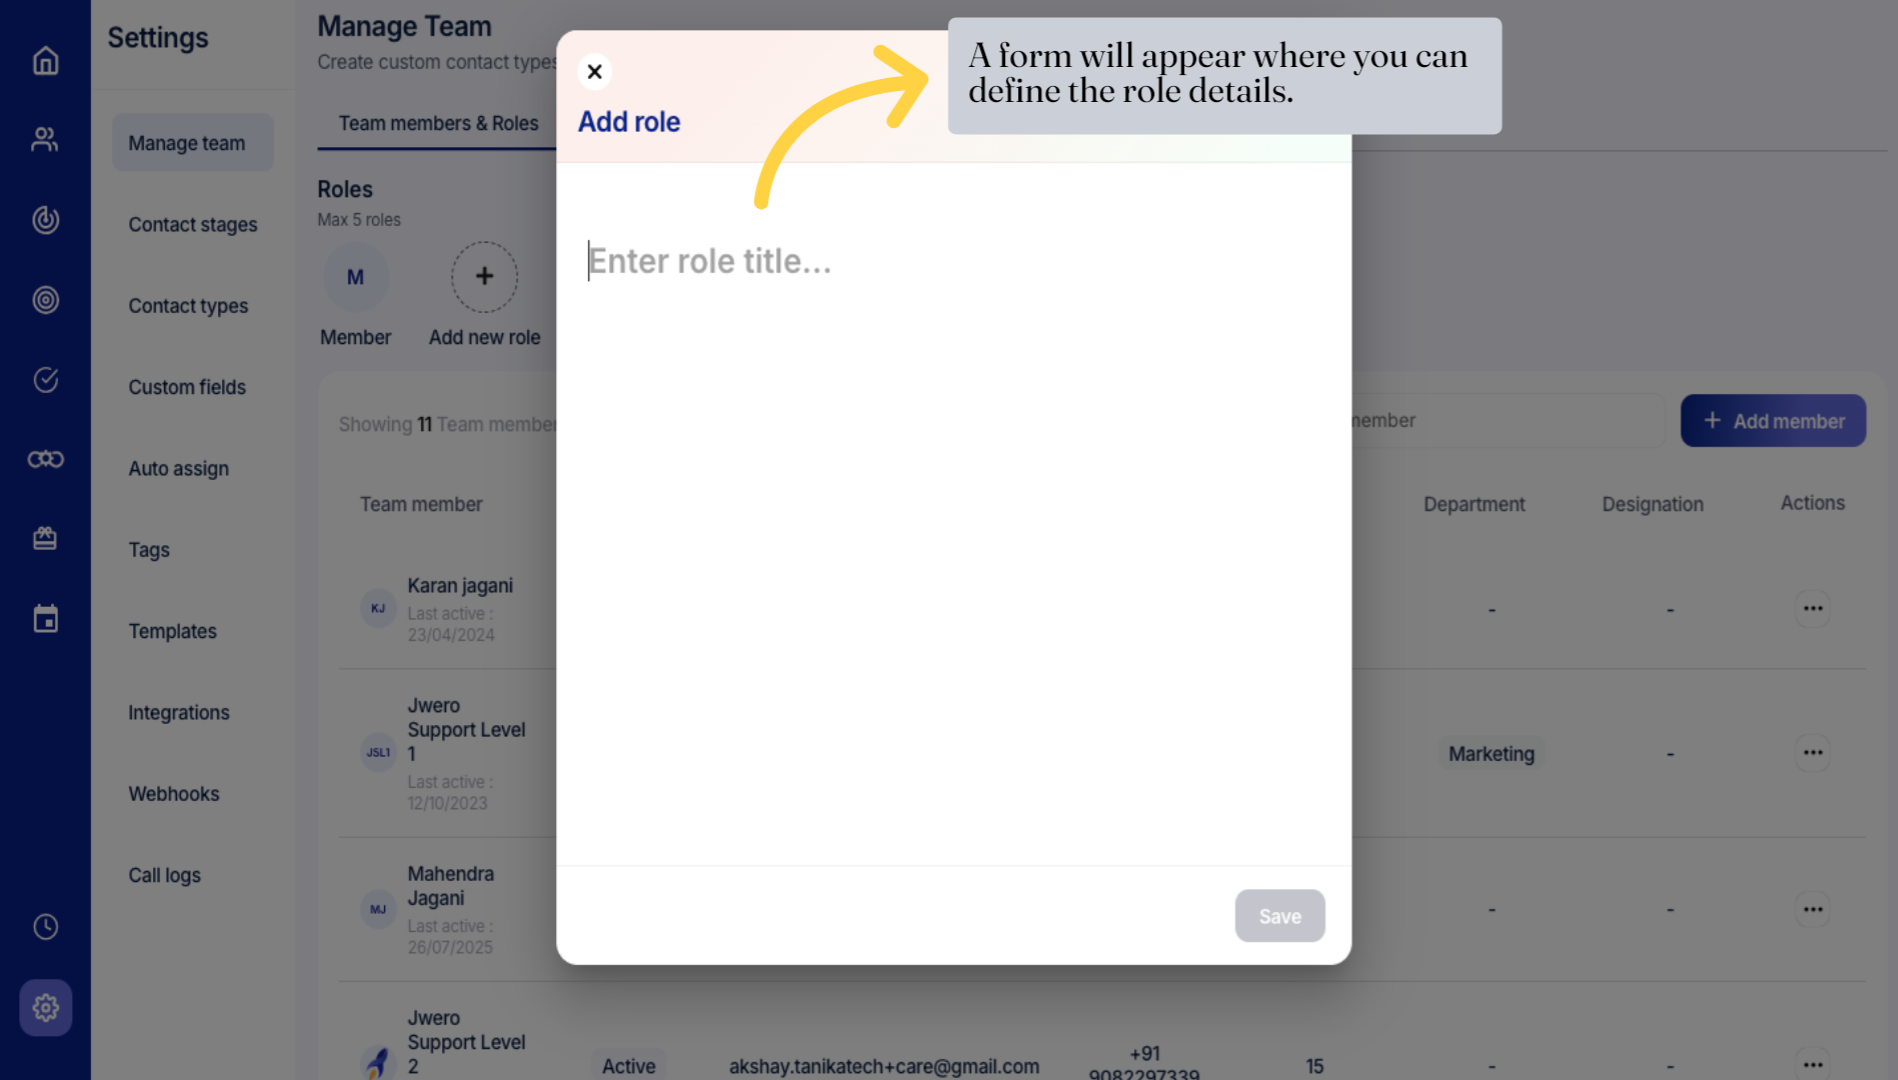
4. A form will appear where you can define the role details.
Enter a descriptive name for your new role to clearly identify its purpose.
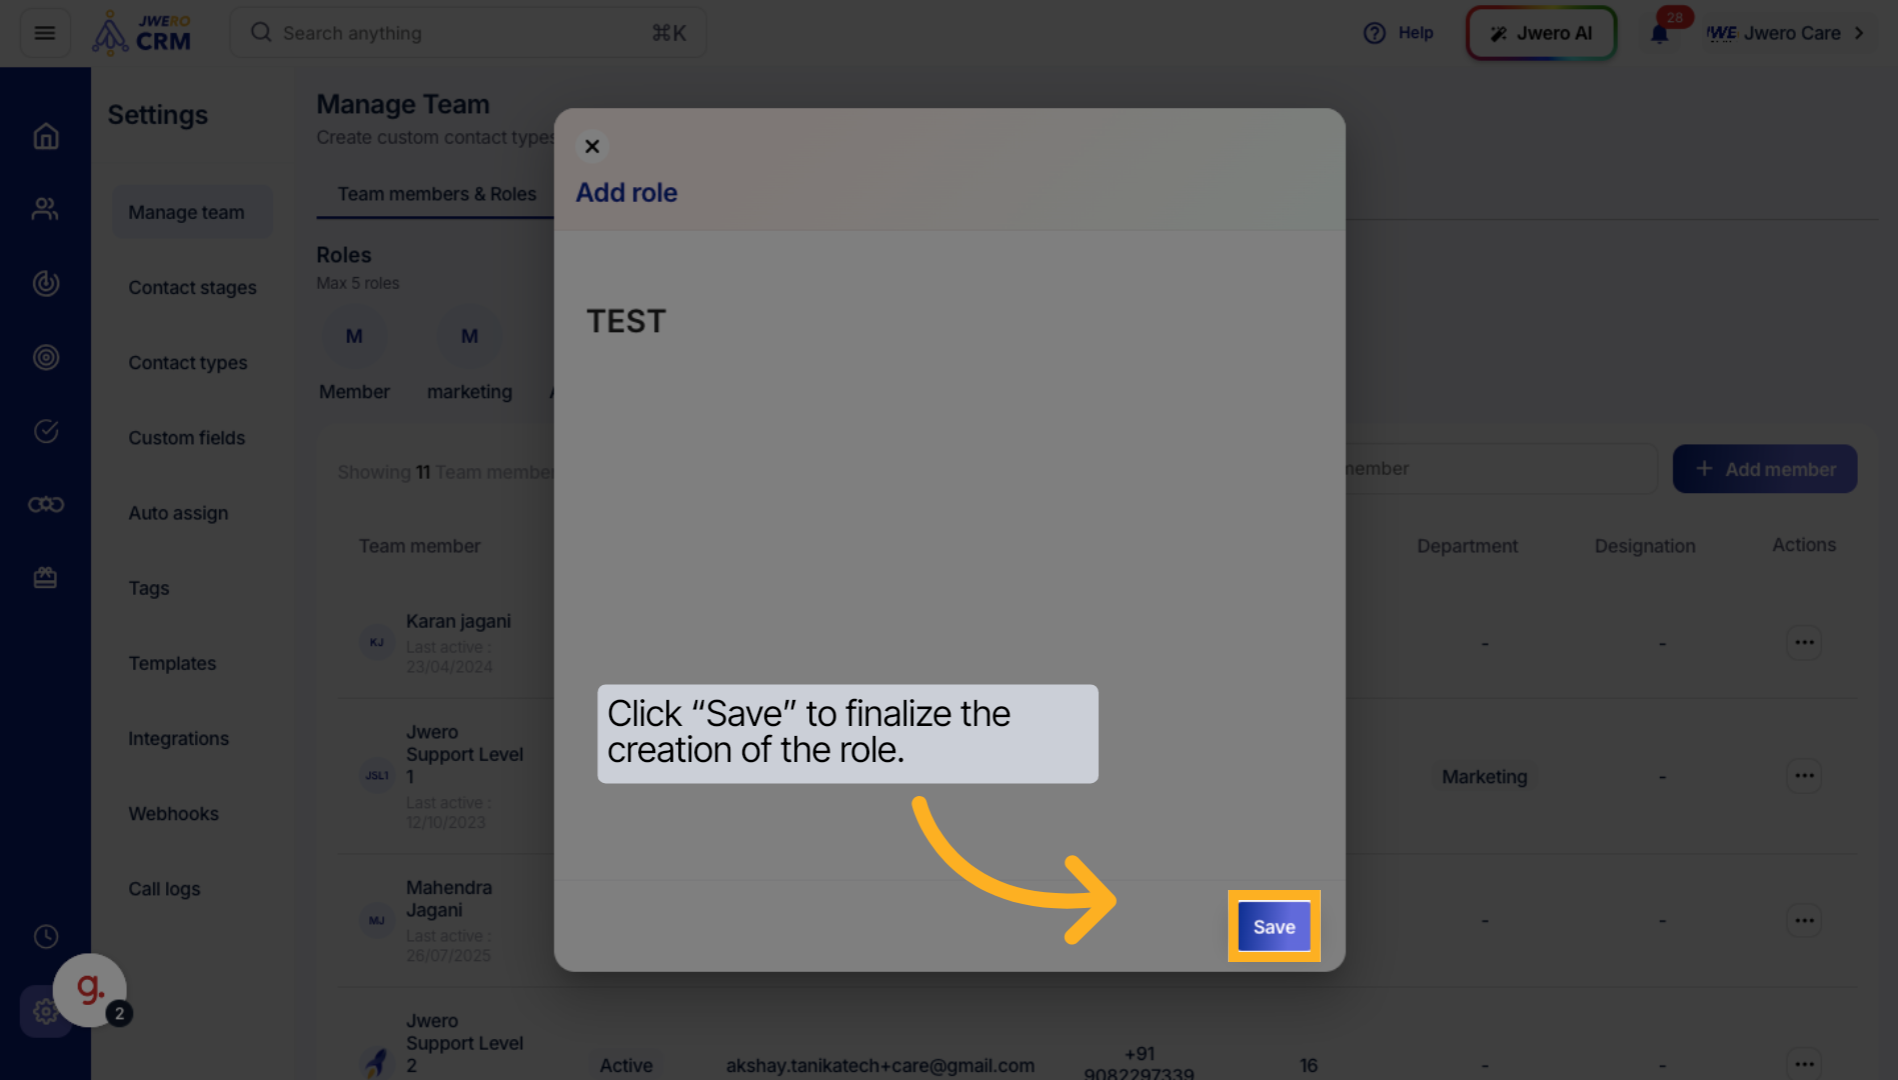
5. Click “Save” to finalize the creation of the role.
Save the newly created role to register it within the system.
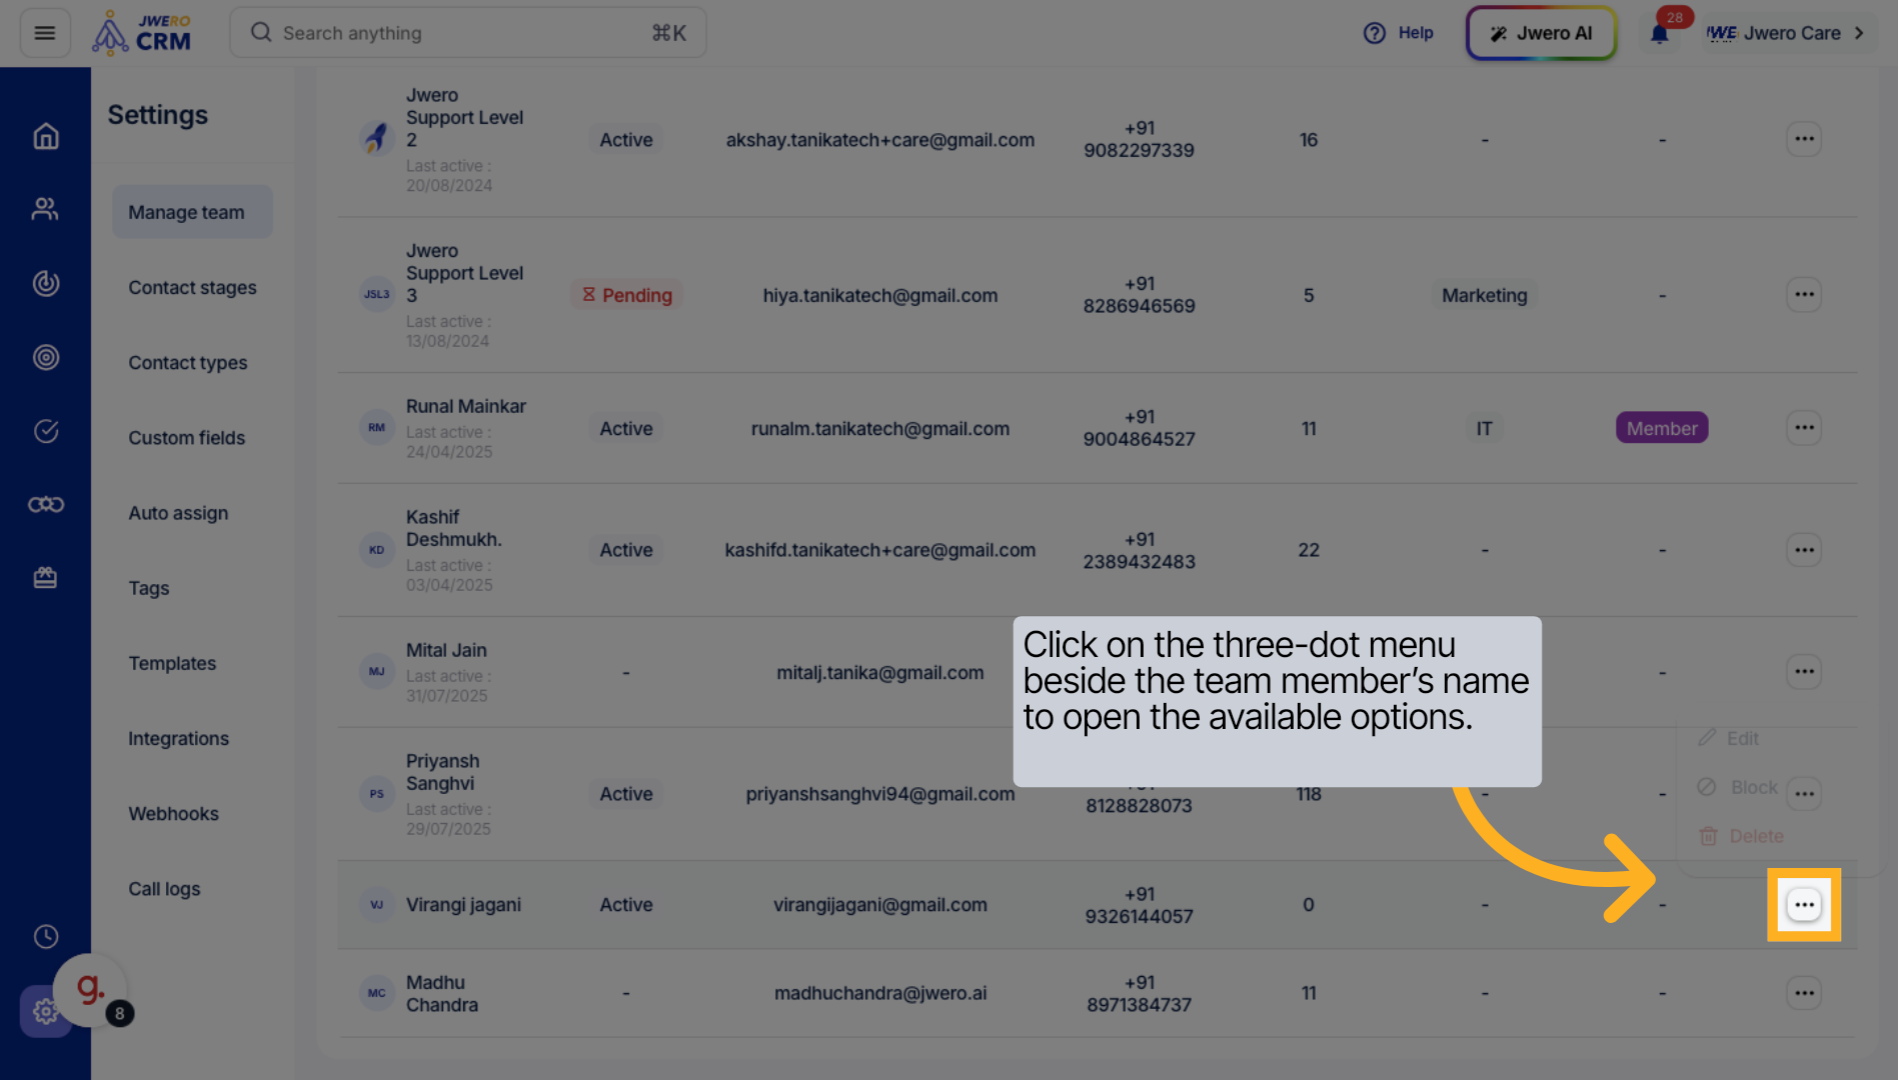
6. Click on the three-dot menu beside the team member’s name to open the available options.
Browse through the available permissions to find those relevant to the role's responsibilities.
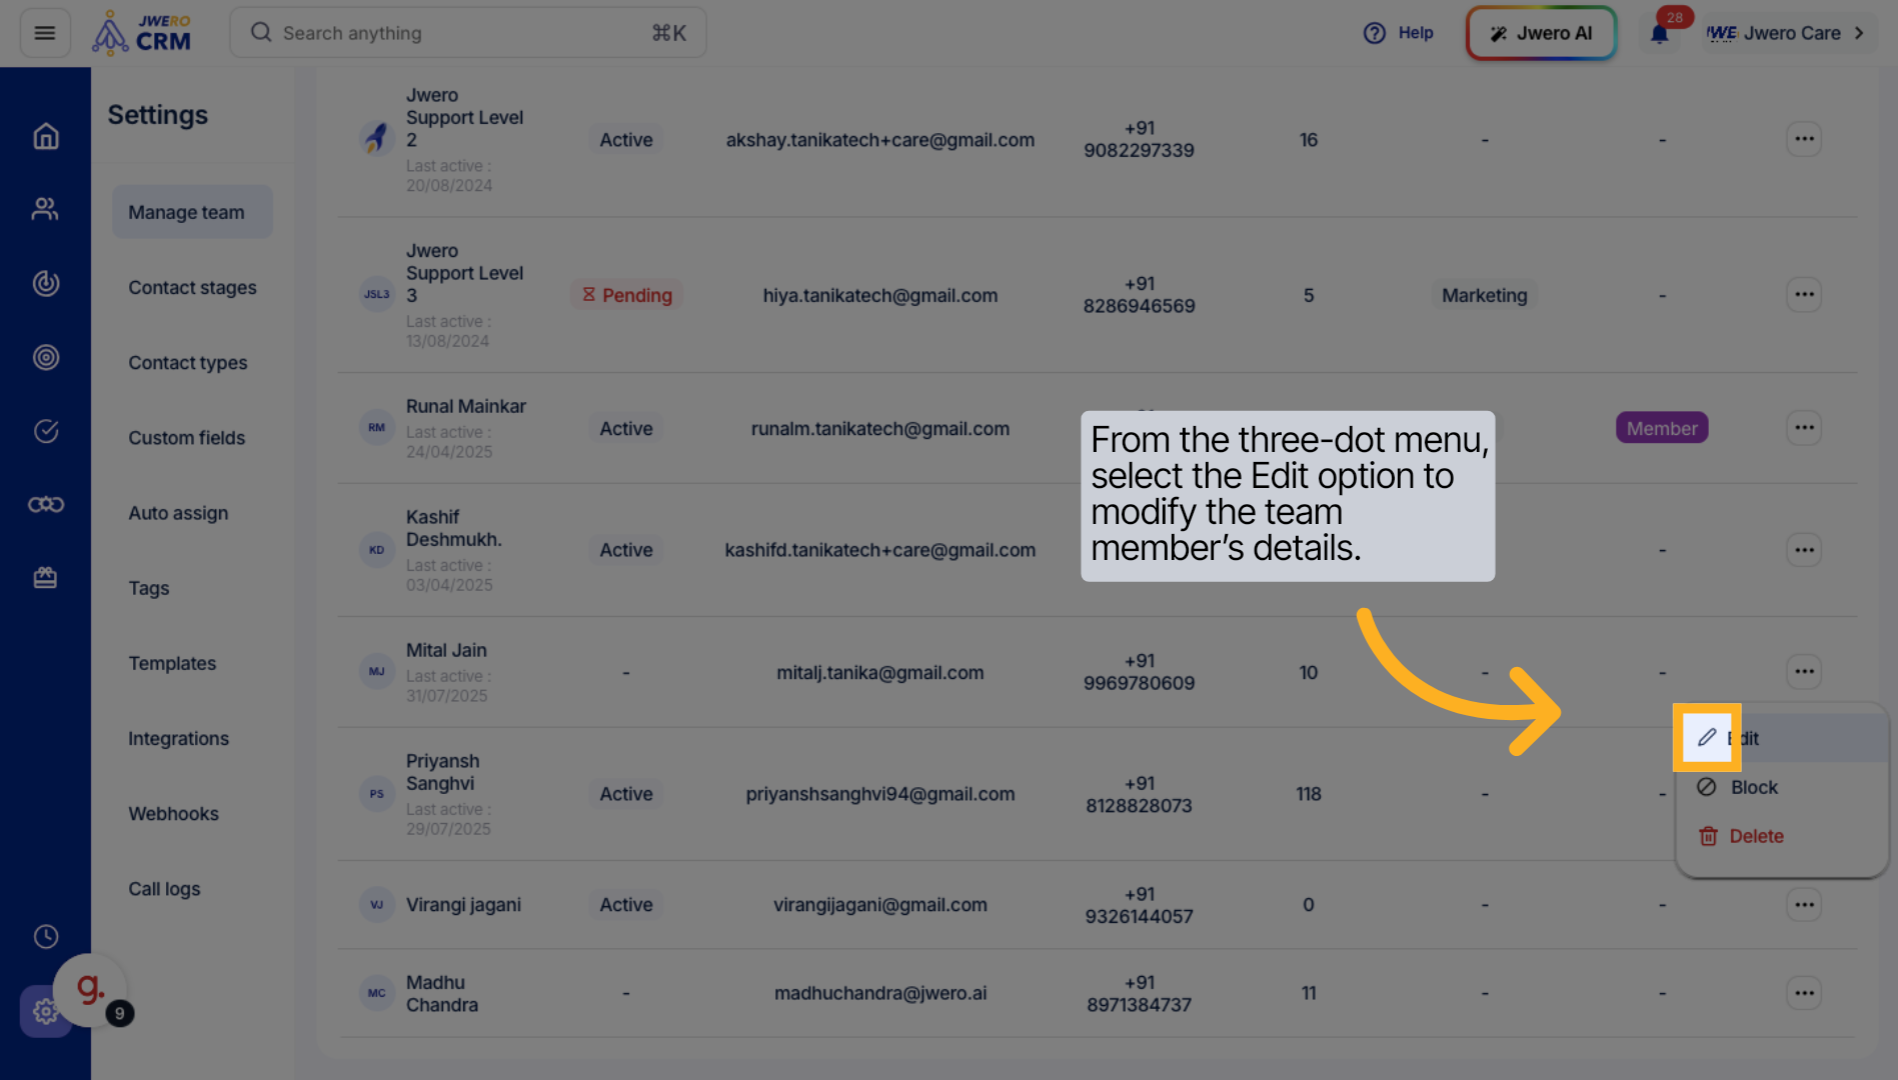
7. From the three-dot menu, select the Edit option to modify the team member’s details.
Select the appropriate permissions that align with the role's function.
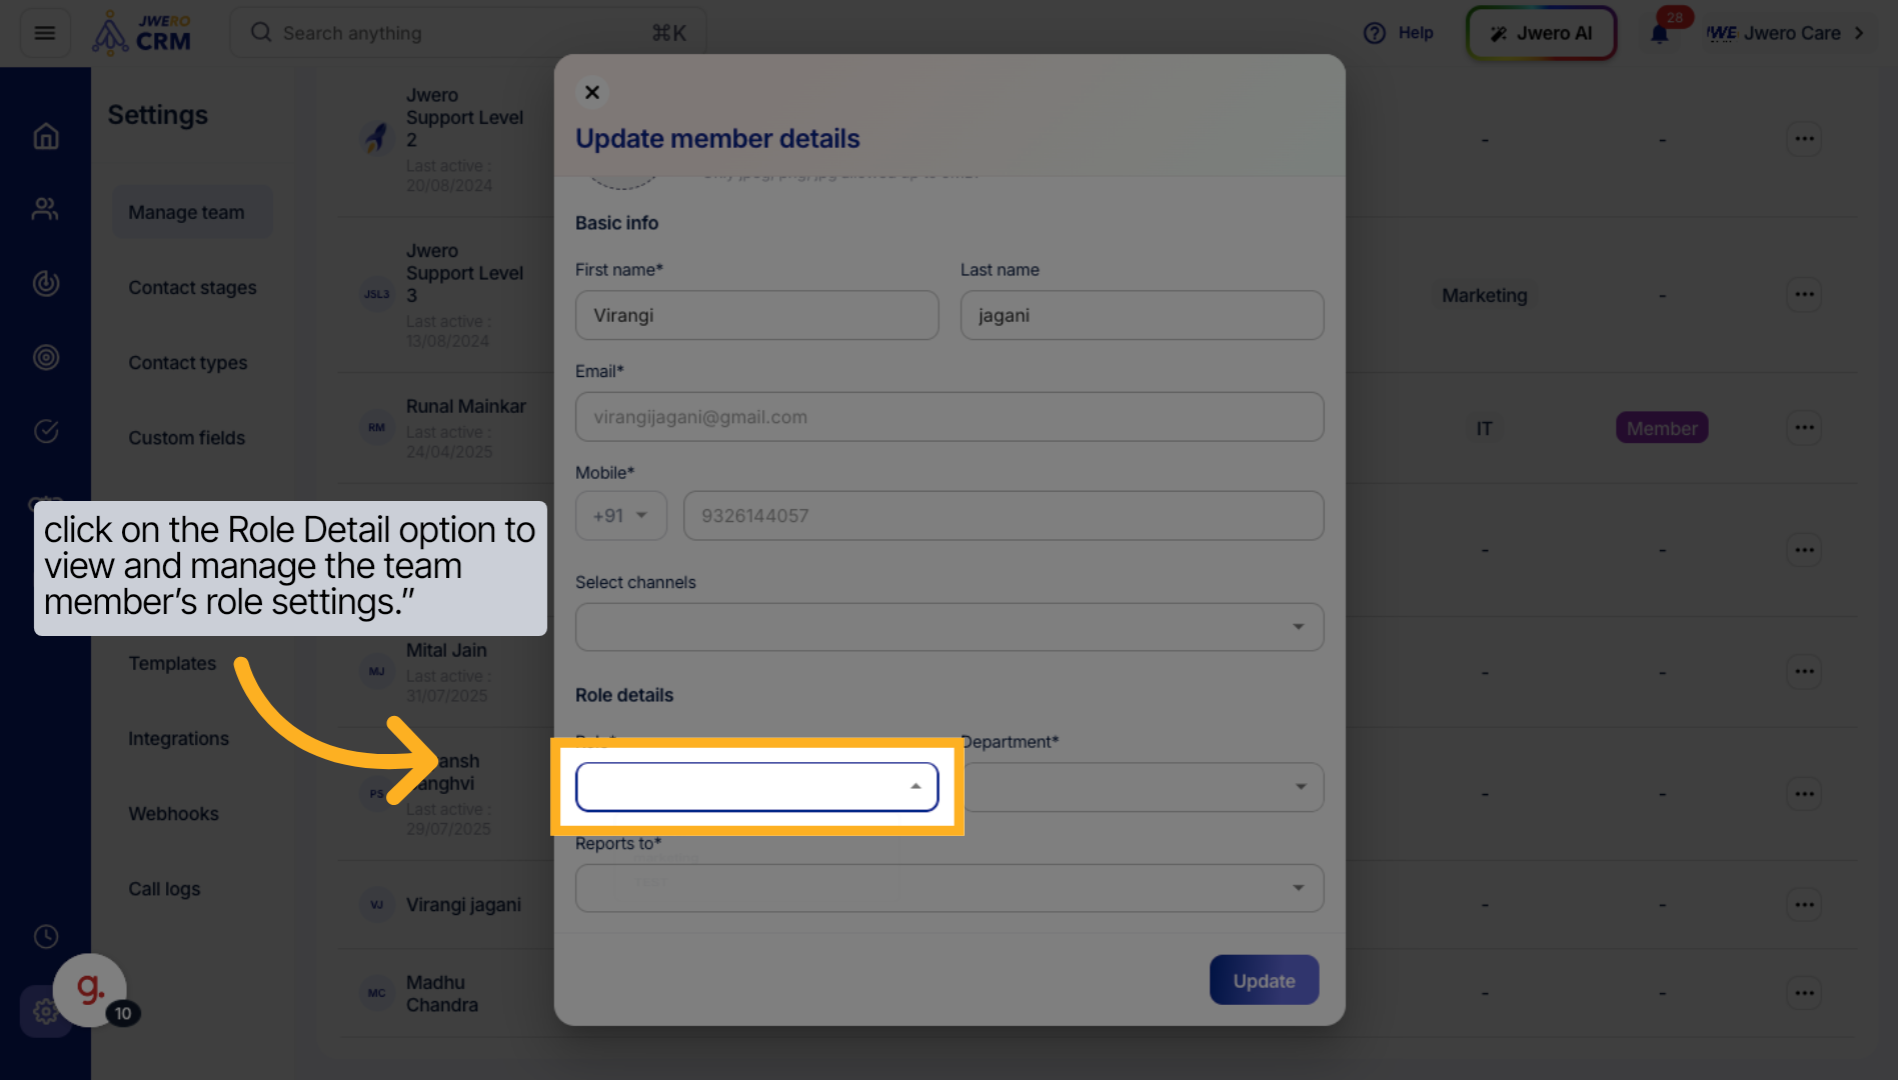
8. click on the Role Detail option to view and manage the team member’s role settings.”
Confirm your selection to apply the chosen permissions to the role.
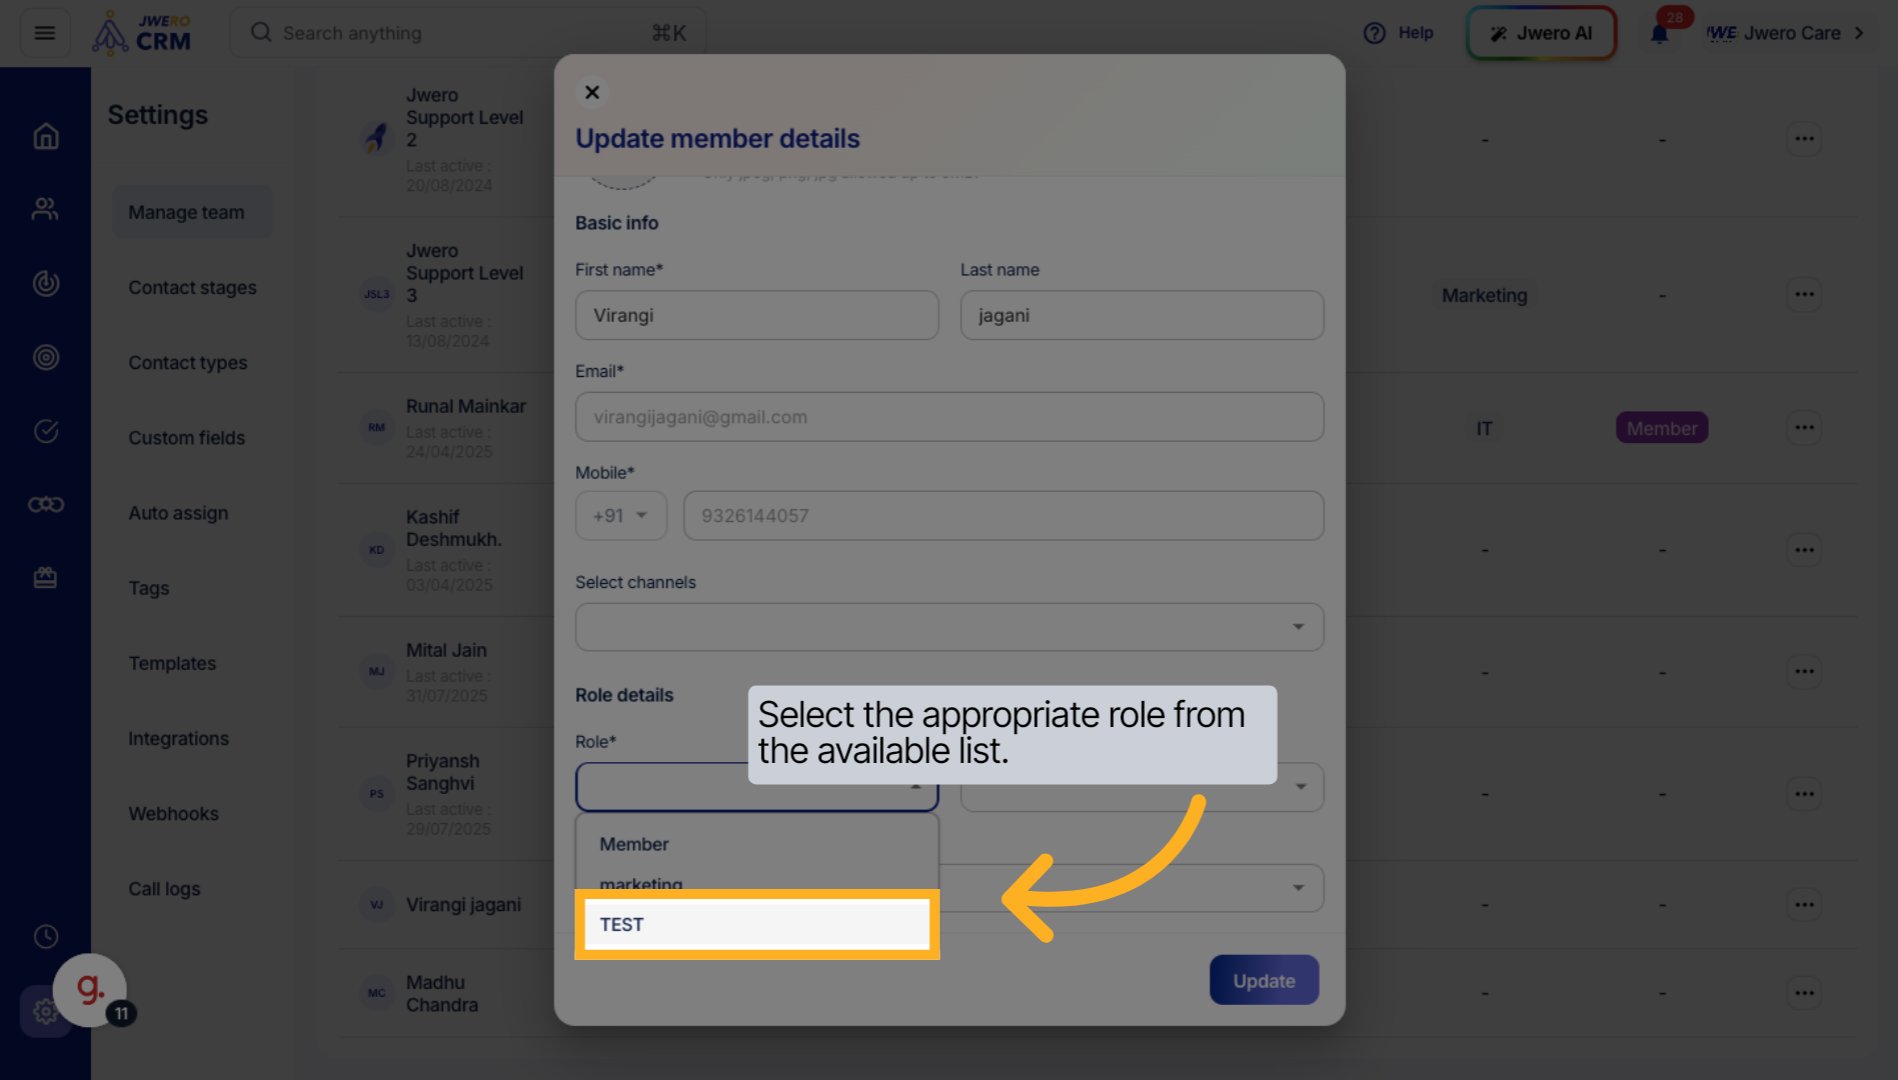
9. Select the appropriate role from the available list.
Return to the main roles list and select the role again to verify changes.
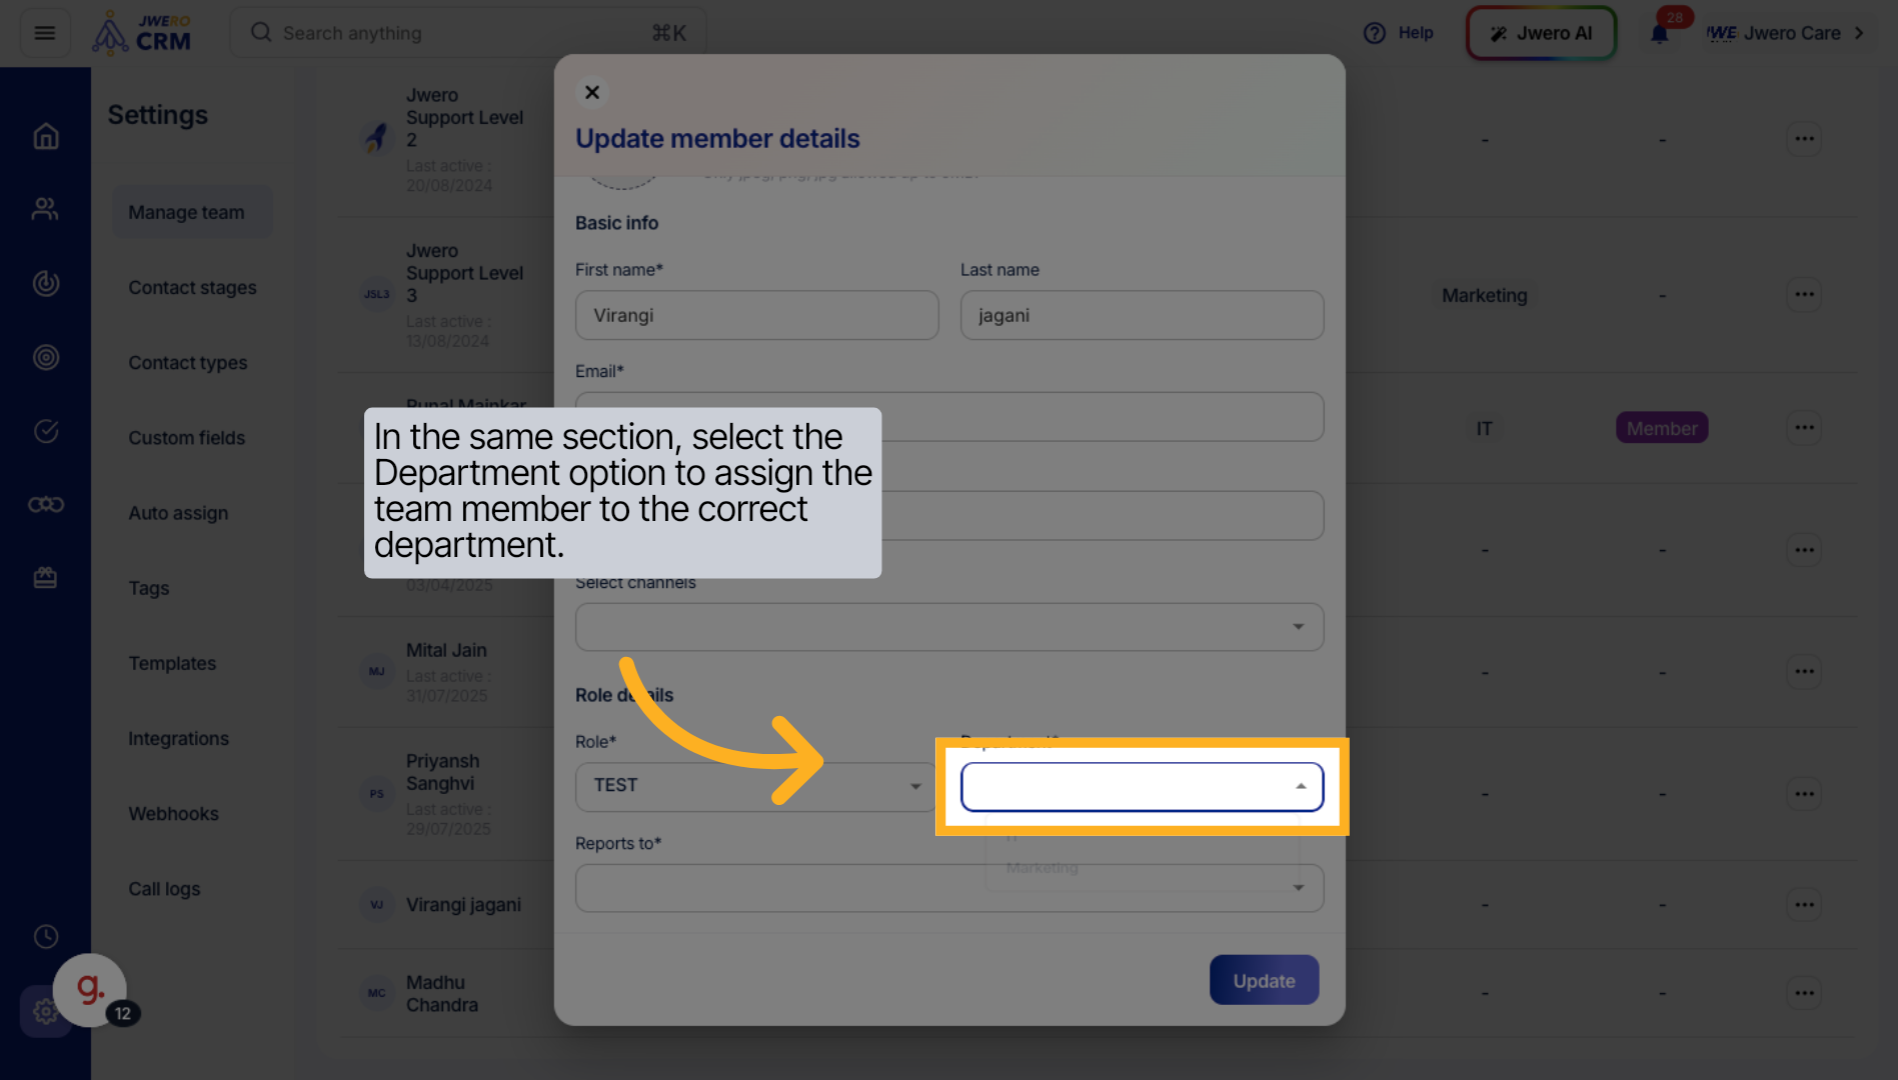
10. In the same section, select the Department option to assign the team member to the correct department.
Reopen the permissions settings to make any additional adjustments if necessary.
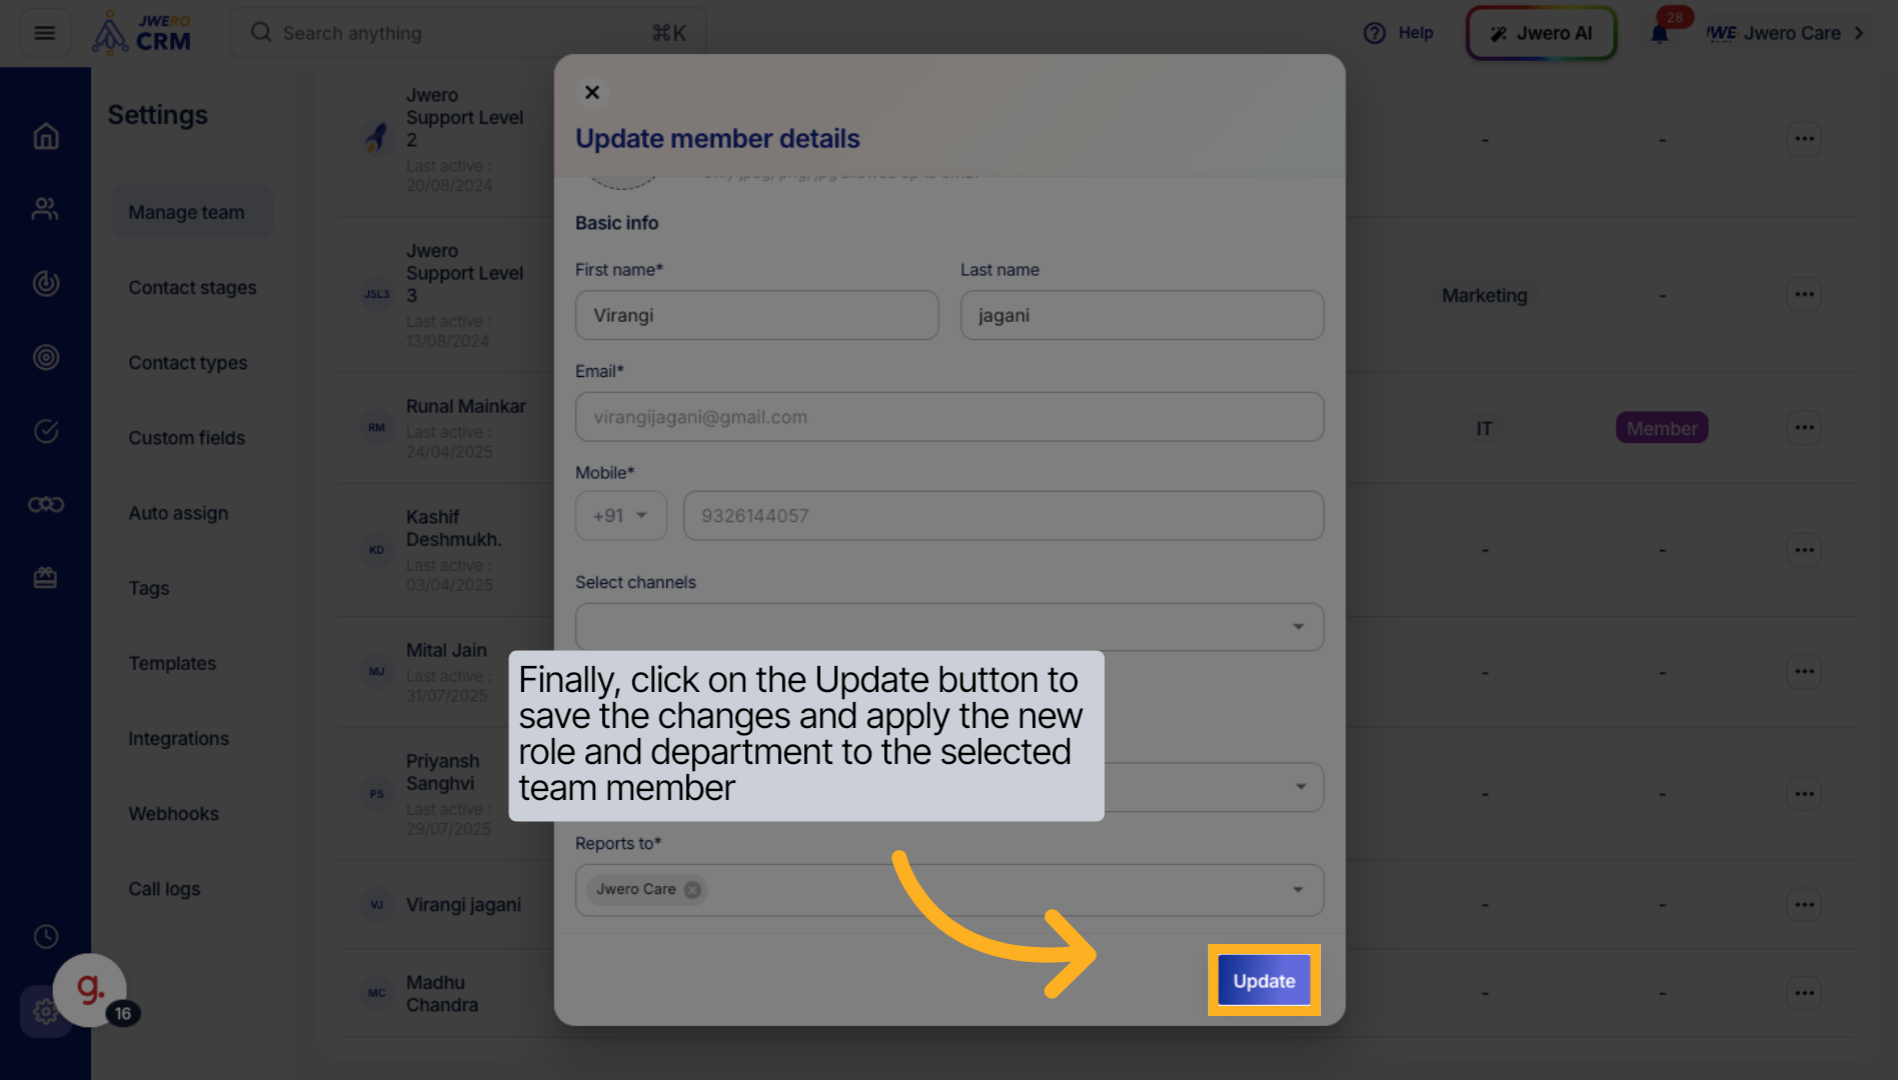
11. Finally, click on the Update button to save the changes and apply the new role and department to the selected team member
Update the role assignment to finalize the permission settings for the selected users.
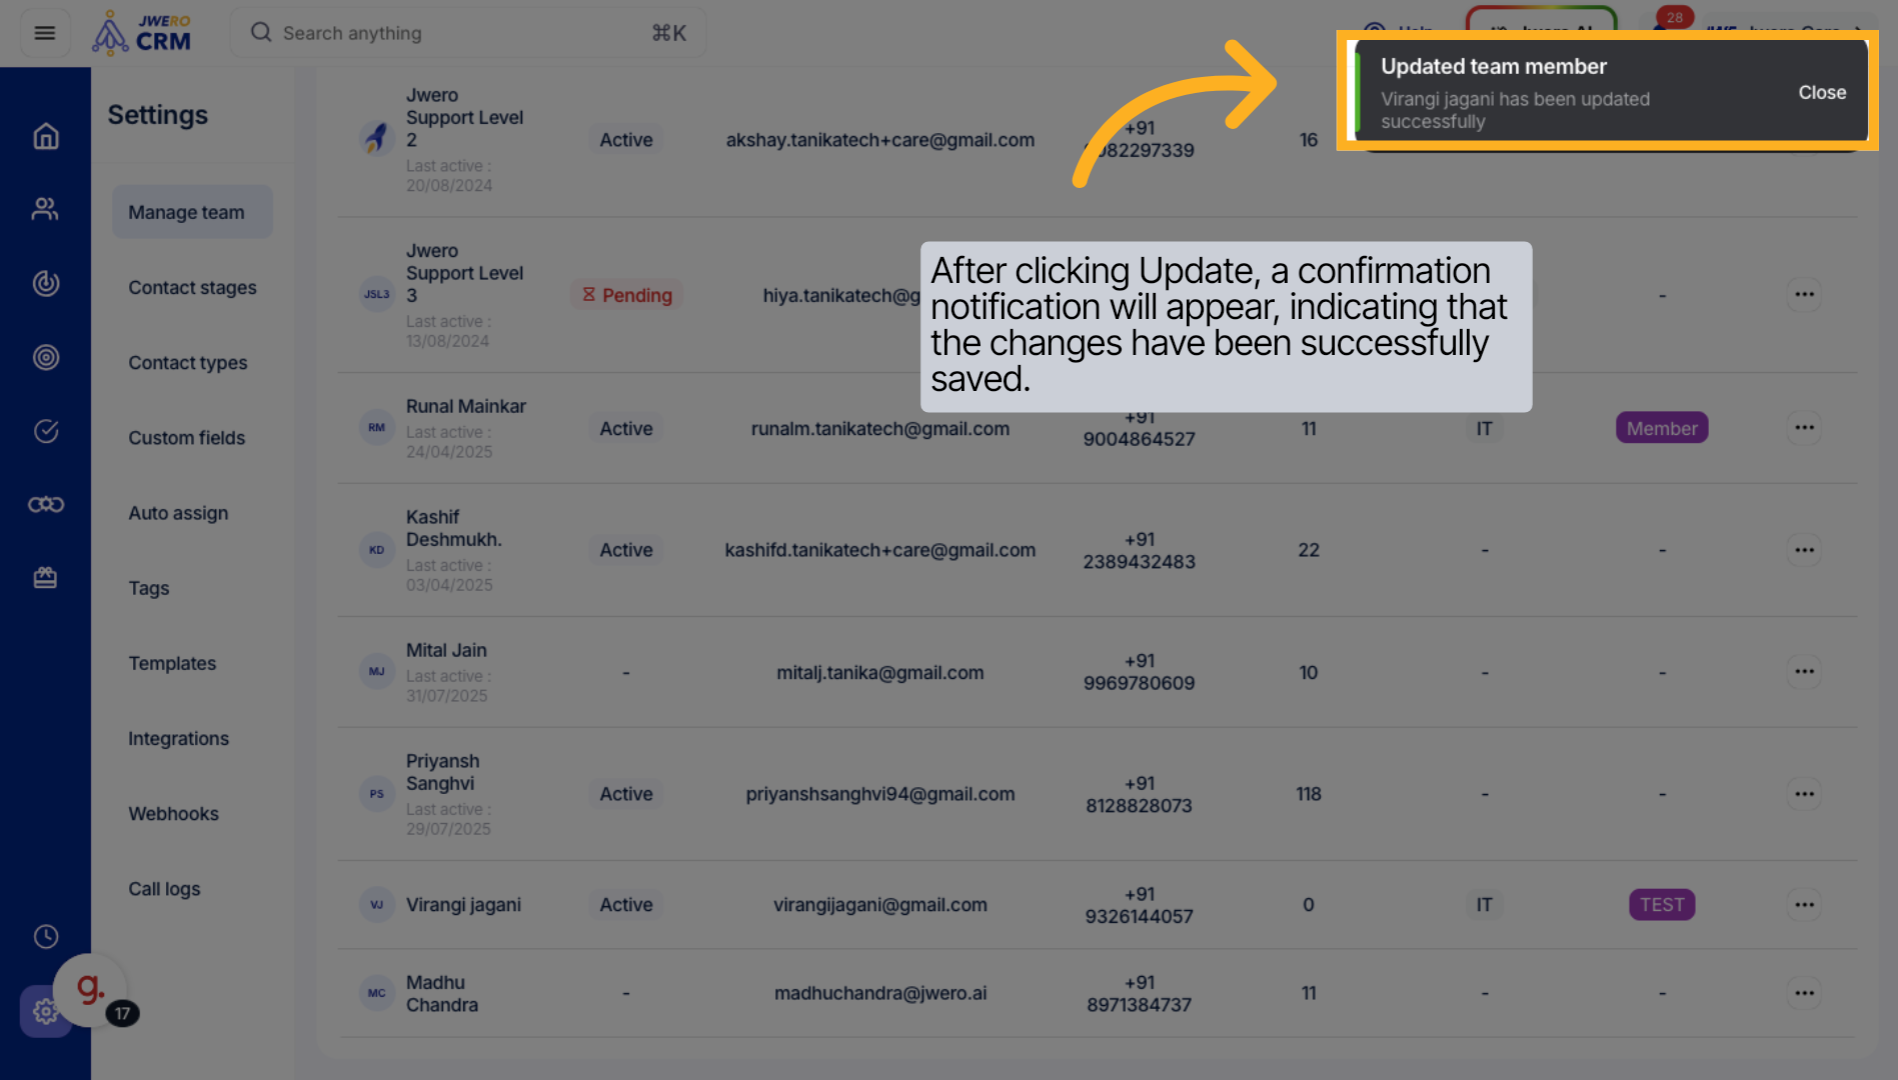
12. After clicking Update, a confirmation notification will appear, indicating that the changes have been successfully saved.
Close the permissions and role management windows to complete the process.
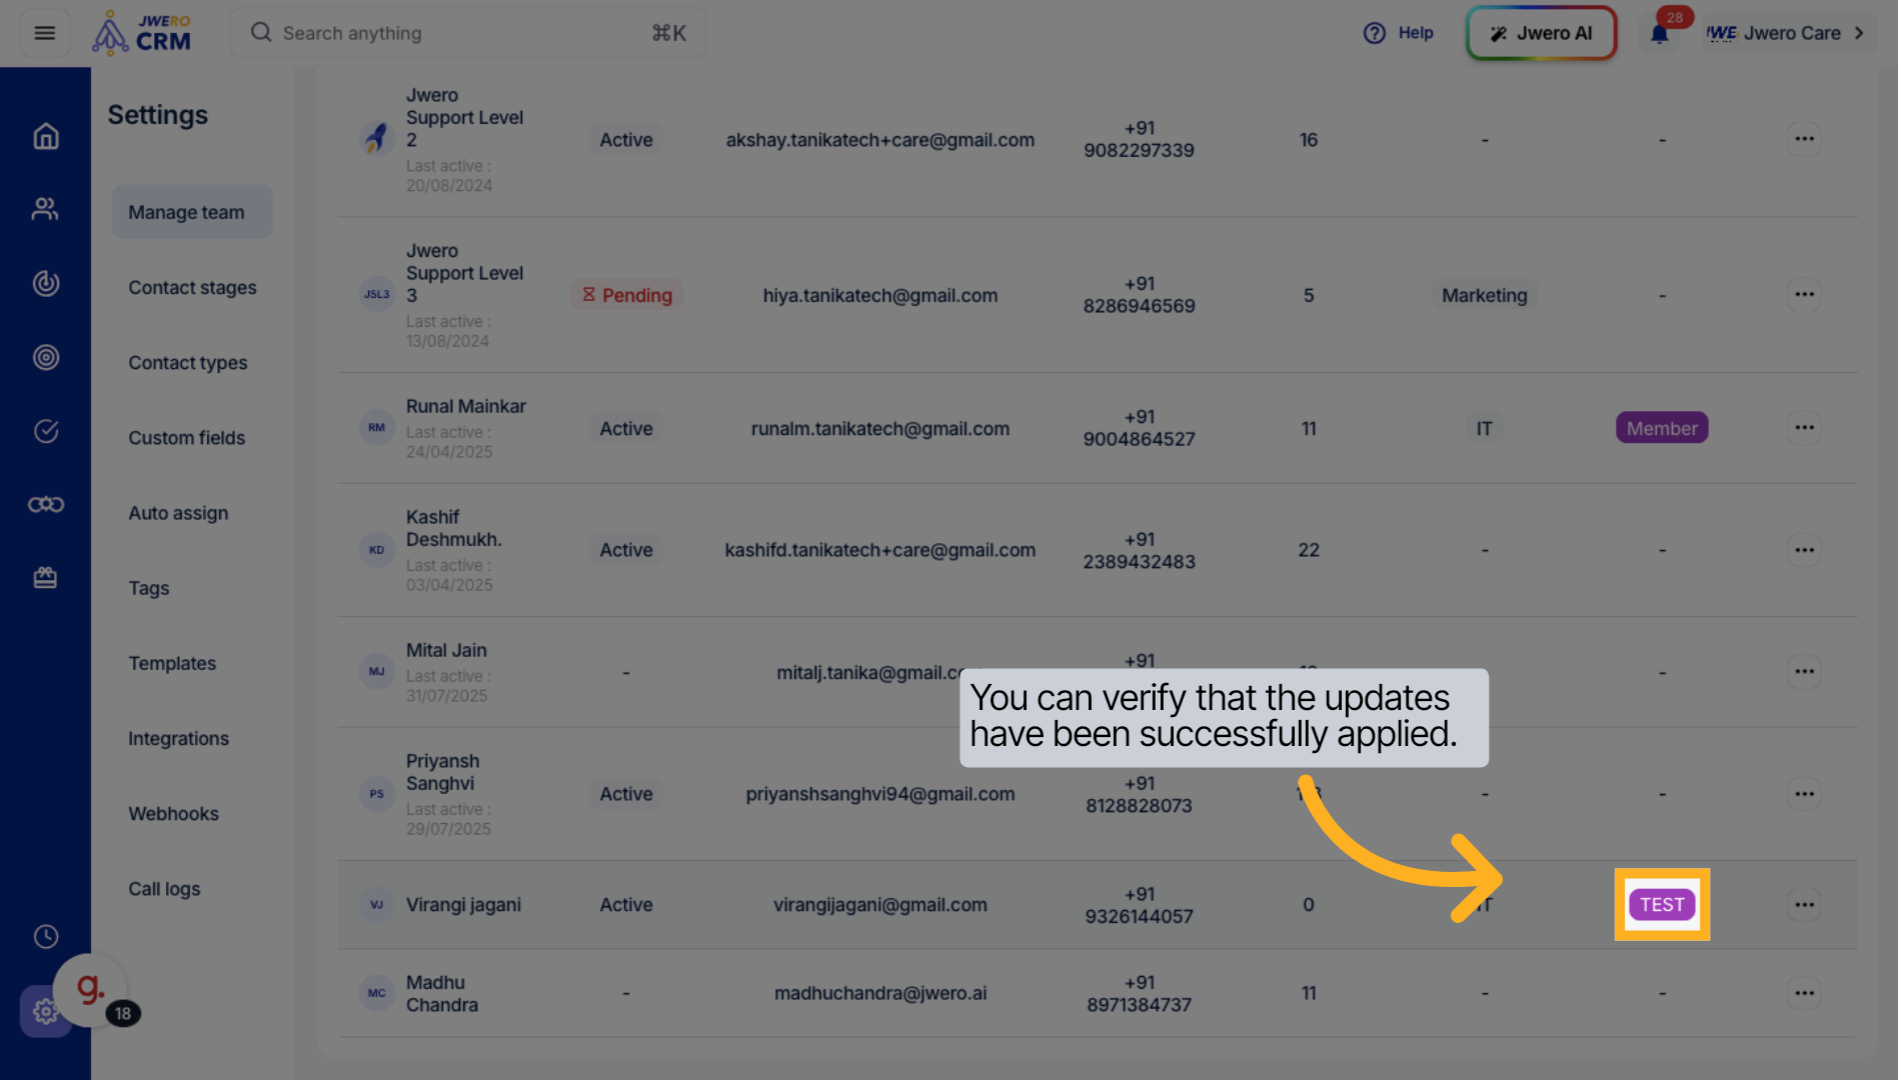
13. You can verify that the updates have been successfully applied.
Revisit the role in the list to ensure all settings and permissions are correctly applied.
This guide walked you through creating a new role in your CRM, assigning relevant permissions, and linking the role to specific departments and users. By following these steps, you can efficiently manage user access and maintain organized role-based permissions.