How To Create A Blog
Go to app.jwero.ai
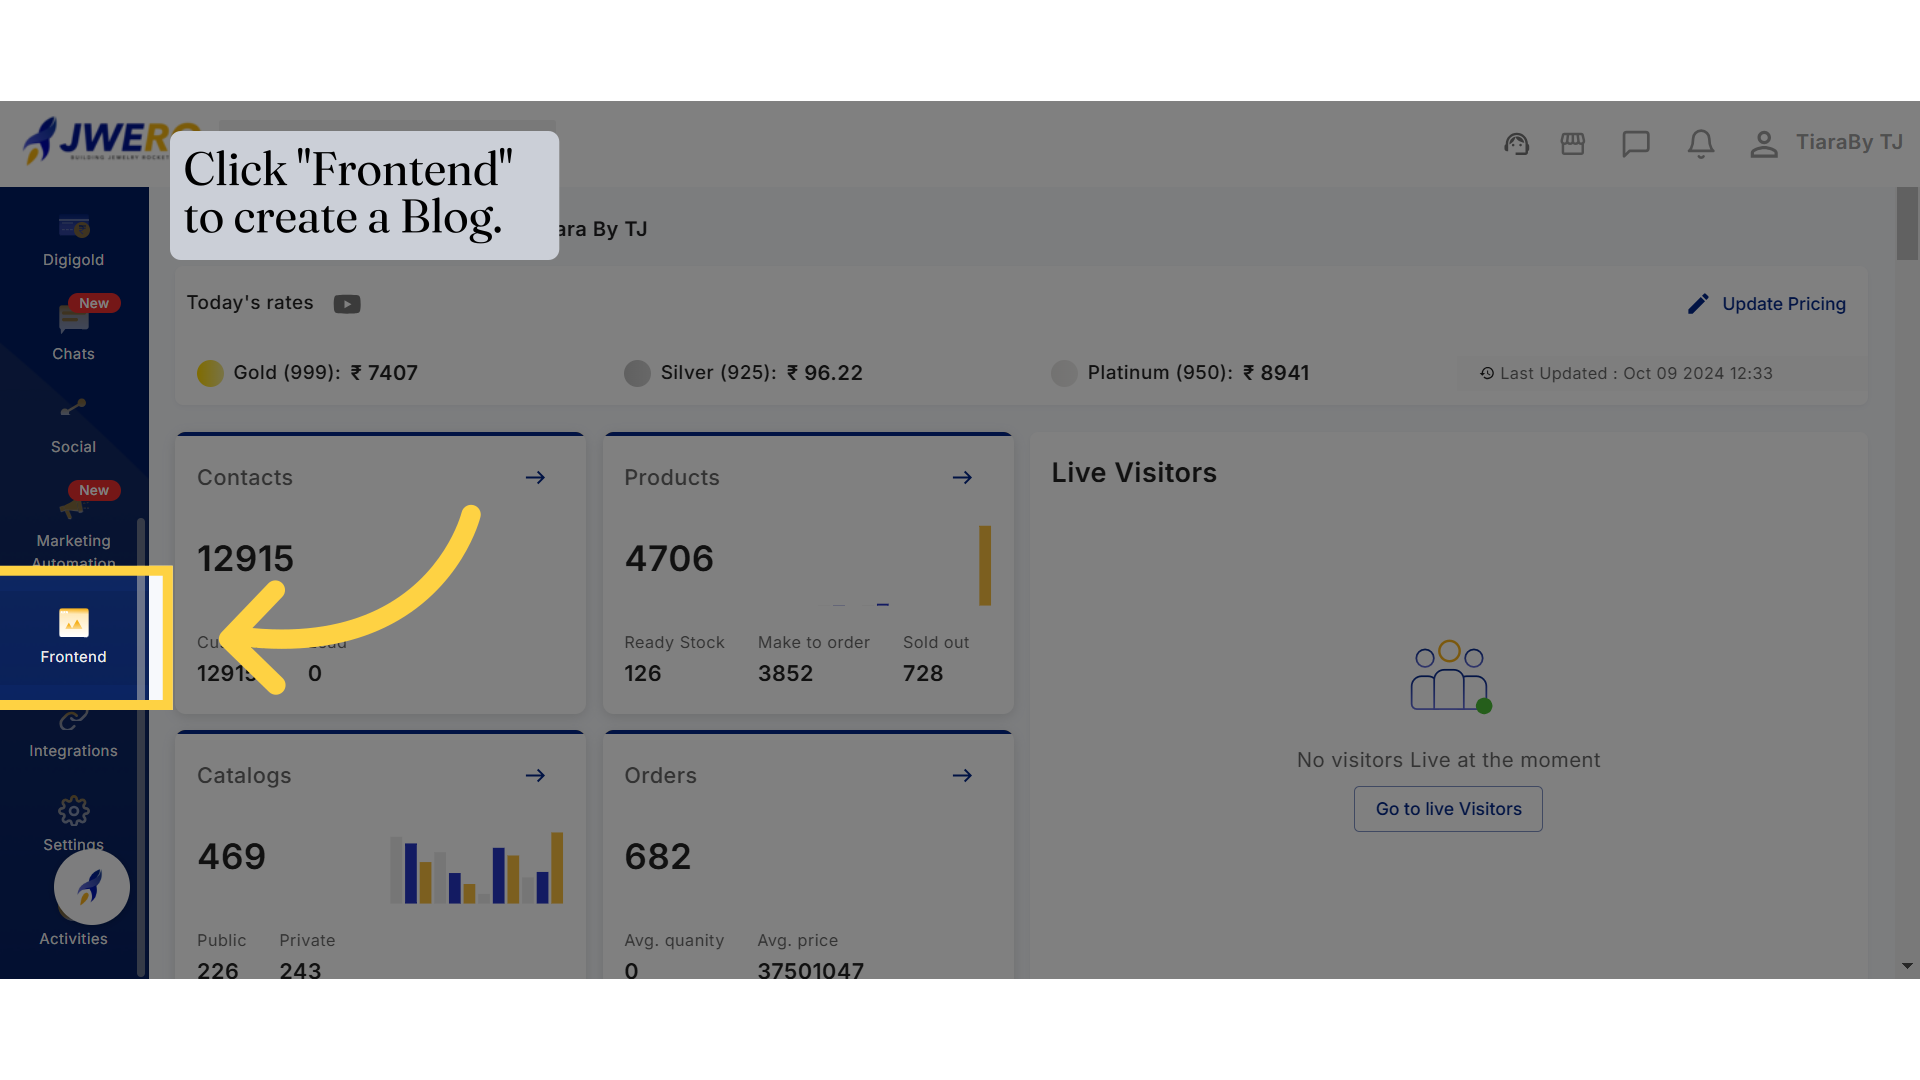
1. Click "Frontend" to create a Blog.
Access "Frontend" to make the required changes.
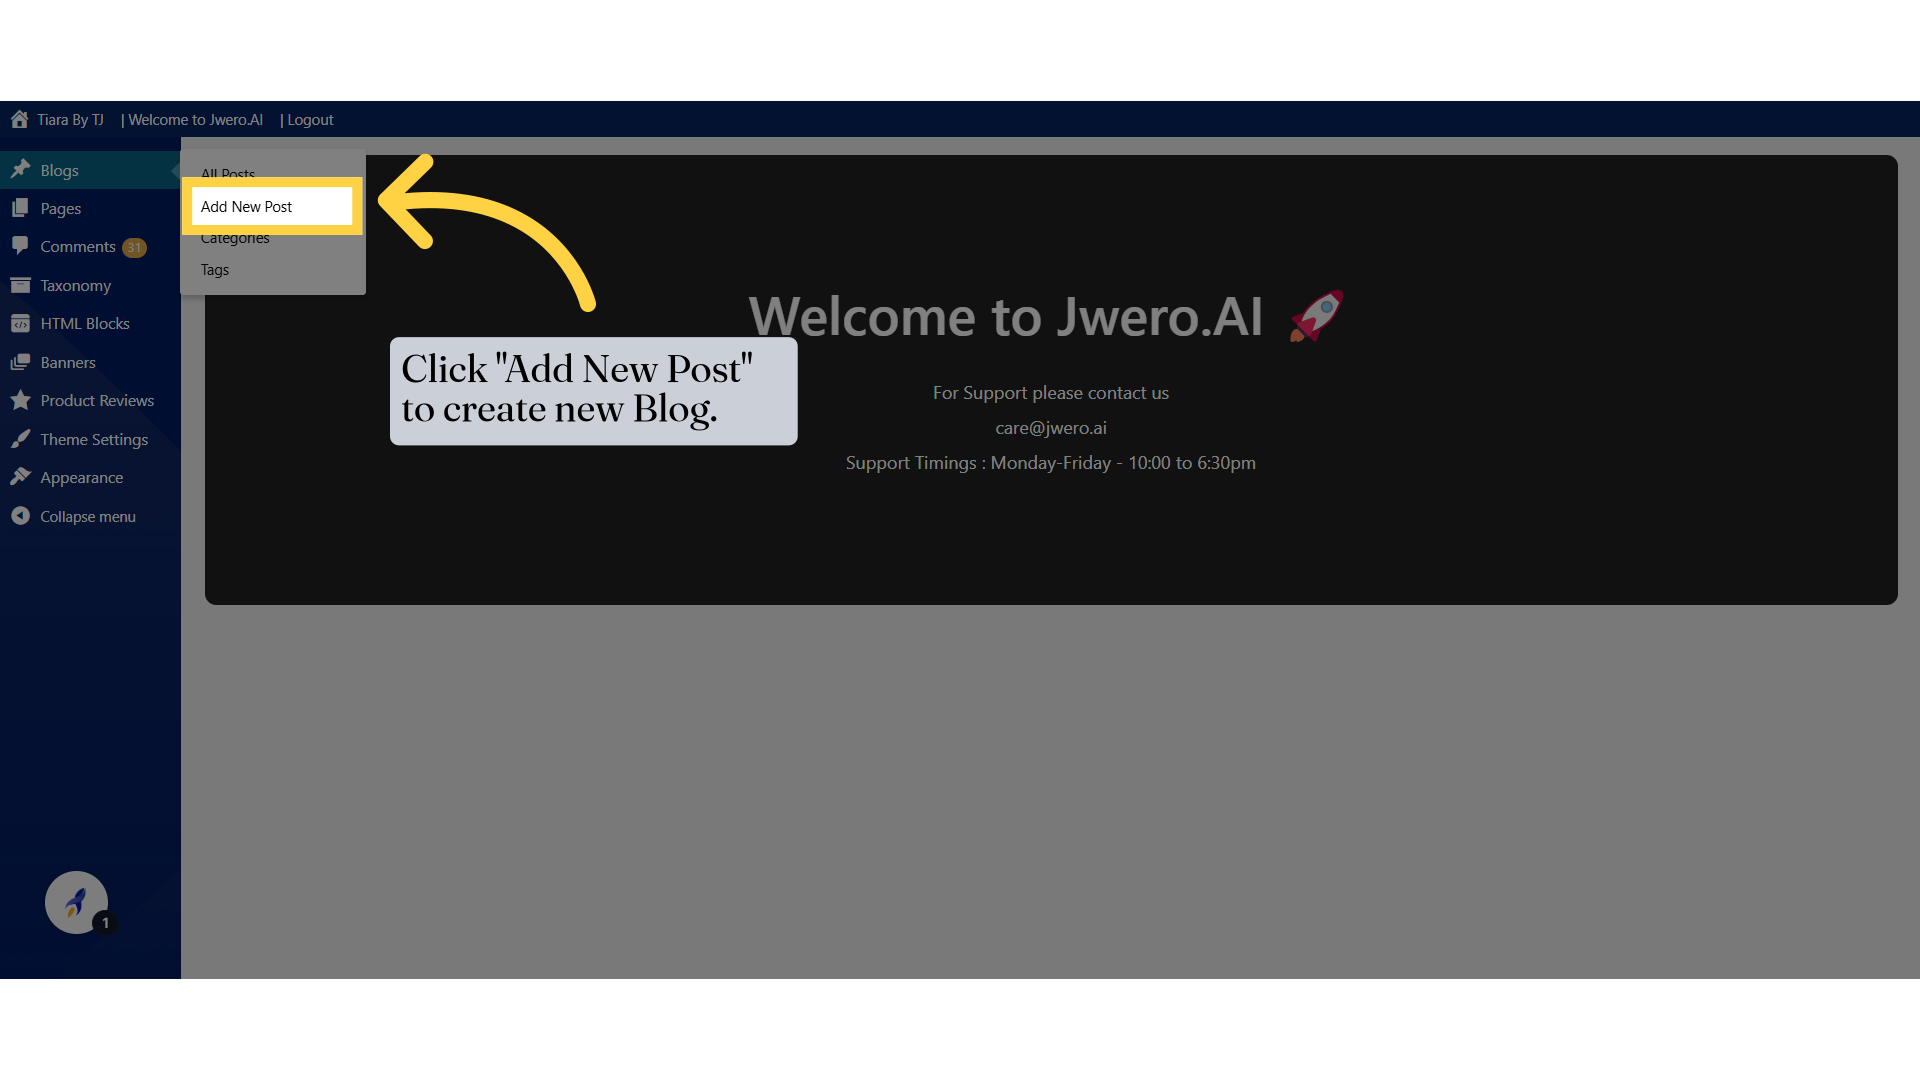
2. Click "Add New Post" to create new Blog.
Begin creating a new post
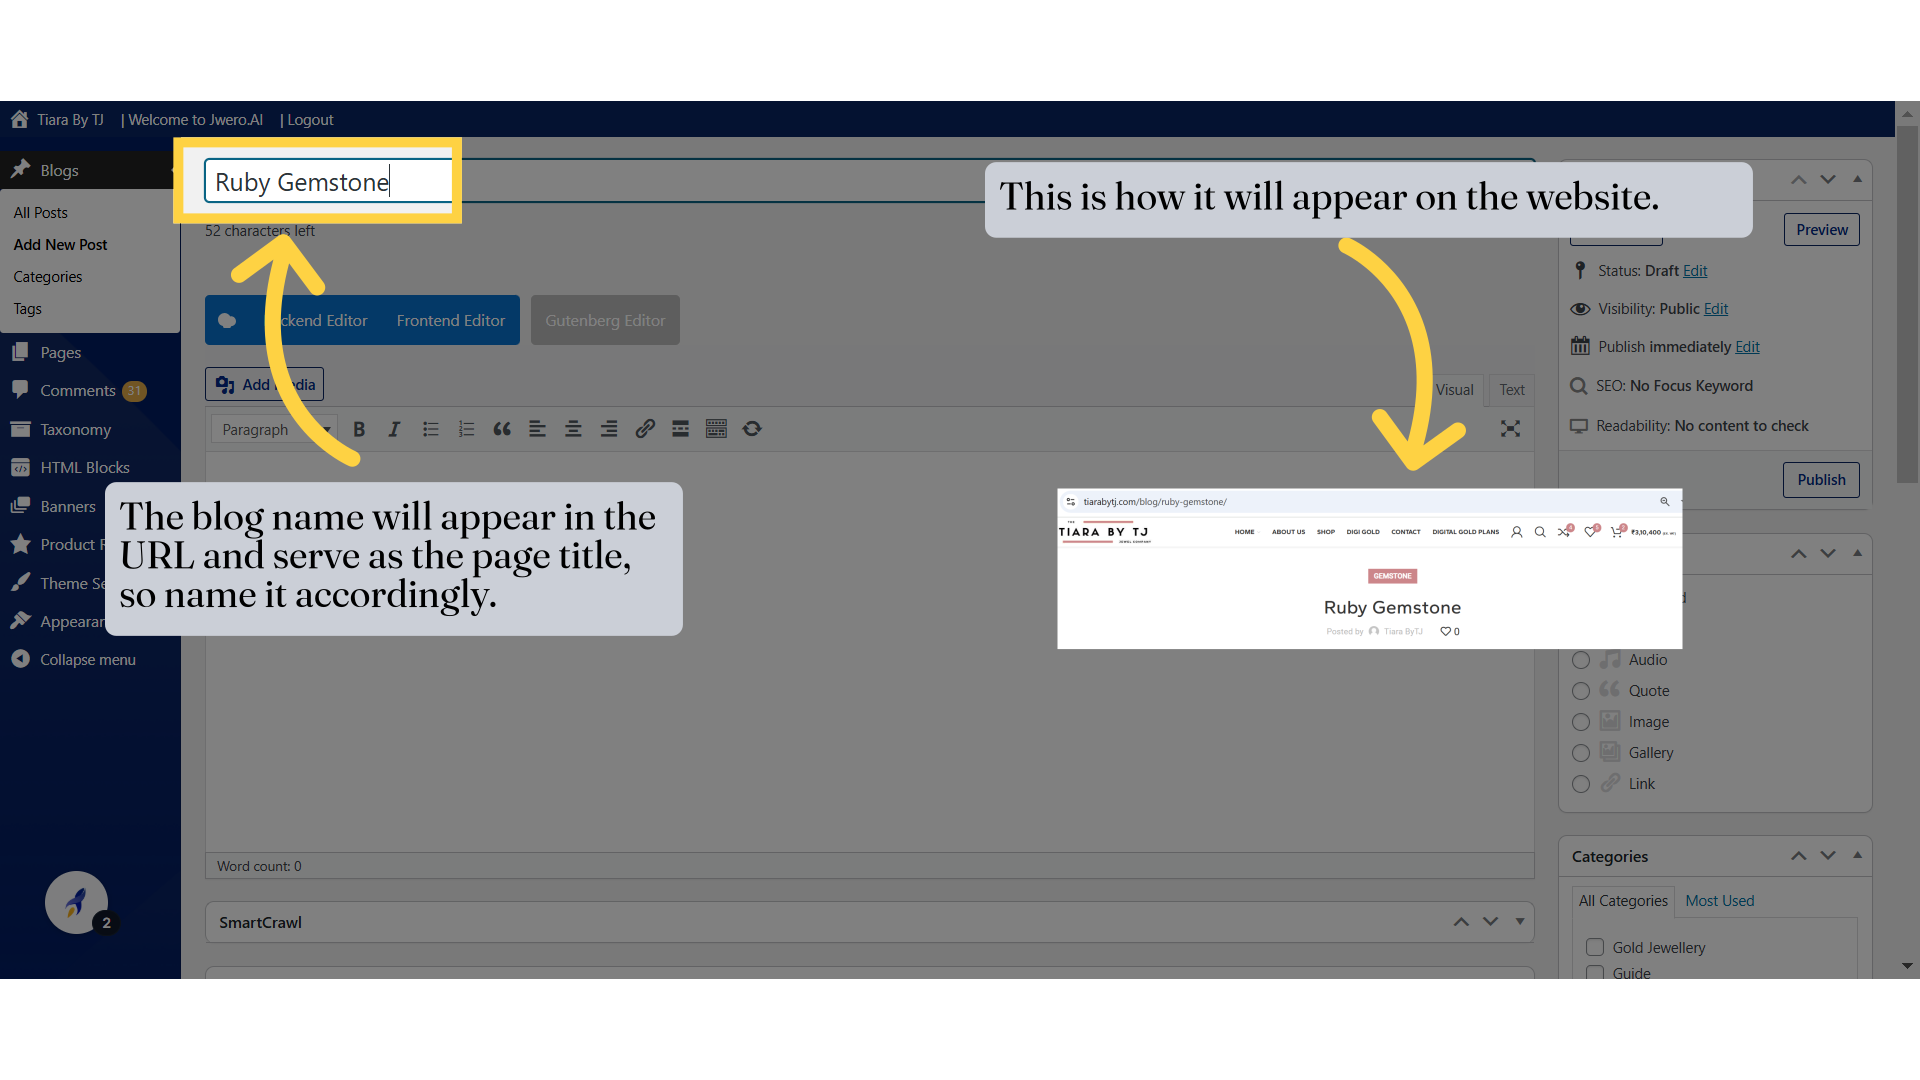
3. The blog name will appear in the URL and serve as the page title, so name it accordingly.
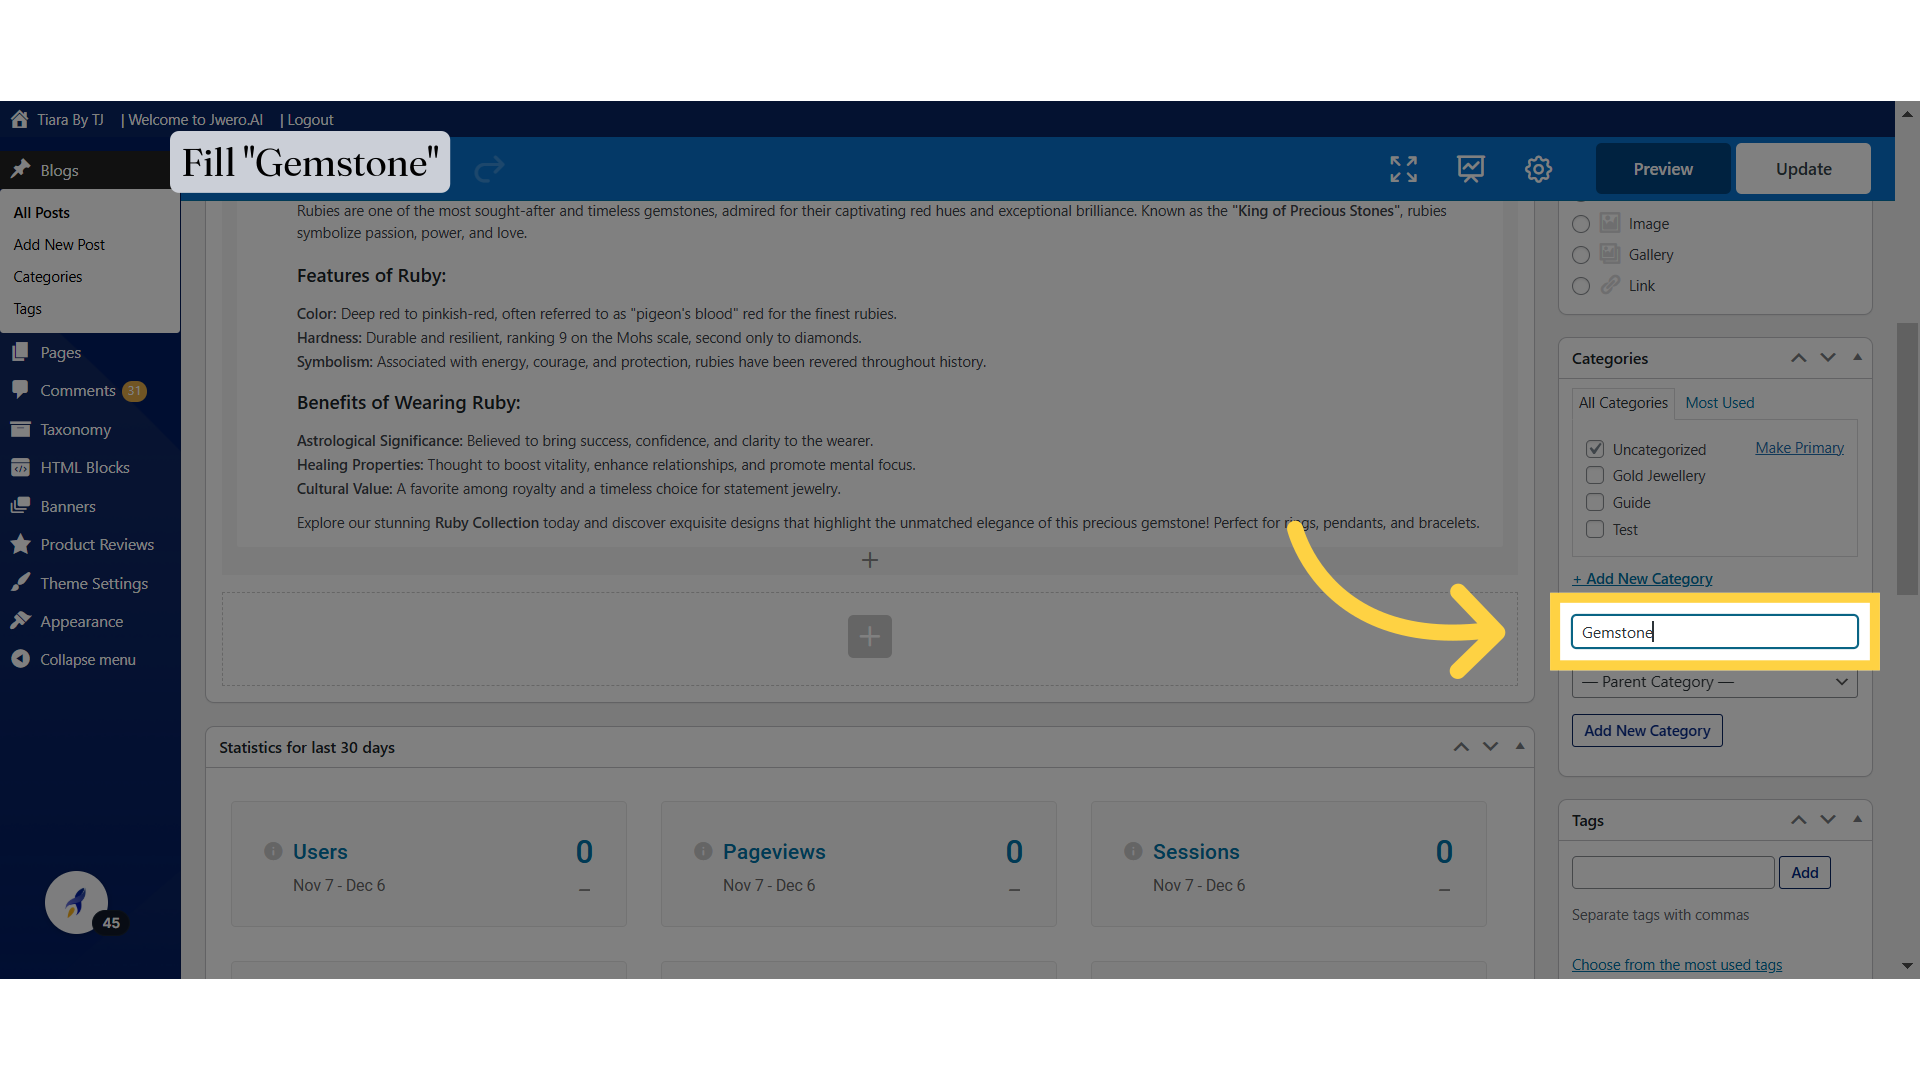
Enter "Ruby Gemstone" in the designated field
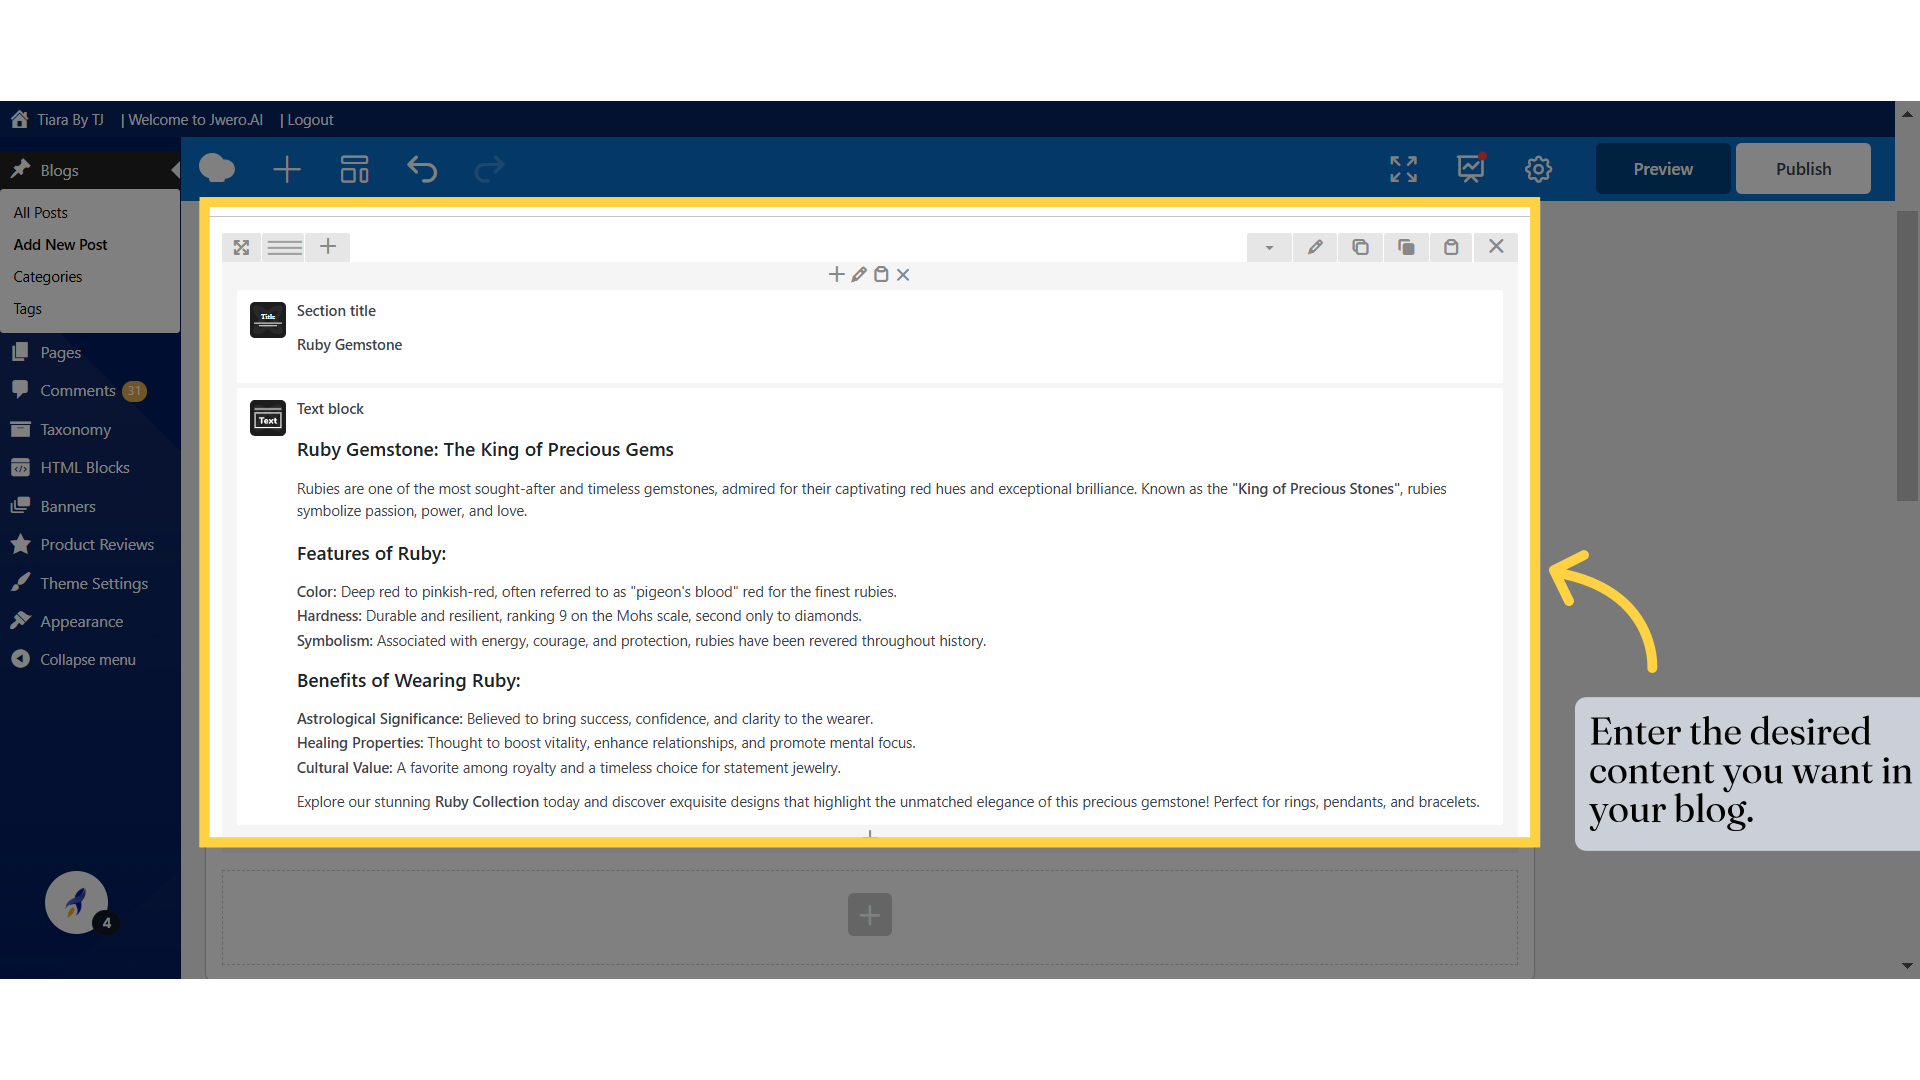
4. Enter the desired content you want in your blog.
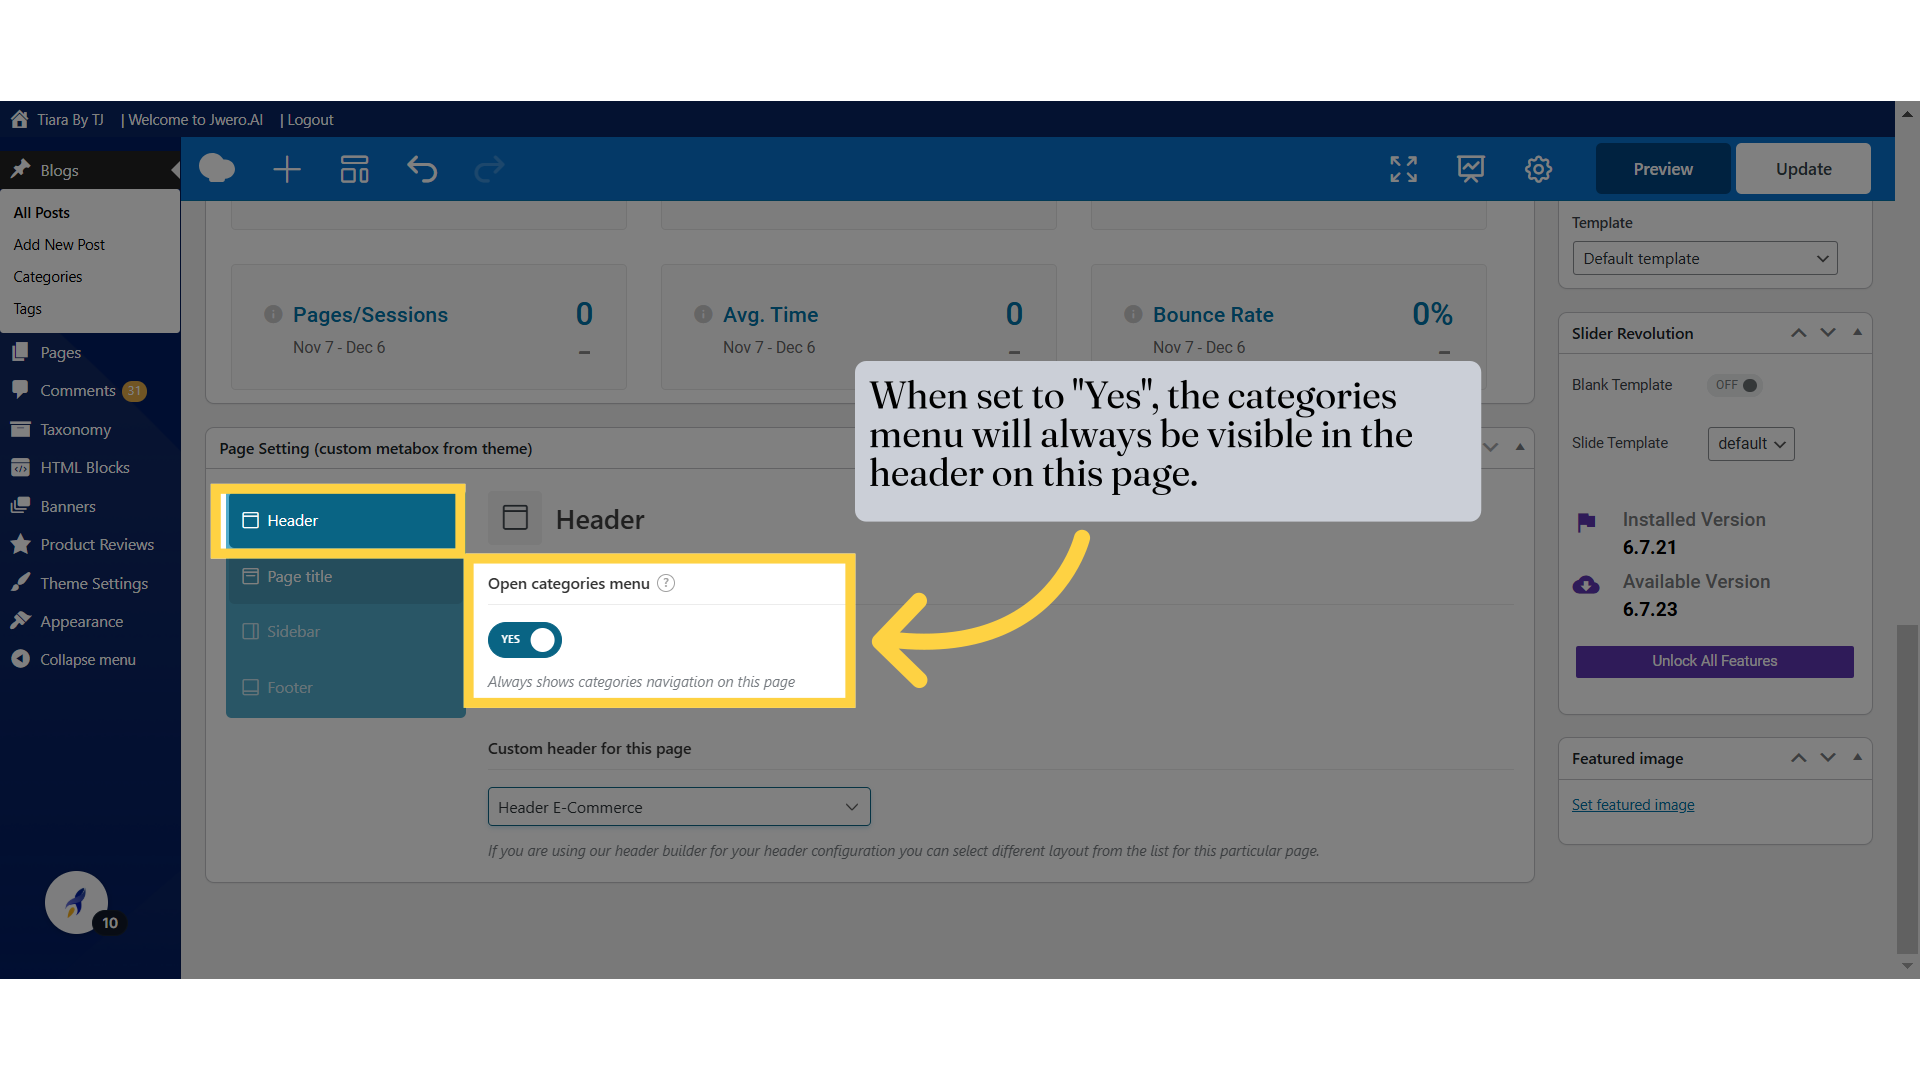
5. When set to "Yes", the categories menu will always be visible in the header on this page.
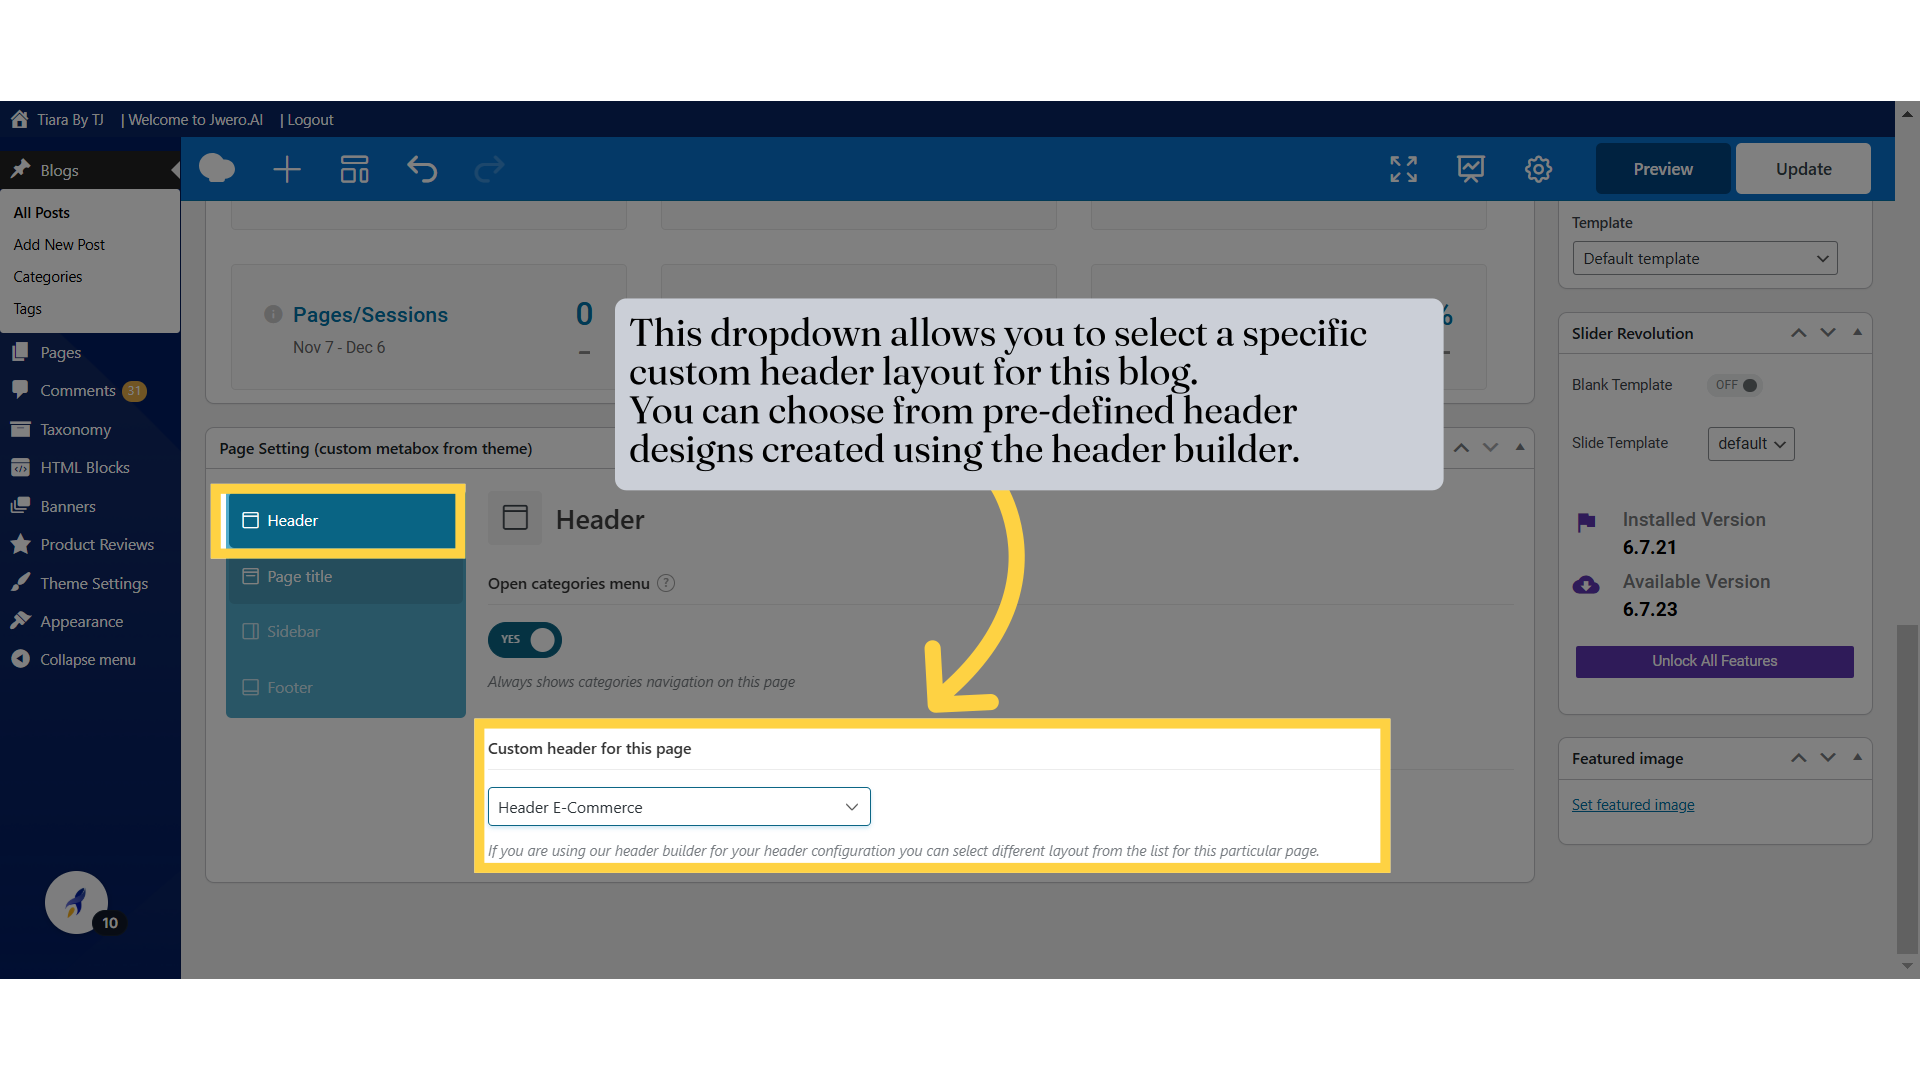
6. When set to "Yes", the categories menu will always be visible in the header on this page.
7. This toggle allows you to show or hide the page title on the front end.

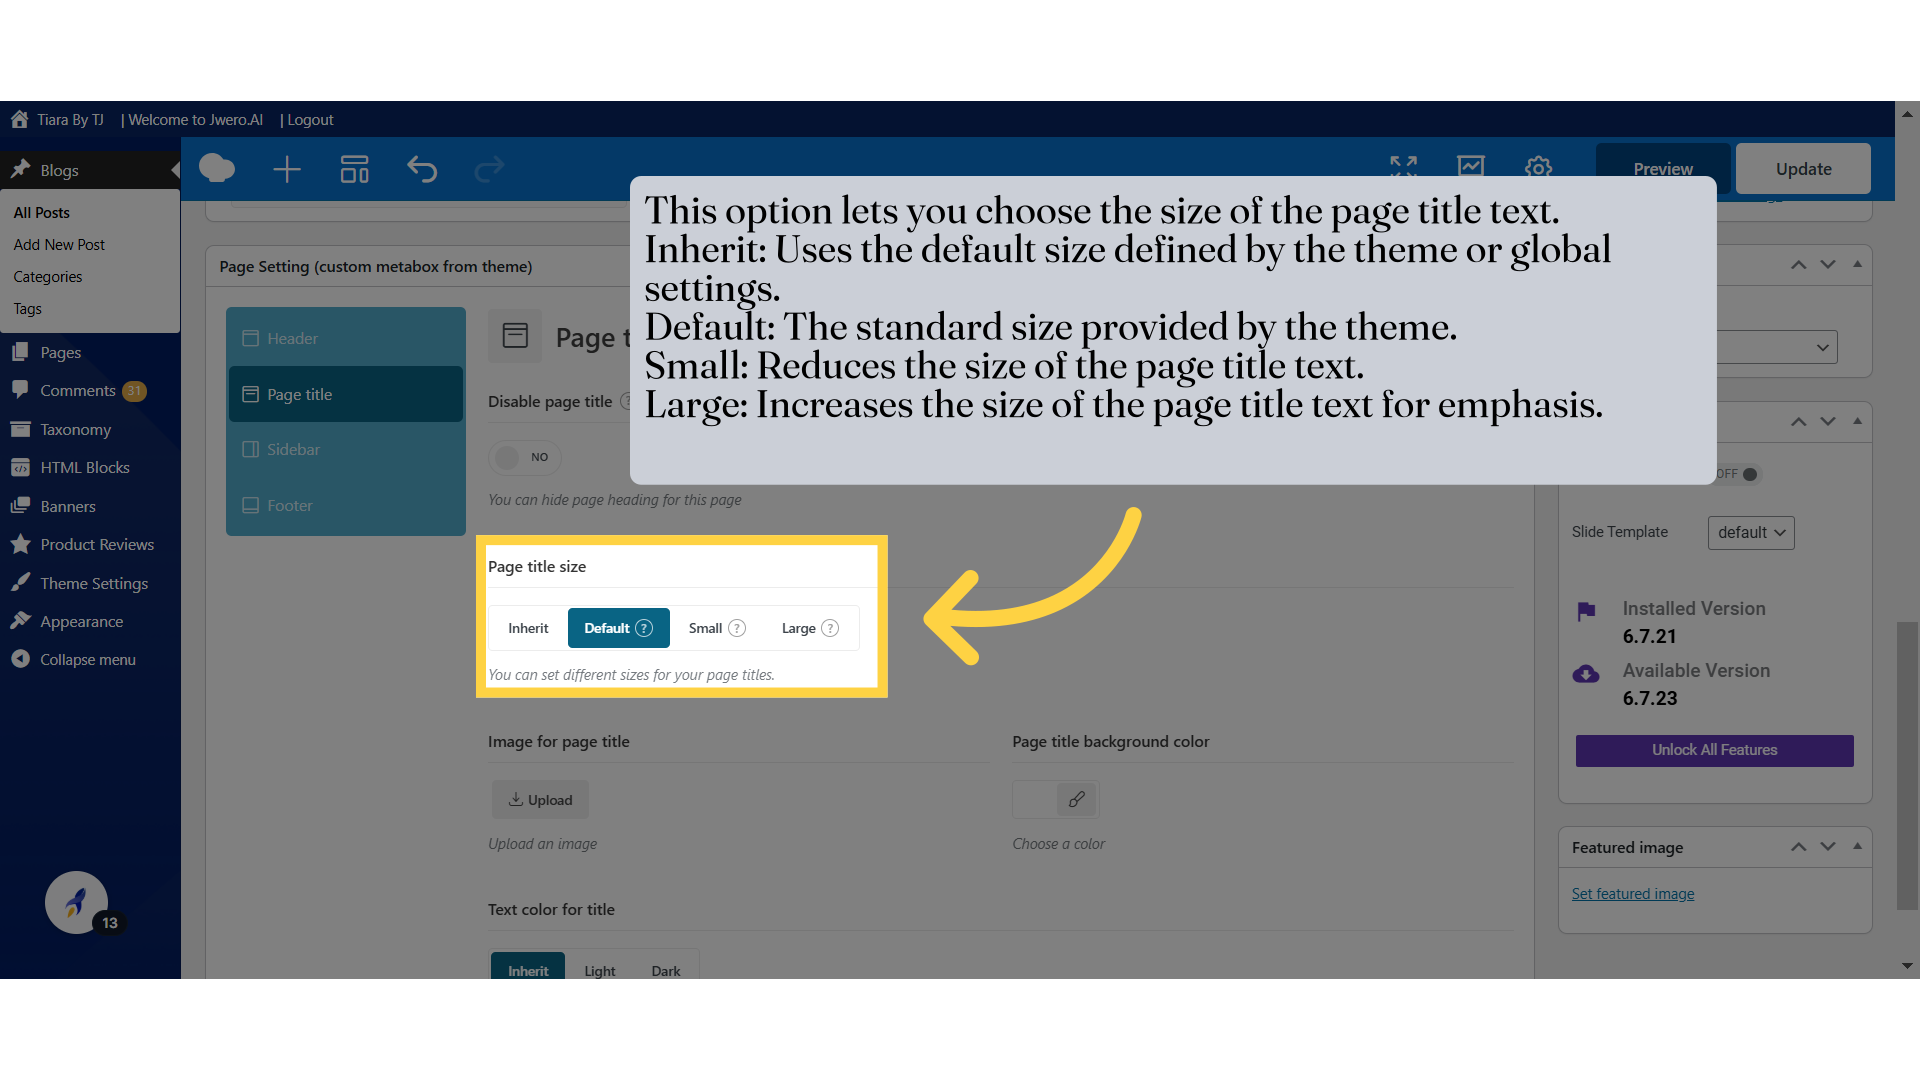
8. This option lets you choose the size of the page title text. Inherit: Uses the default size defined by the theme or global settings. Default: The standard size provided by the theme. Small: Reduces the size of the page title text. Large: Increases the size of the page title text for emphasis.
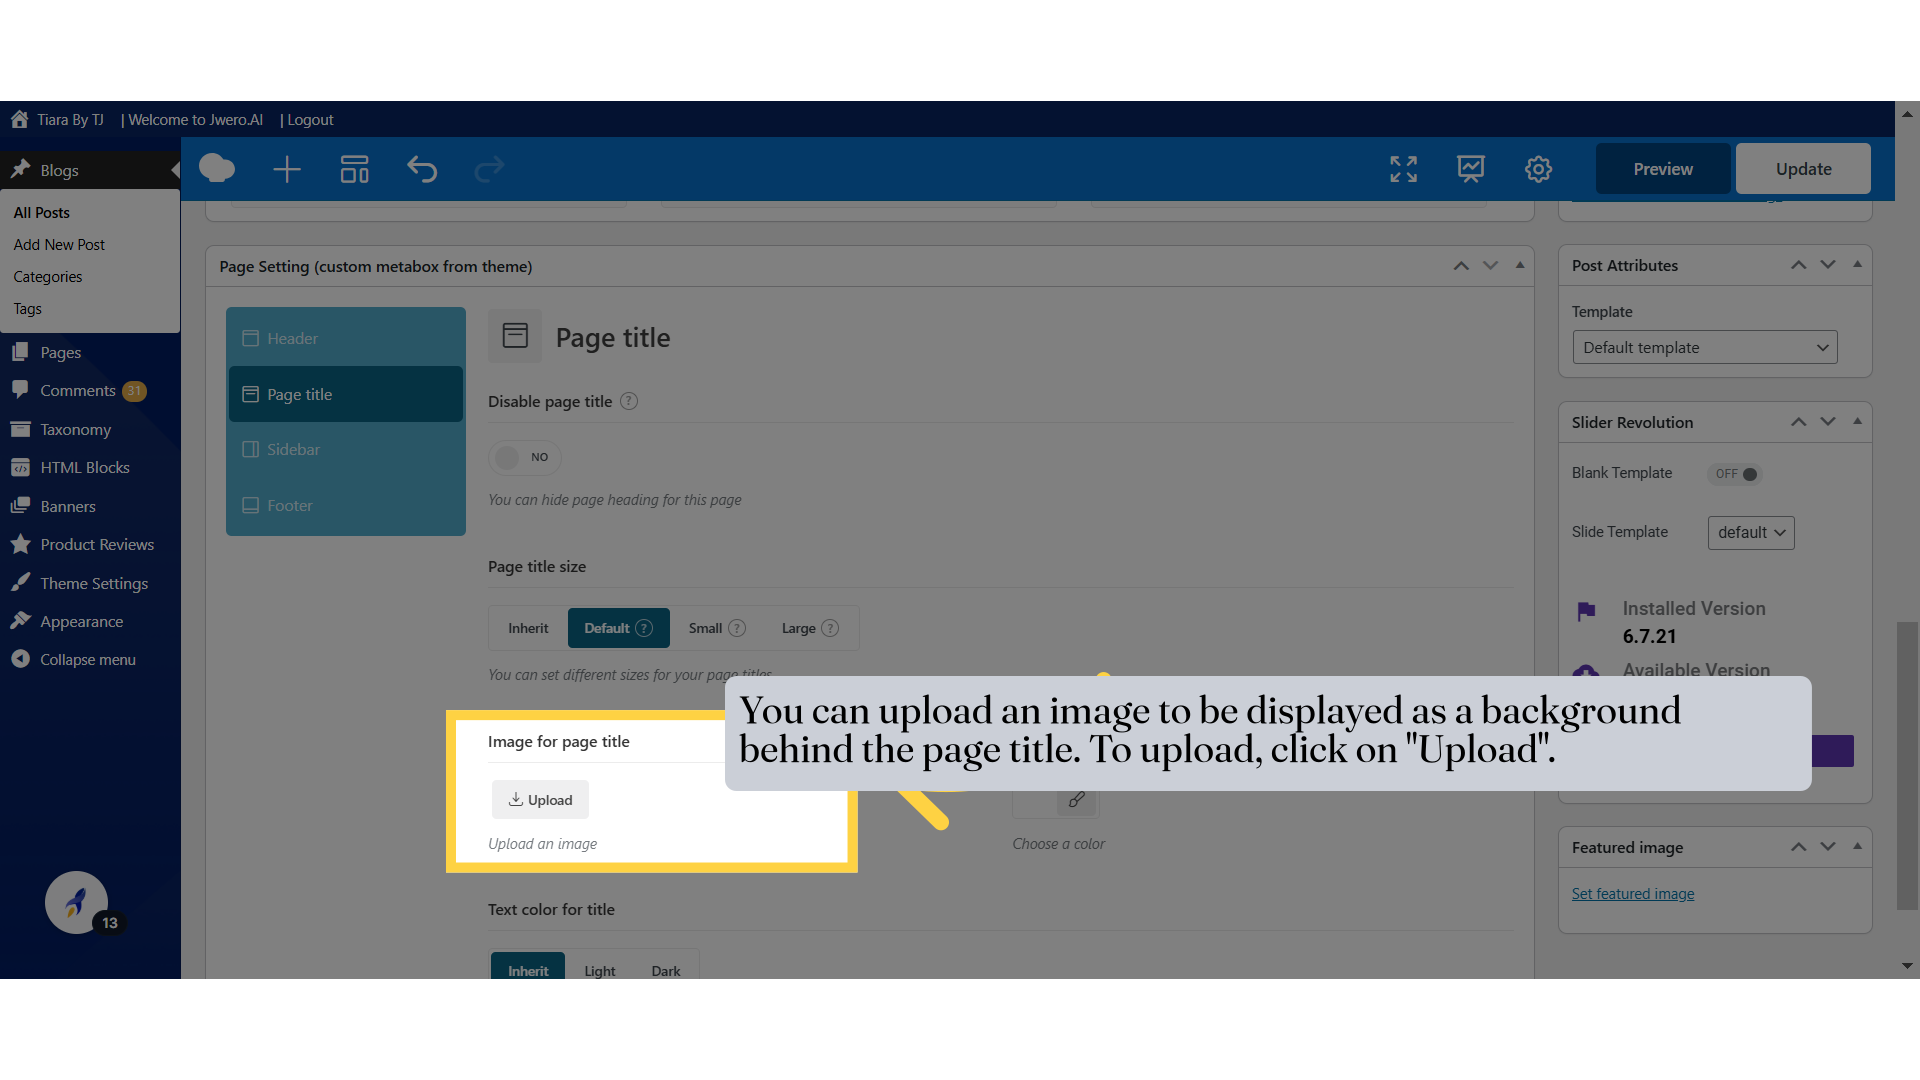
9. You can upload an image to be displayed as a background behind the page title. To upload, click on "Upload".
10. Select the image from the "Media Library" if it has already been uploaded.
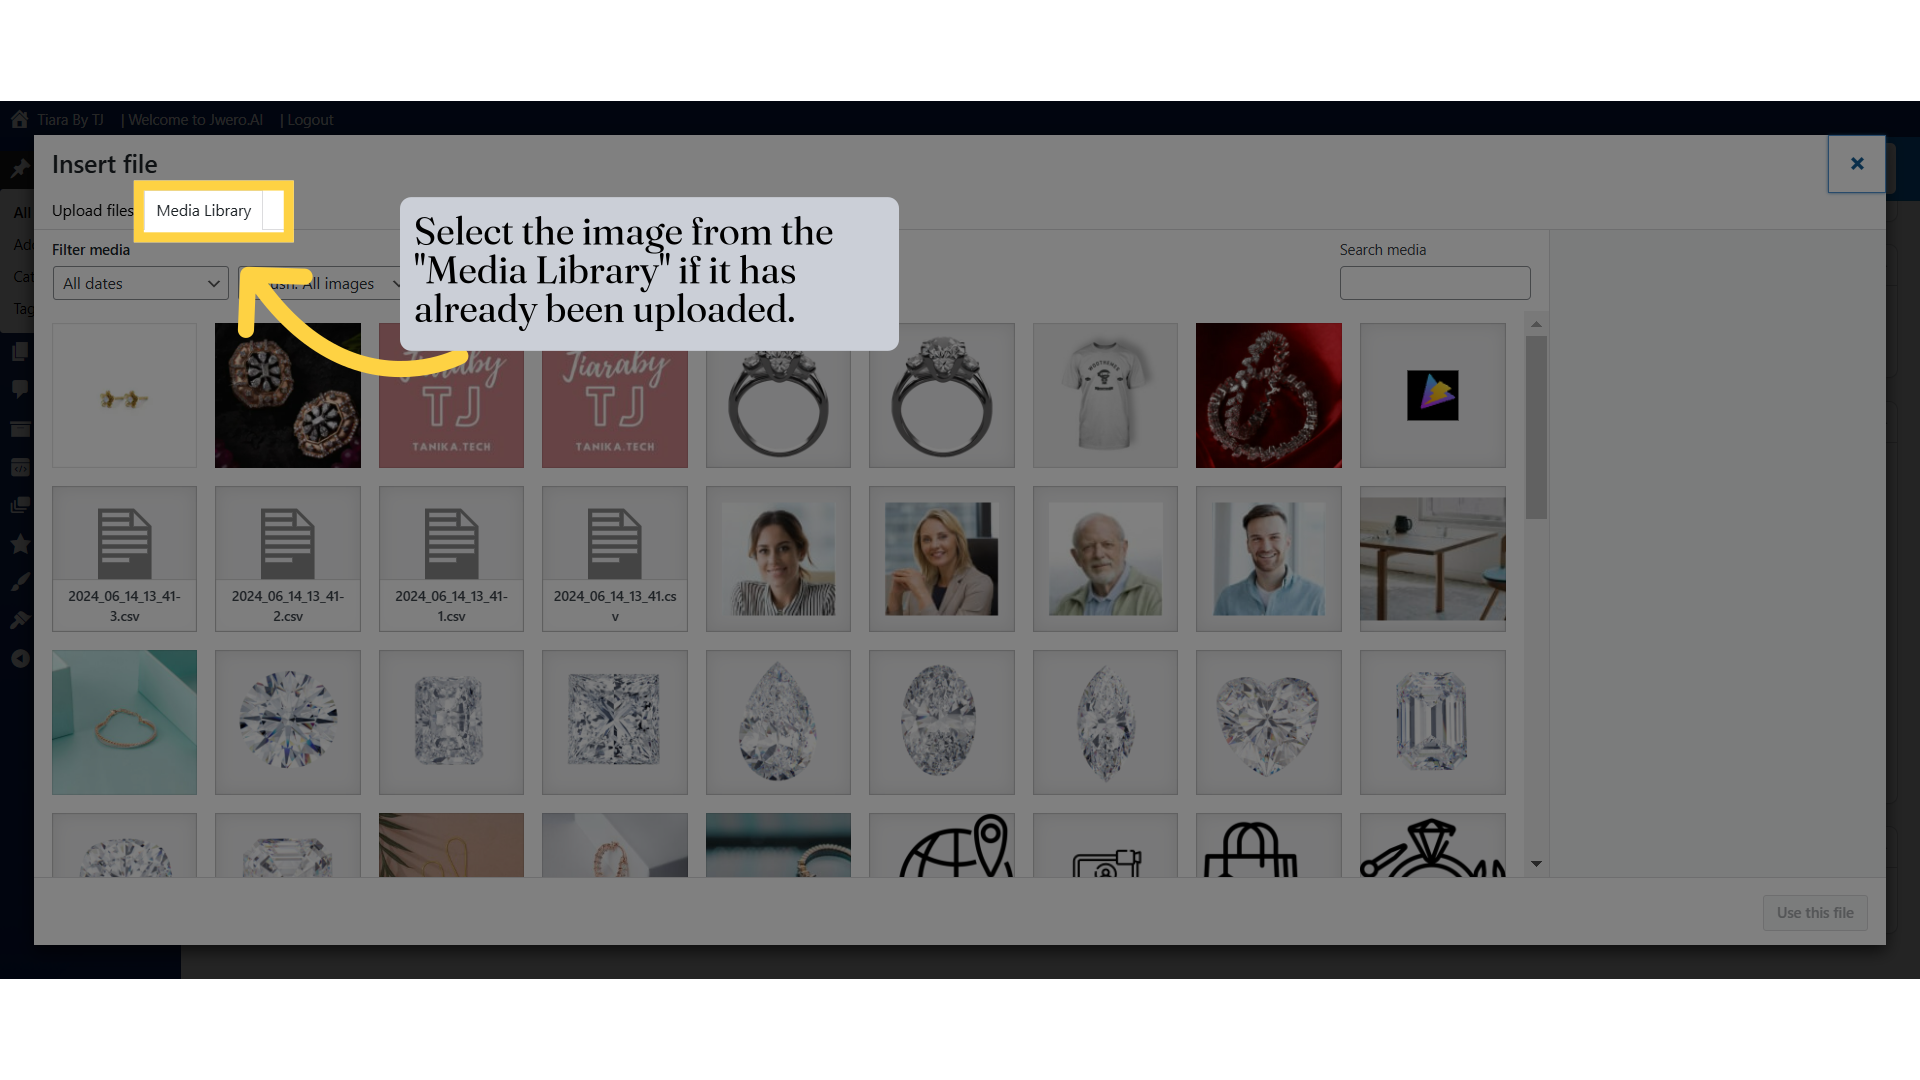
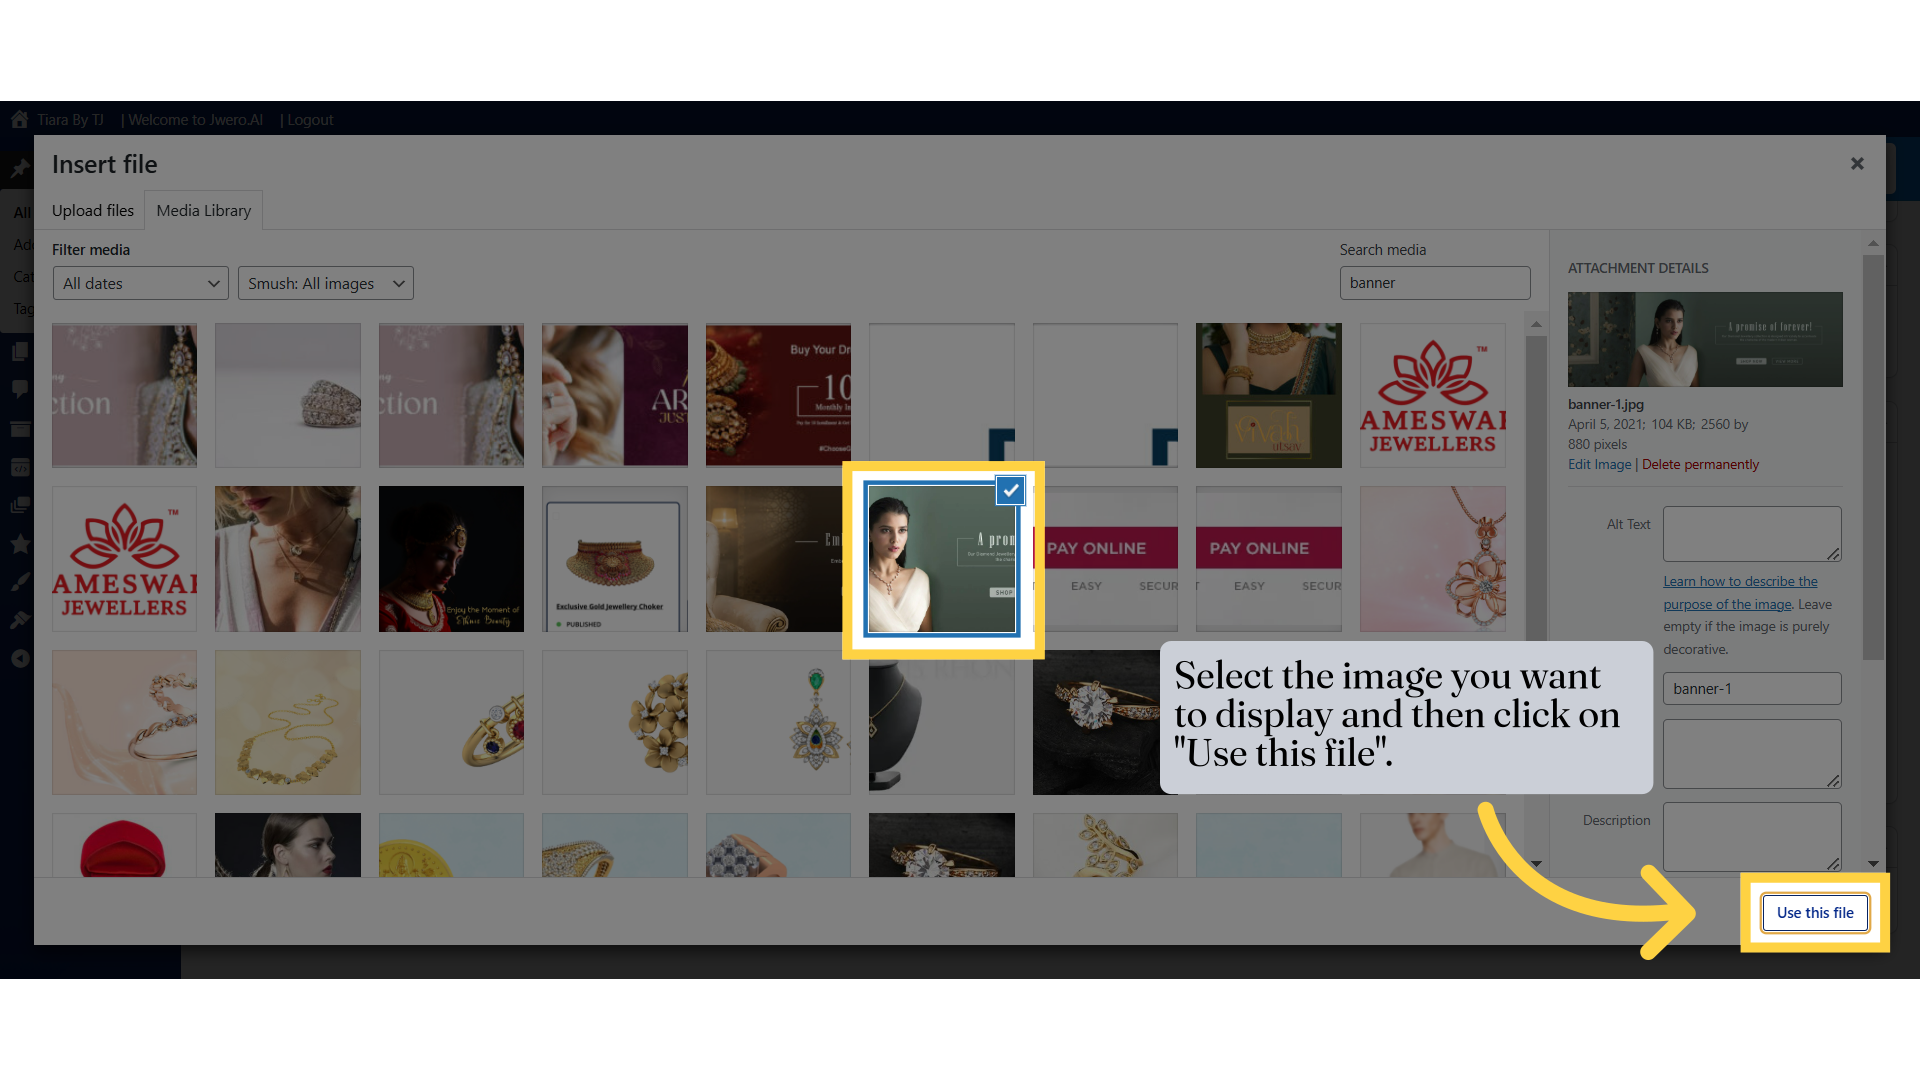
11. Select the image you want to display and then click on "Use this file".
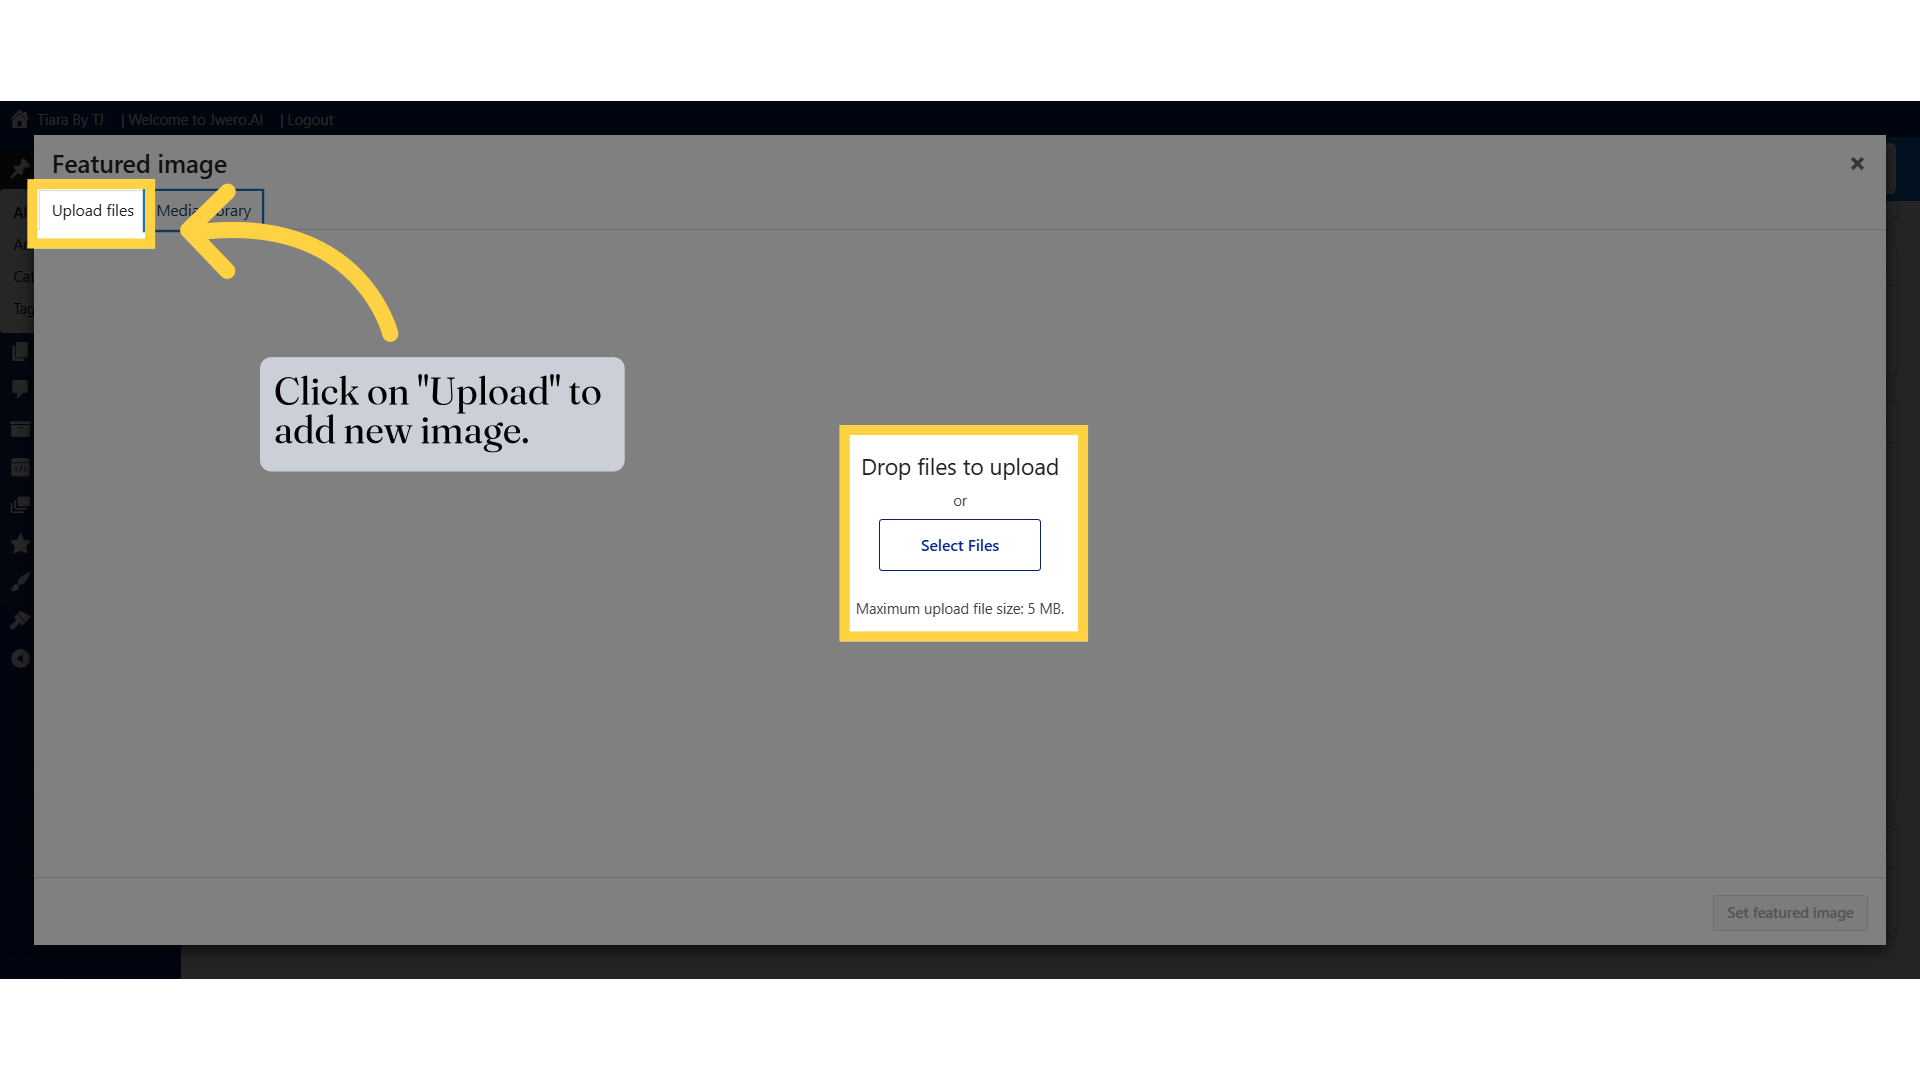
12. Click on "Upload" to add new image.
Access the Media Library

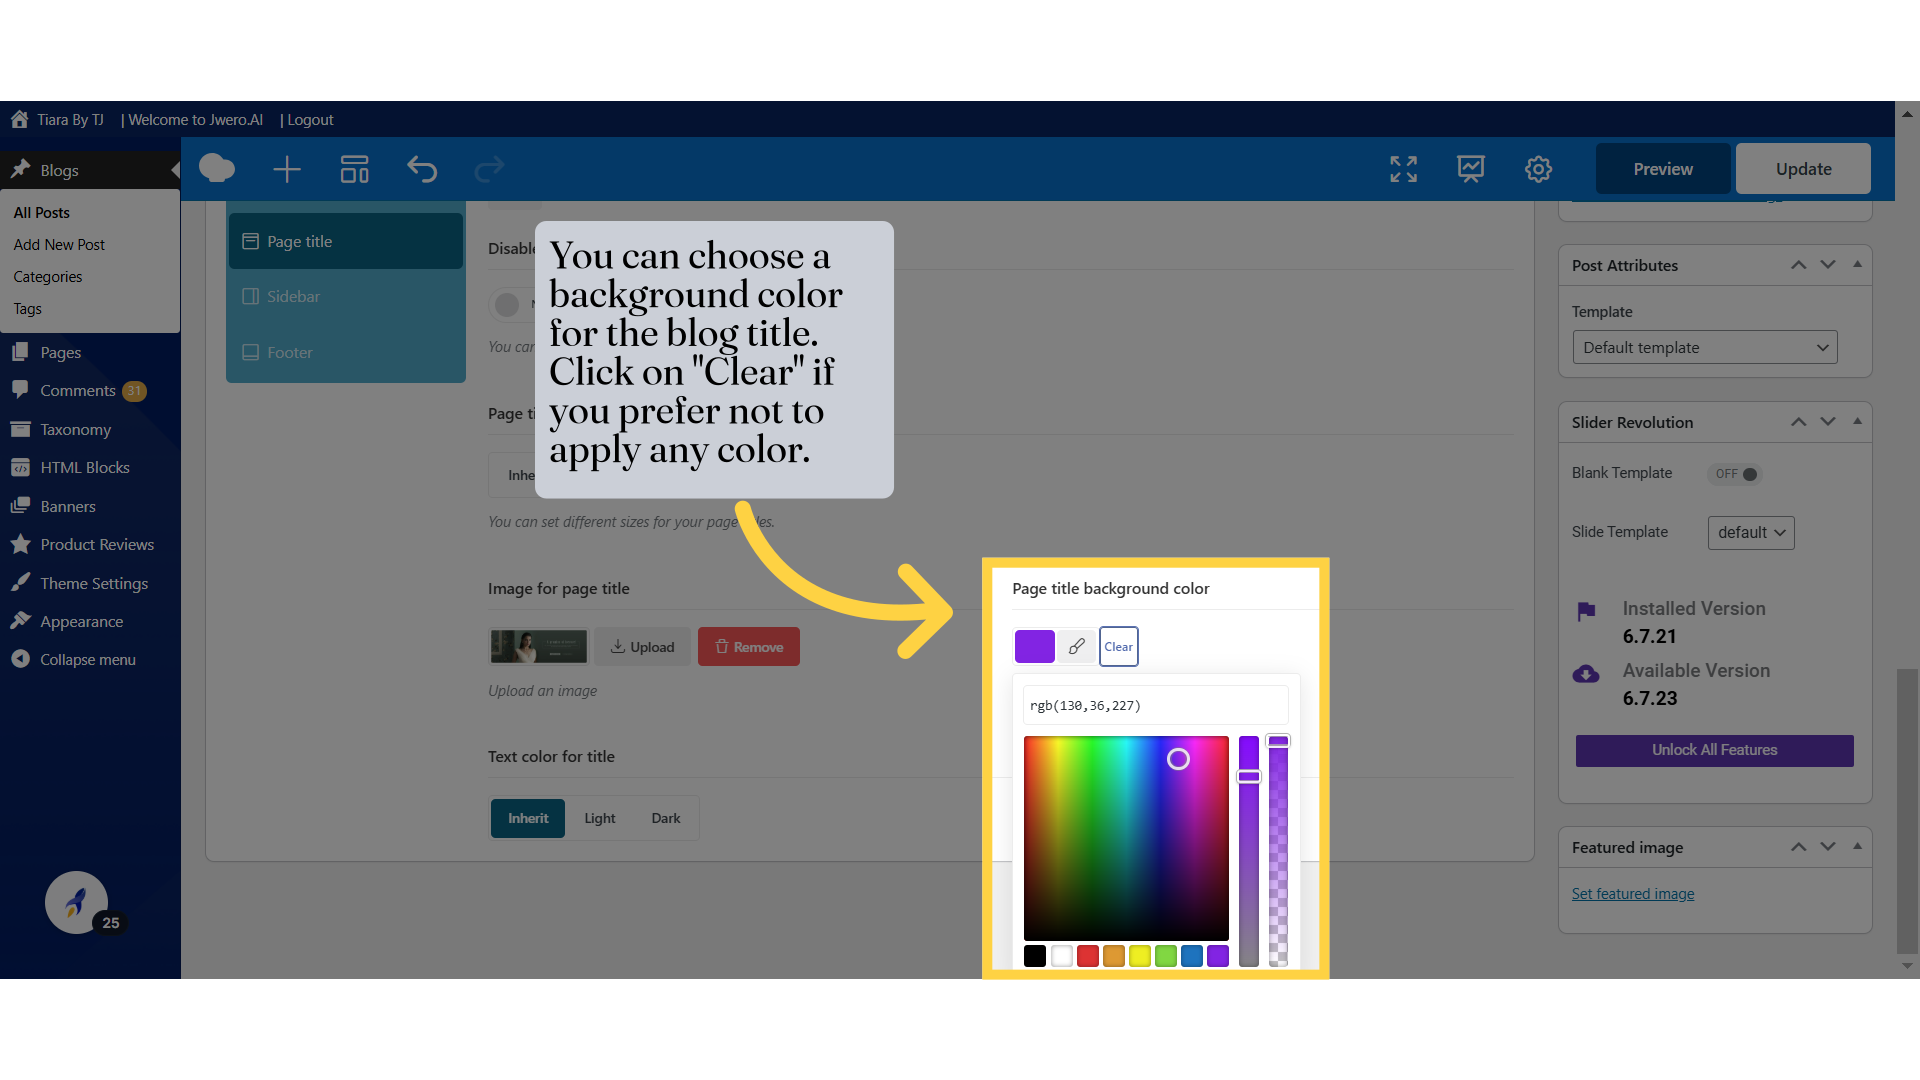
13. You can choose a background color for the blog title. Click on "Clear" if you prefer not to apply any color.
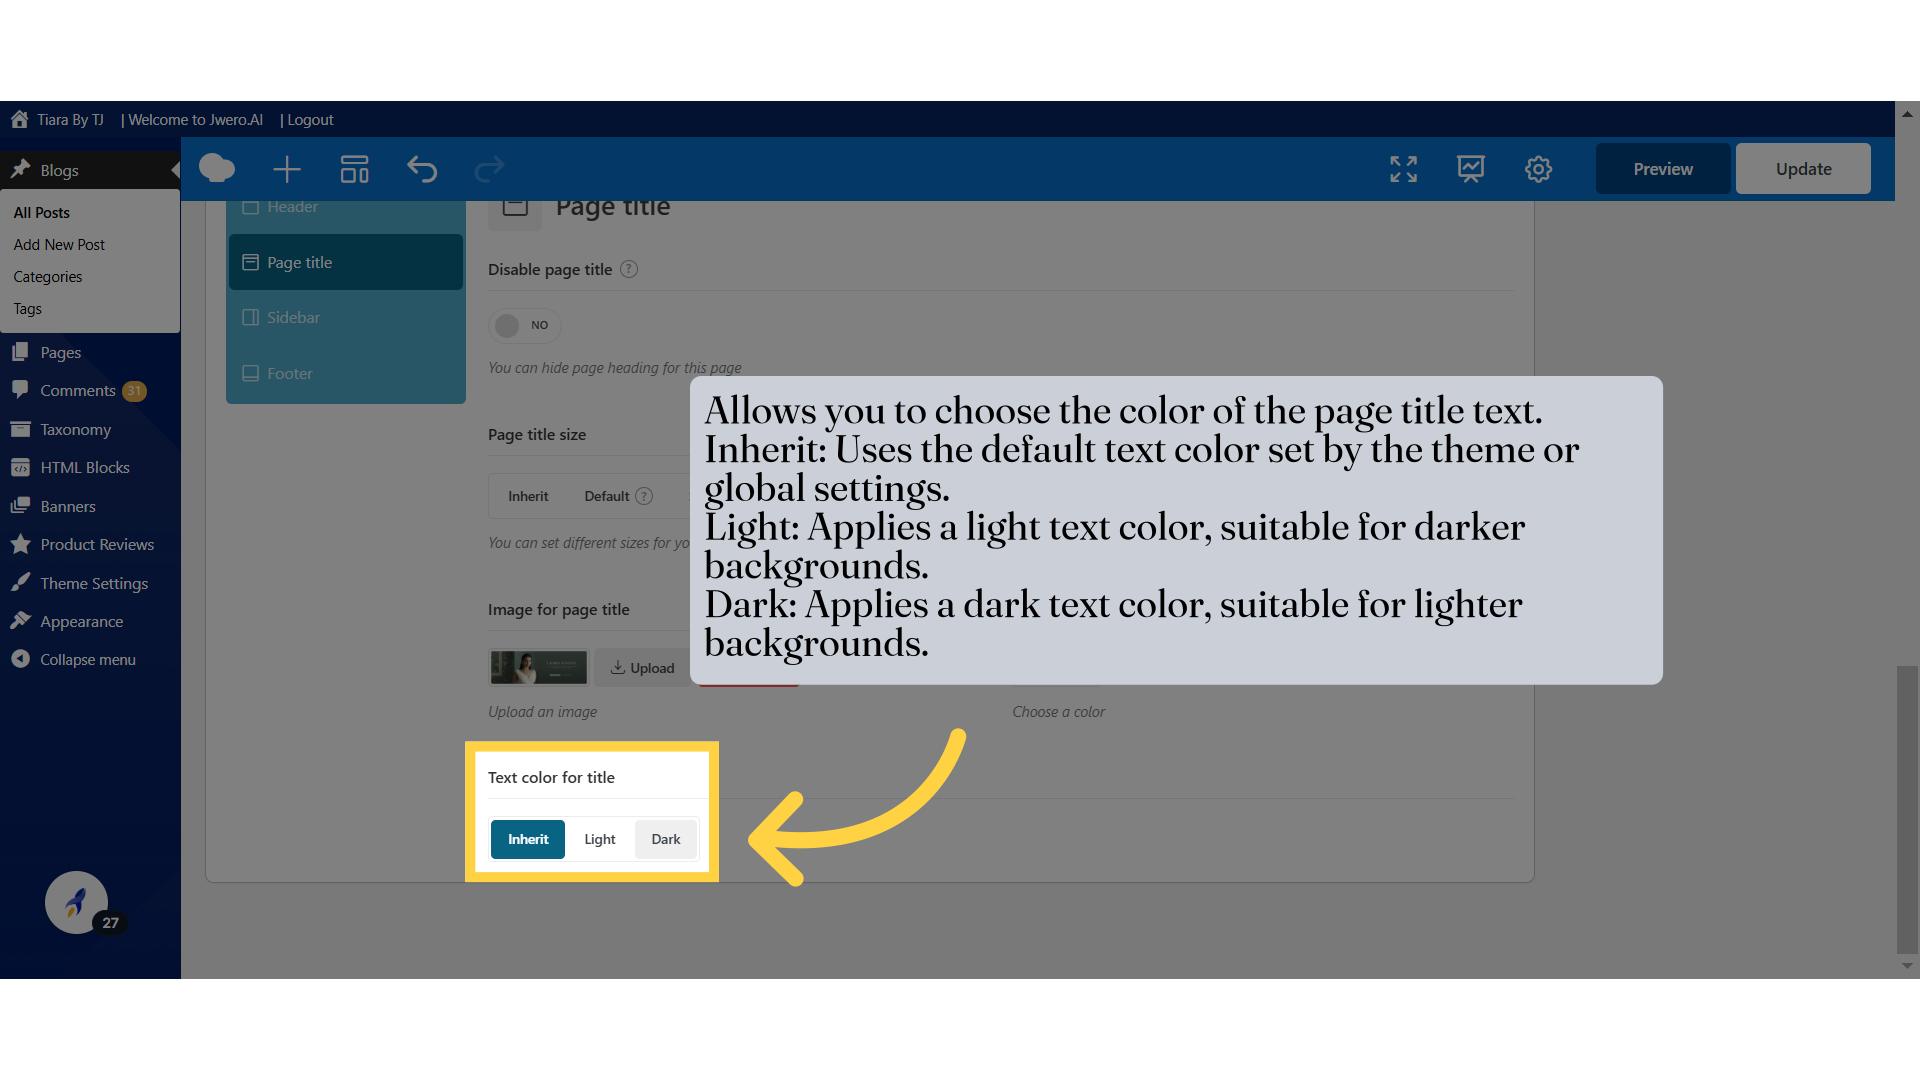
14. Allows you to choose the color of the page title text. Inherit: Uses the default text color set by the theme or global settings. Light: Applies a light text color, suitable for darker backgrounds. Dark: Applies a dark text color, suitable for lighter backgrounds.
15. This option allows you to select the alignment of the sidebar relative to the main content of the page or remove the sidebar entirely. Inherit: Uses the global or theme default sidebar position setting. Without: Removes the sidebar entirely, allowing the content to take the full width of the page. Left: Places the sidebar on the left side of the page content. Right: Places the sidebar on the right side of the page content.

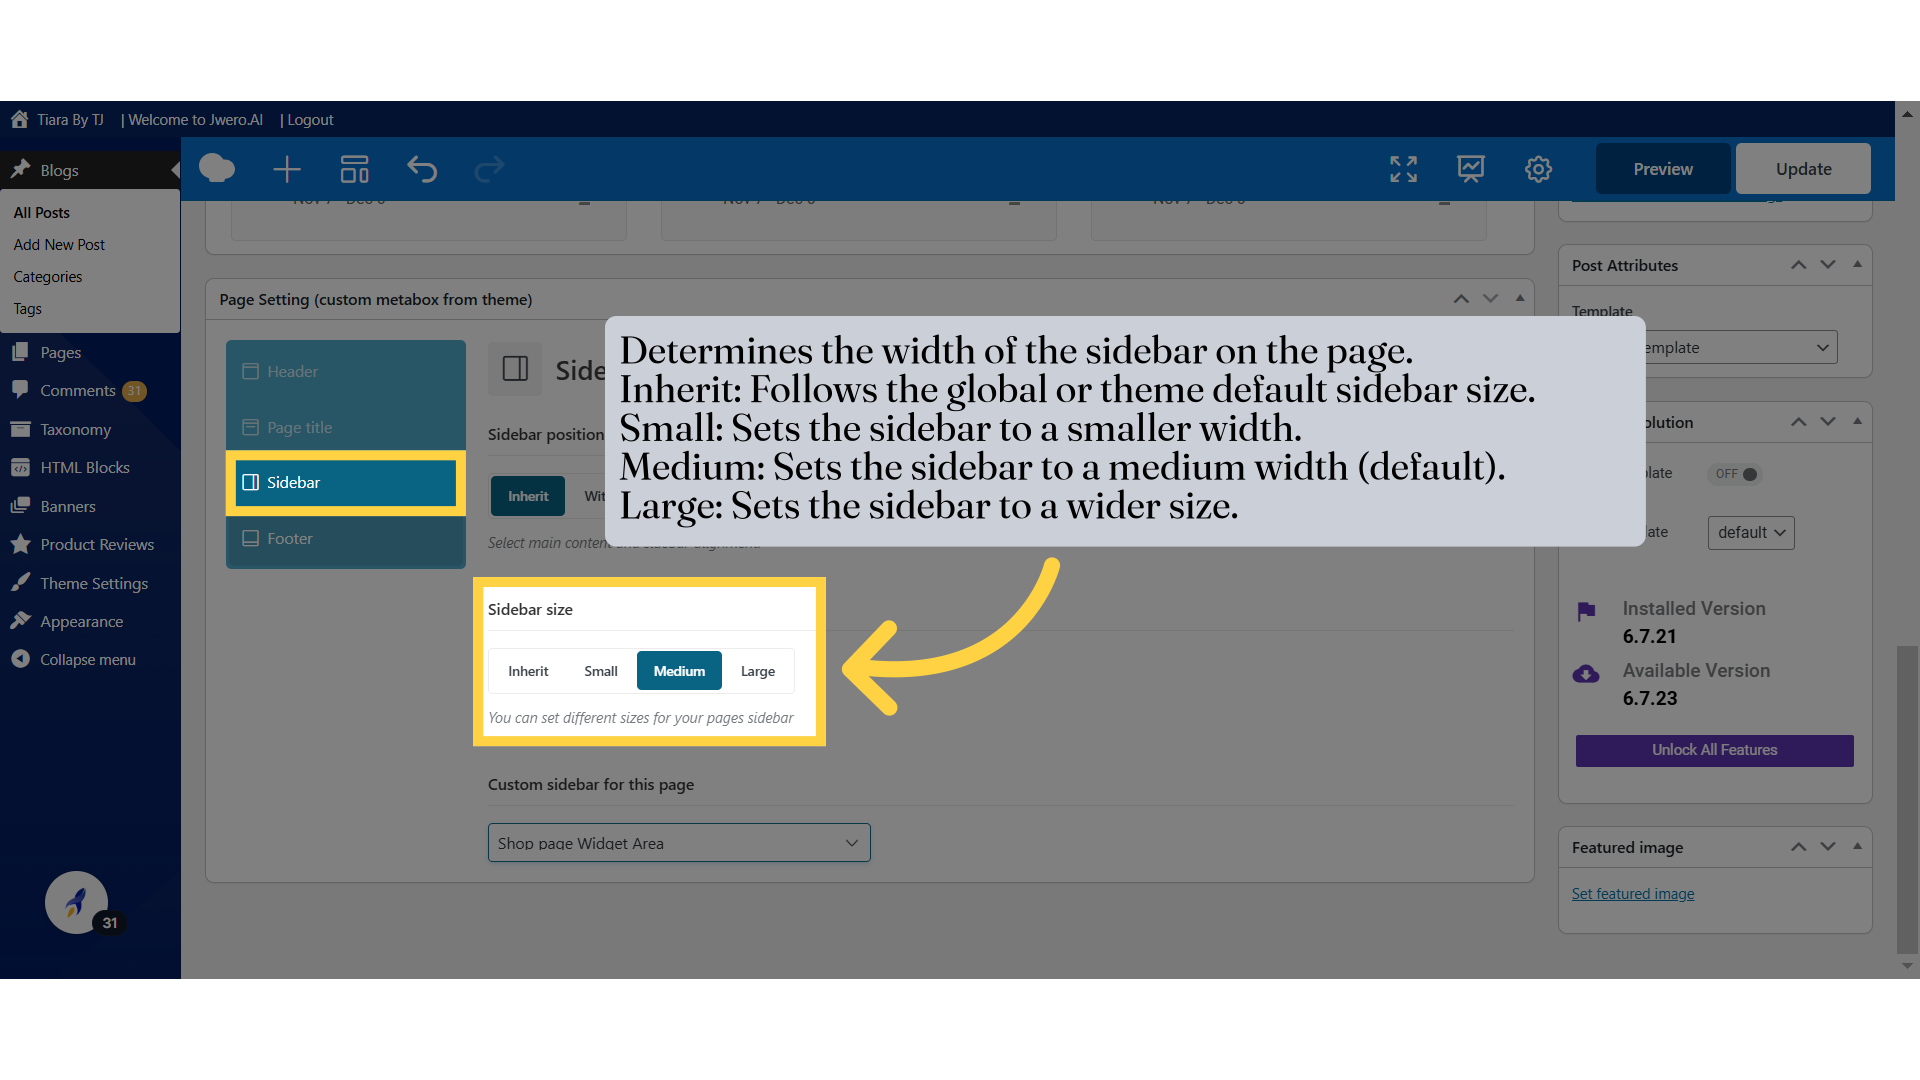
16. Determines the width of the sidebar on the page. Inherit: Follows the global or theme default sidebar size. Small: Sets the sidebar to a smaller width. Medium: Sets the sidebar to a medium width (default). Large: Sets the sidebar to a wider size.
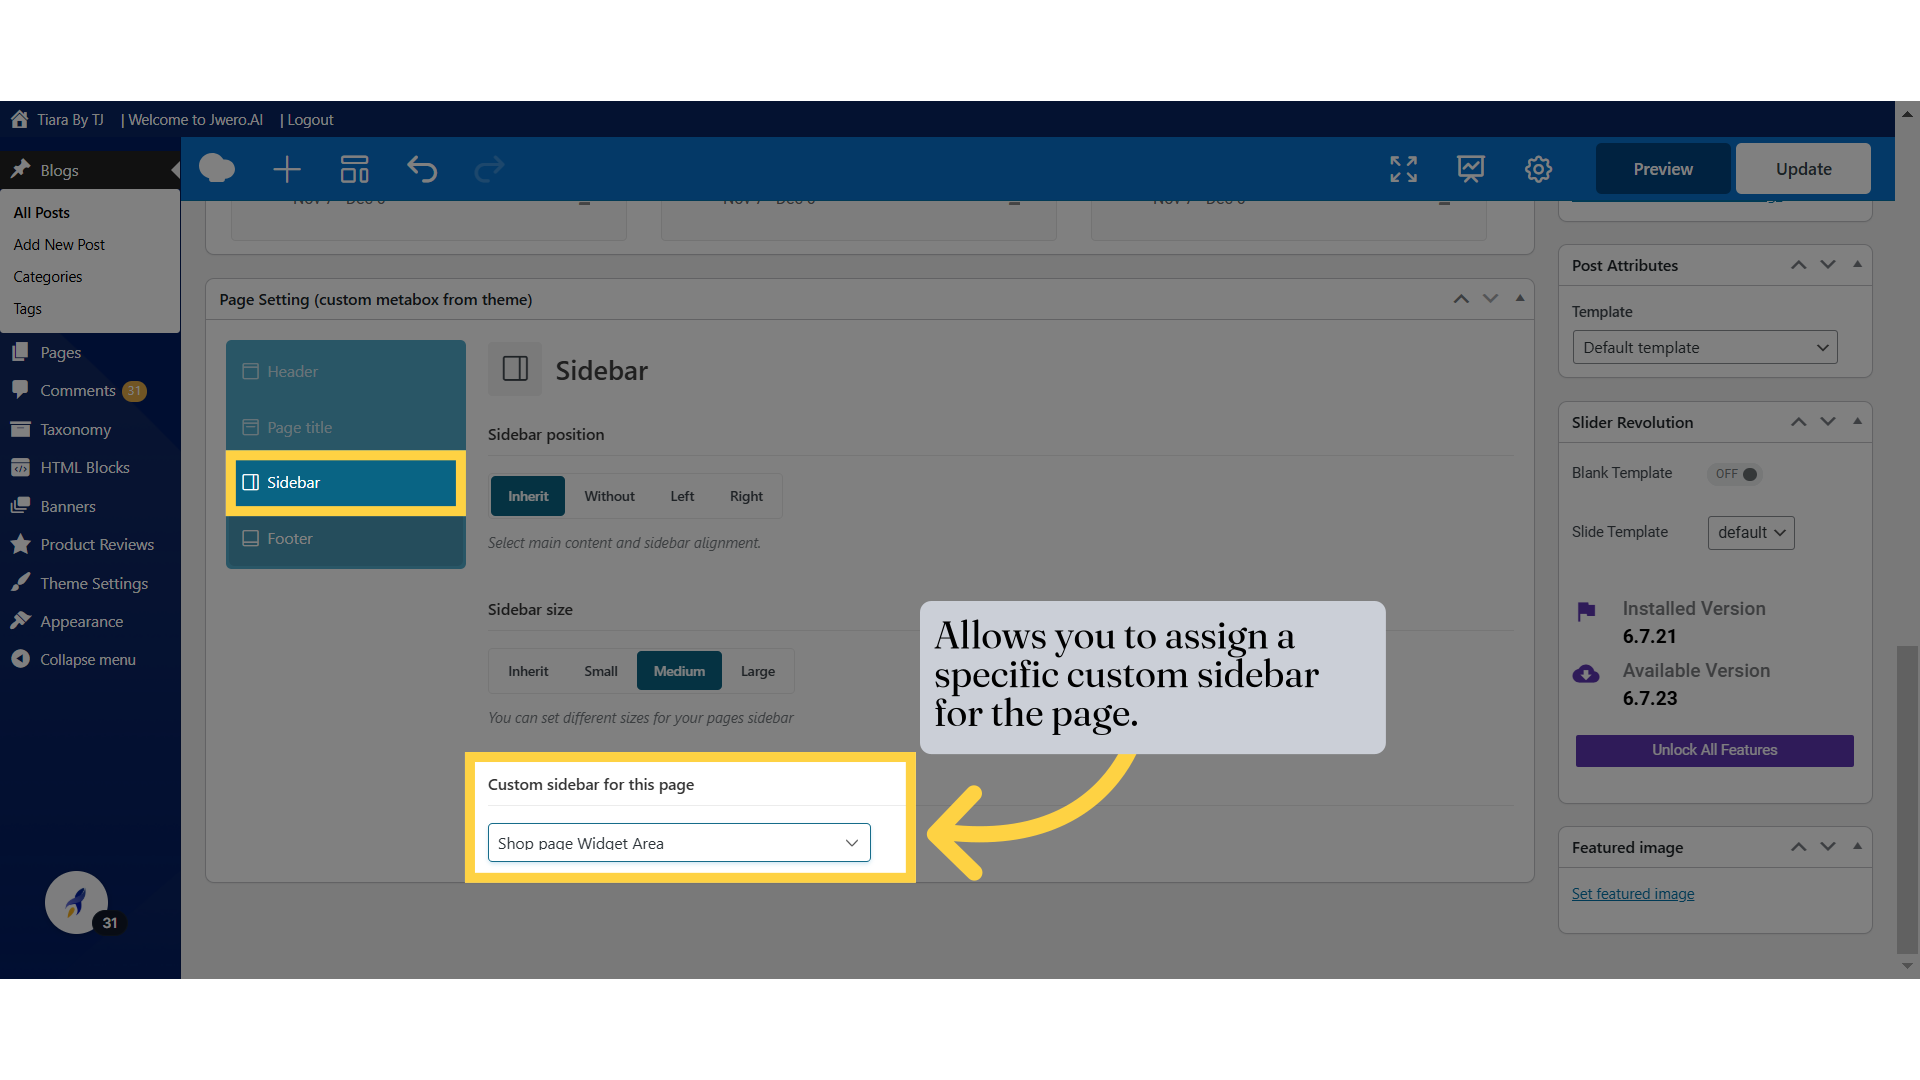
17. Allows you to assign a specific custom sidebar for the page.
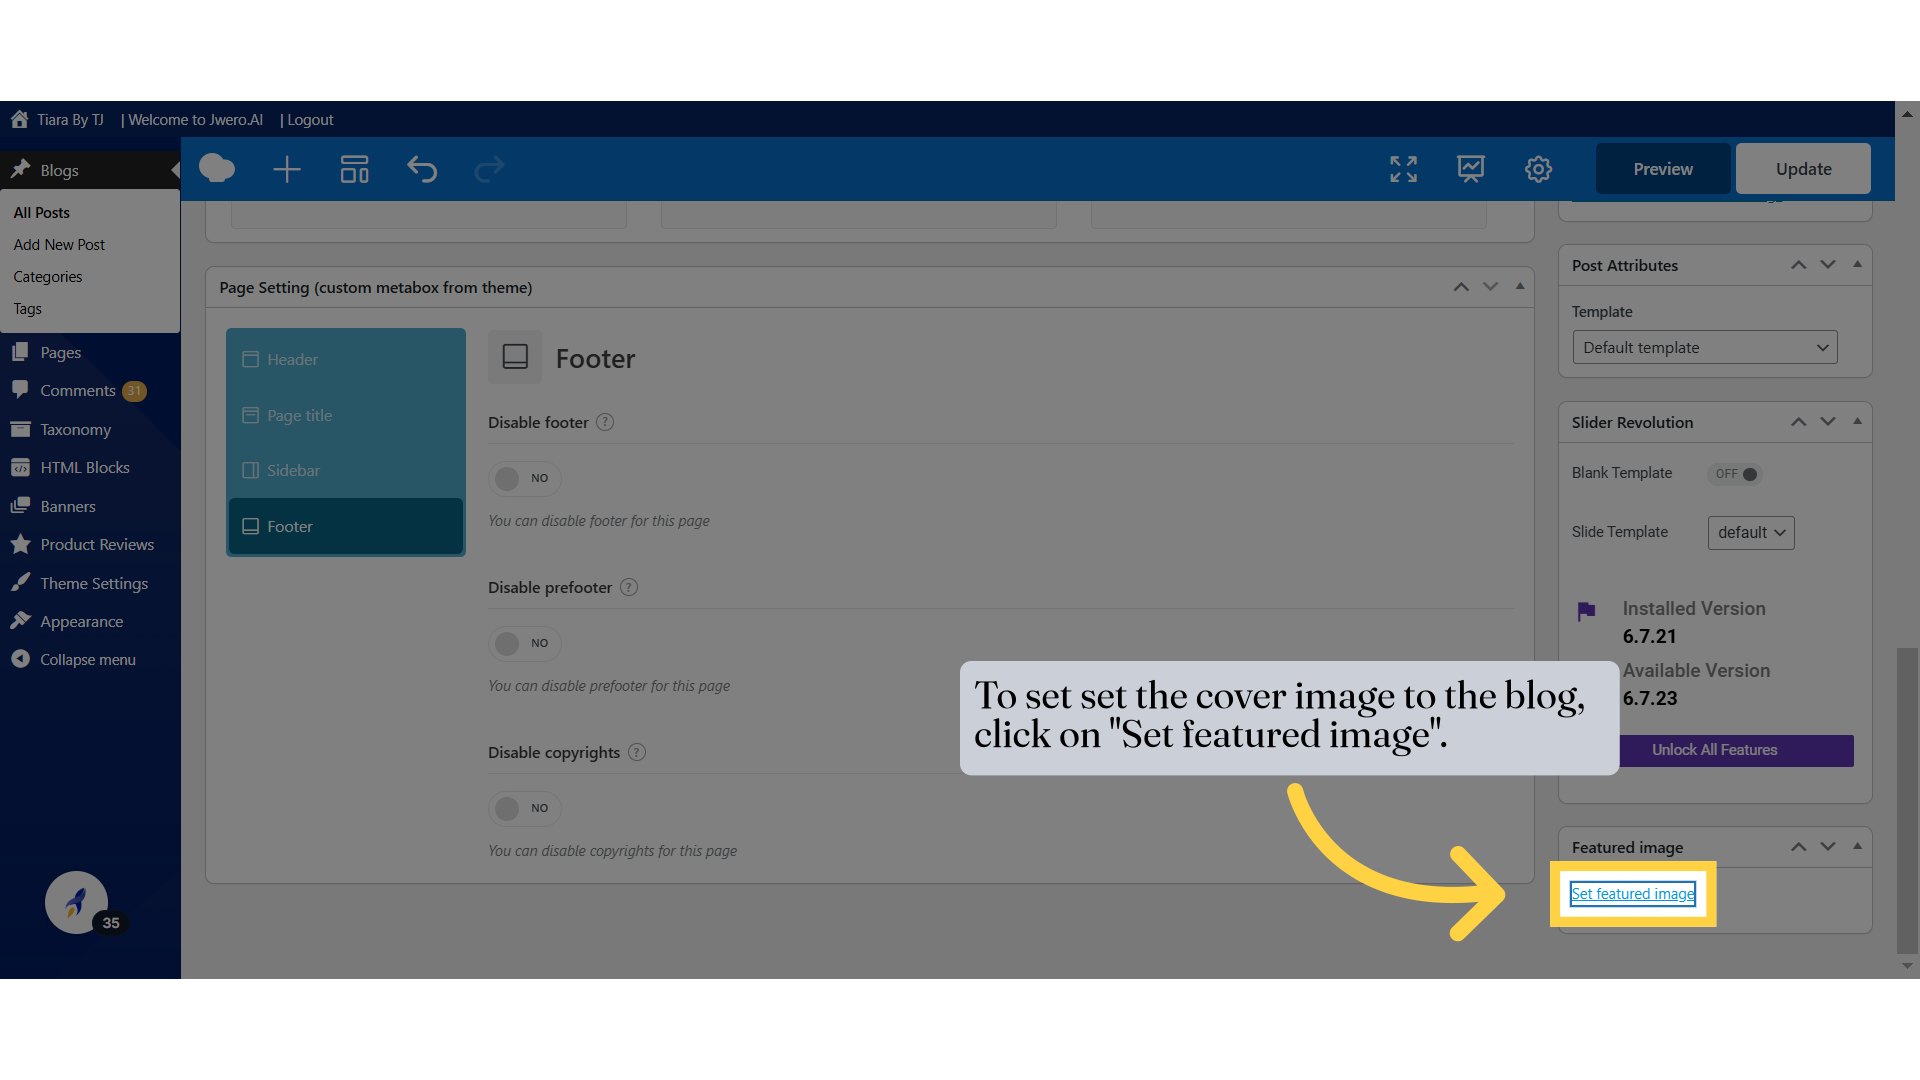
18. To set set the cover image to the blog, click on "Set featured image".
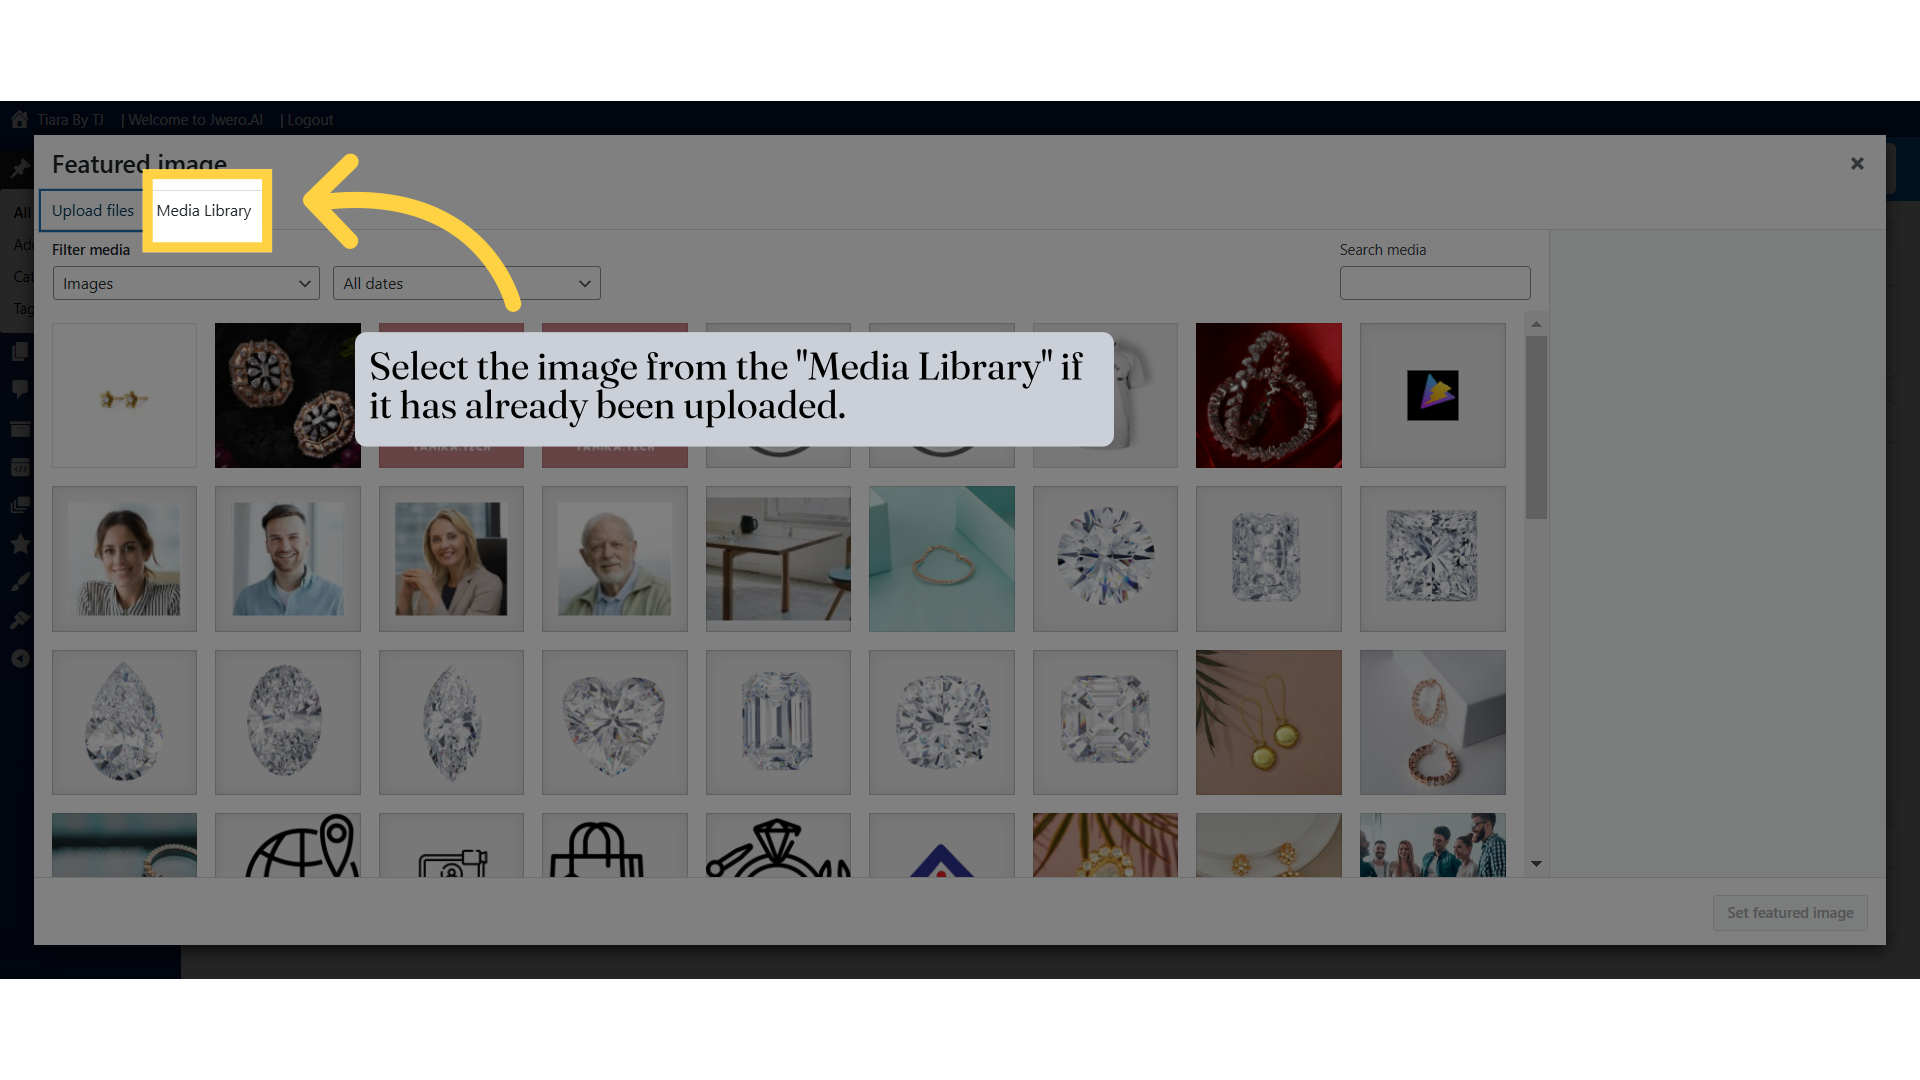
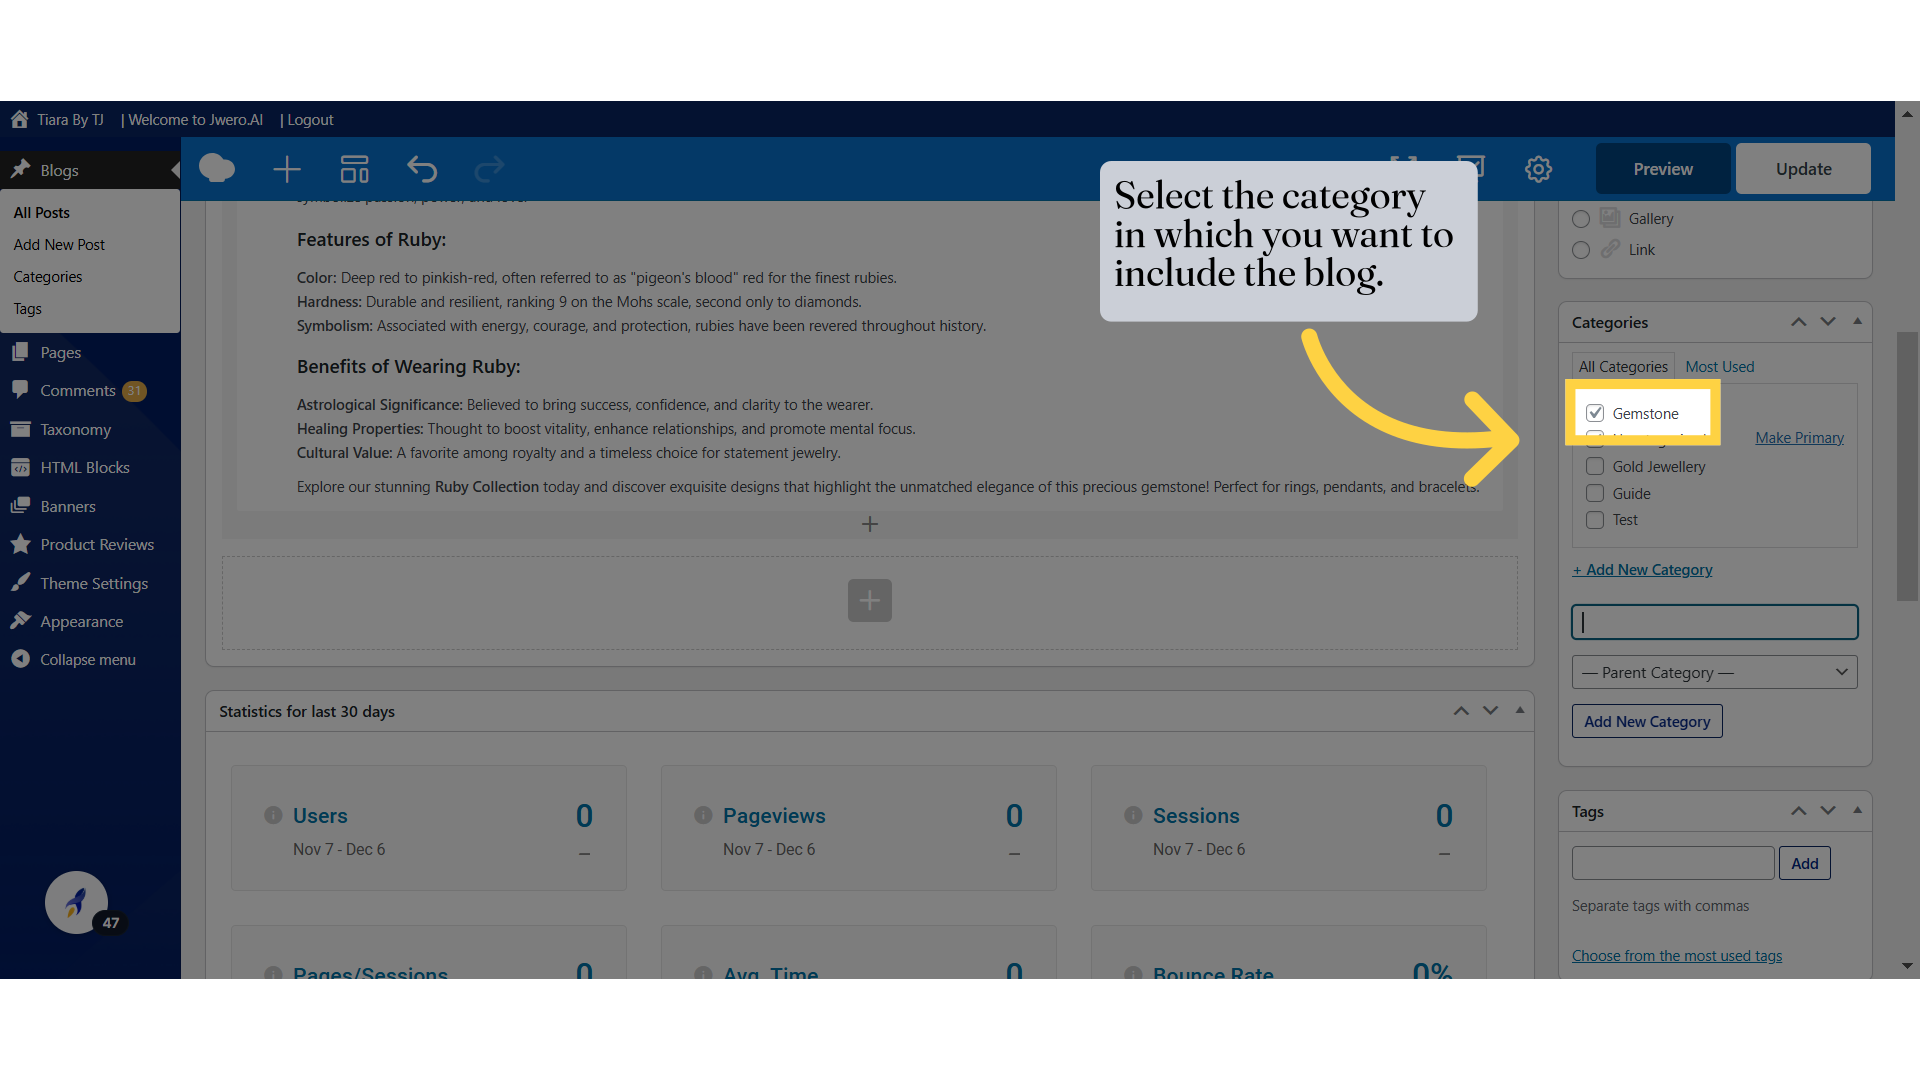
19. Select the image from the "Media Library" if it has already been uploaded.
20. Click on "Upload" to add new image.
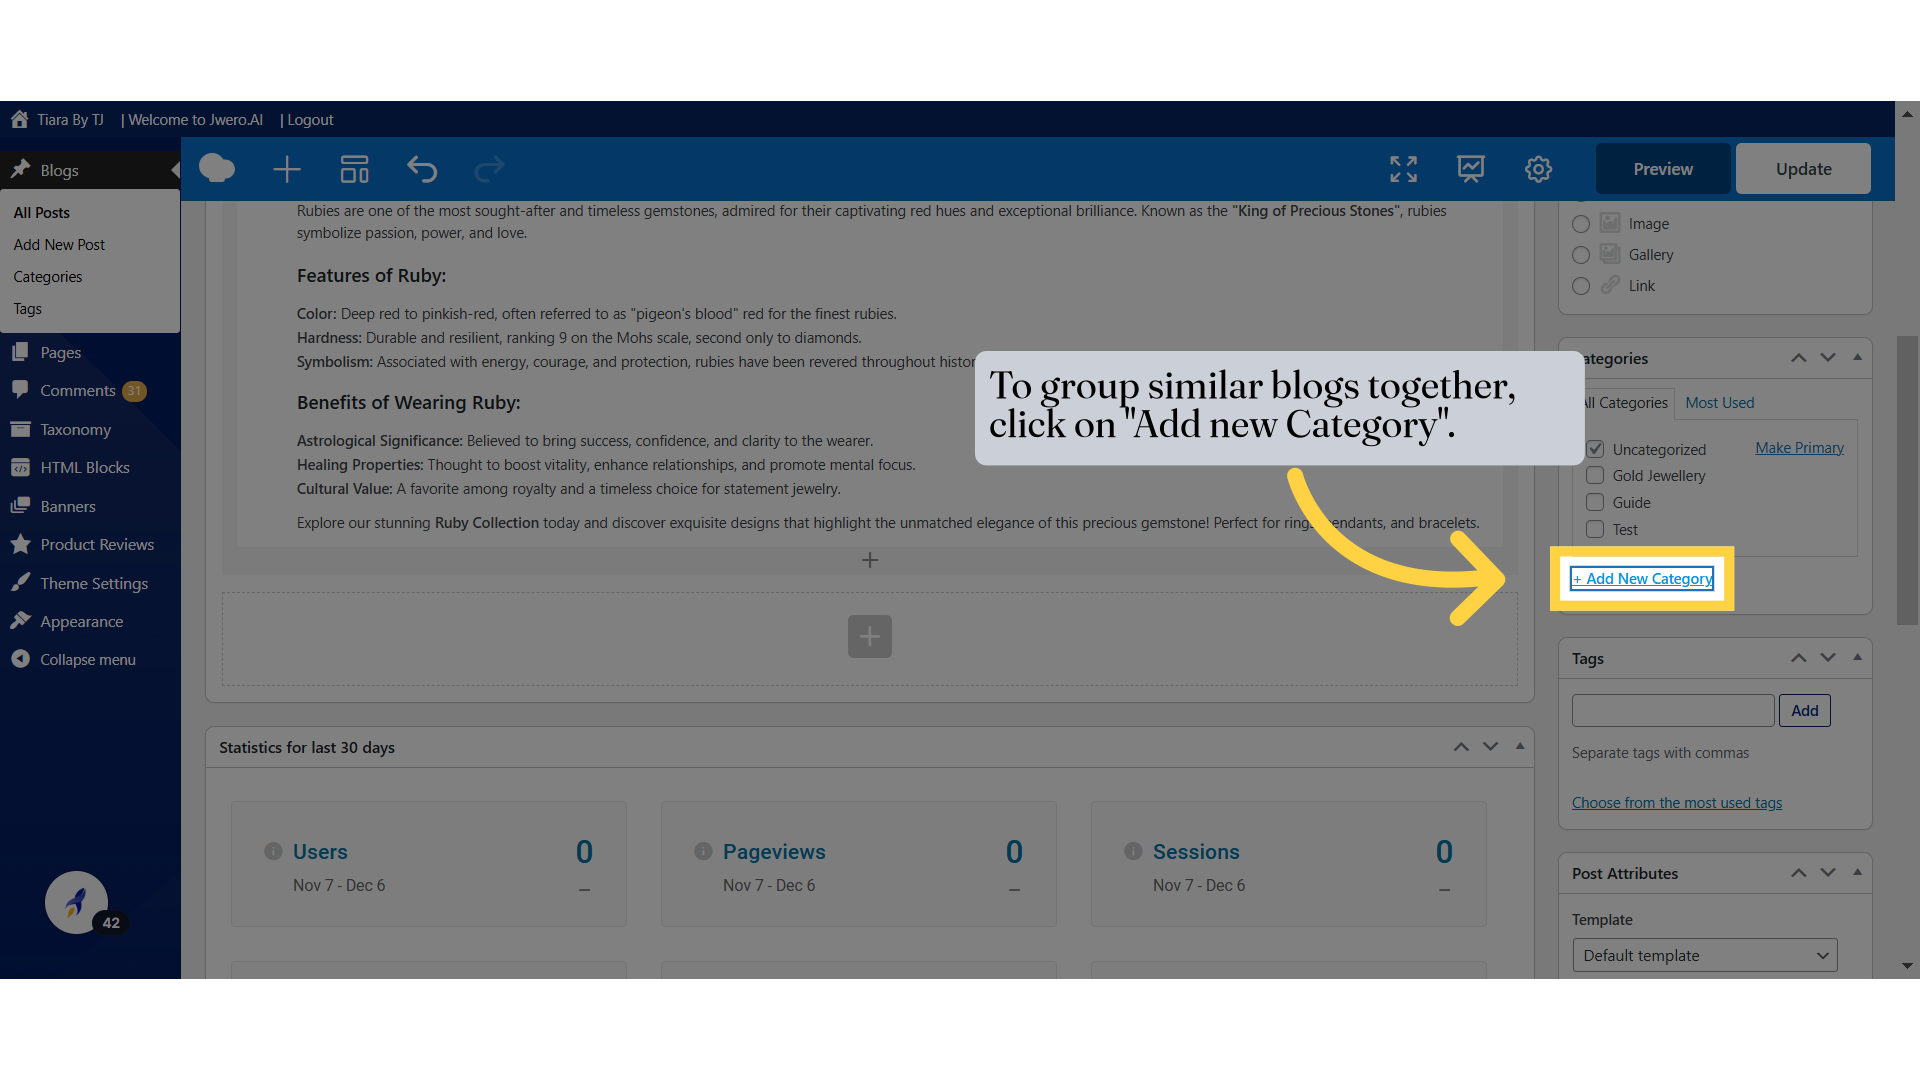
21. To group similar blogs together, click on "Add new Category".
22. Enter the desired category name.
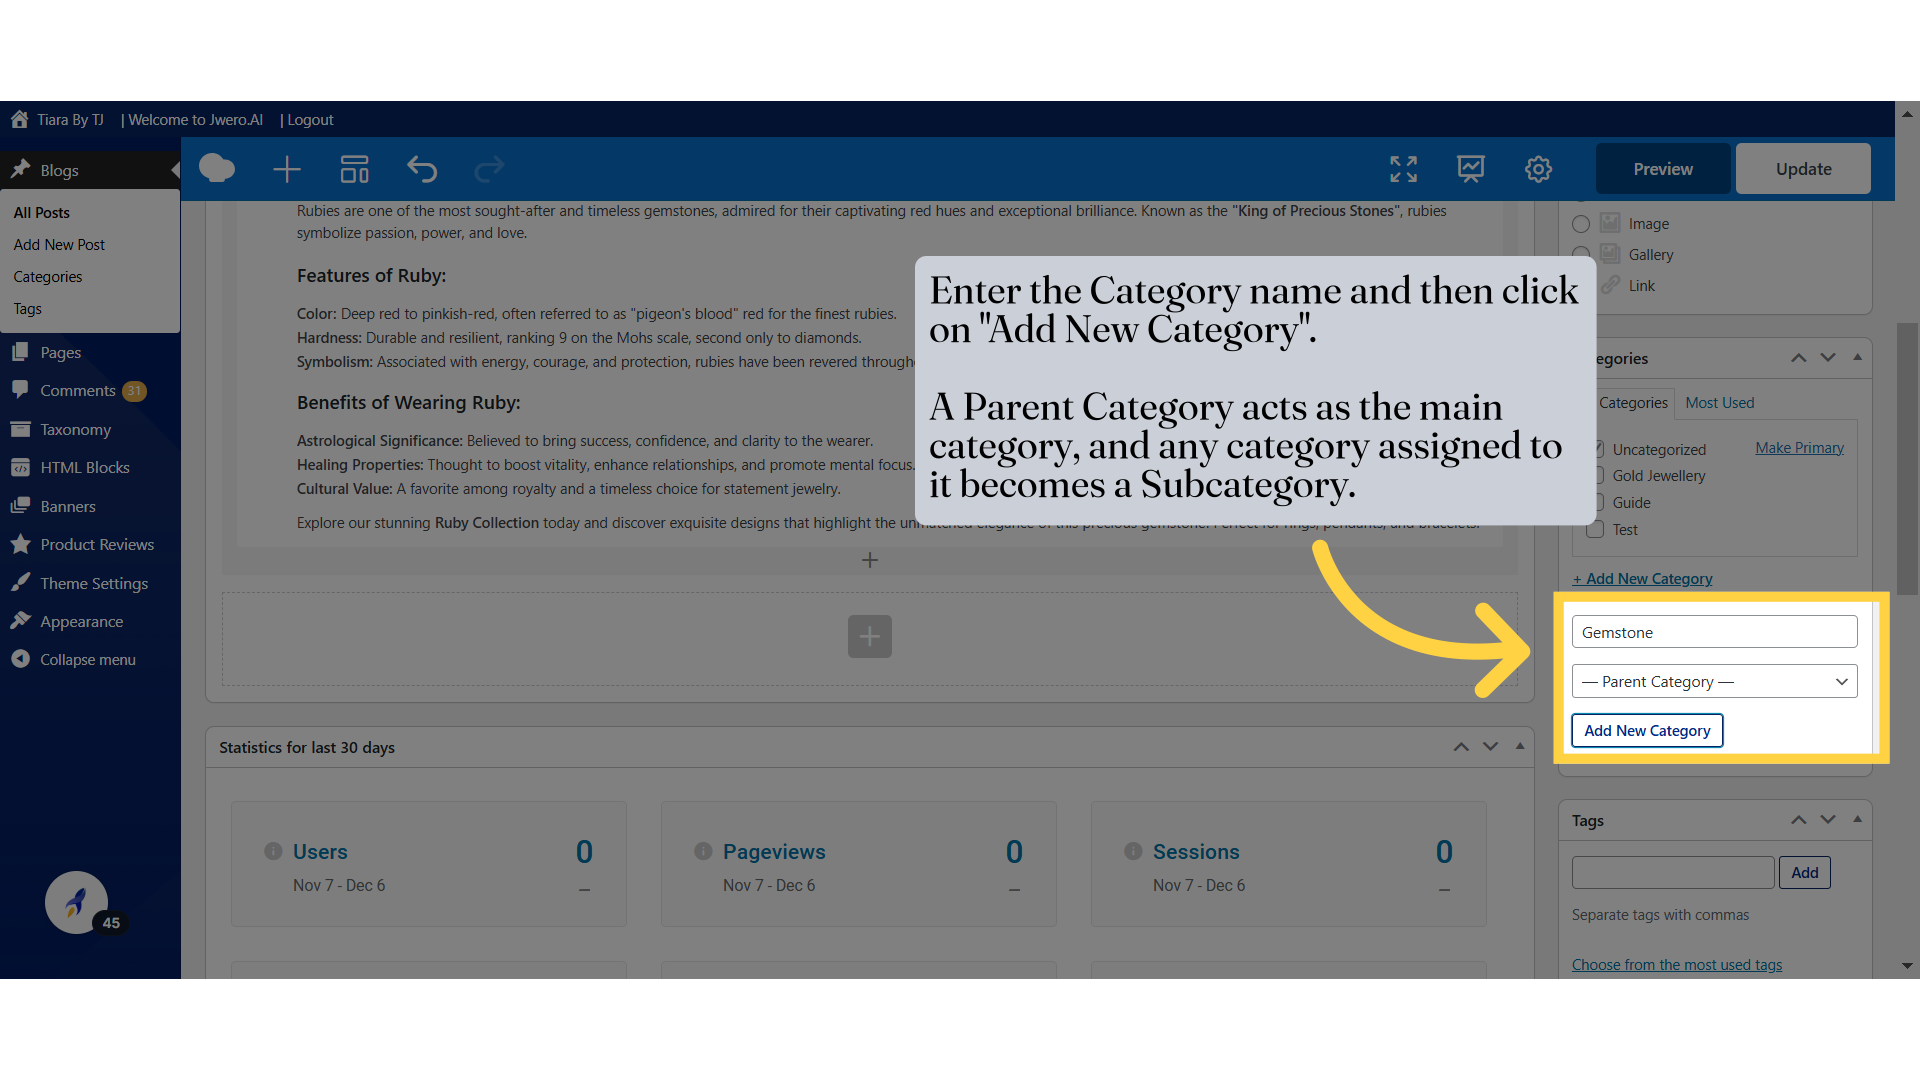
23. Enter the Category name and then click on "Add New Category". A Parent Category acts as the main category, and any category assigned to it becomes a Subcategory.
24. Select the category in which you want to include the blog.
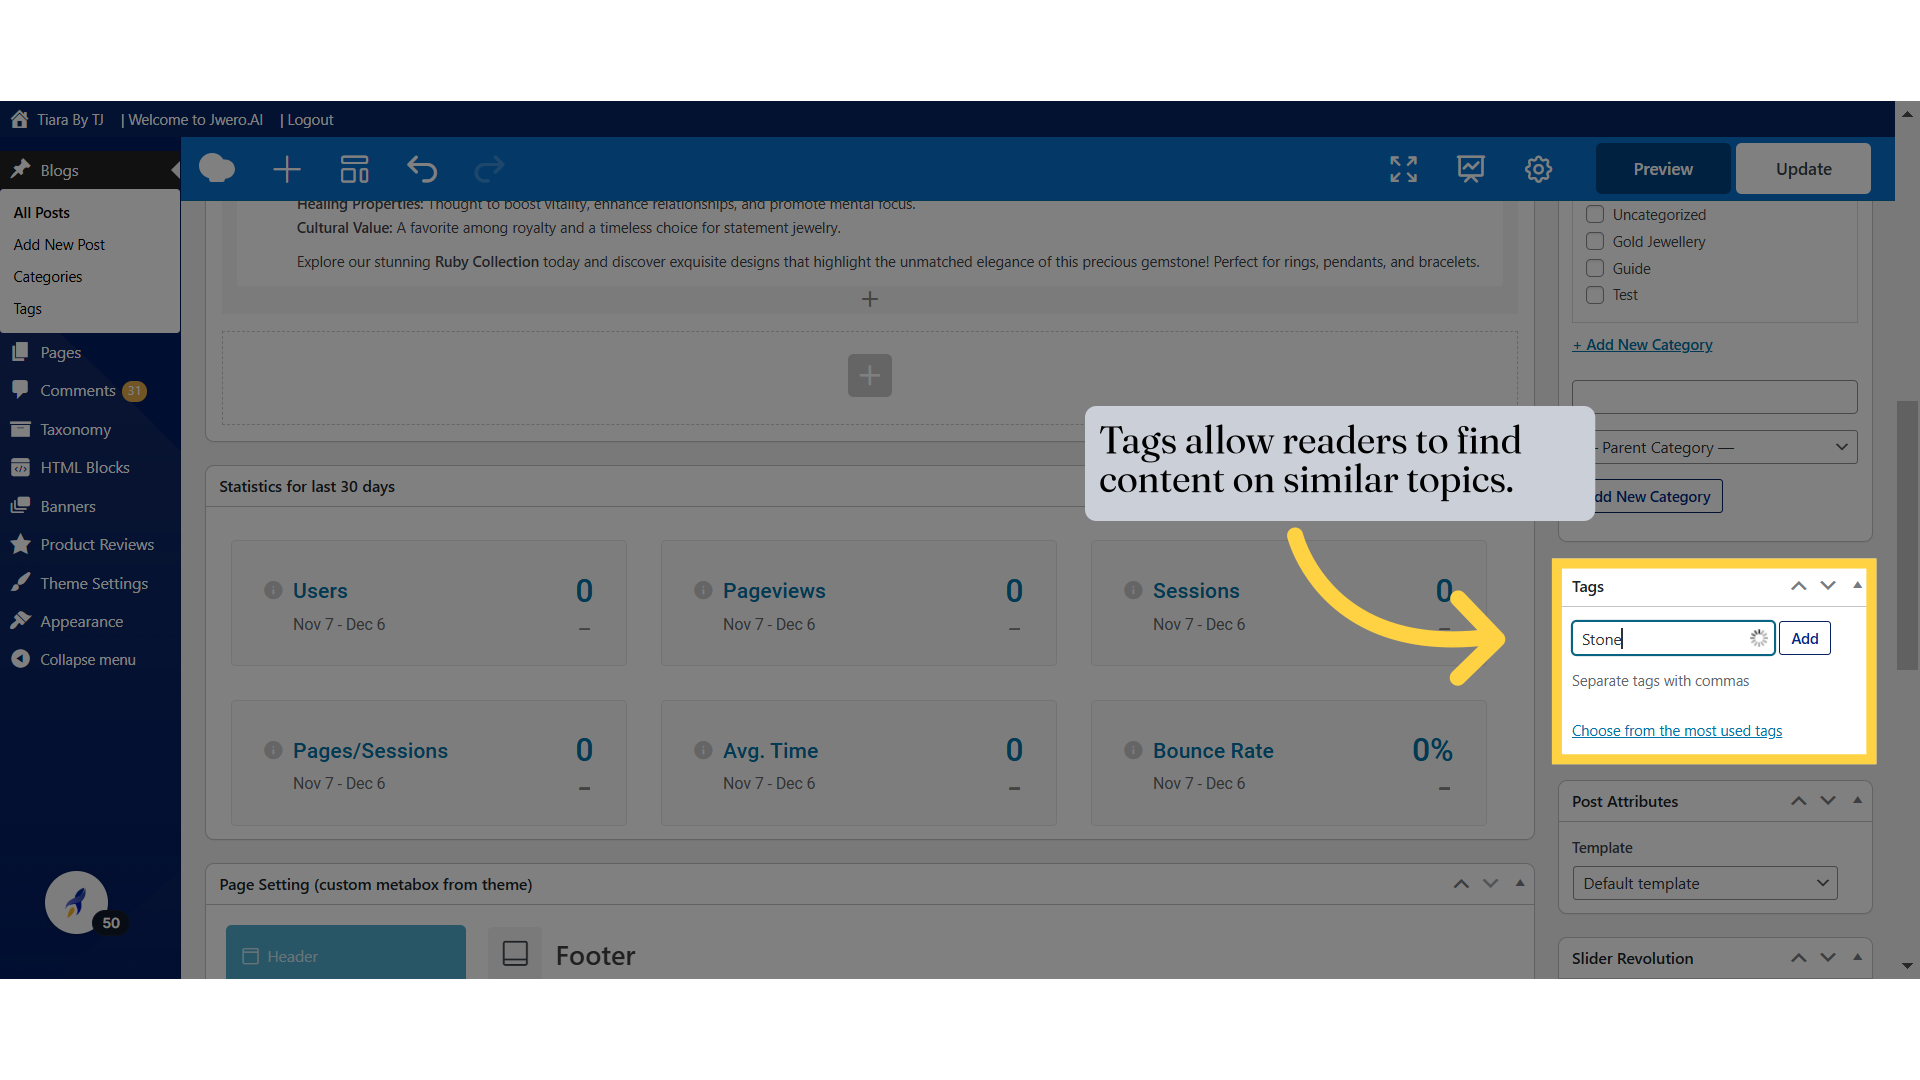
25. Tags allow readers to find content on similar topics.
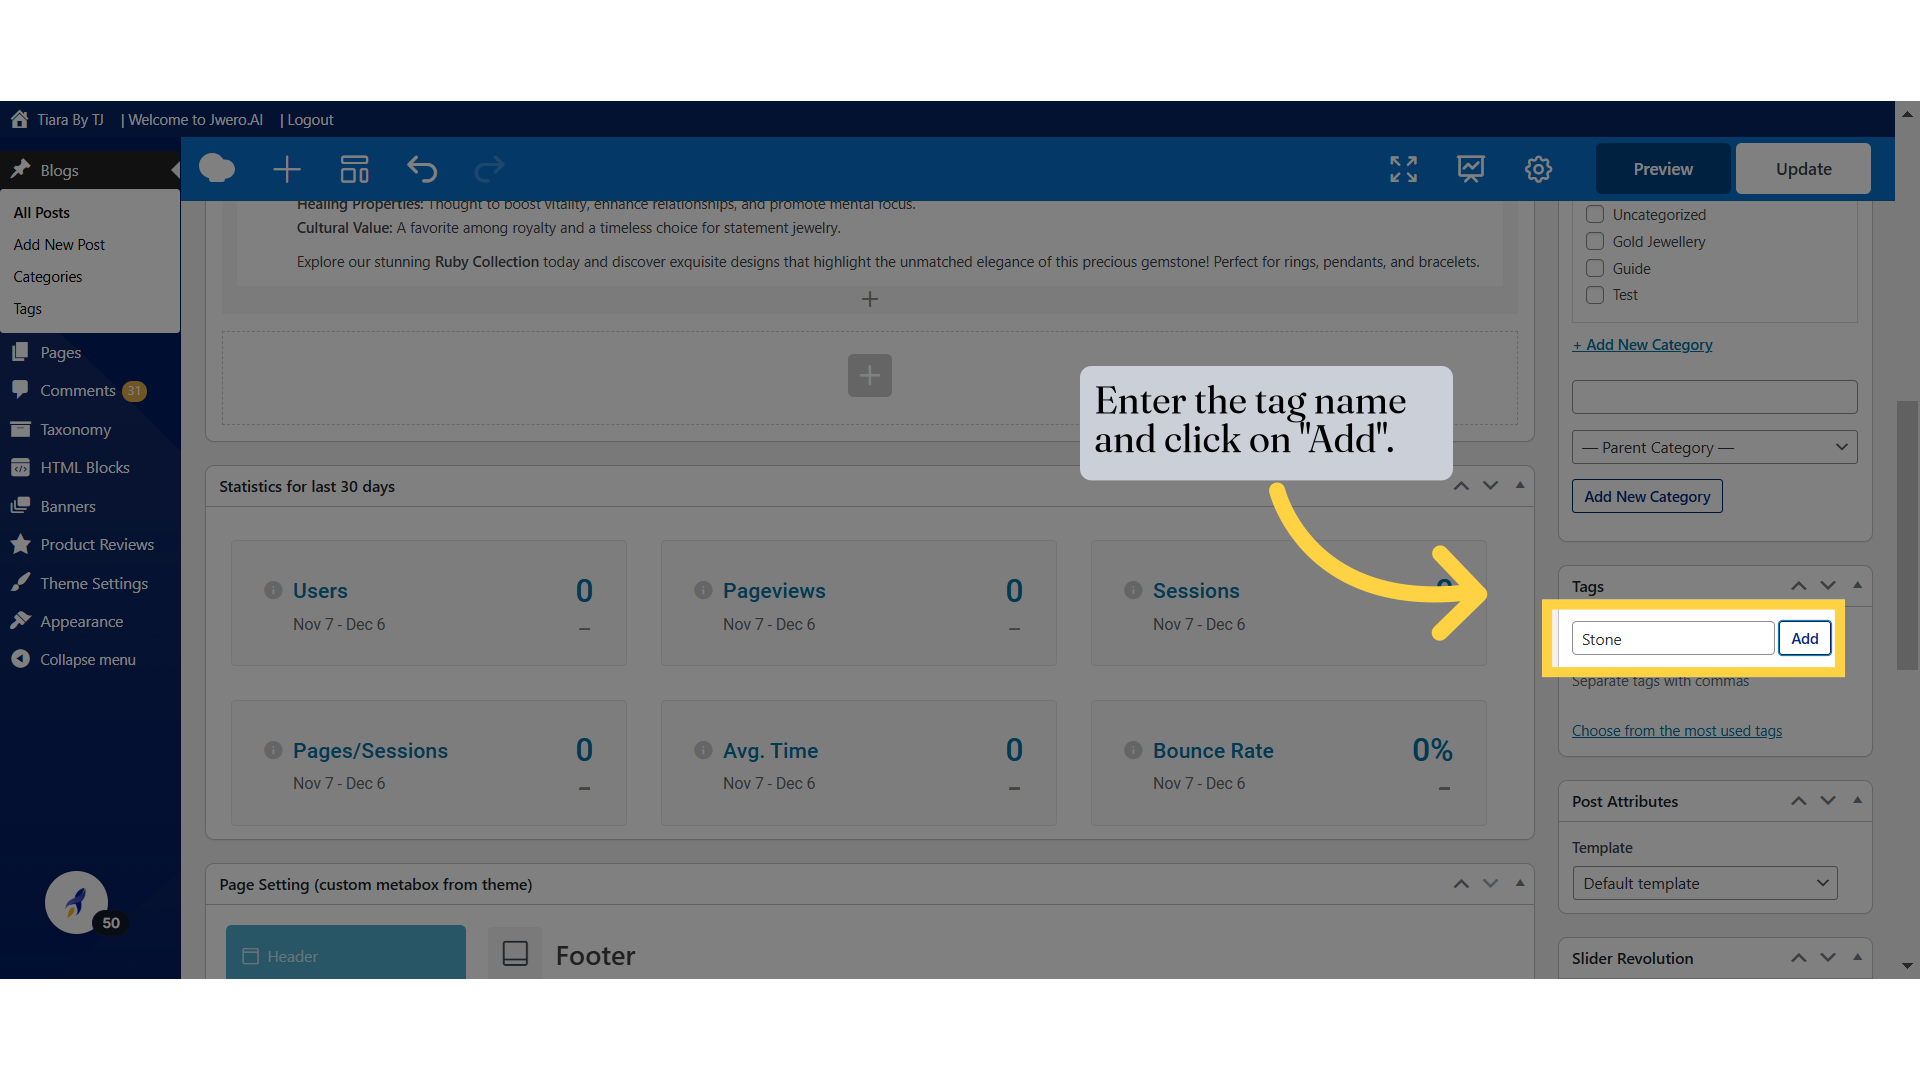
26. Enter the tag name and click on "Add".
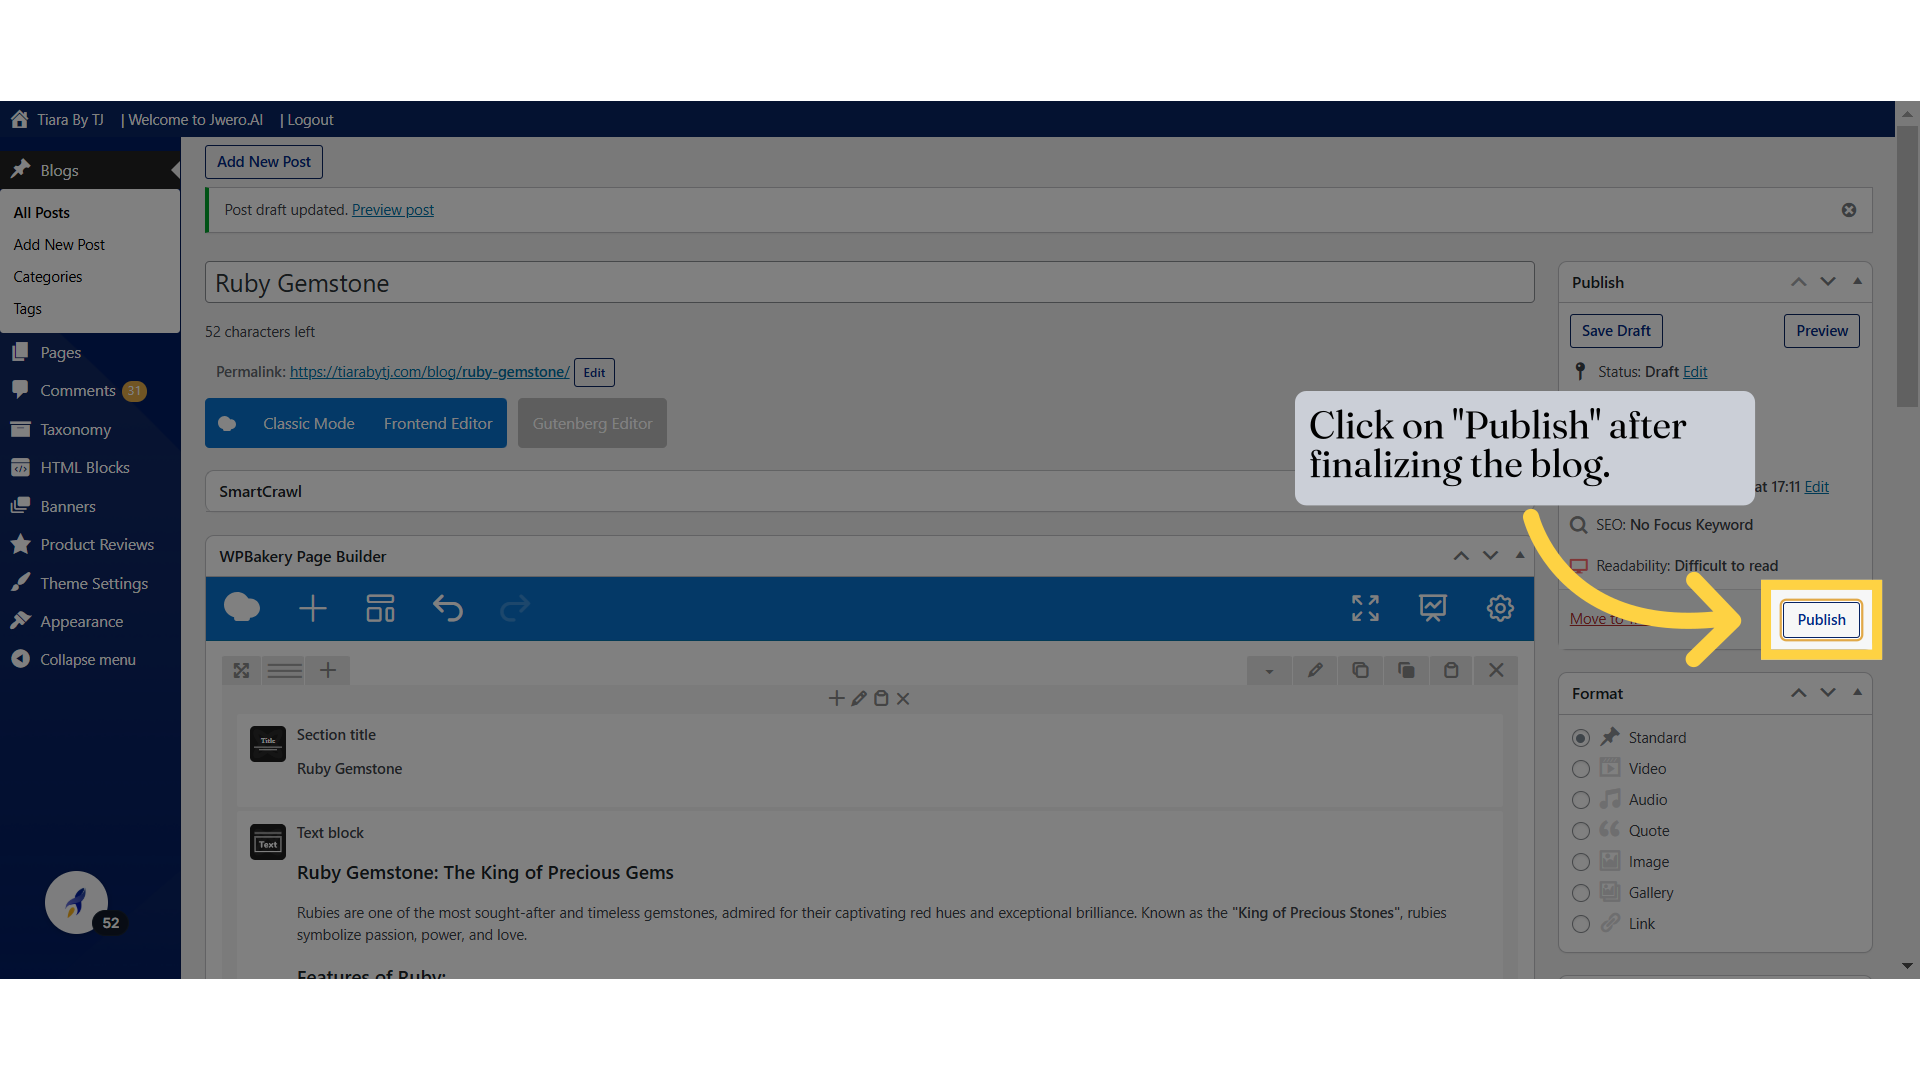
27. Click on "Publish" after finalizing the blog.
Publish the post
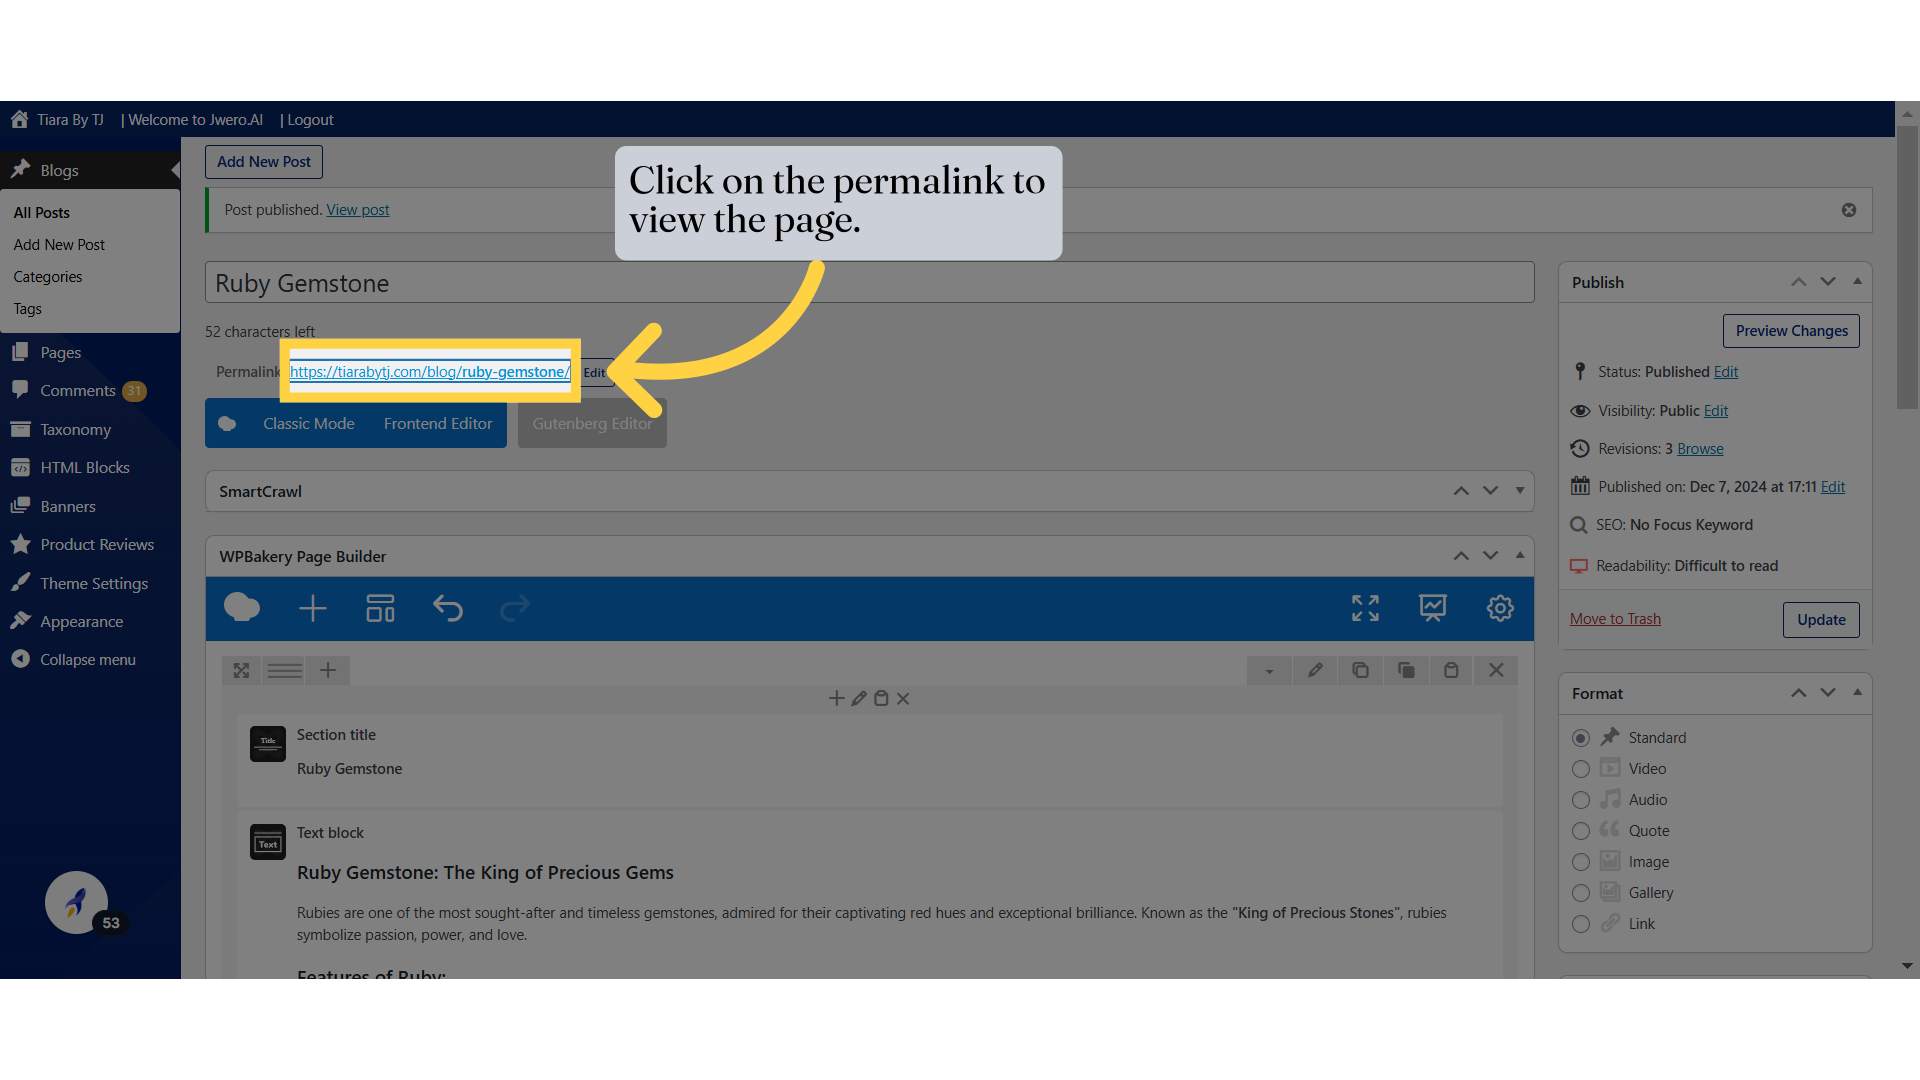
28. Click on the permalink to view the page.
29. This is how the blog will look on the website.
