How To Add A Team Member

How To Add A Team Member


1. Team member

Team member

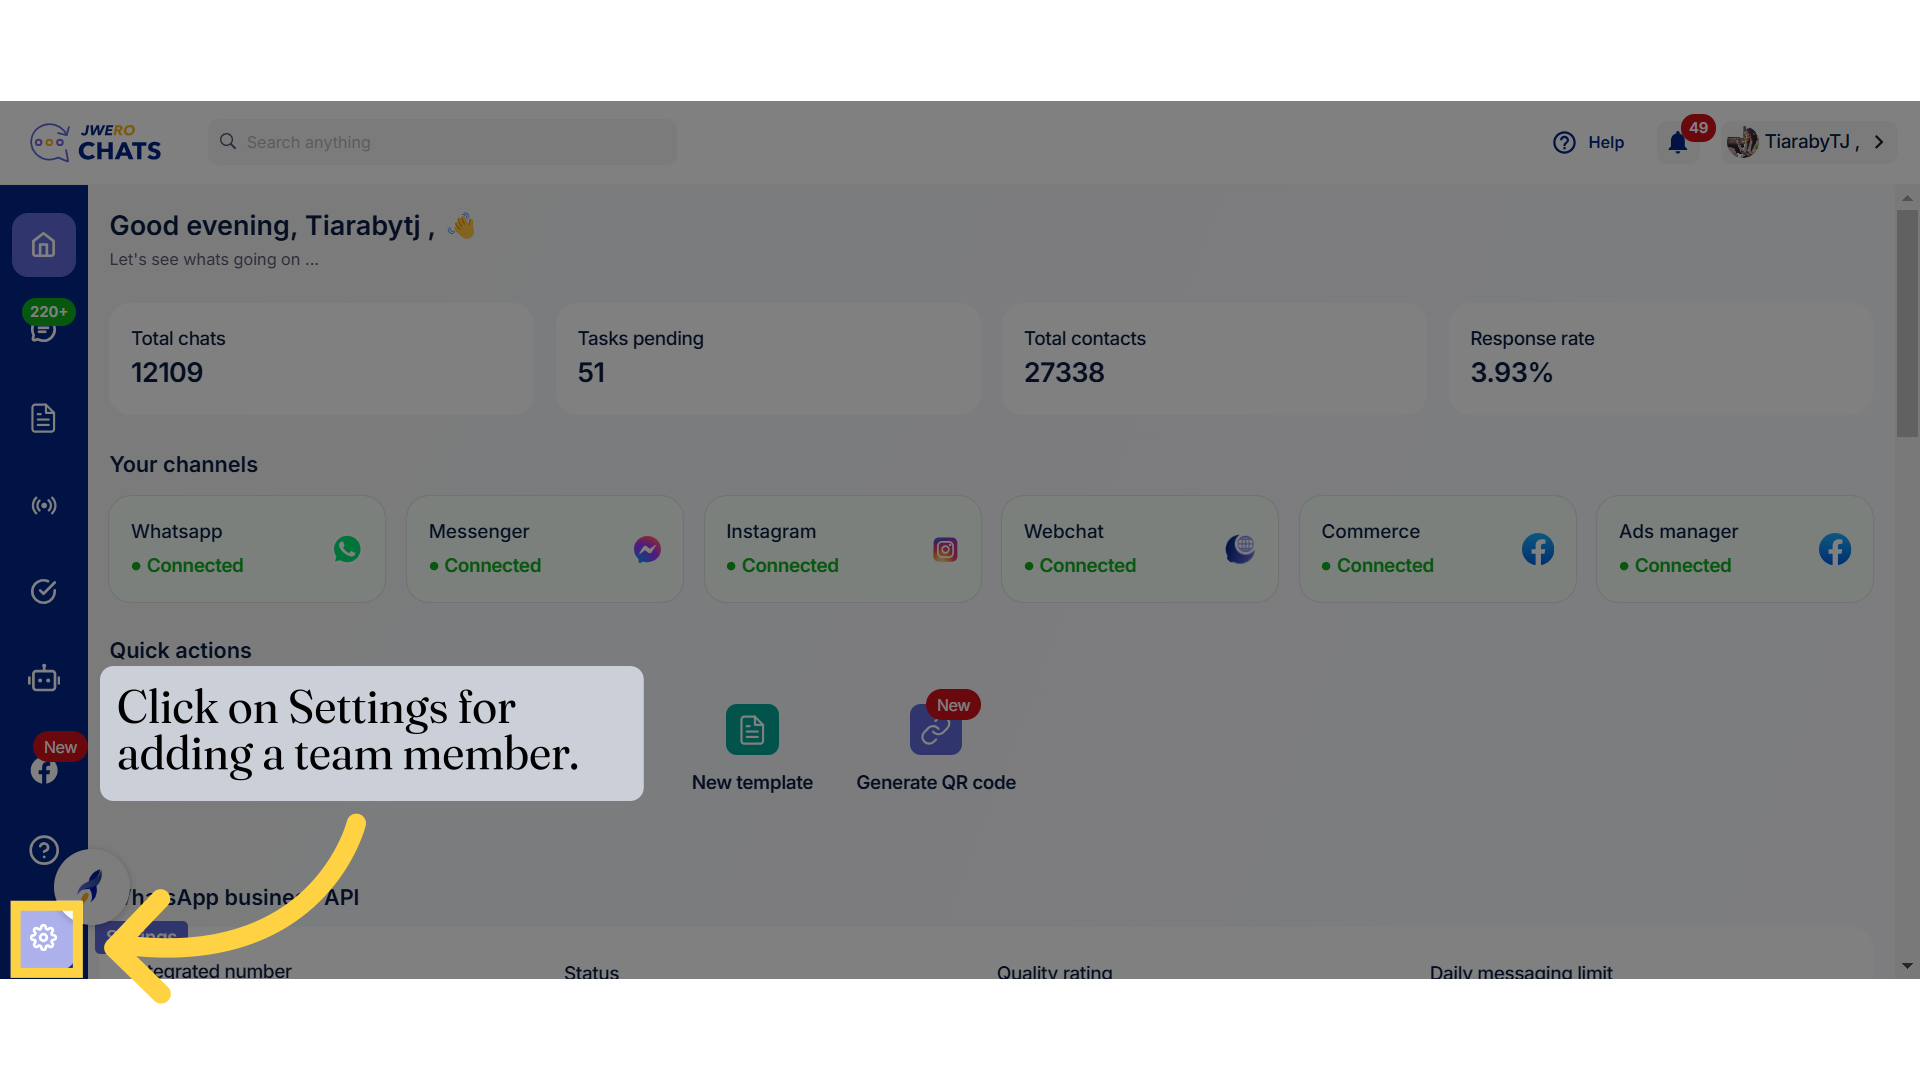
2. Click on Settings for adding a team member.

Click on Settings for adding a team member.

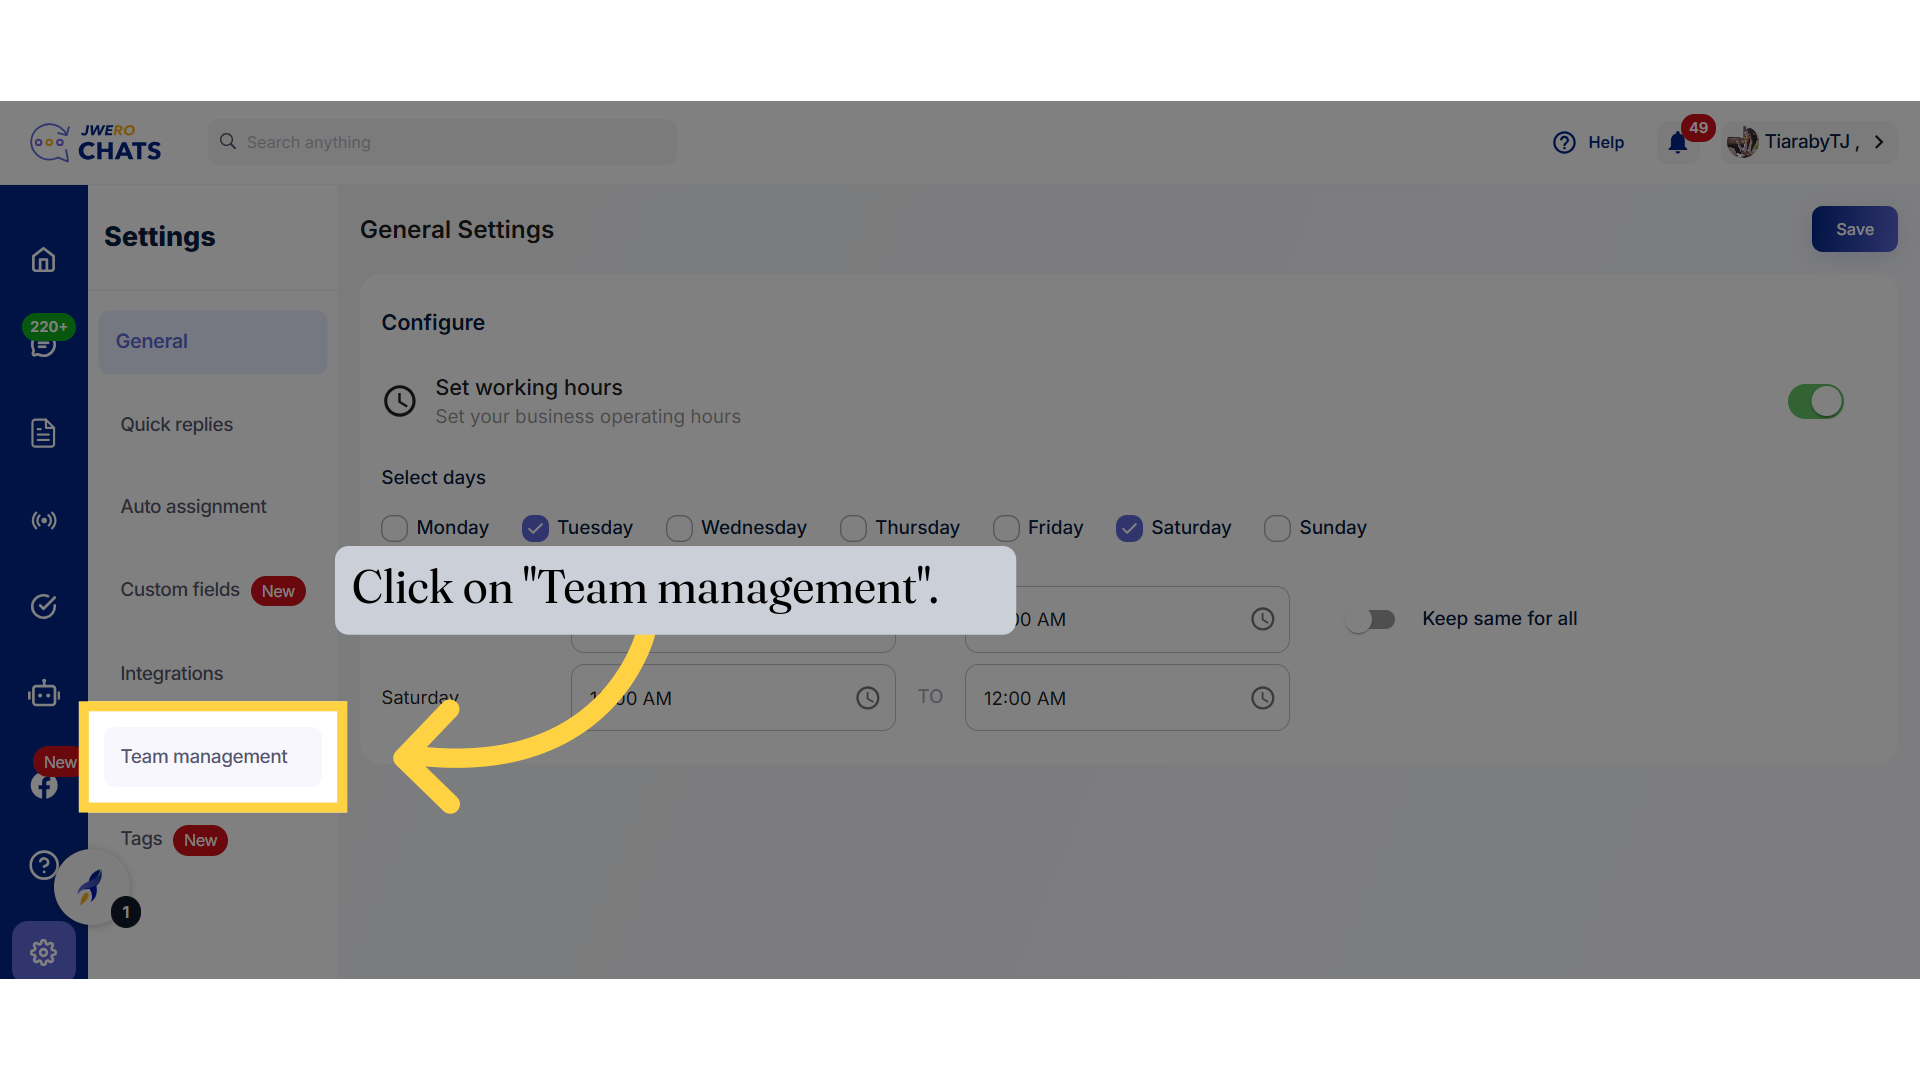
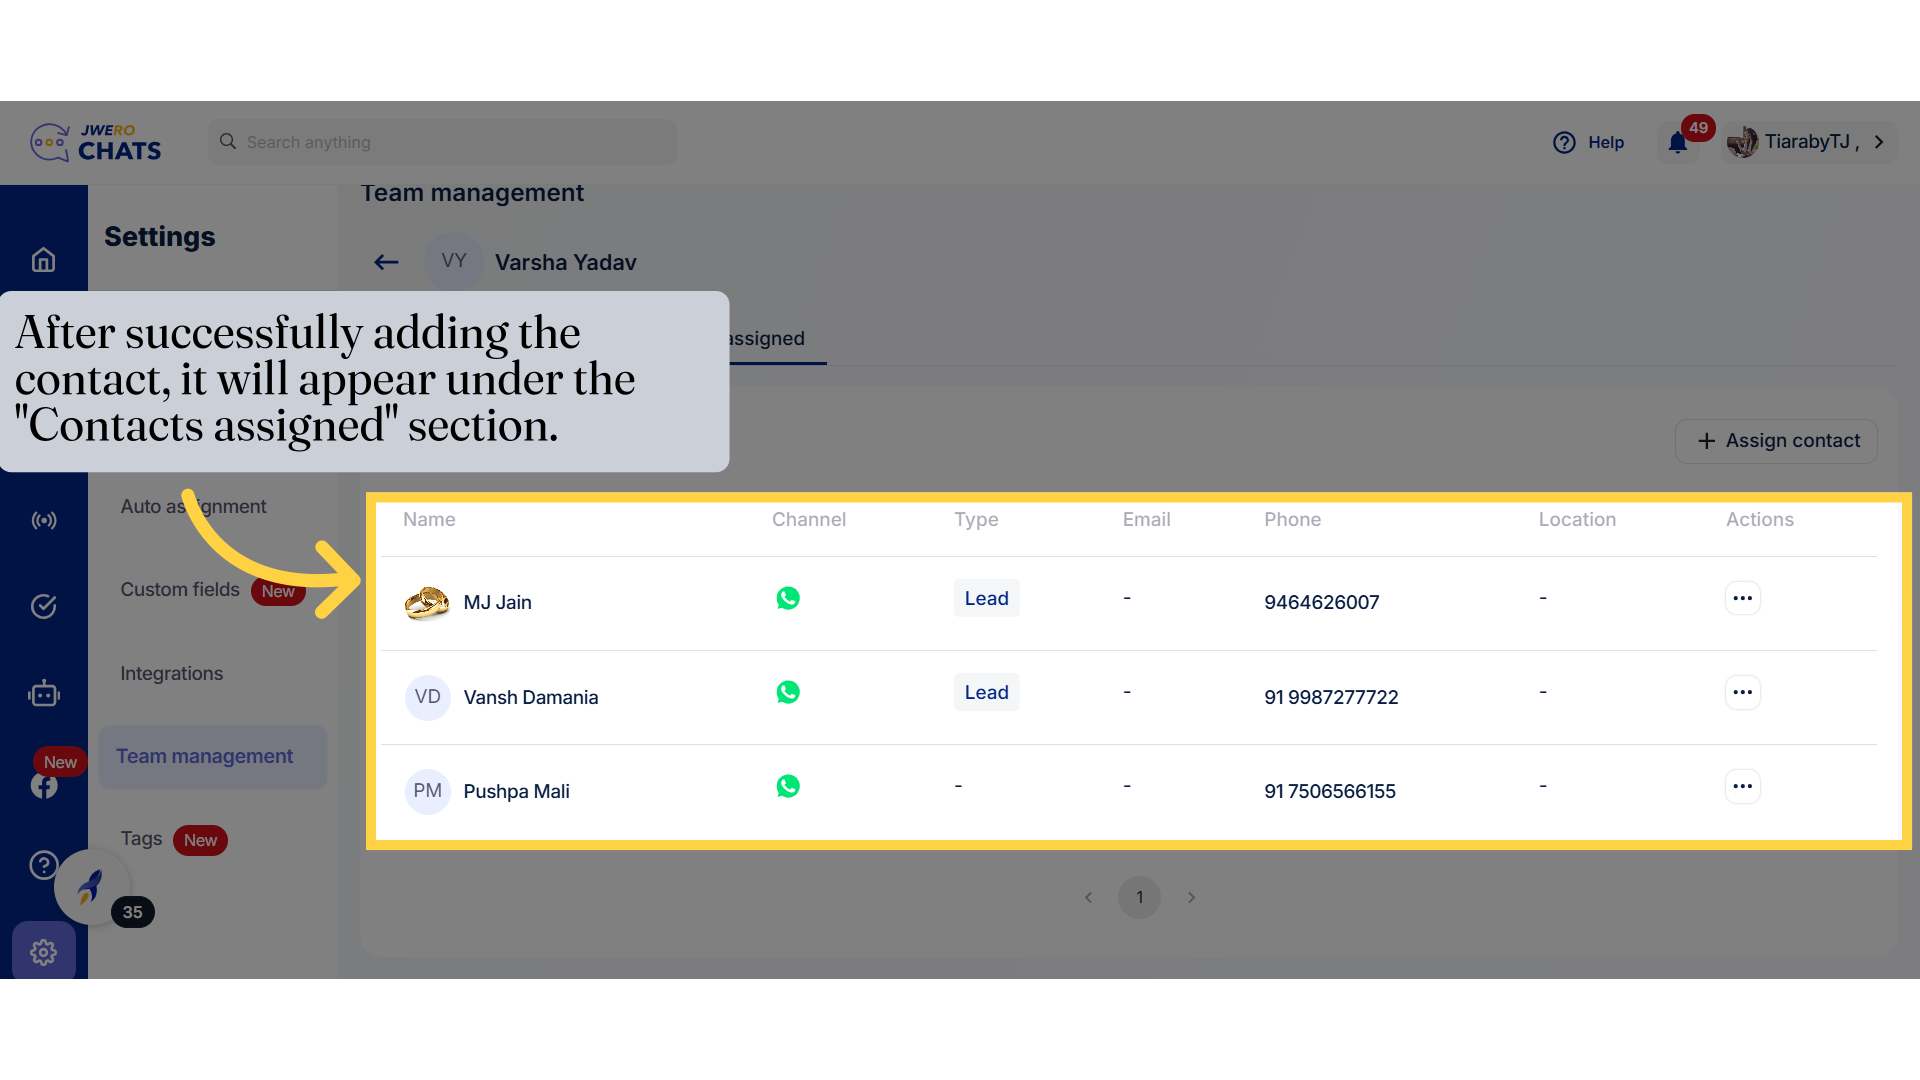
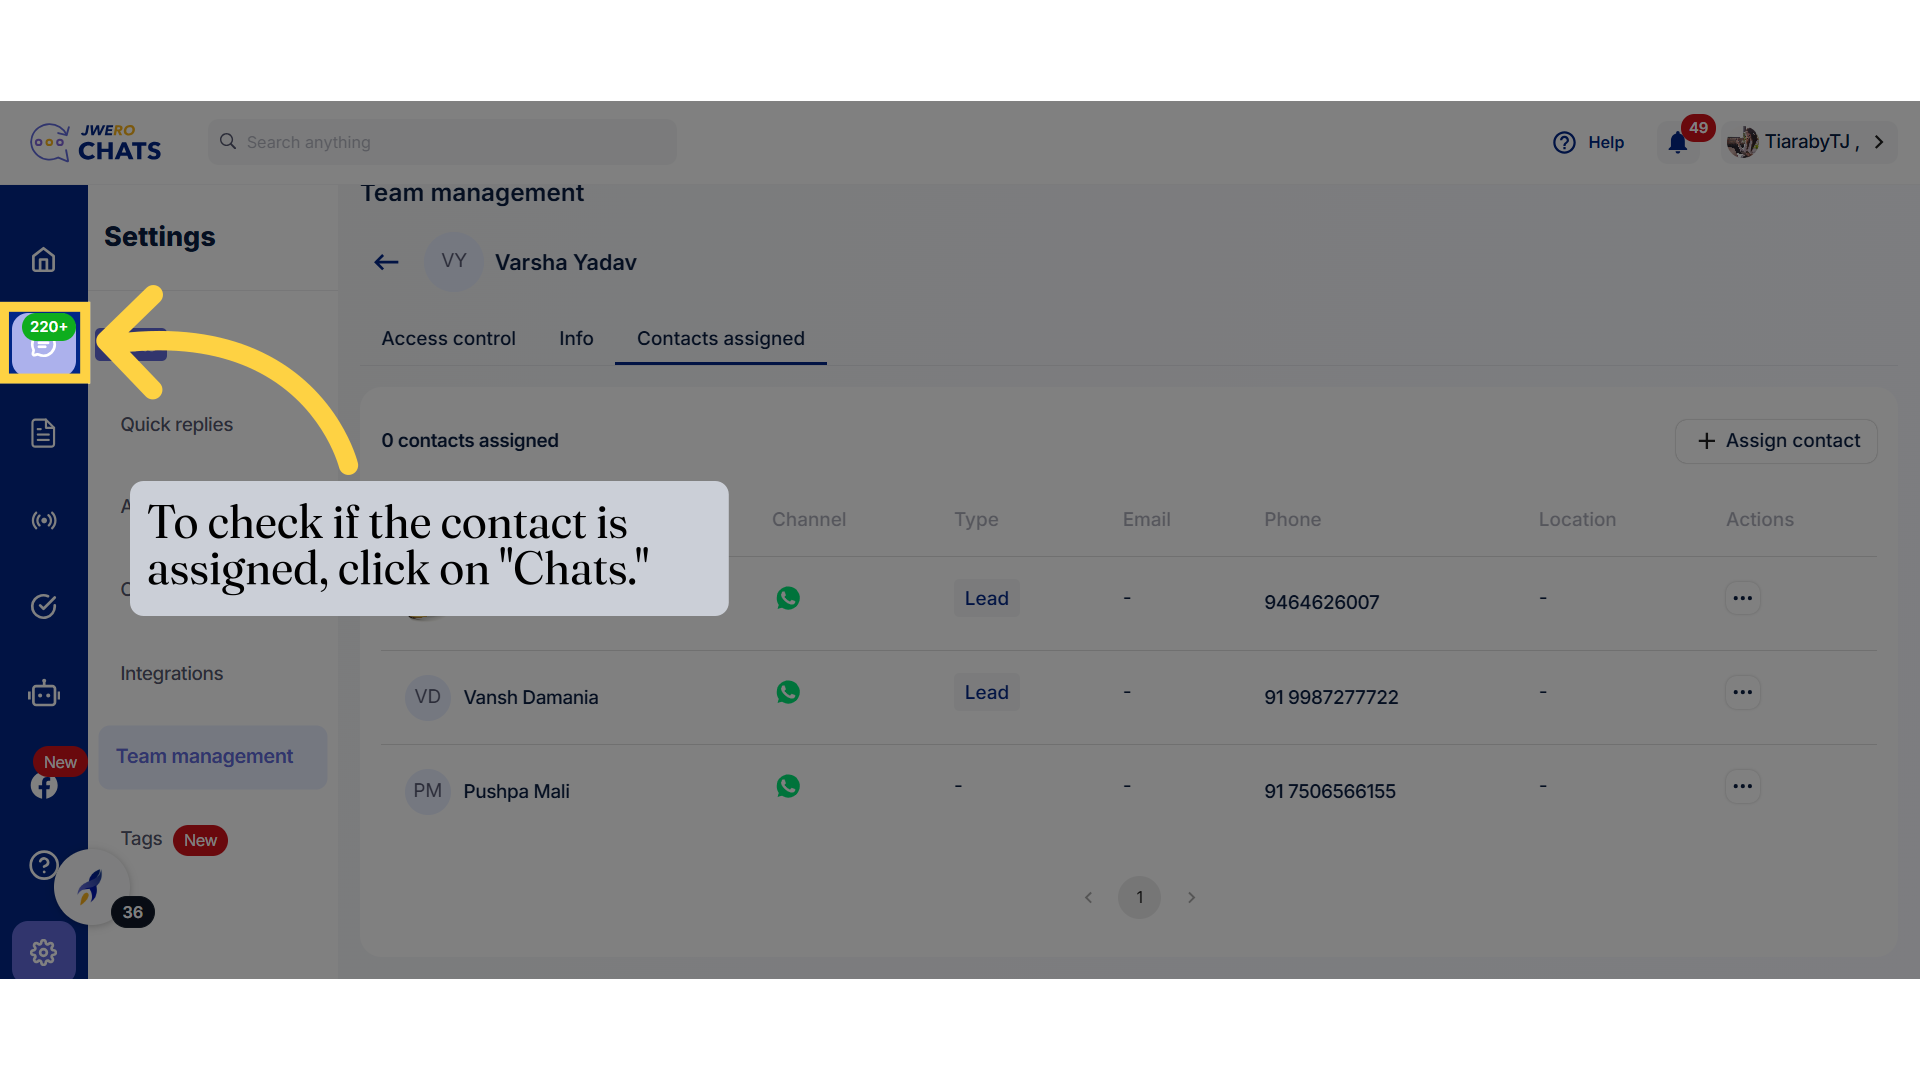
3. Click on "Team management".

Click on 'Team management'.

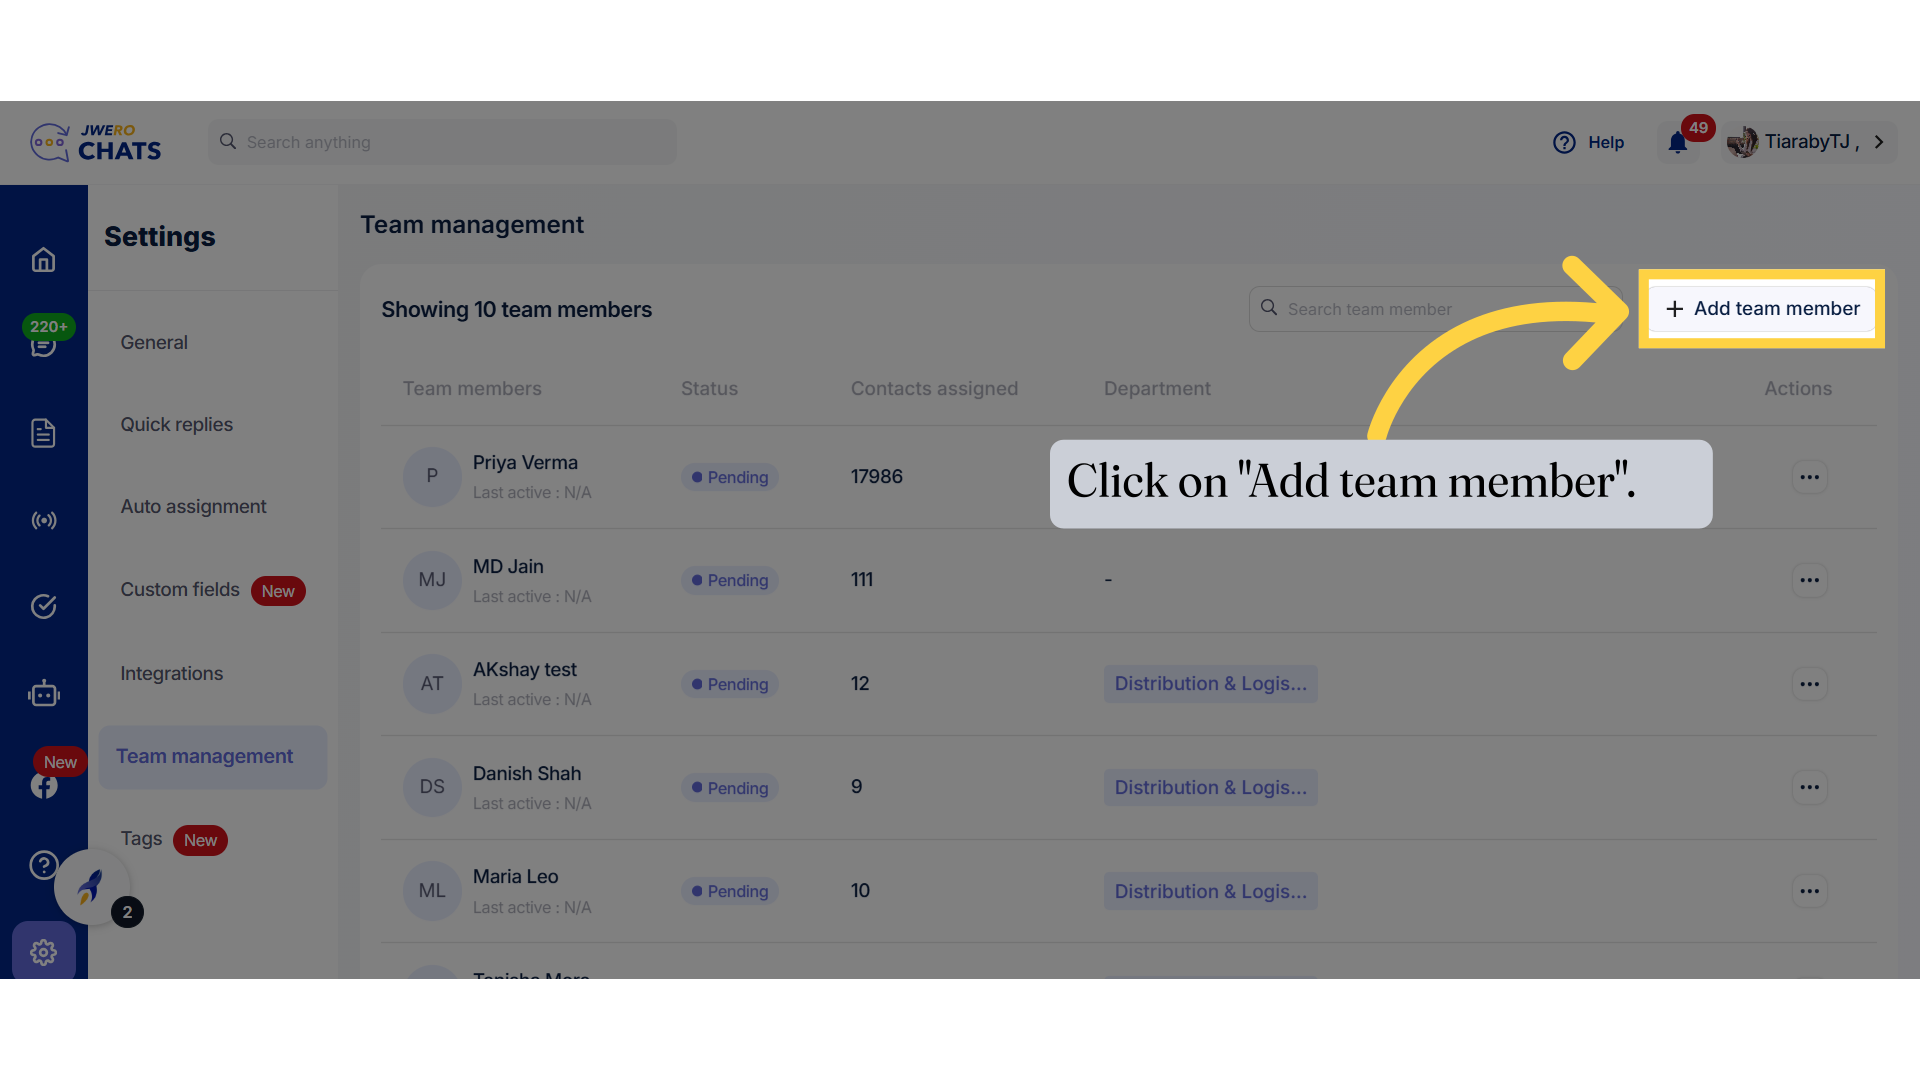
4. Click on "Add team member".

Click on 'Add team member'.

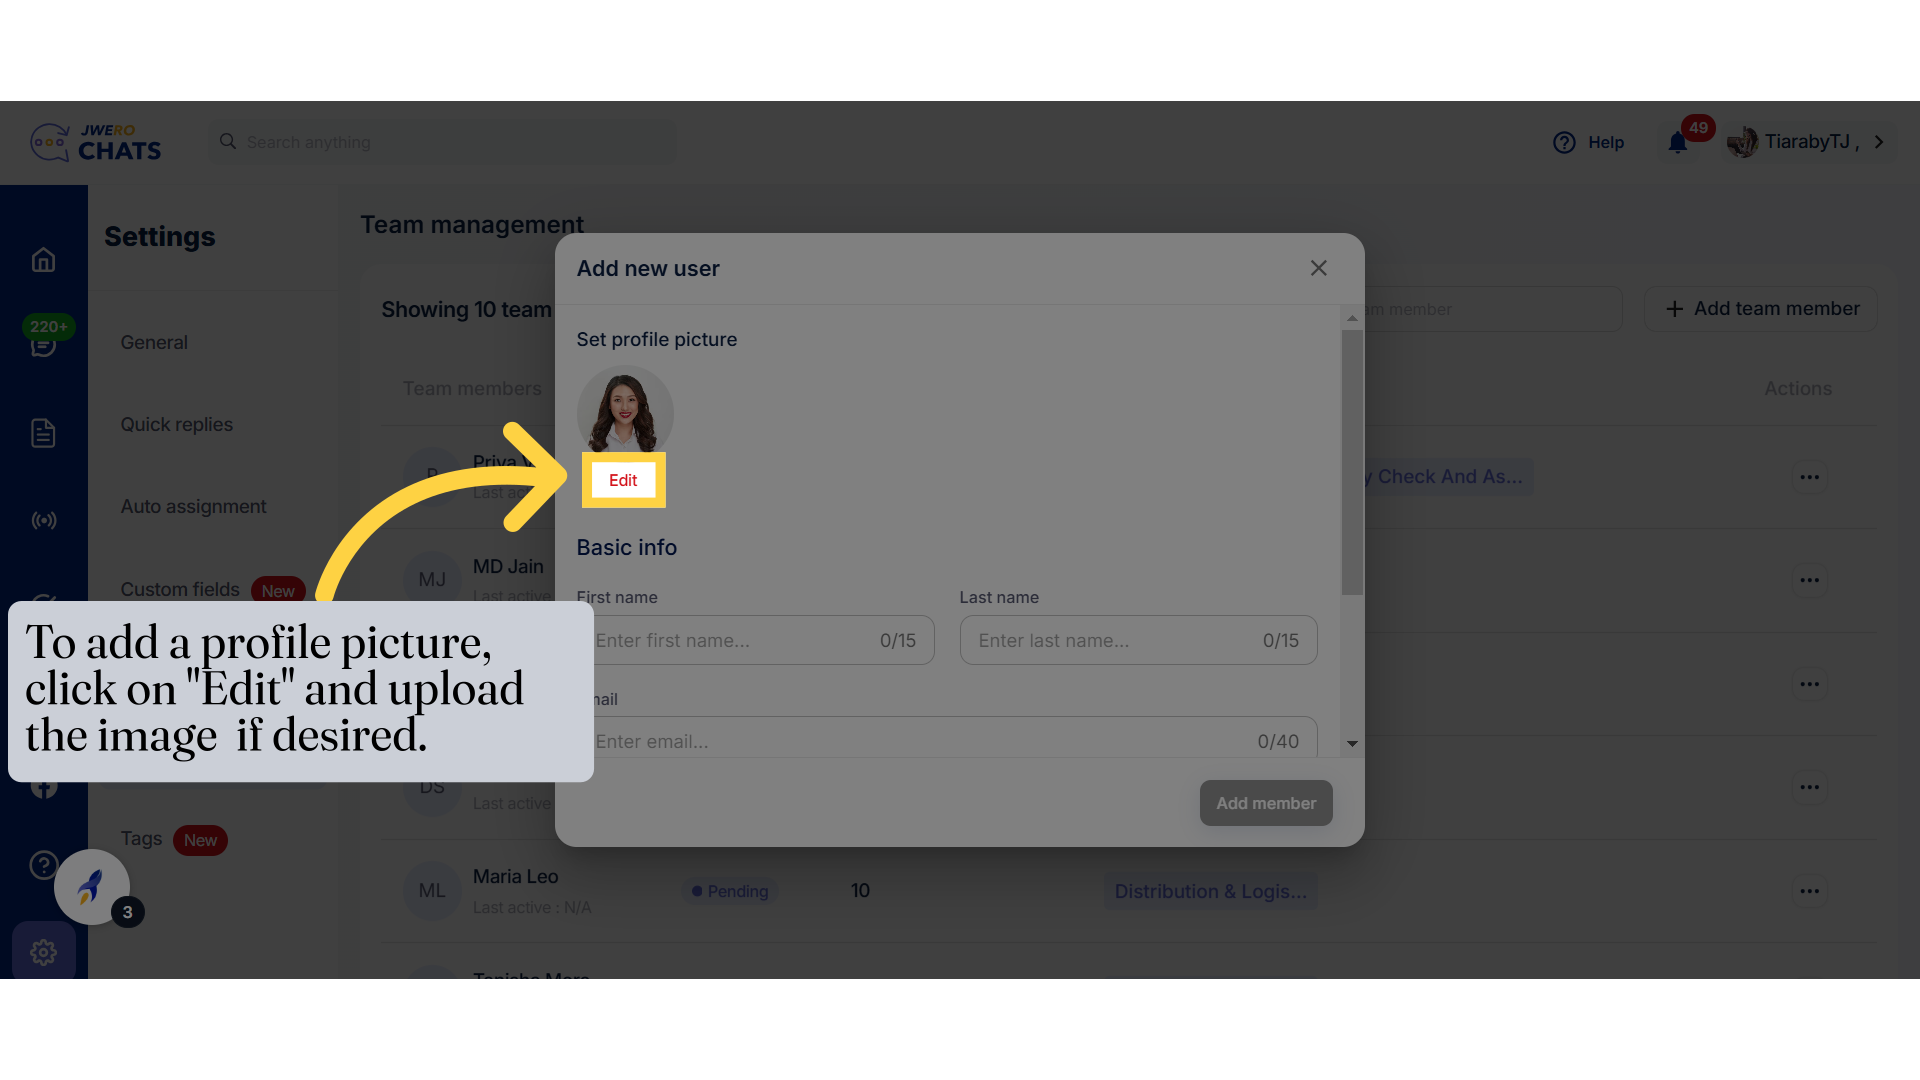
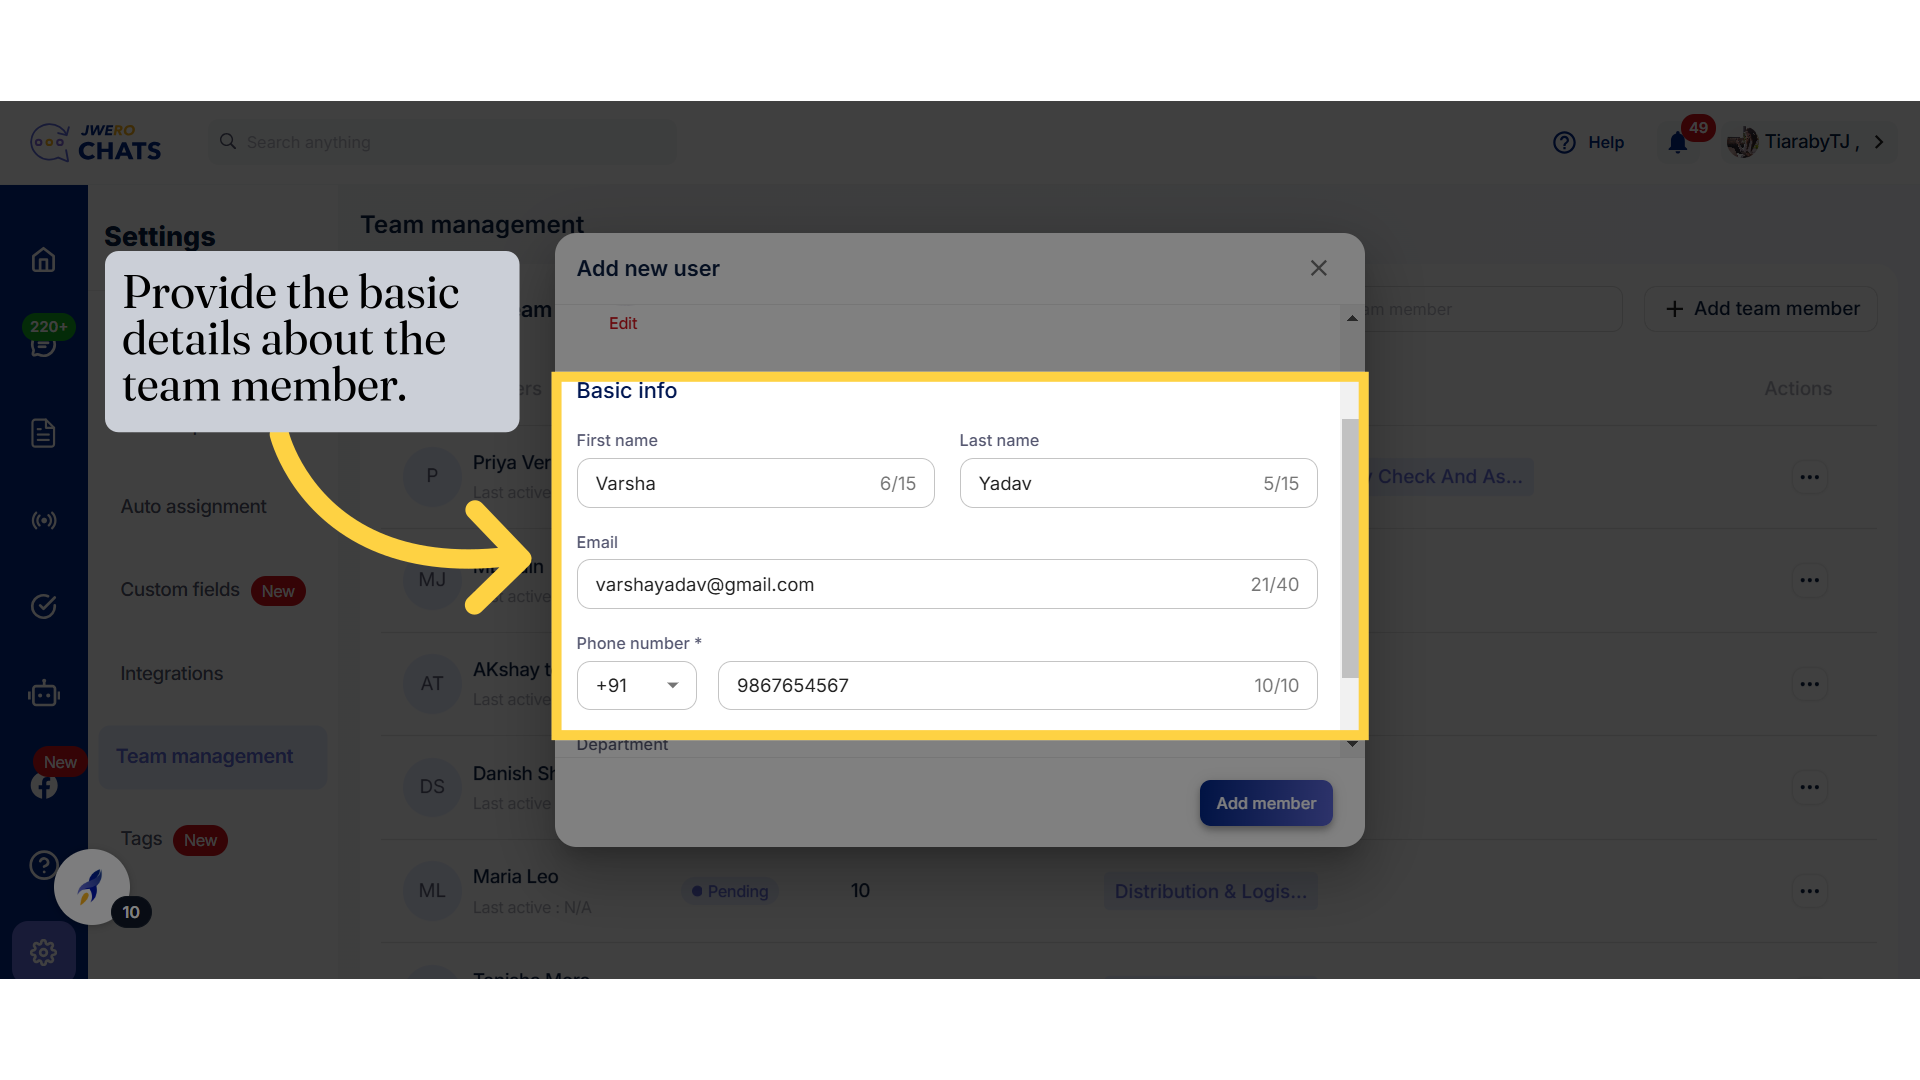
5. To add a profile picture, click on "Edit" and upload the image  if desired.


6. Provide the basic information.

Provide the basic information.

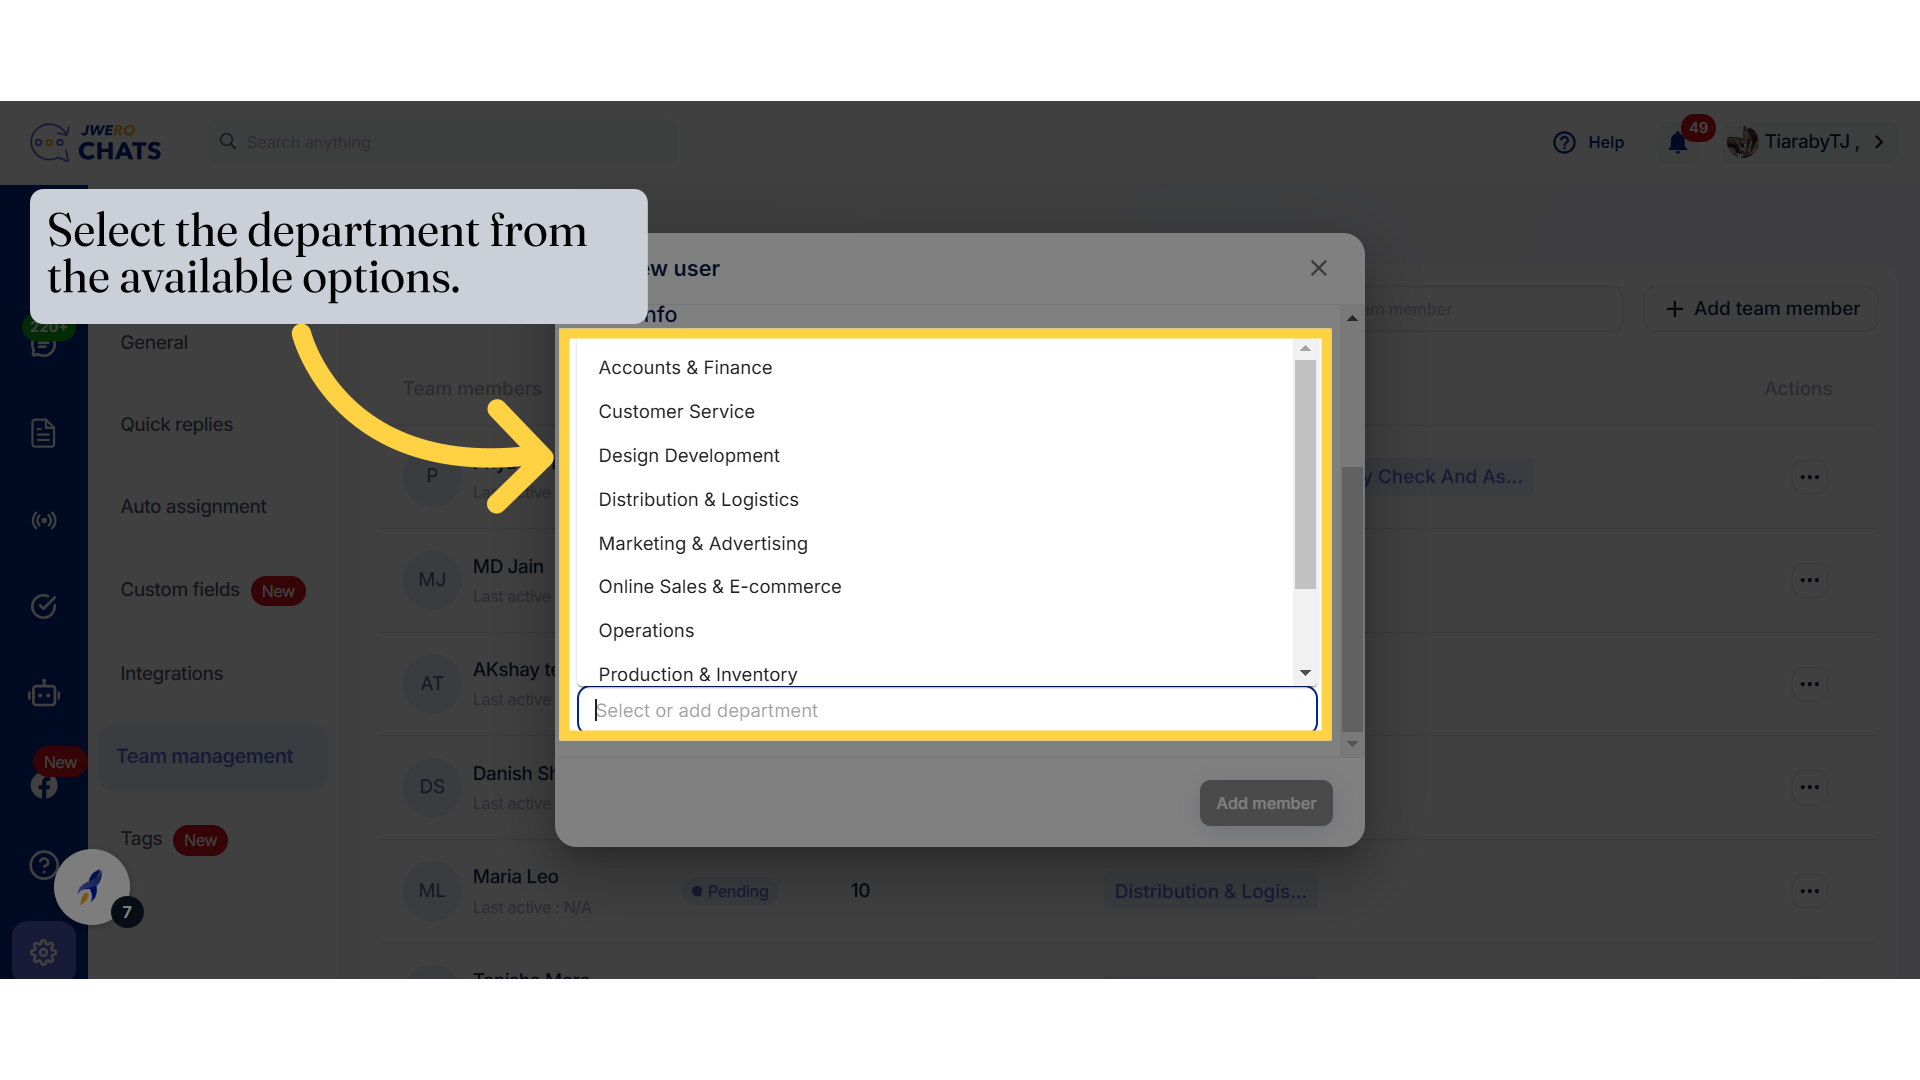
7. Select the department from the available options.

Select the department from the available options.

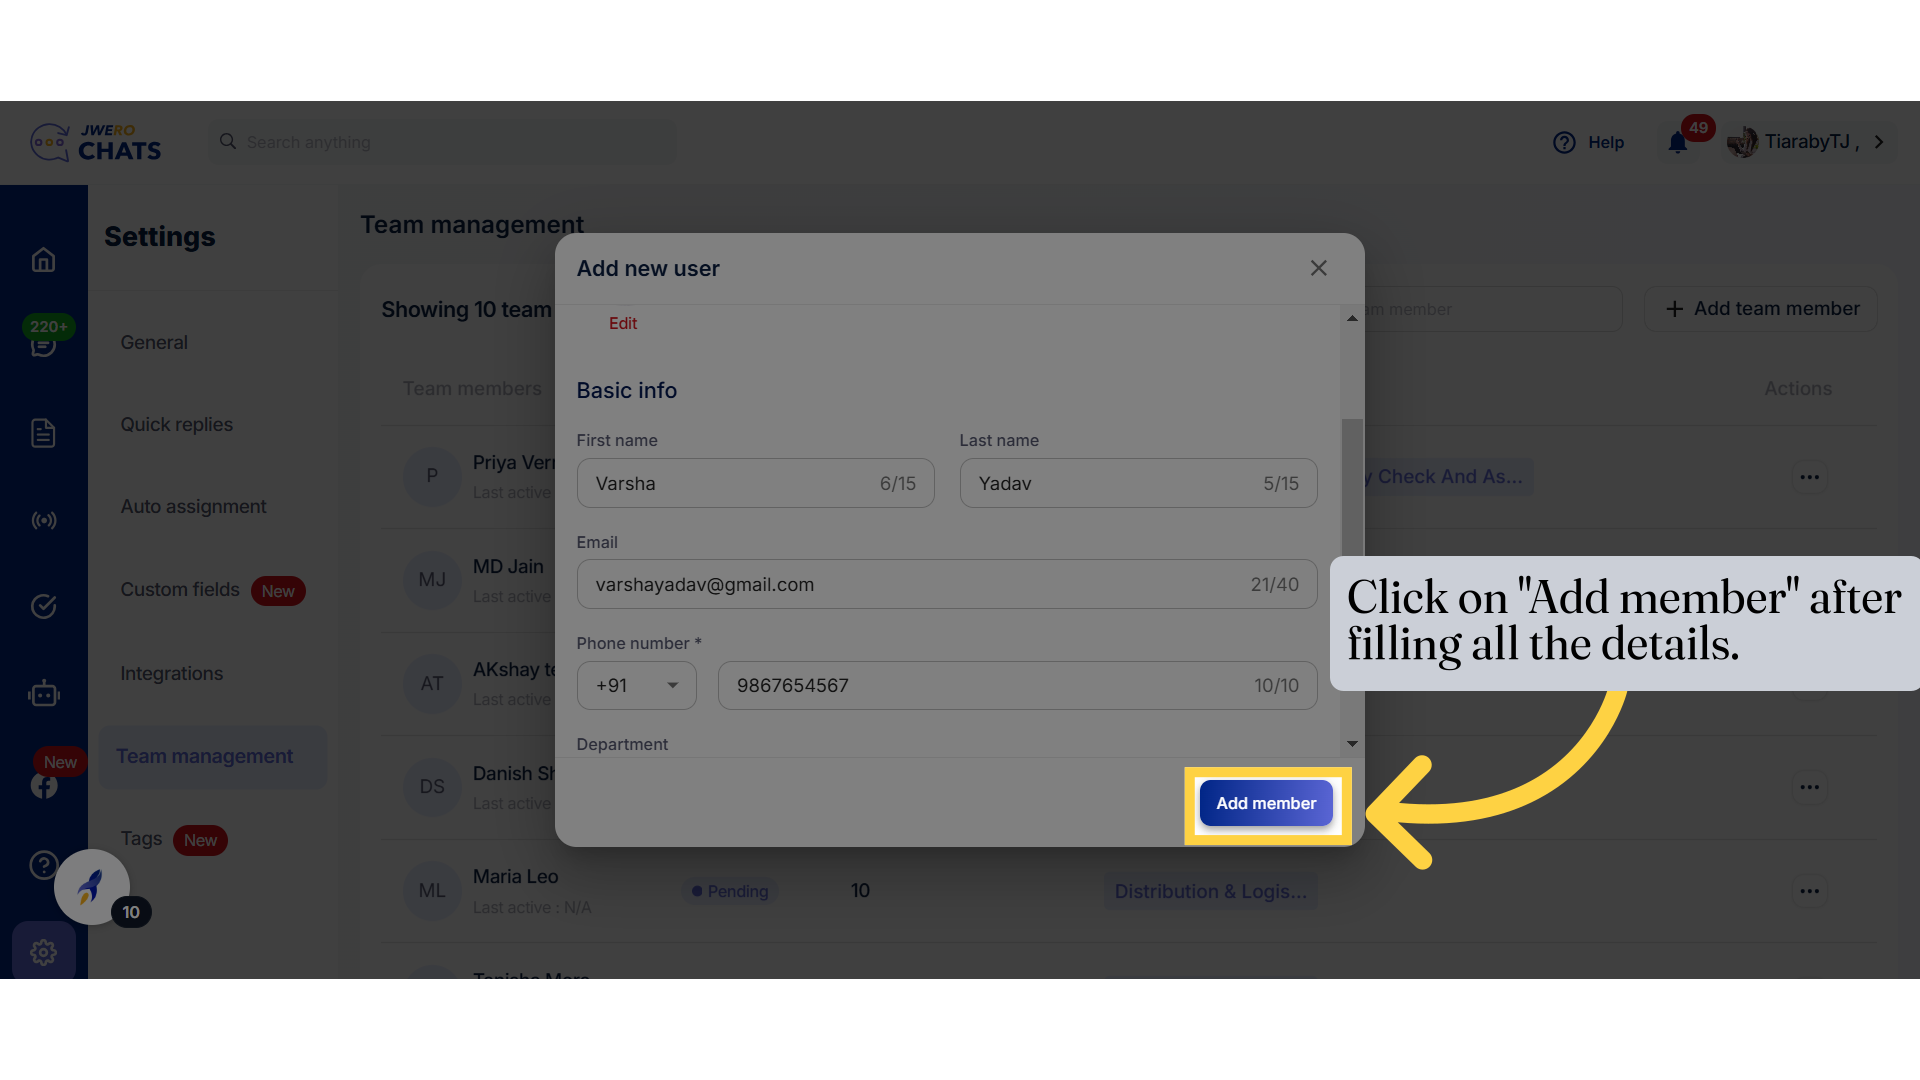
8. Click on "Add member"

Click on 'Add member'

9. We will have three sections to configure. Let’s go through them one by one.


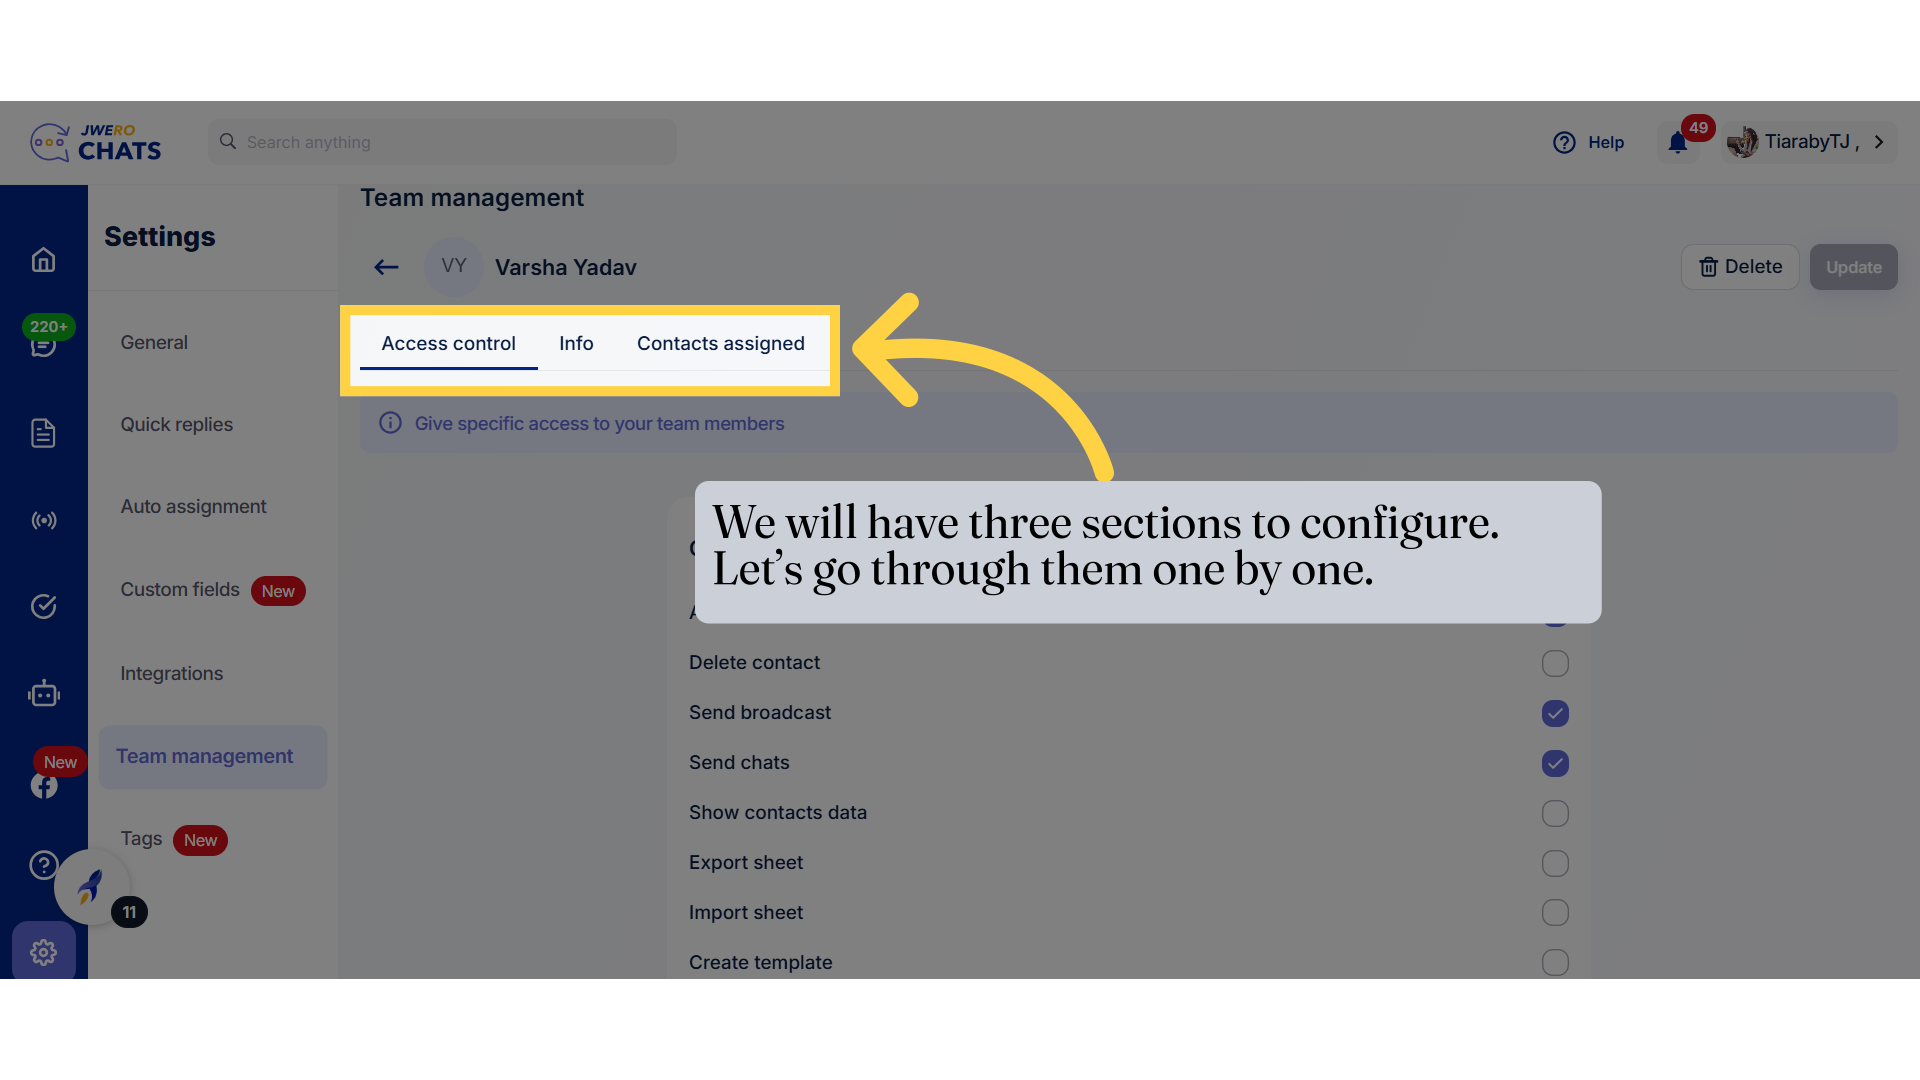
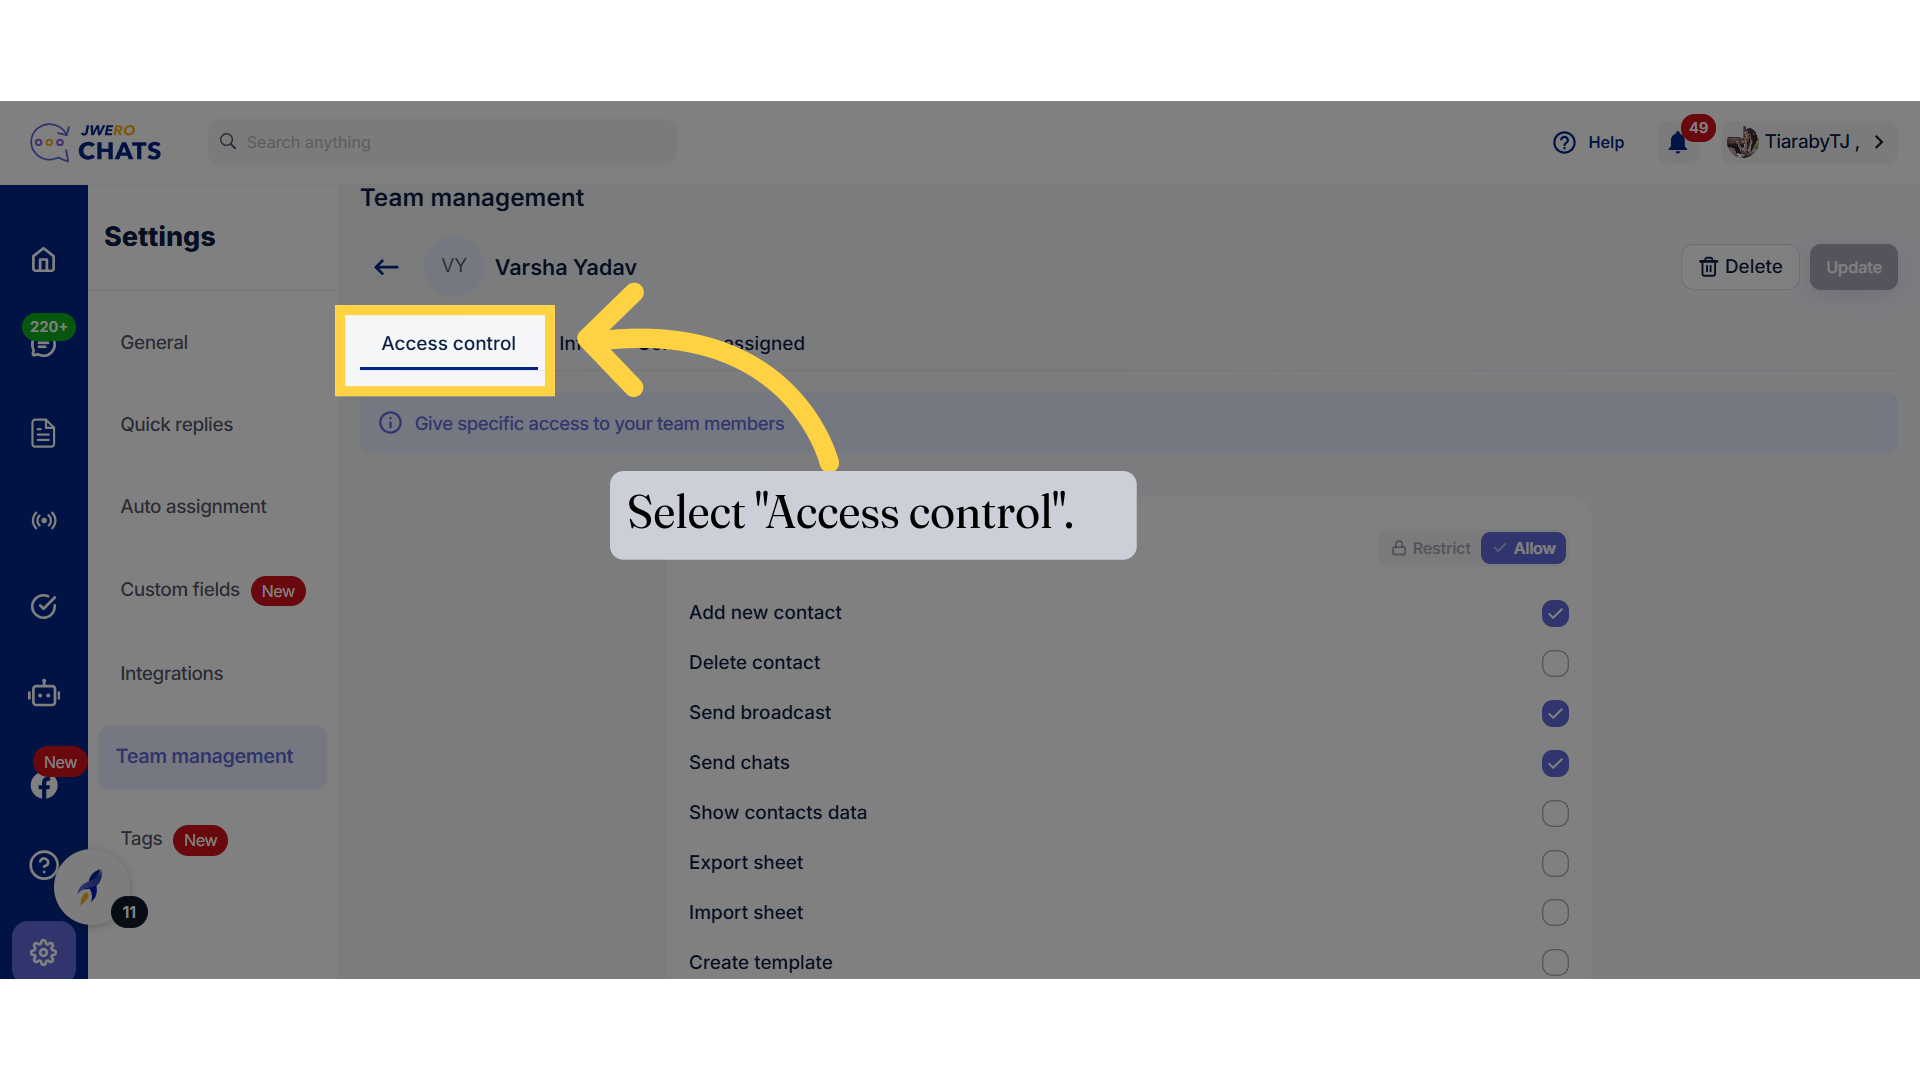
10. Select "Access control".

Select 'Access control'.

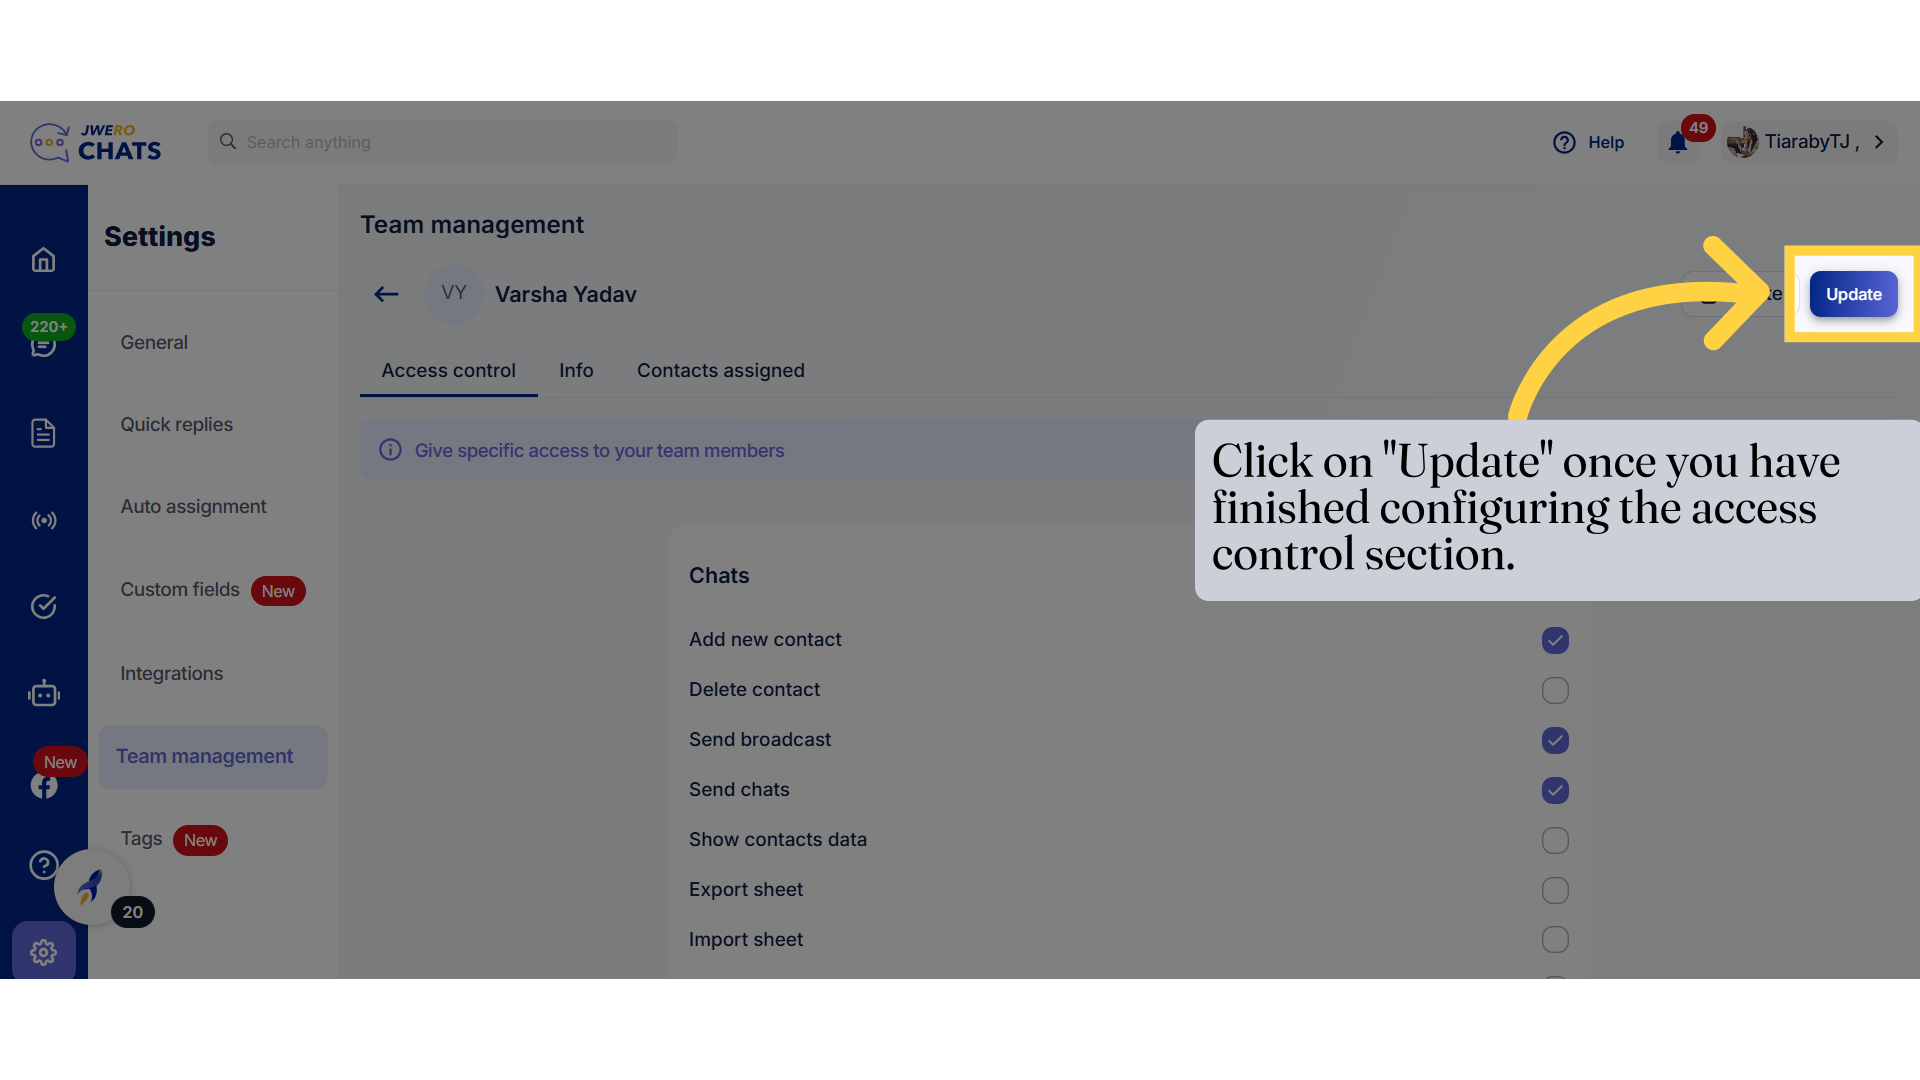
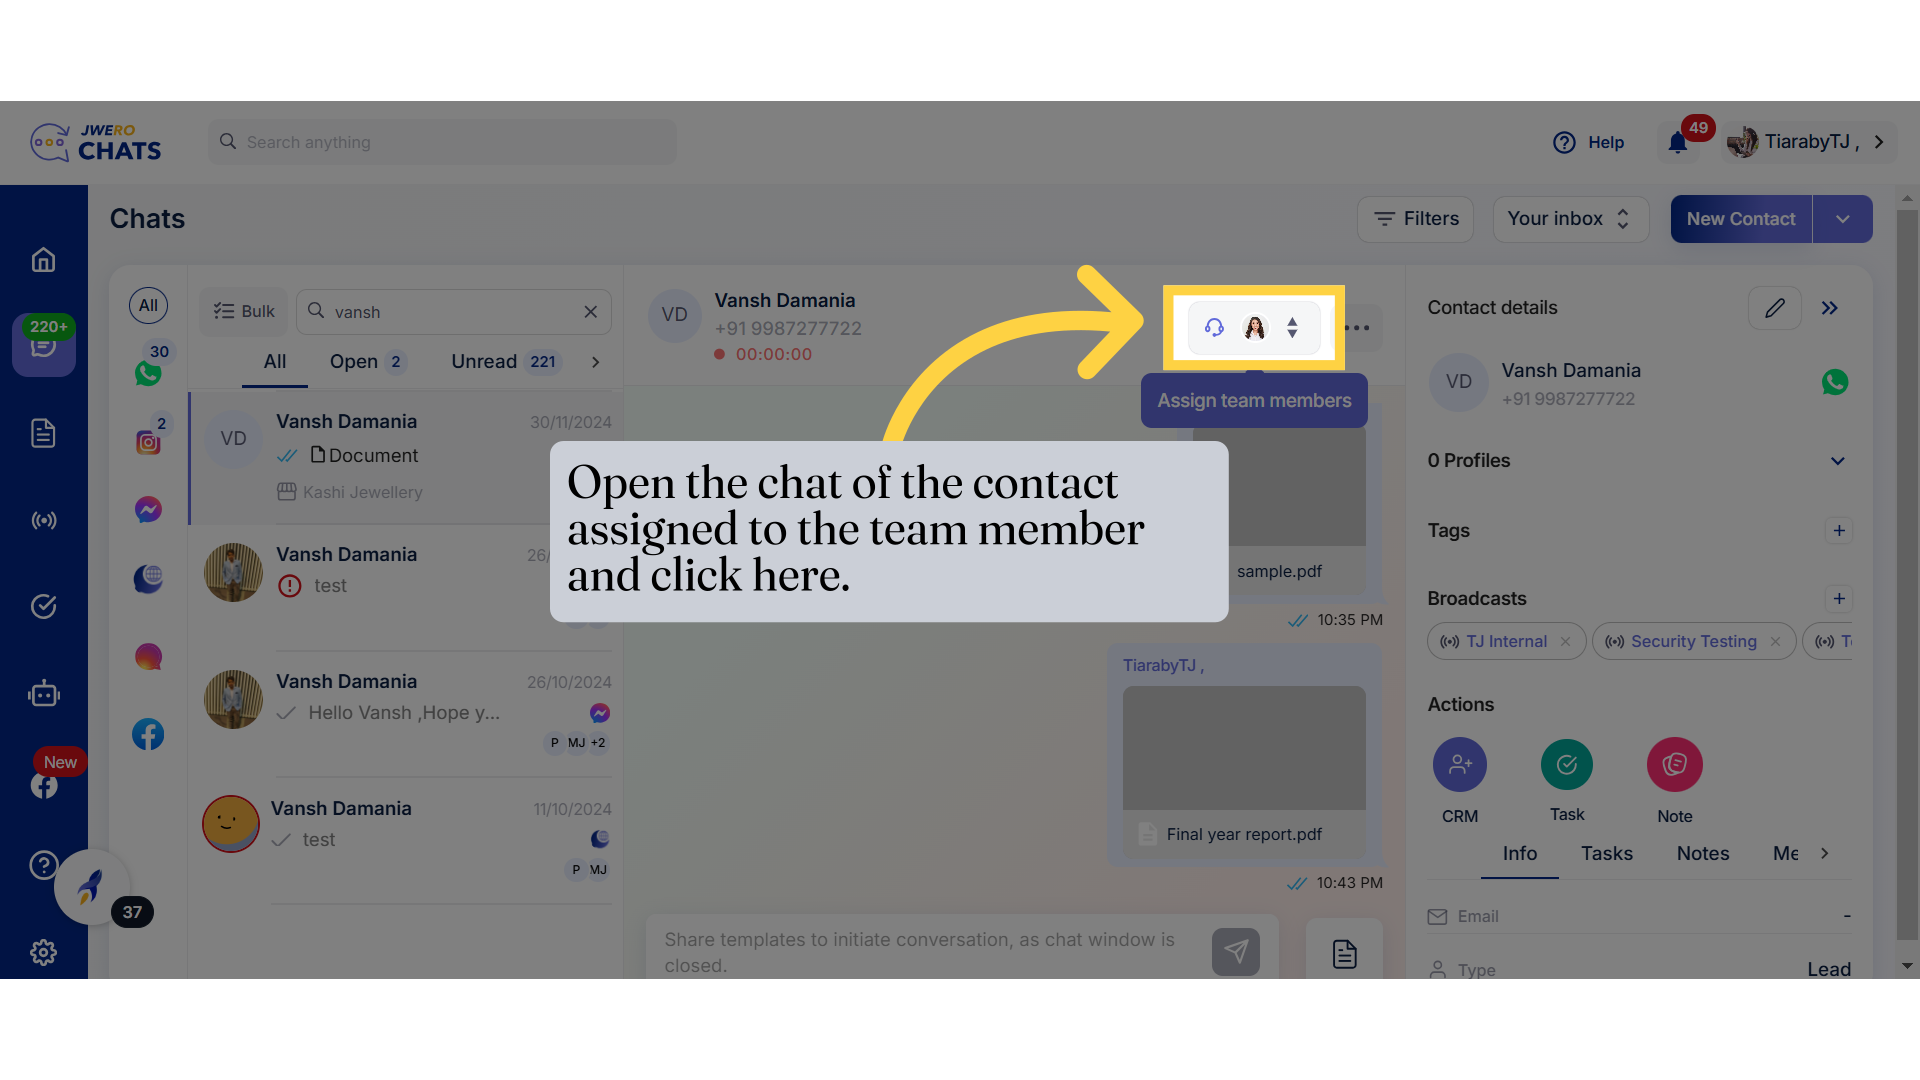
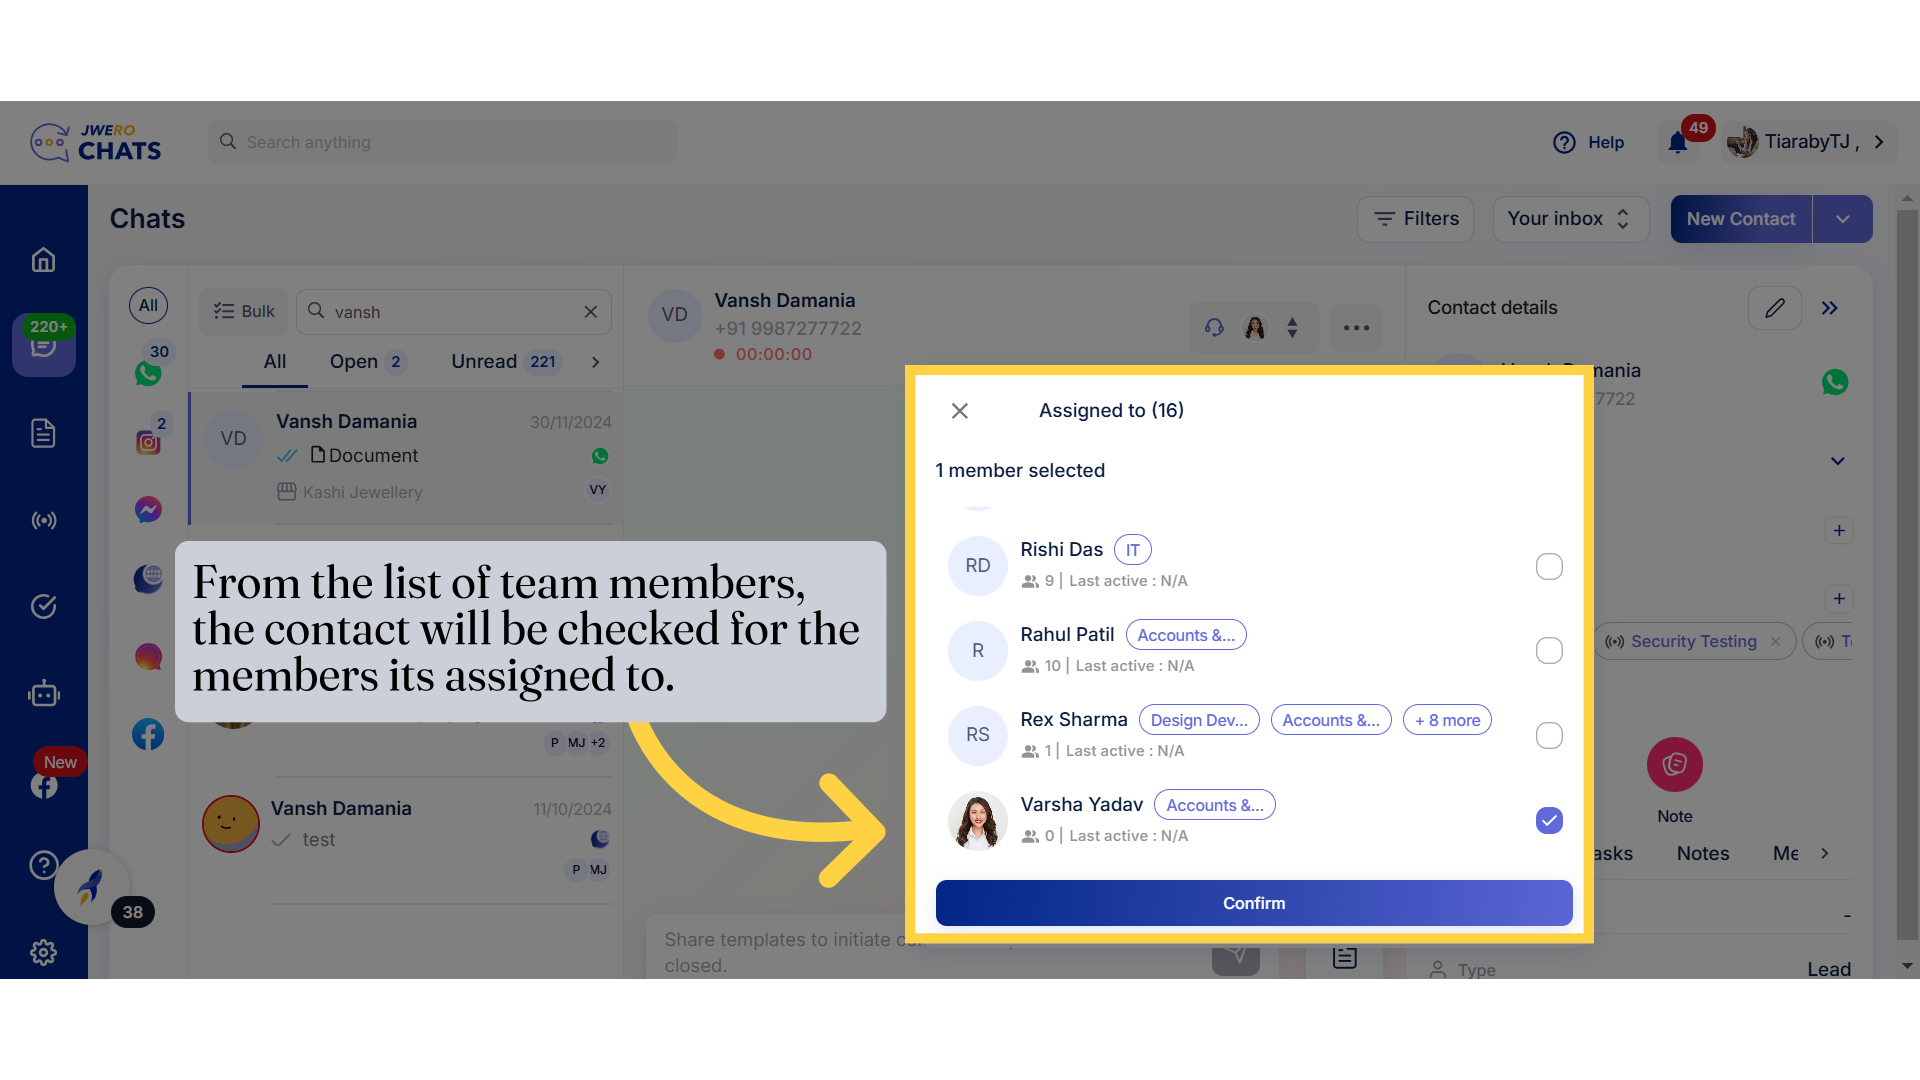
11. Manage and control specific access permissions for team members within the Chats module.

Manage and control specific access permissions for team members within the Chats module.

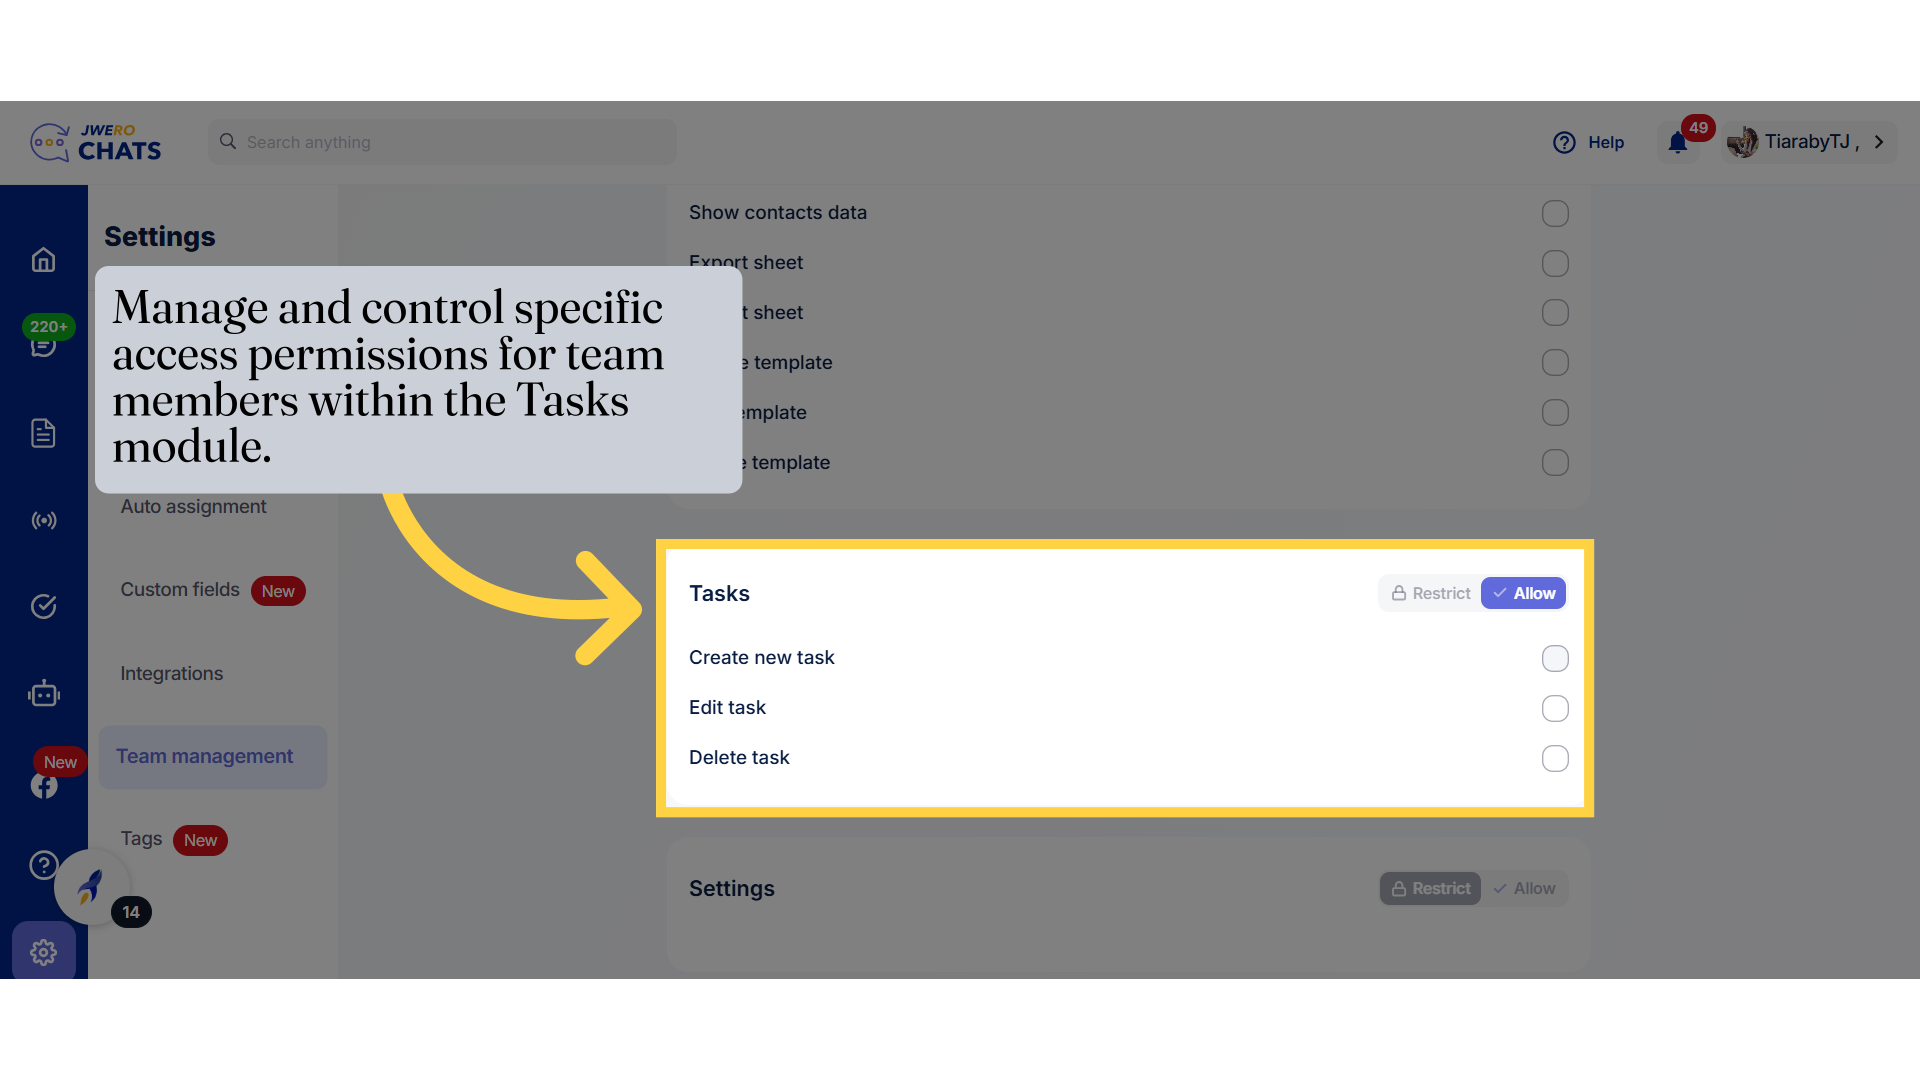
12. Manage and control specific access permissions for team members within the Tasks module.

Manage and control specific access permissions for team members within the Tasks module.

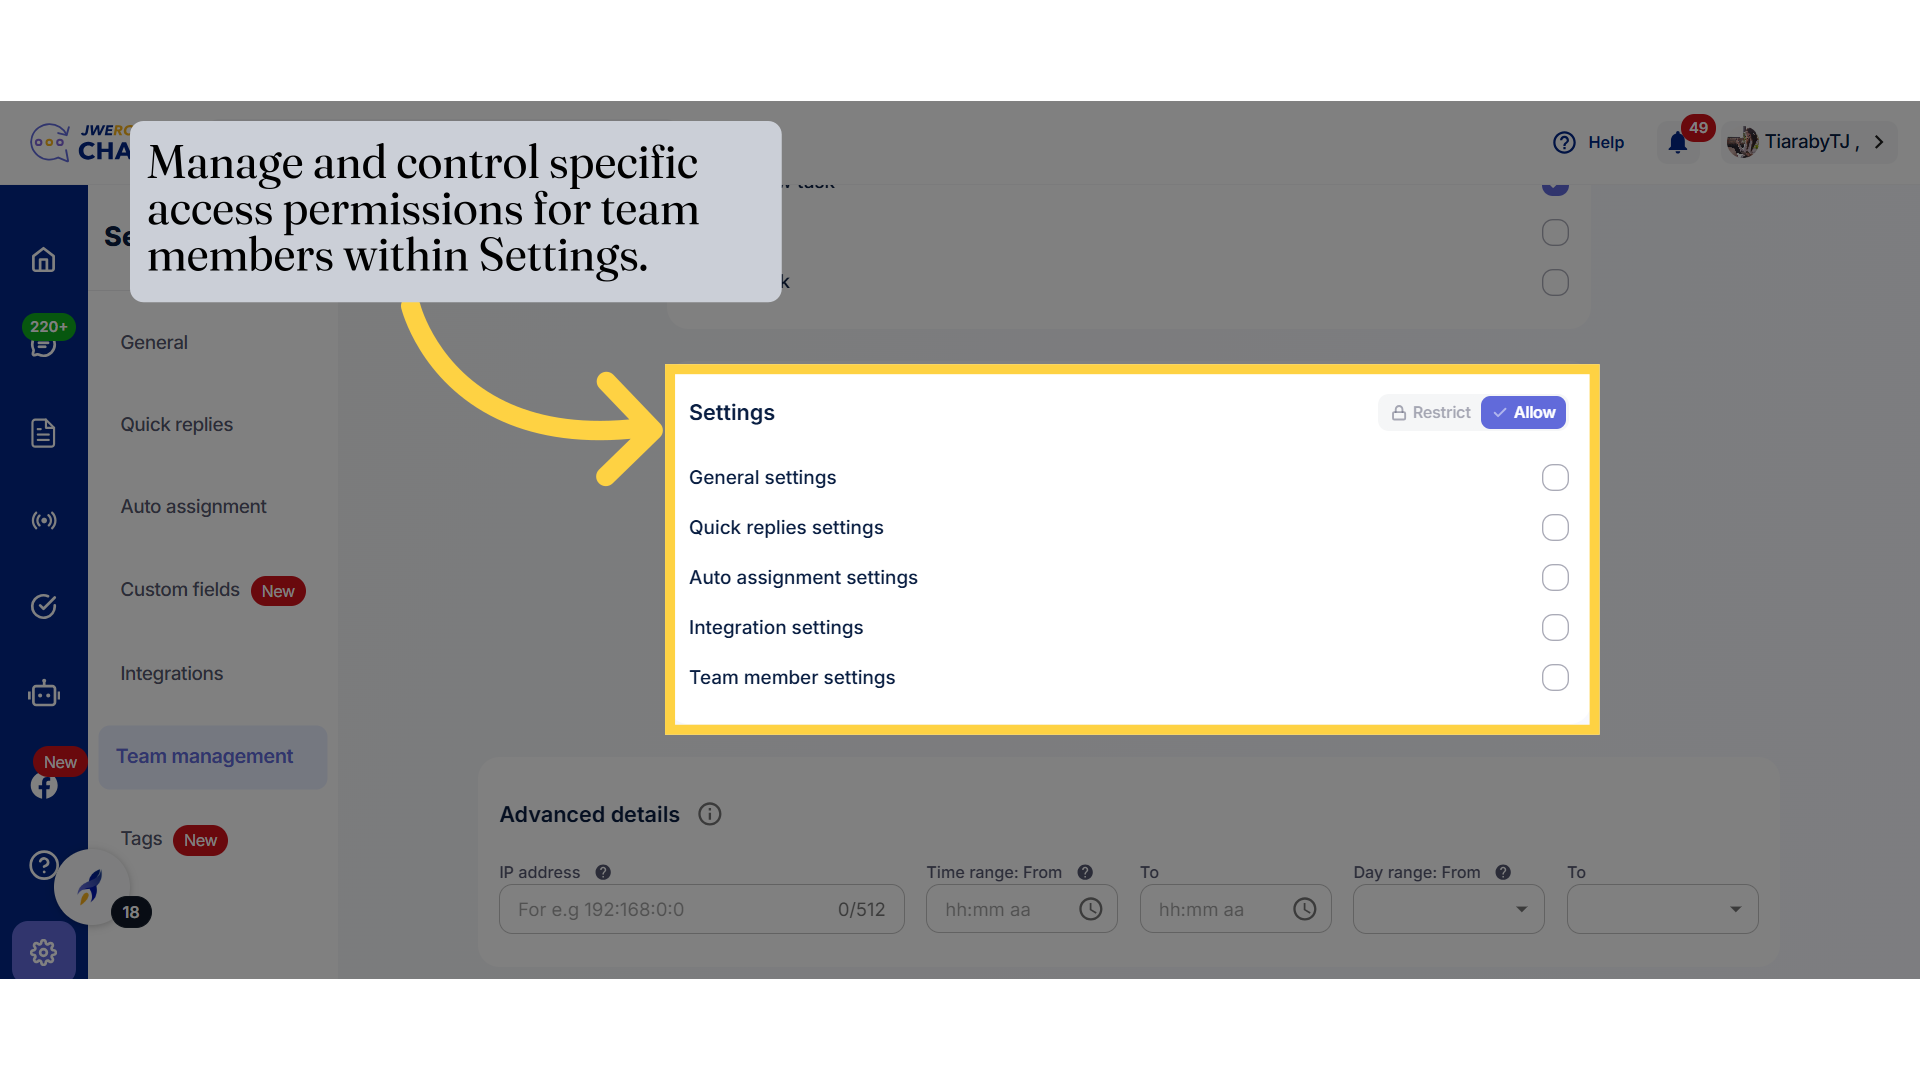
13. Manage and control specific access permissions for team members within Settings.

Manage and control specific access permissions for team members within Settings.

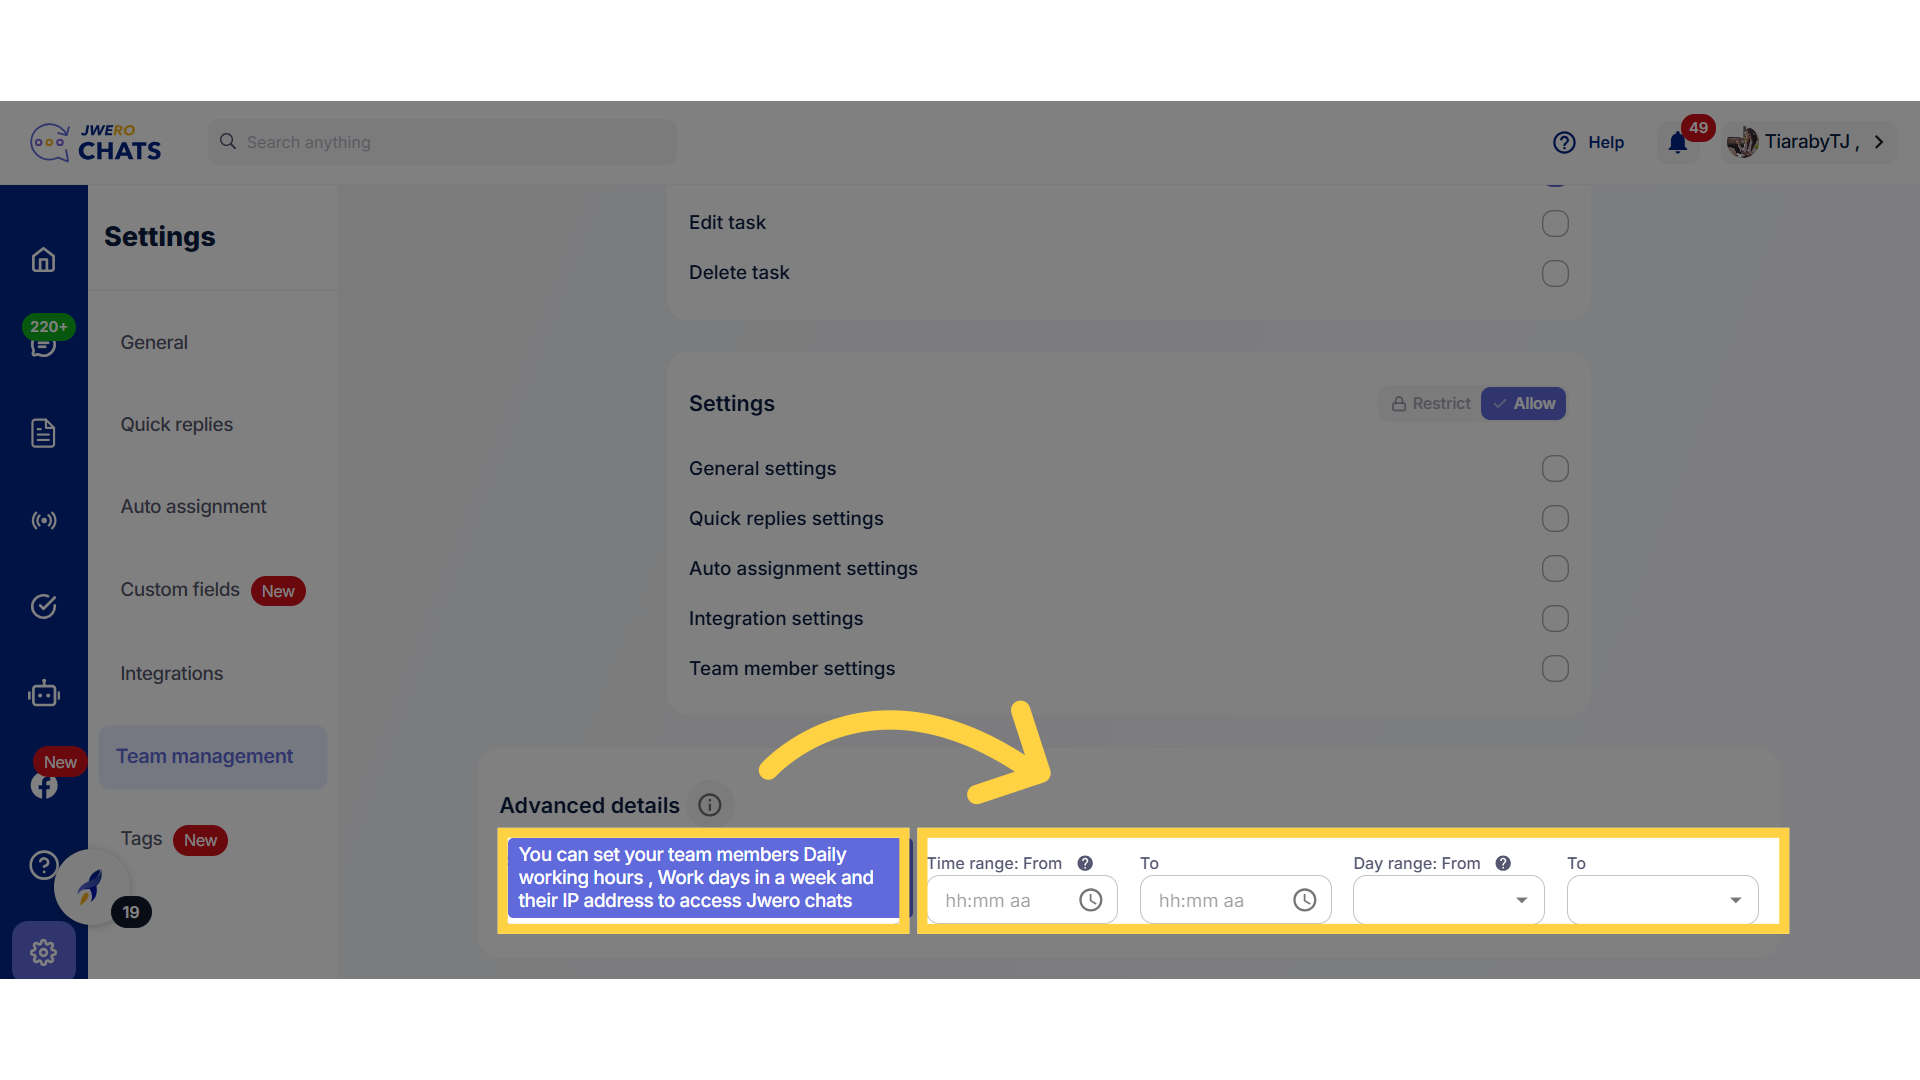
14. Advanced Details

Advanced Details

15. Click on "Update" once you have finished configuring the access control section.

Click on 'Update' once you have finished configuring the access control section.

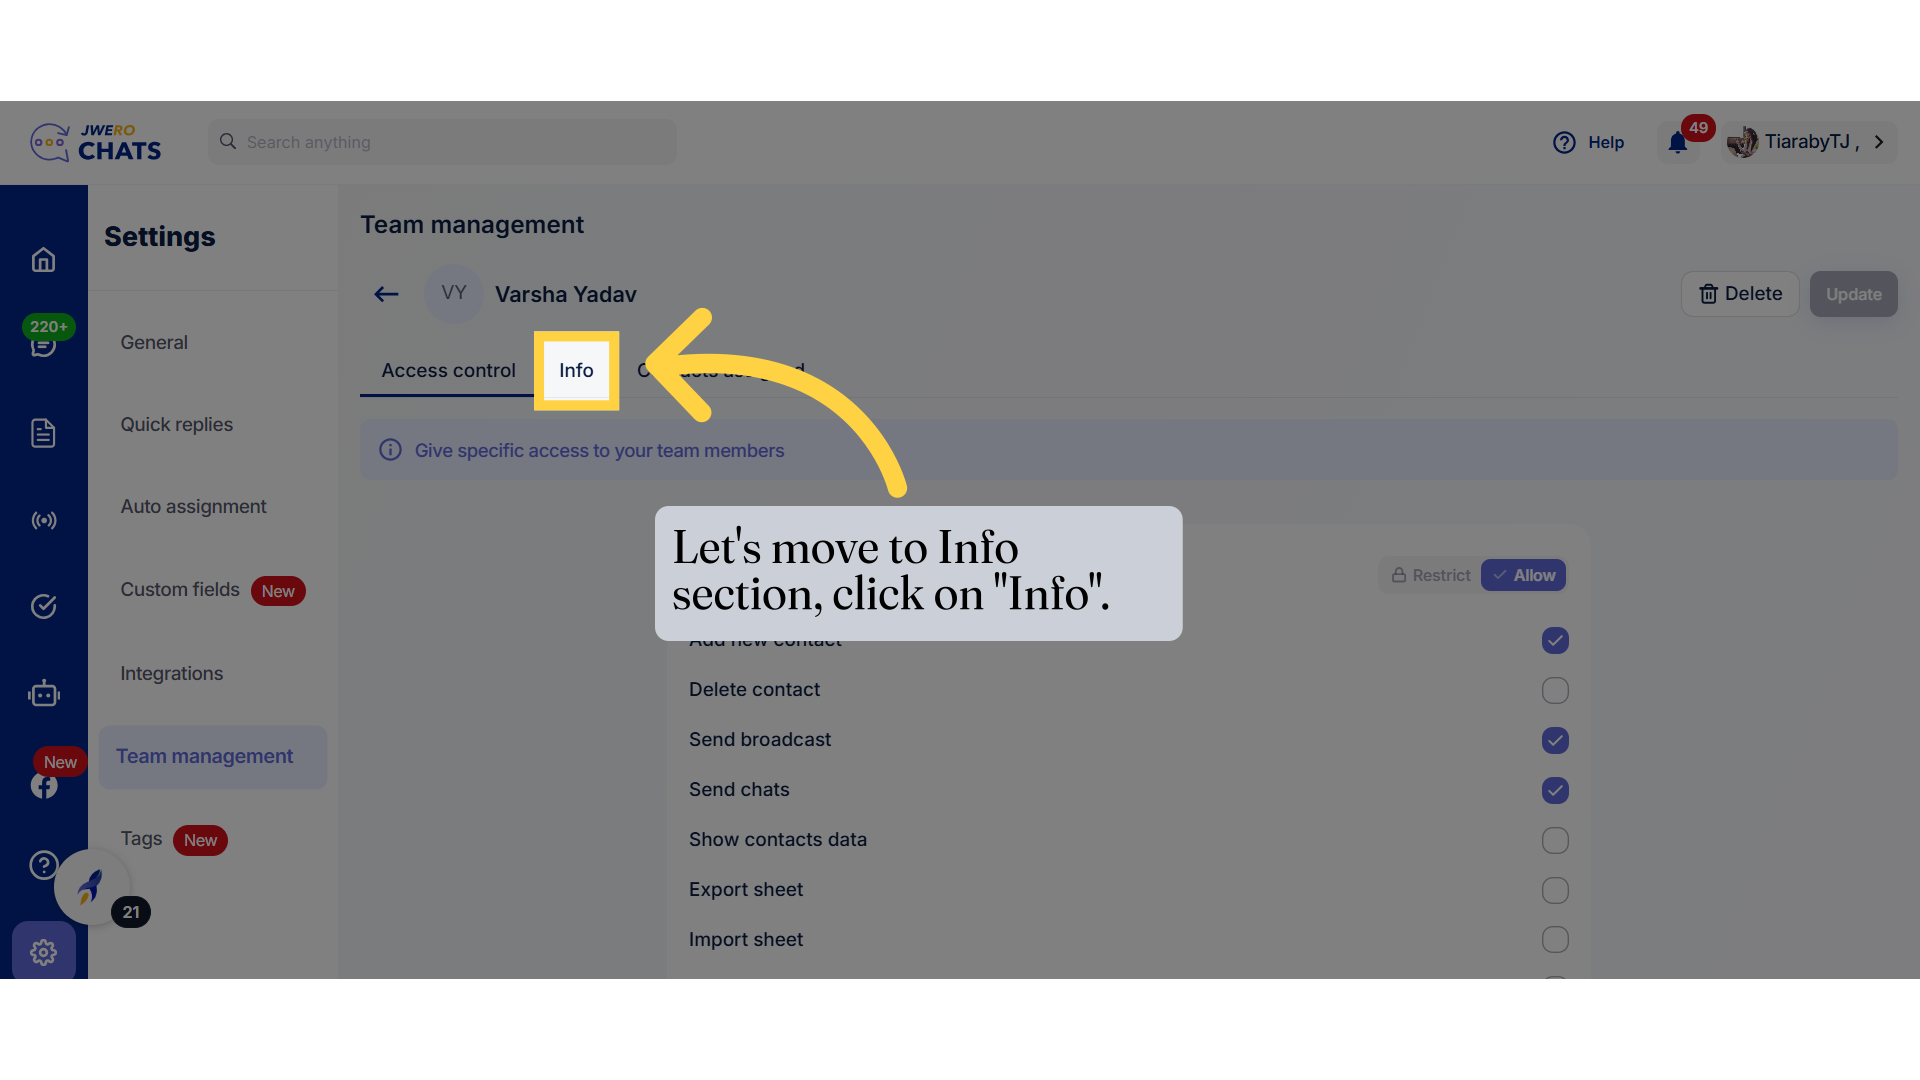
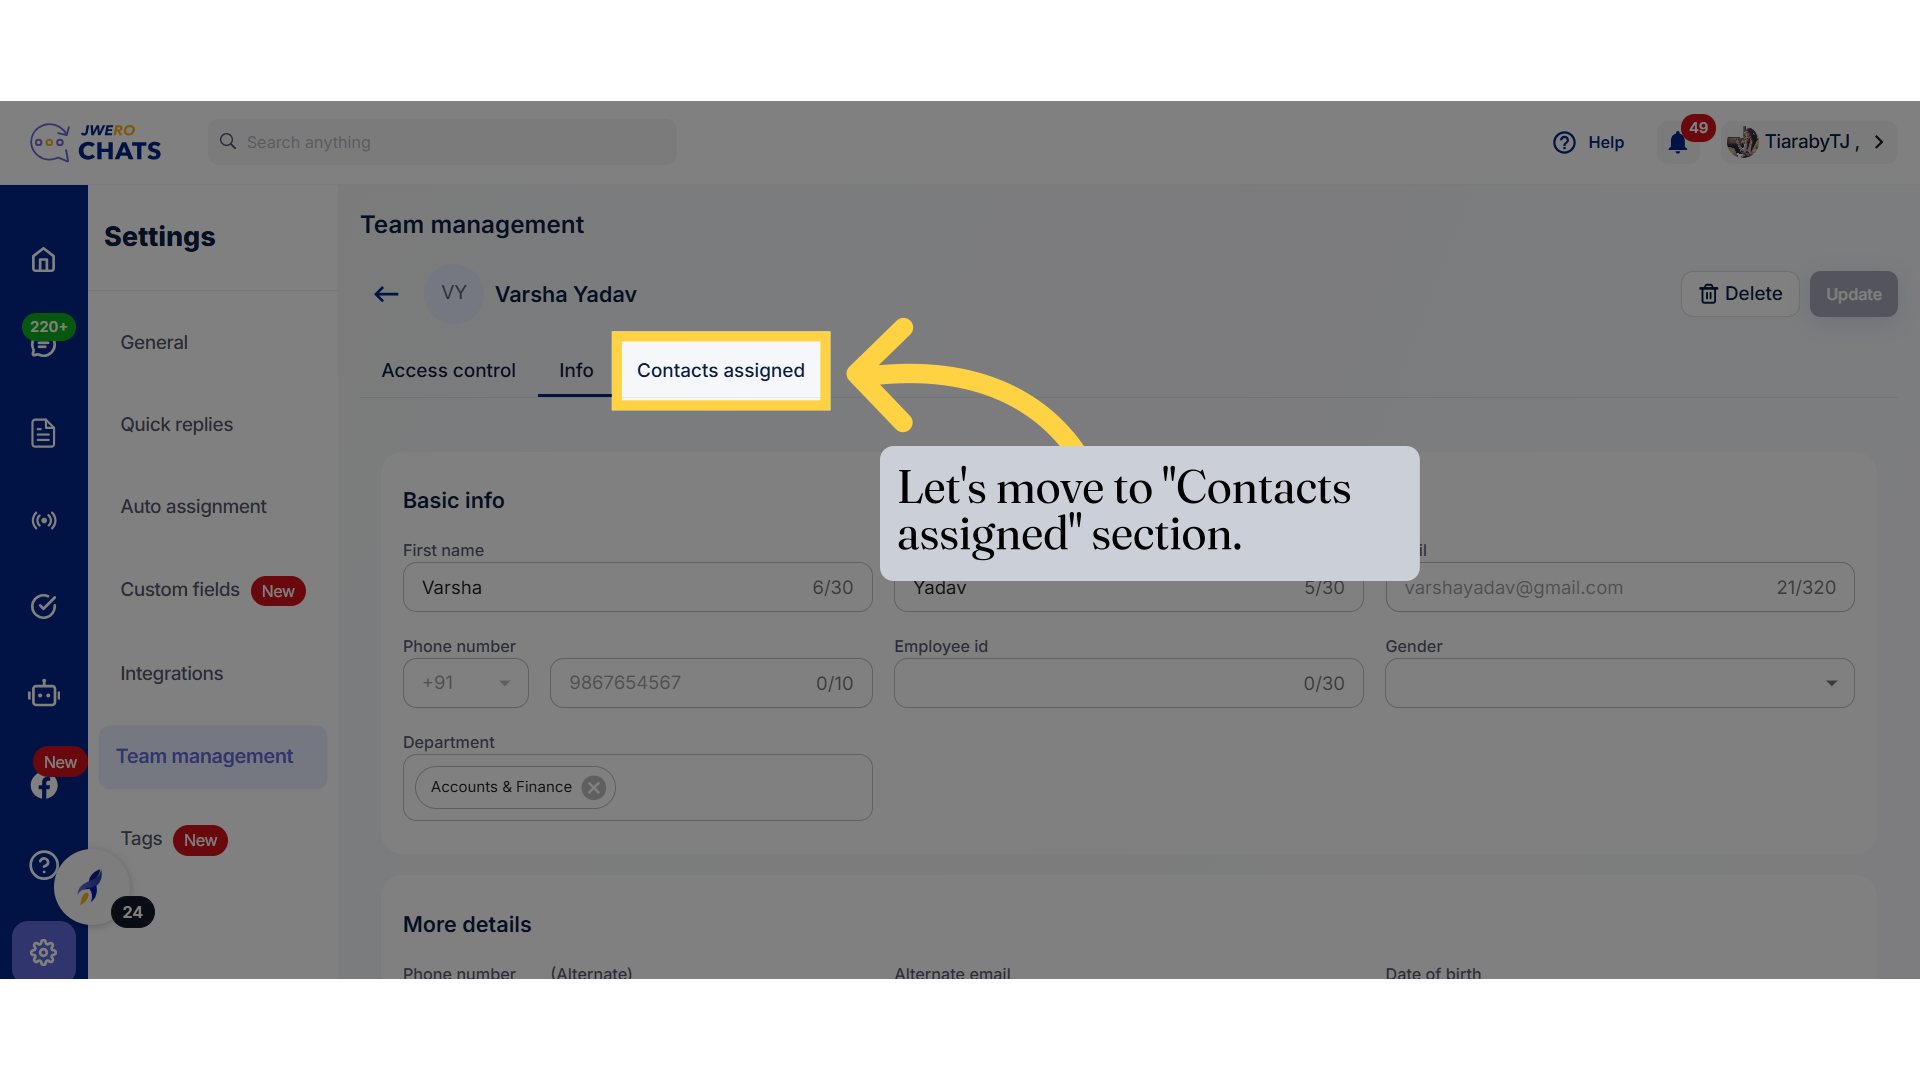
16. Let's move to Info section, click on "Info".

Let's move to Info section, click on 'Info'.

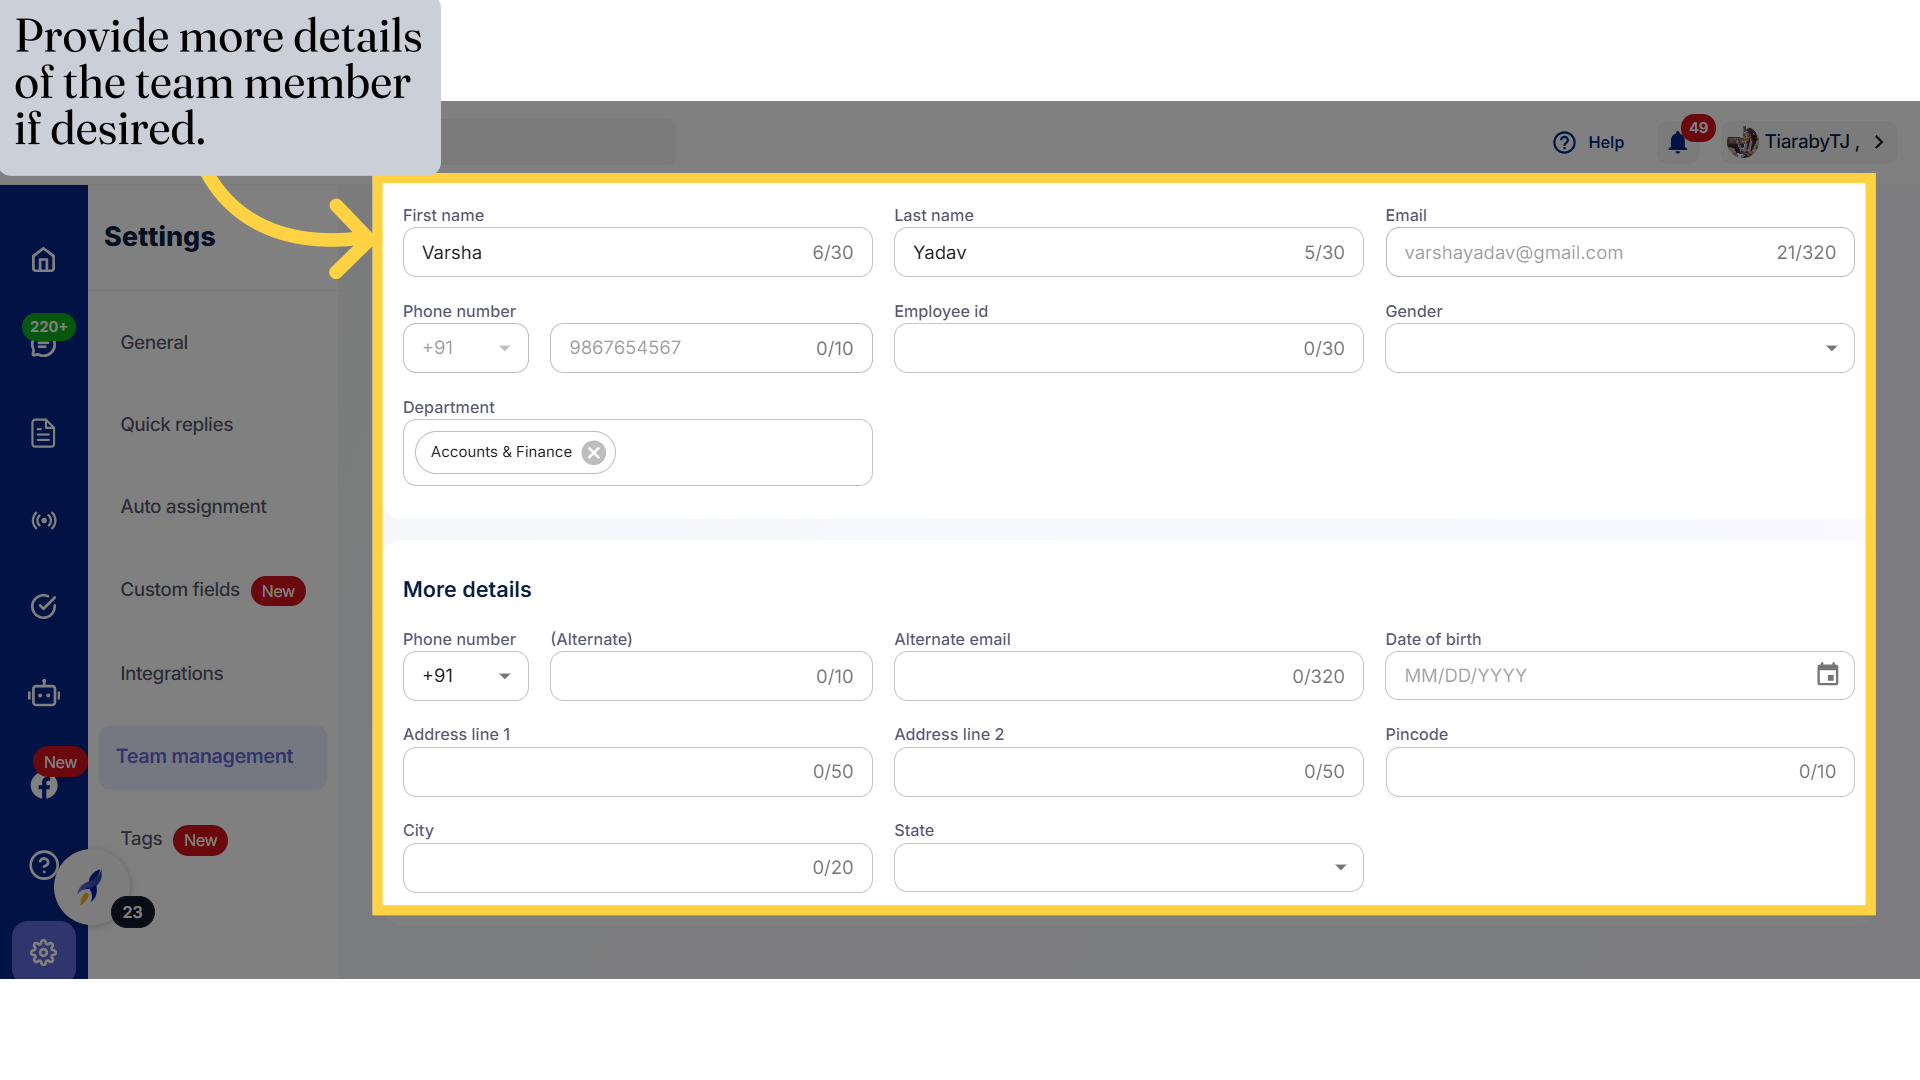
17. Provide more details of the team member if desired.

Provide more details of the team member if desired.

18. Let's move to "Contacts assigned" section.

Let's move to 'Contacts assigned' section.

19. Click on "Assign contact" to add contacts for your team member for managing them.

Click on 'Assign contact' to add contacts for your team member for managing them.

20. Select the contacts you want to add.

Select the contacts you want to add.

21. You will see this notification after successfully adding the contacts.

You will see this notification after successfully adding the contacts.

22. After successfully adding the contact, it will appear under the "Contacts assigned" section.

After successfully adding the contact, it will appear under the 'Contacts assigned' section.

23. To check if the contact is assigned, click on "Chats."

To check if the contact is assigned, click on 'Chats.'

24. Open the chat of the contact assigned to the team member and click here.

Open the chat of the contact assigned to the team member and click here.

25. From the list of team members, the contact will be checked for the members its assigned to.

From the list of team members, the contact will be checked for the members its assigned to.