Filter Action In Trigger
Filter Action In Trigger
1. Filter action
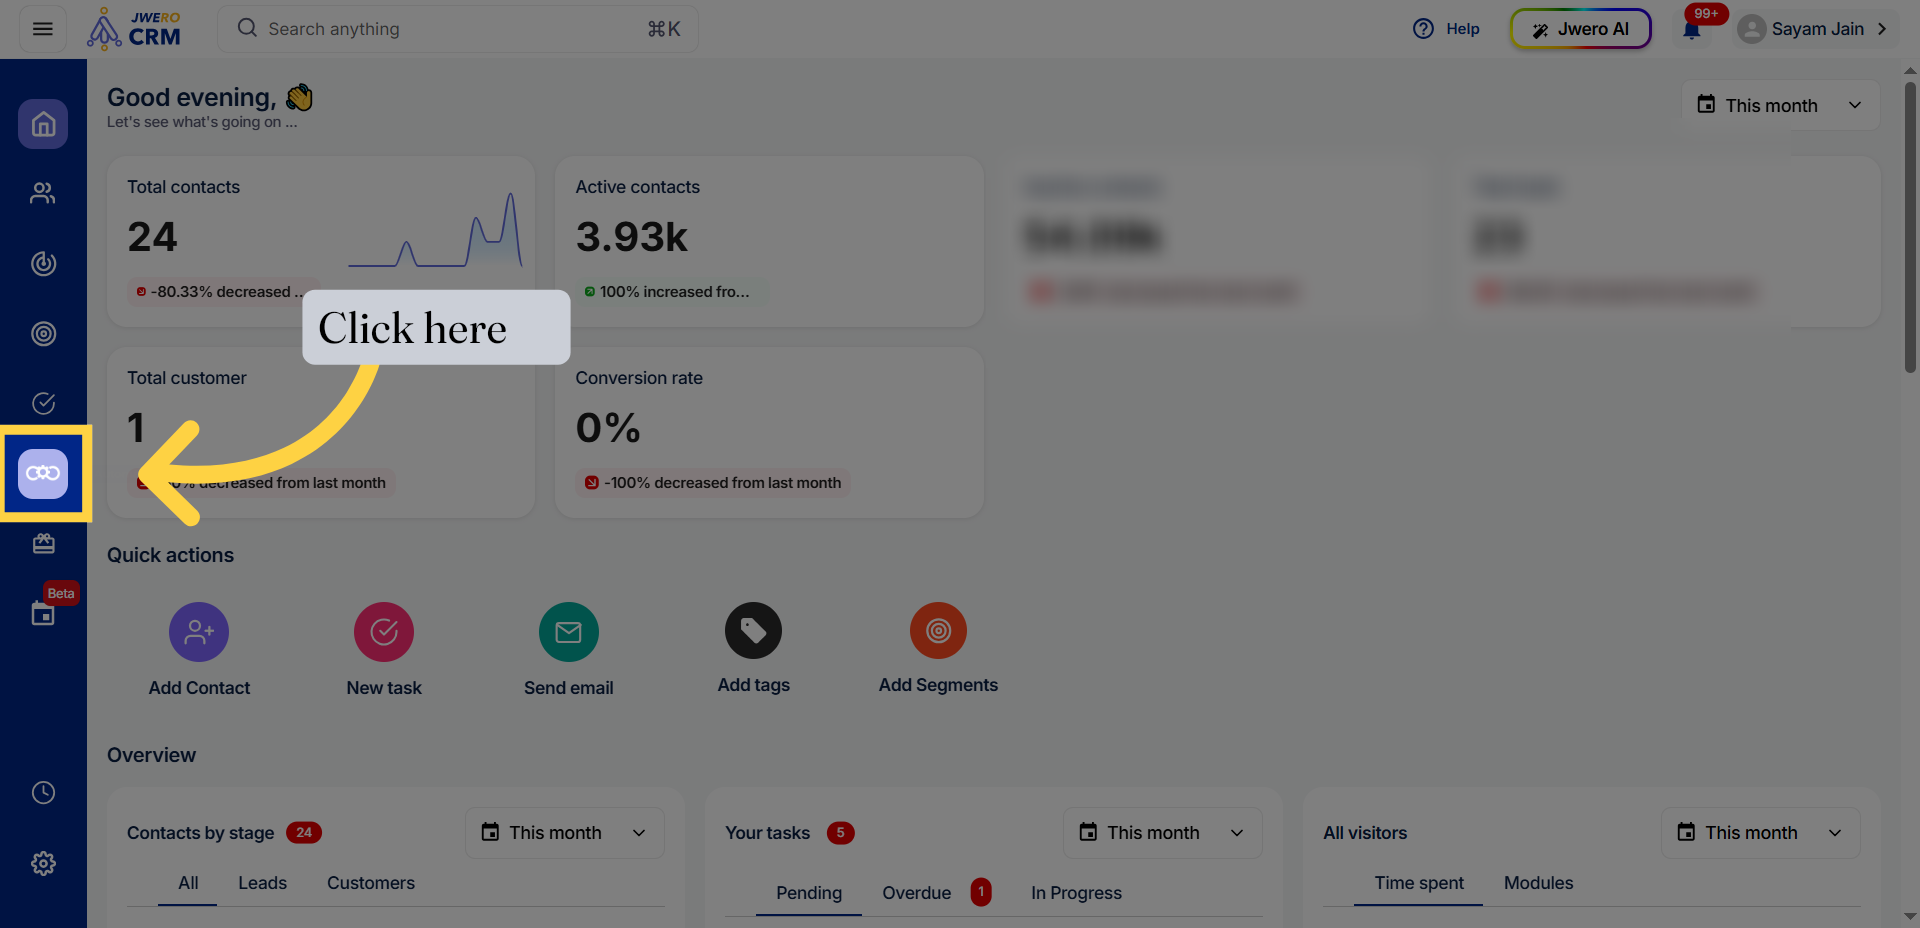
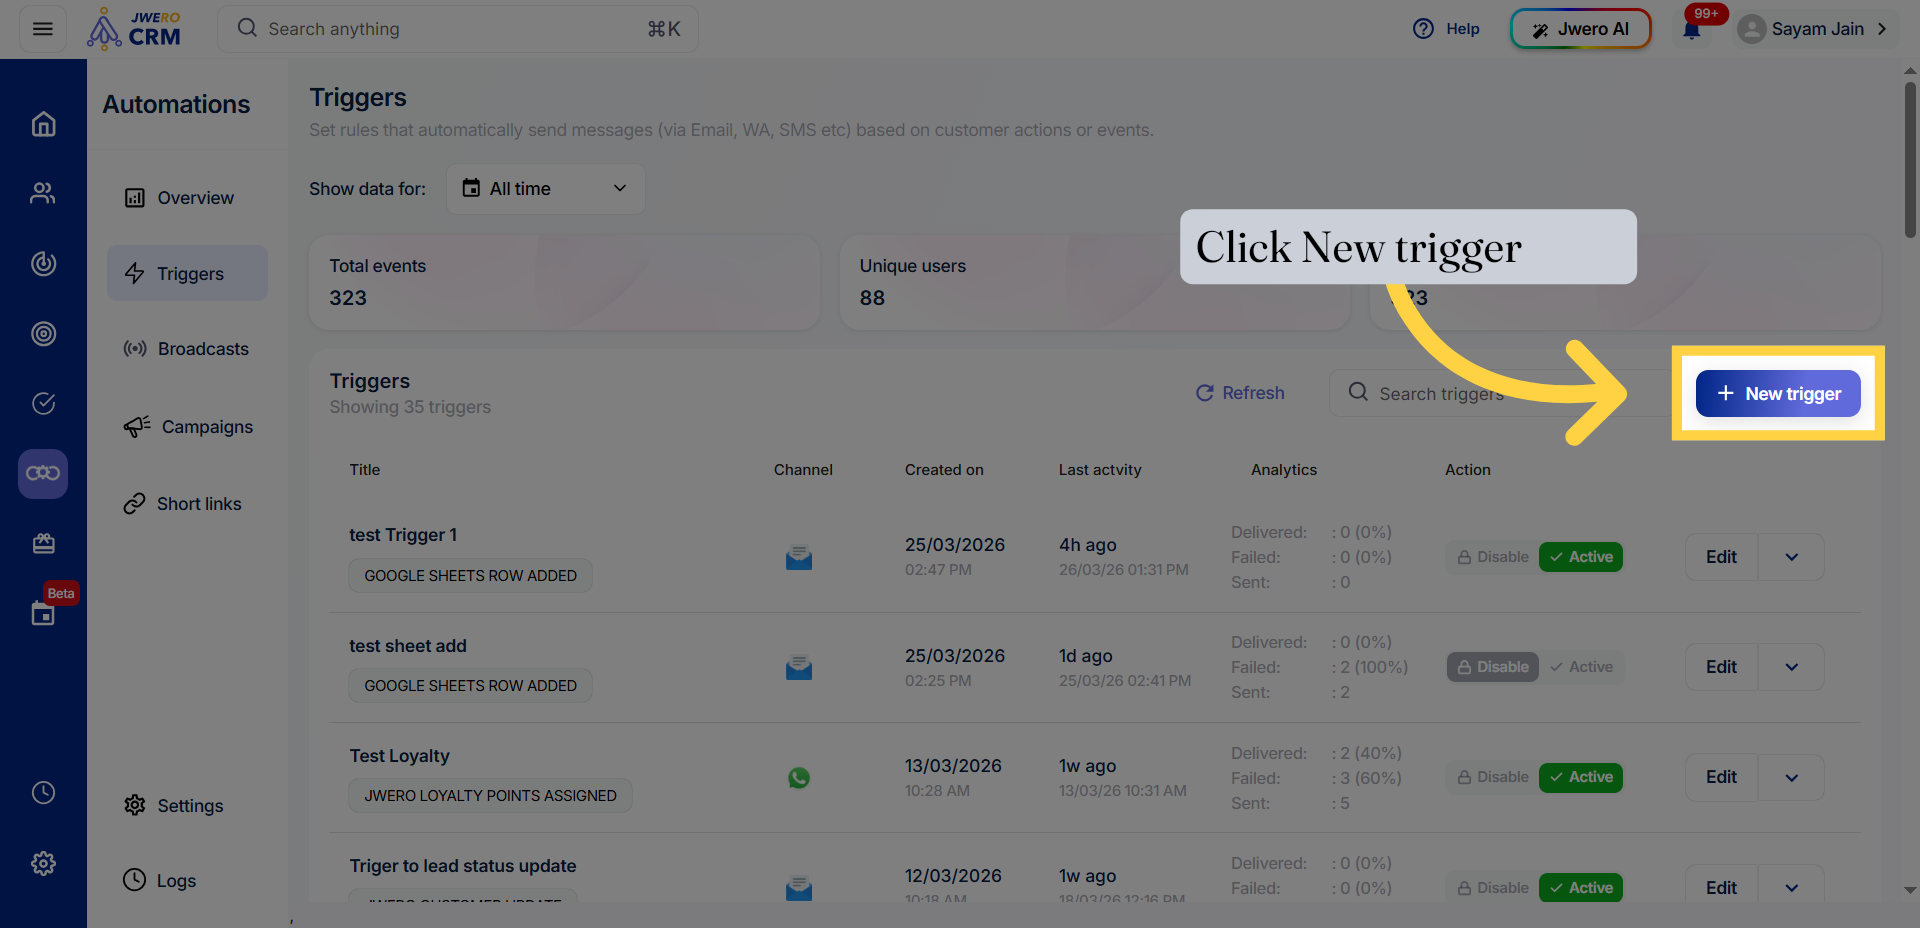
2. Go To Automations
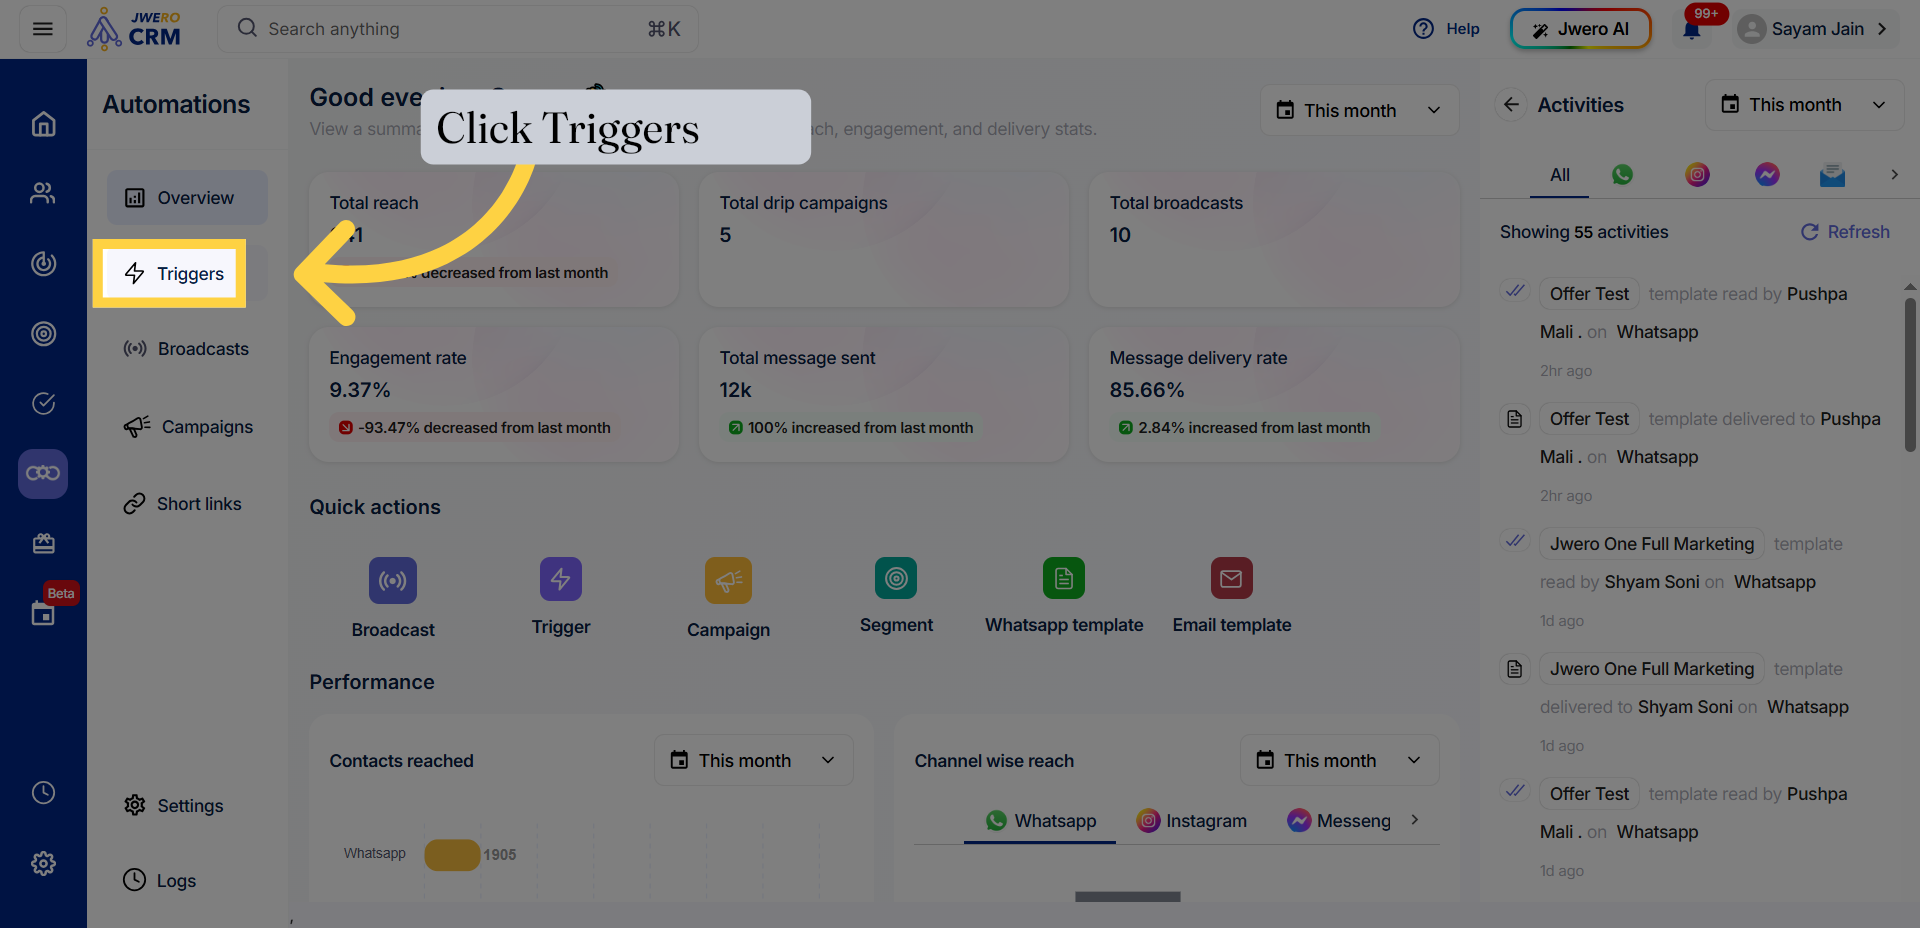
3. Open Triggers Section
4. Create New Trigger
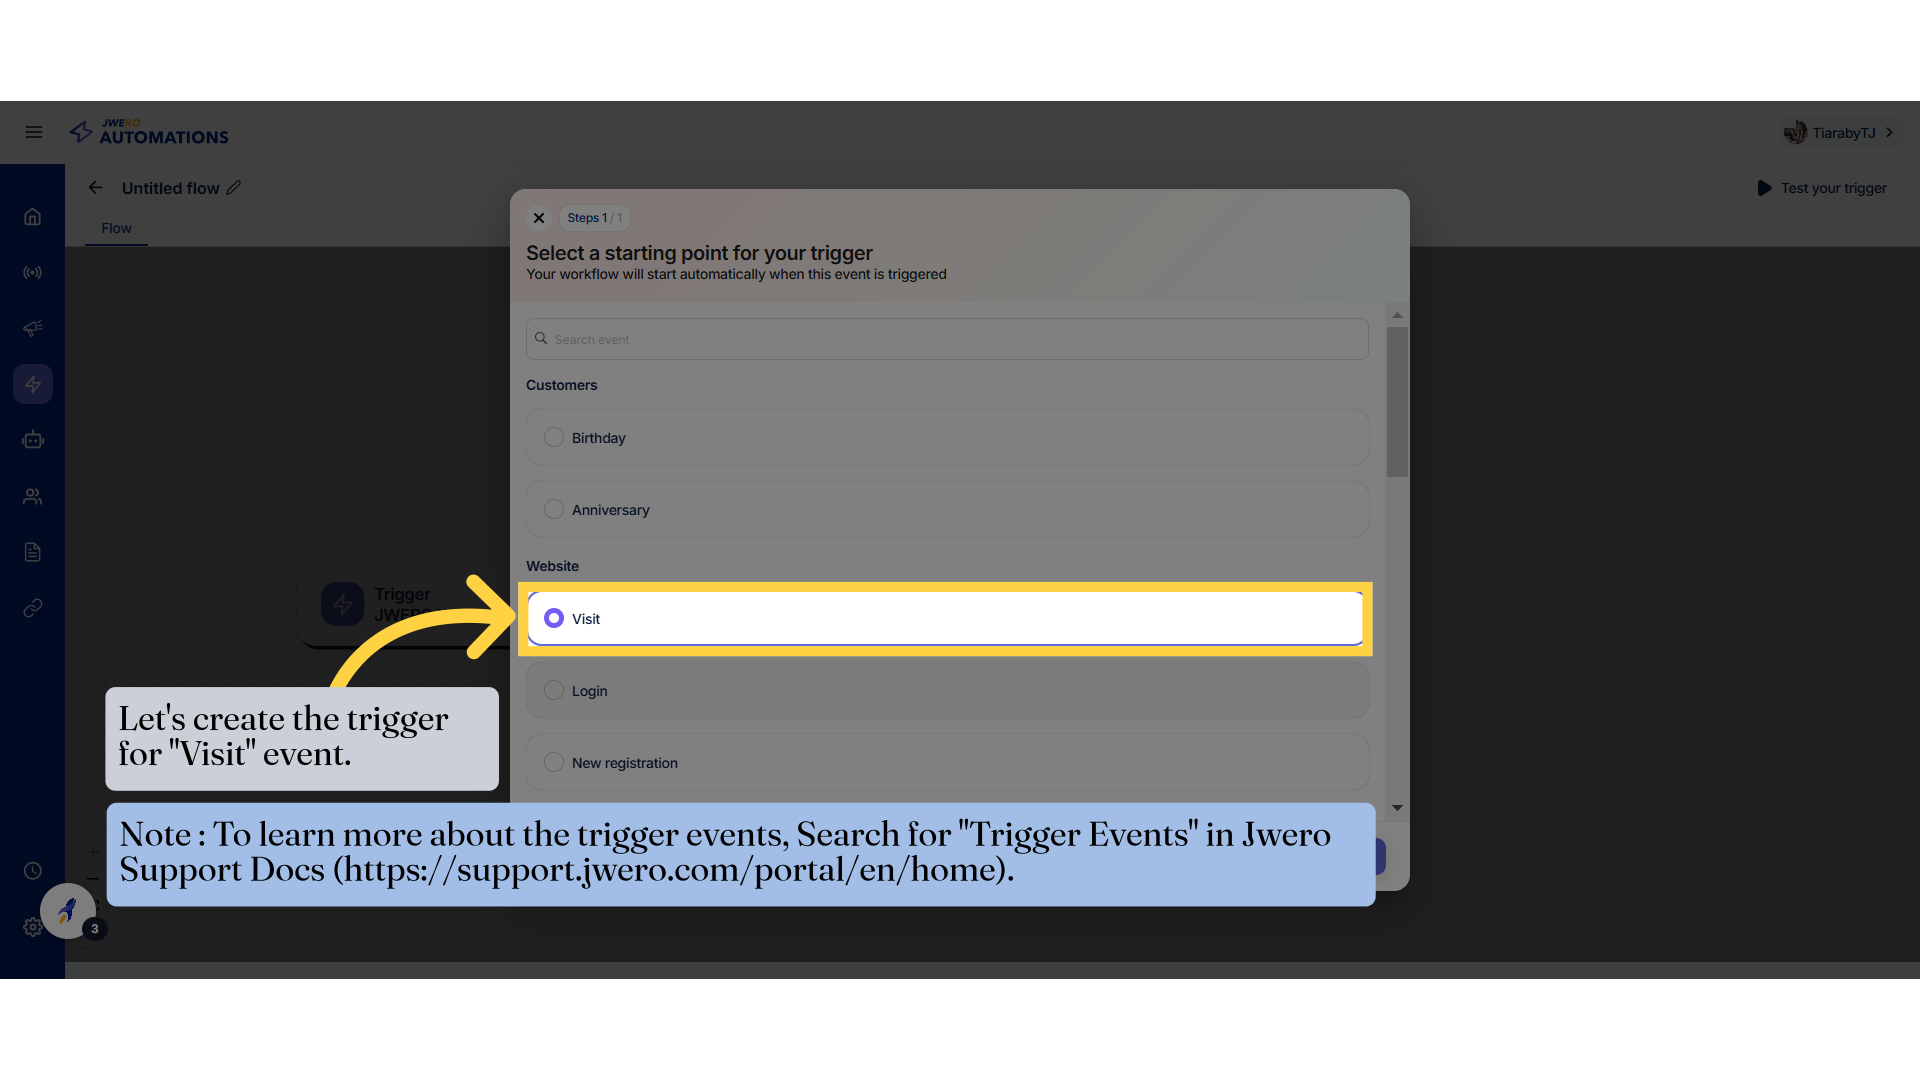
5. Let's create the trigger for "Visit" event.
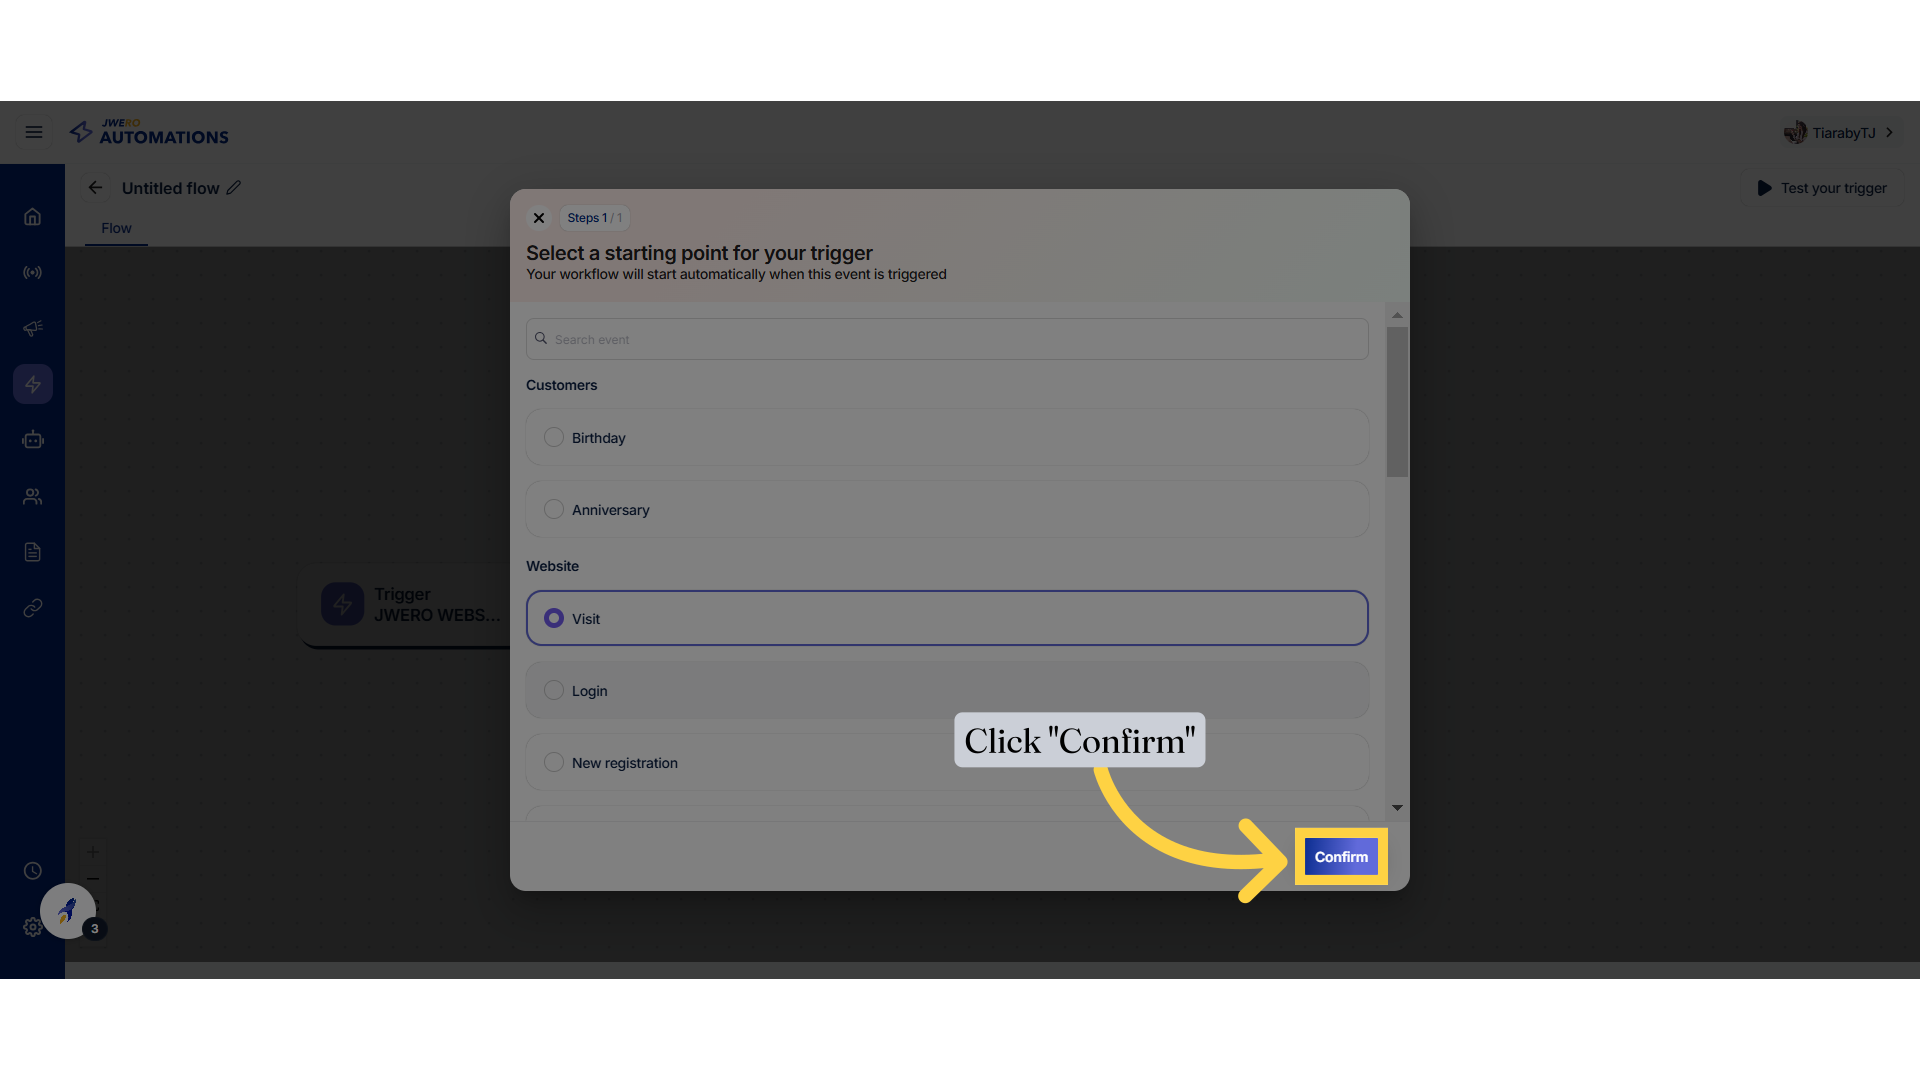
6. Click "Confirm"
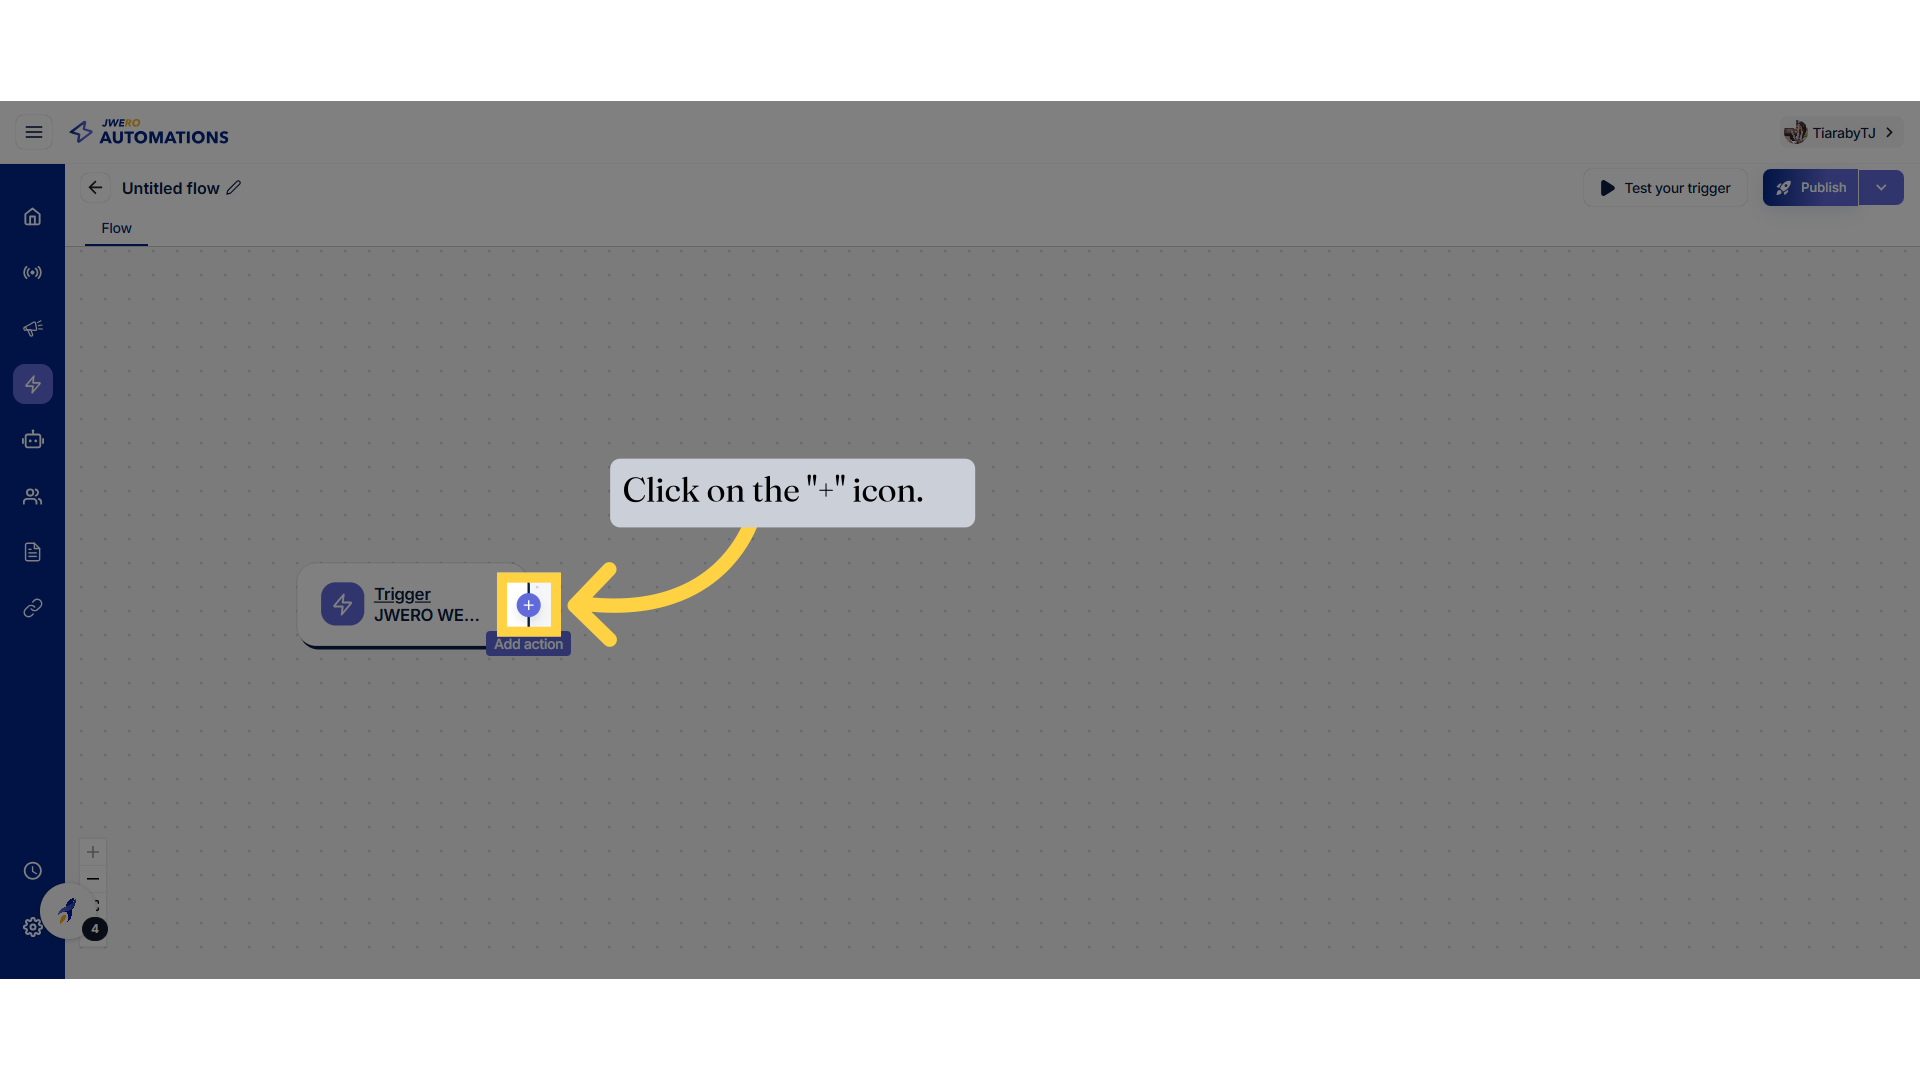
7. You will get this node which is the starting point of the trigger flow.

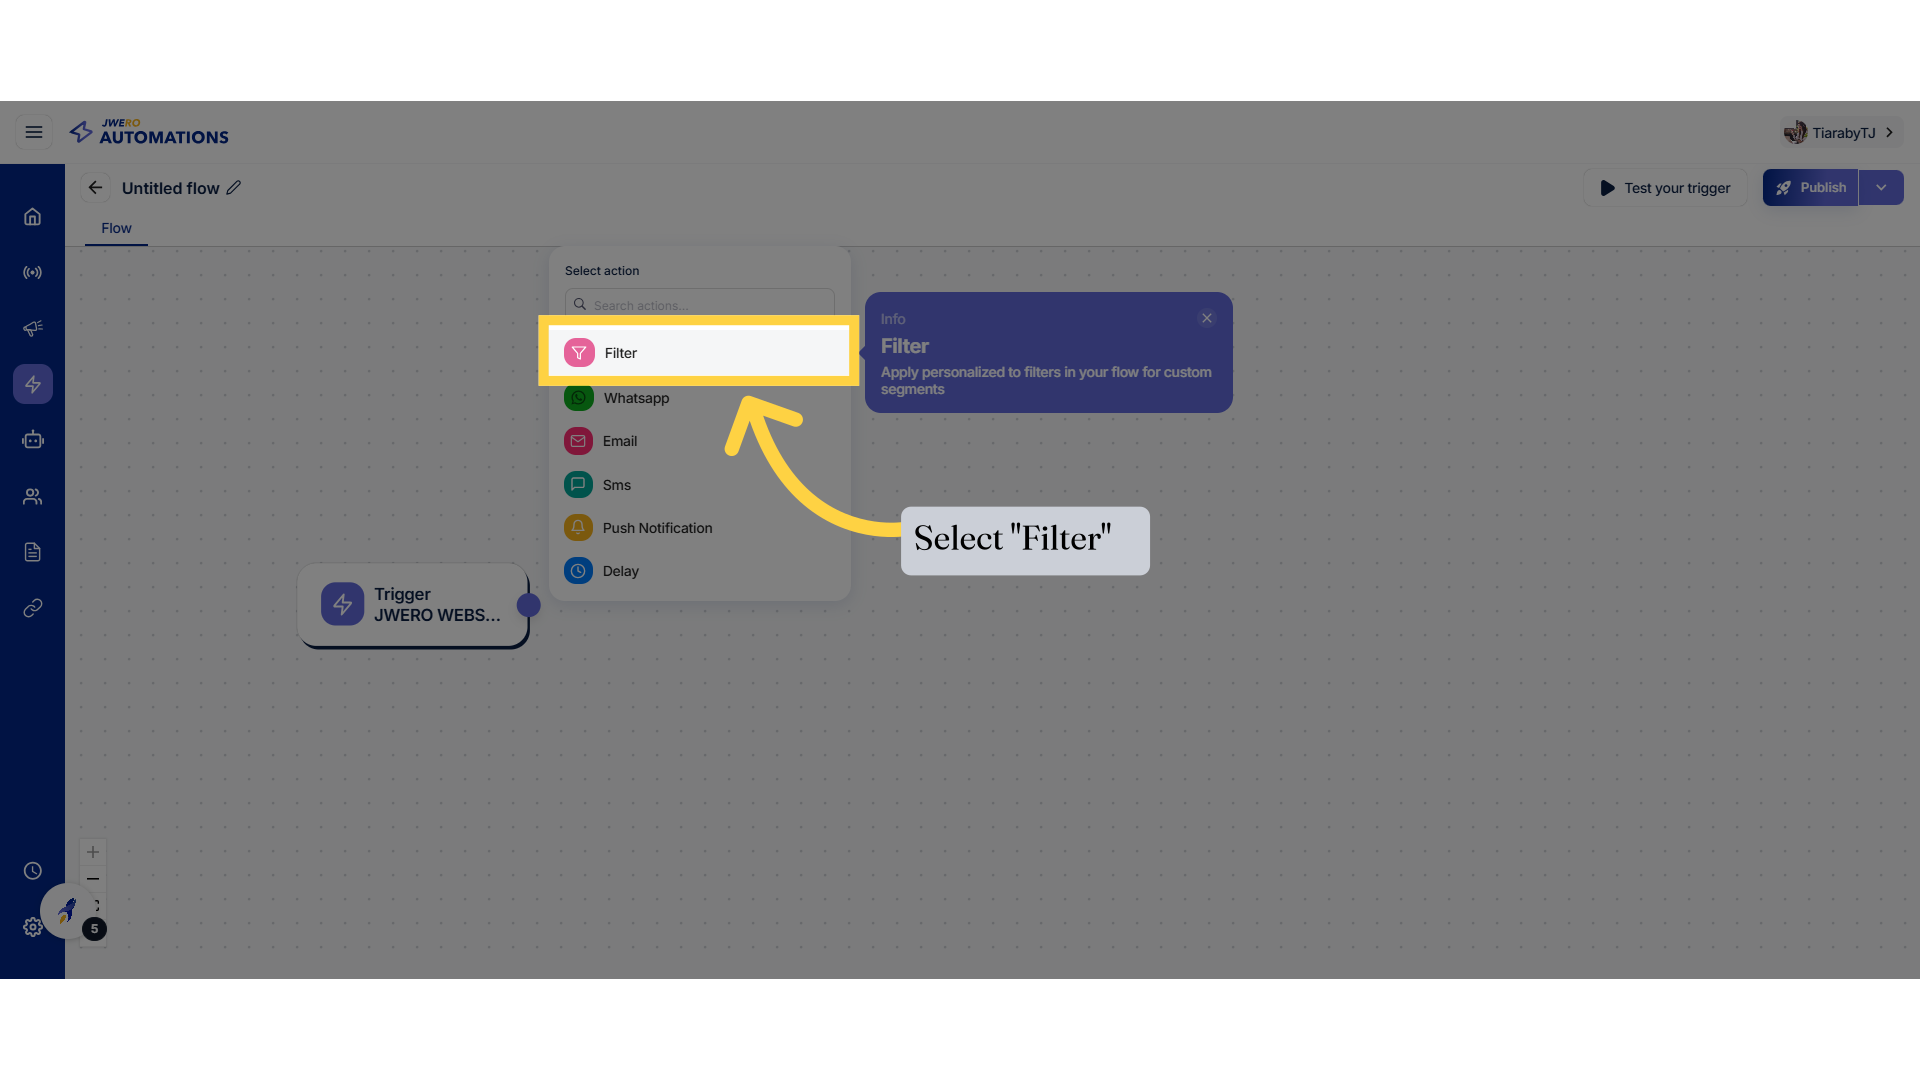
8. Click on the "+" icon.
9. Select "Filter"
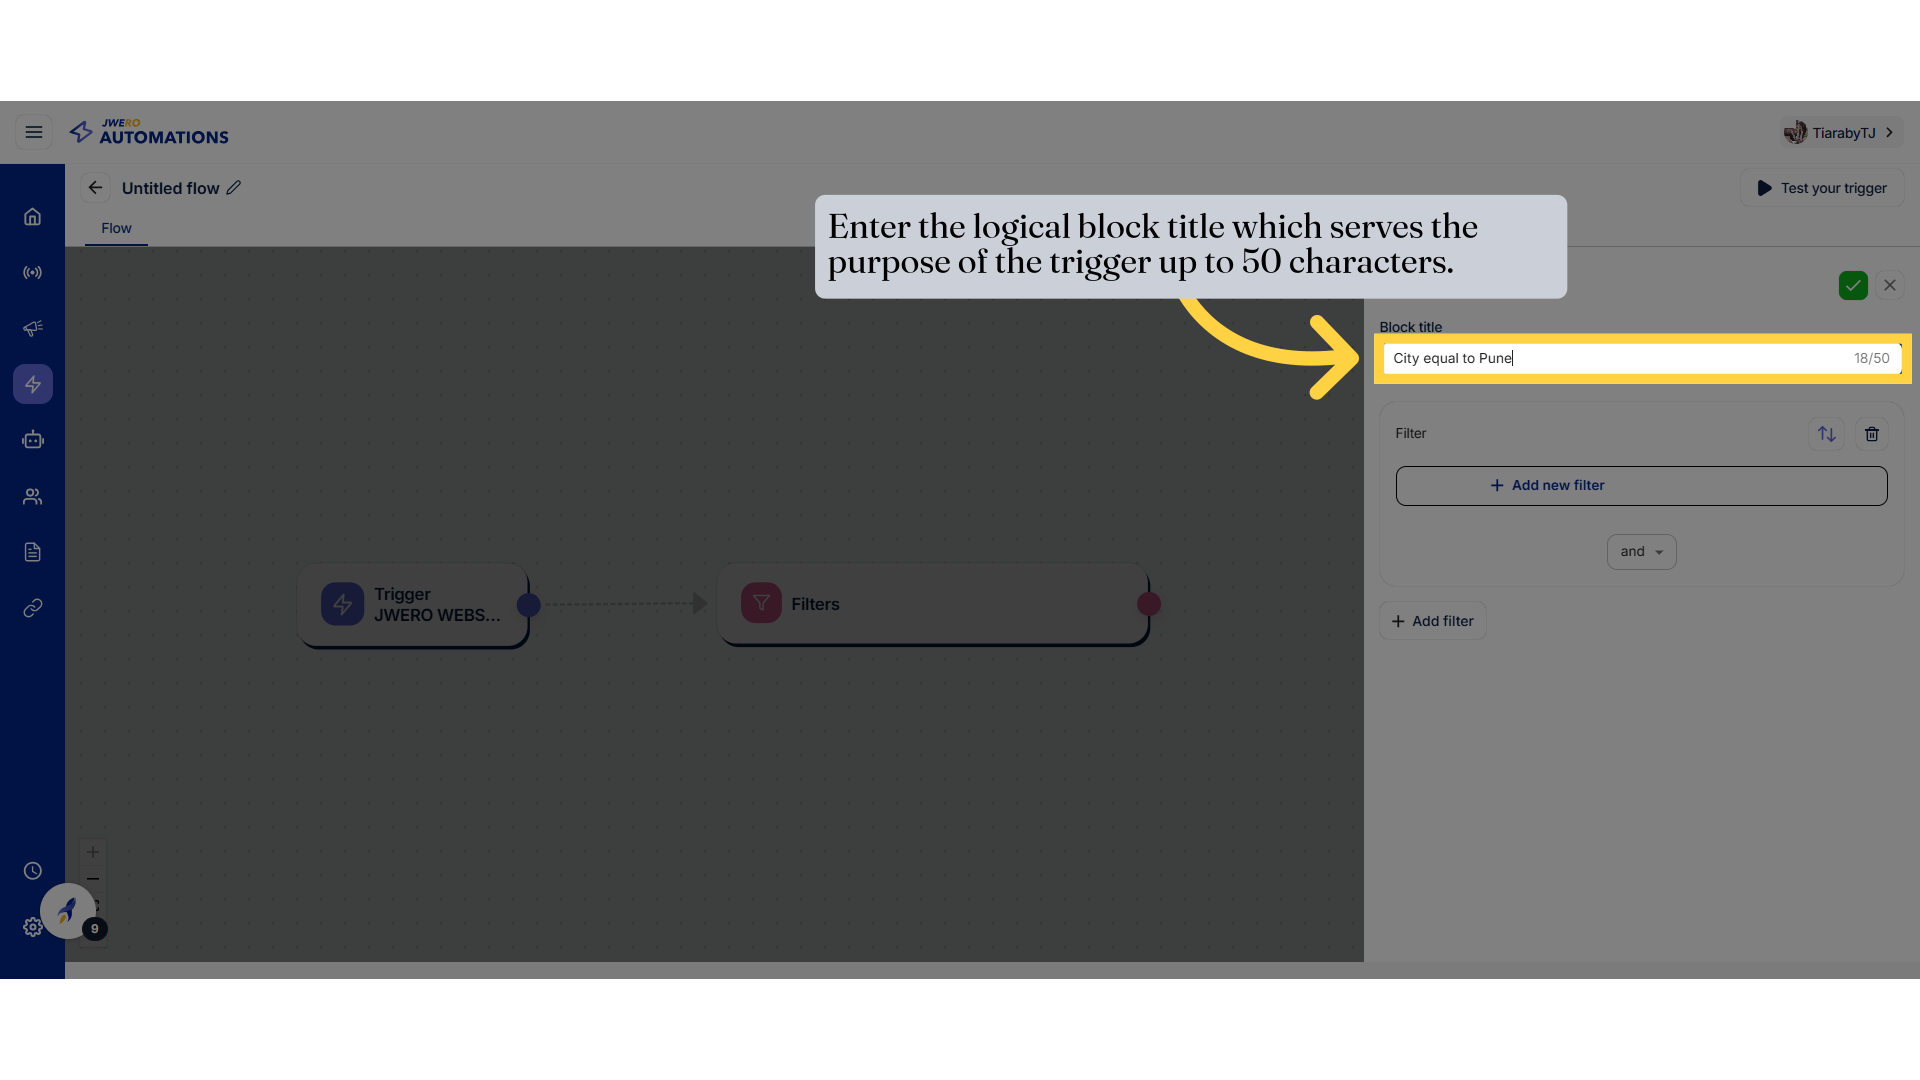
10. Block Title
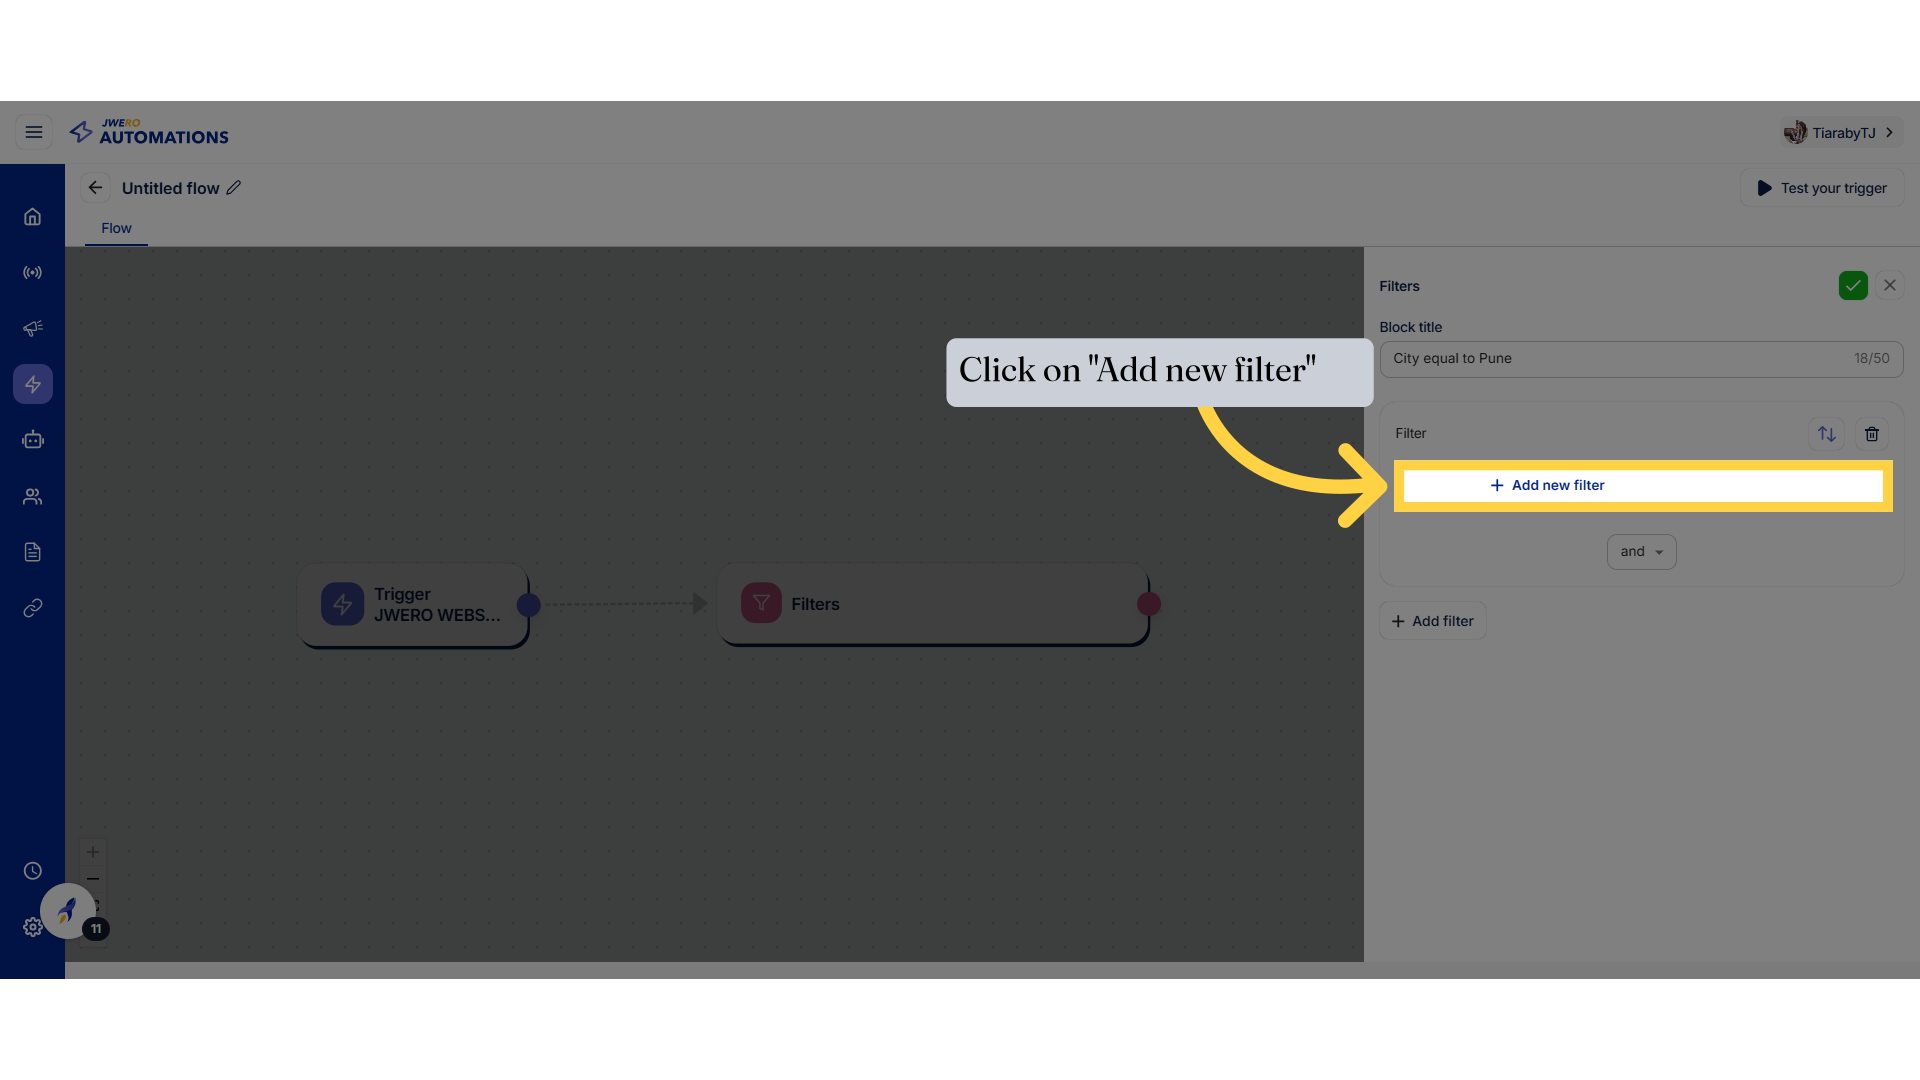
11. Click on "Add new filter"
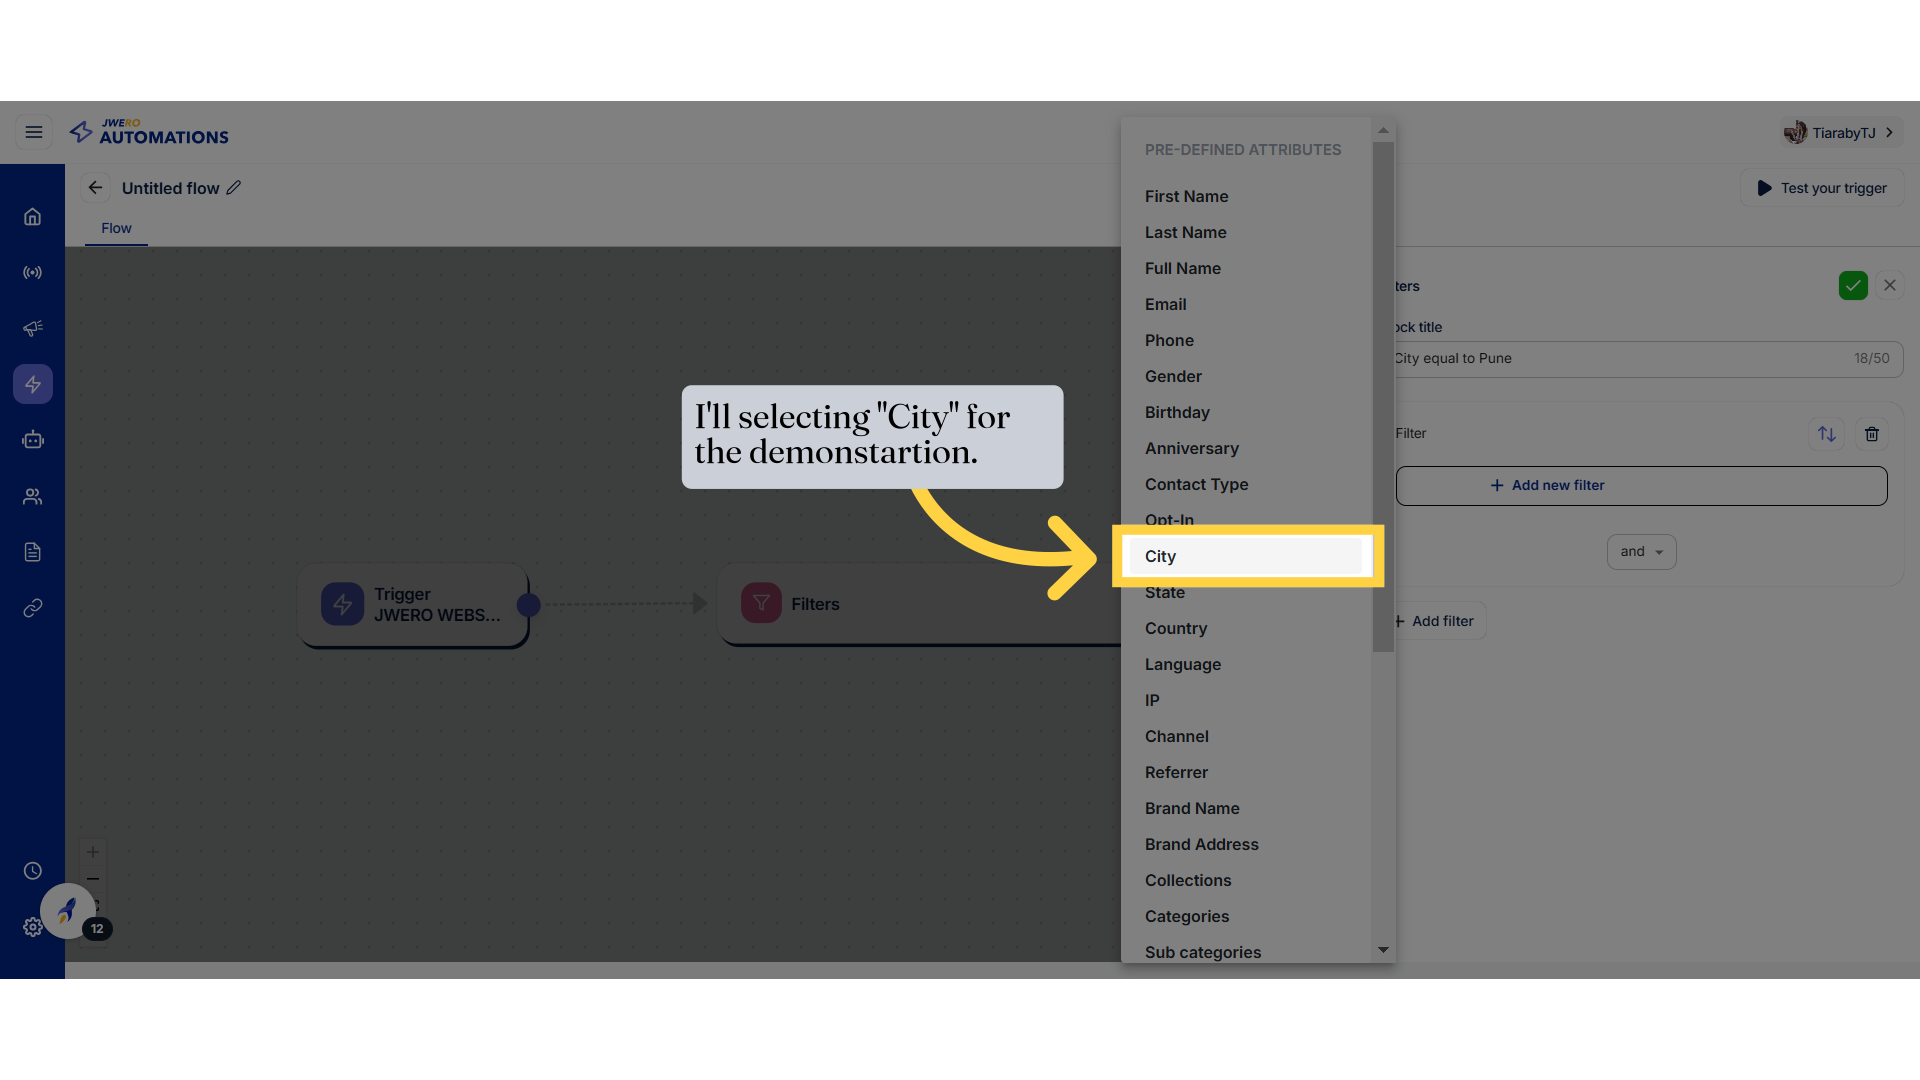
12. Select the appropriate attribute from the available options.
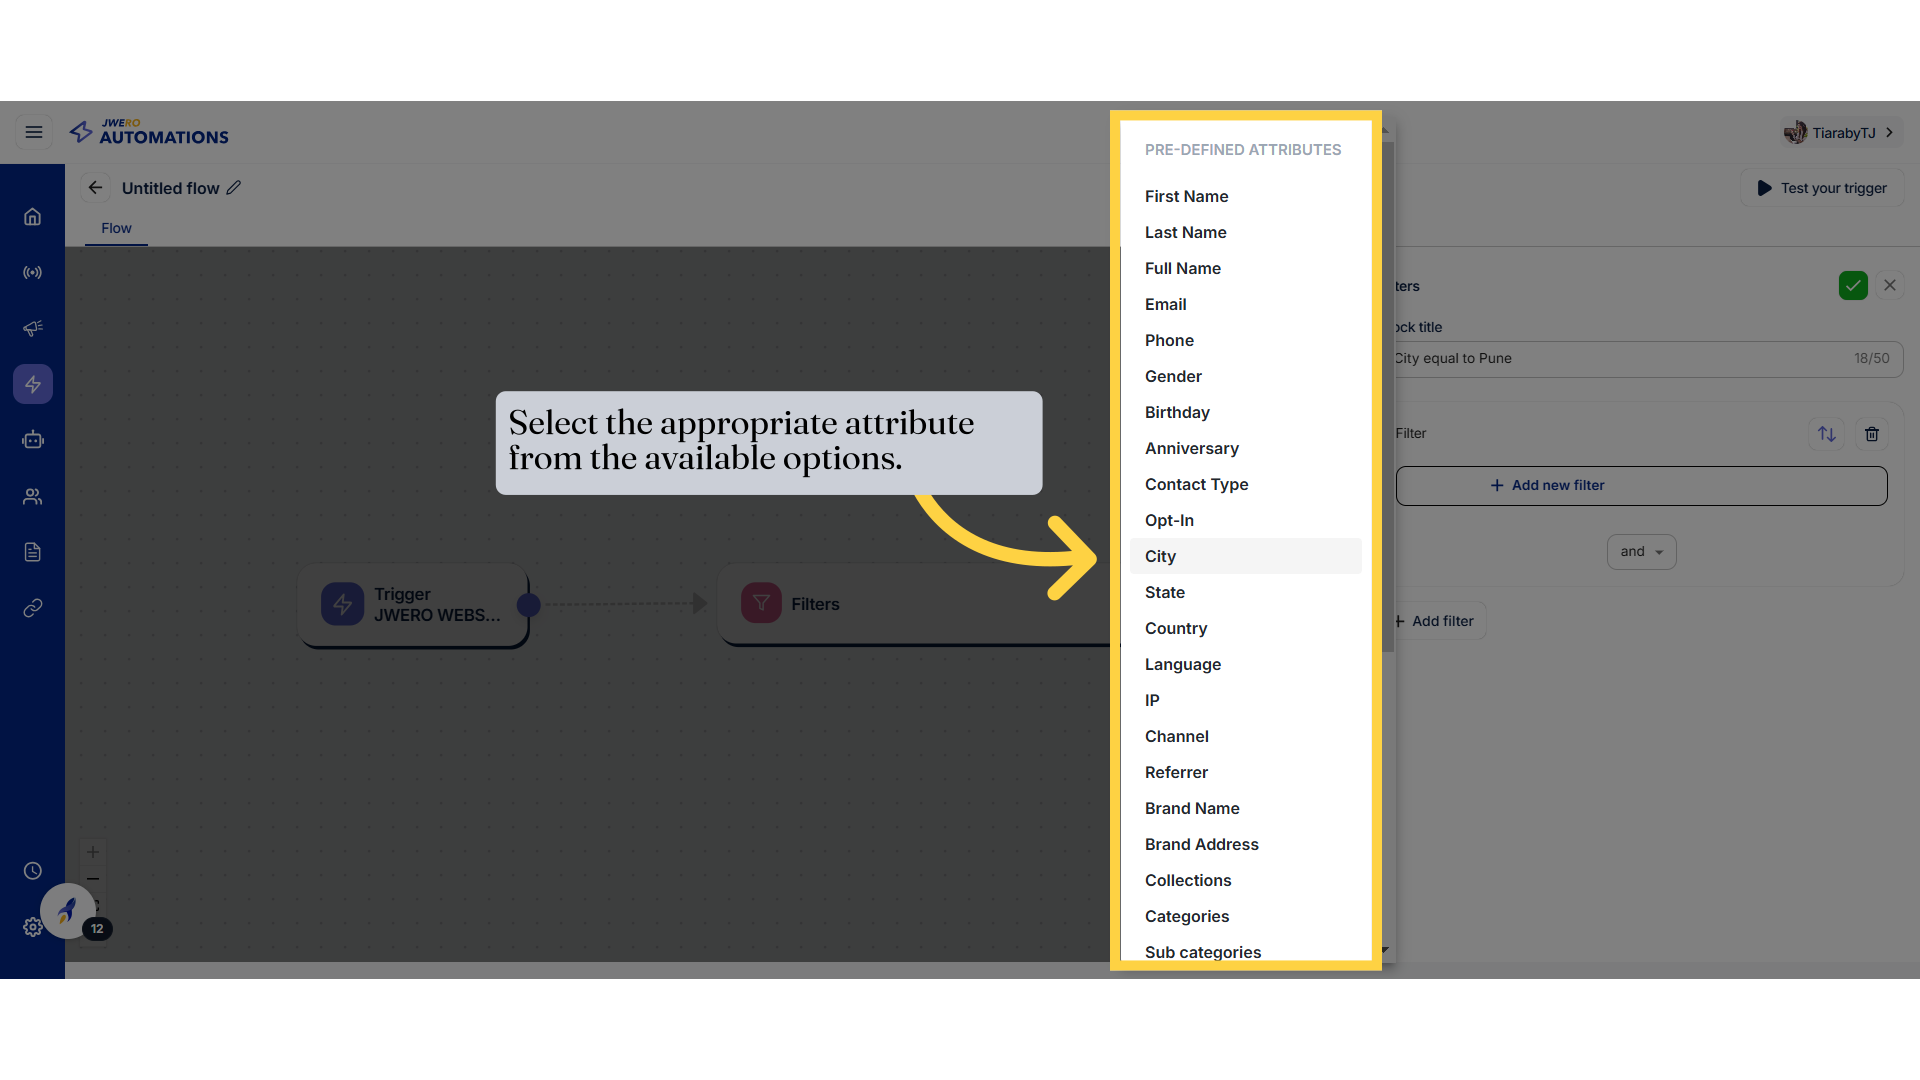
13. I'll selecting "City" for the demonstartion.
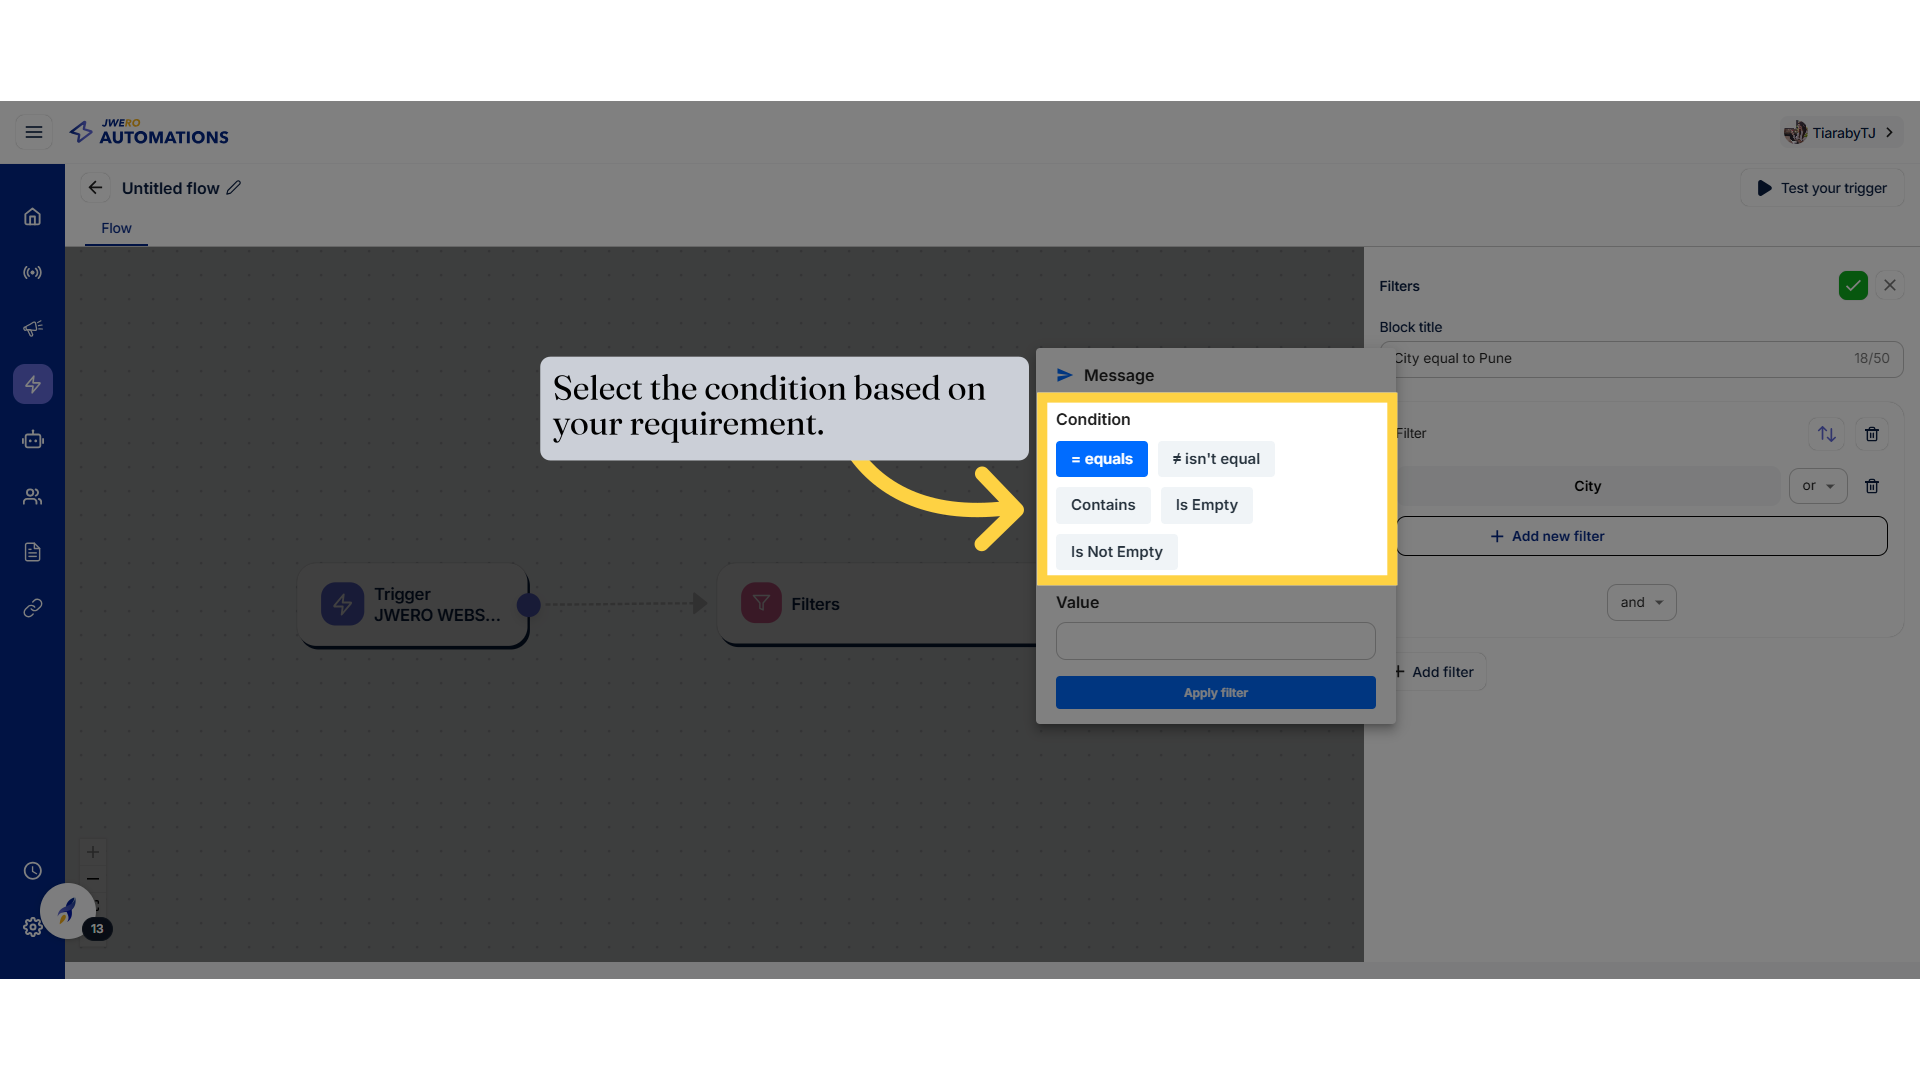
14. Select the condition based on your requirement.
= Equals : Retrieves records where the field exactly matches the given value.
Example : City Equals Pune
≠ Isn't Equal : Retrieves records where the field does NOT match the given value.
Example : City Isn't Equal to Pune
Contains : Retrieves records where the field includes the given value as part of the text.
Example : City Contains "Pune"
Is Empty : Retrieves records where the field has no value or is completely blank.
Example : City Is Empty
Is Not Empty : Retrieves records where the field has any value (not blank or null).
Example : City Is Not Empty
15. Filter Value

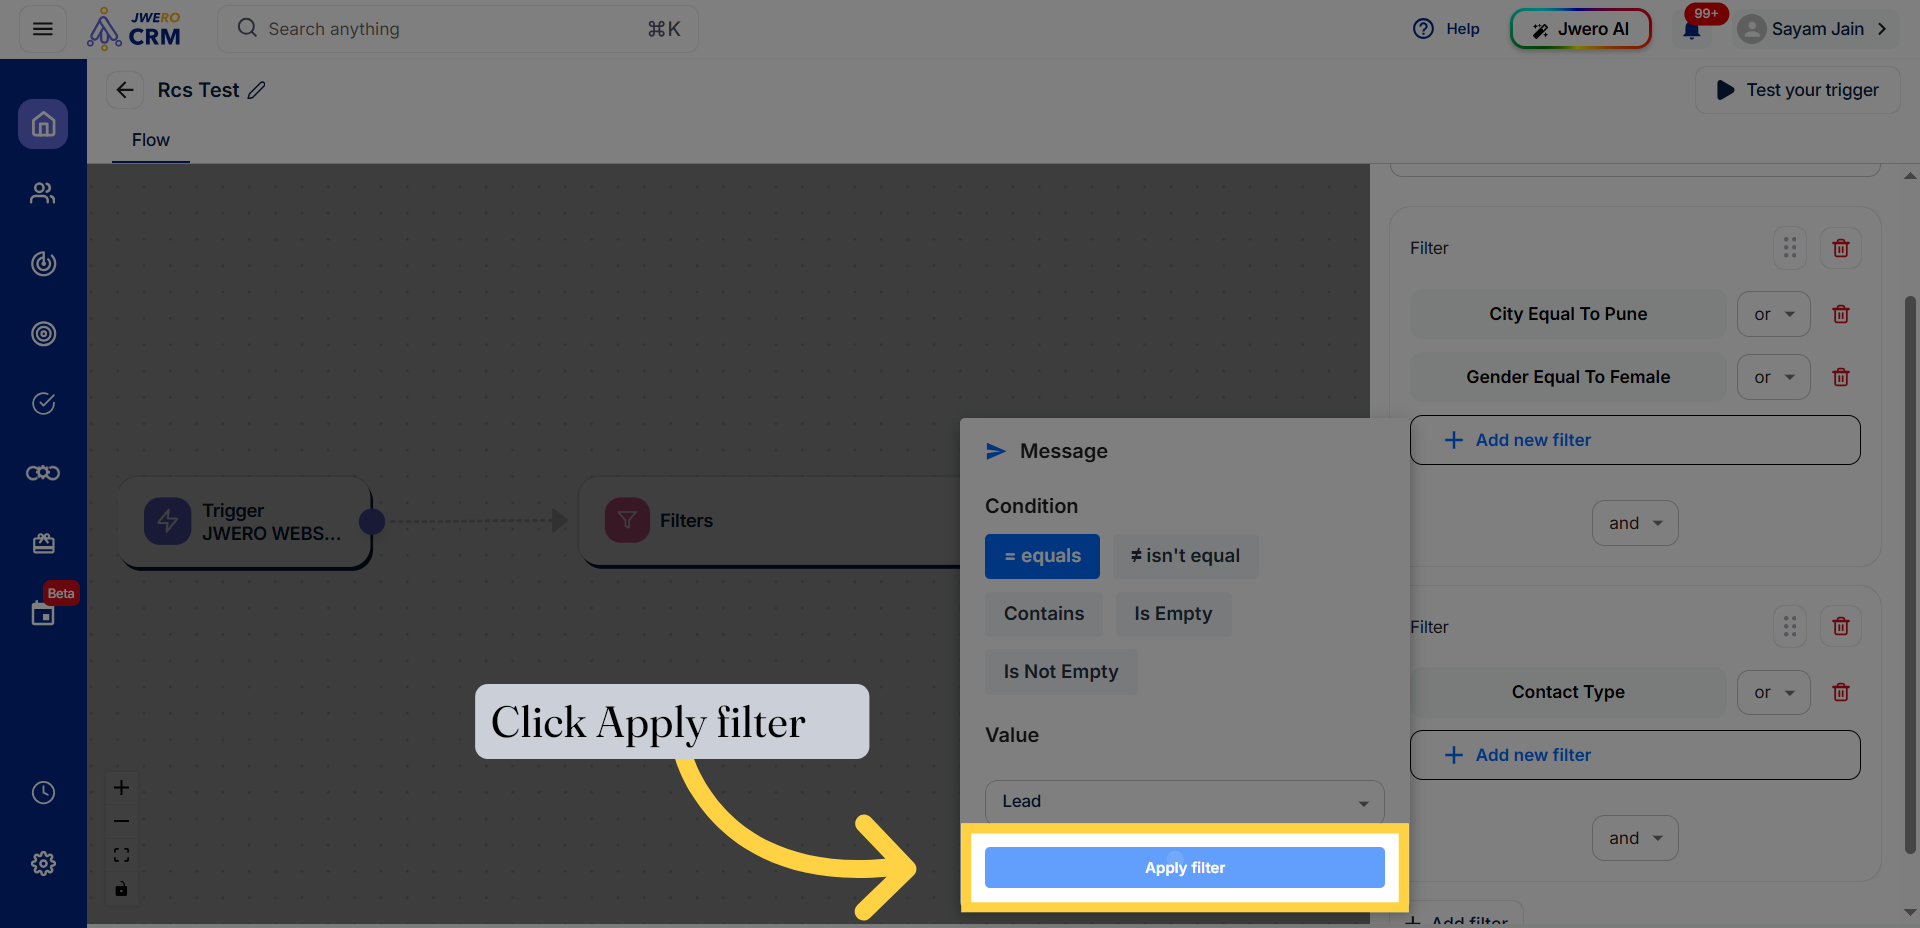
16. Click on "Apply Filter"

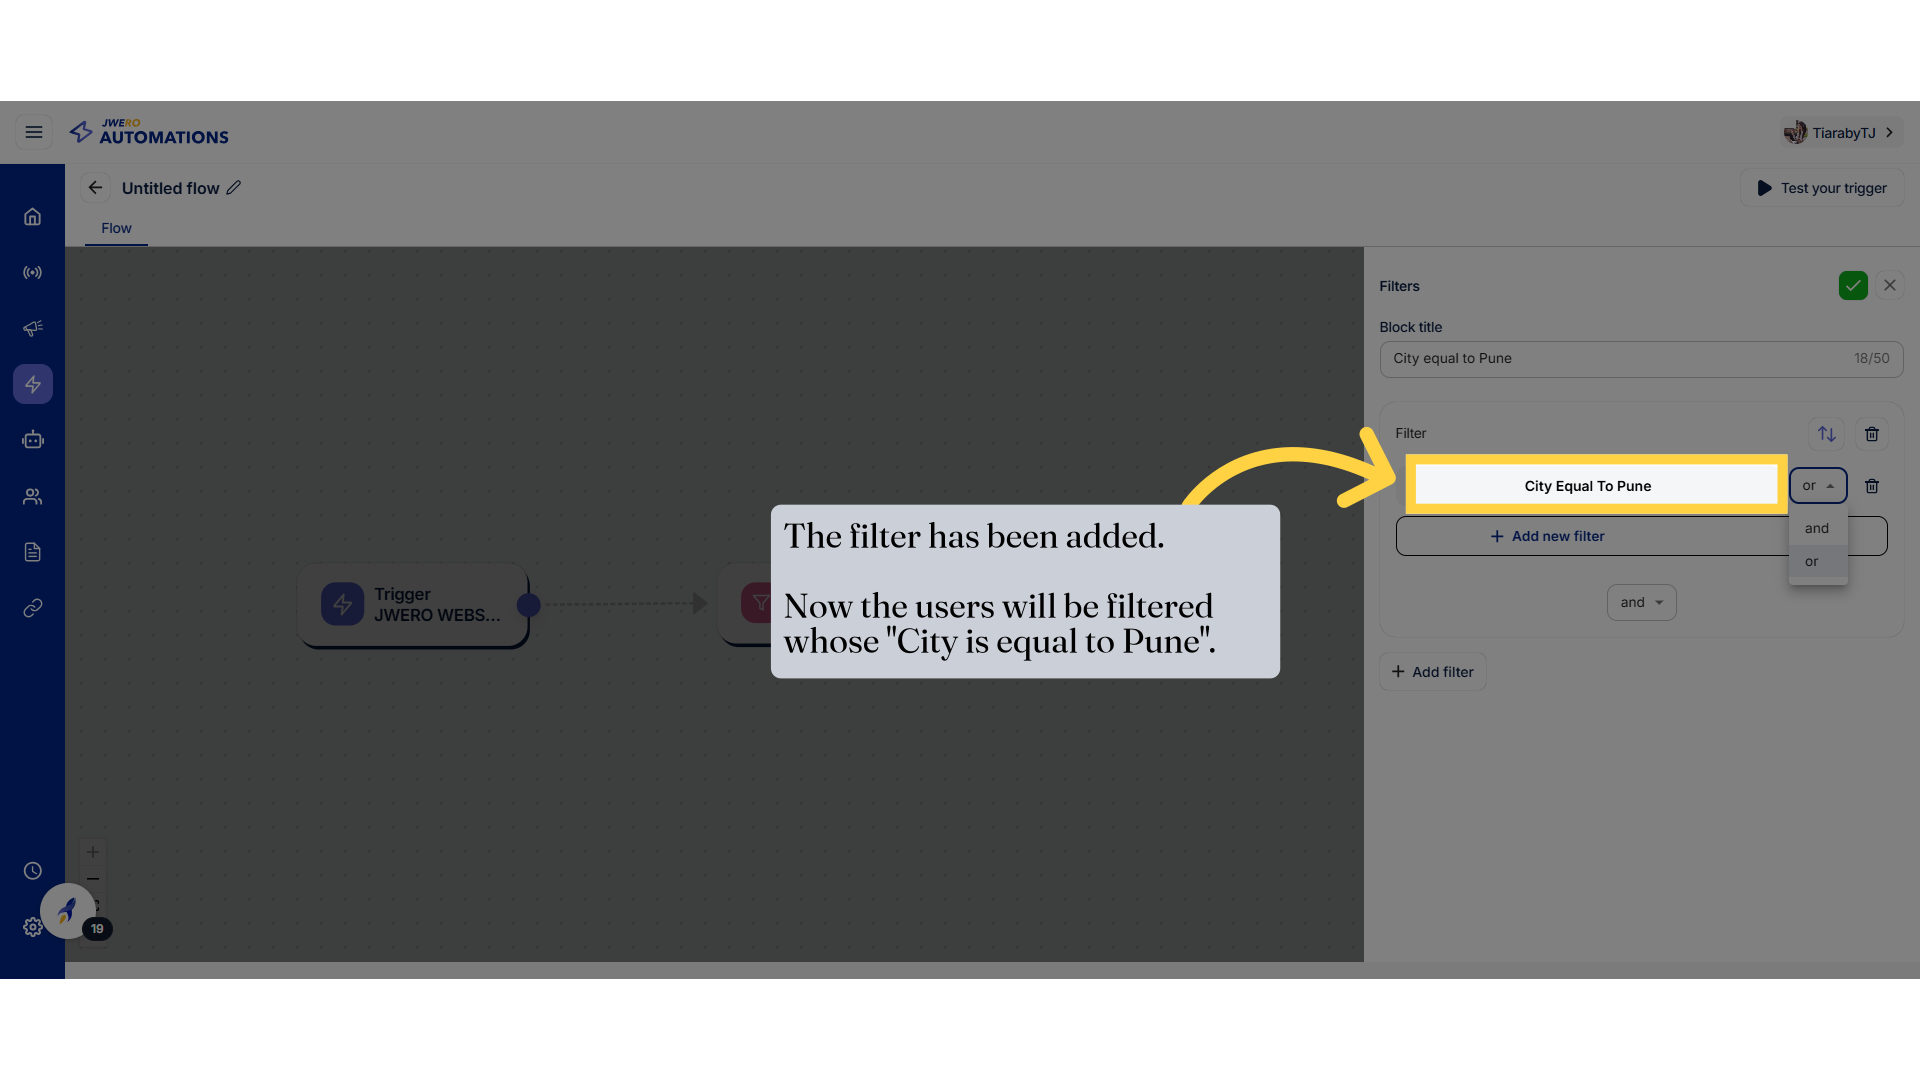
17. The filter has been added.
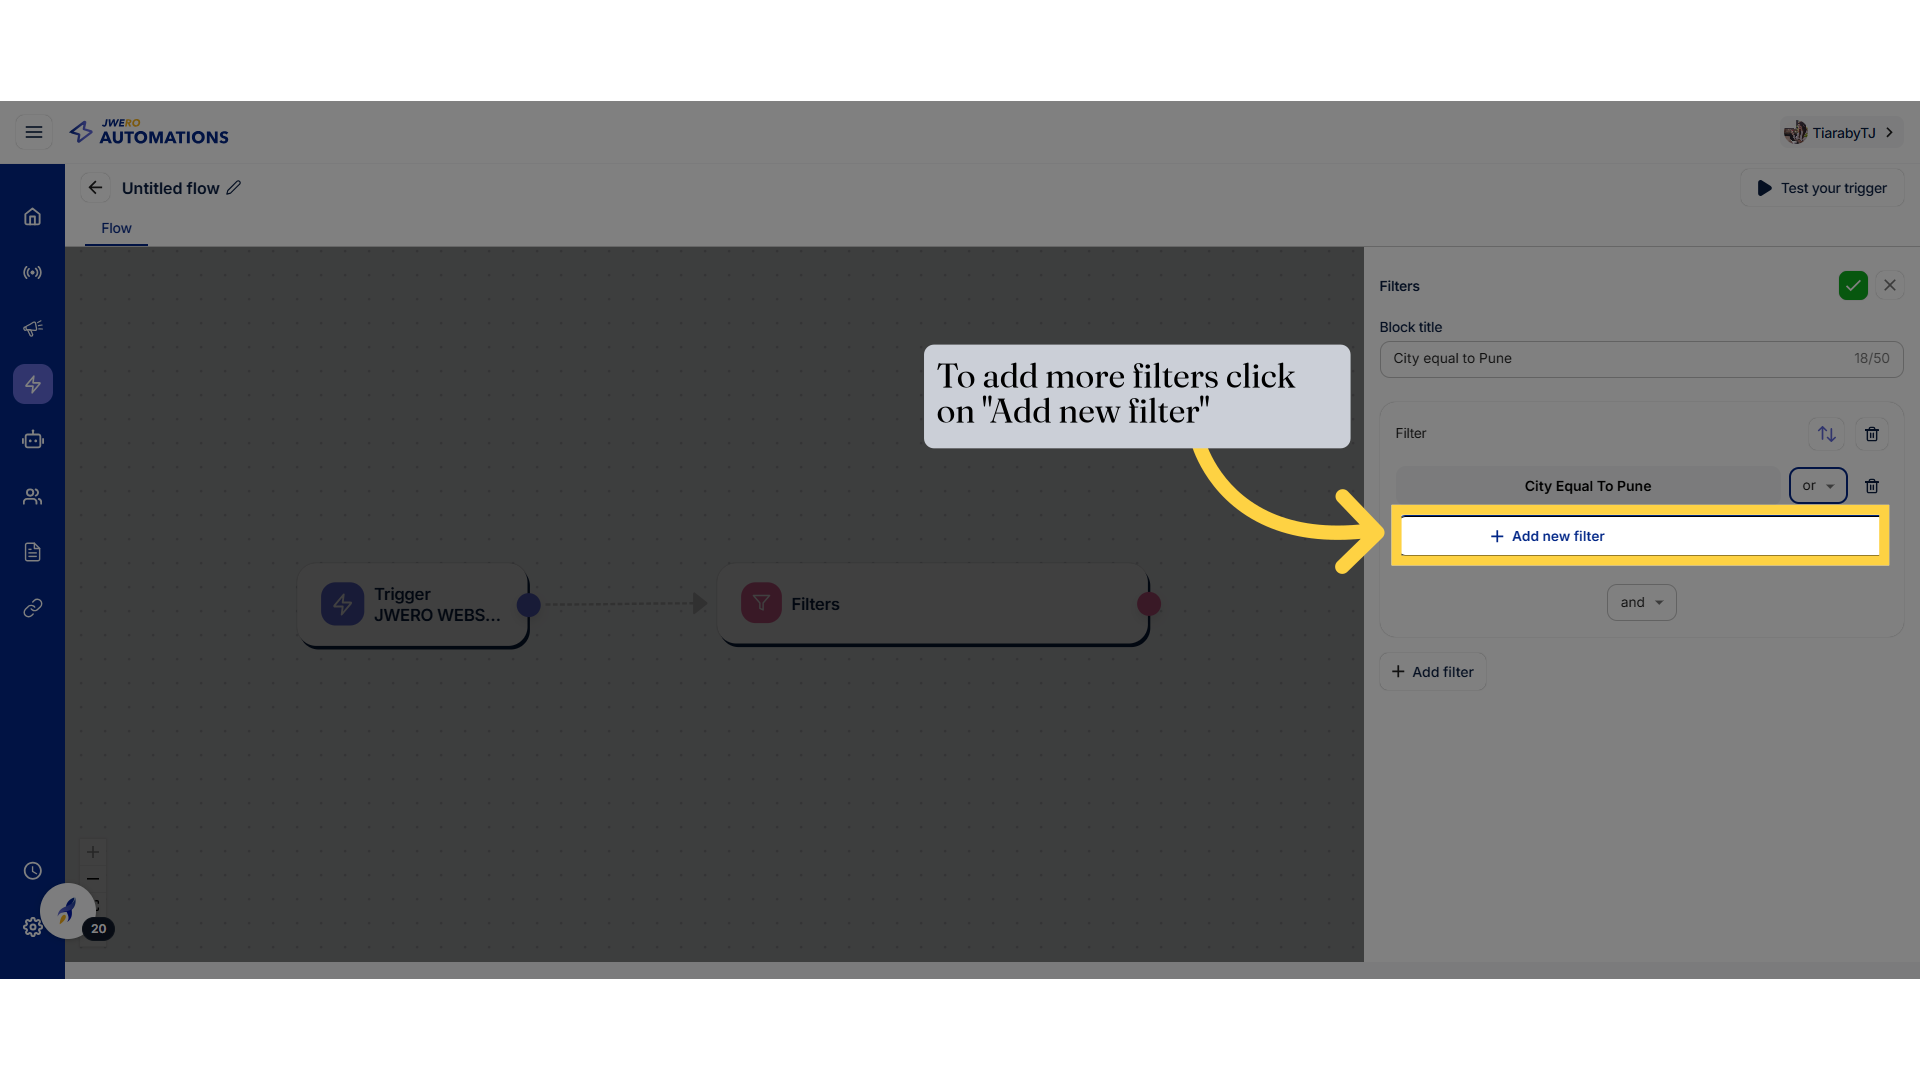
18. To add more filters click on "Add new filter"
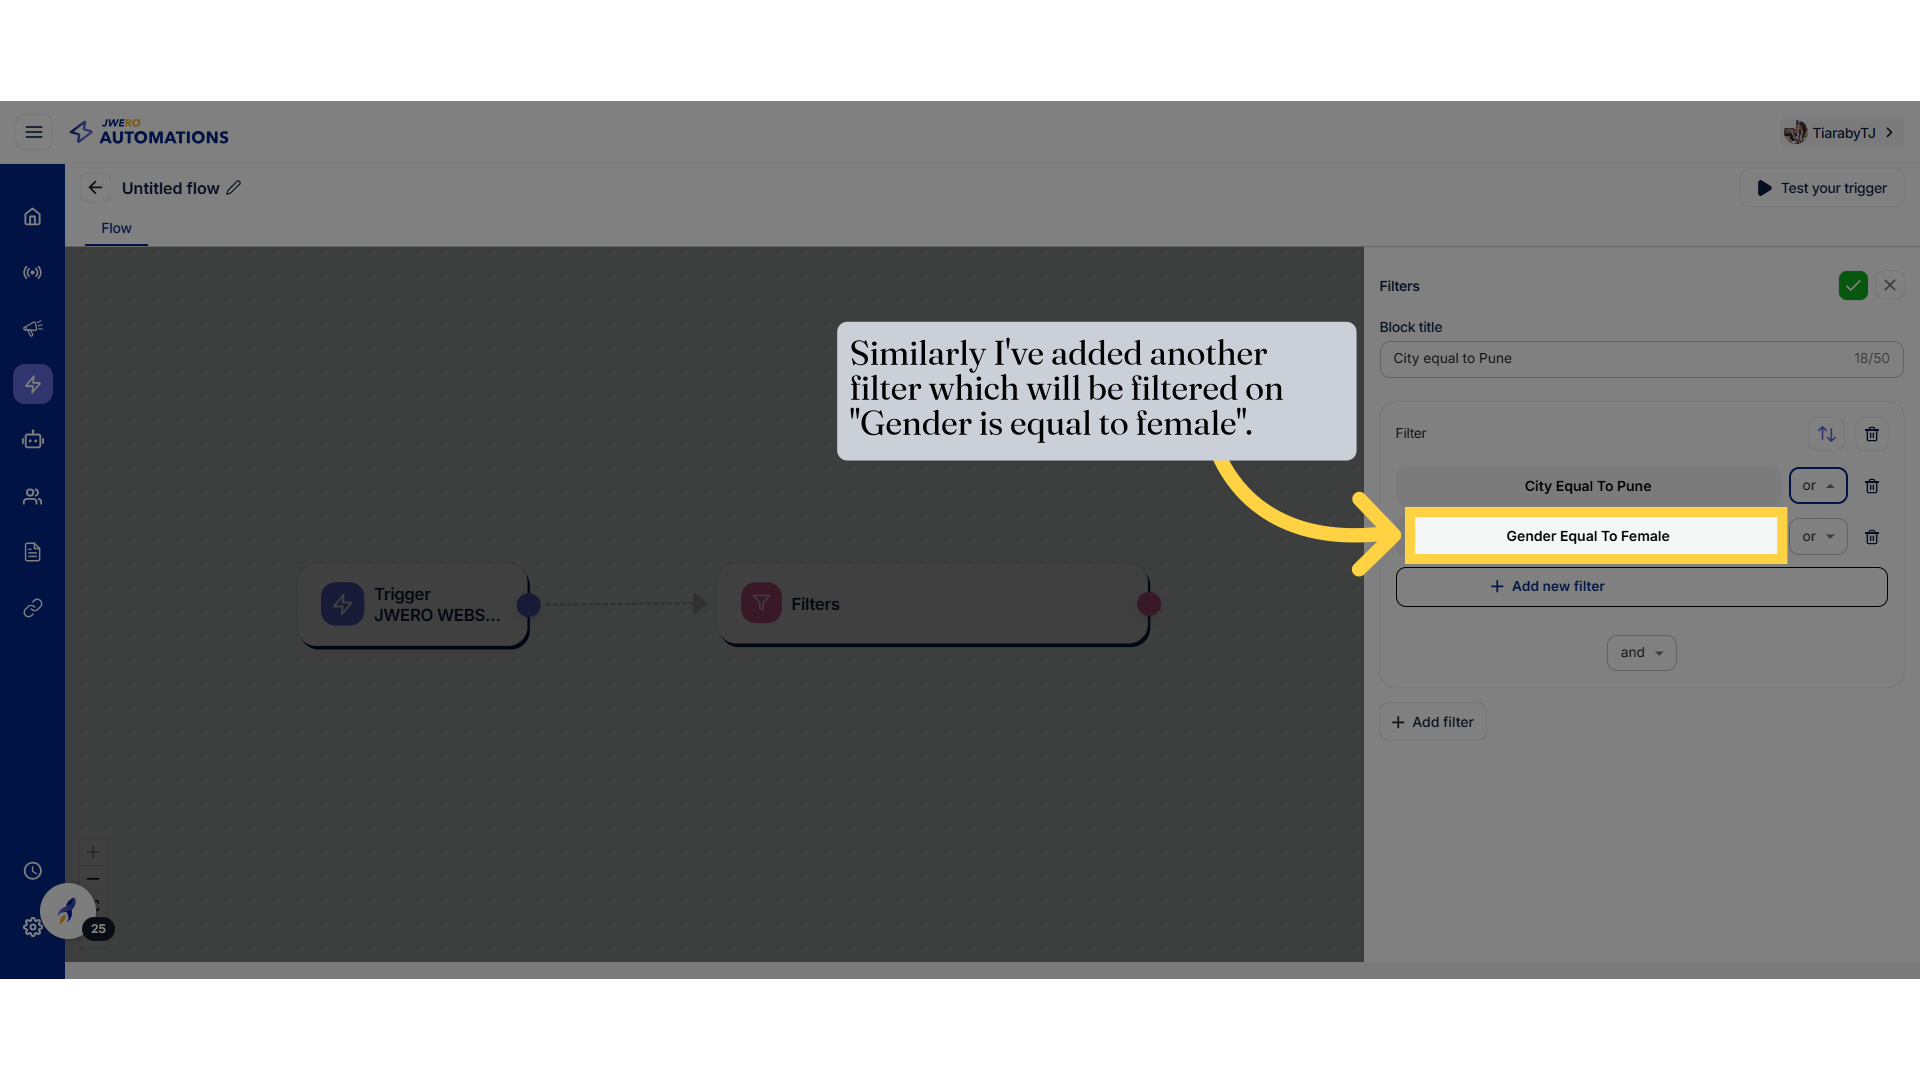
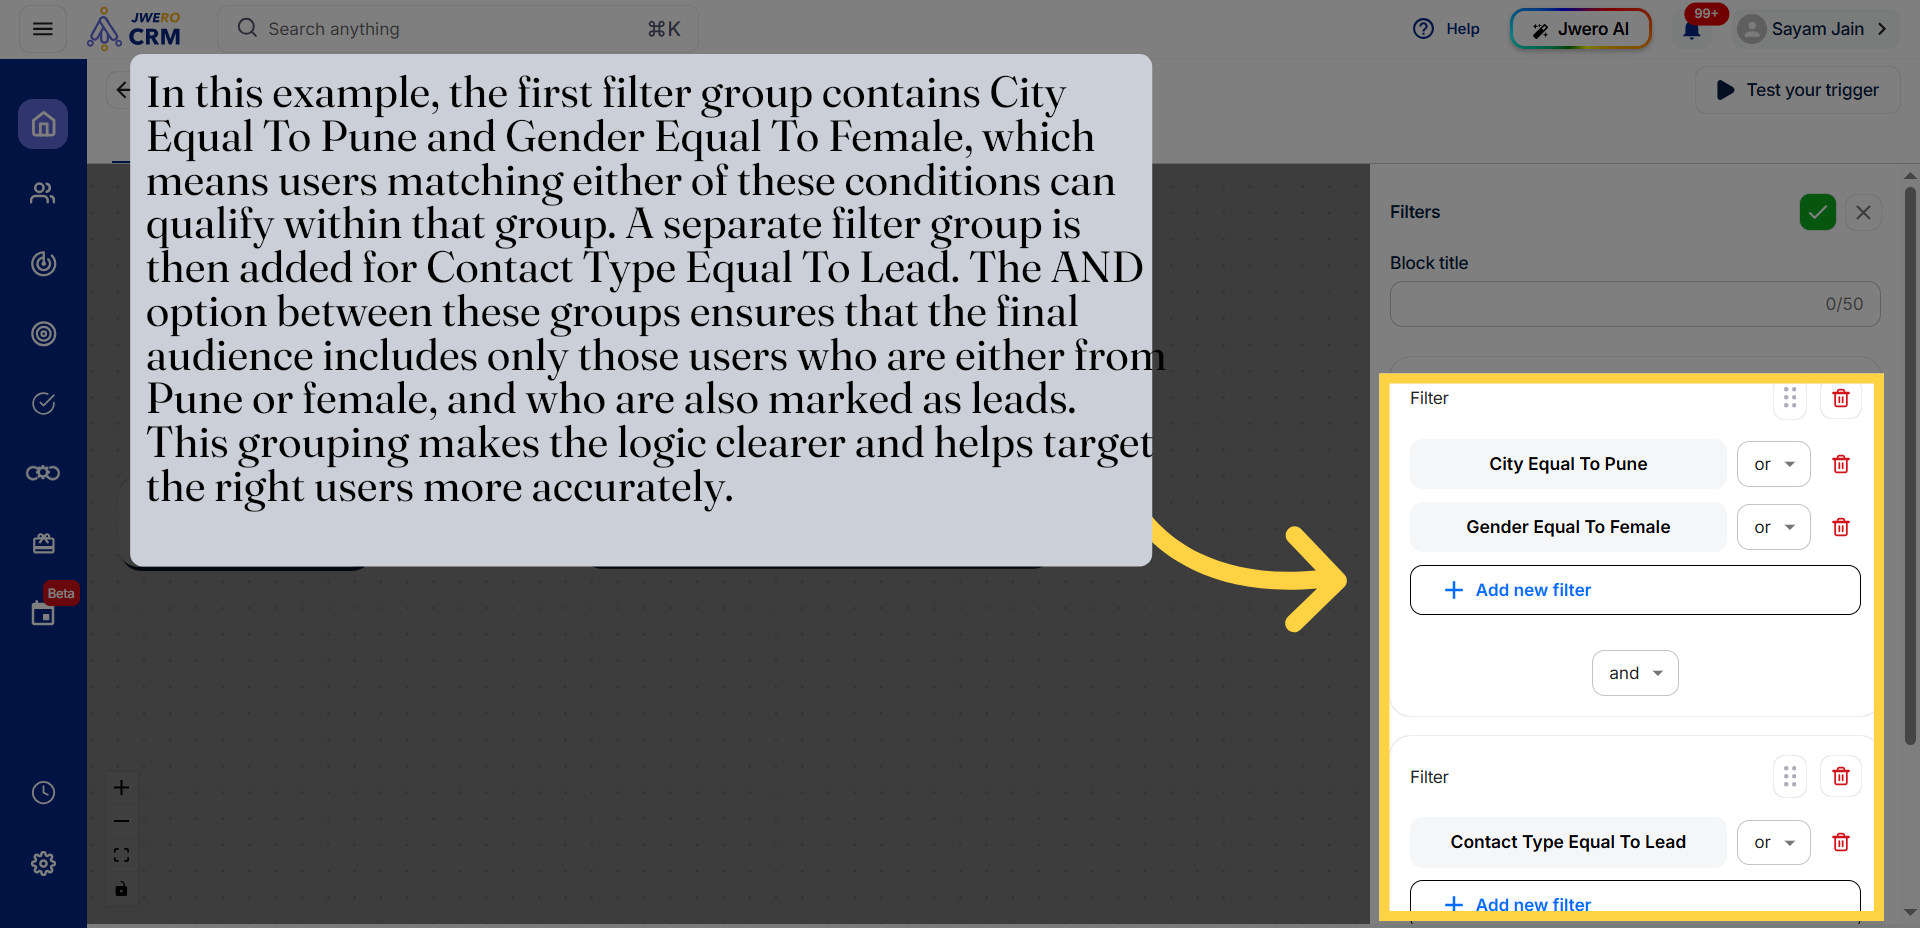
19. Similarly I've added another filter which will be filtered on "Gender is equal to female".
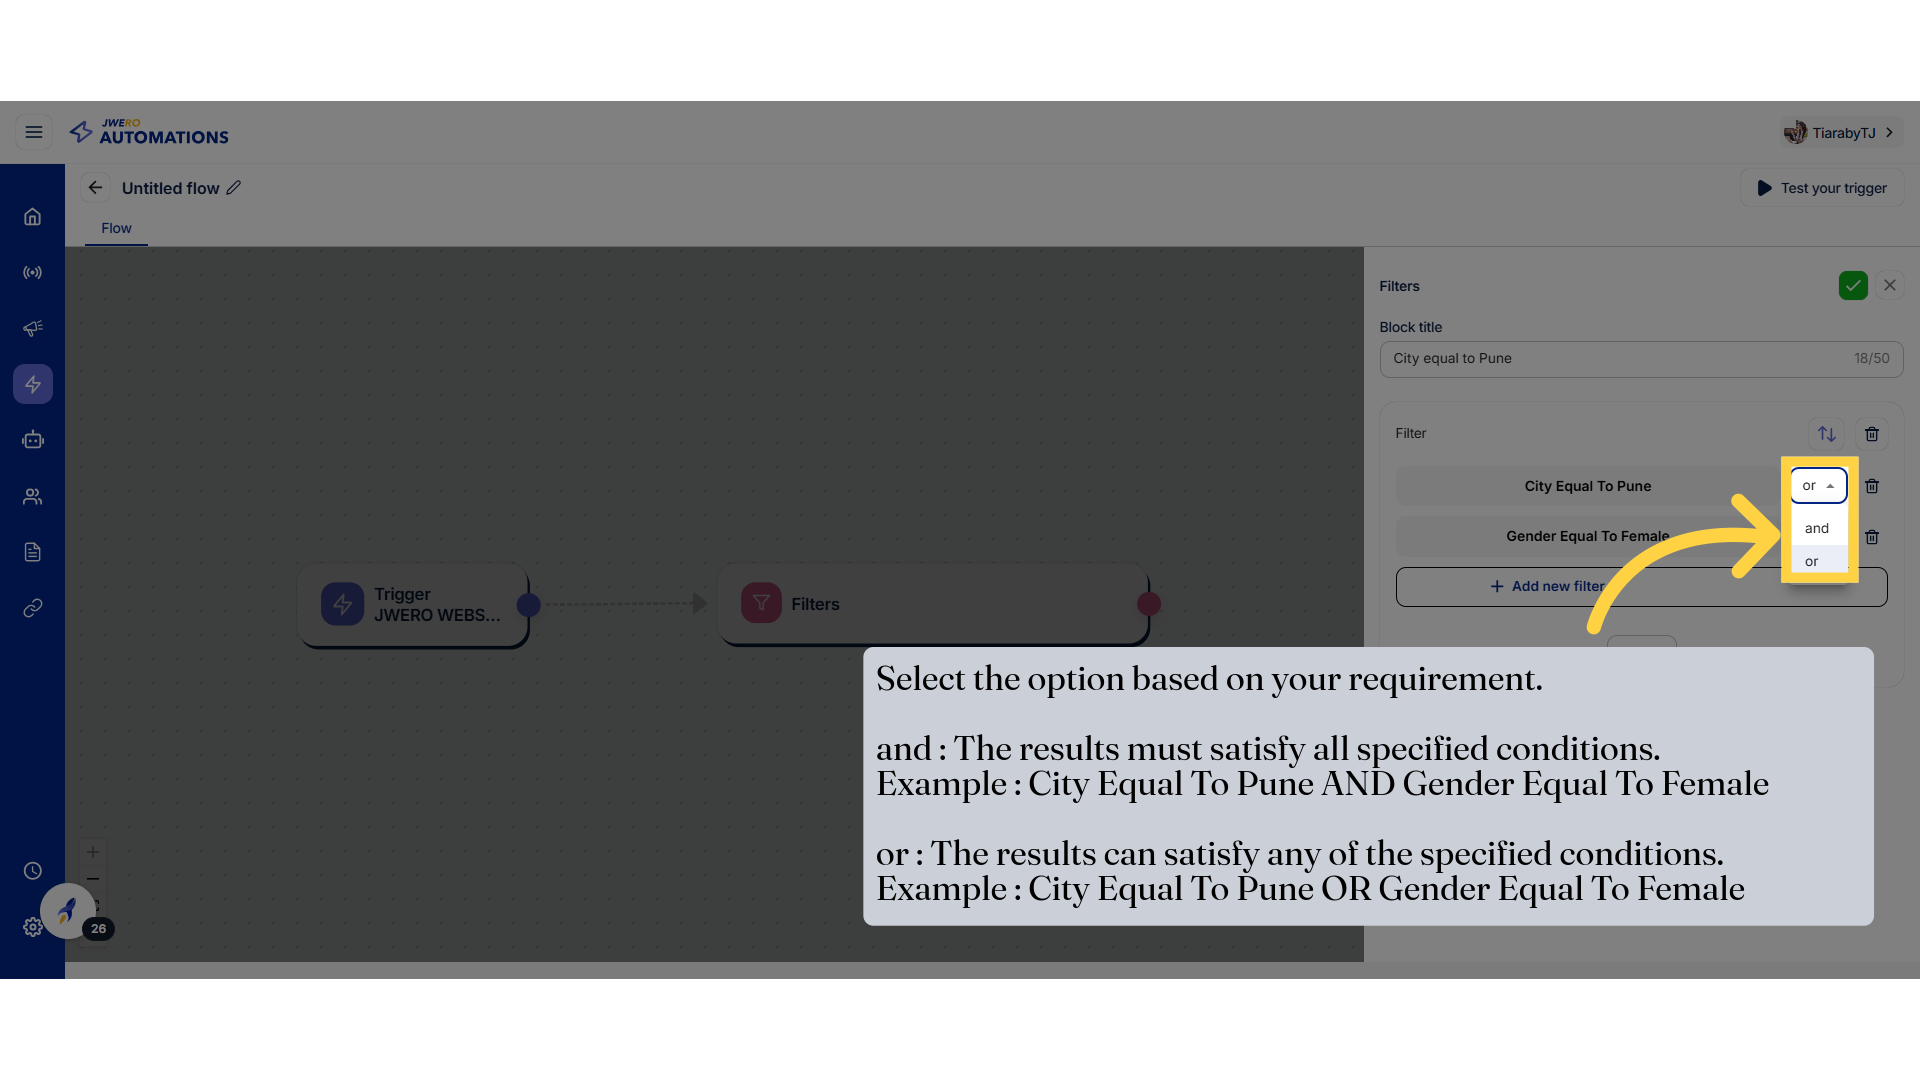
20. Select the option based on your requirement
and : The results must satisfy all specified conditions.
Example : City Equal To Pune AND Gender Equal To Female
or : The results can satisfy any of the specified conditions.
Example : City Equal To Pune OR Gender Equal To Female
21. If You Want You Can Add More Conditions
-
Defines relationship between groups
The AND / OR option decides how different filter groups work together. -
AND (All conditions must match)
Select AND when you want users to meet every filter group. -
OR (Any one condition can match)
Select OR when matching any one filter group is enough. -
Why separate AND / OR is given
It allows you to control logic between different groups of filters, not just individual conditions. -
Helps in better targeting
Makes your automation more accurate by clearly defining how filters should combine.
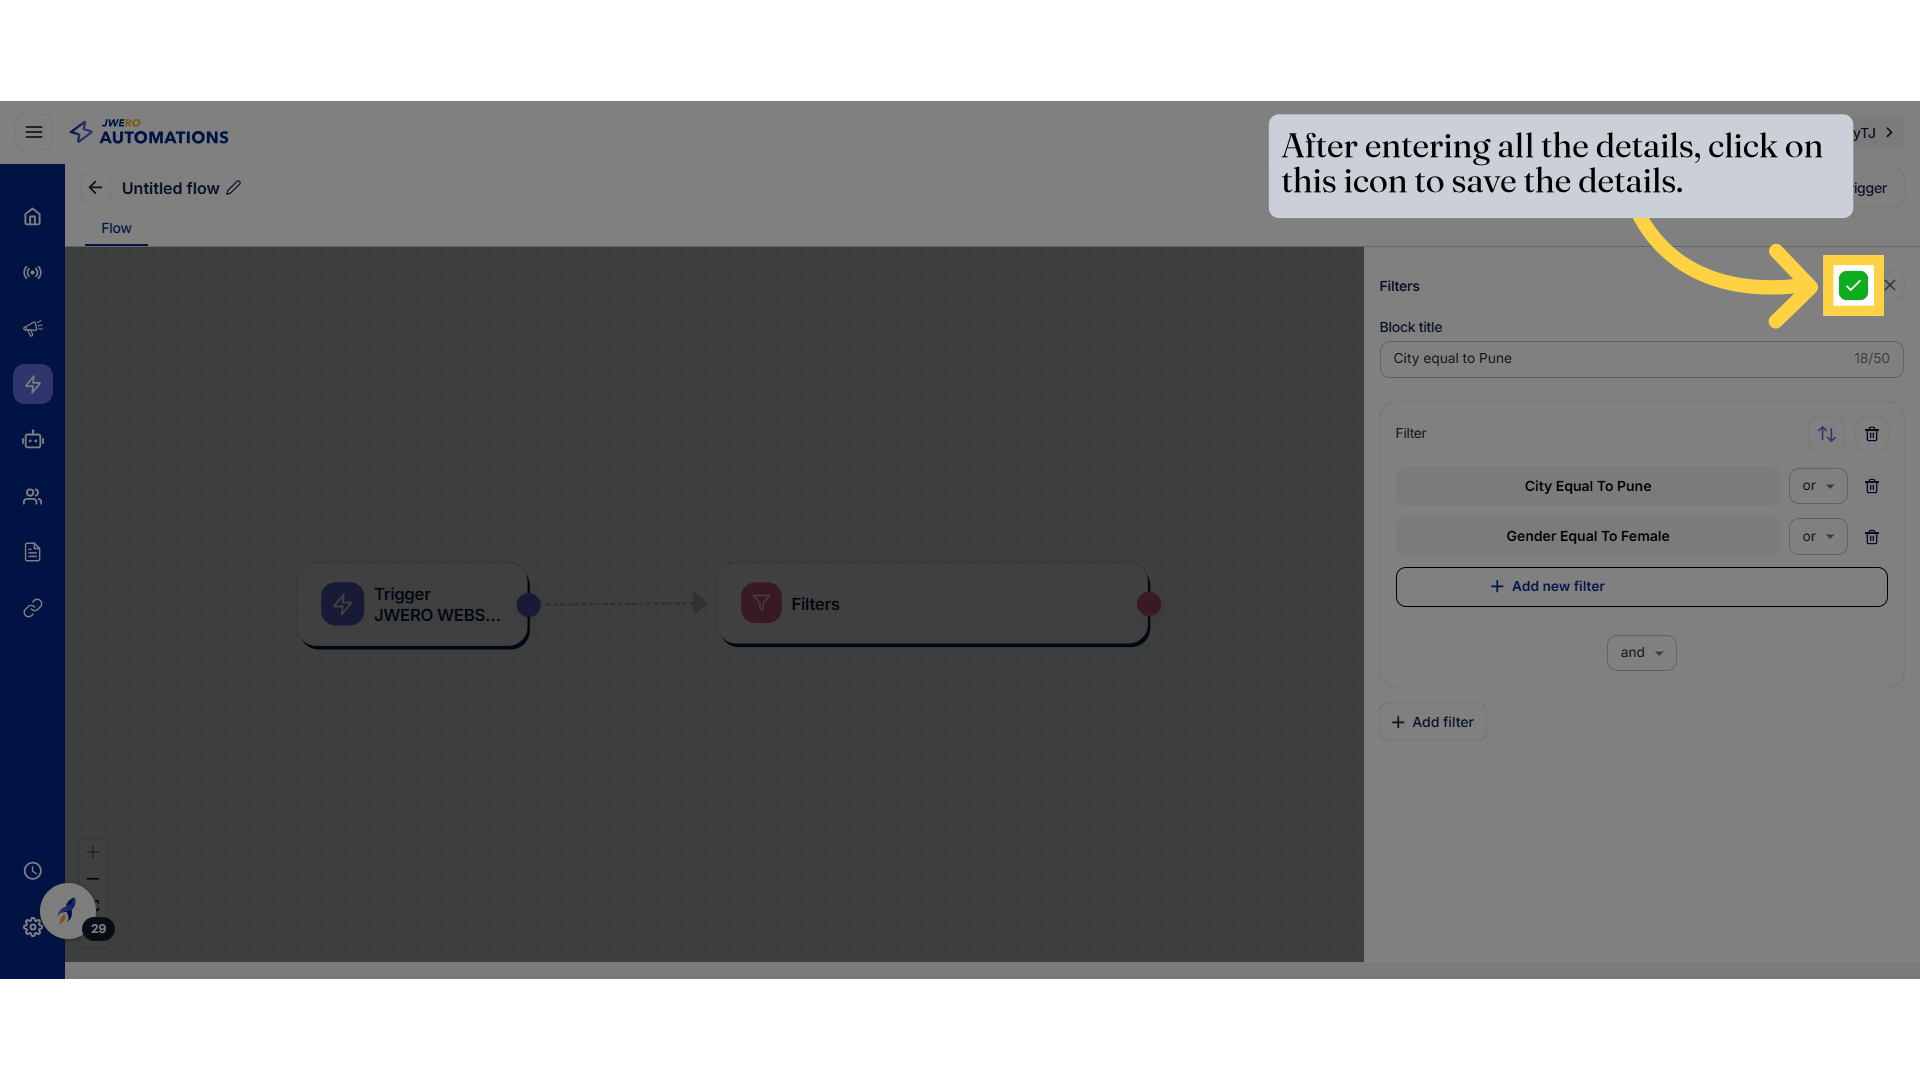
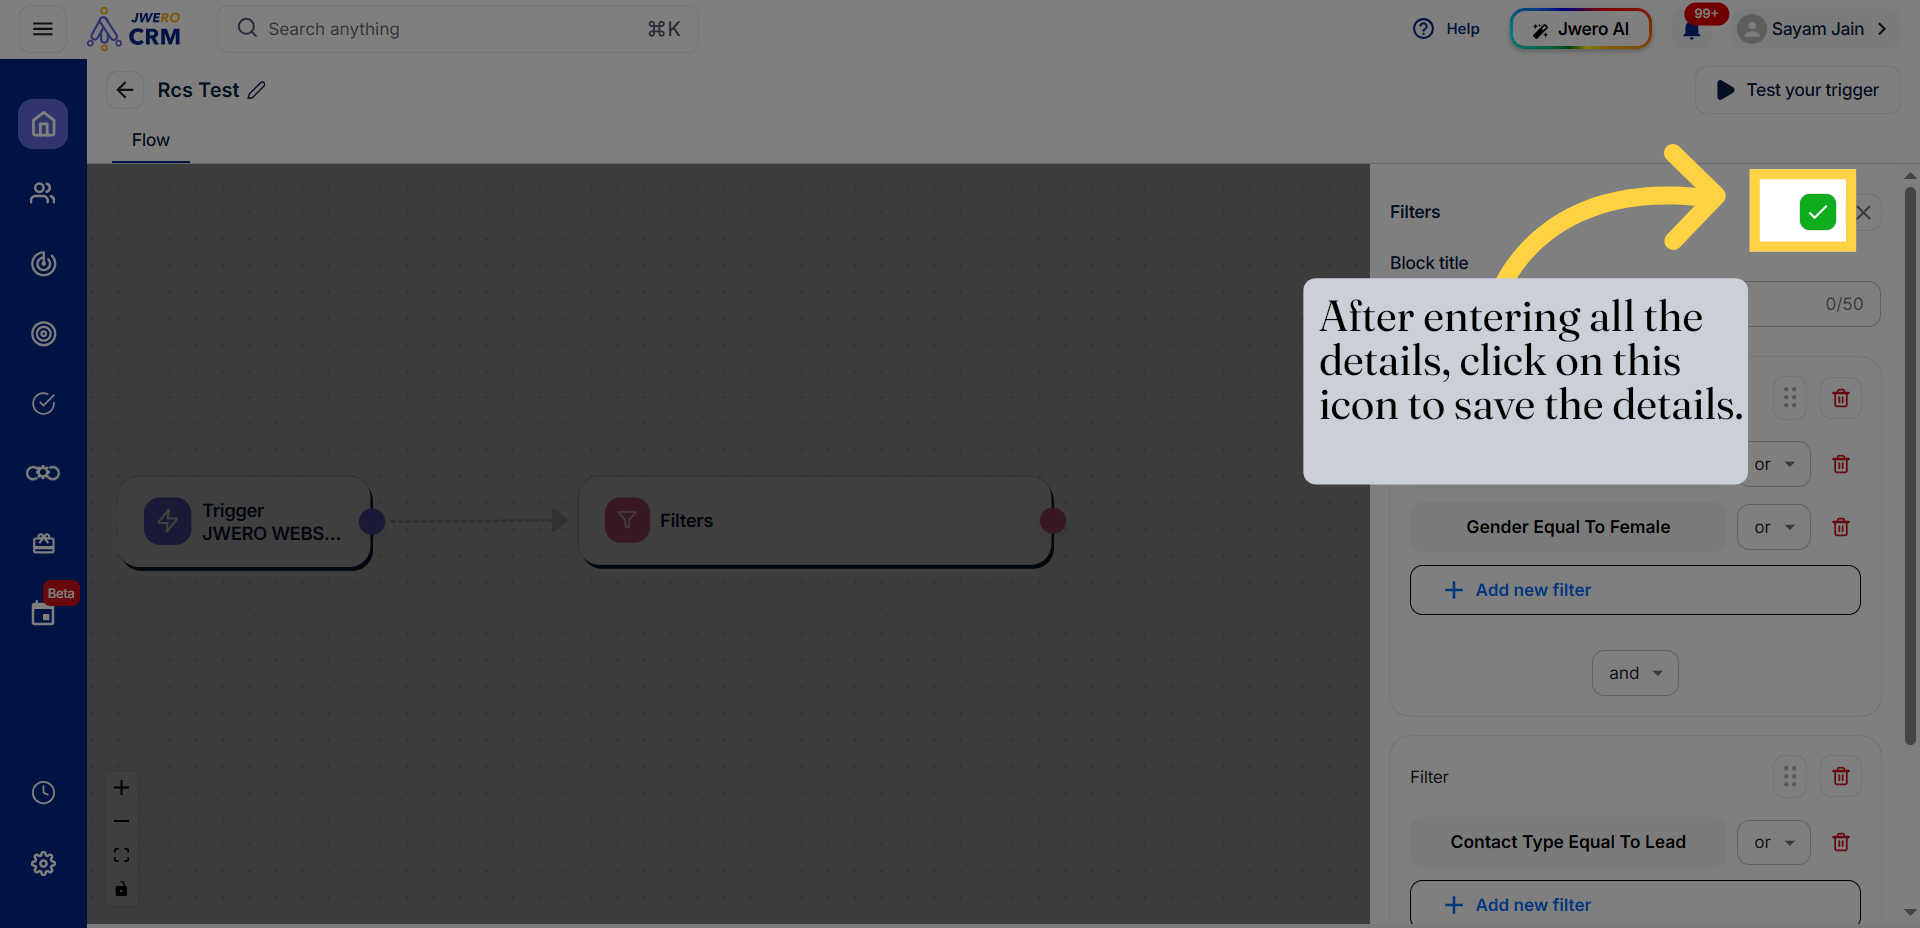
22. After entering all the details, click on this icon to save the details.
-
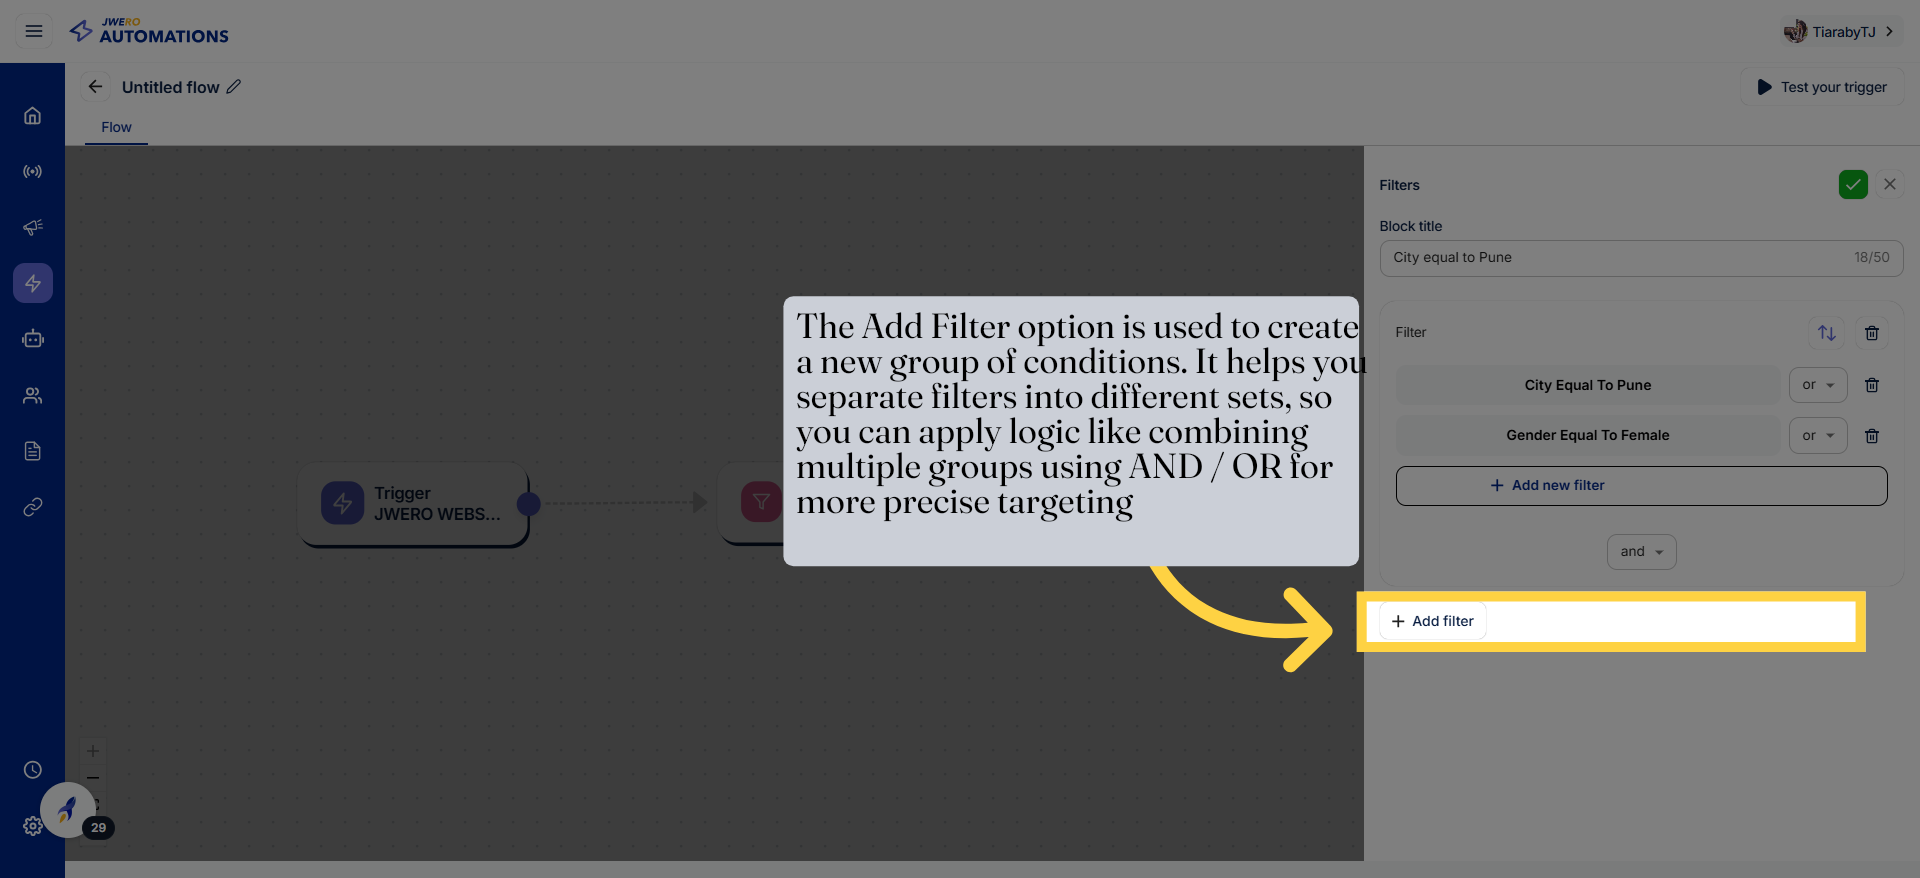
Creates a new filter group
The Add Filter option lets you create a separate set of conditions. -
Separates conditions clearly
Helps organize filters into different groups instead of mixing everything together. -
Works with AND / OR logic
Each group can be combined using AND / OR for better control. -
Improves targeting accuracy
Allows more precise filtering by structuring conditions properly.
23. Select Contact Type Filter
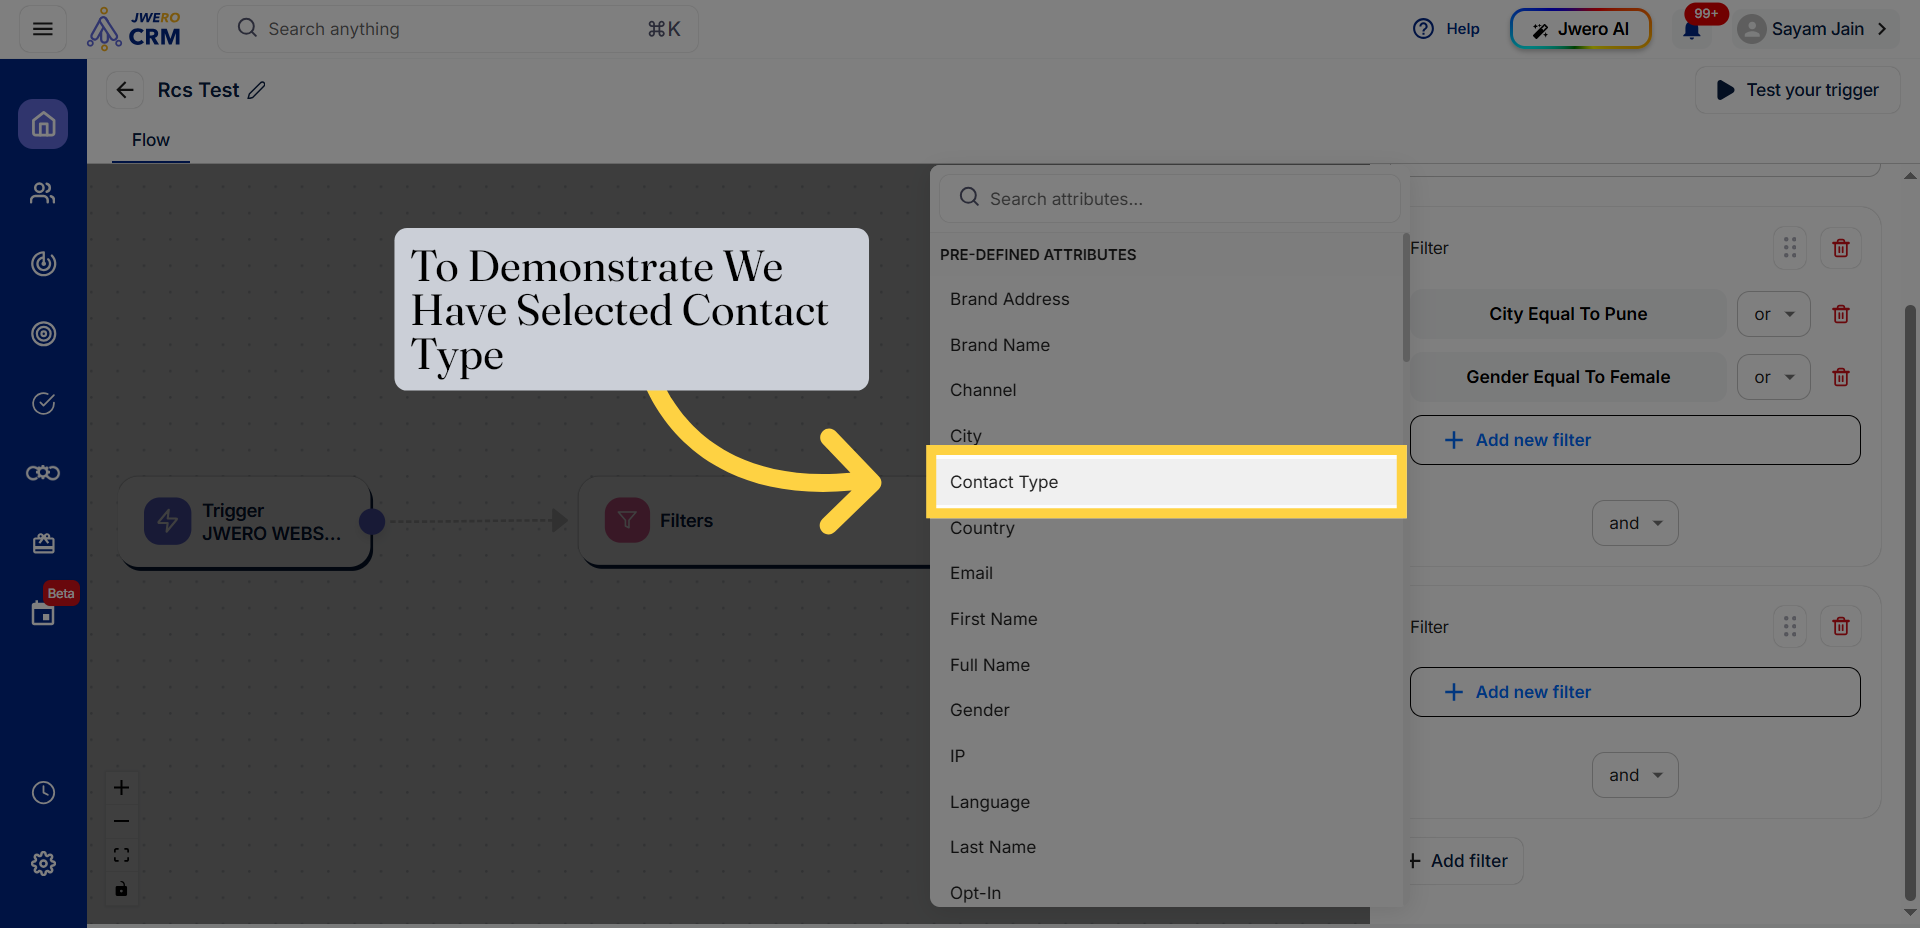
24. Open Contact Type Options

25. Choose Lead Contact Type
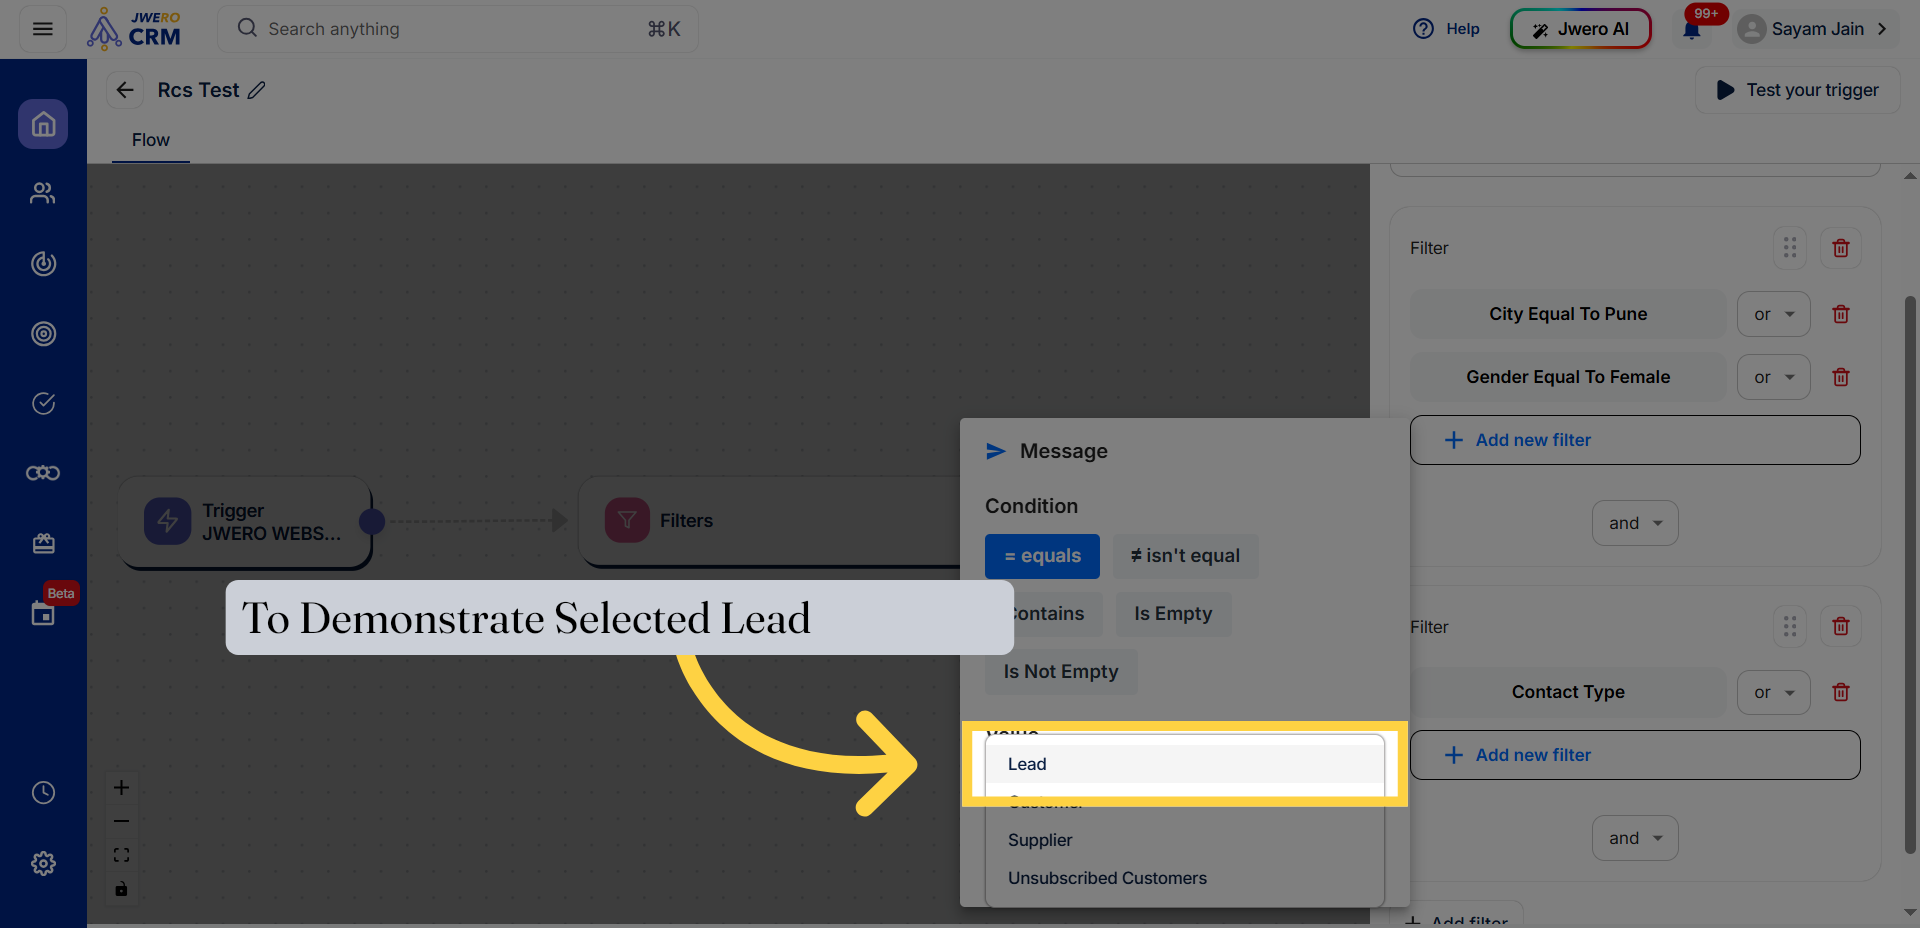
26. Apply Configured Filter
27. Access Filtered Contacts
• Single group condition:
City = Pune OR Gender = Female AND Contact Type = Lead
• How system reads it:
City = Pune OR (Gender = Female AND Contact Type = Lead)
• Why this happens:
AND is checked before OR
• Result:
- All users from Pune
- Or users who are Female + Lead
• Problem:
Pune users may match even if they are not leads
• Better way:
- Group 1: City = Pune OR Gender = Female
- Group 2: Contact Type = Lead
• Final logic:
(City = Pune OR Gender = Female) AND Contact Type = Lead
• Correct result:
28. Save The Configure You Want To Proceed Ahead
29. The filter has been added.

30. You can add the flow further by clicking on the icon.

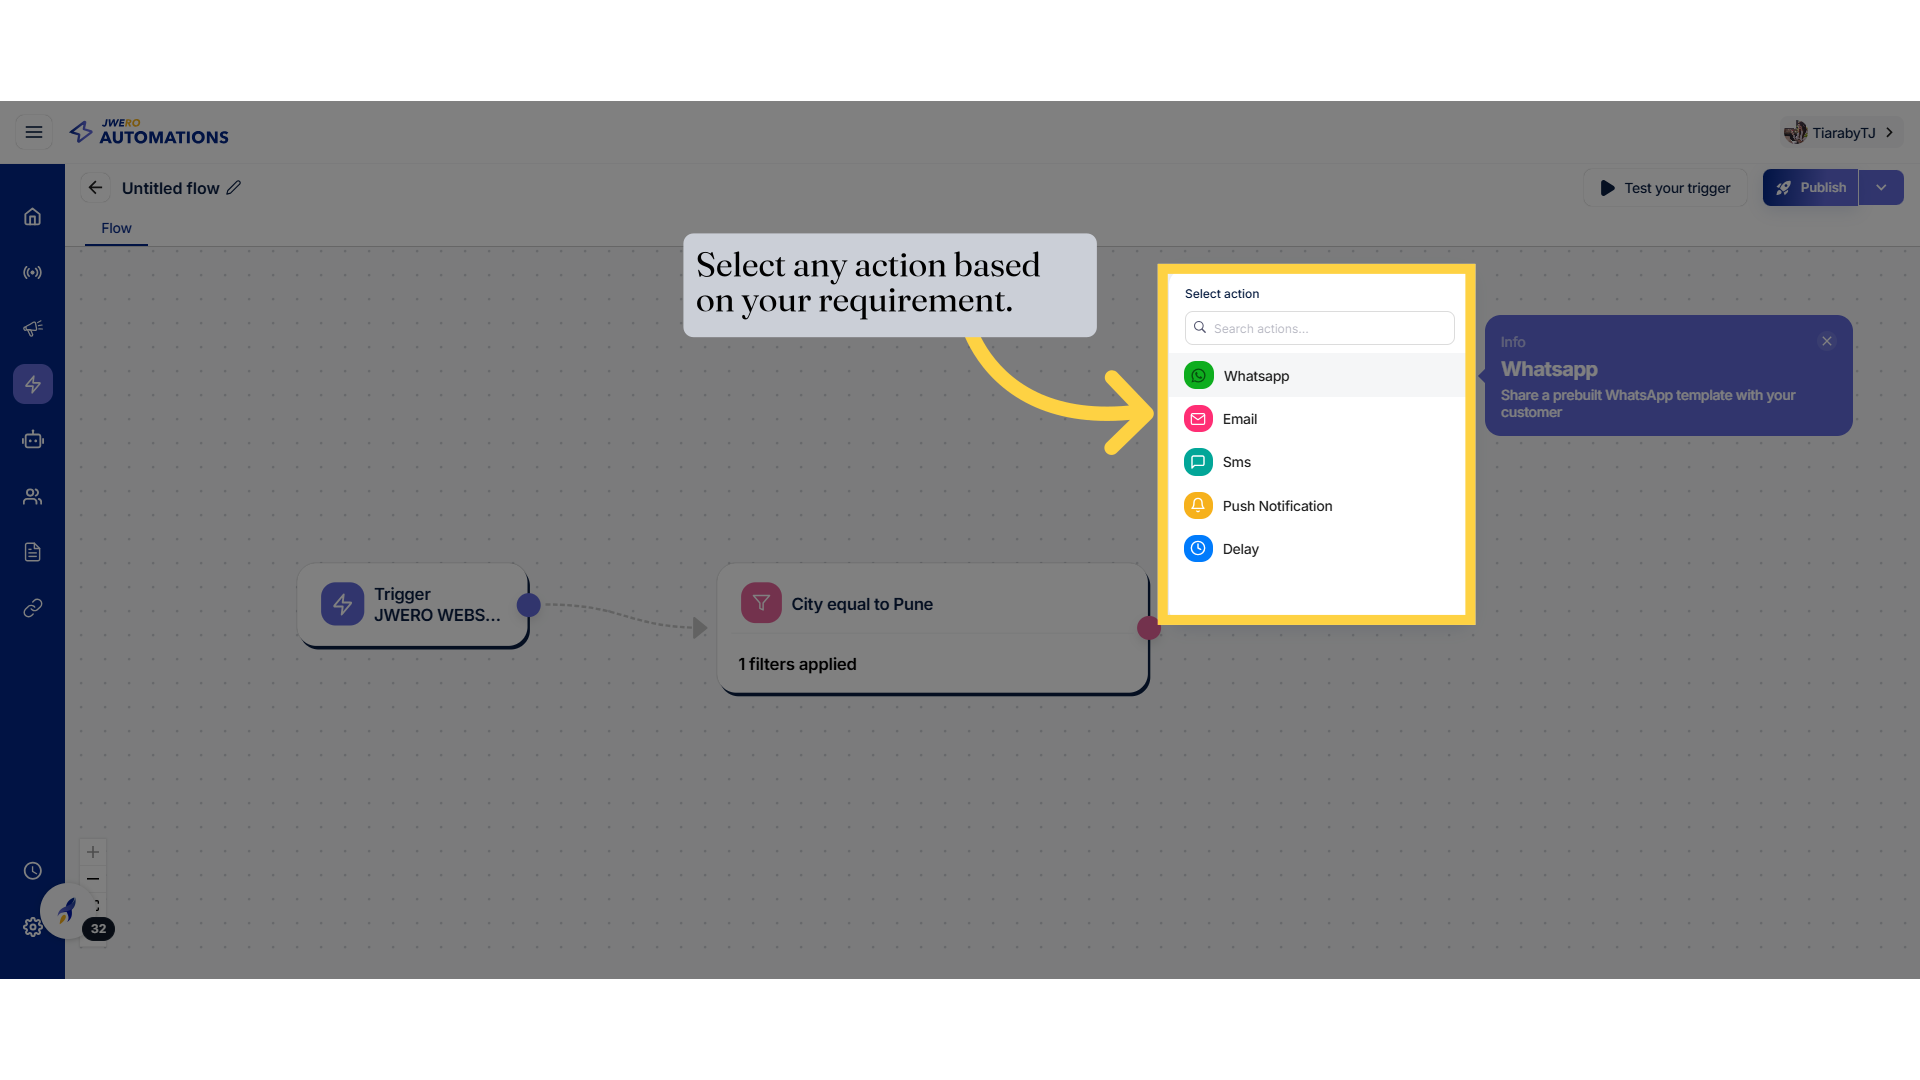
31. Select any action based on your requirement.
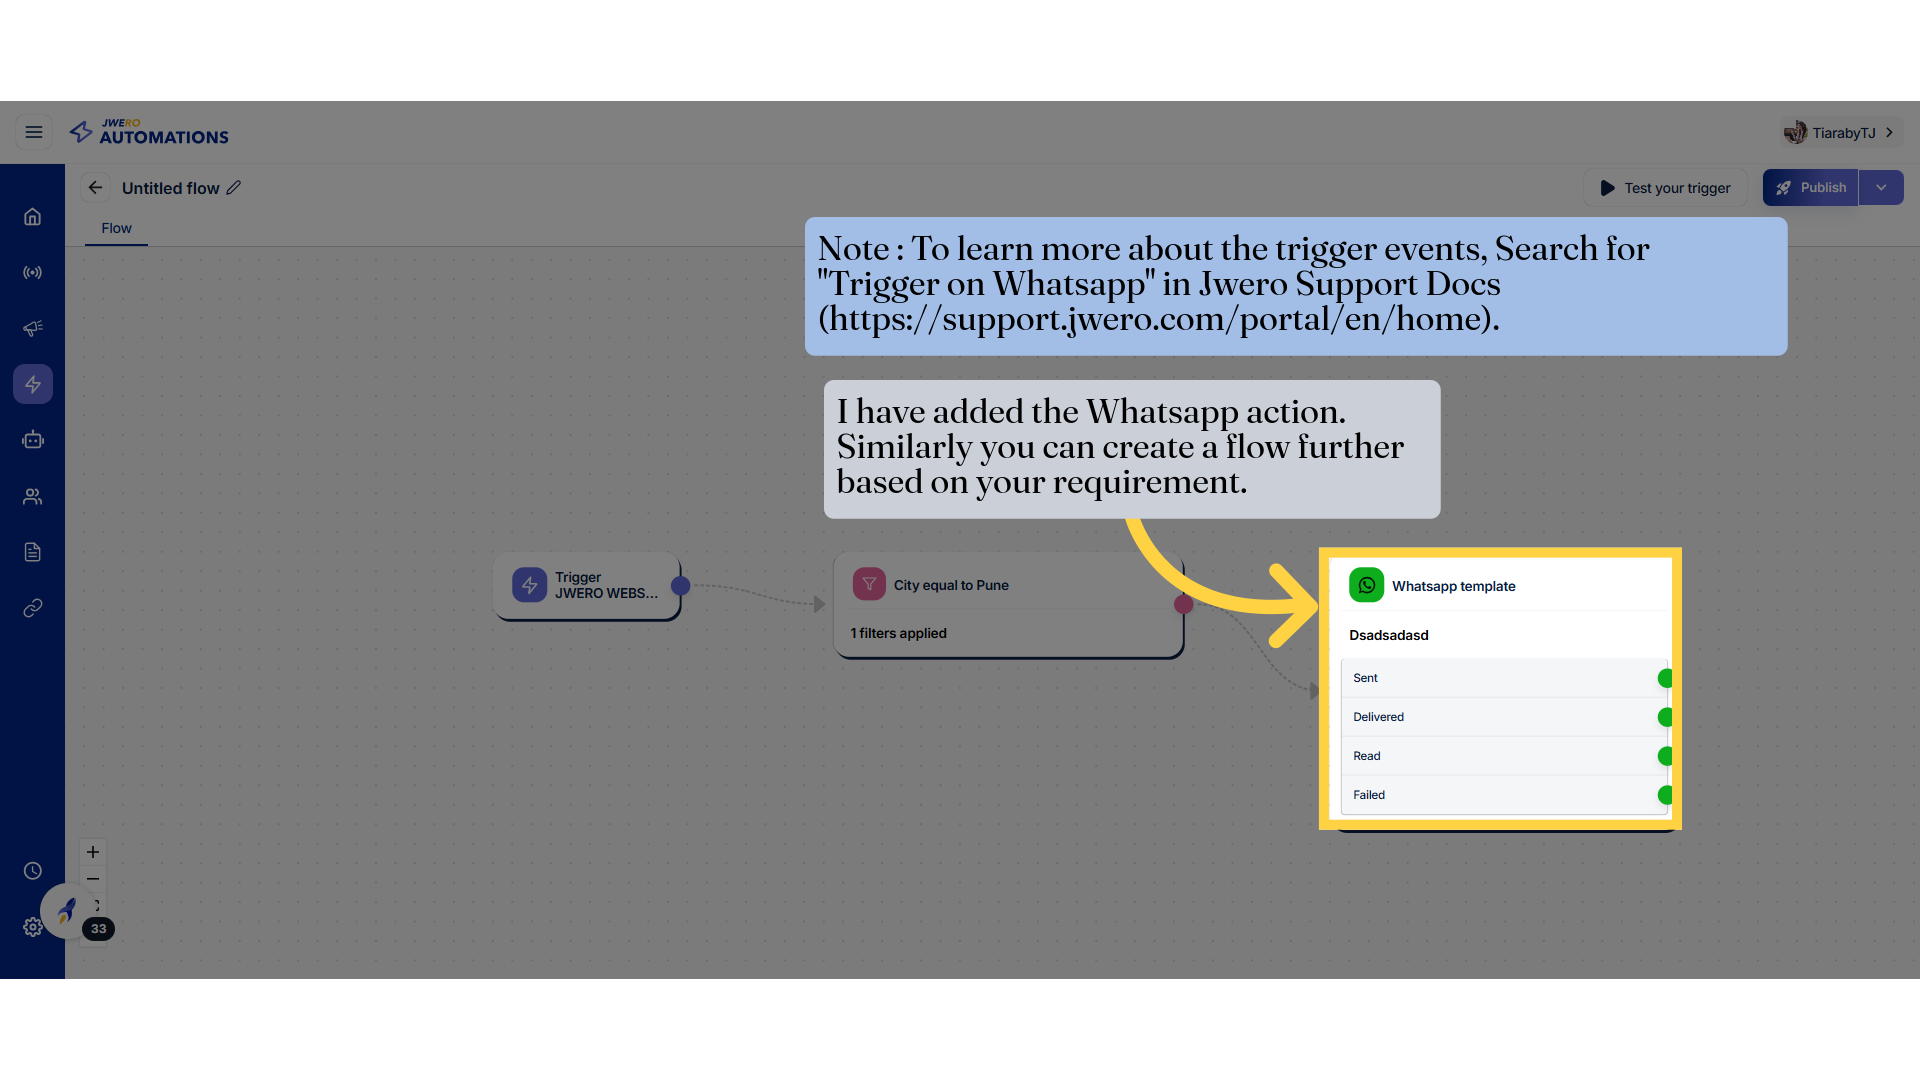
32. I have added the Whatsapp action. Similarly you can create a flow further based on your requirement.
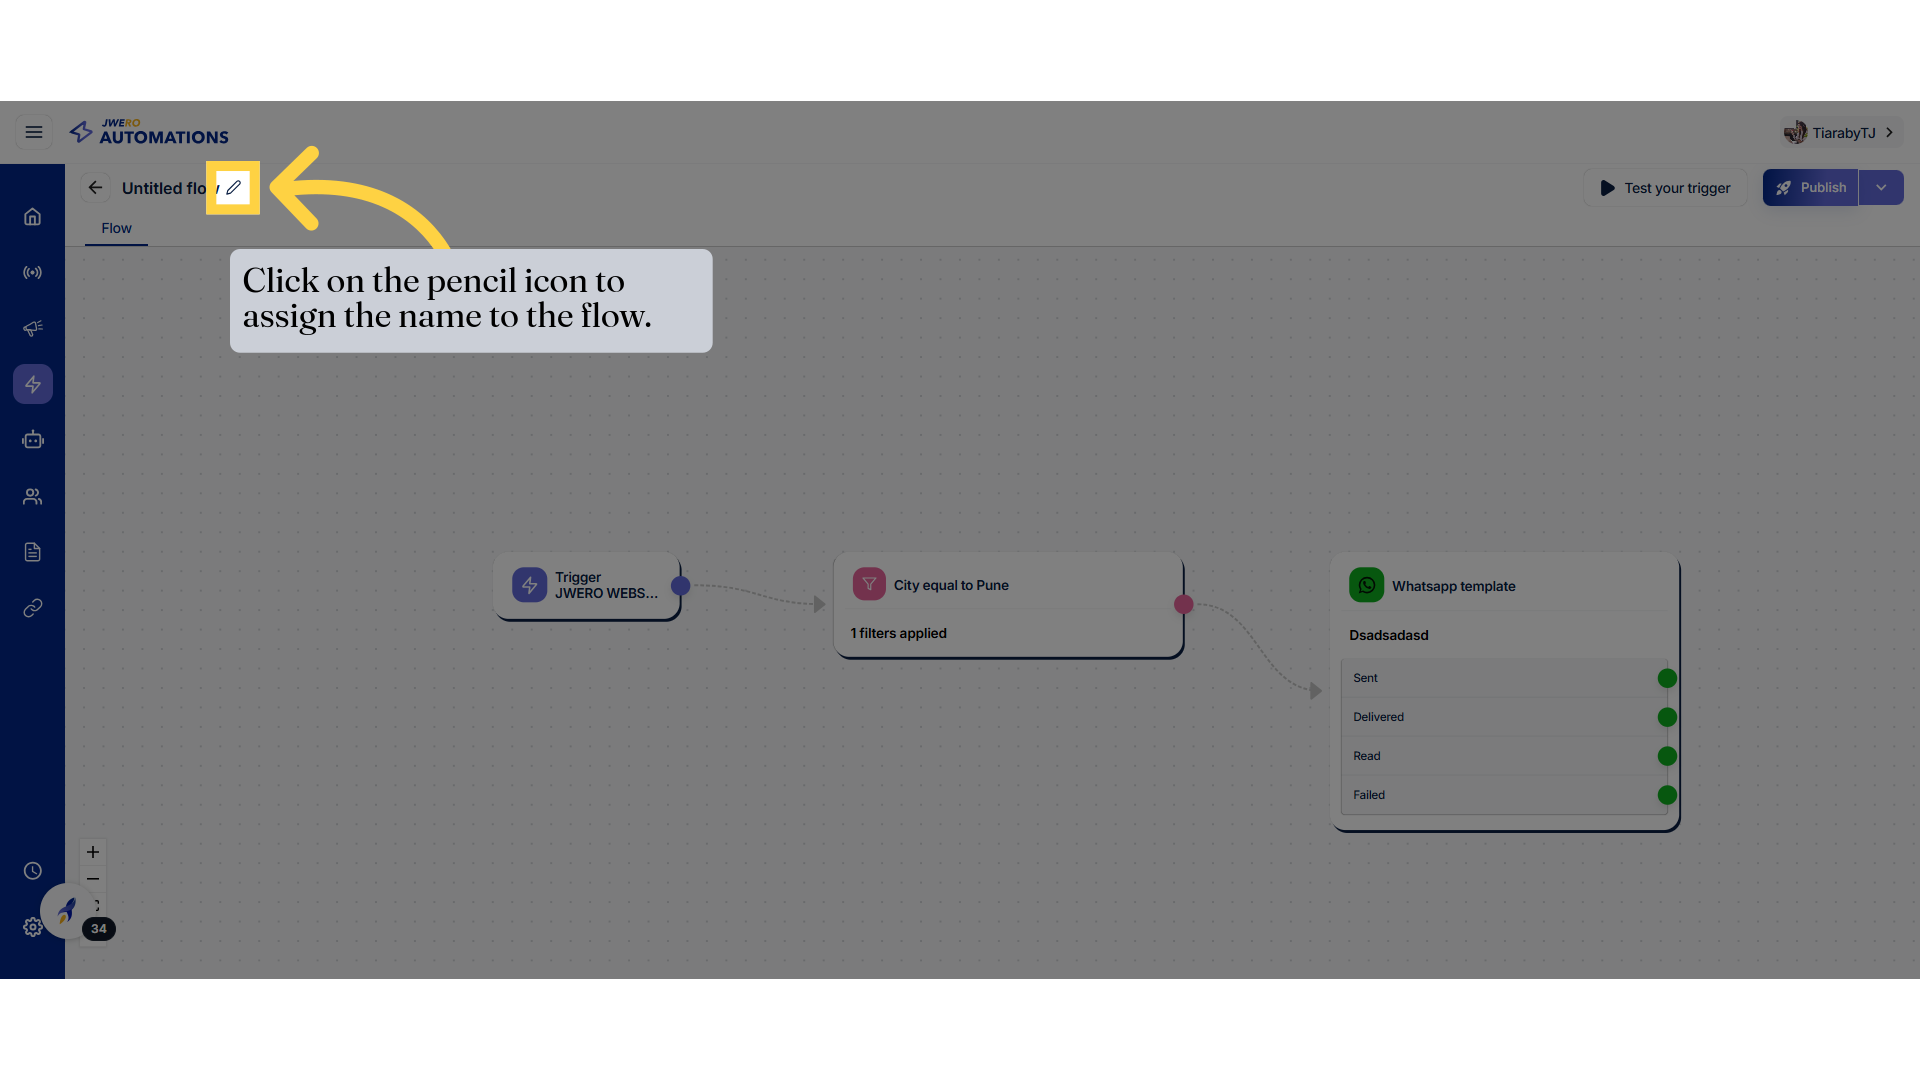
33. Click on the pencil icon to assign the name to the flow.
34. Flow Title
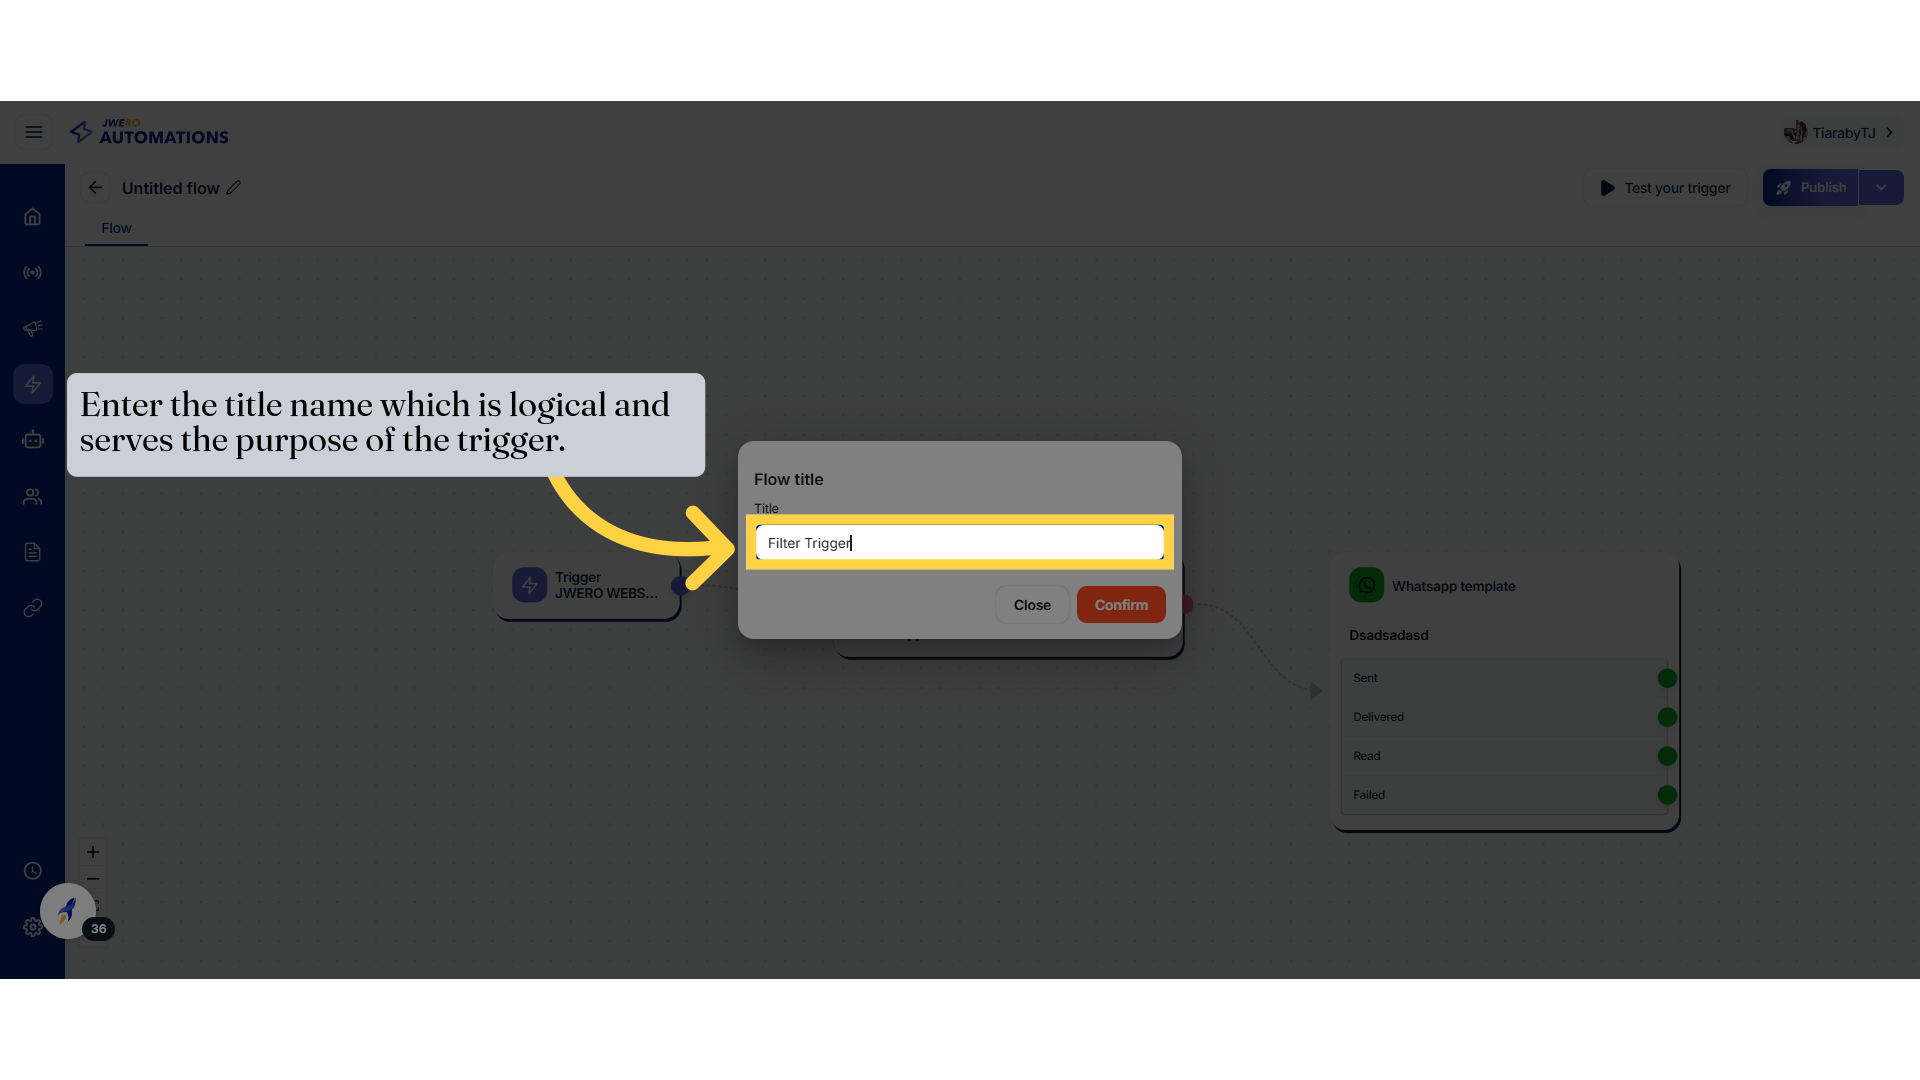
35. Click "Confirm"

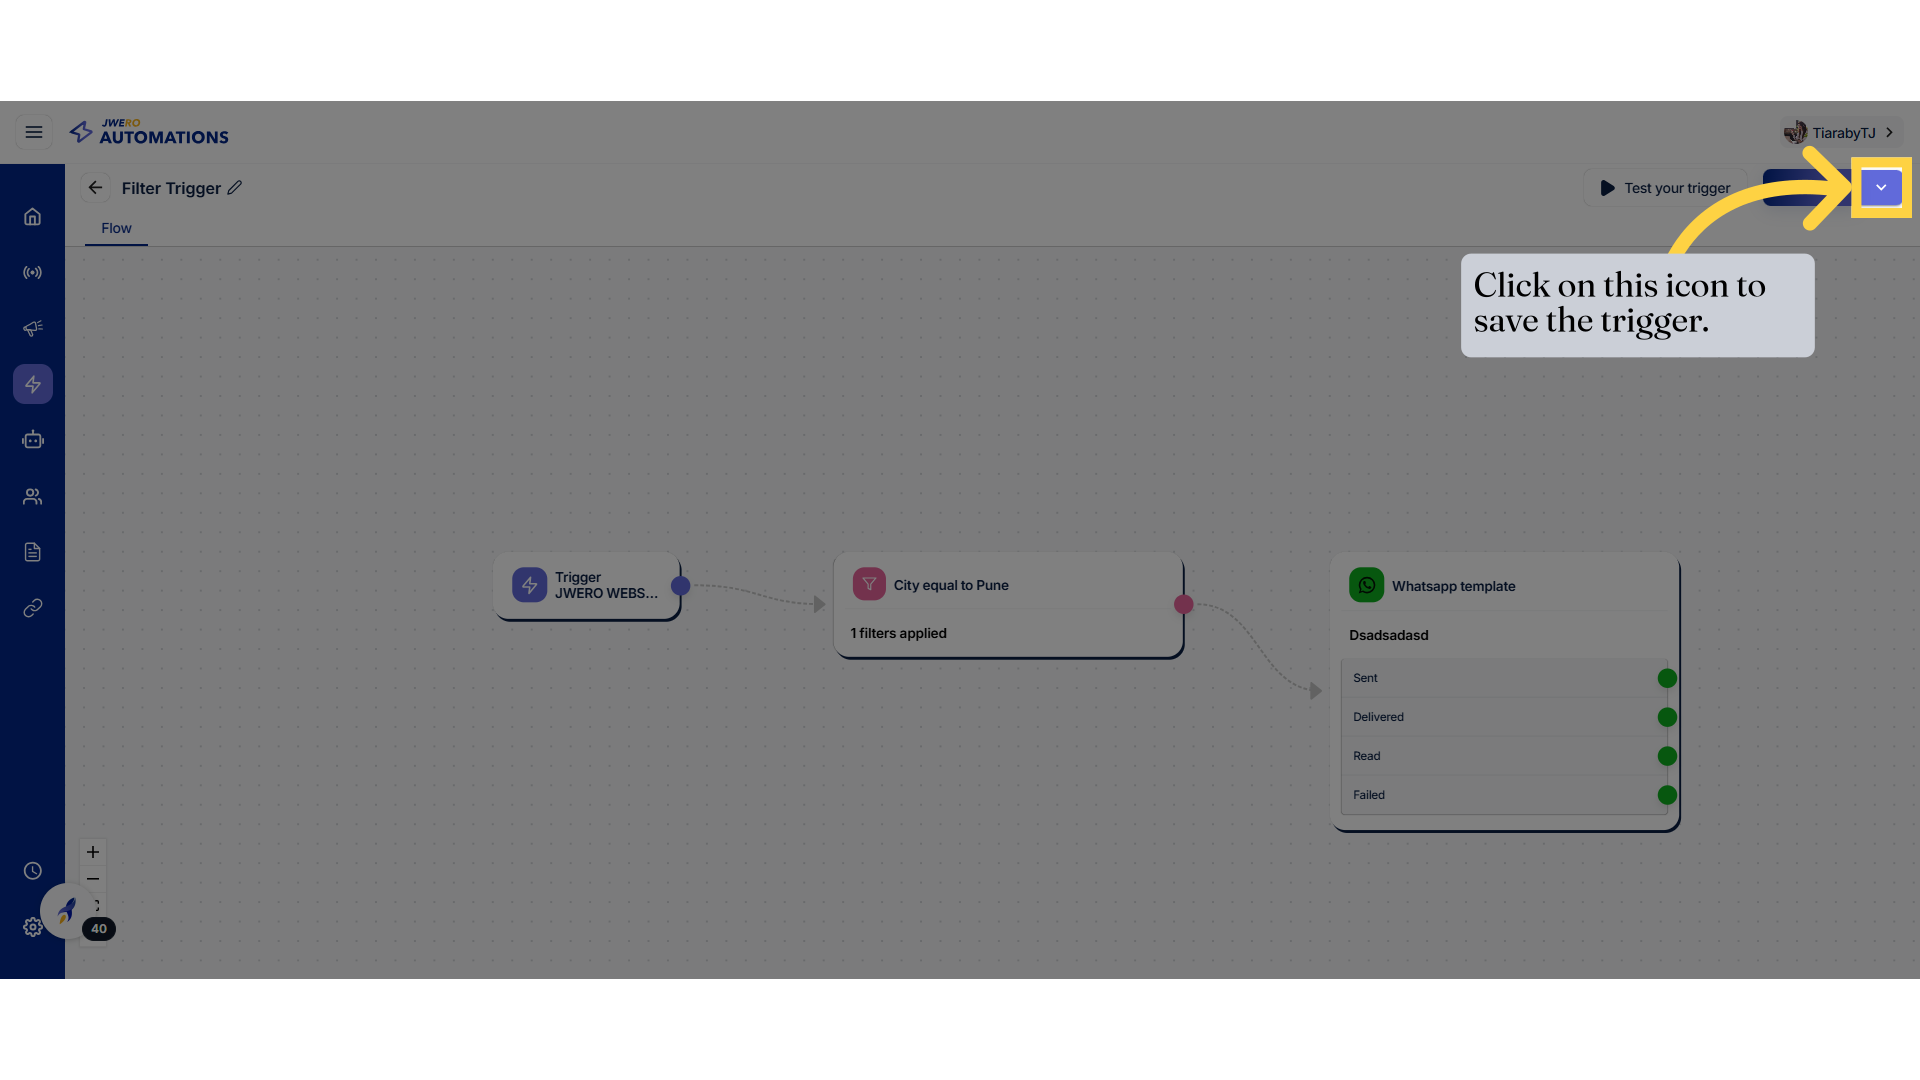
36. Click on this icon to save the trigger.
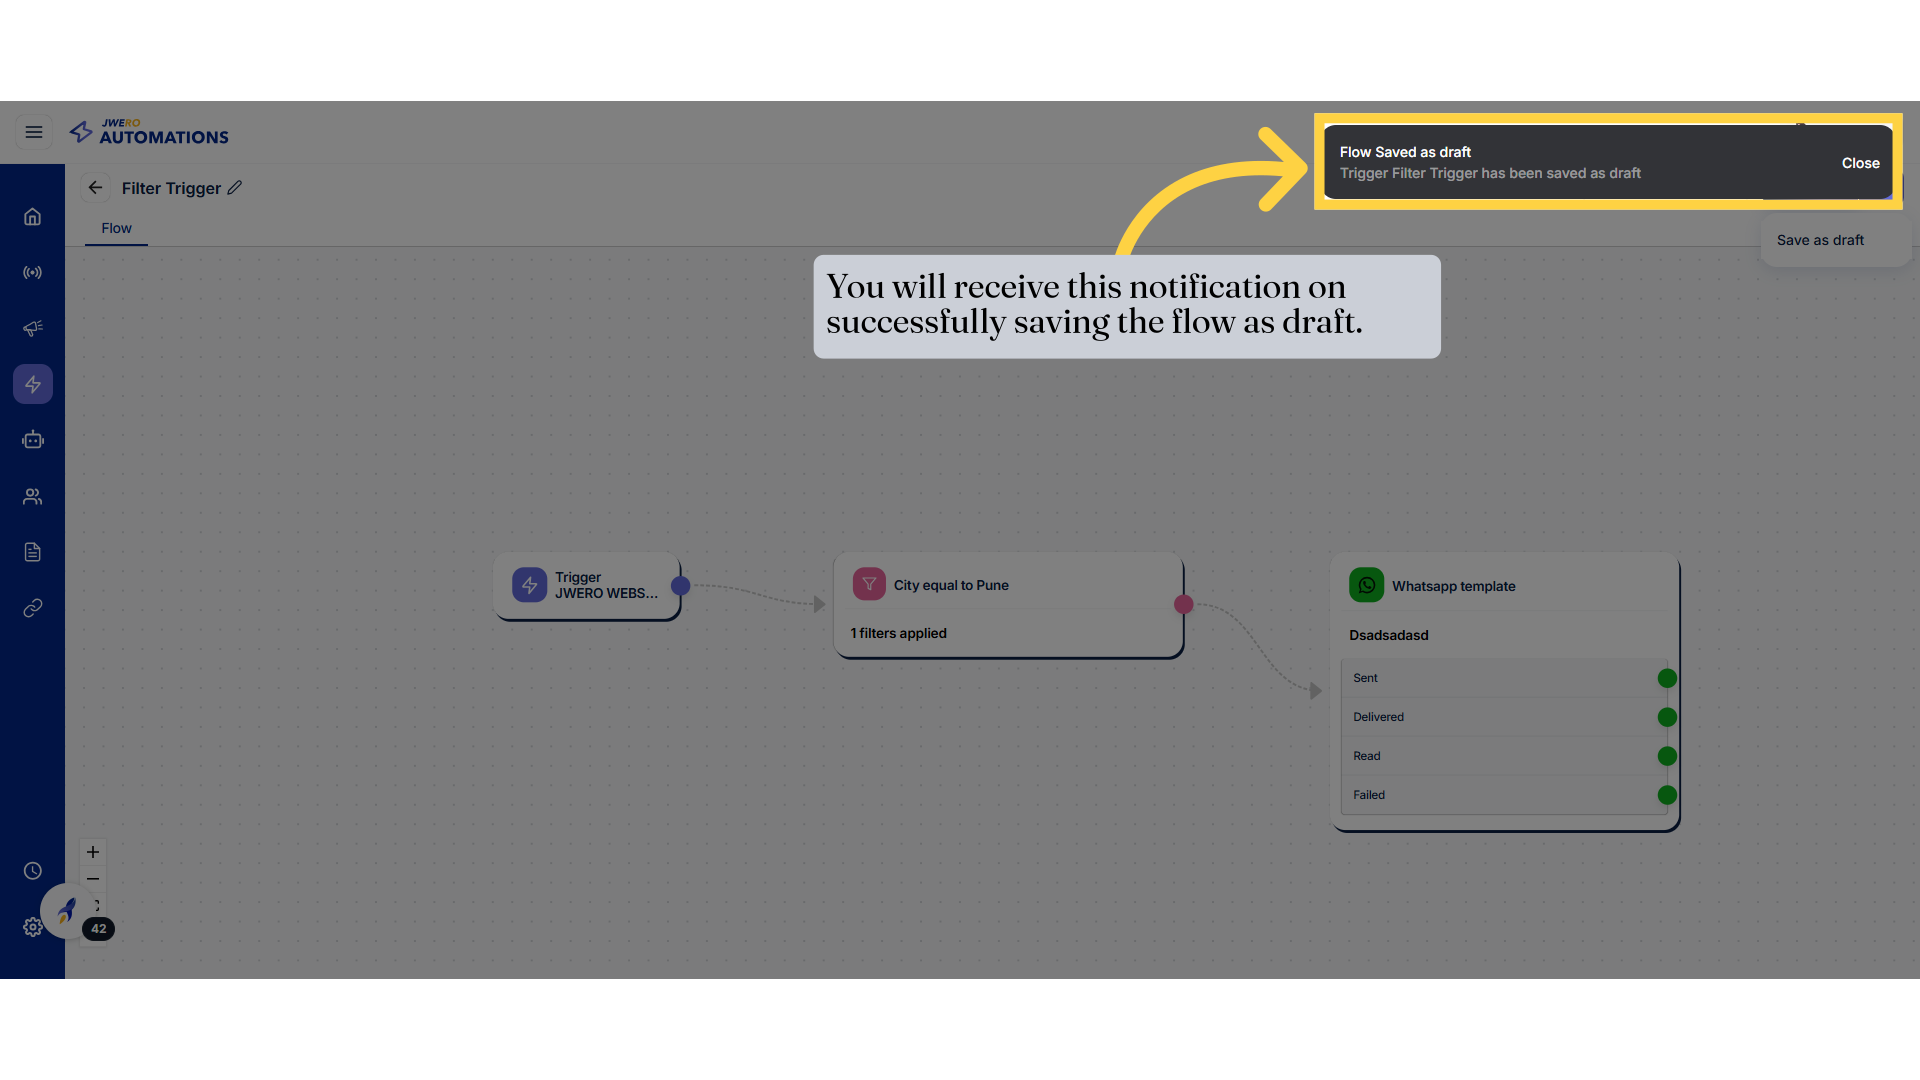
37. Click "Save as draft"

38. You will receive this notification on successfully saving the flow as draft.
39. To test the trigger click on "Test your trigger"

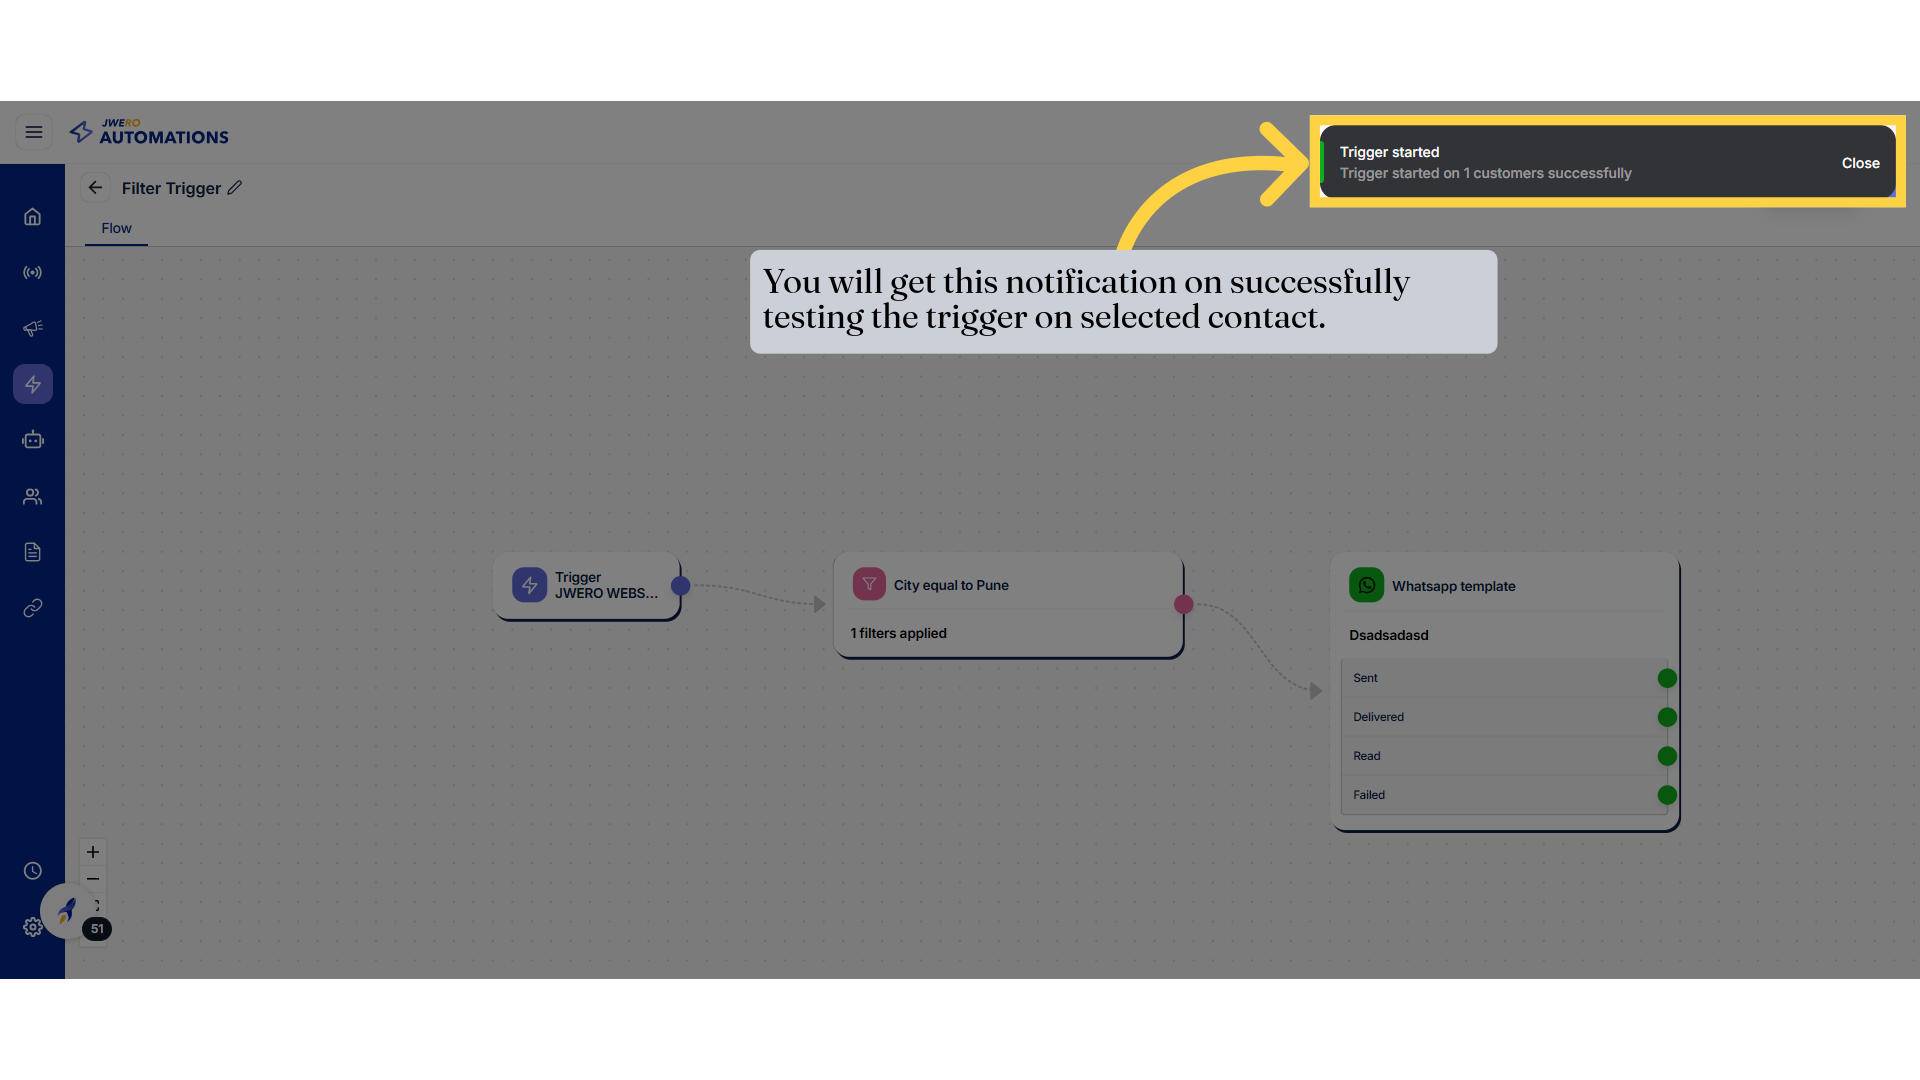
40. Select the contact on which you want to test the trigger and click on "Add contacts".

41. You will get this notification on successfully testing the trigger on selected contact.
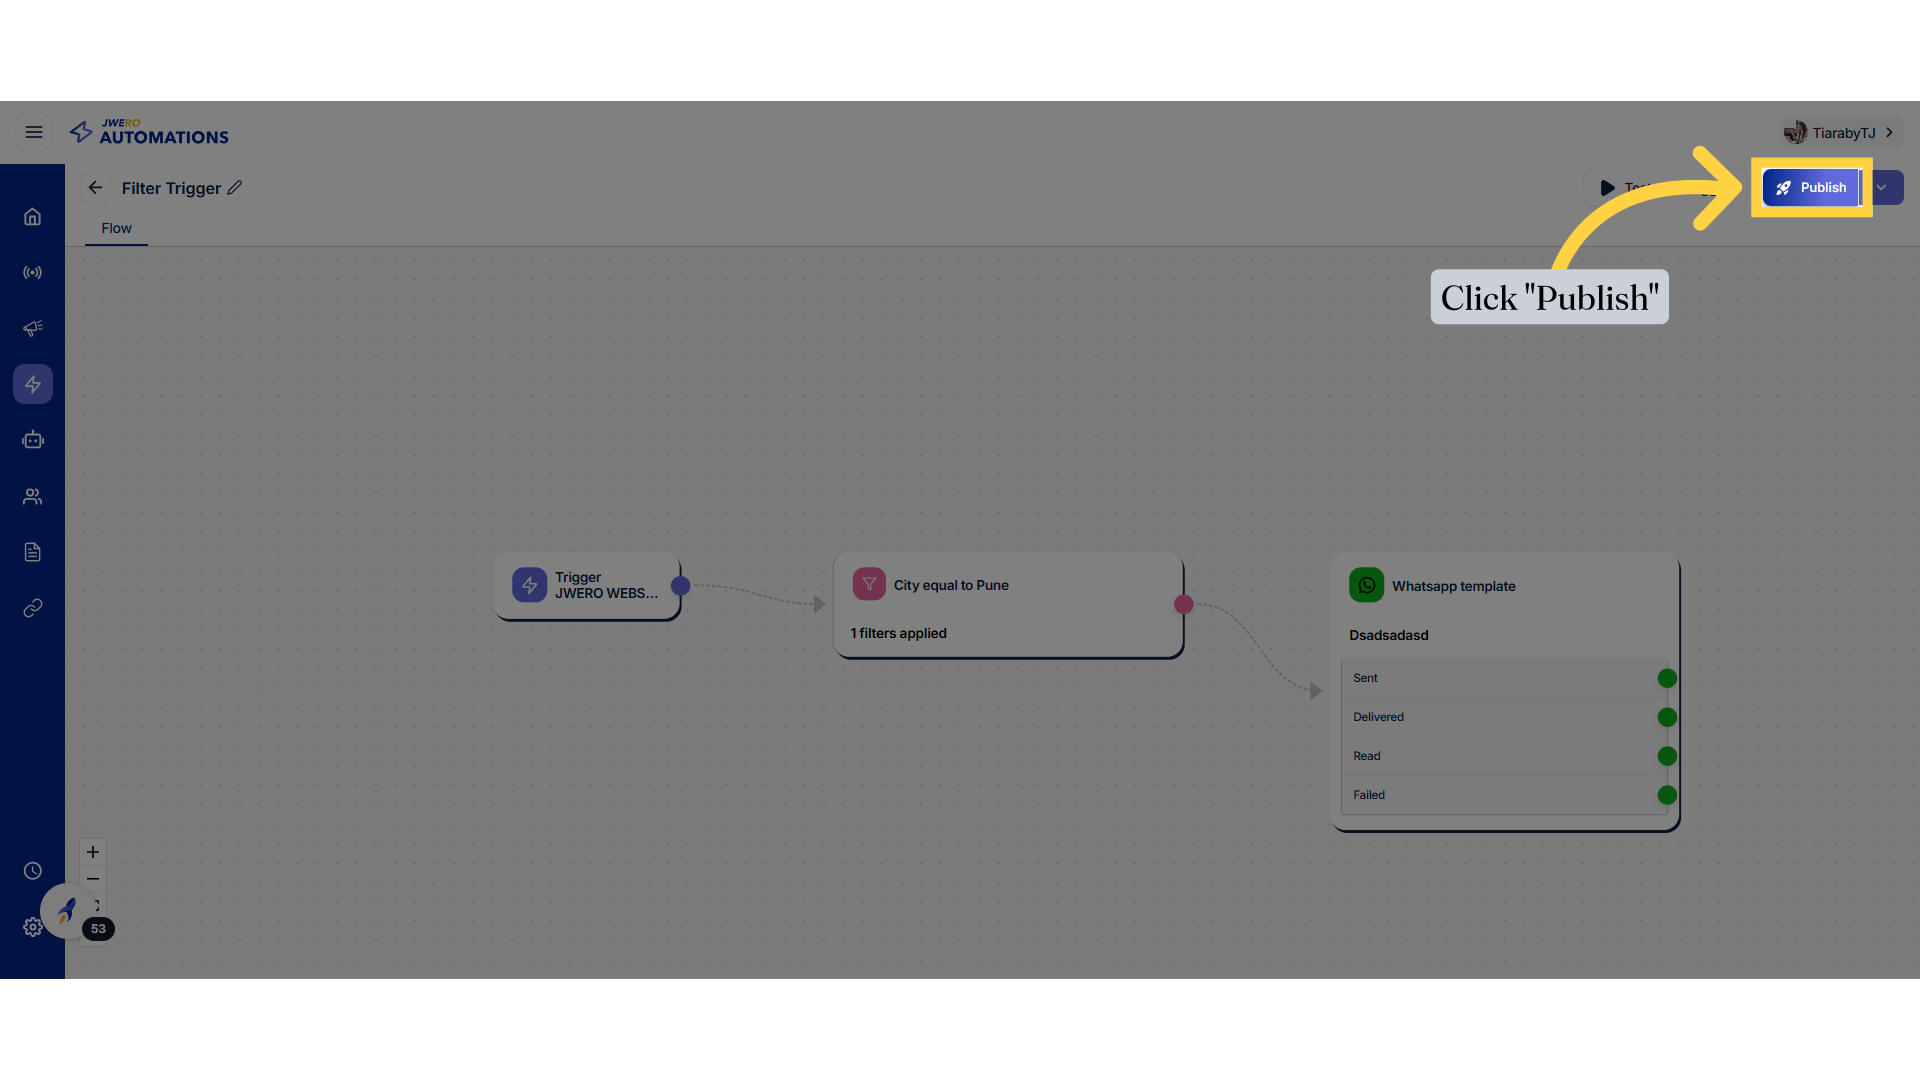
42. Click "Publish"
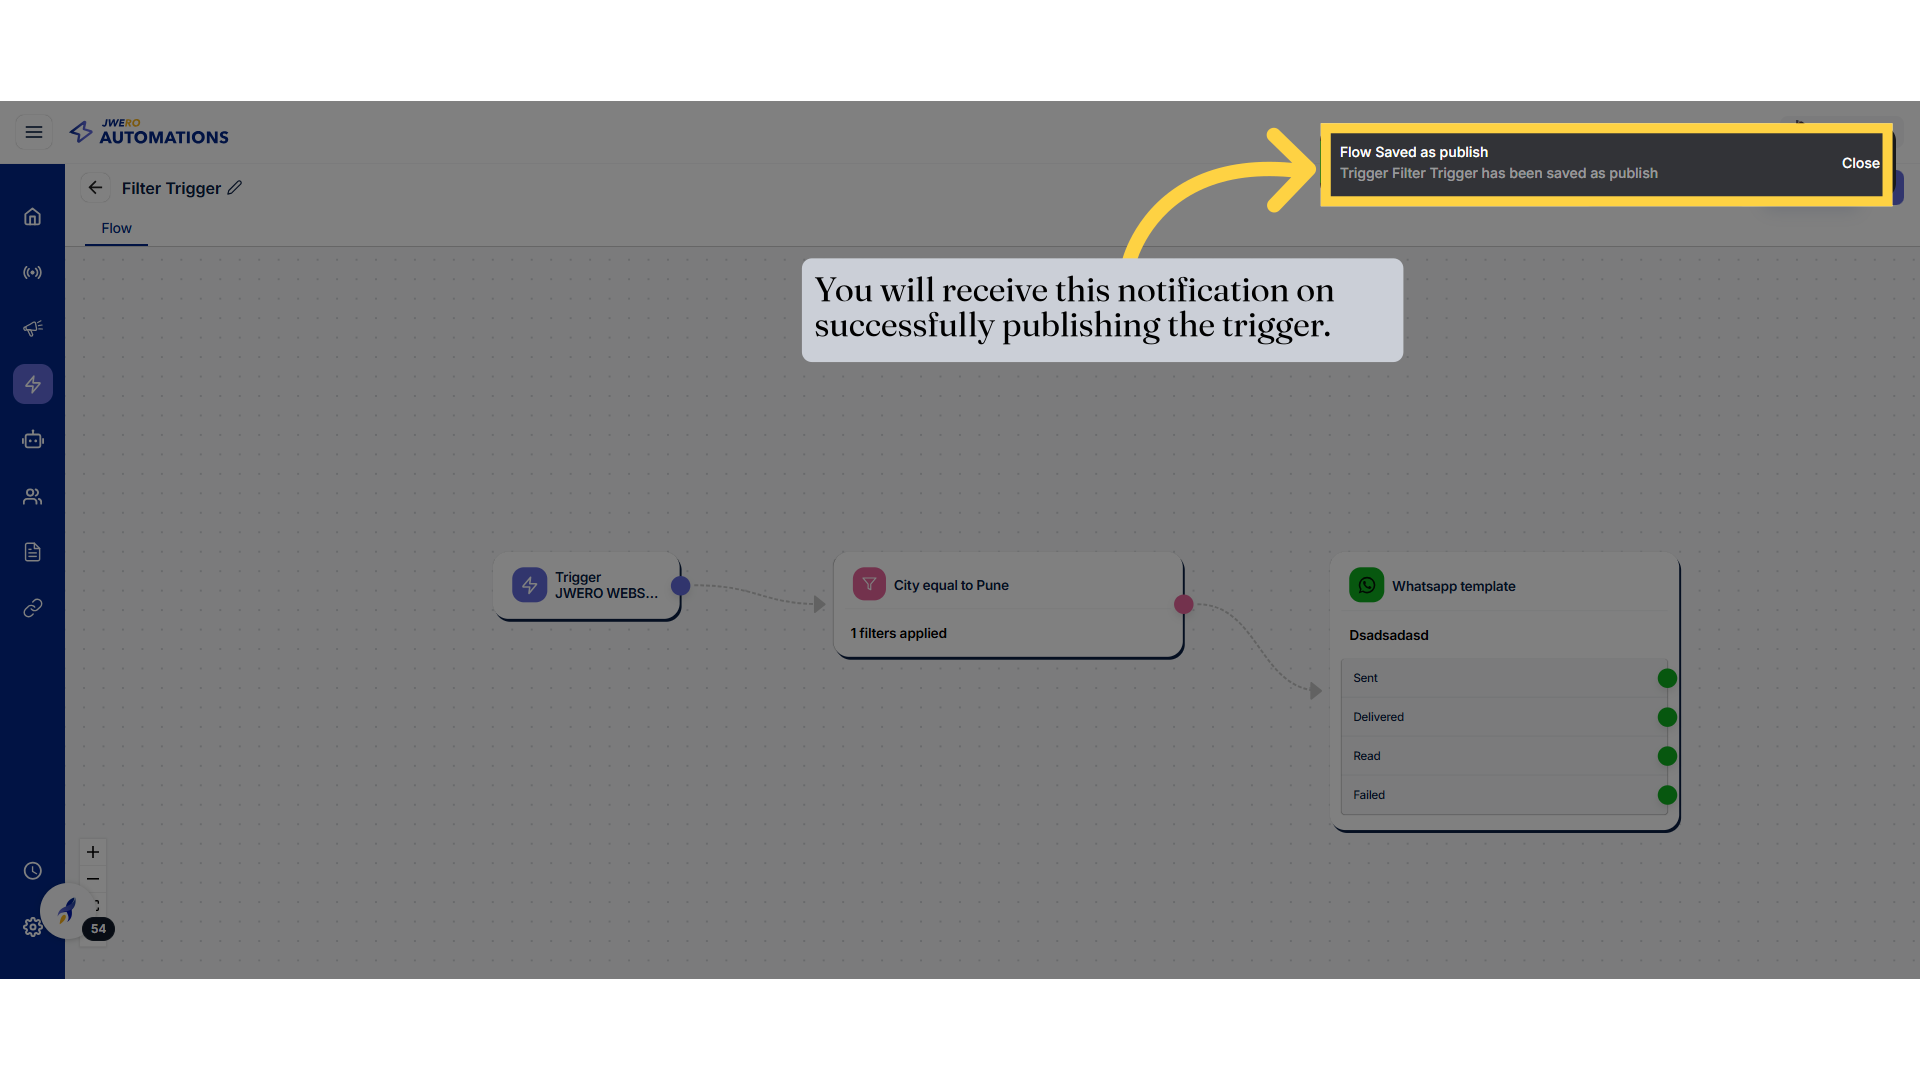
43. You will receive this notification on successfully publishing the trigger.