How To Create A Chatbot
1. Chatbot
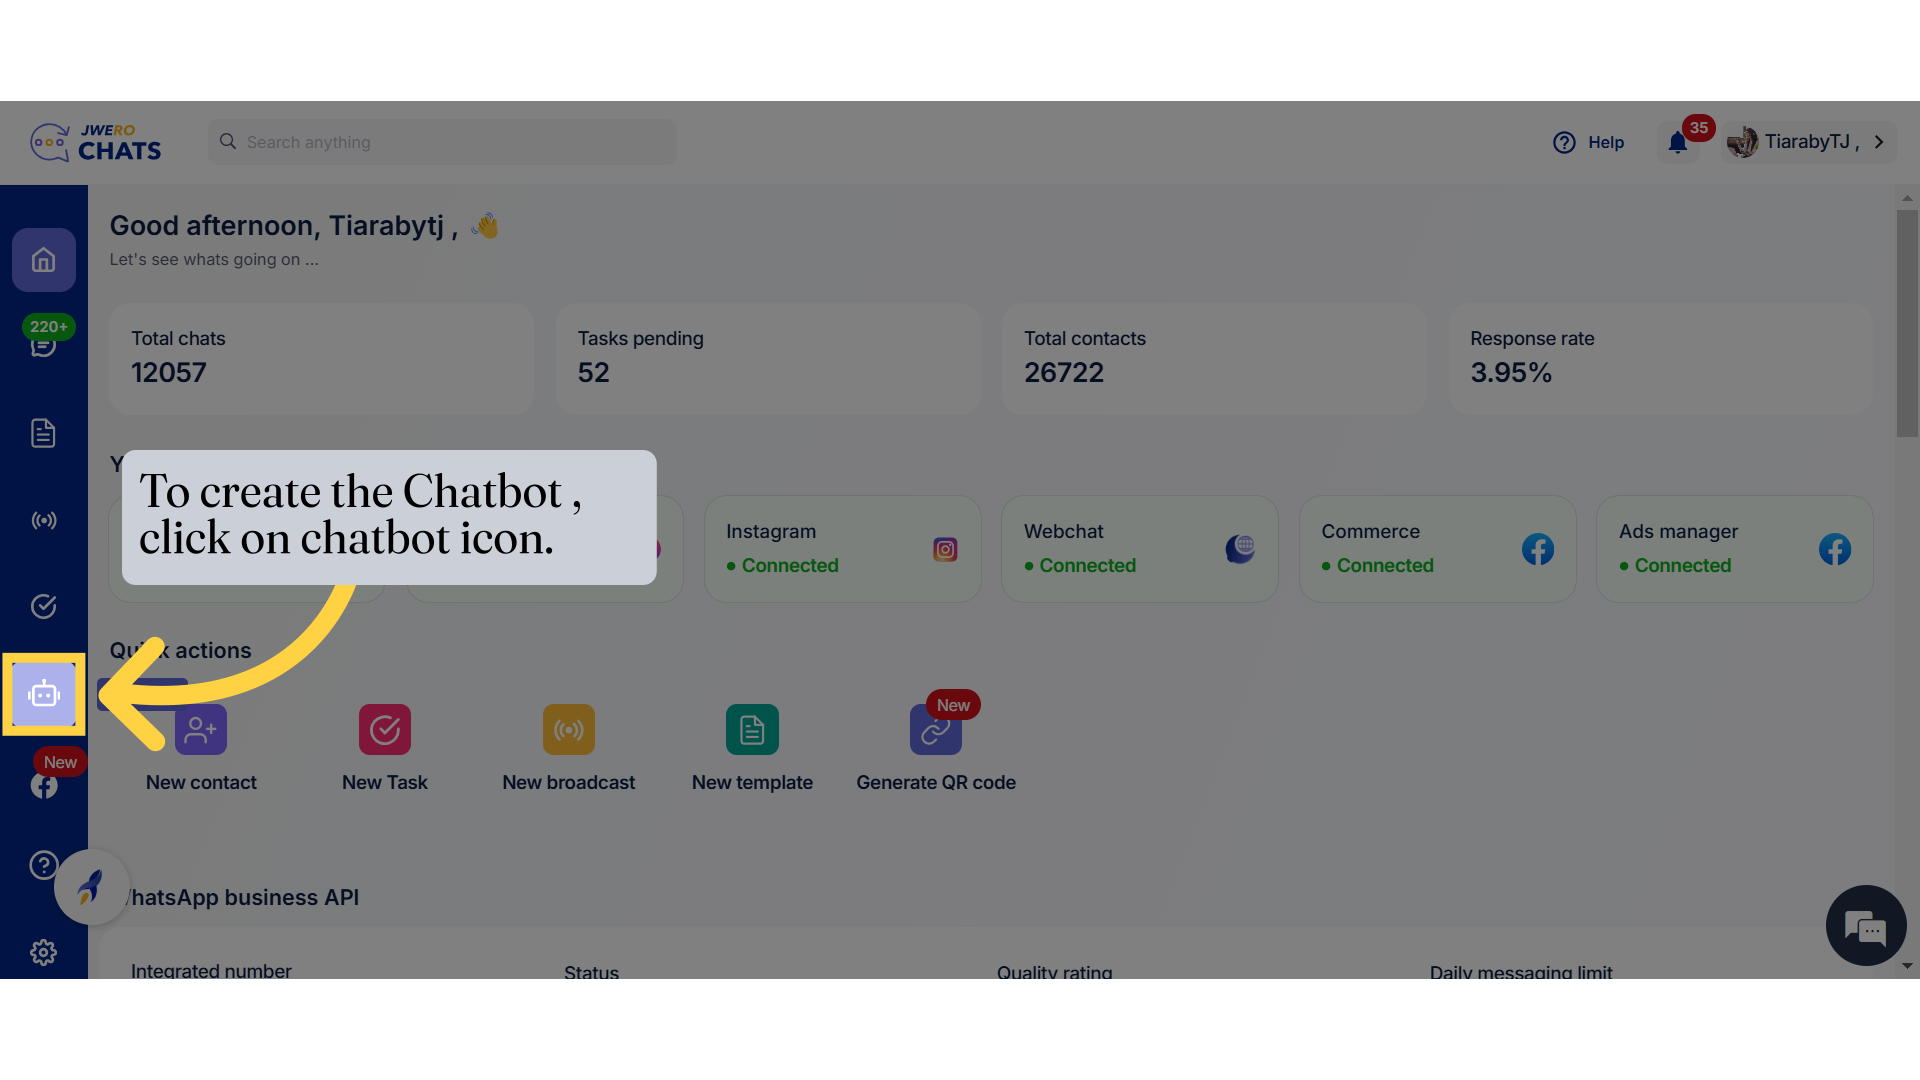
2. To create the Chatbot , click on chatbot icon.
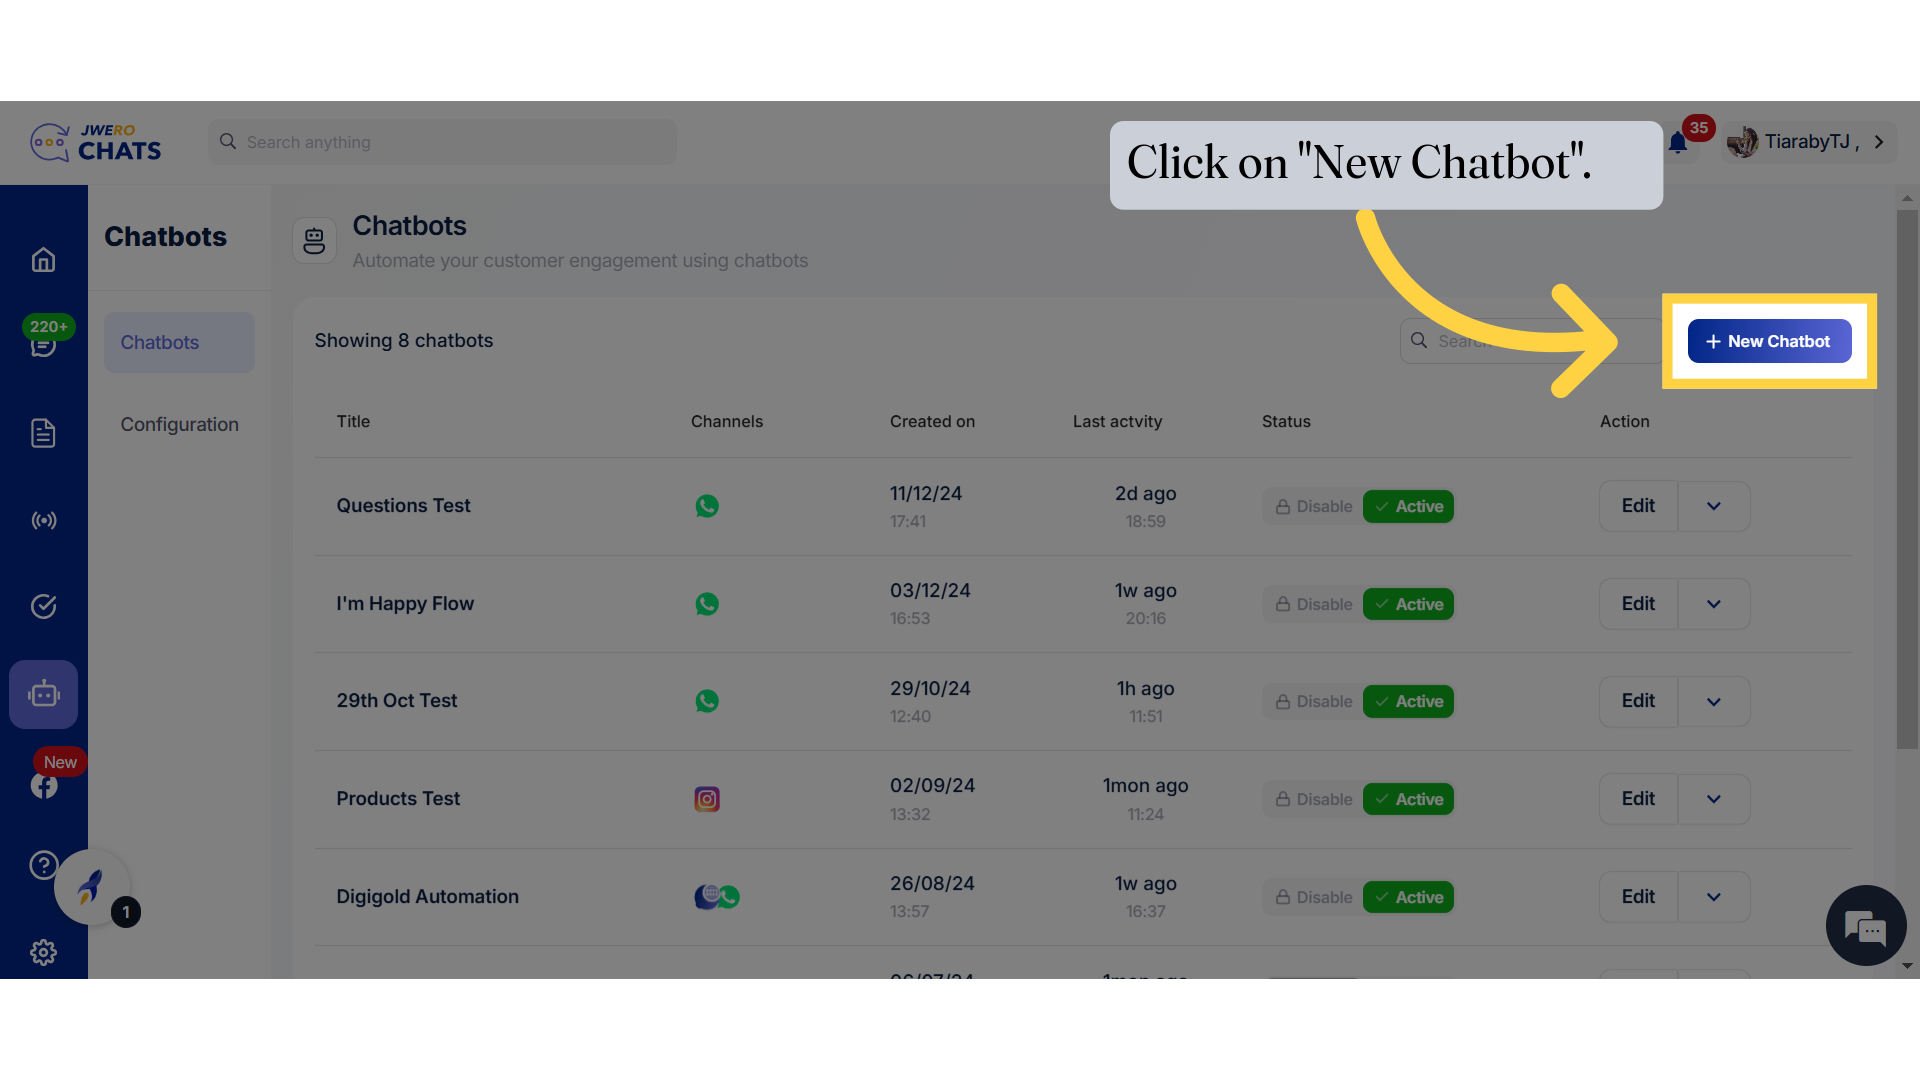
3. Click on "New Chatbot".
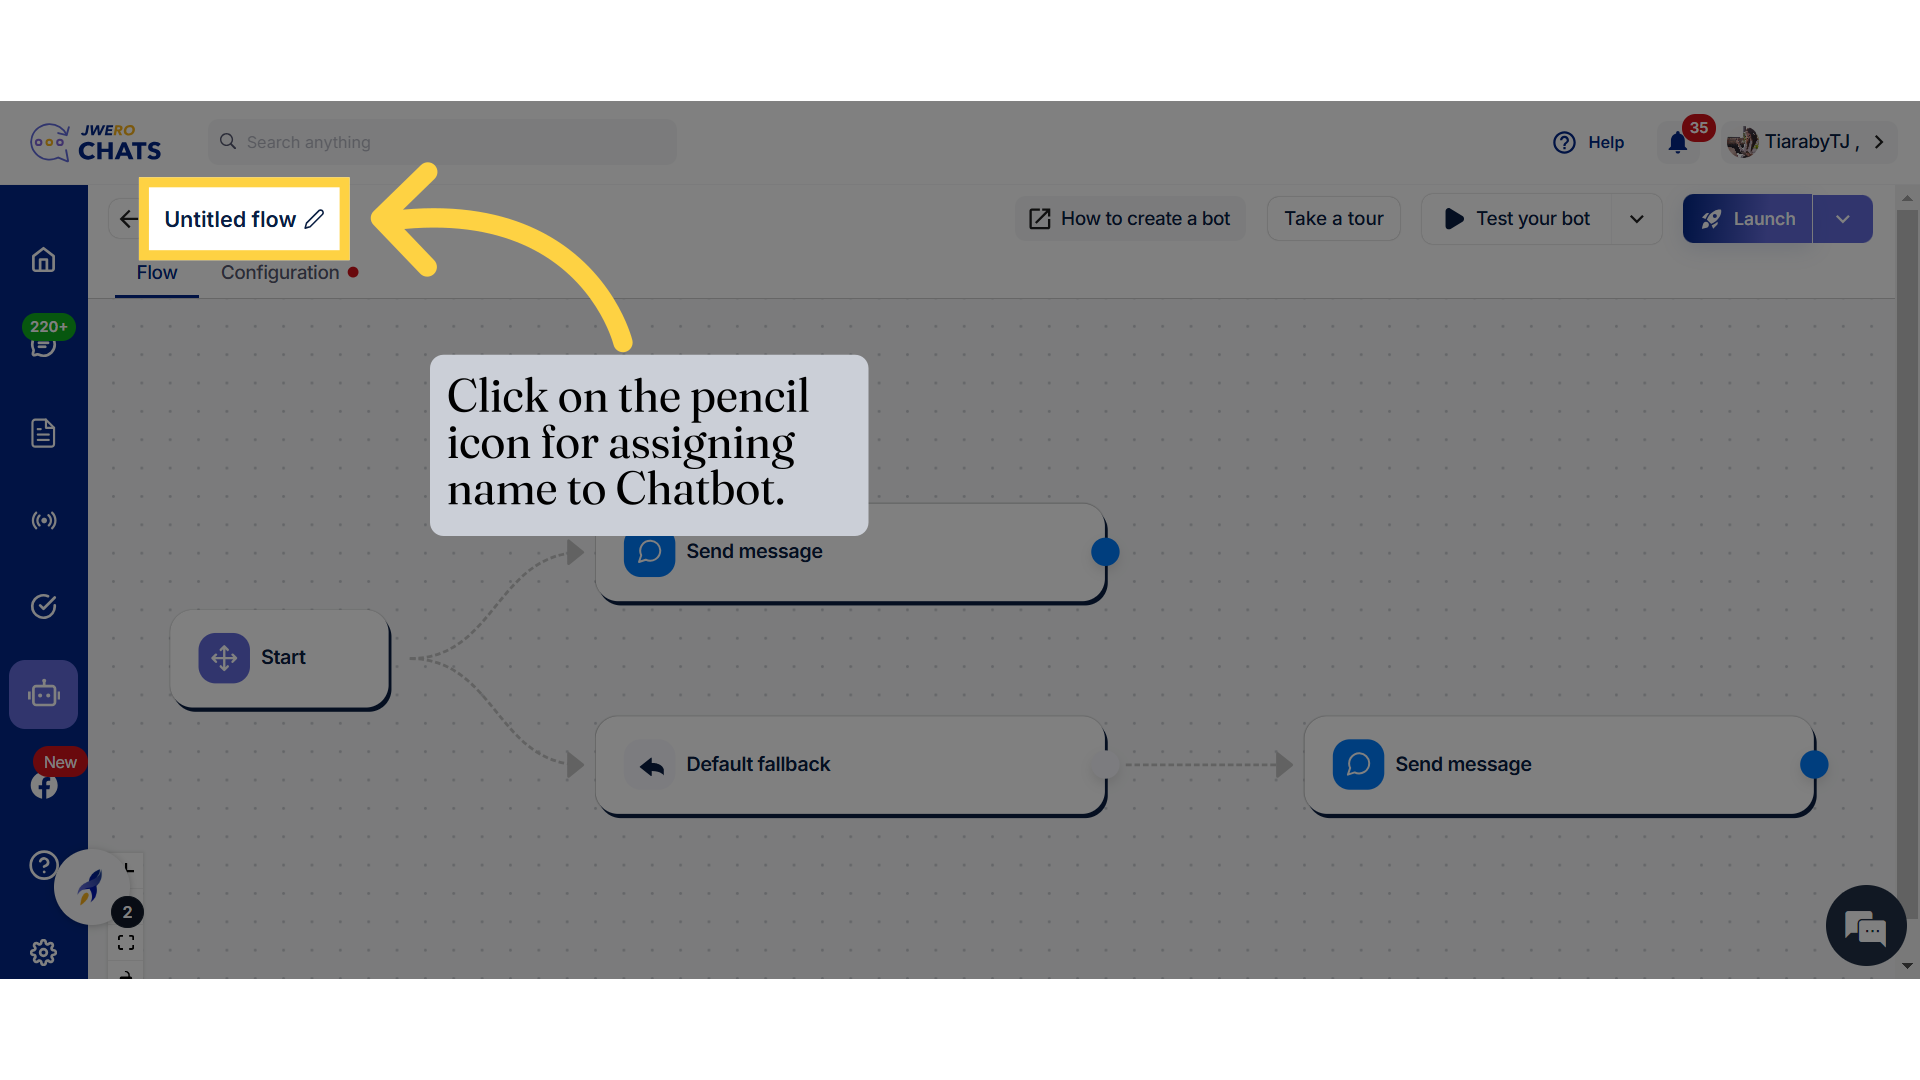
4. Click on the pencil icon for assigning name to Chatbot.
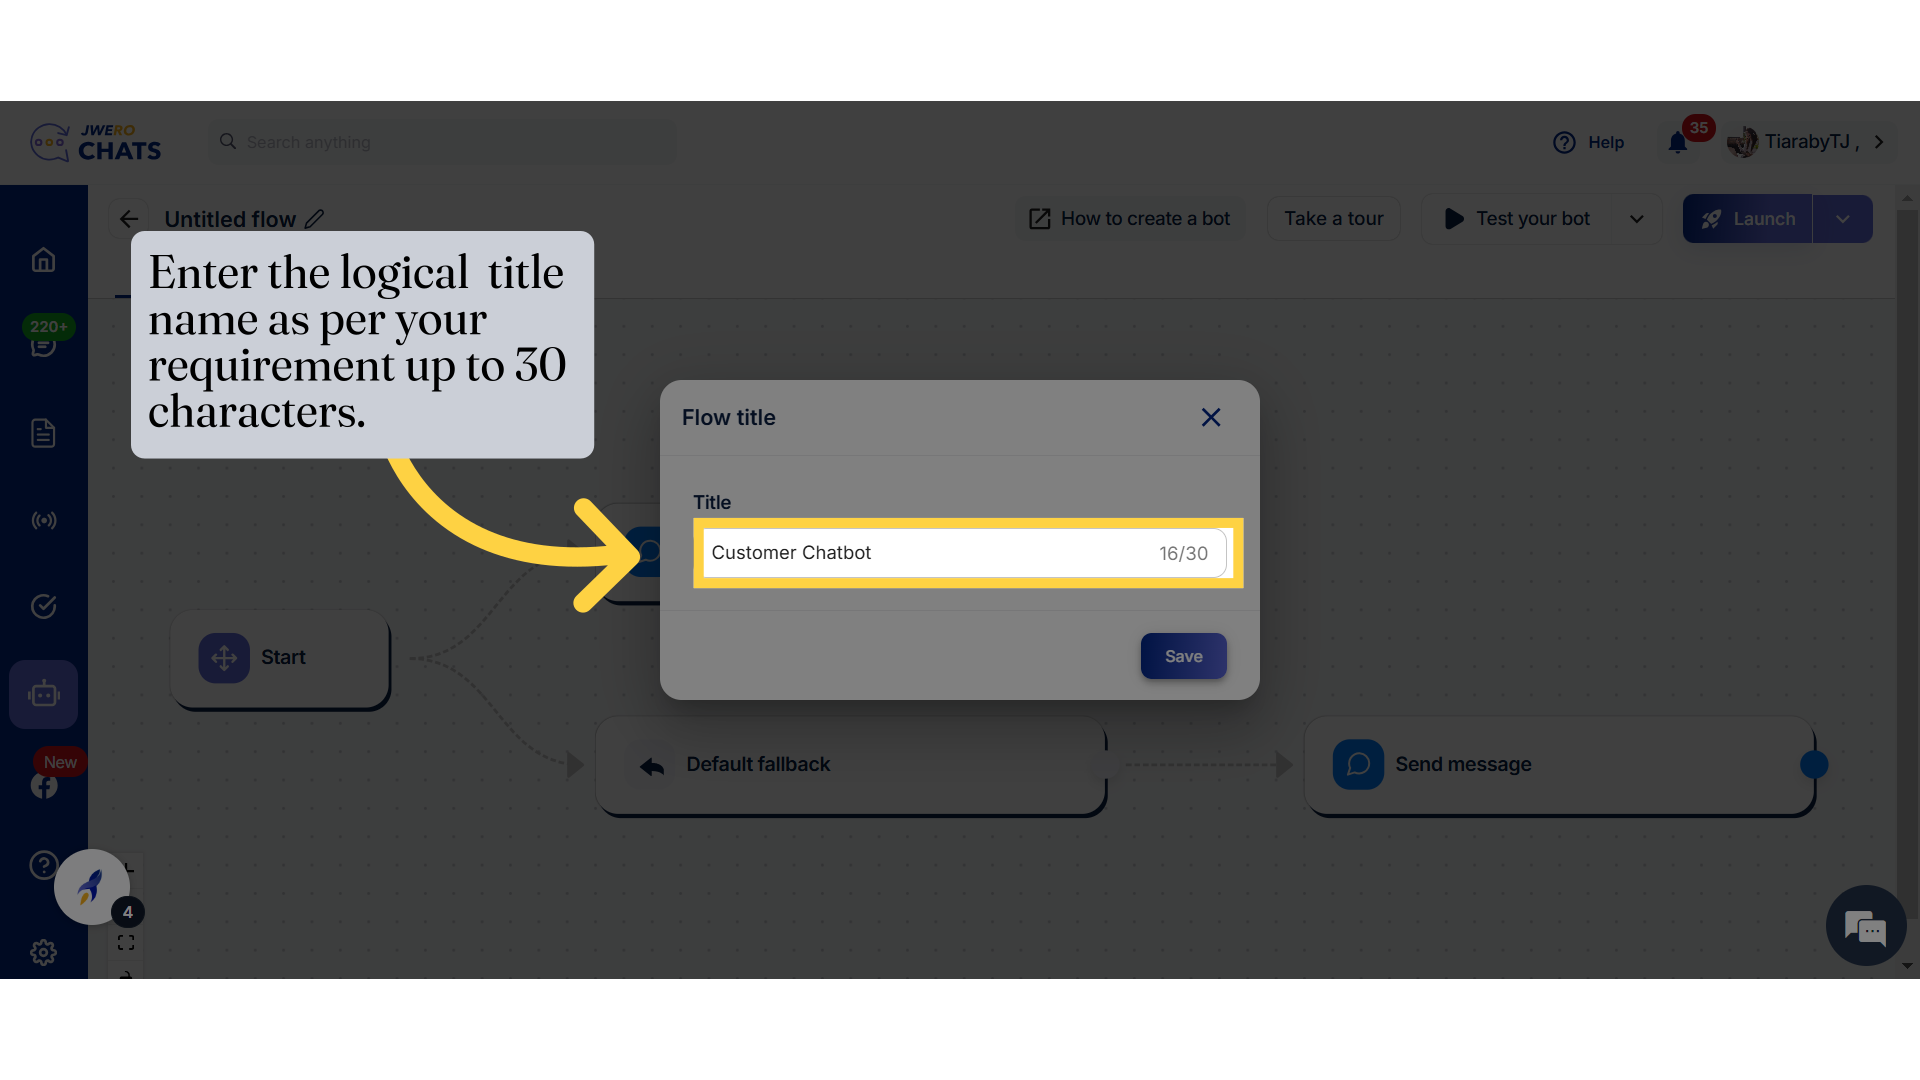
5. Enter the logical title name as per your requirement up to 30 characters.
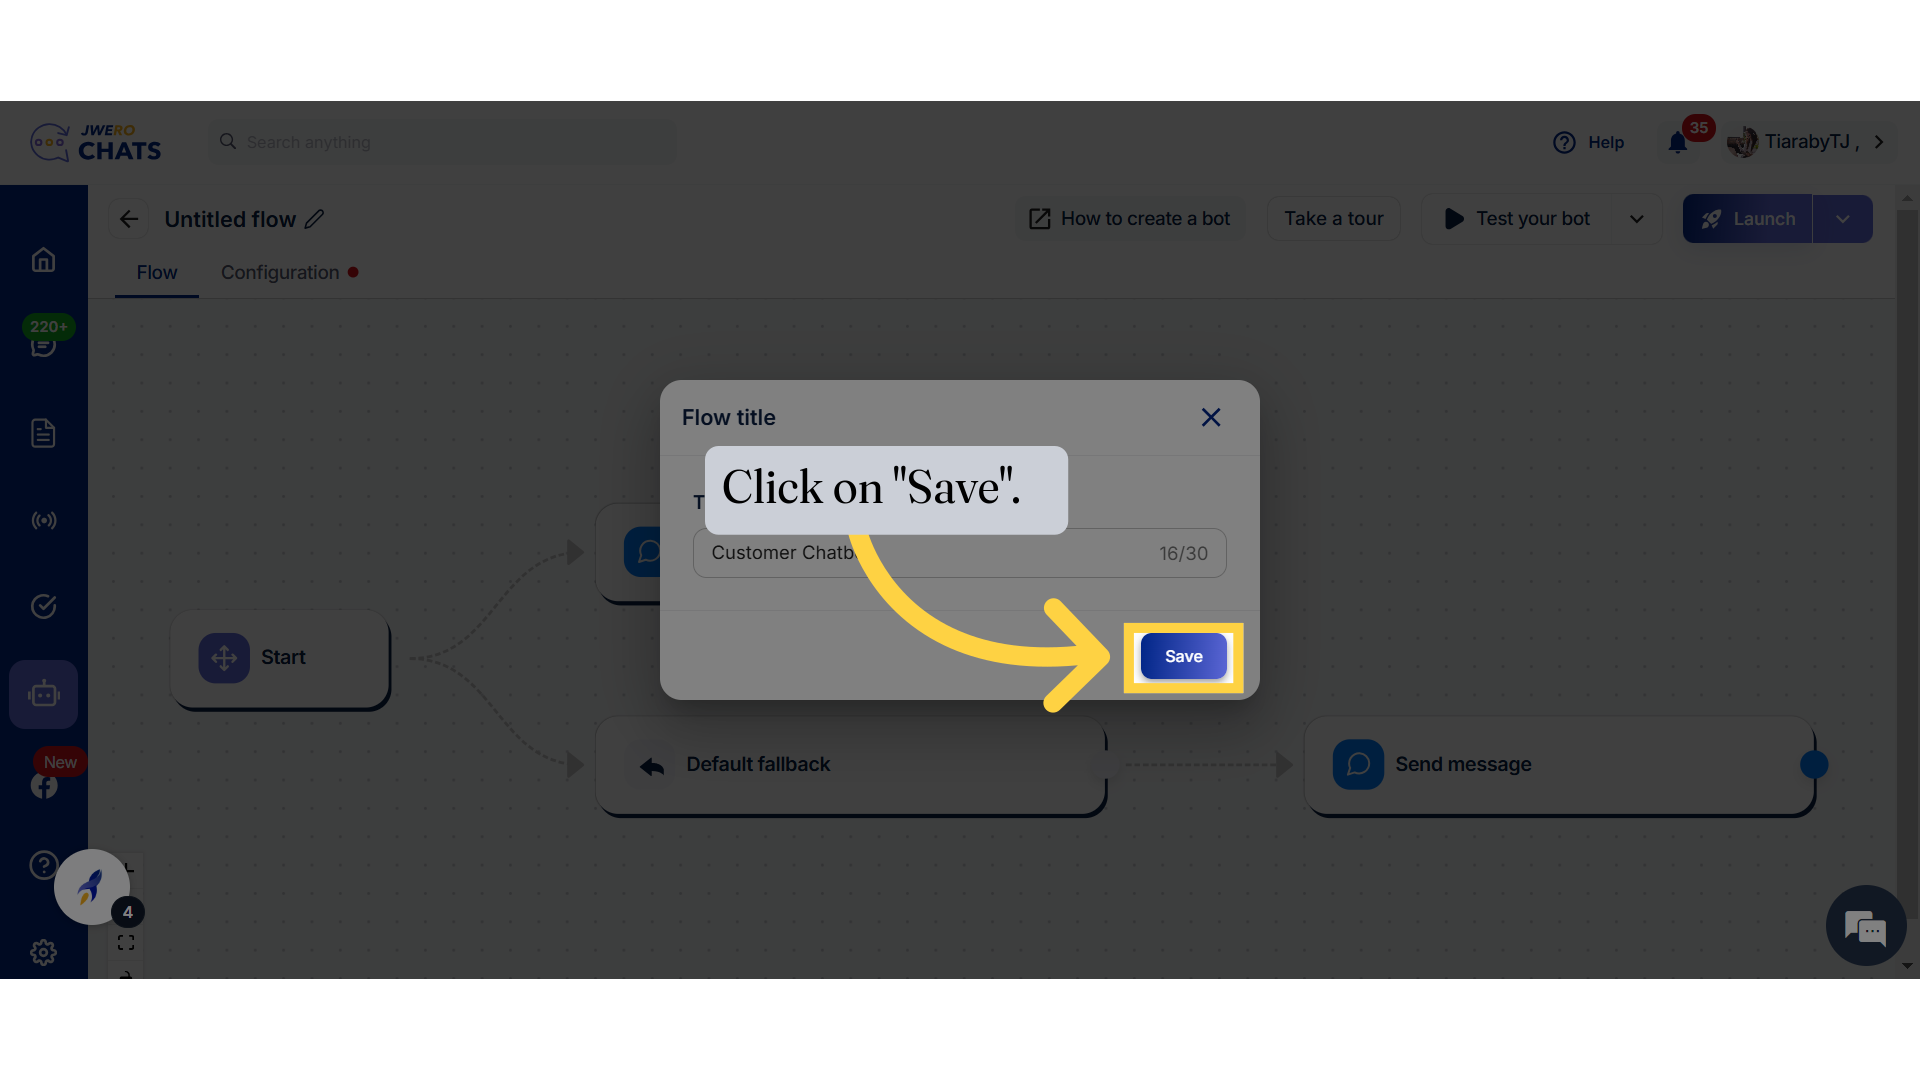
6. Click on "Save".
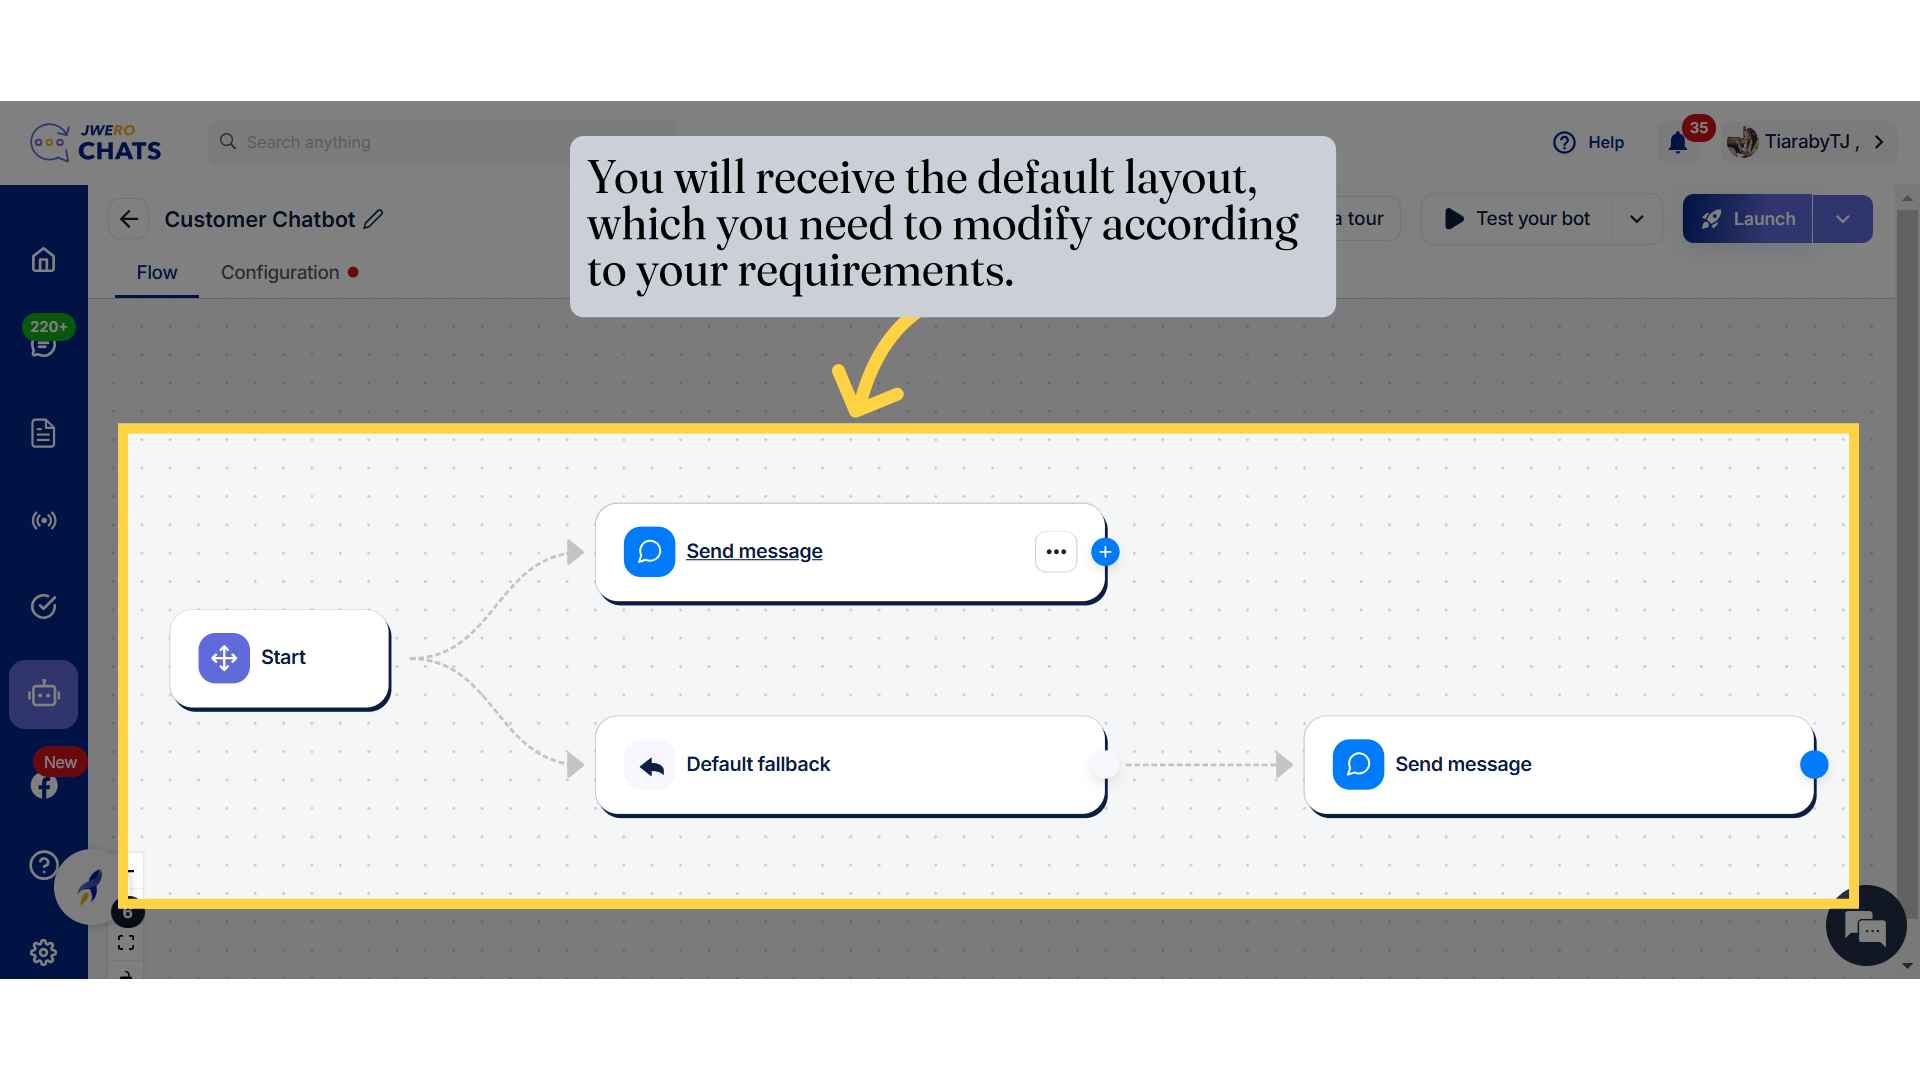
7. You will receive the default layout, which you need to modify according to your requirements.
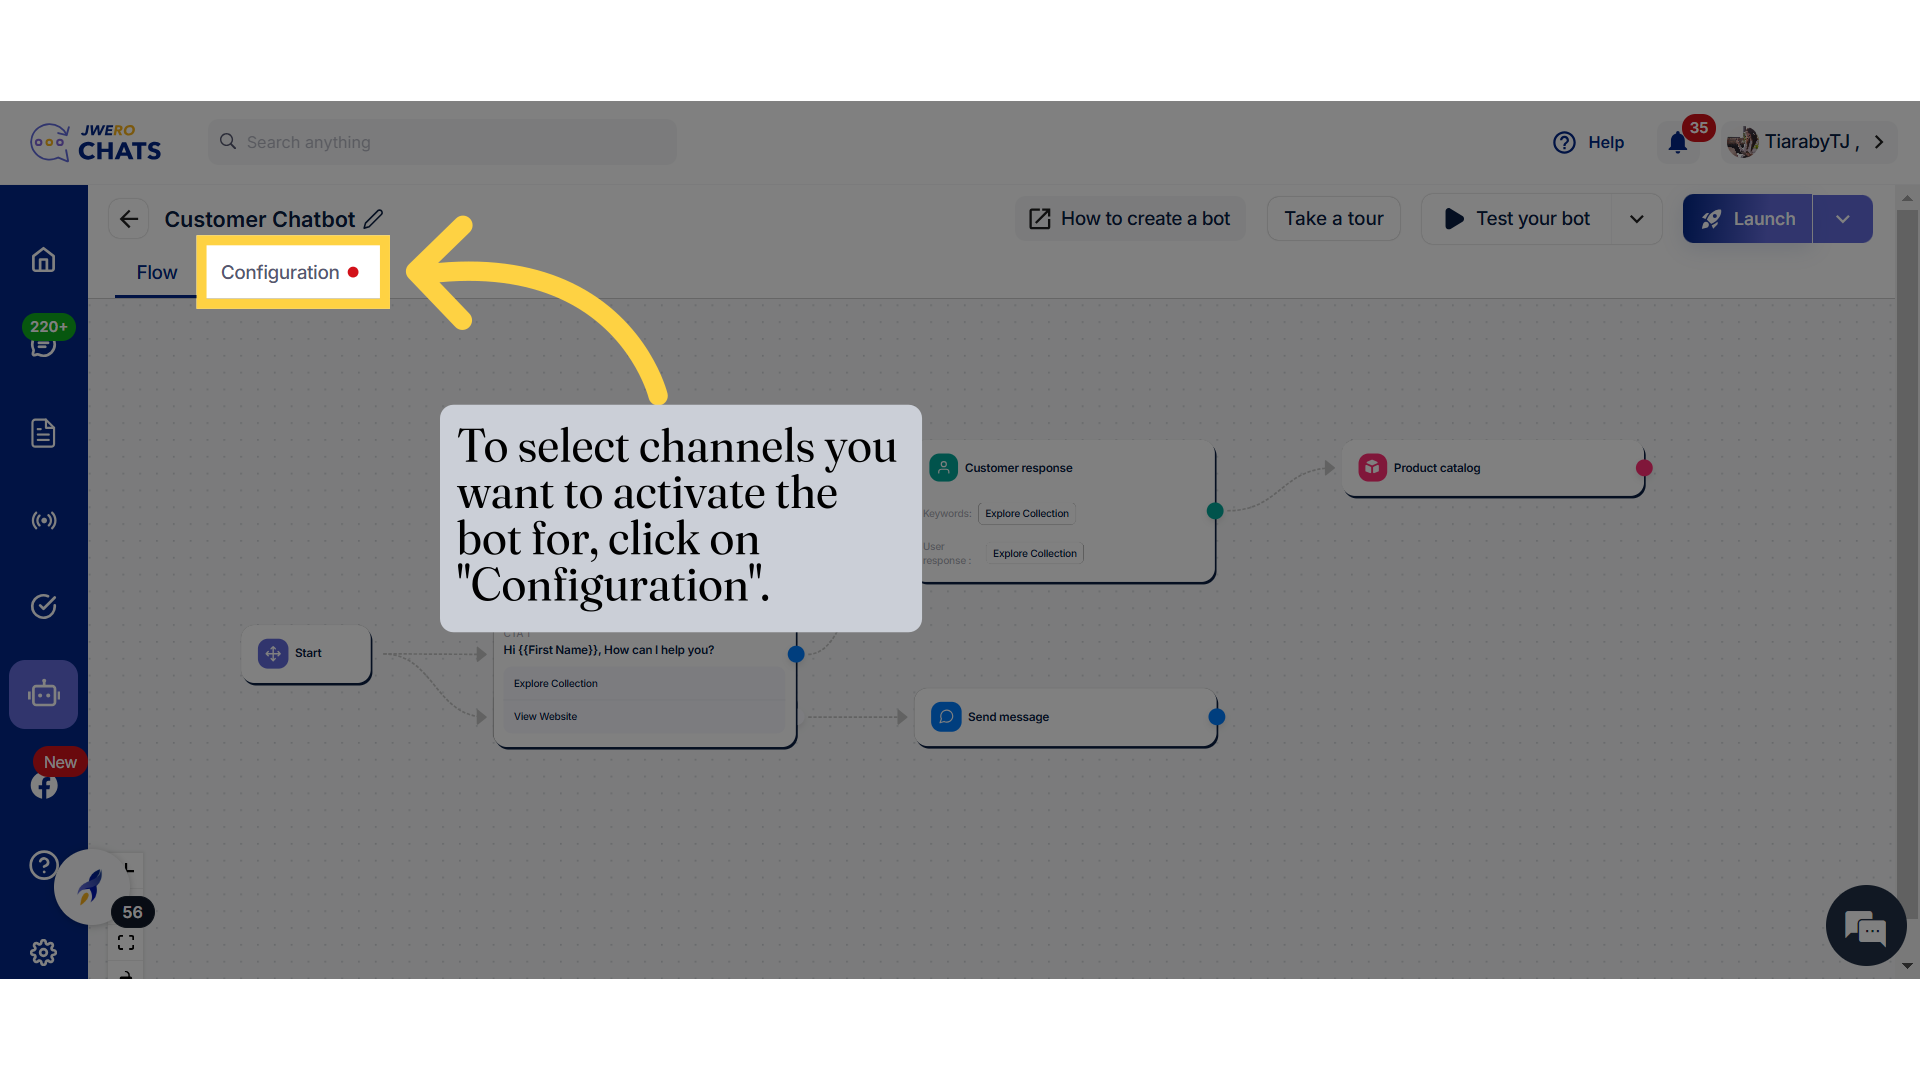
8. To select channels you want to activate the bot for, click on "Configuration".
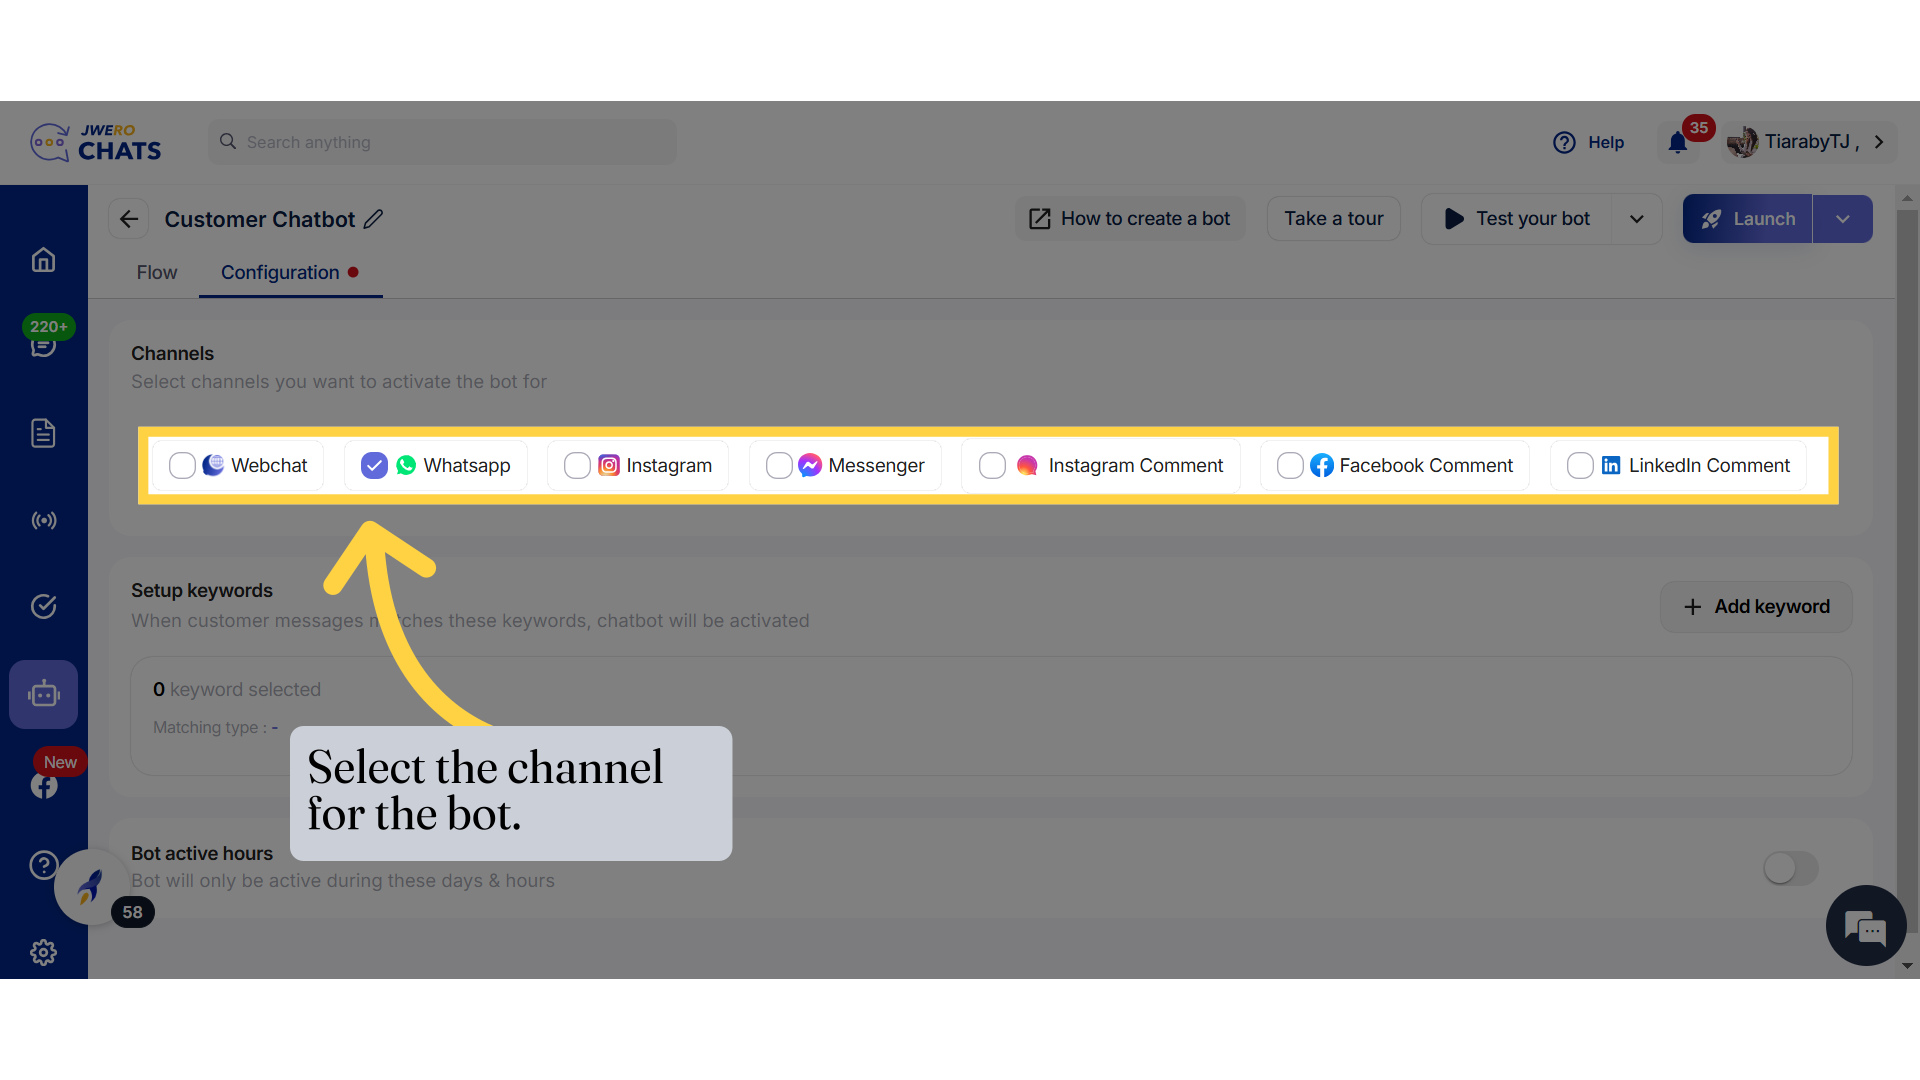
9. Select the channel.
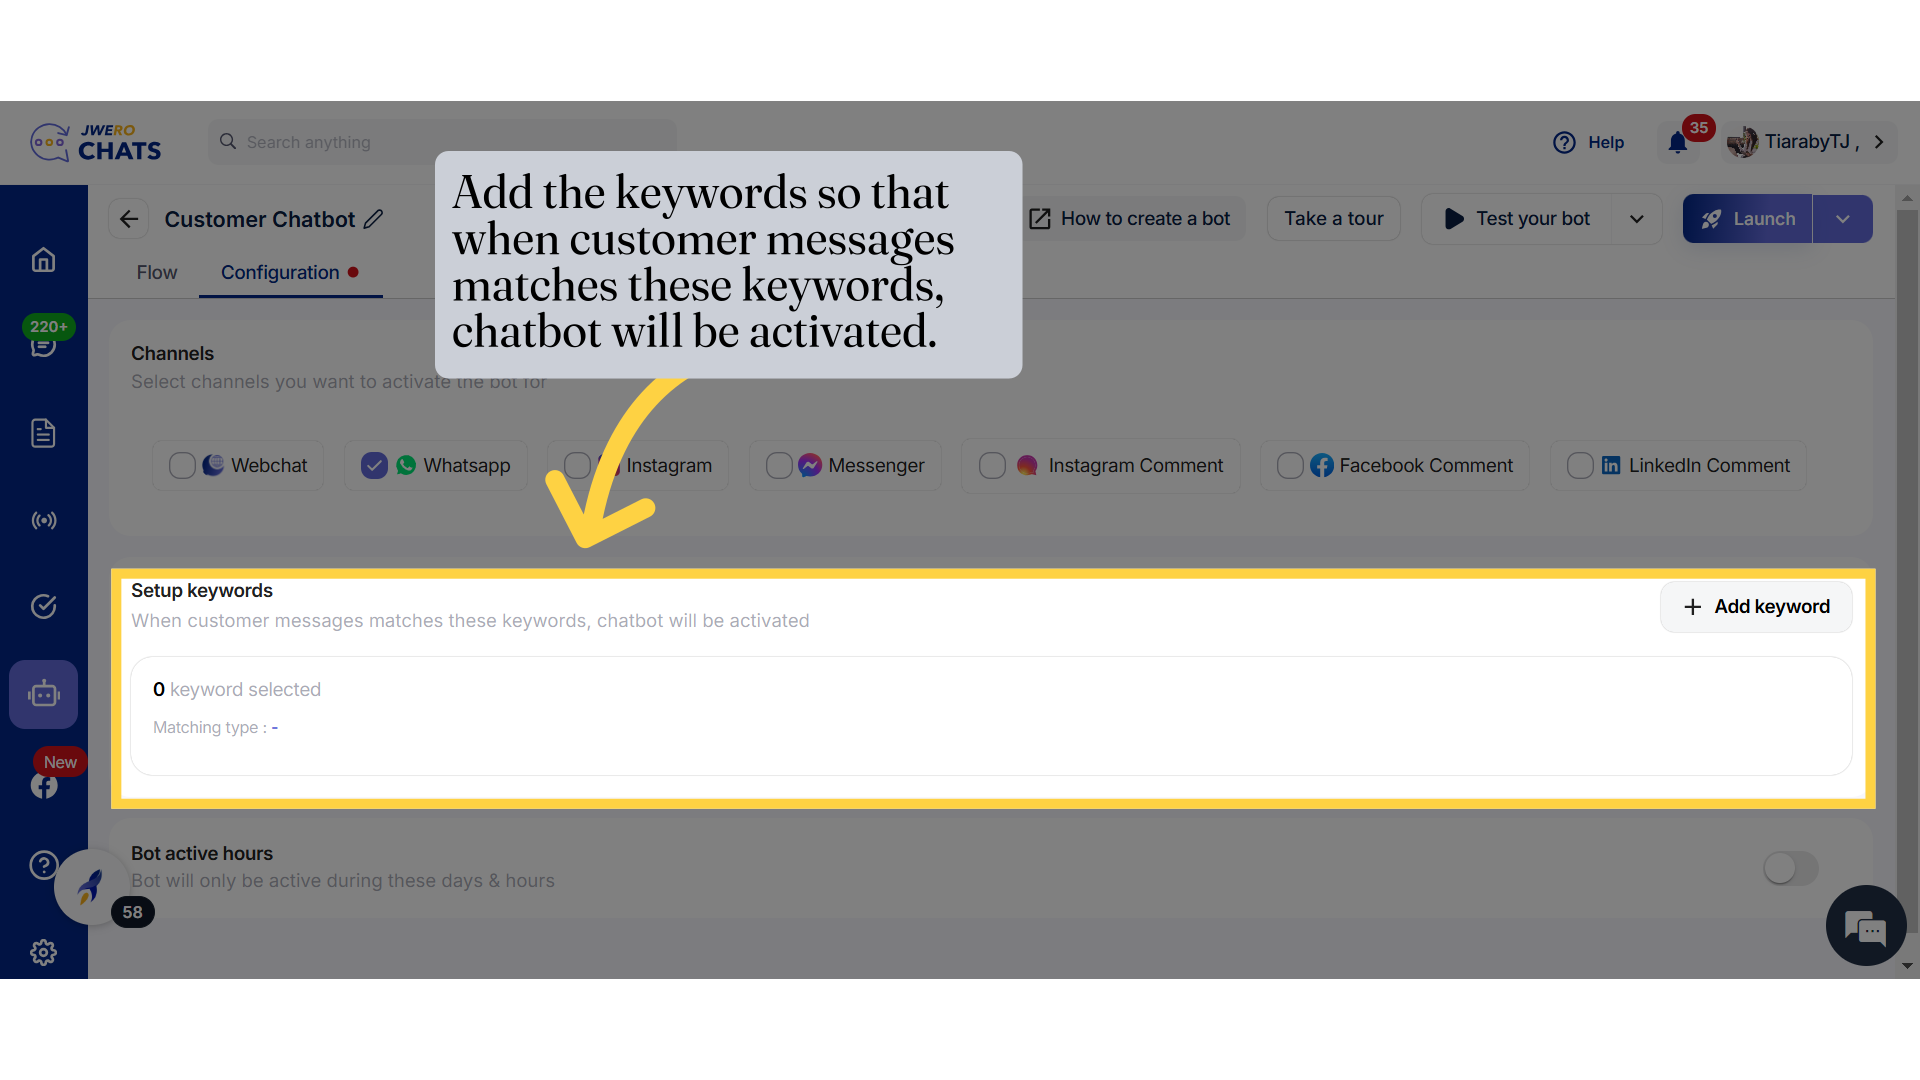
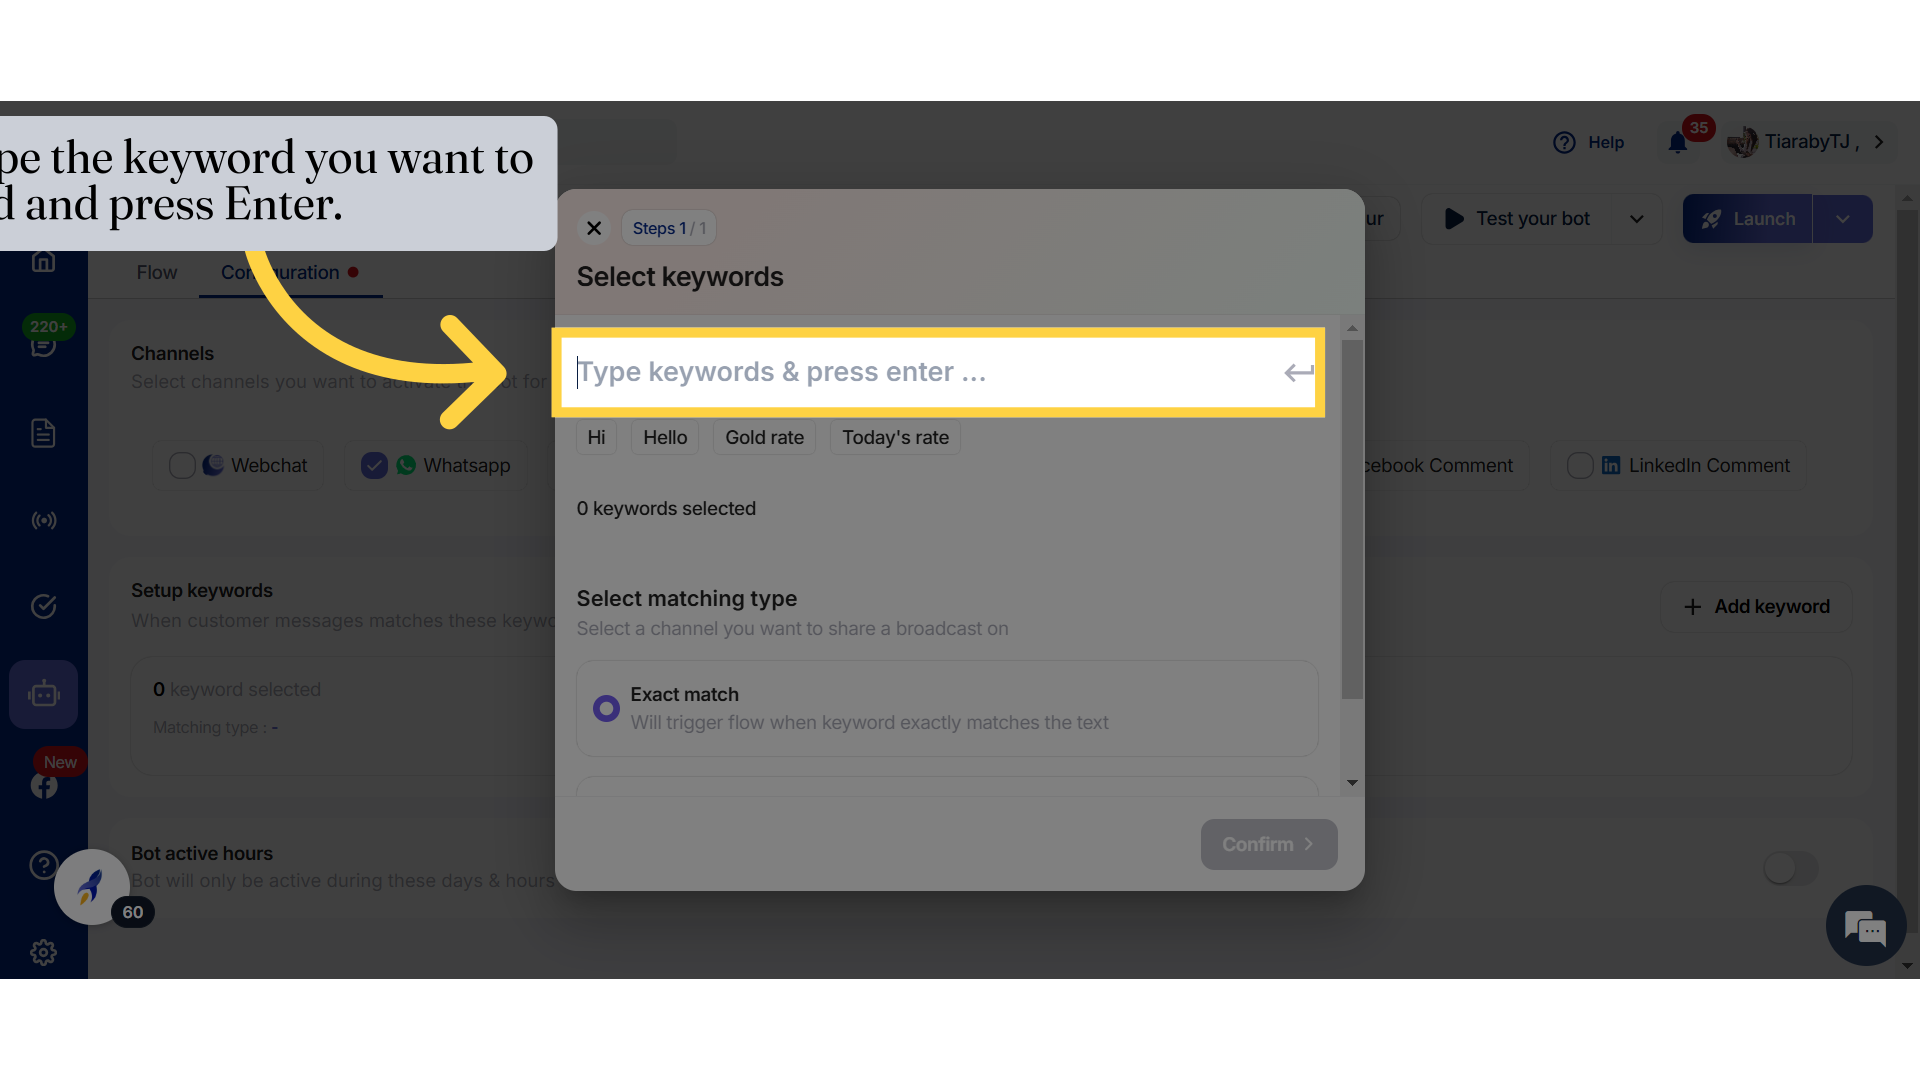
10. Add the keywords so that when customer messages matches these keywords, chatbot will be activated.
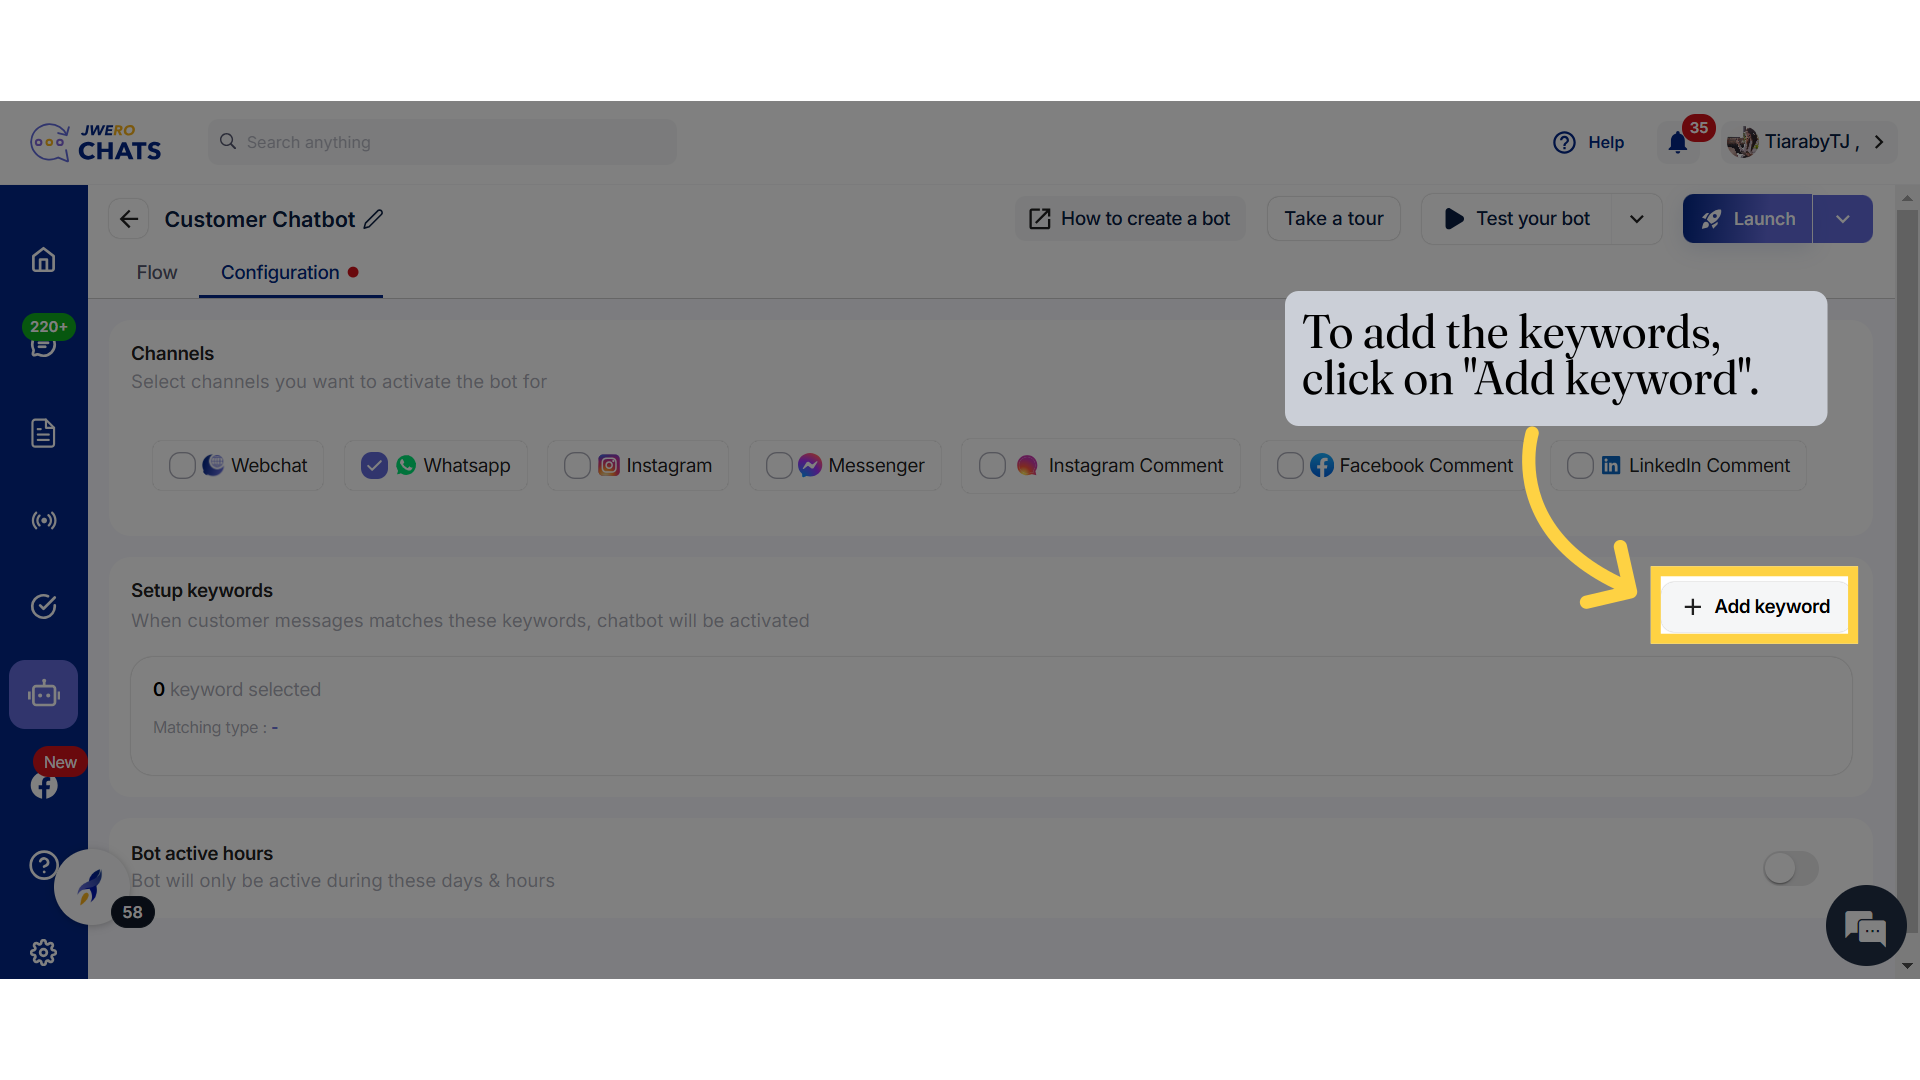
11. To add the keywords, click on "Add keyword".
12. Type the keyword you want to add and press Enter.
13. This chatbot will be triggered when users send "Gold Rate" or "Products."
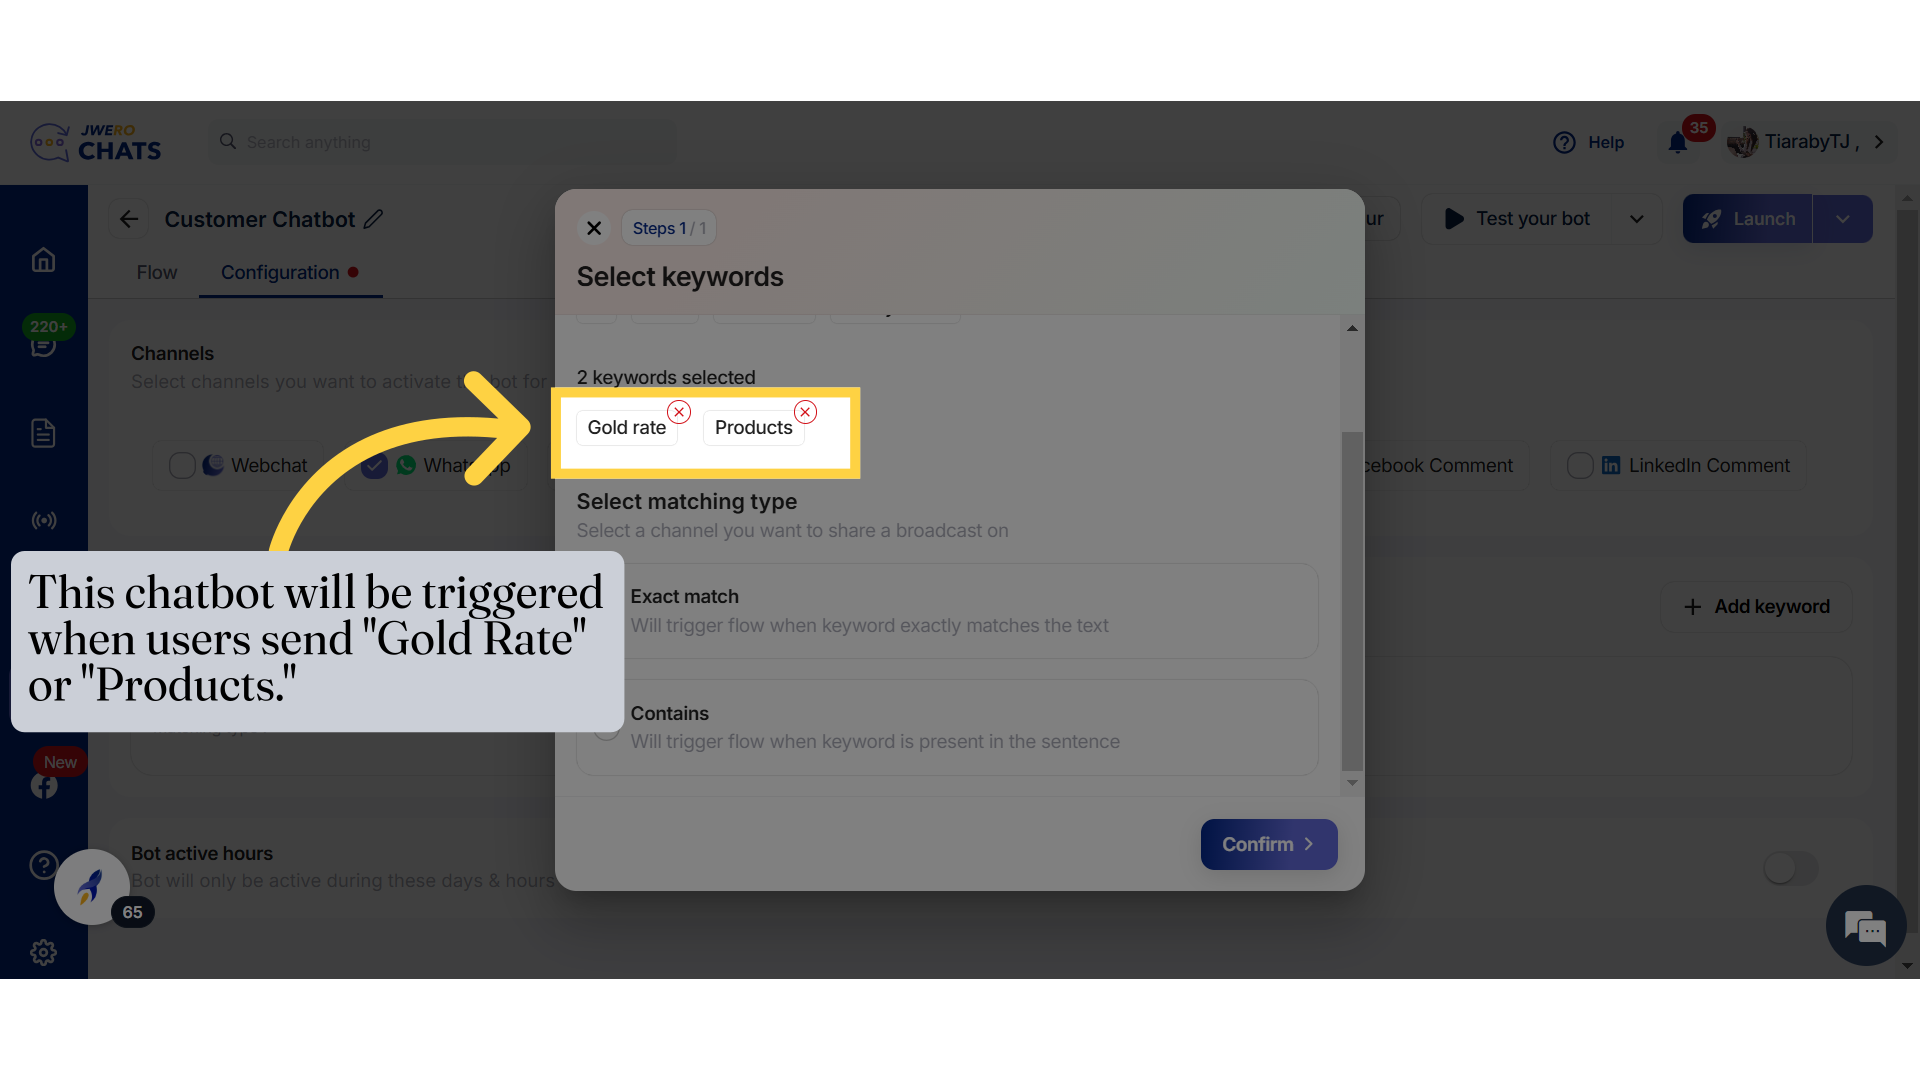
14. Matching Type.
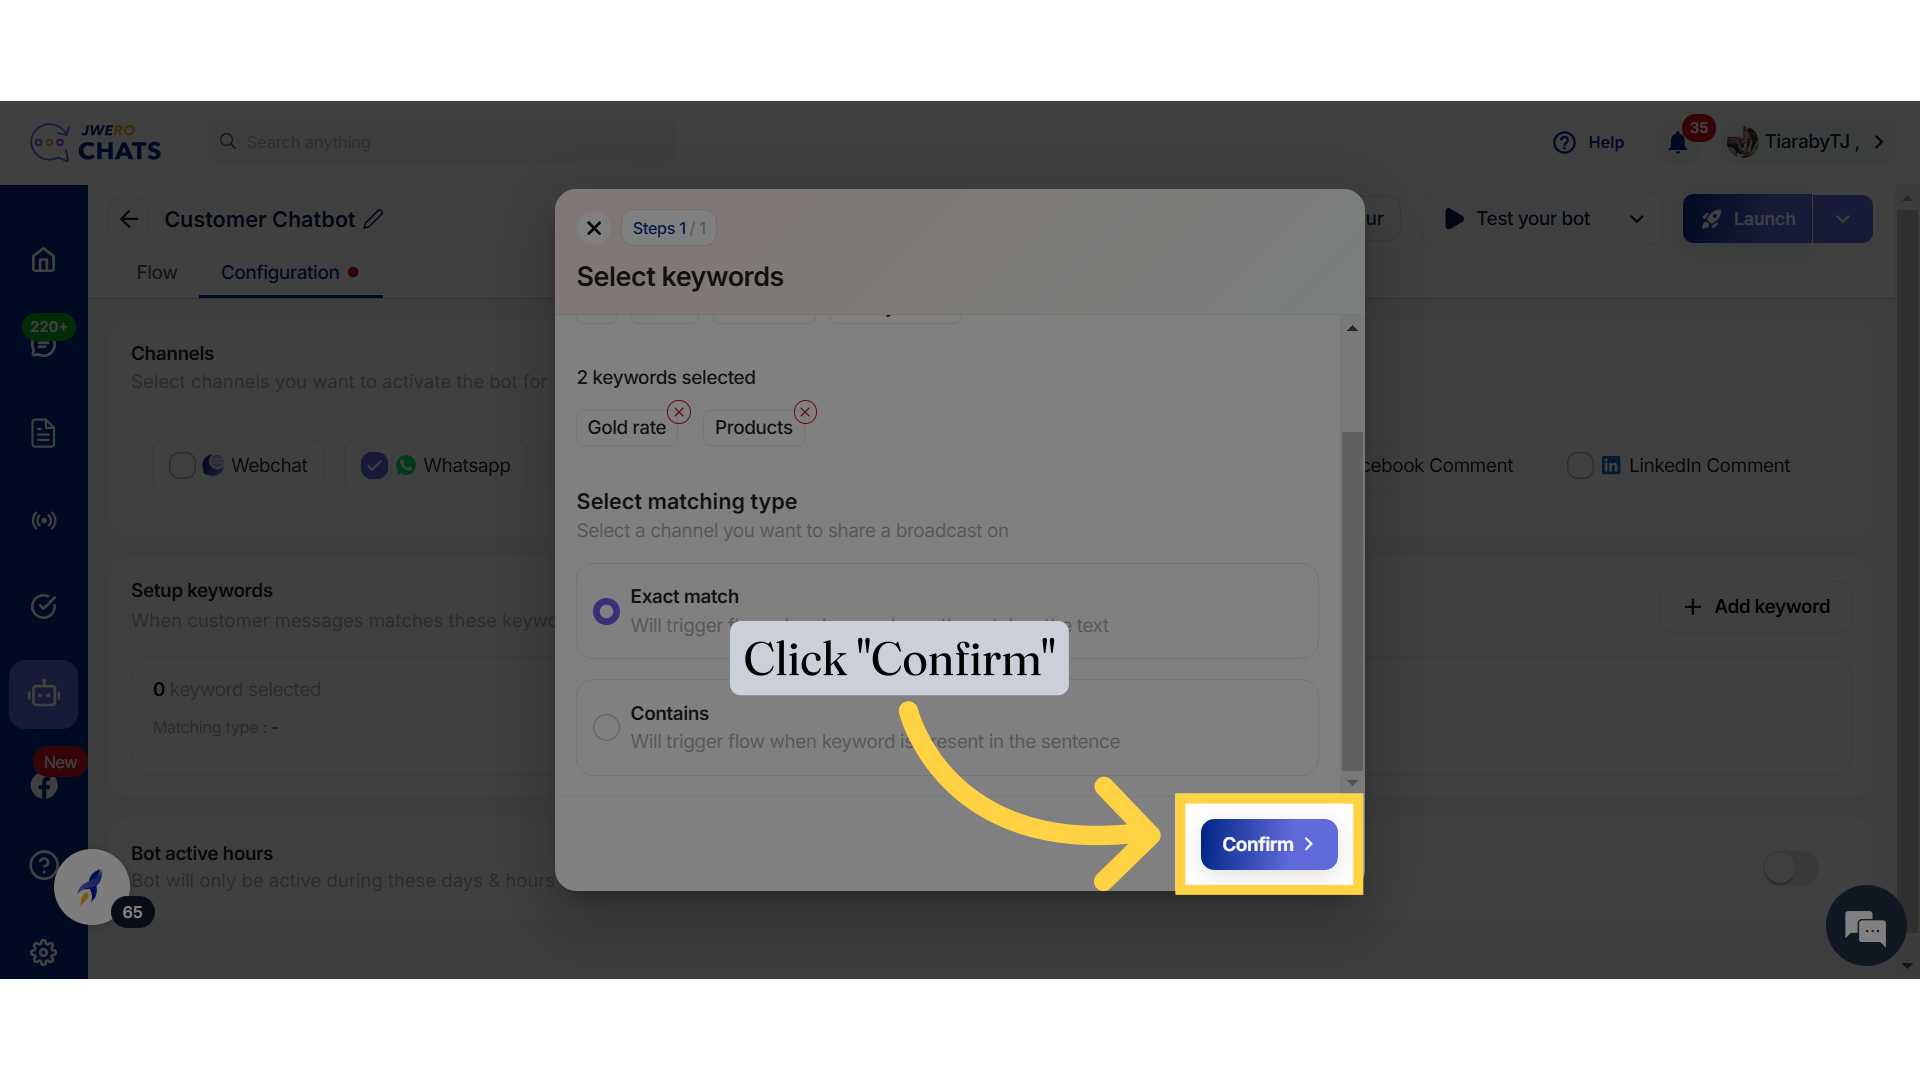
15. Click "Confirm"
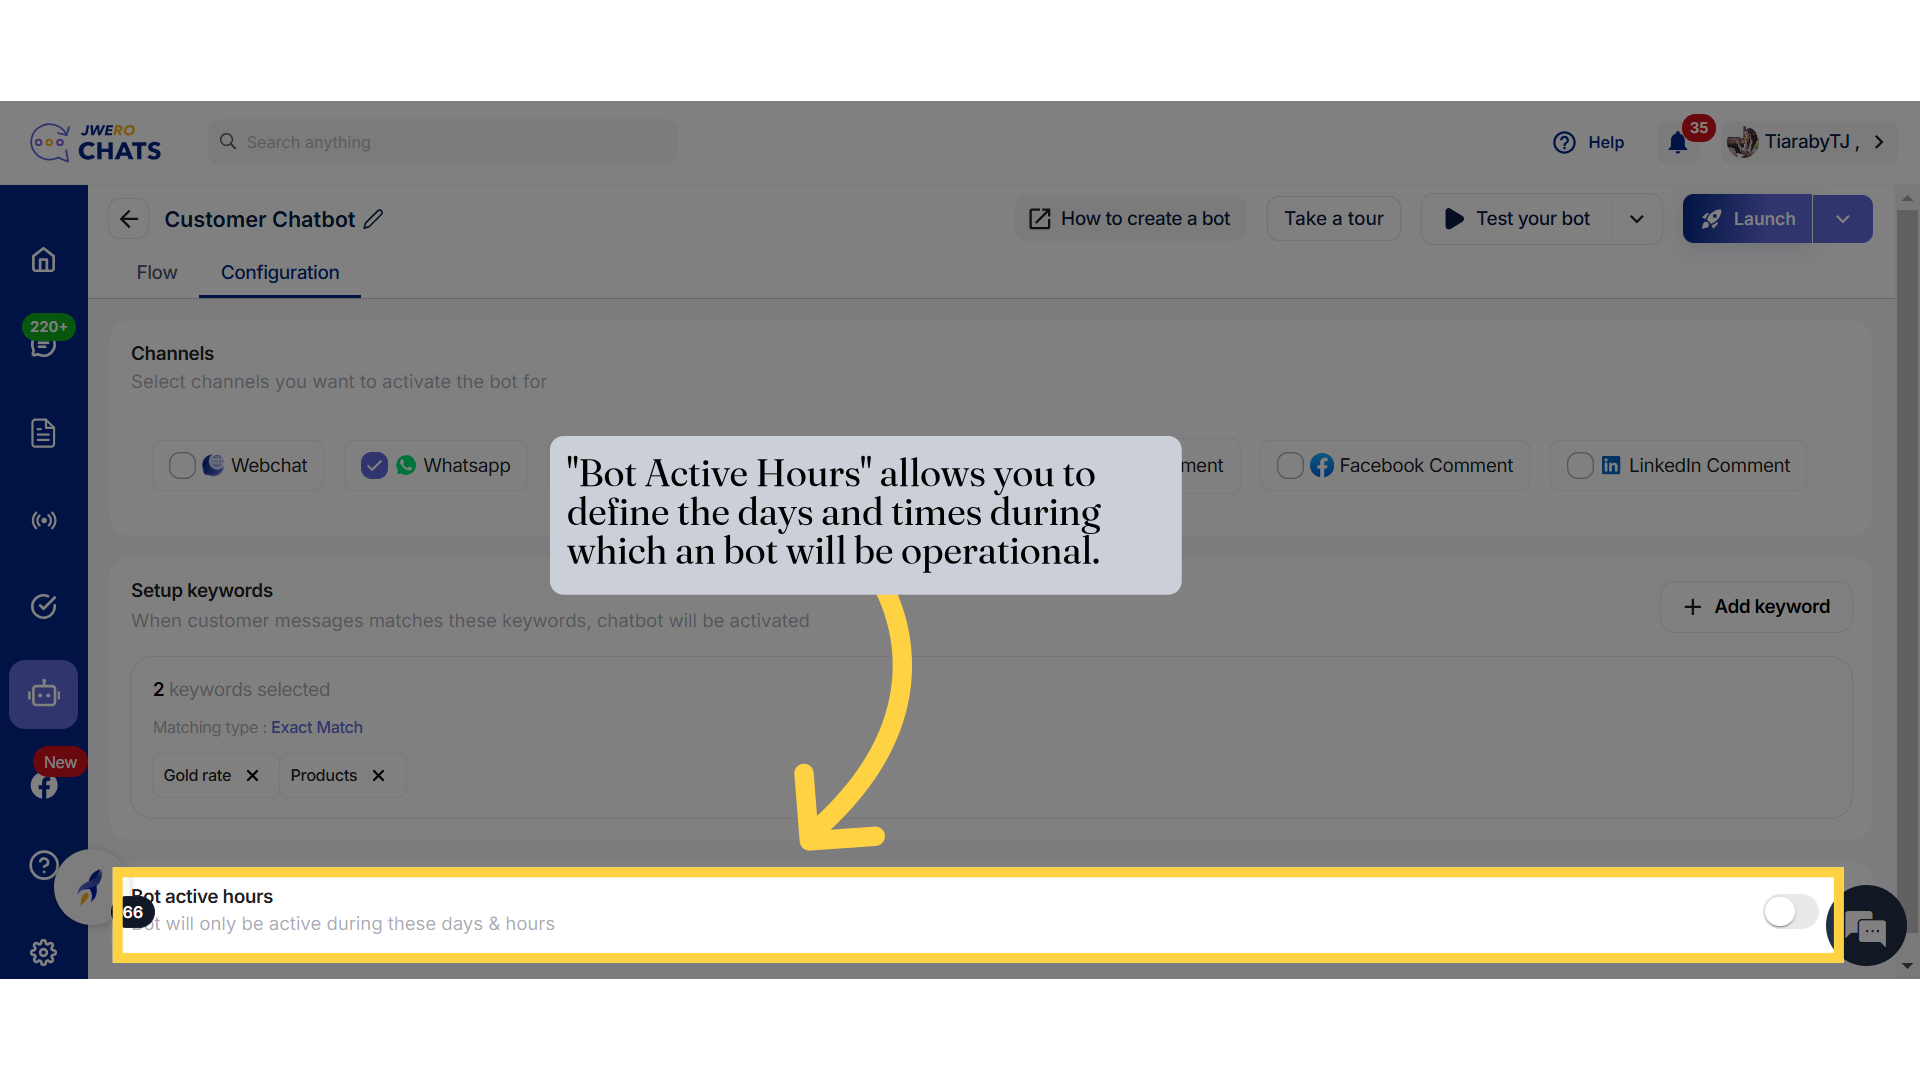
16. "Bot Active Hours" allows you to define the days and times during which an bot will be operational.
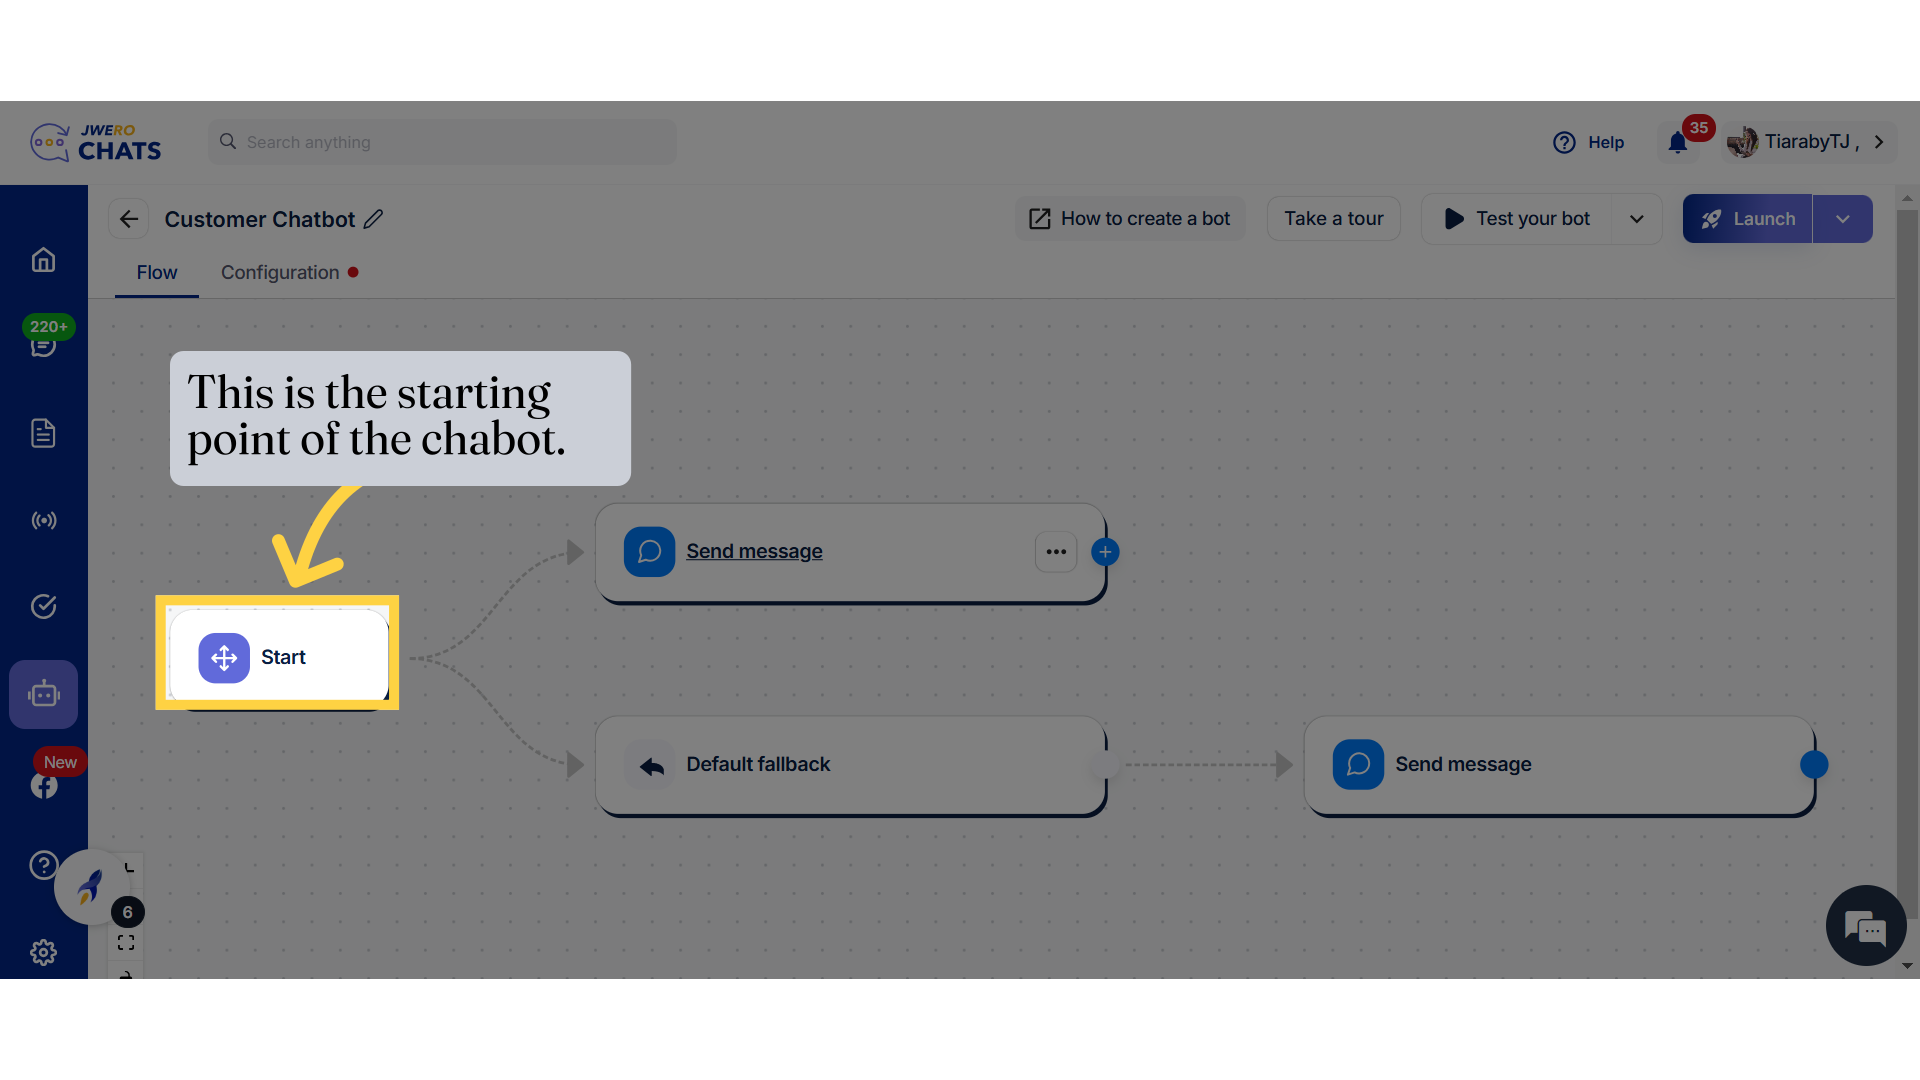
17. This is the starting point of the chabot.
18. The Default Fallback is a preset response triggered when the chatbot encounters unrecognized user inputs or situations where no specific response is configured. Example: "Sorry, I didn't understand that. Can I assist you with something else?"
The Default Fallback is a preset response triggered when the chatbot encounters unrecognized user inputs or situations where no specific response is configured. You can enter a message such as, for example: "Sorry, I didn't understand that. Can I assist you with something else?"

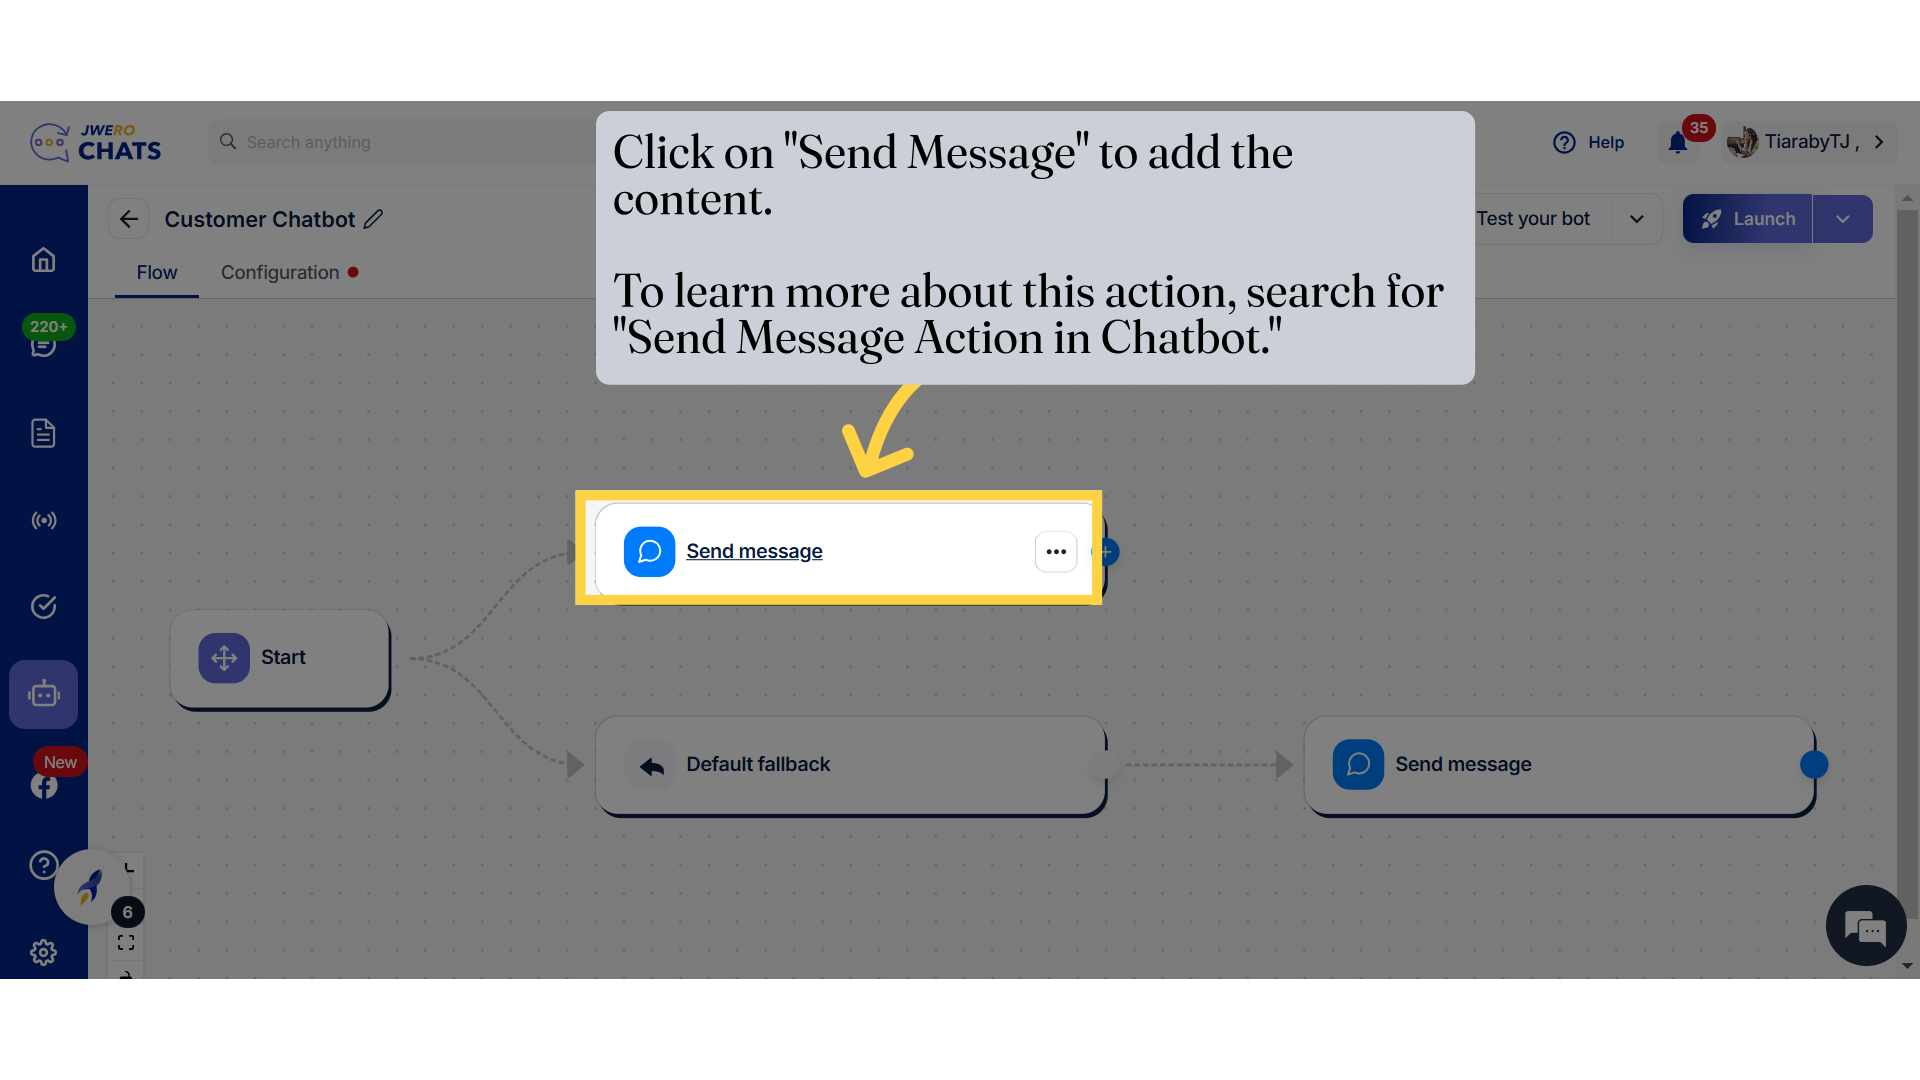
19. Click on "Send Message" to add the content. To learn more about this action, search for "Send Message Action in Chatbot."
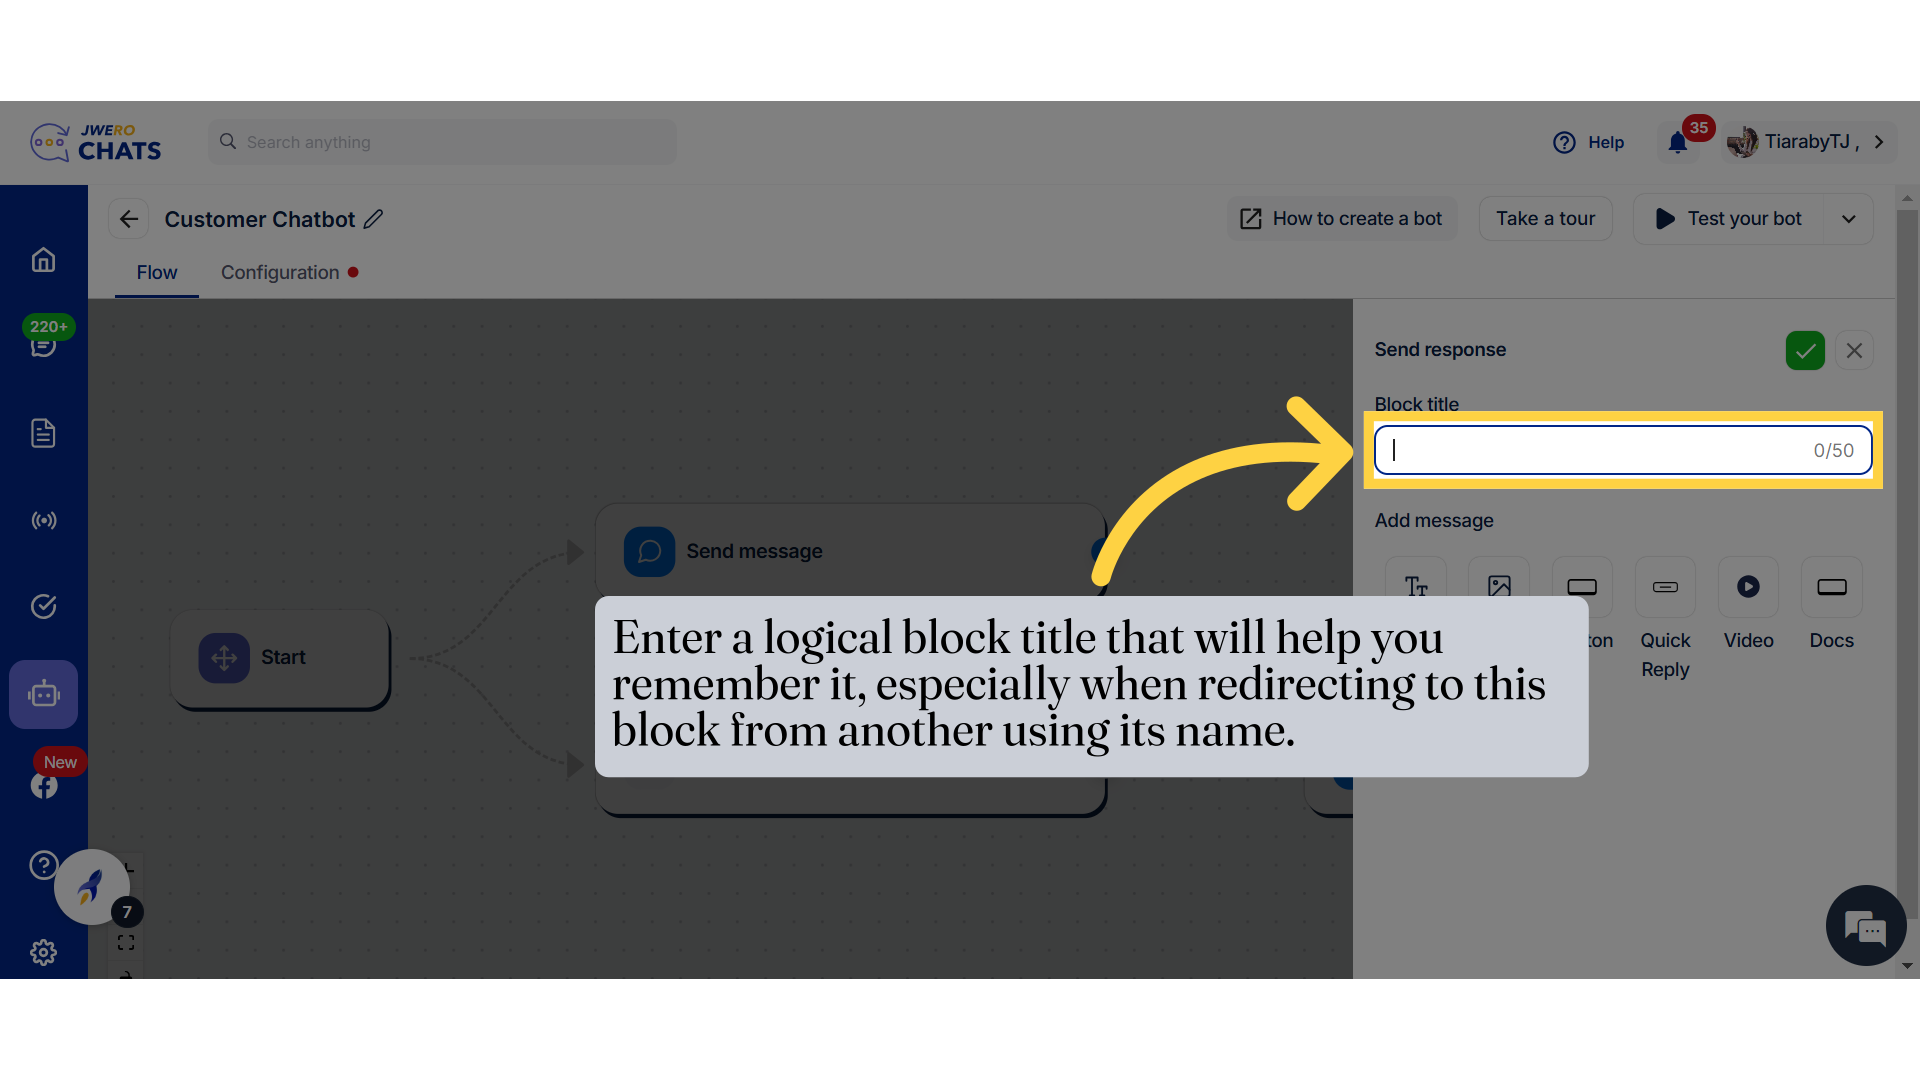
20. Enter a logical block title that will help you remember it, especially when redirecting to this block from another using its name.
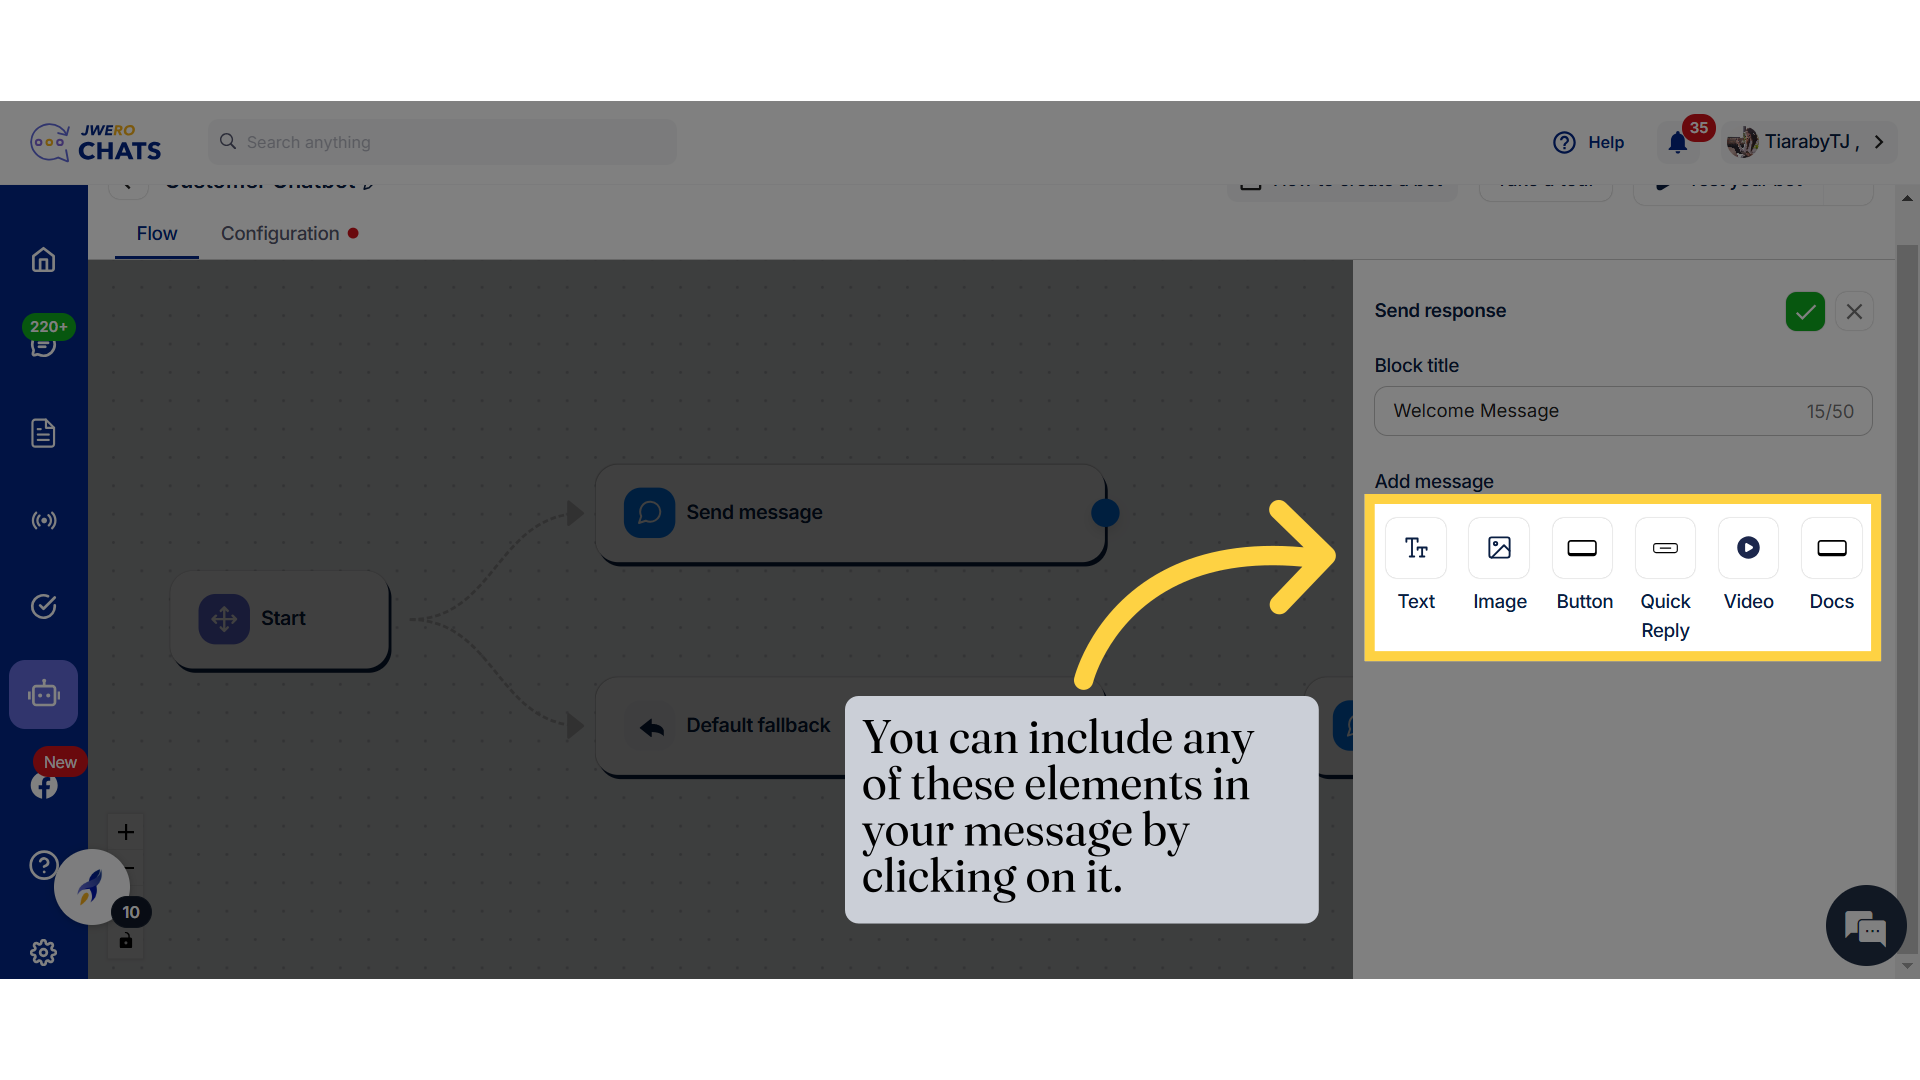
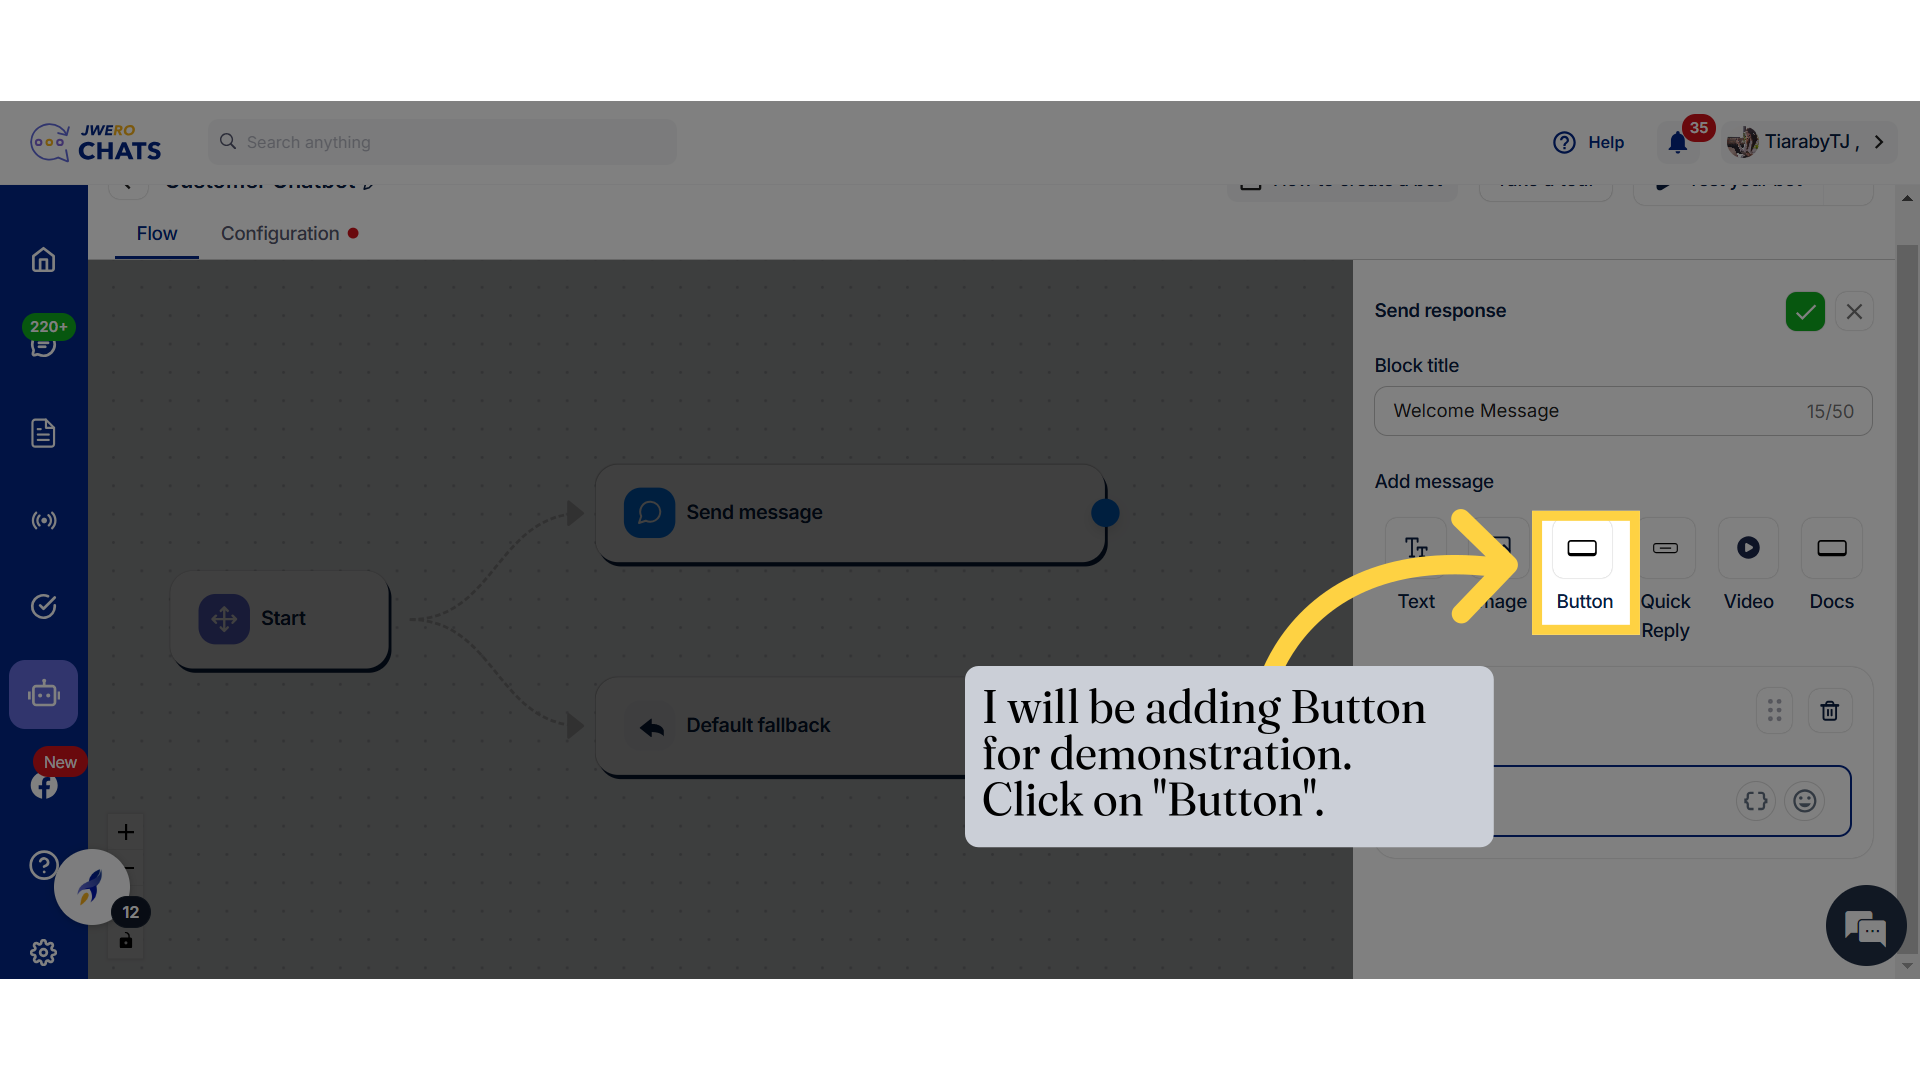
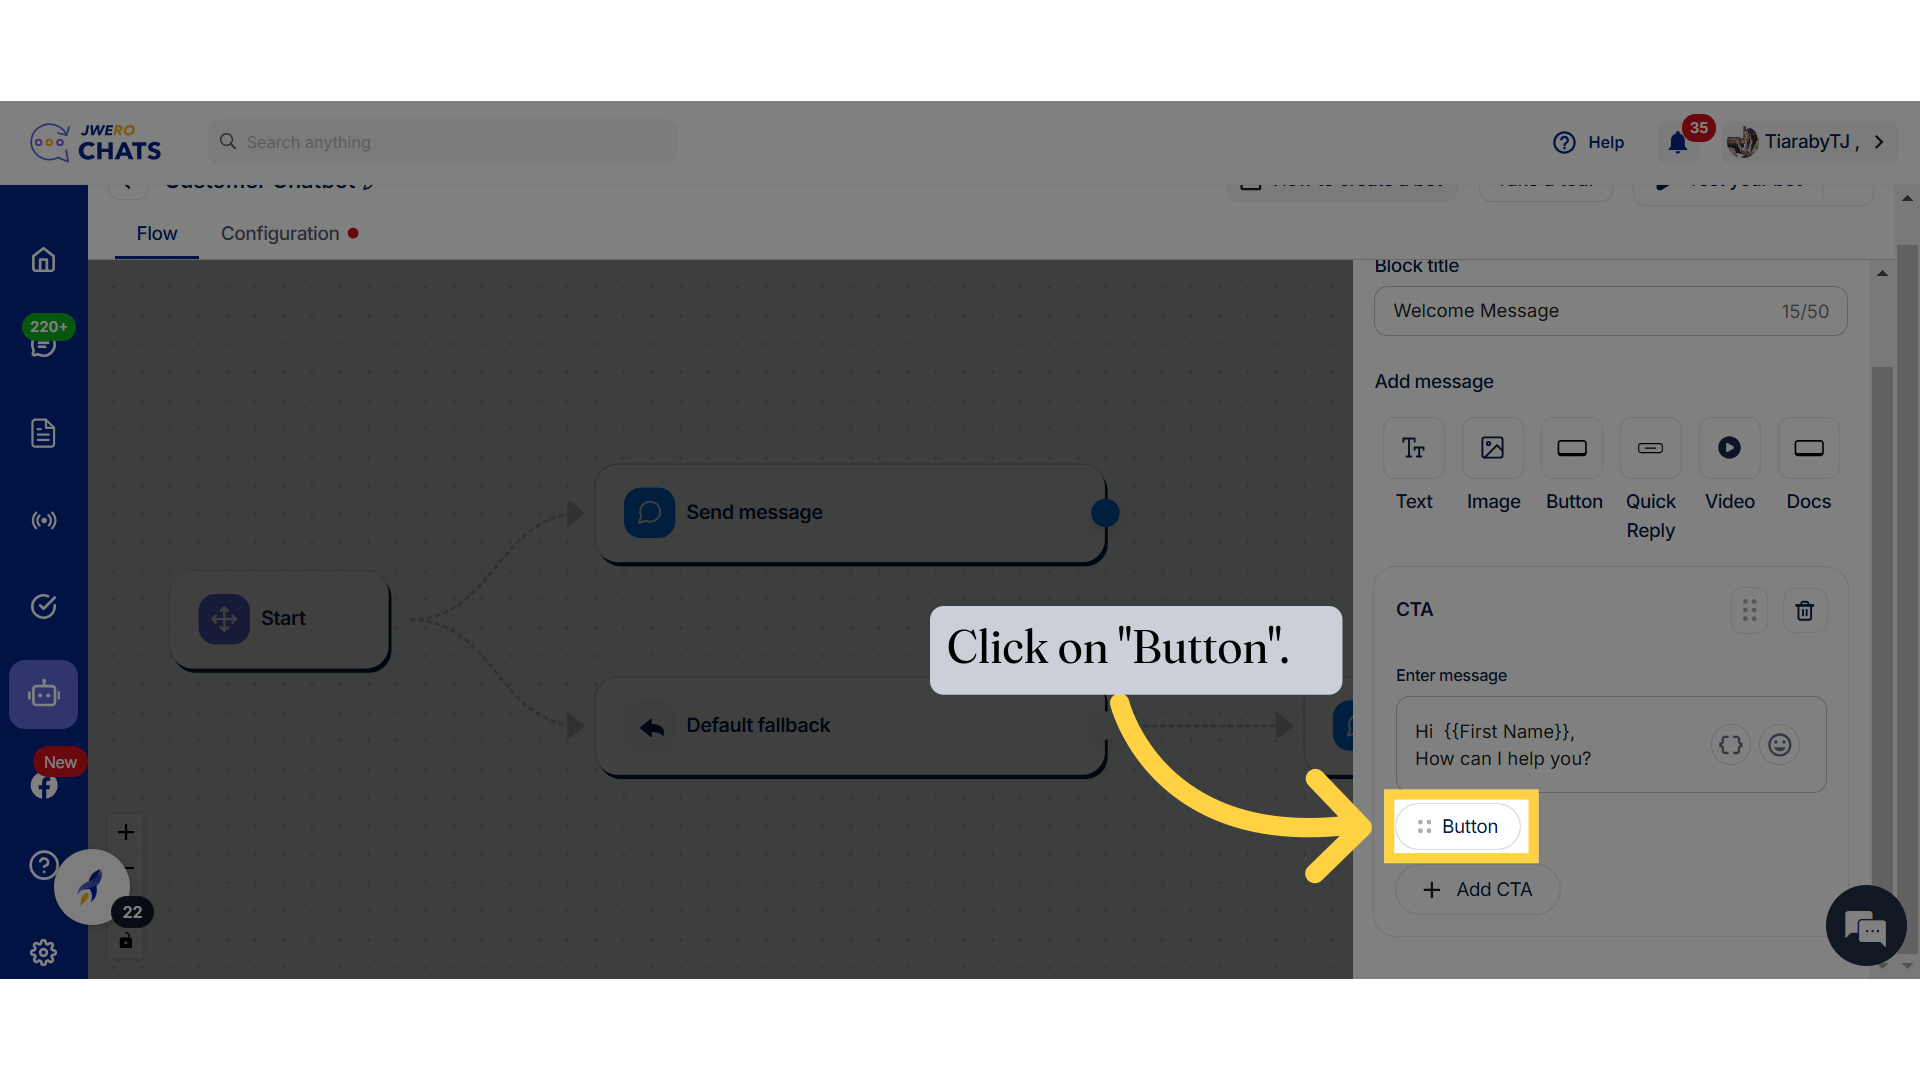
21. You can include any of these elements in your message by clicking on it.
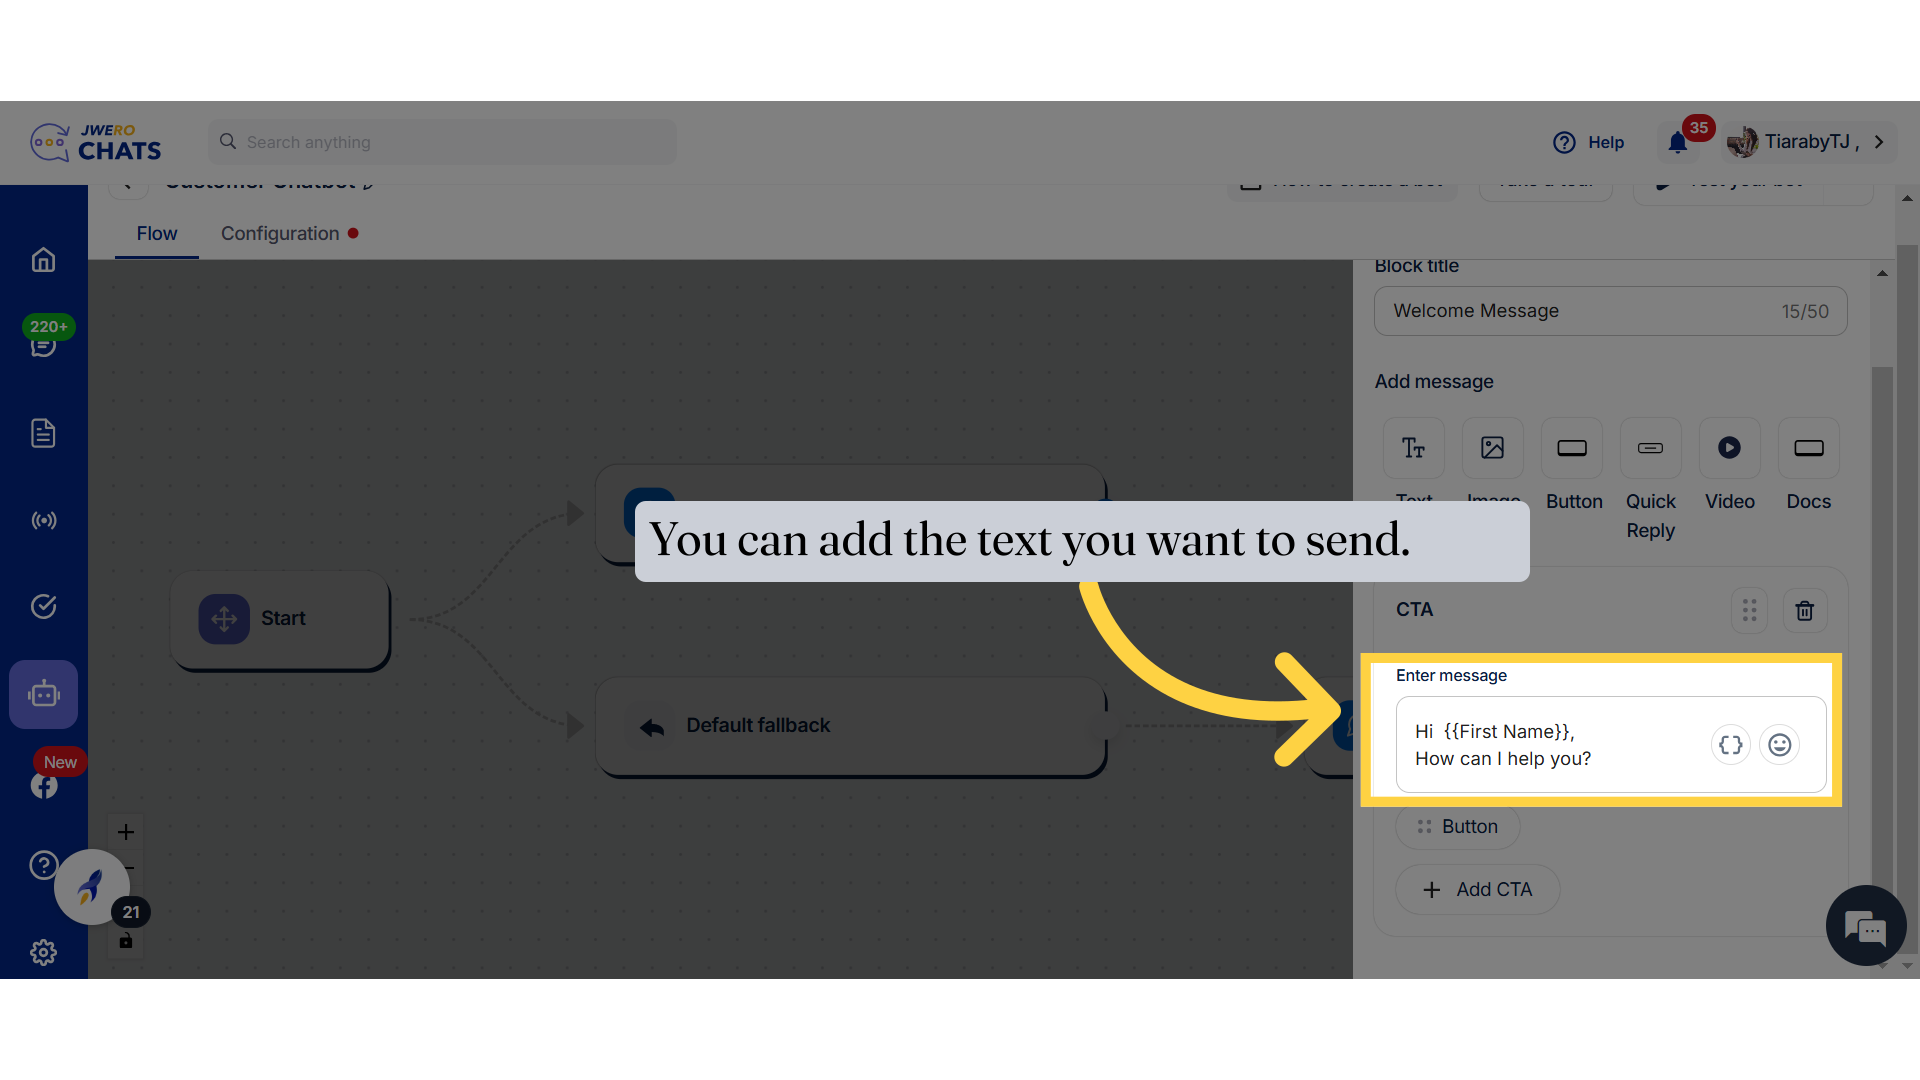
22. I will be adding Button for demonstration. Click on "Button".
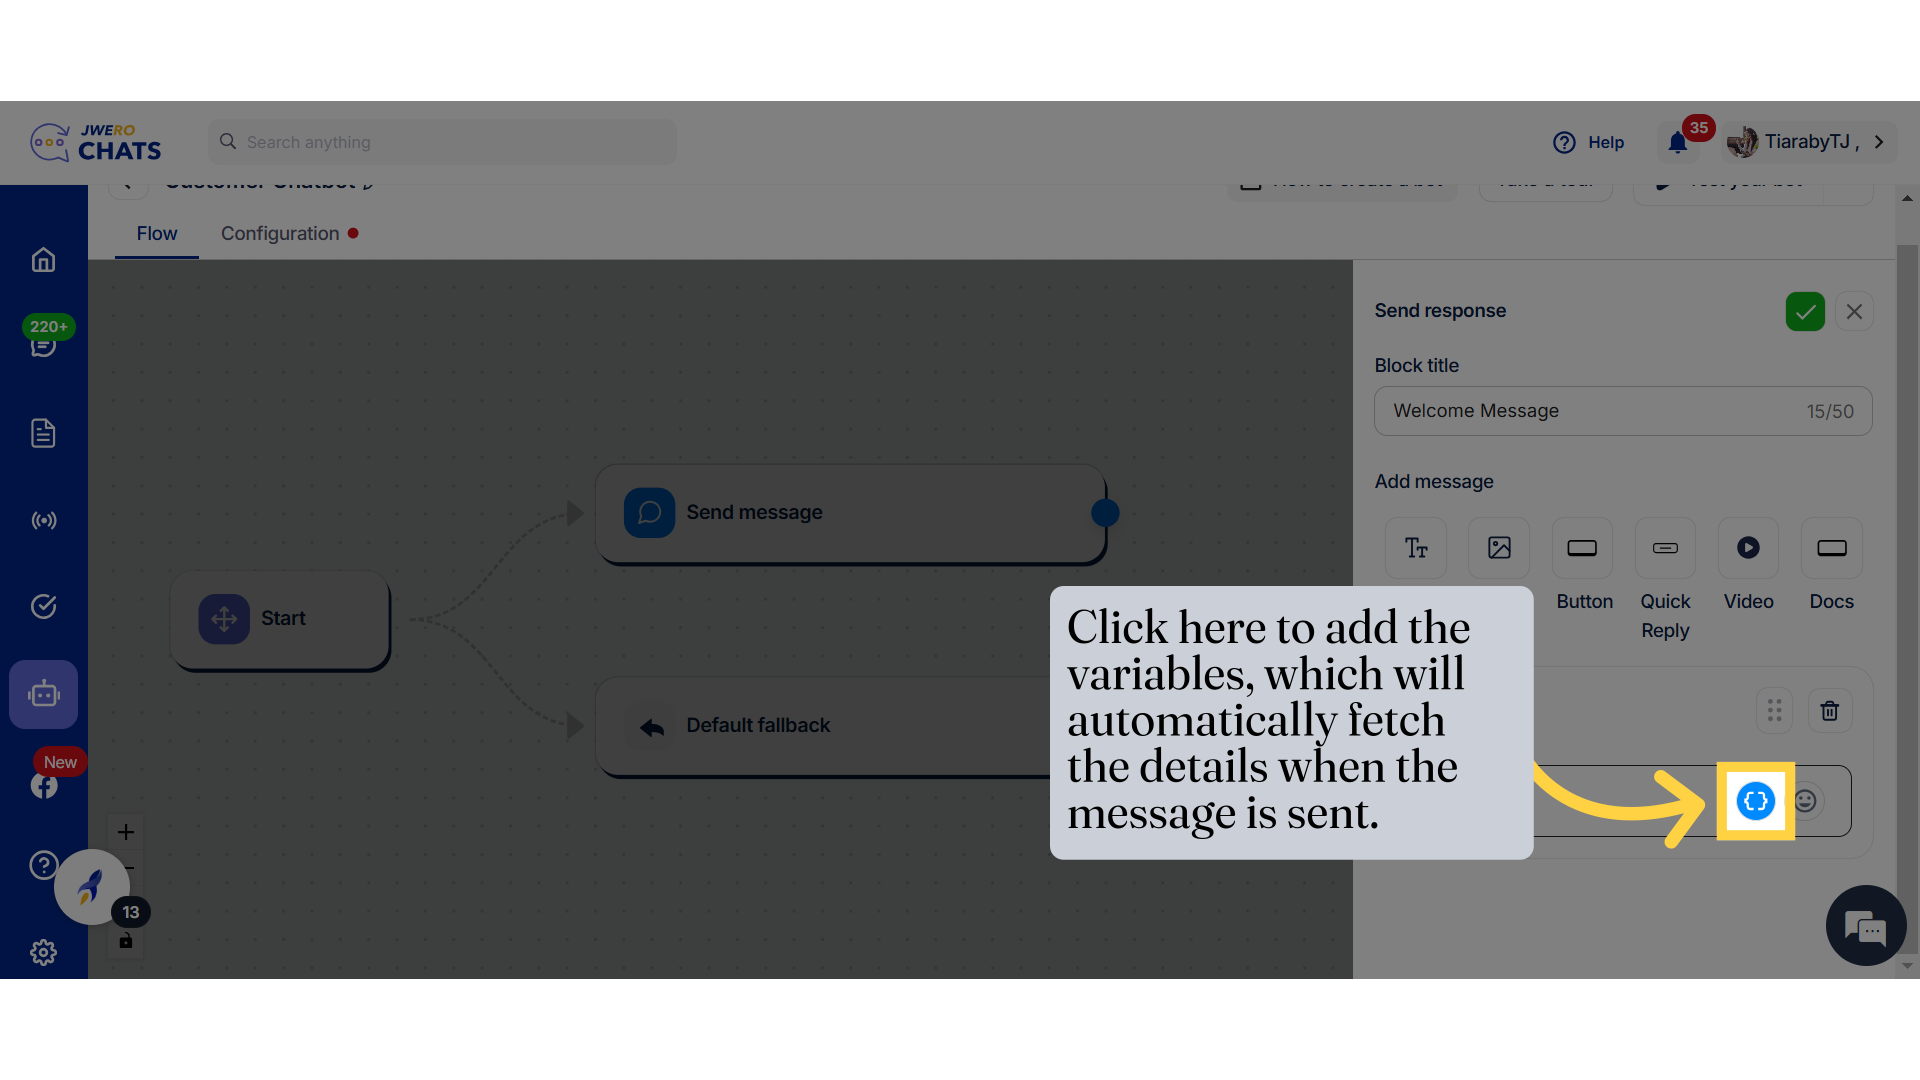
23. You can add the text you want to send.
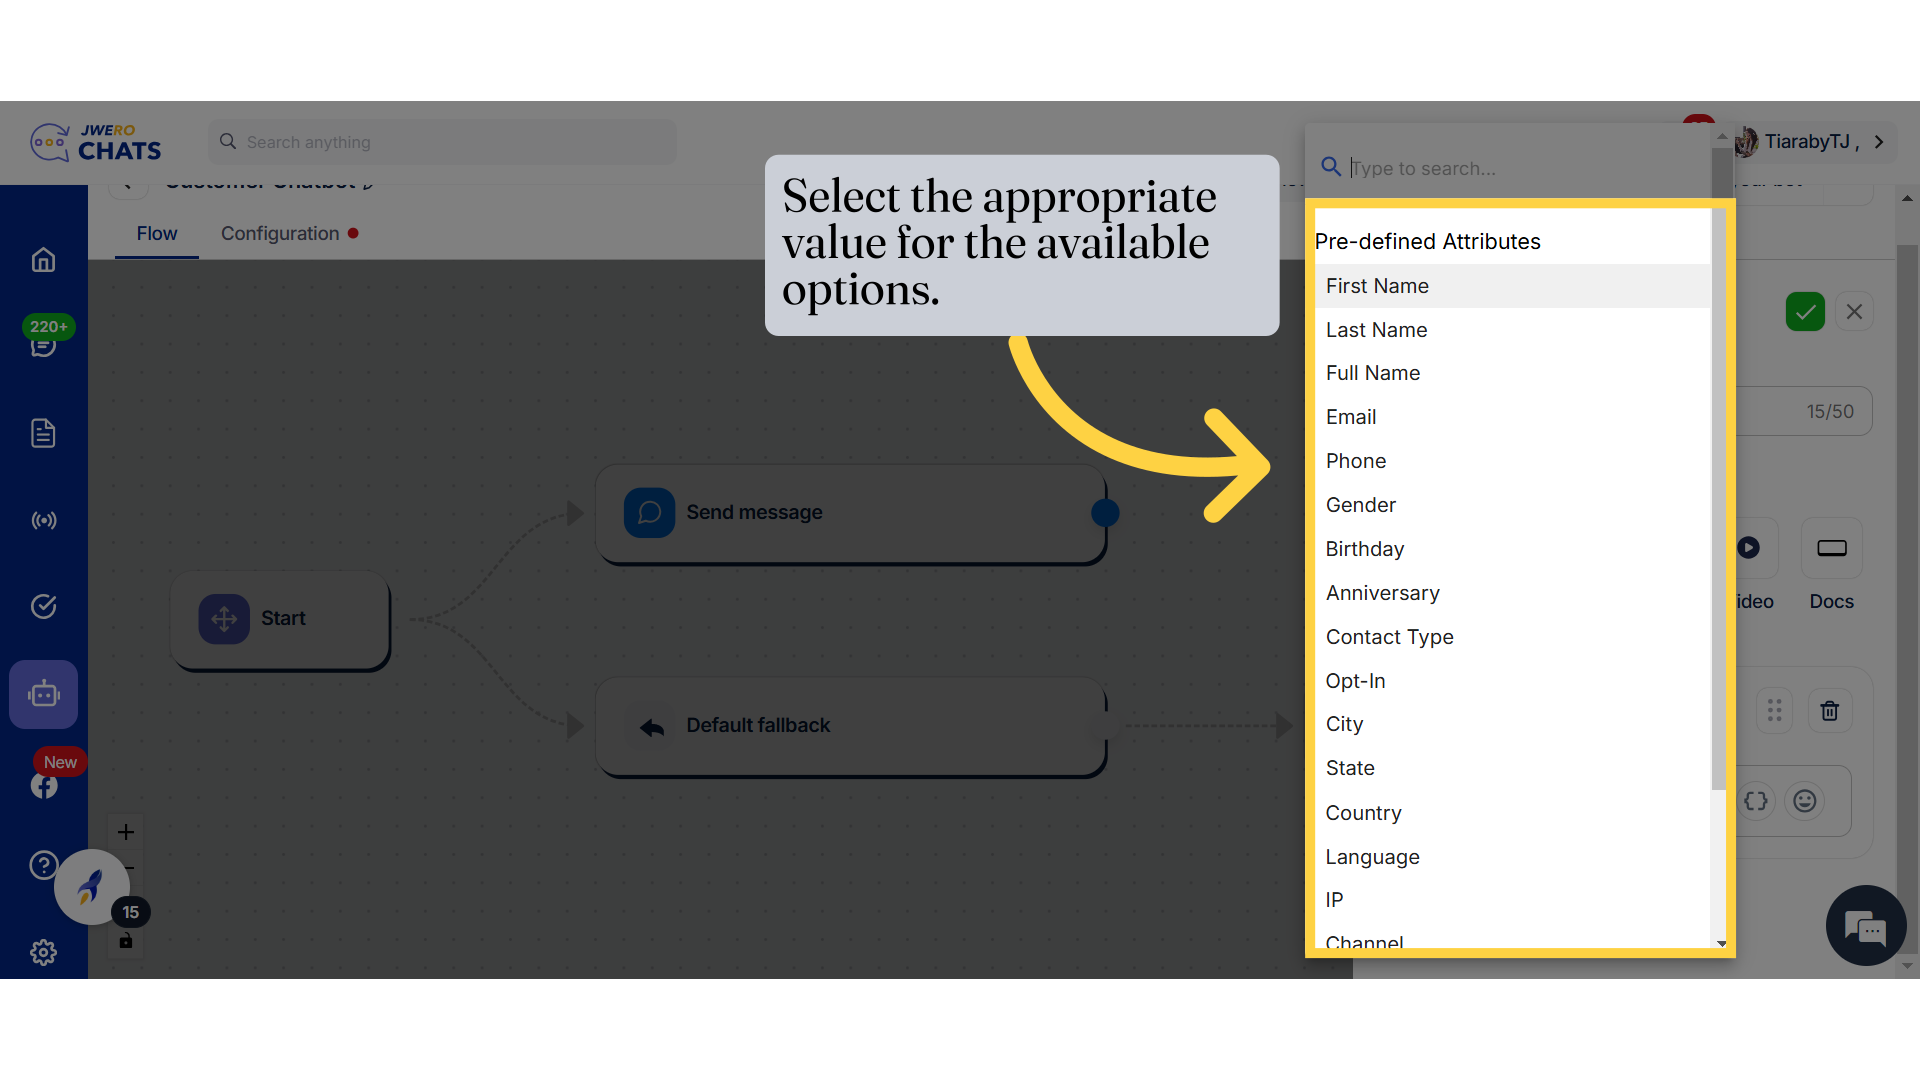
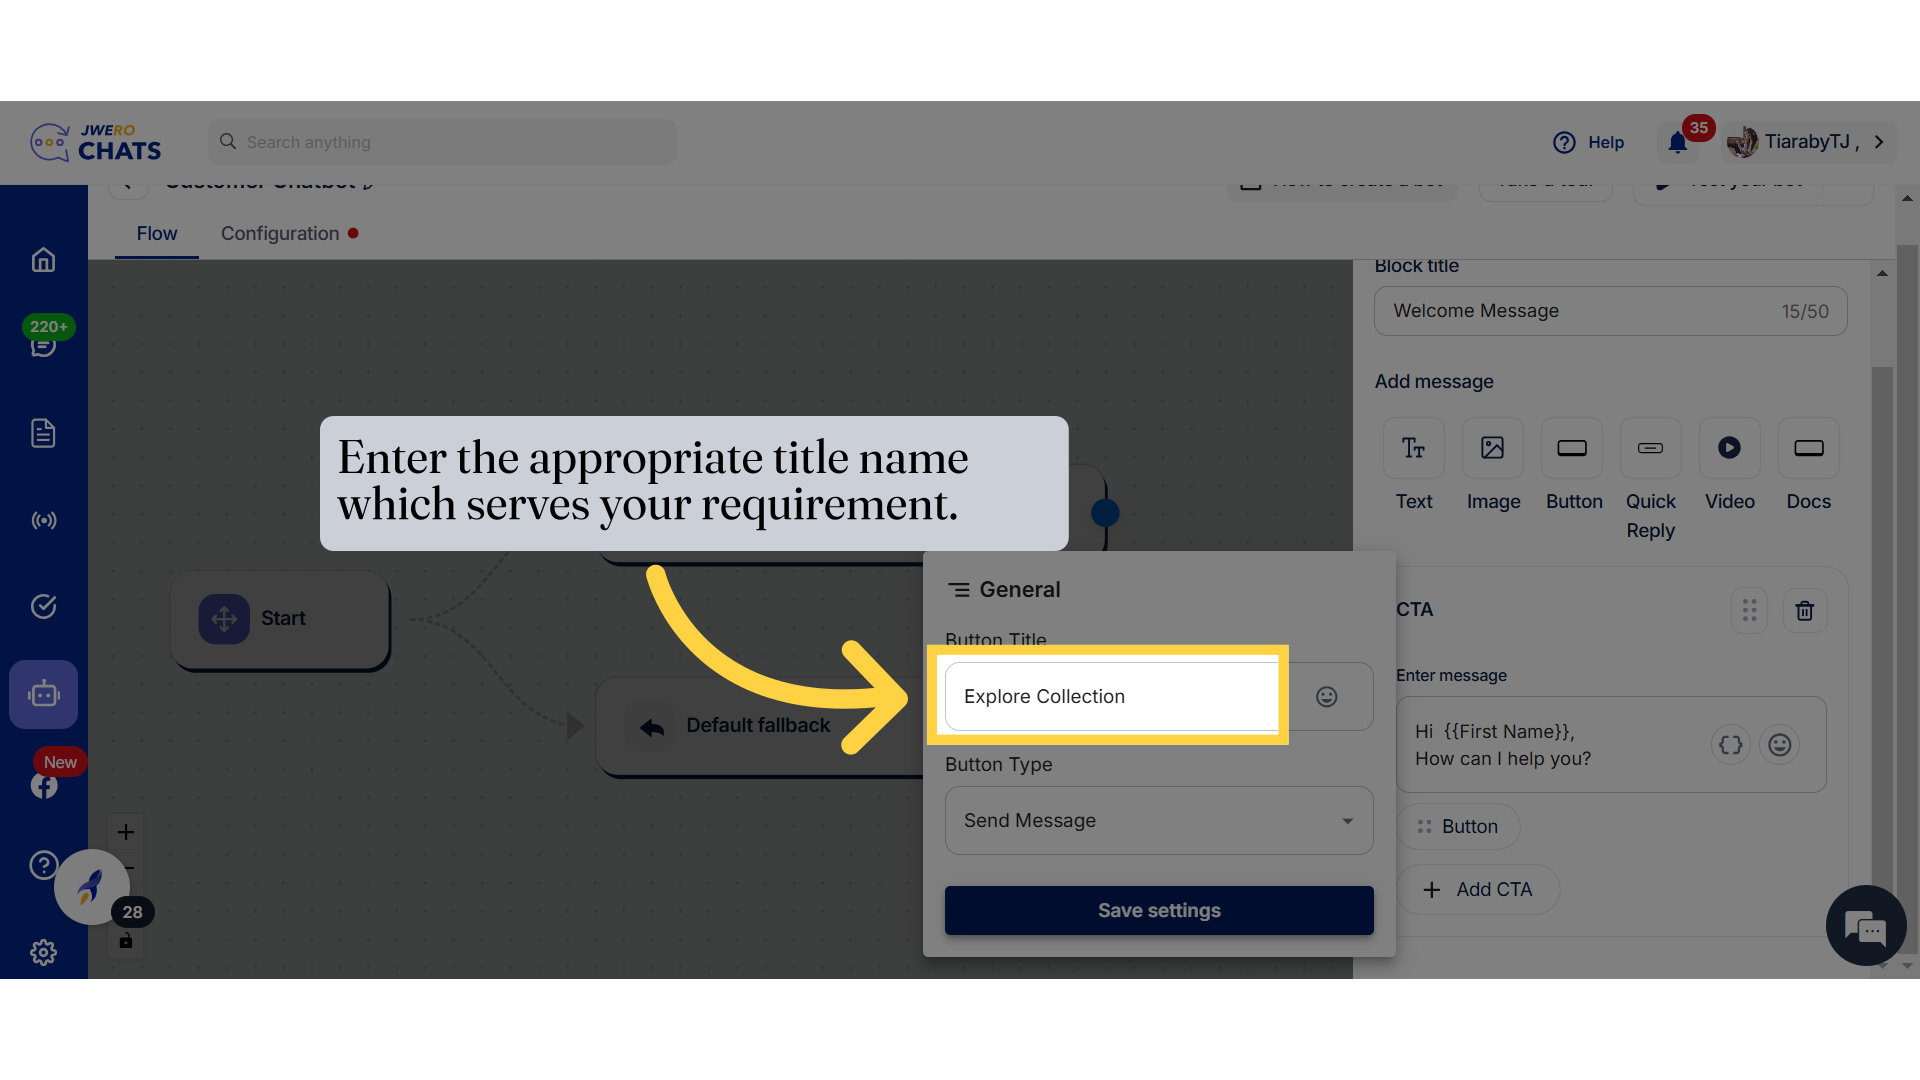
24. Click here to add the variables, which will automatically fetch the details when the message is sent.
25. Select the appropriate value for the available options.
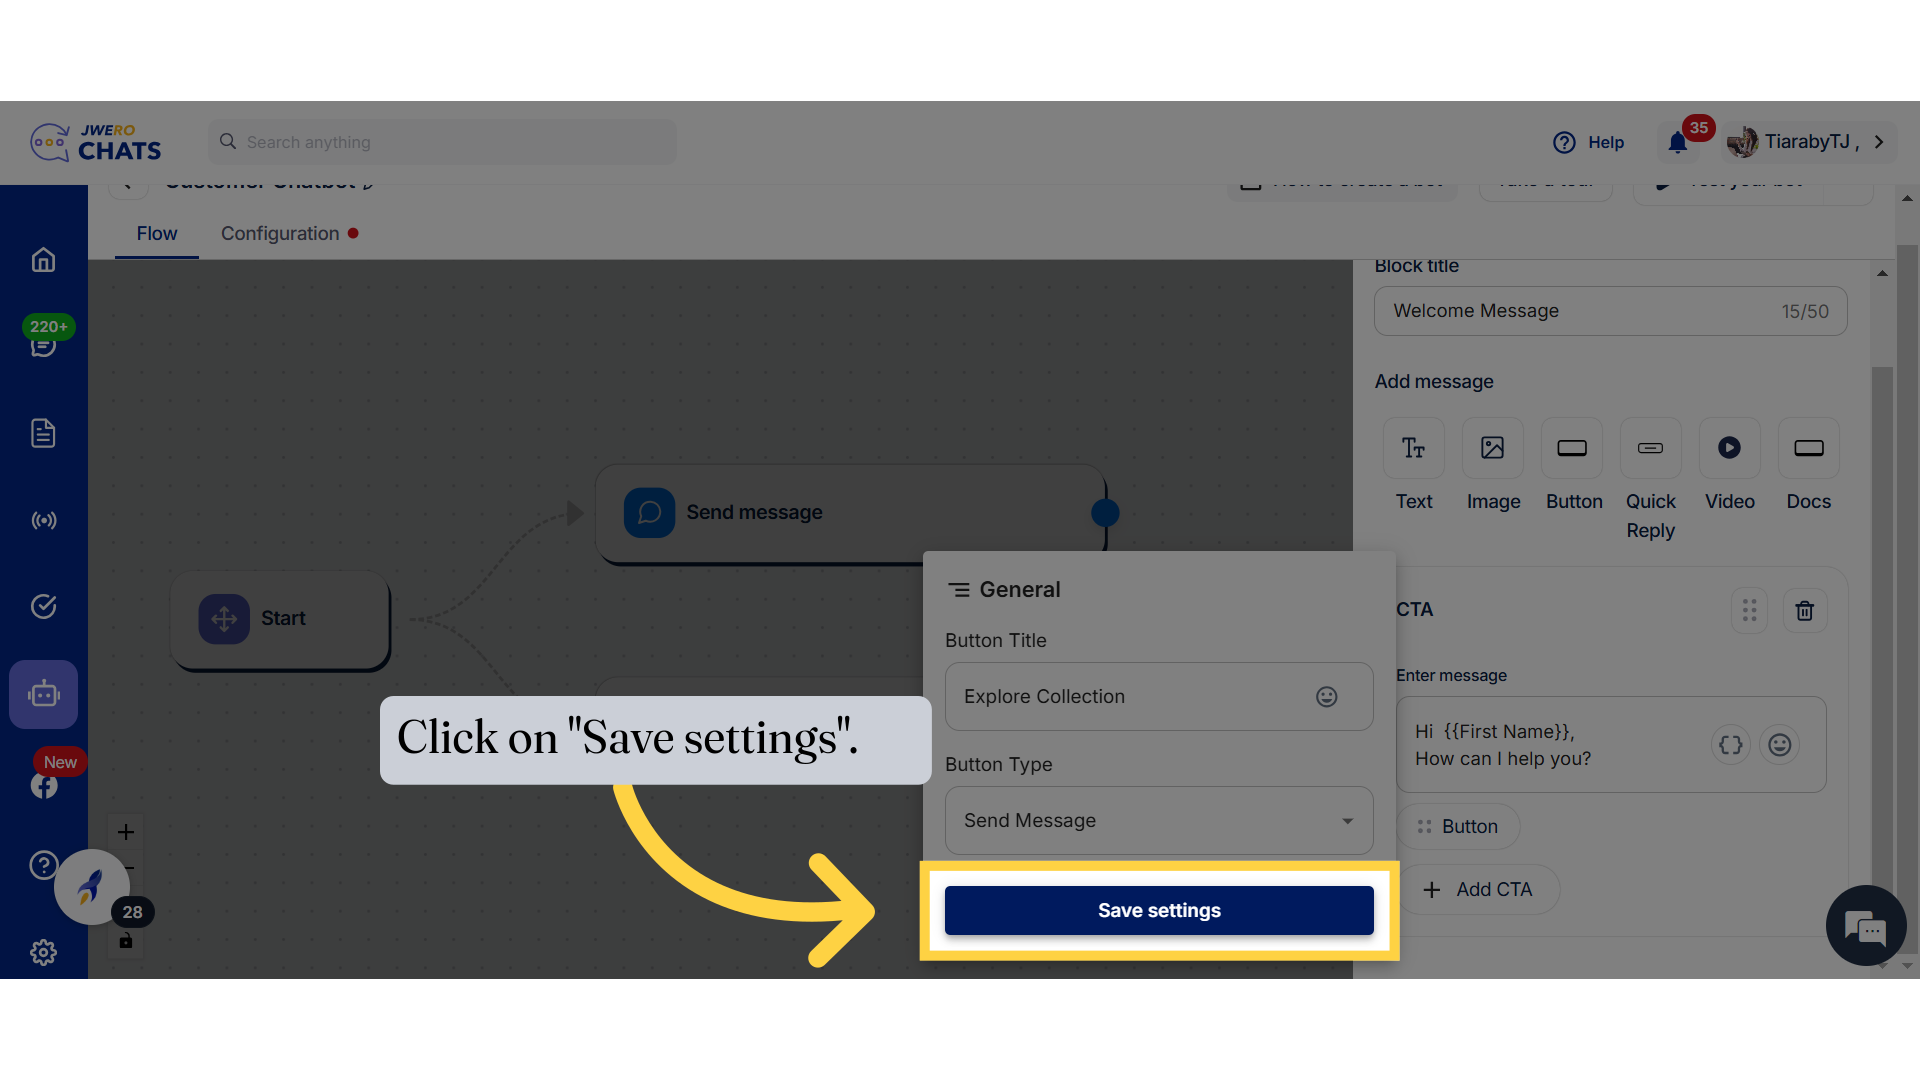
26. Click on "Button".
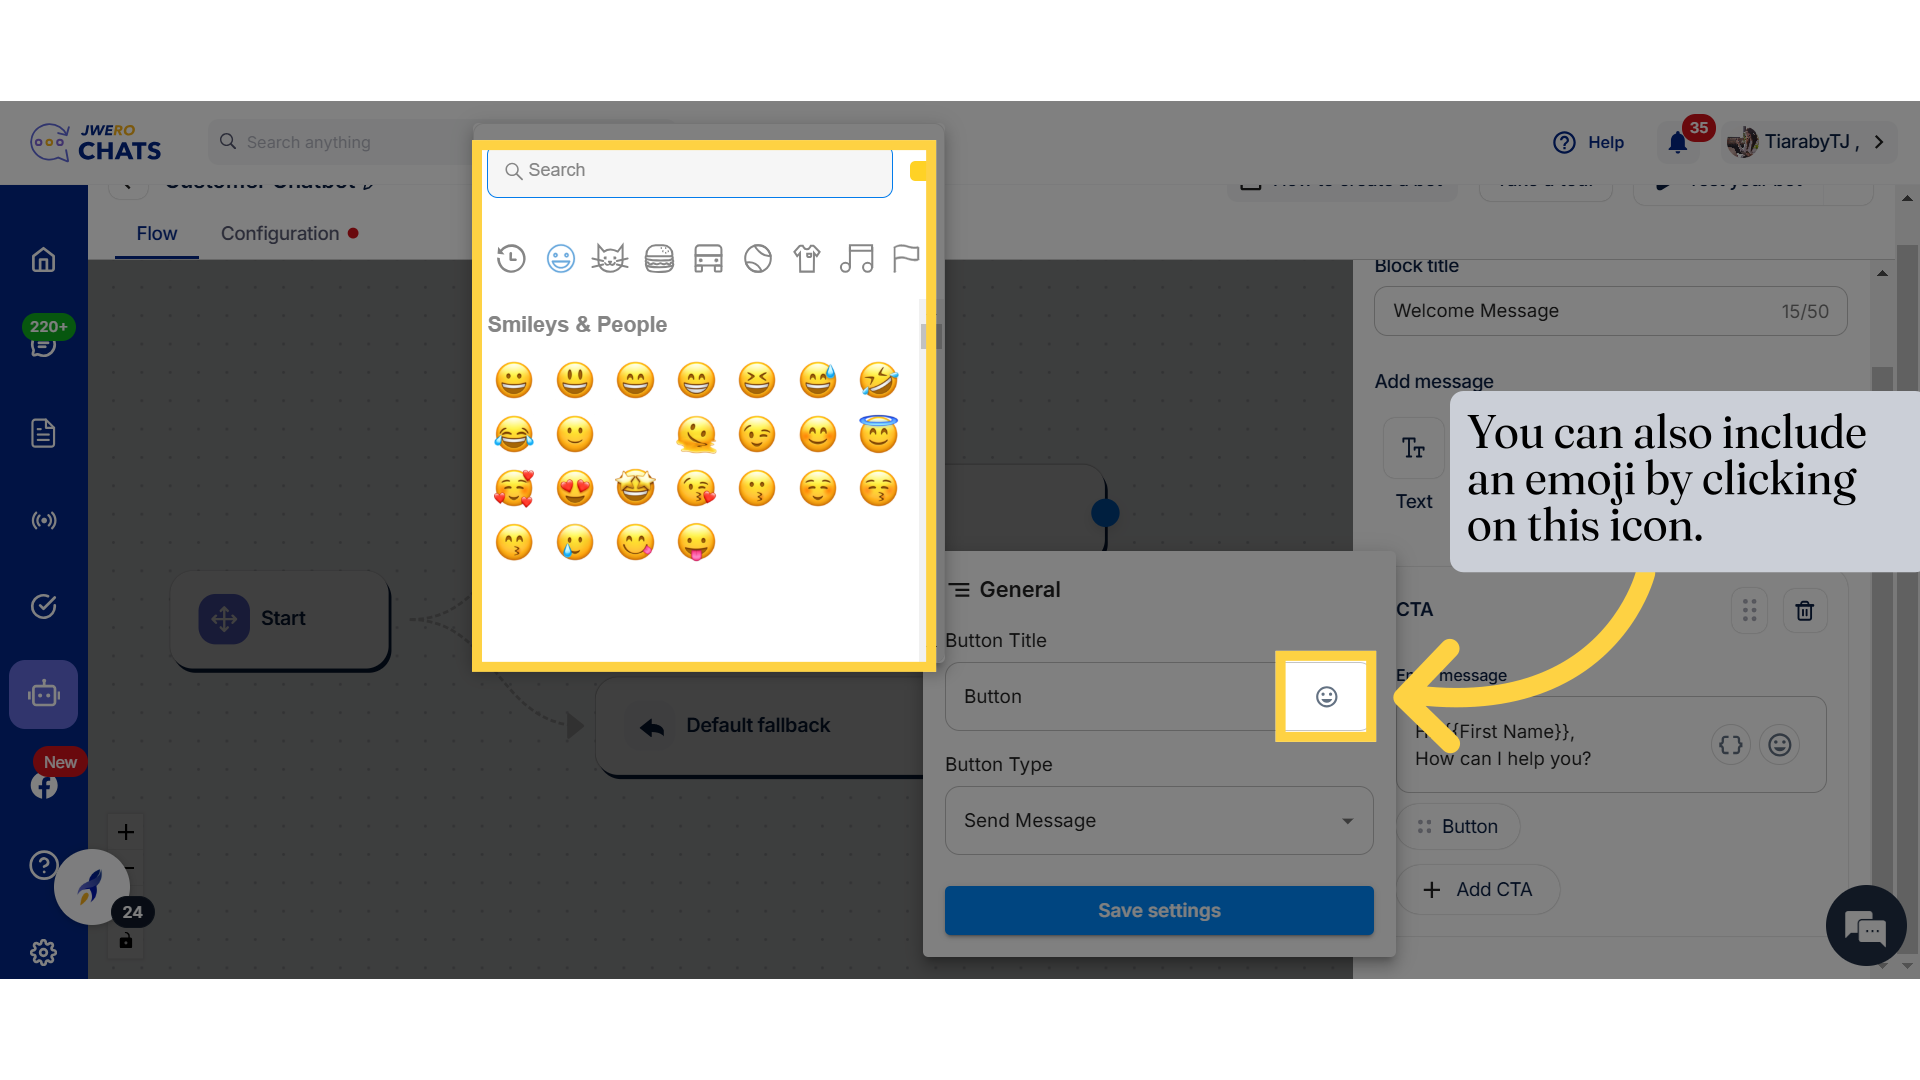
27. Click on "Save settings".
28. You can also include an emoji by clicking on this icon.
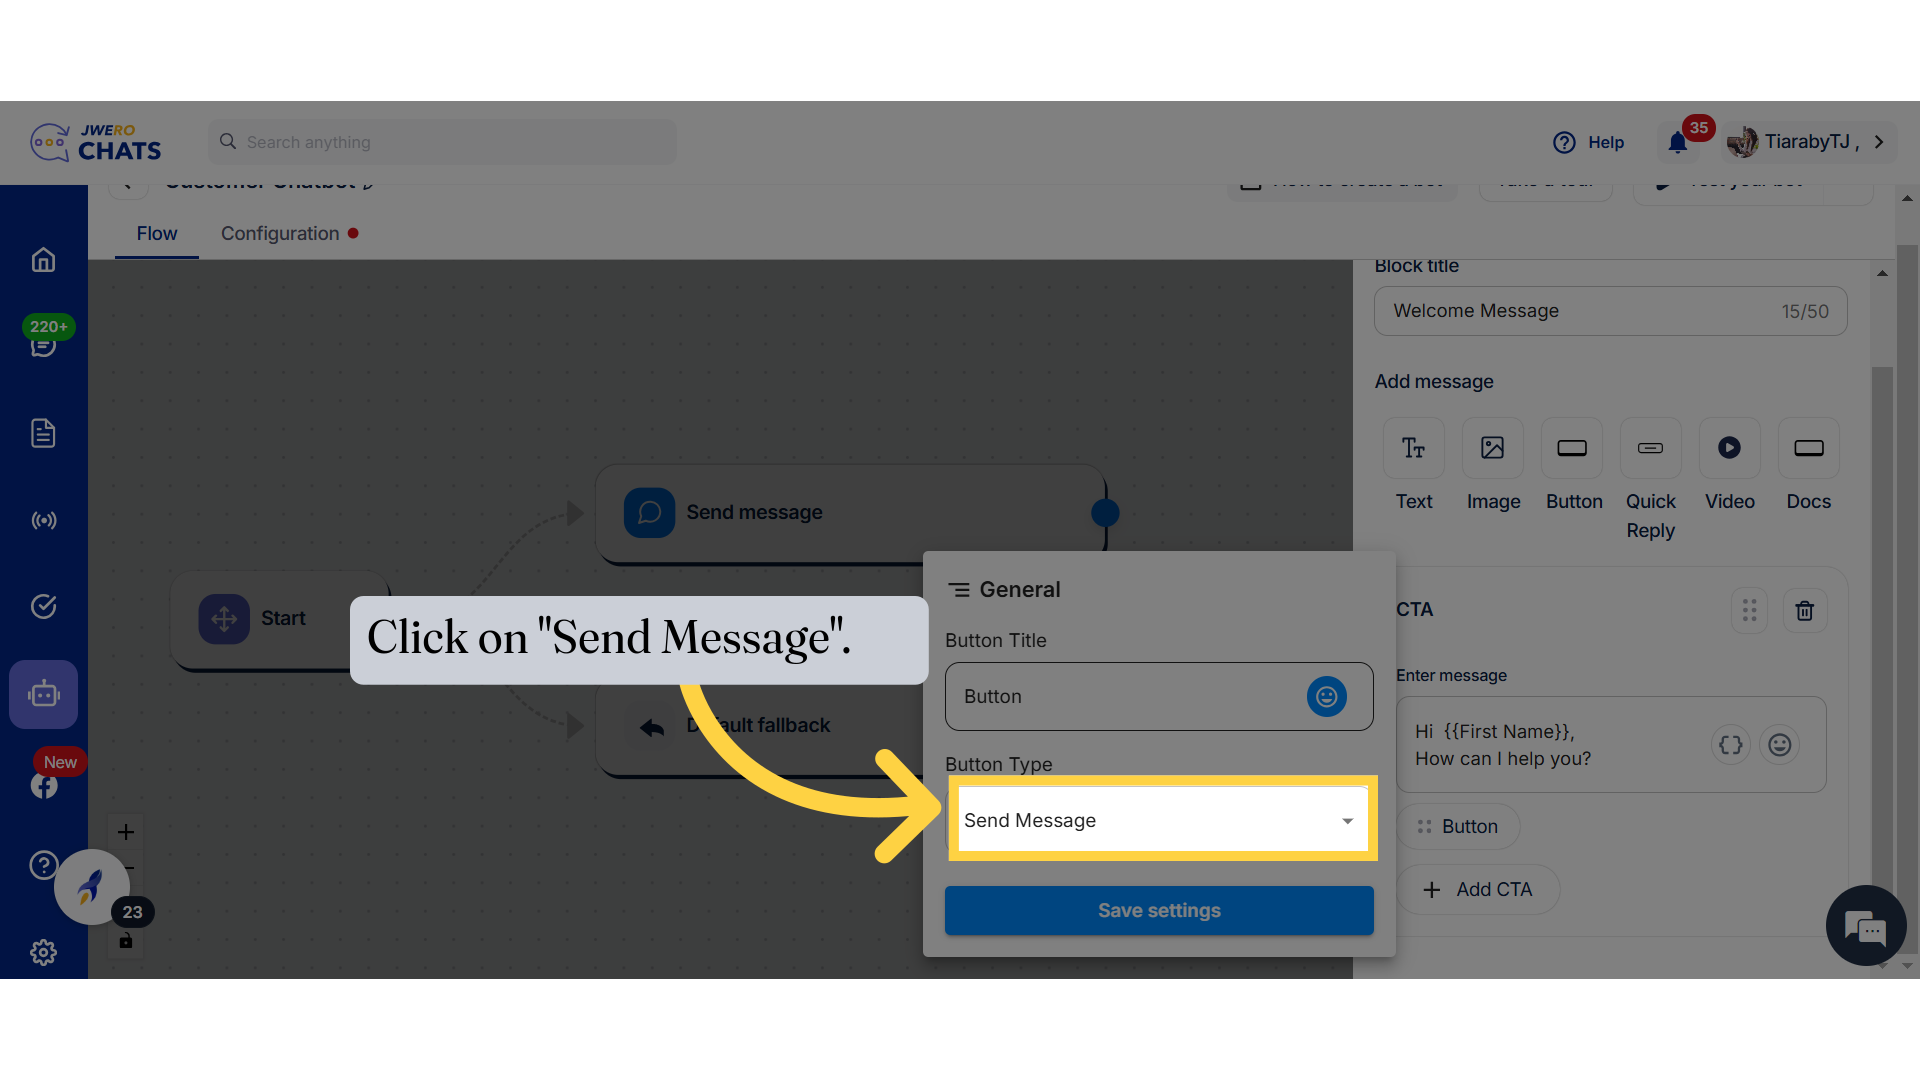
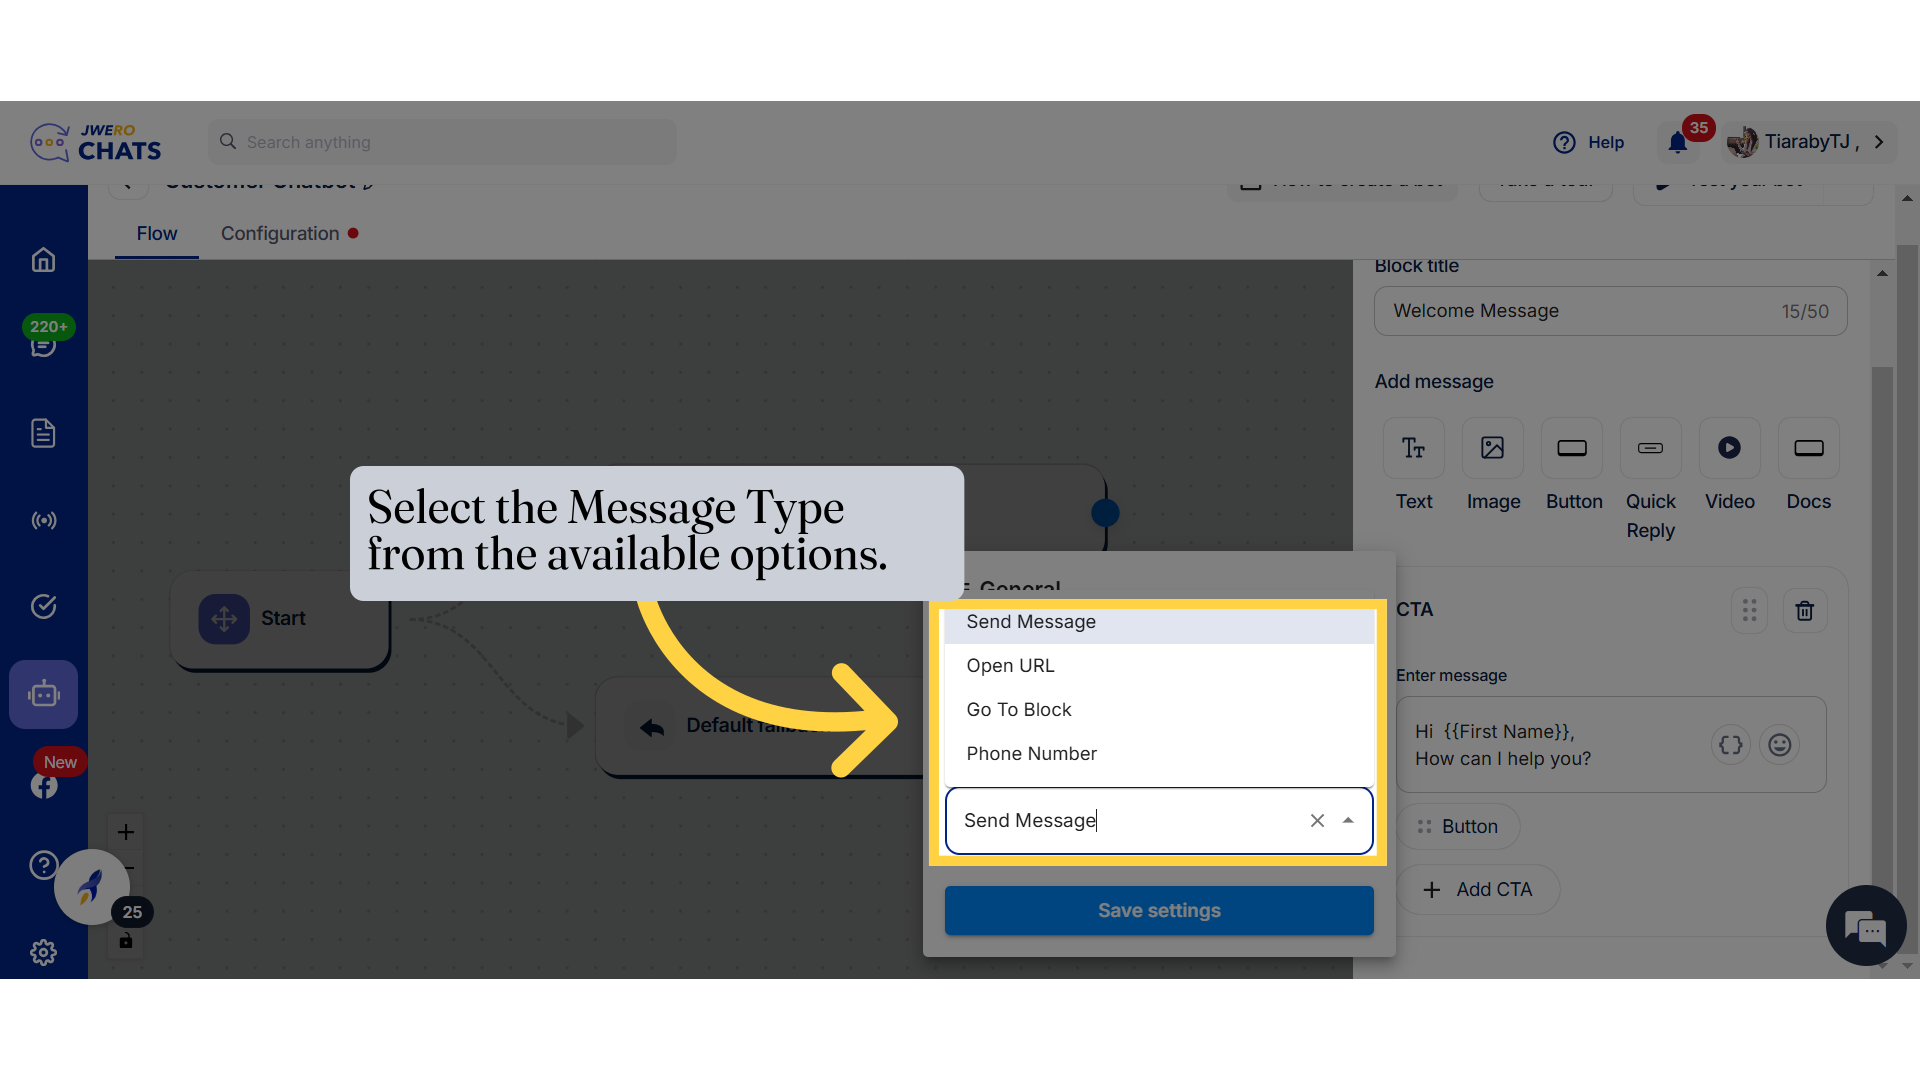
29. Click on "Send Message".
30. Select the Message Type from the available options.
31. Click on "Save settings".
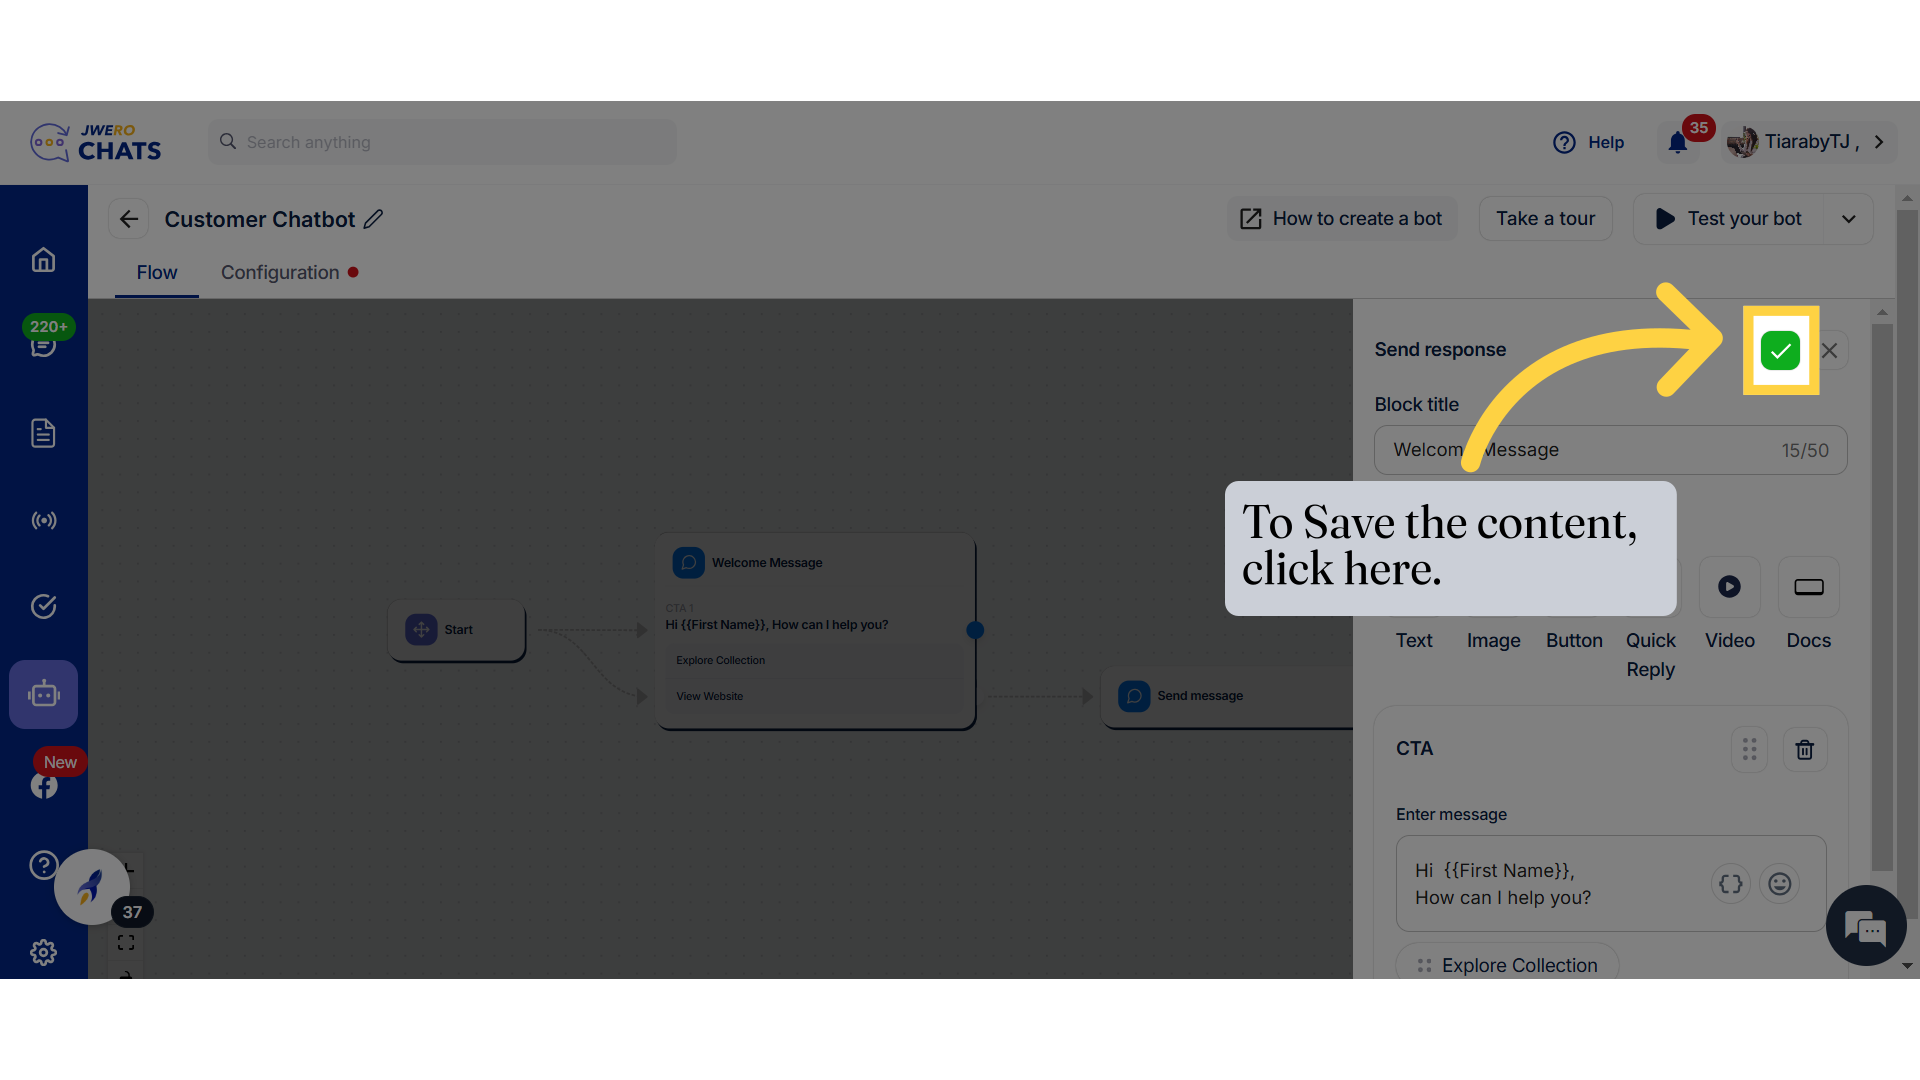
32. To add a button, click on "Add CTA".

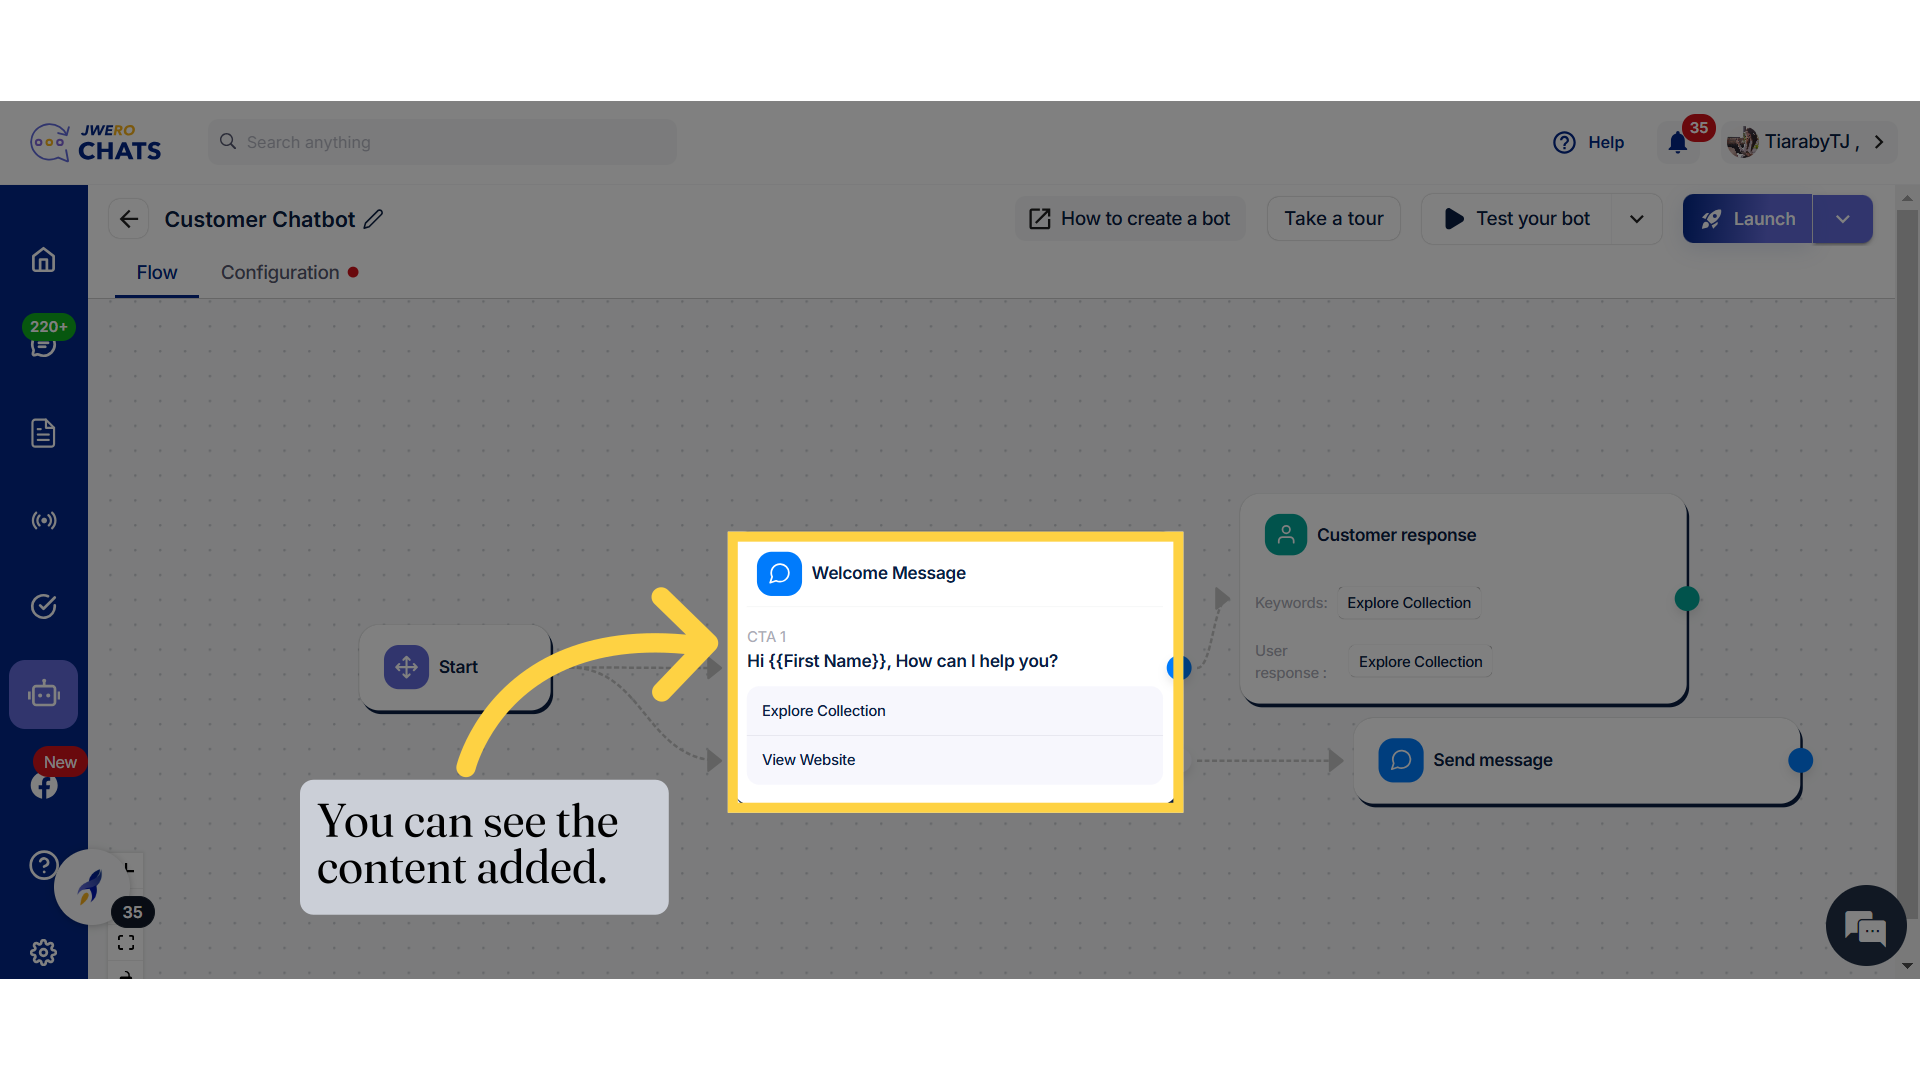
33. To Save the content, click here.
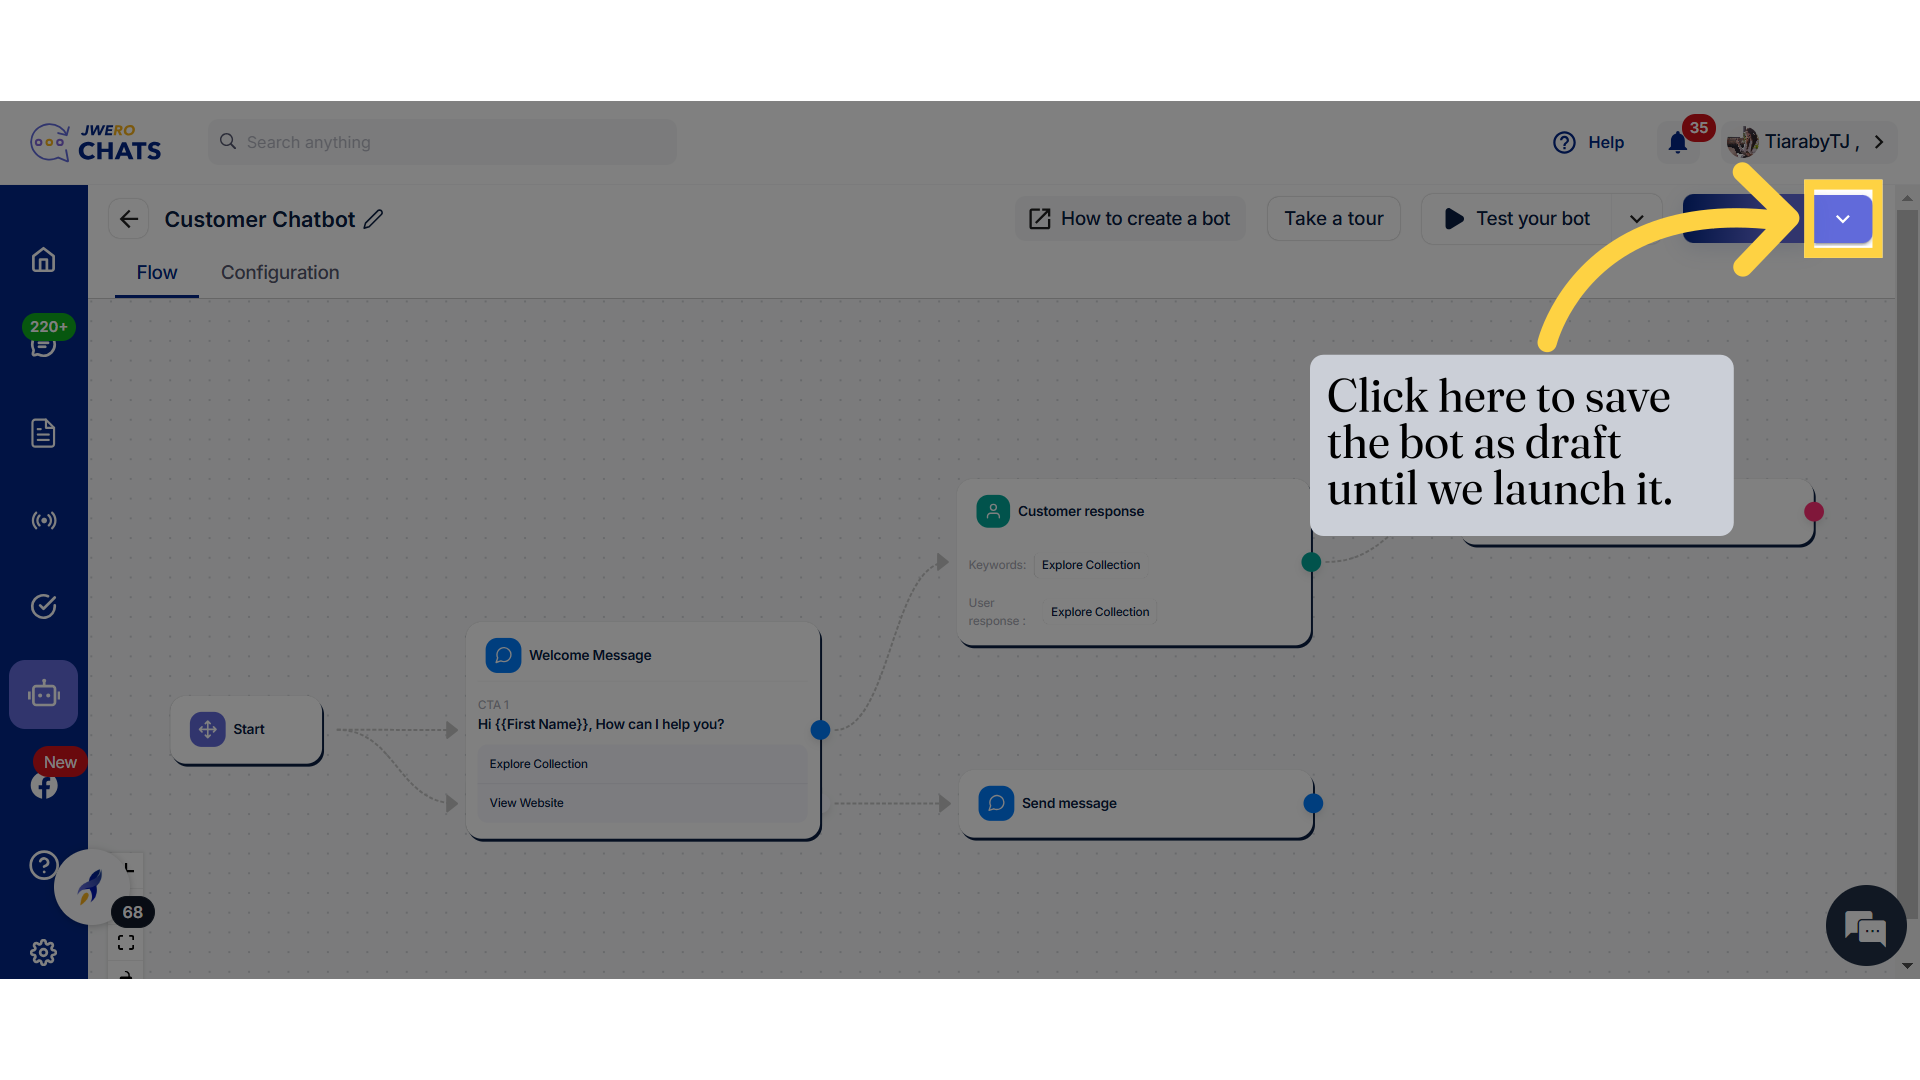
34. You can see the content added.
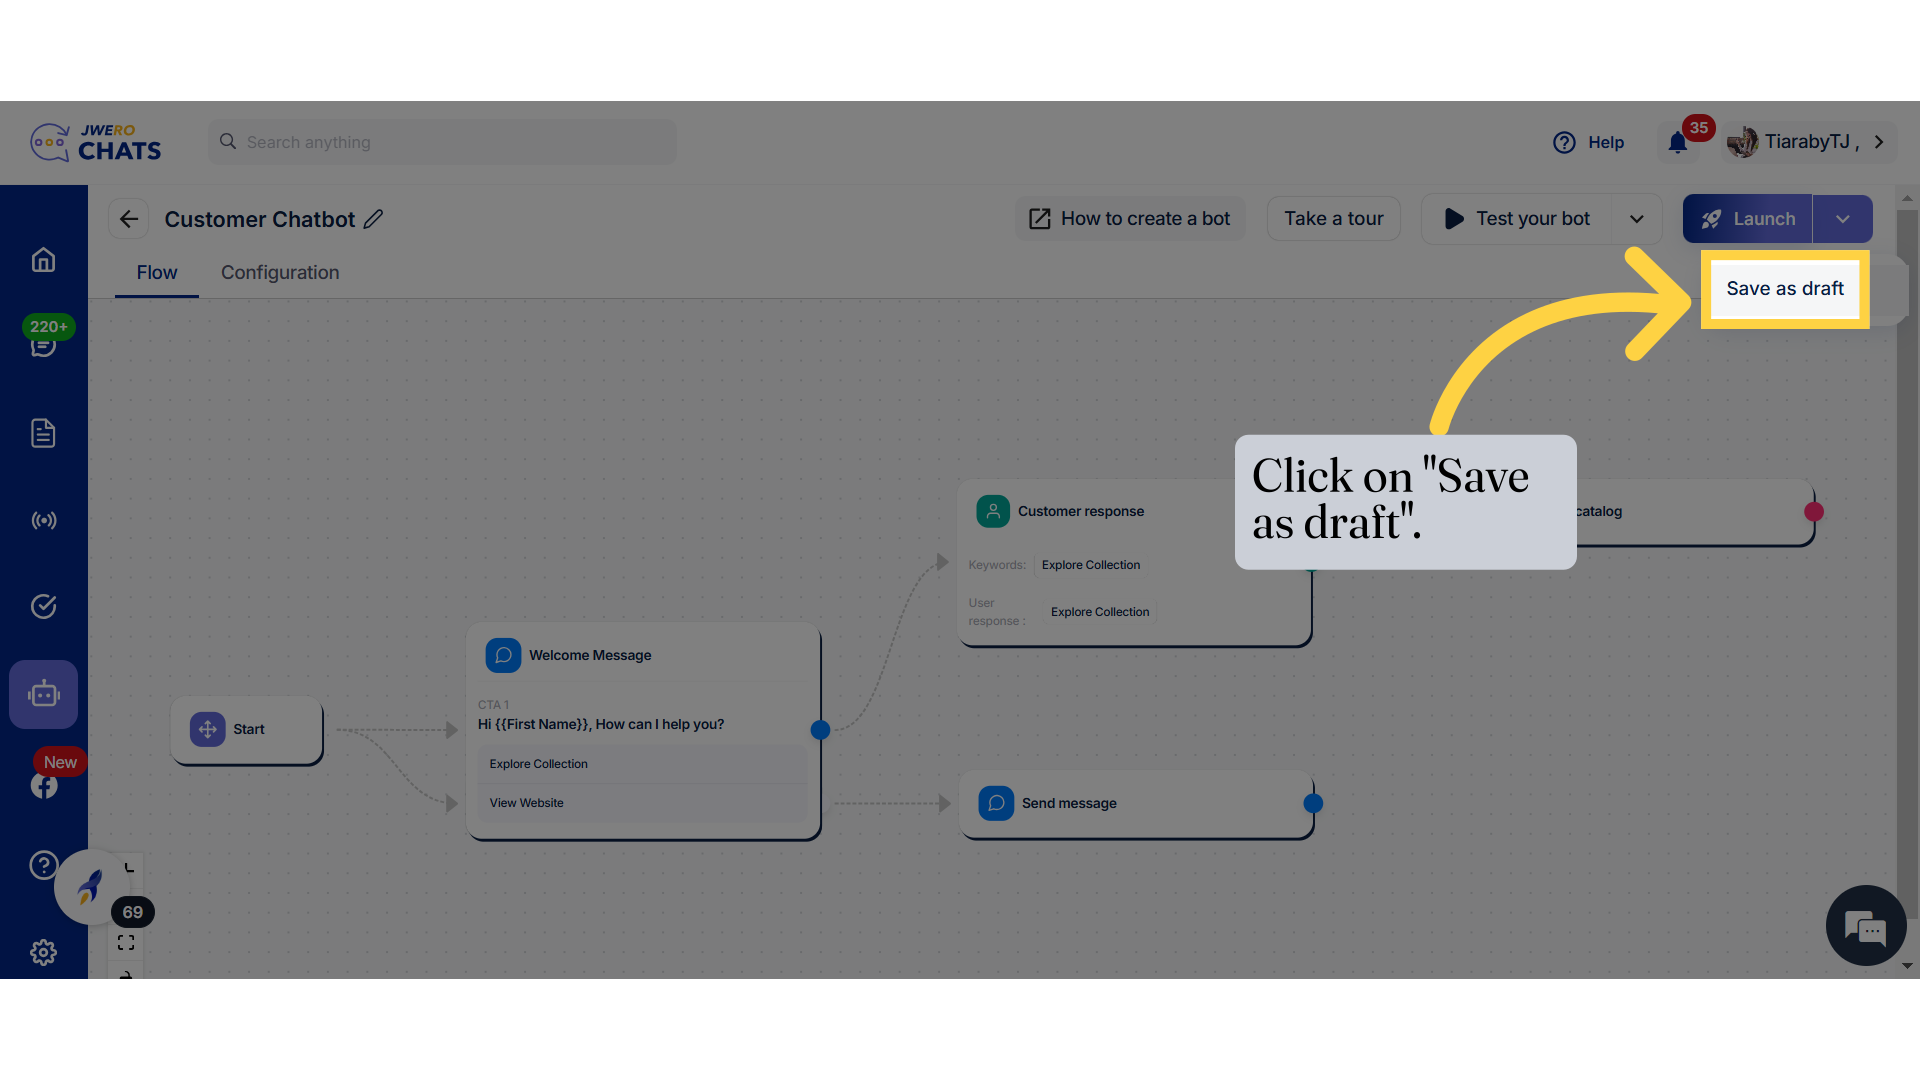
35. Click here to save the bot as draft until we launch it.
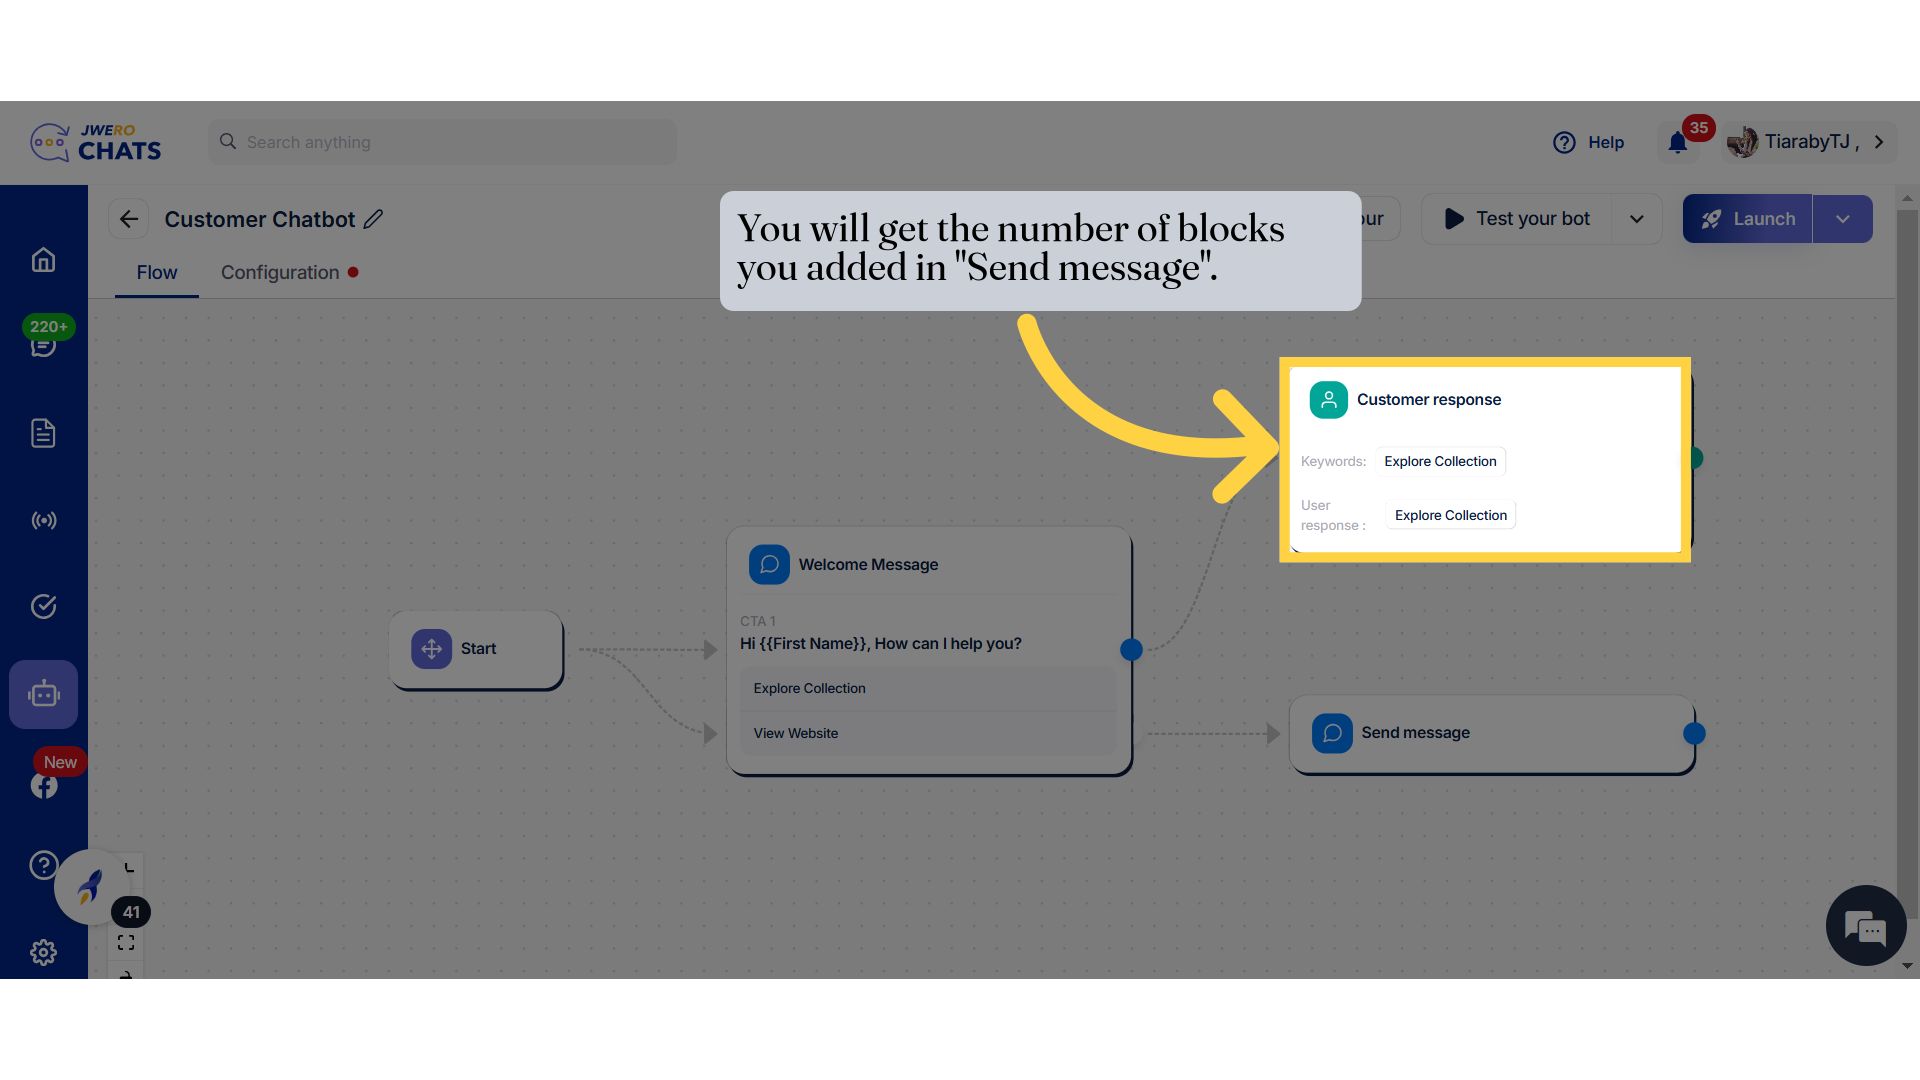
36. Click on "Save as draft".
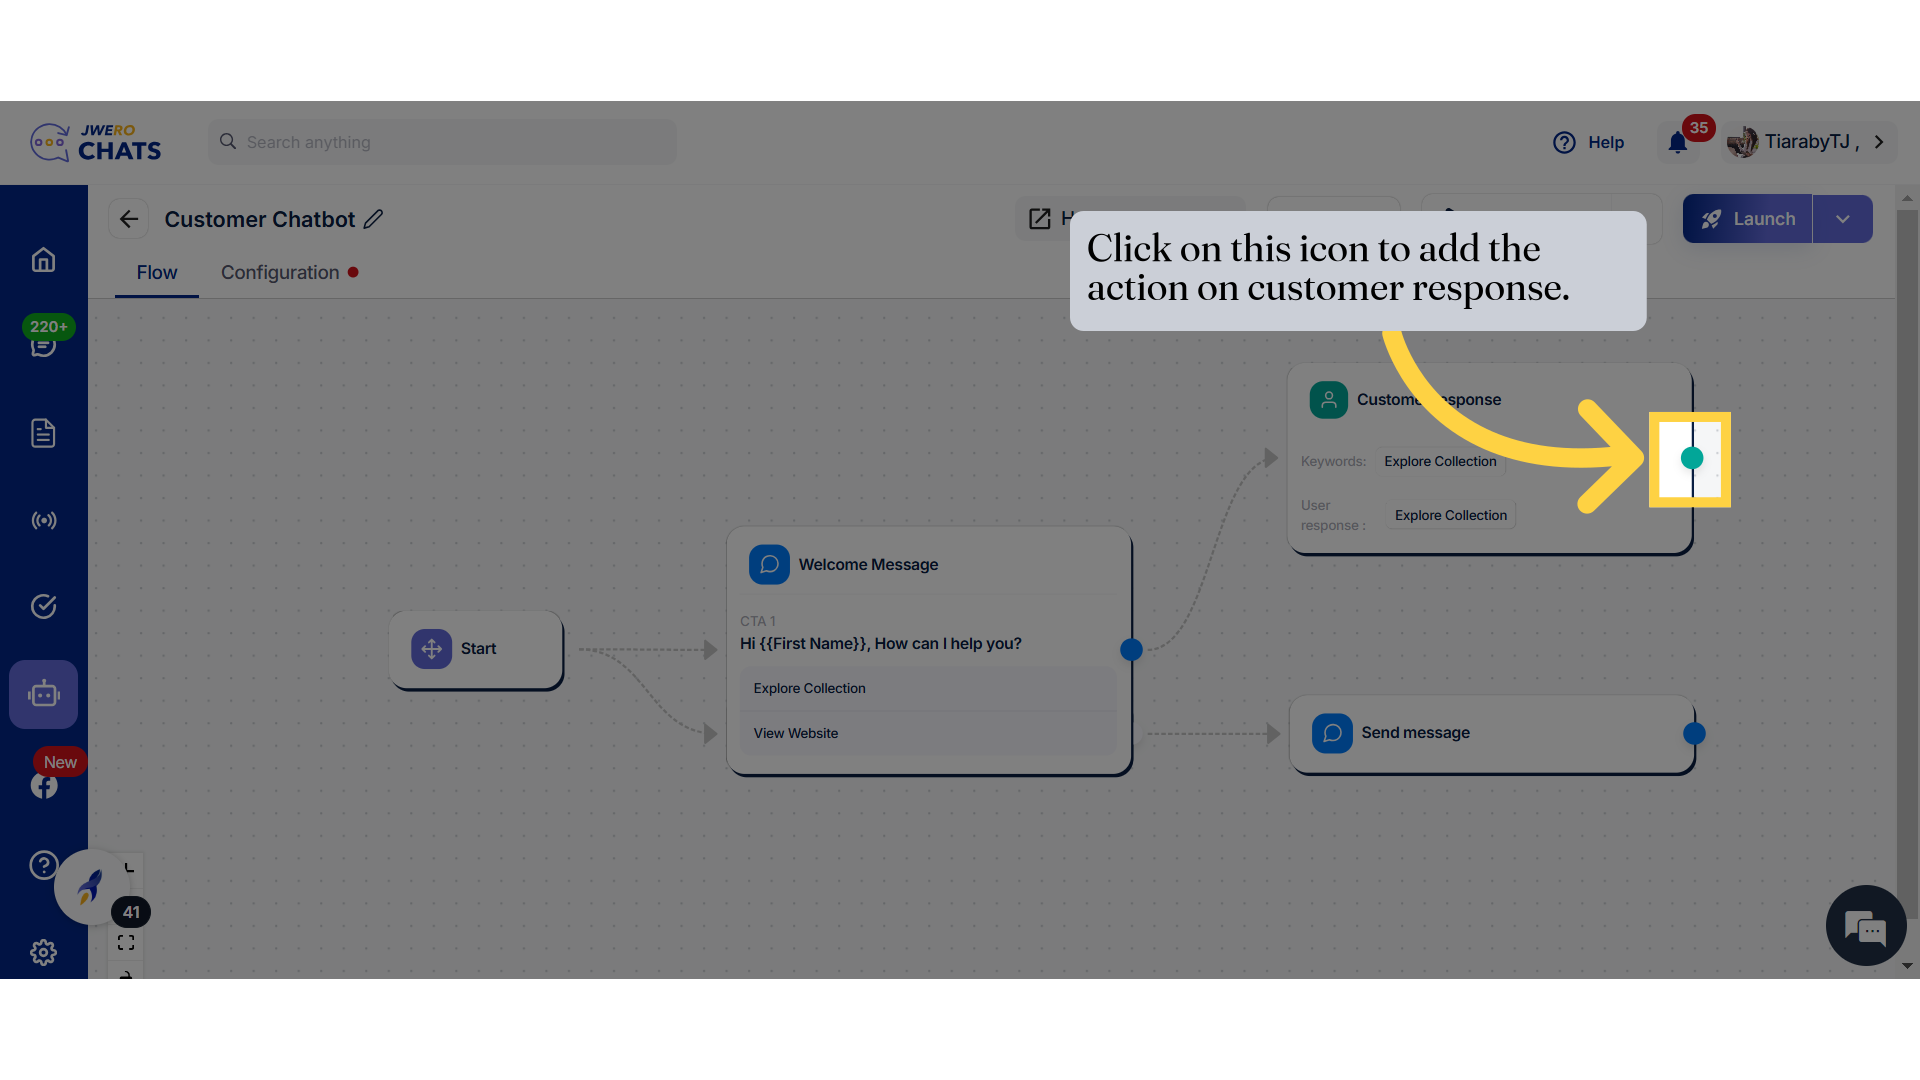
37. You will get the number of blocks you added in "Send message".
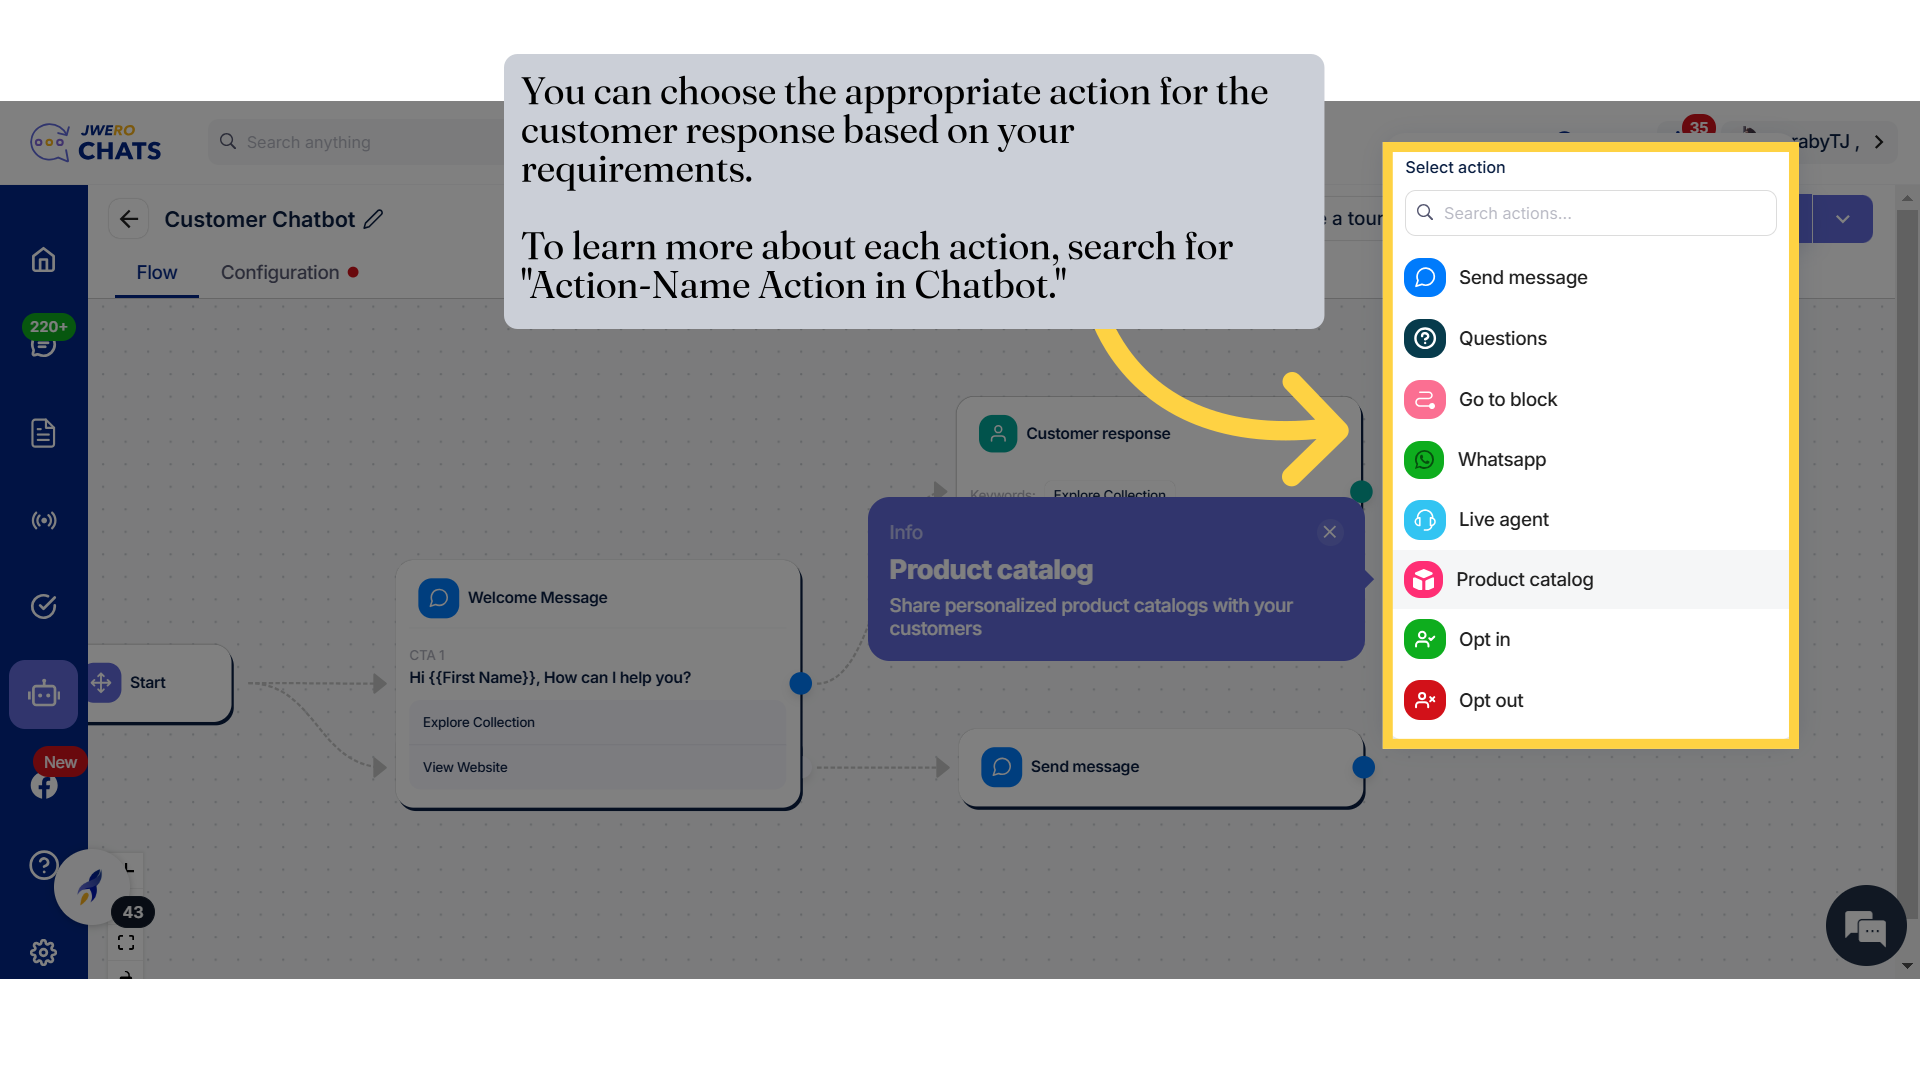
38. Click on this icon to add the action on customer response.
39. You can choose the appropriate action for the customer response based on your requirements. To learn more about each action, search for "Action-Name Action in Chatbot."
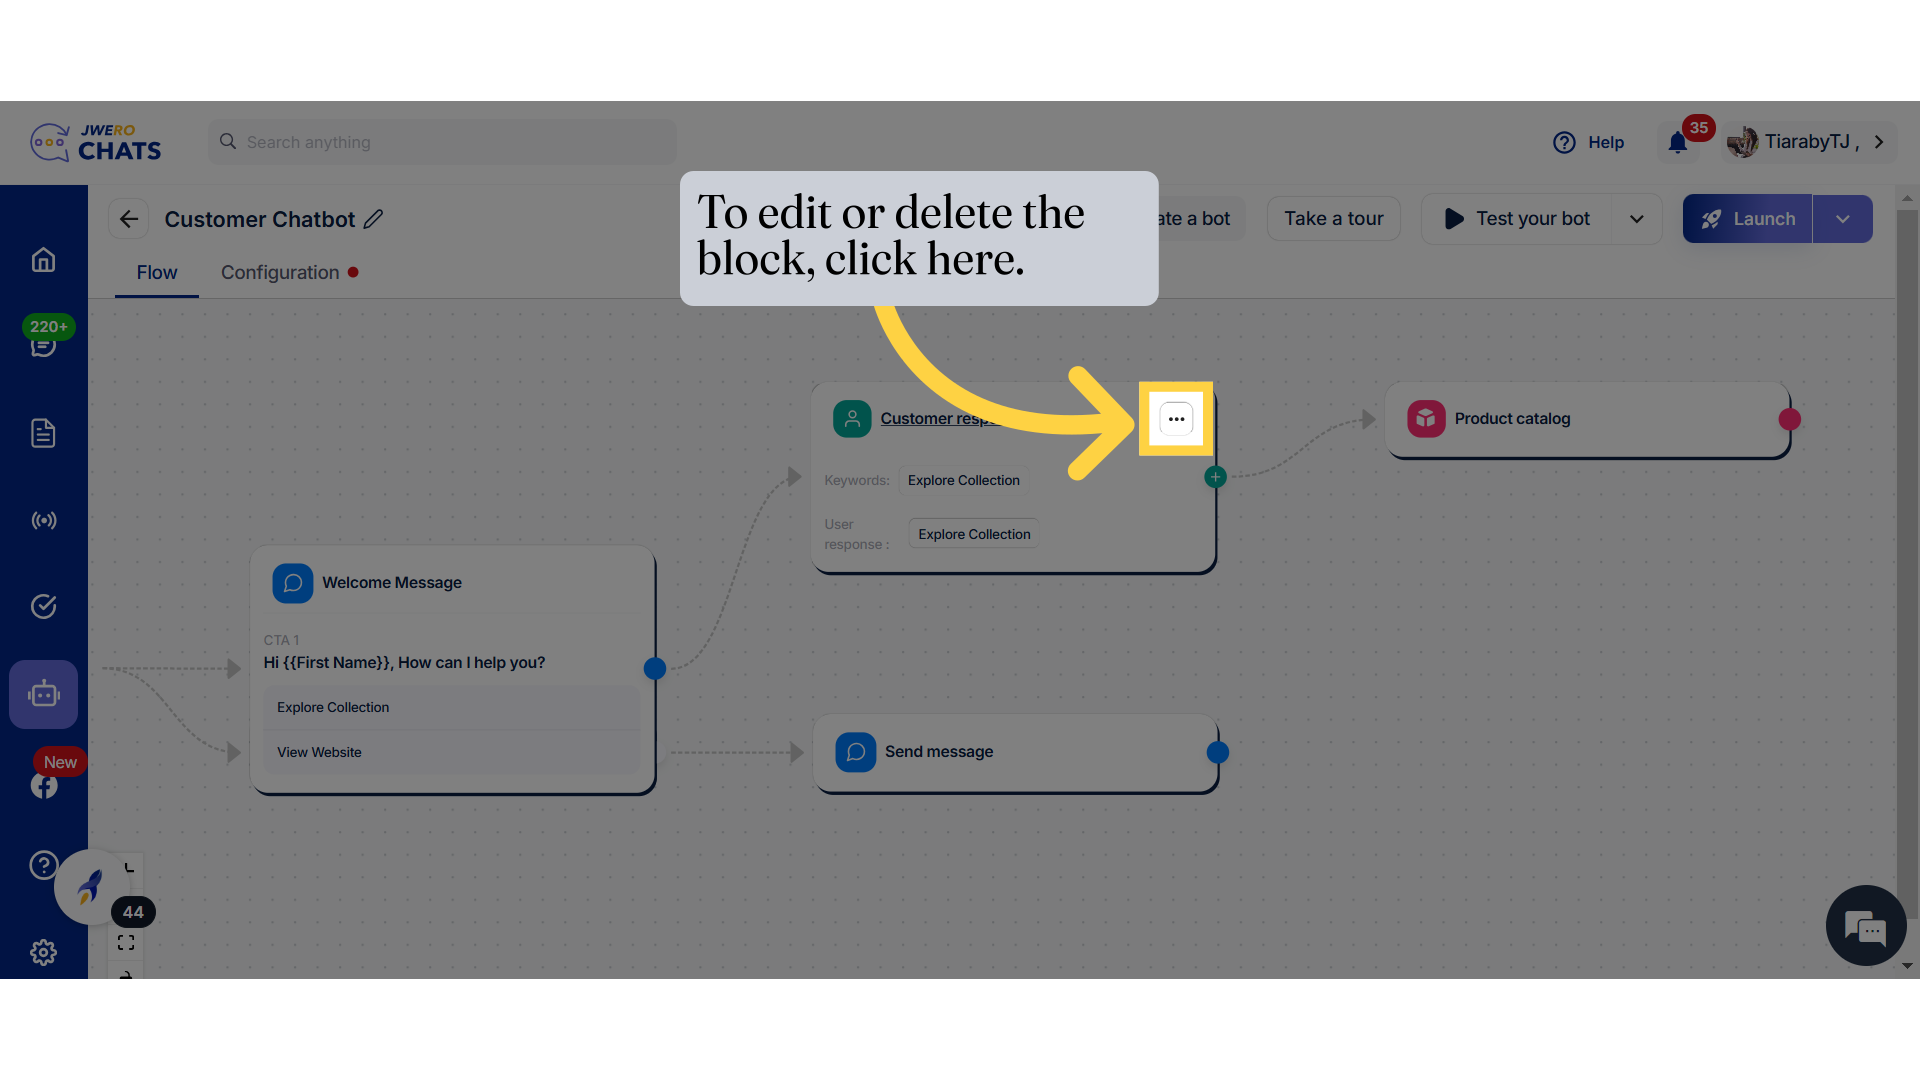
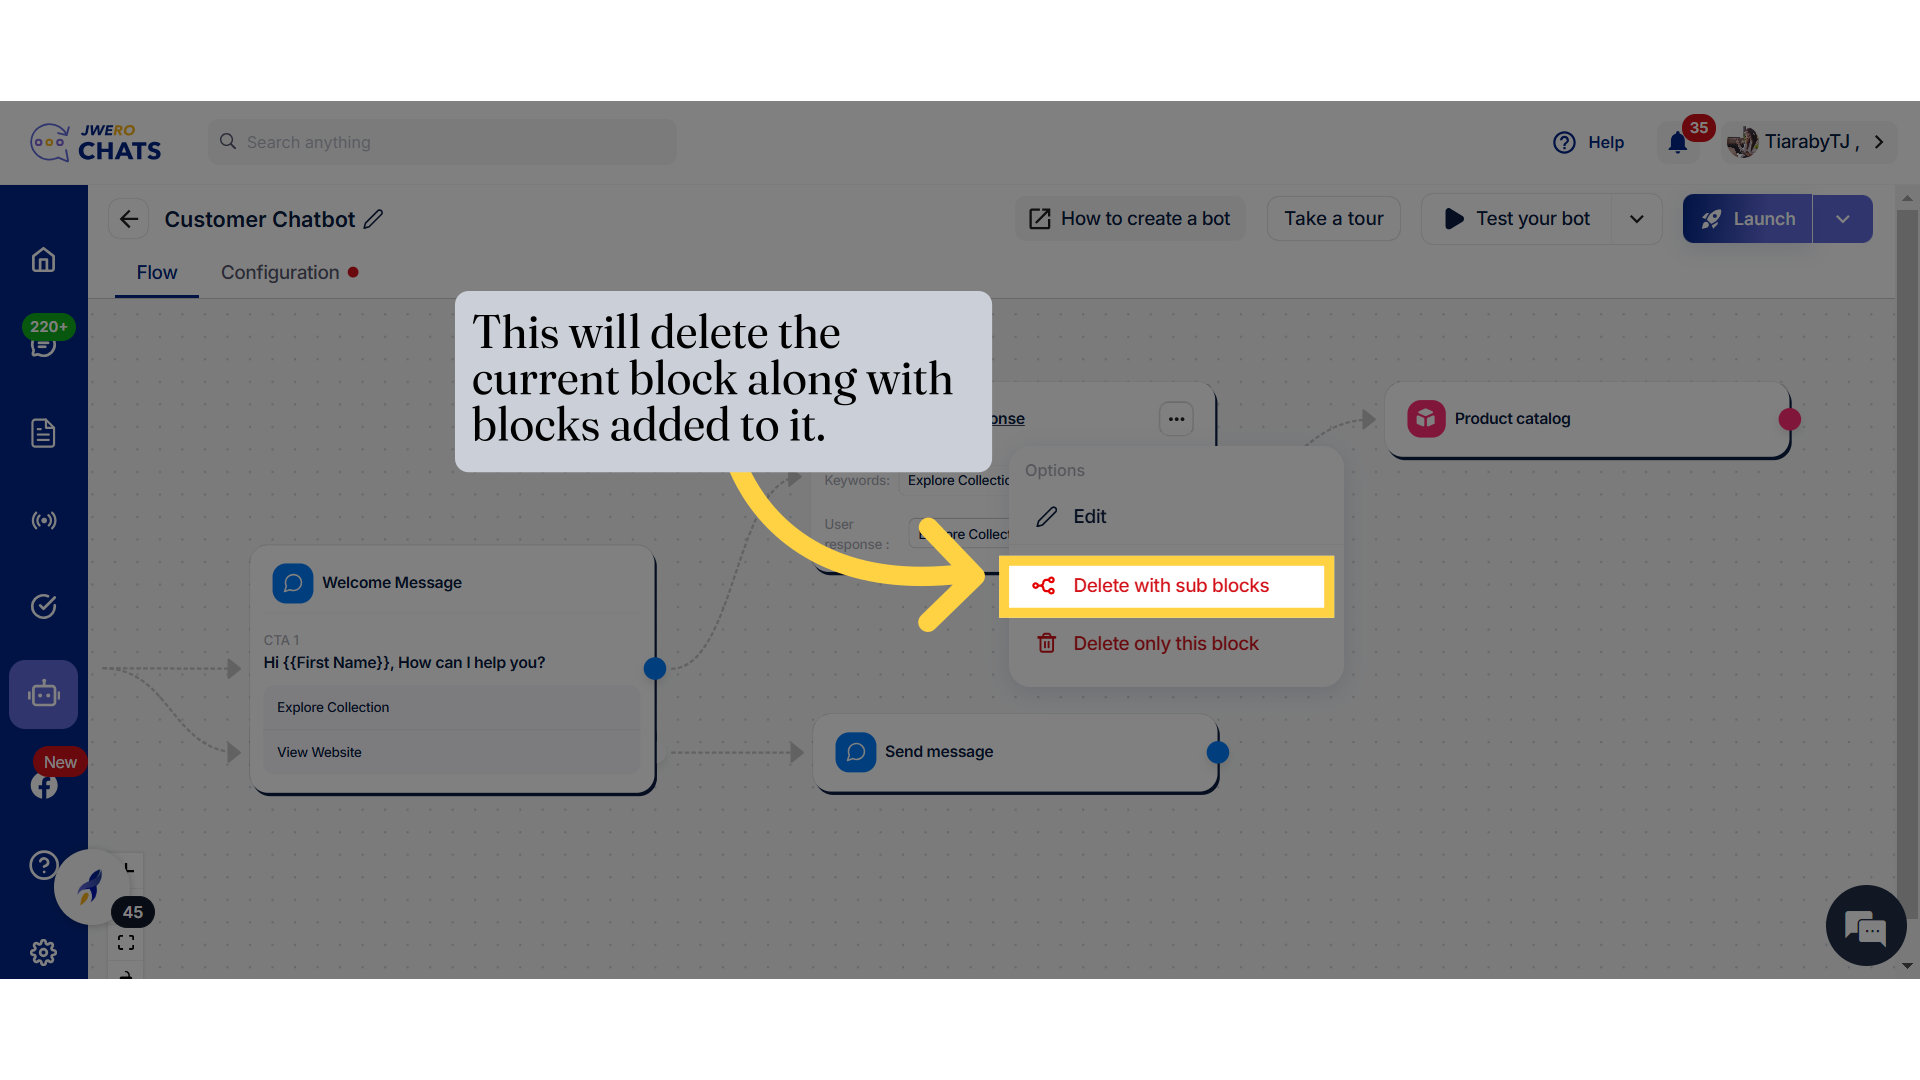
40. To edit or delete the block, click here.
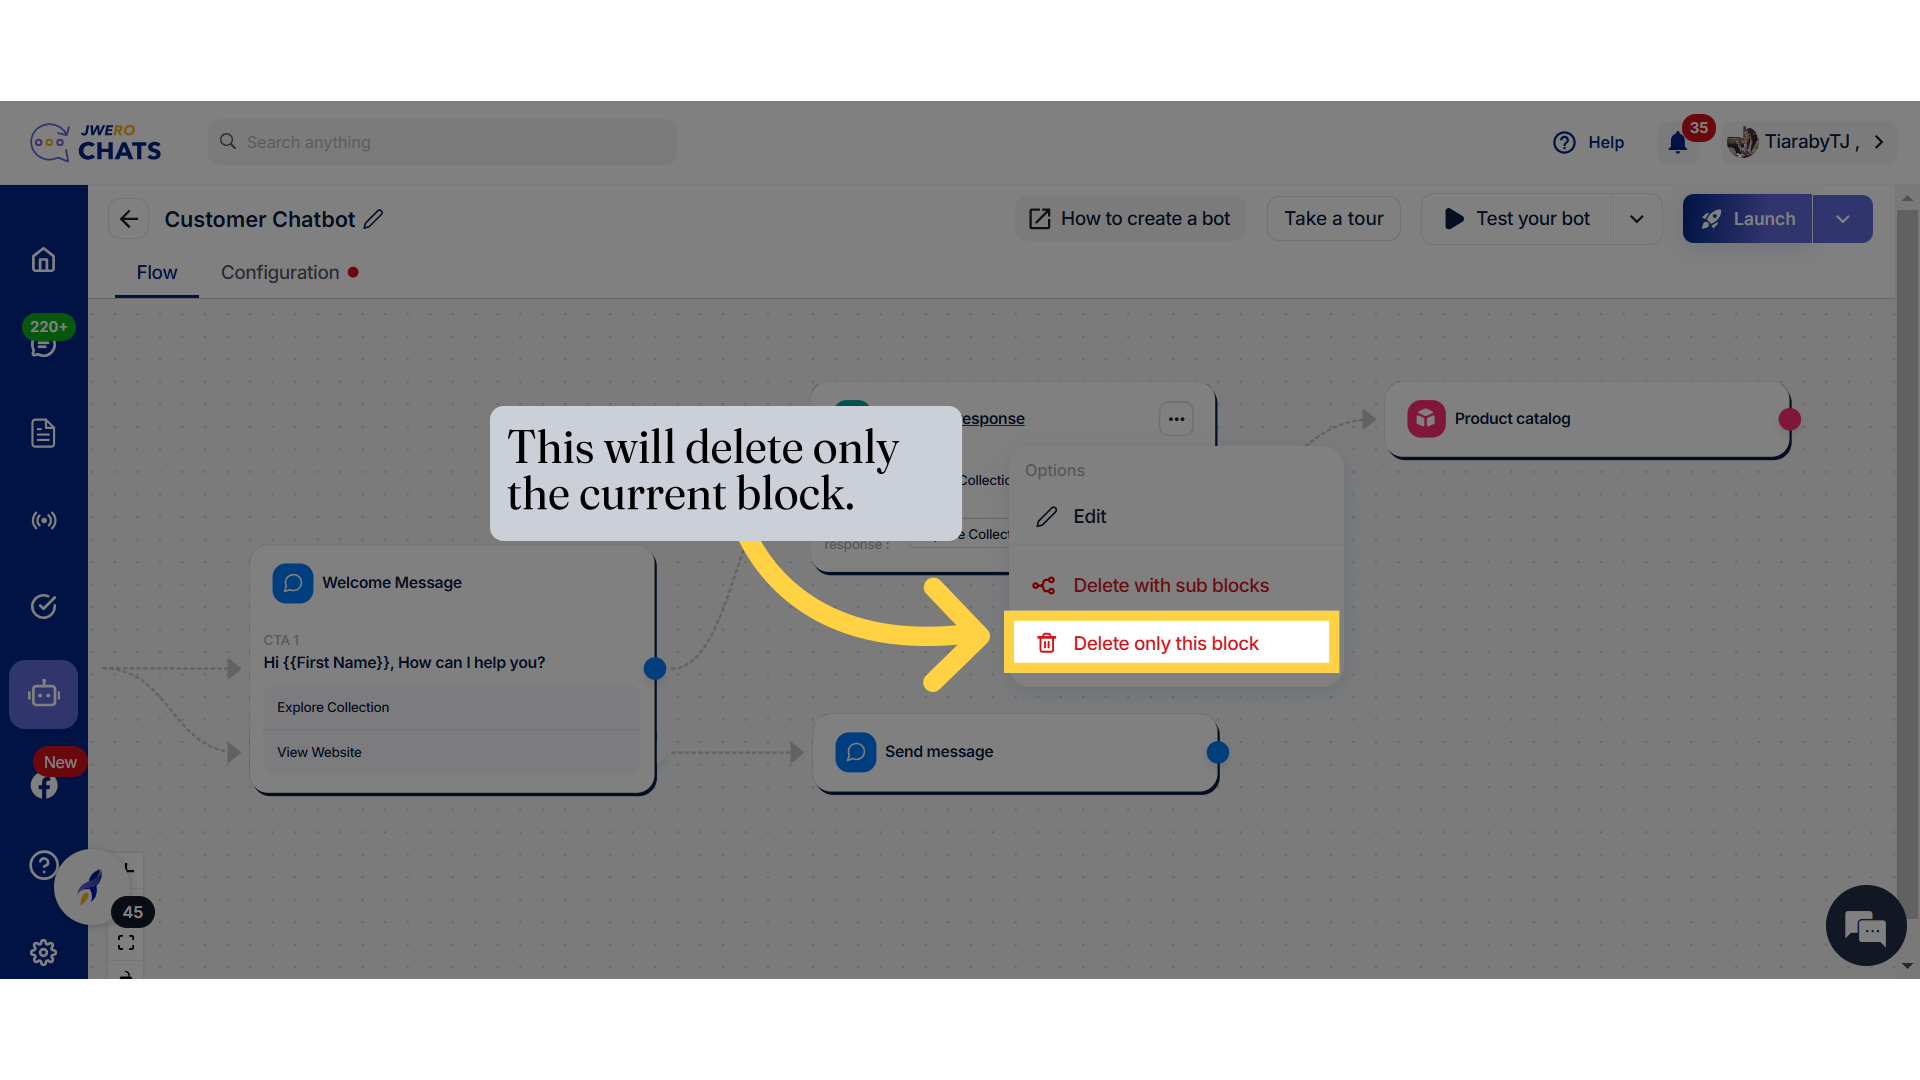
41. This will delete the current block along with blocks added to it.
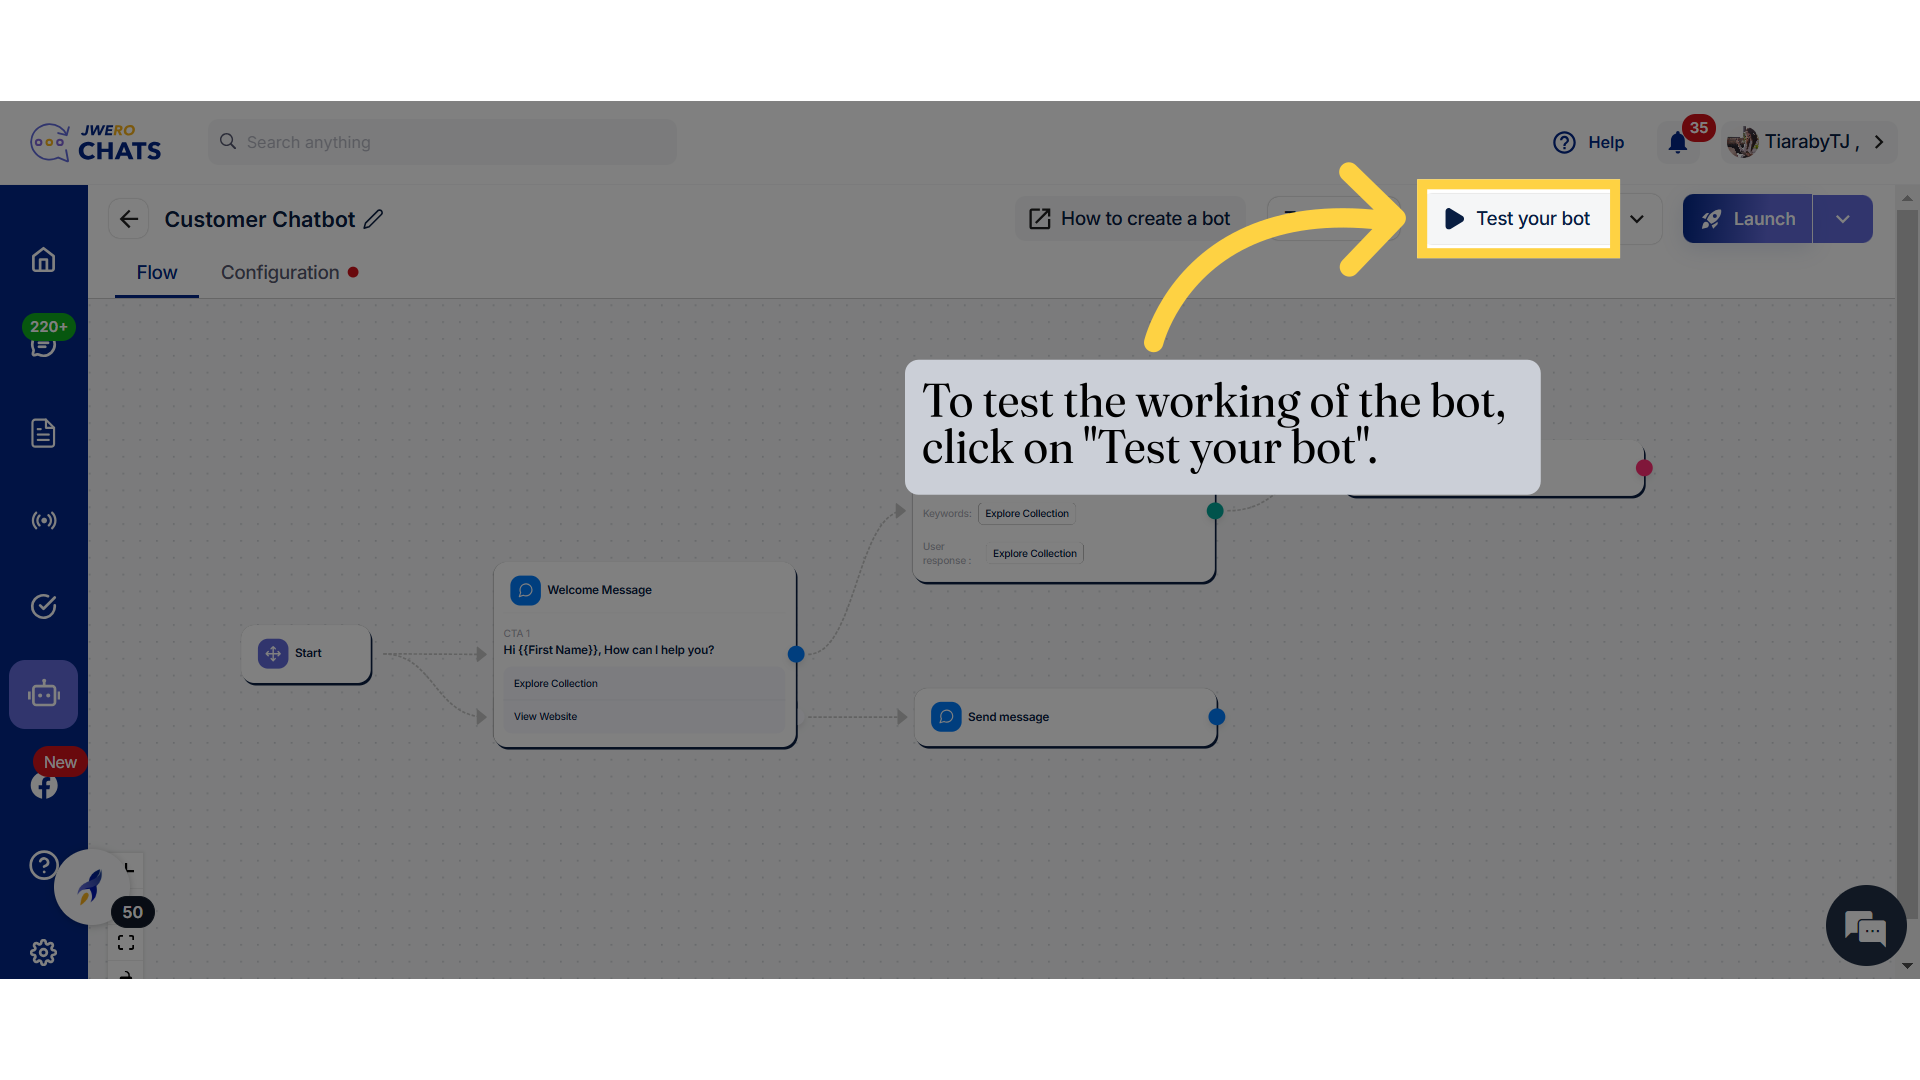
42. This will delete only the current block.
43. To test the working of the bot, click on "Test your bot".
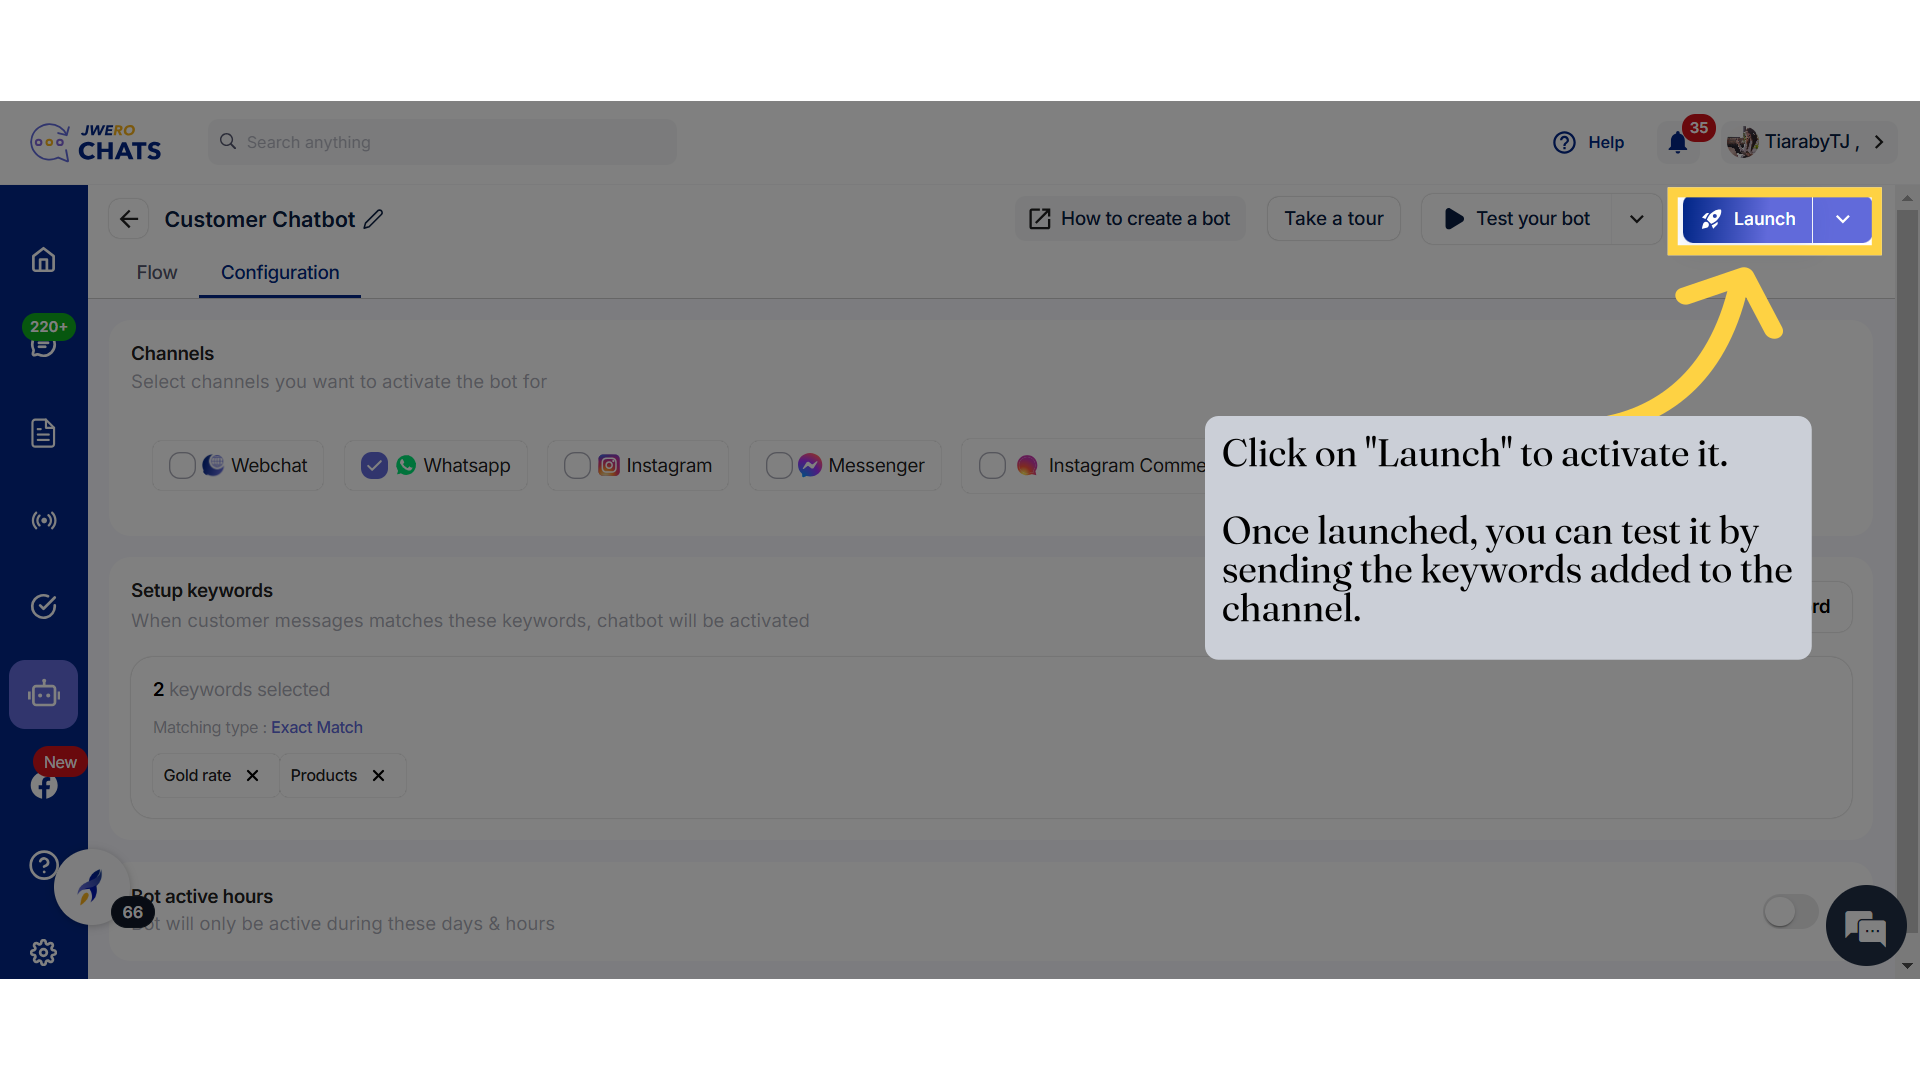
44. Here you can test the working of the bot.

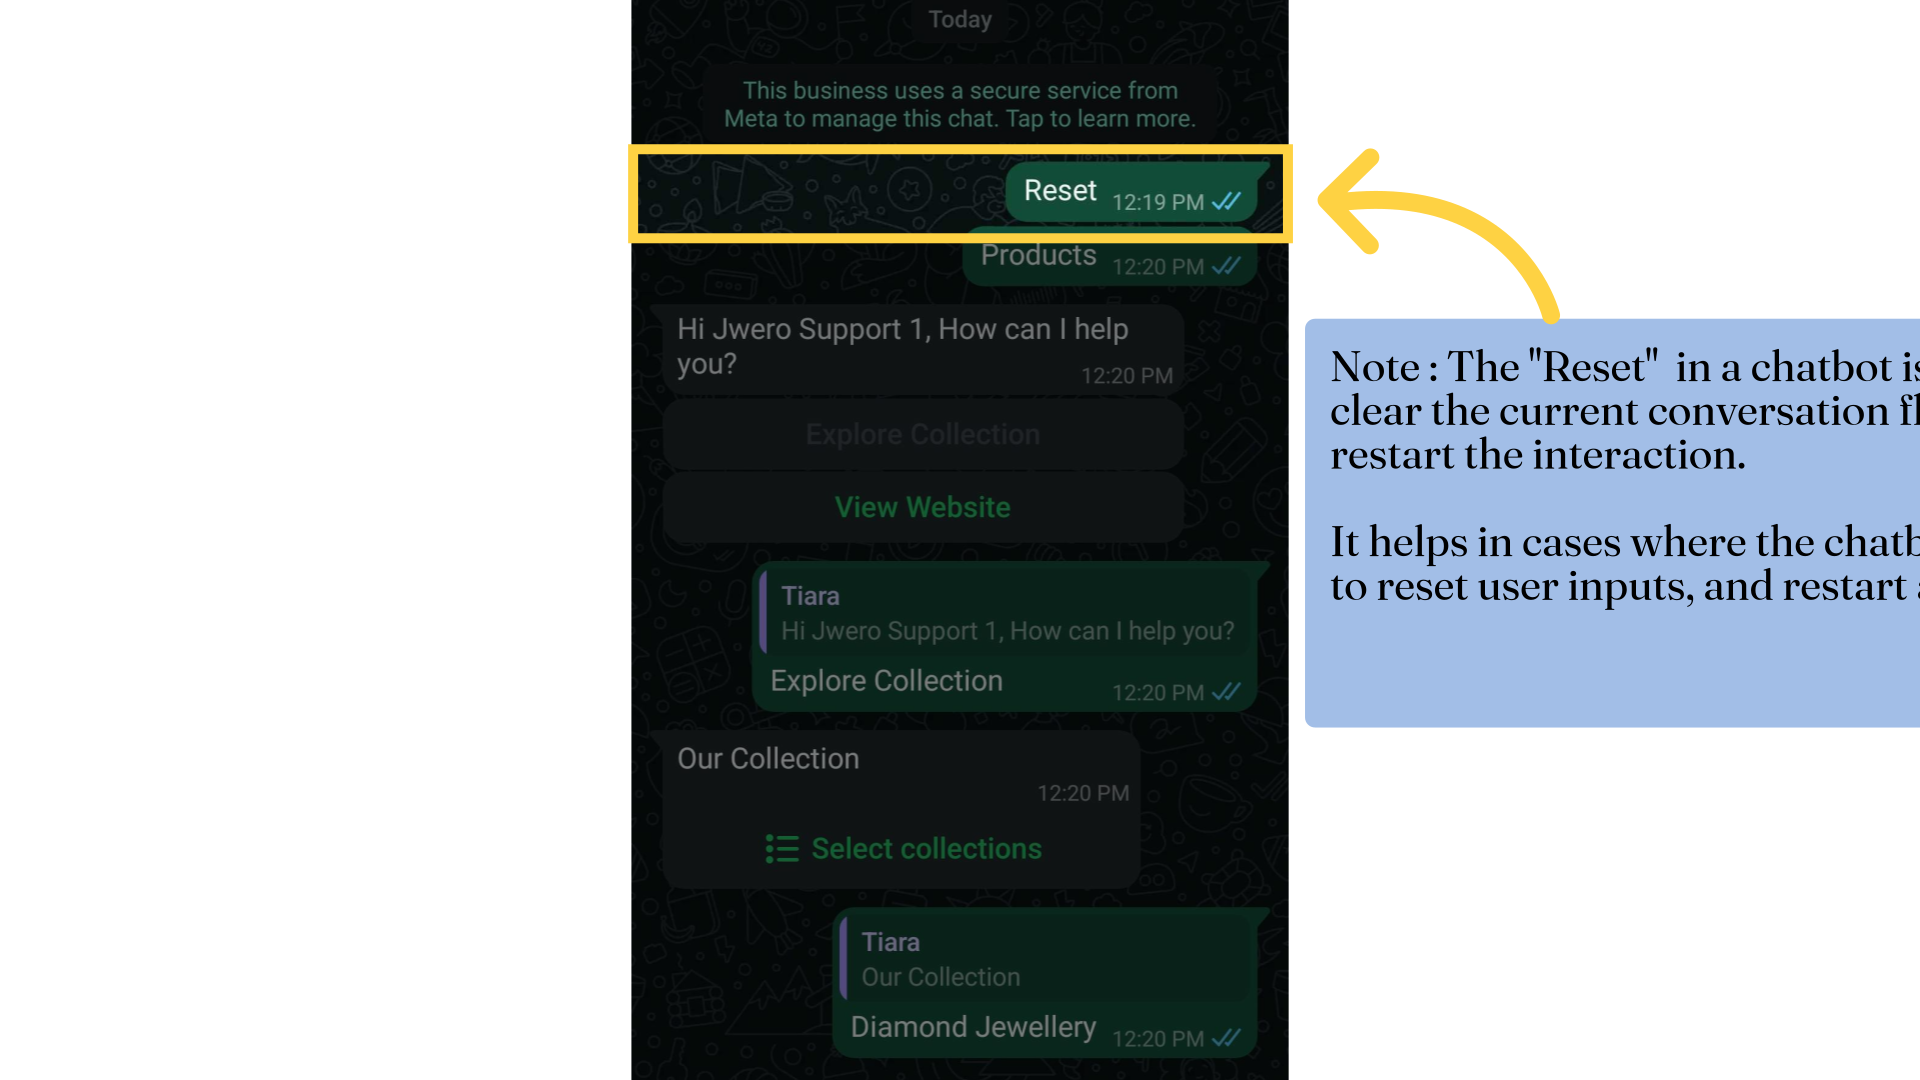
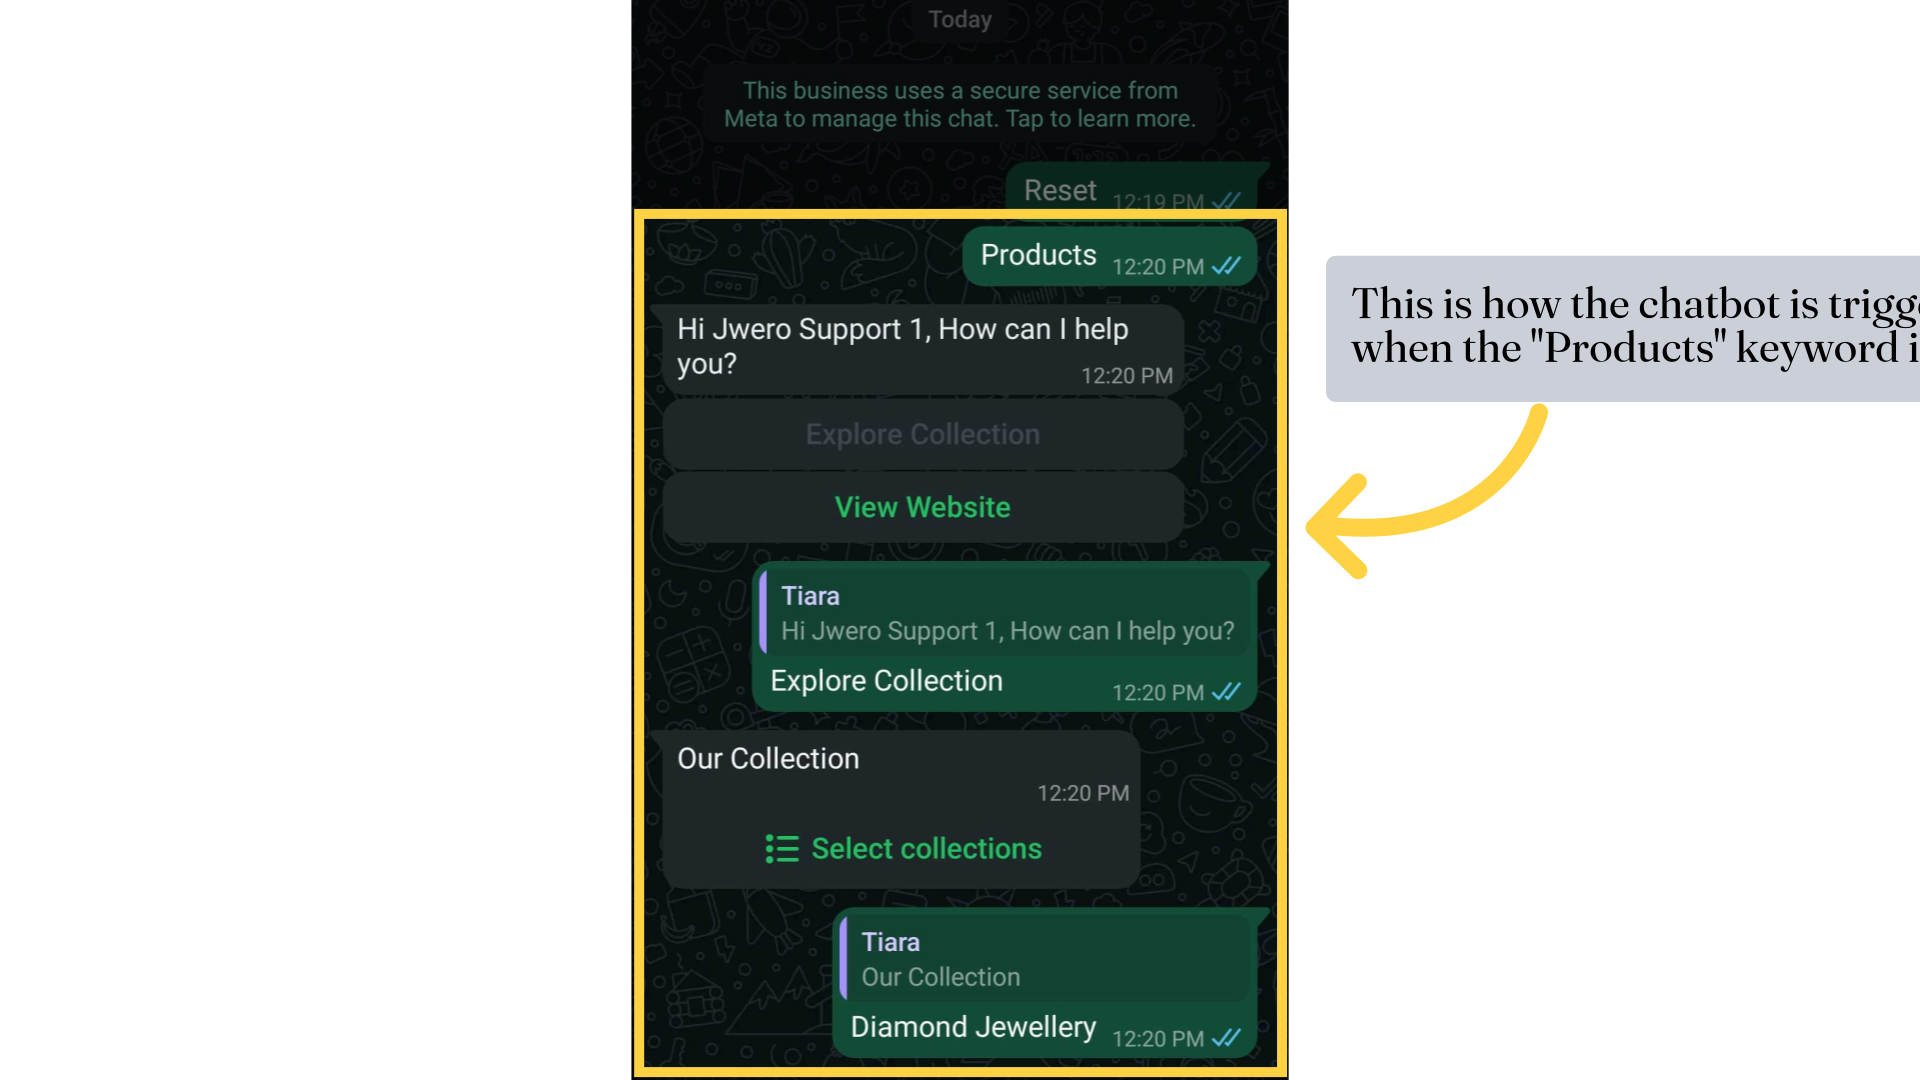
45. Click on "Launch" to activate it. Once launched, you can test it by sending the keywords added to the channel.
46. This is how the chatbot is triggered when the "Products" keyword is sent.
47. Note : The "Reset" in a chatbot is used to clear the current conversation flow and restart the interaction. It helps in cases where the chatbot needs to reset user inputs, and restart a flow.