Assign To Tag Action In Chatbot
1. Add to Tag
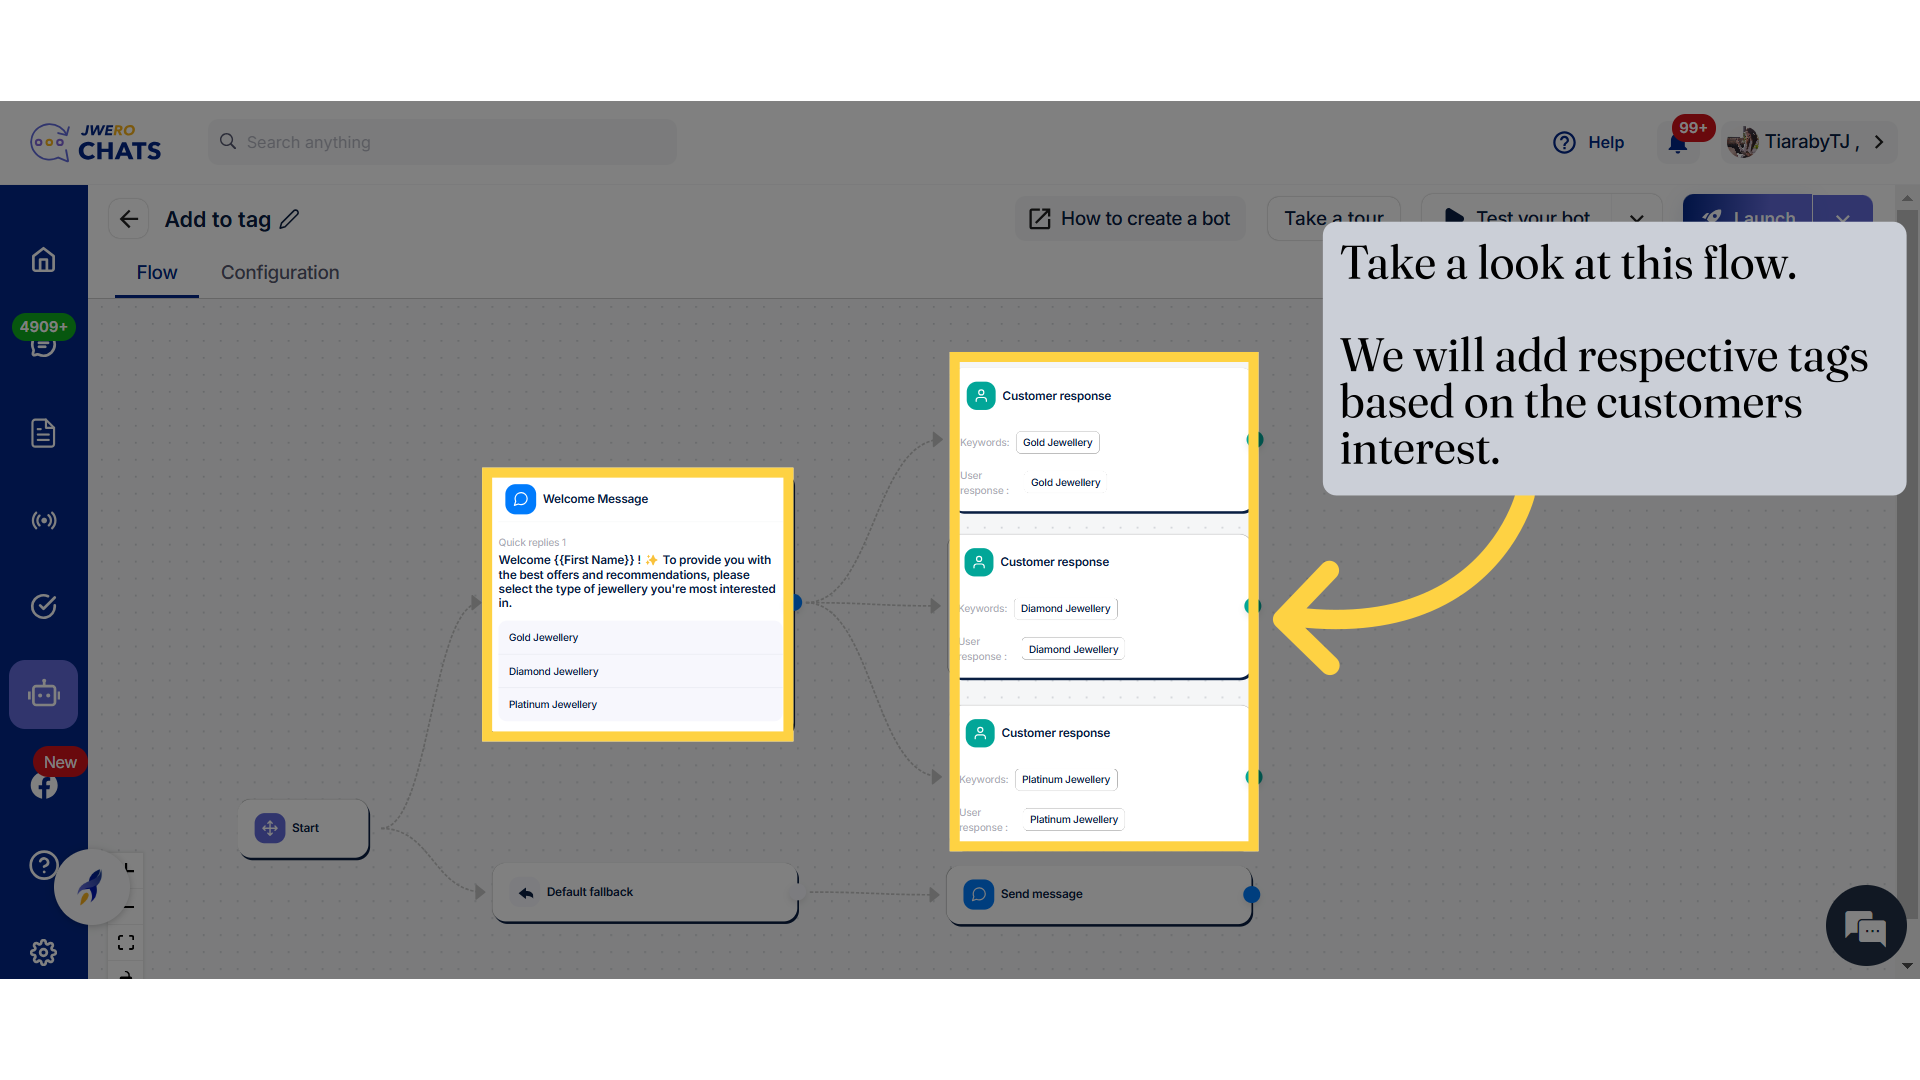
2. Take a look at this flow. We will add respective tags based on the customers interest.
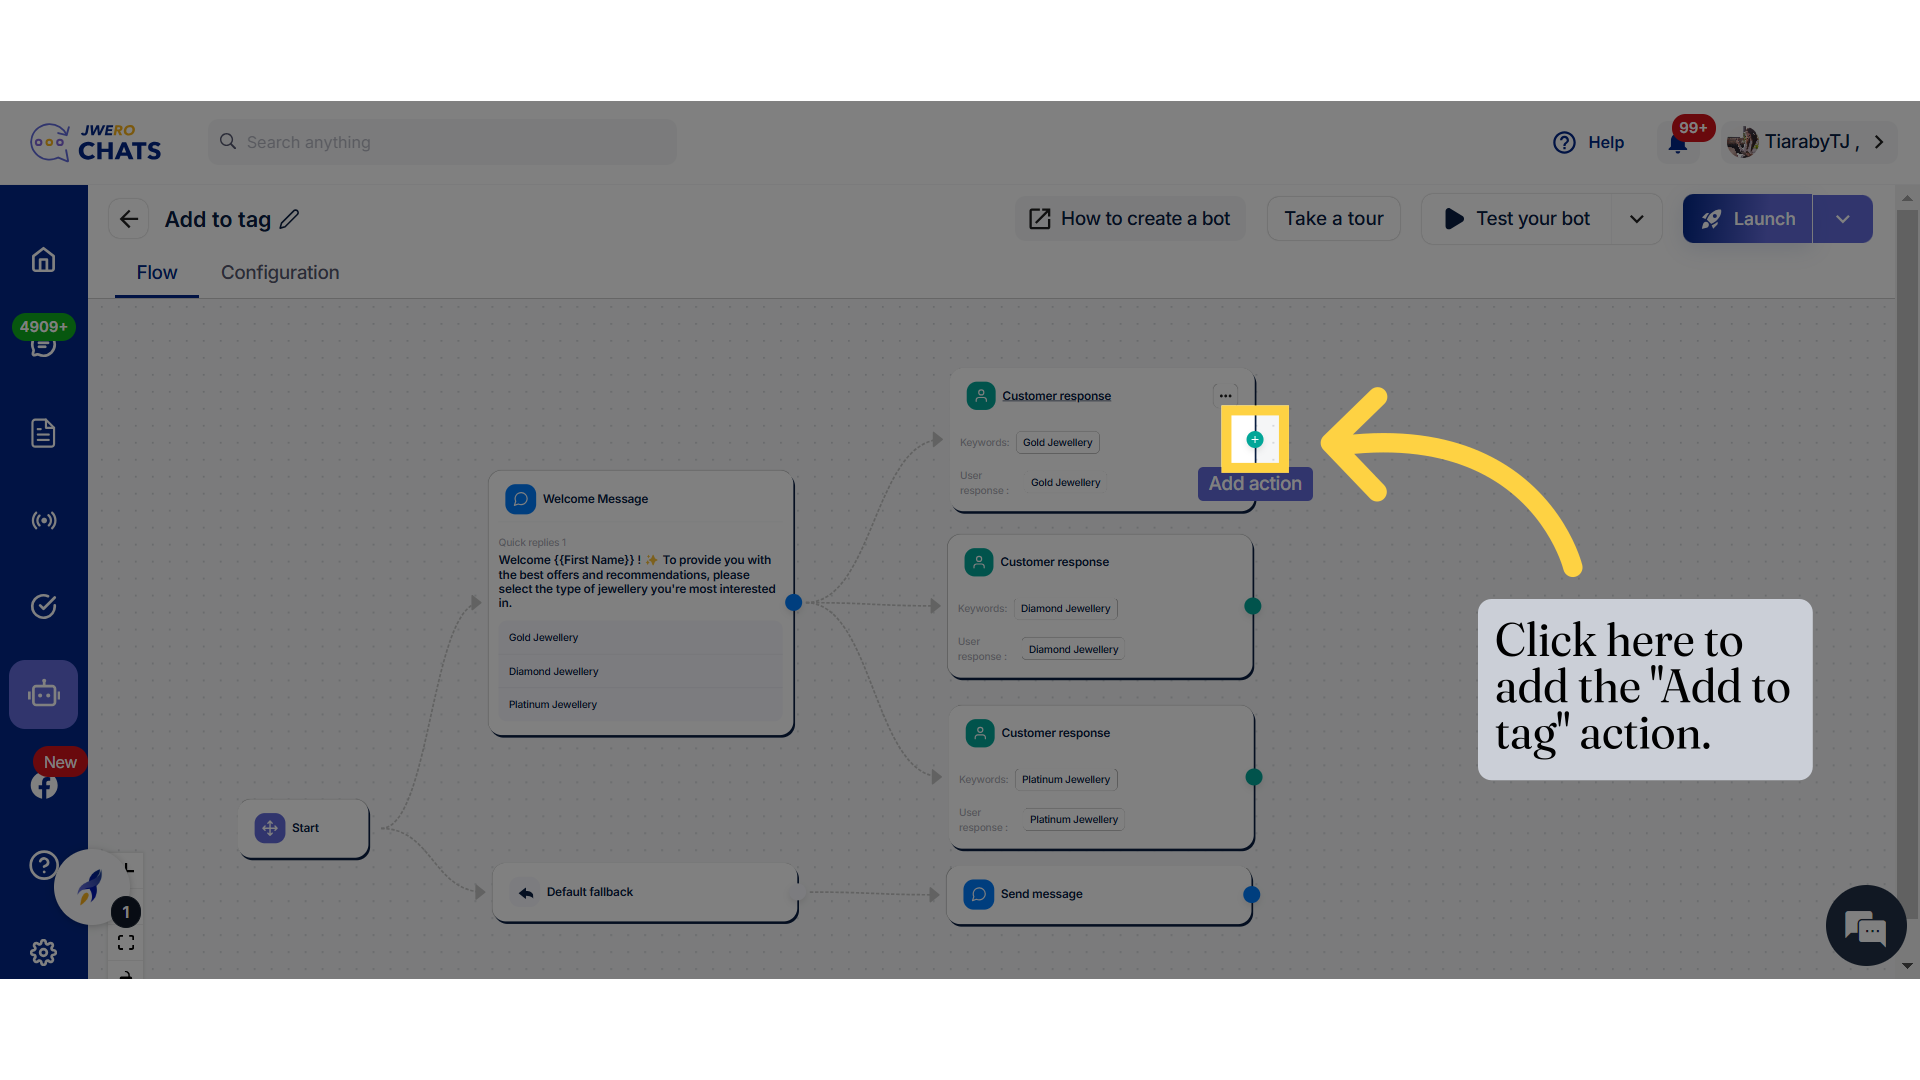
3. Click here to add the "Add to tag" action.
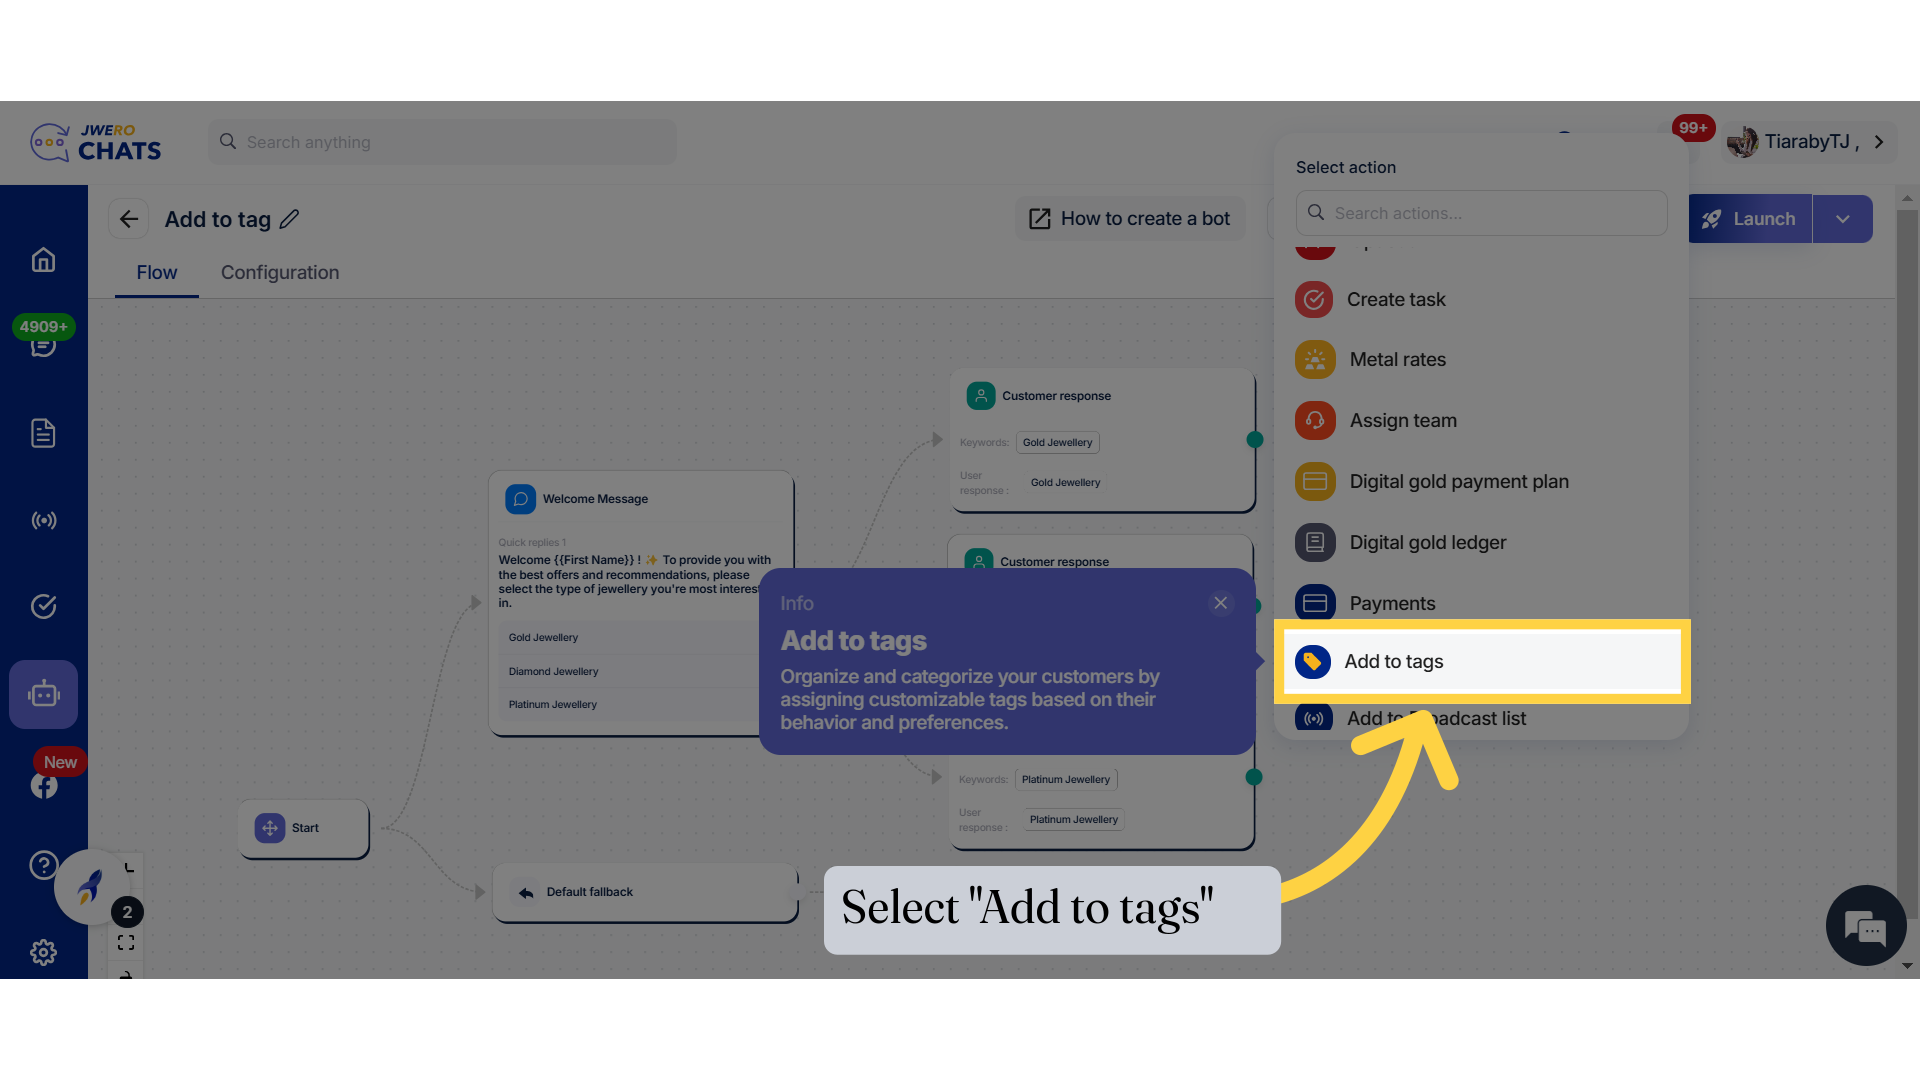
4. Select "Add to tags"
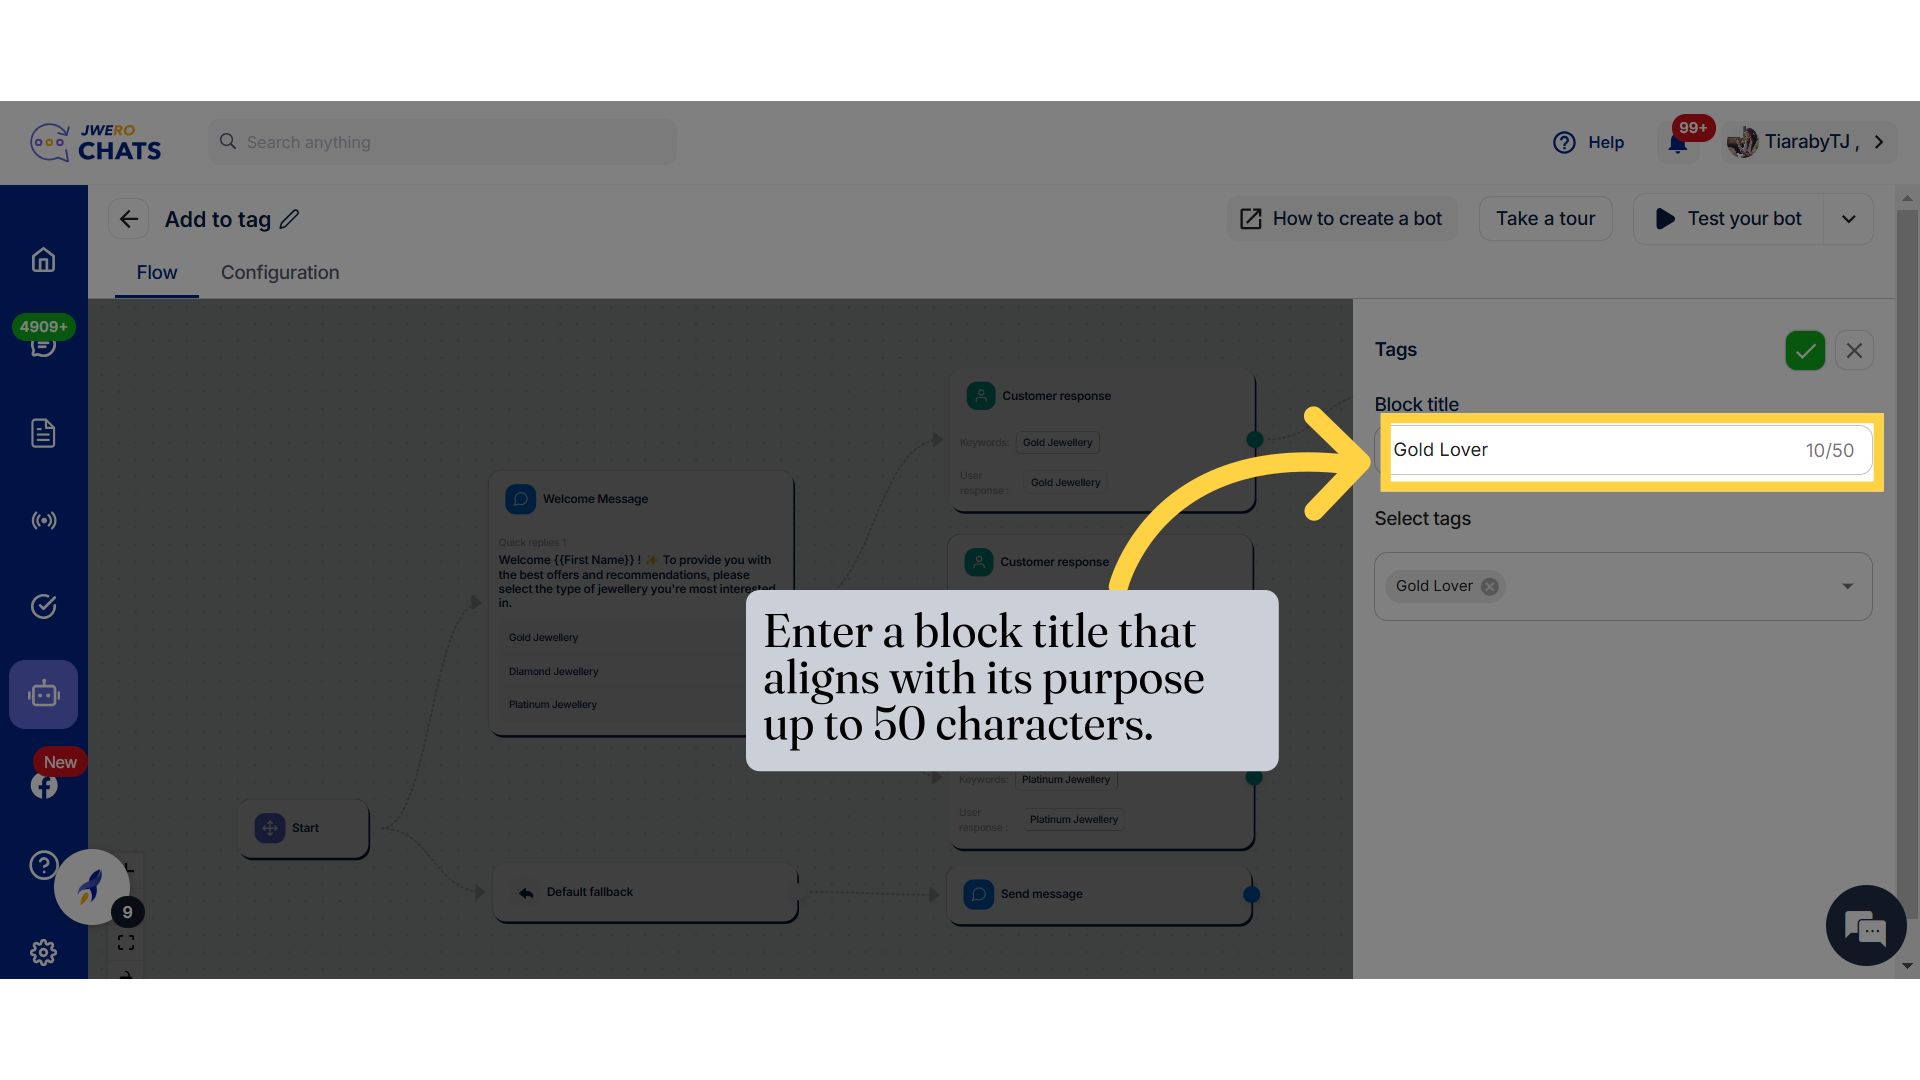
5. Enter a block title that aligns with its purpose up to 50 characters.
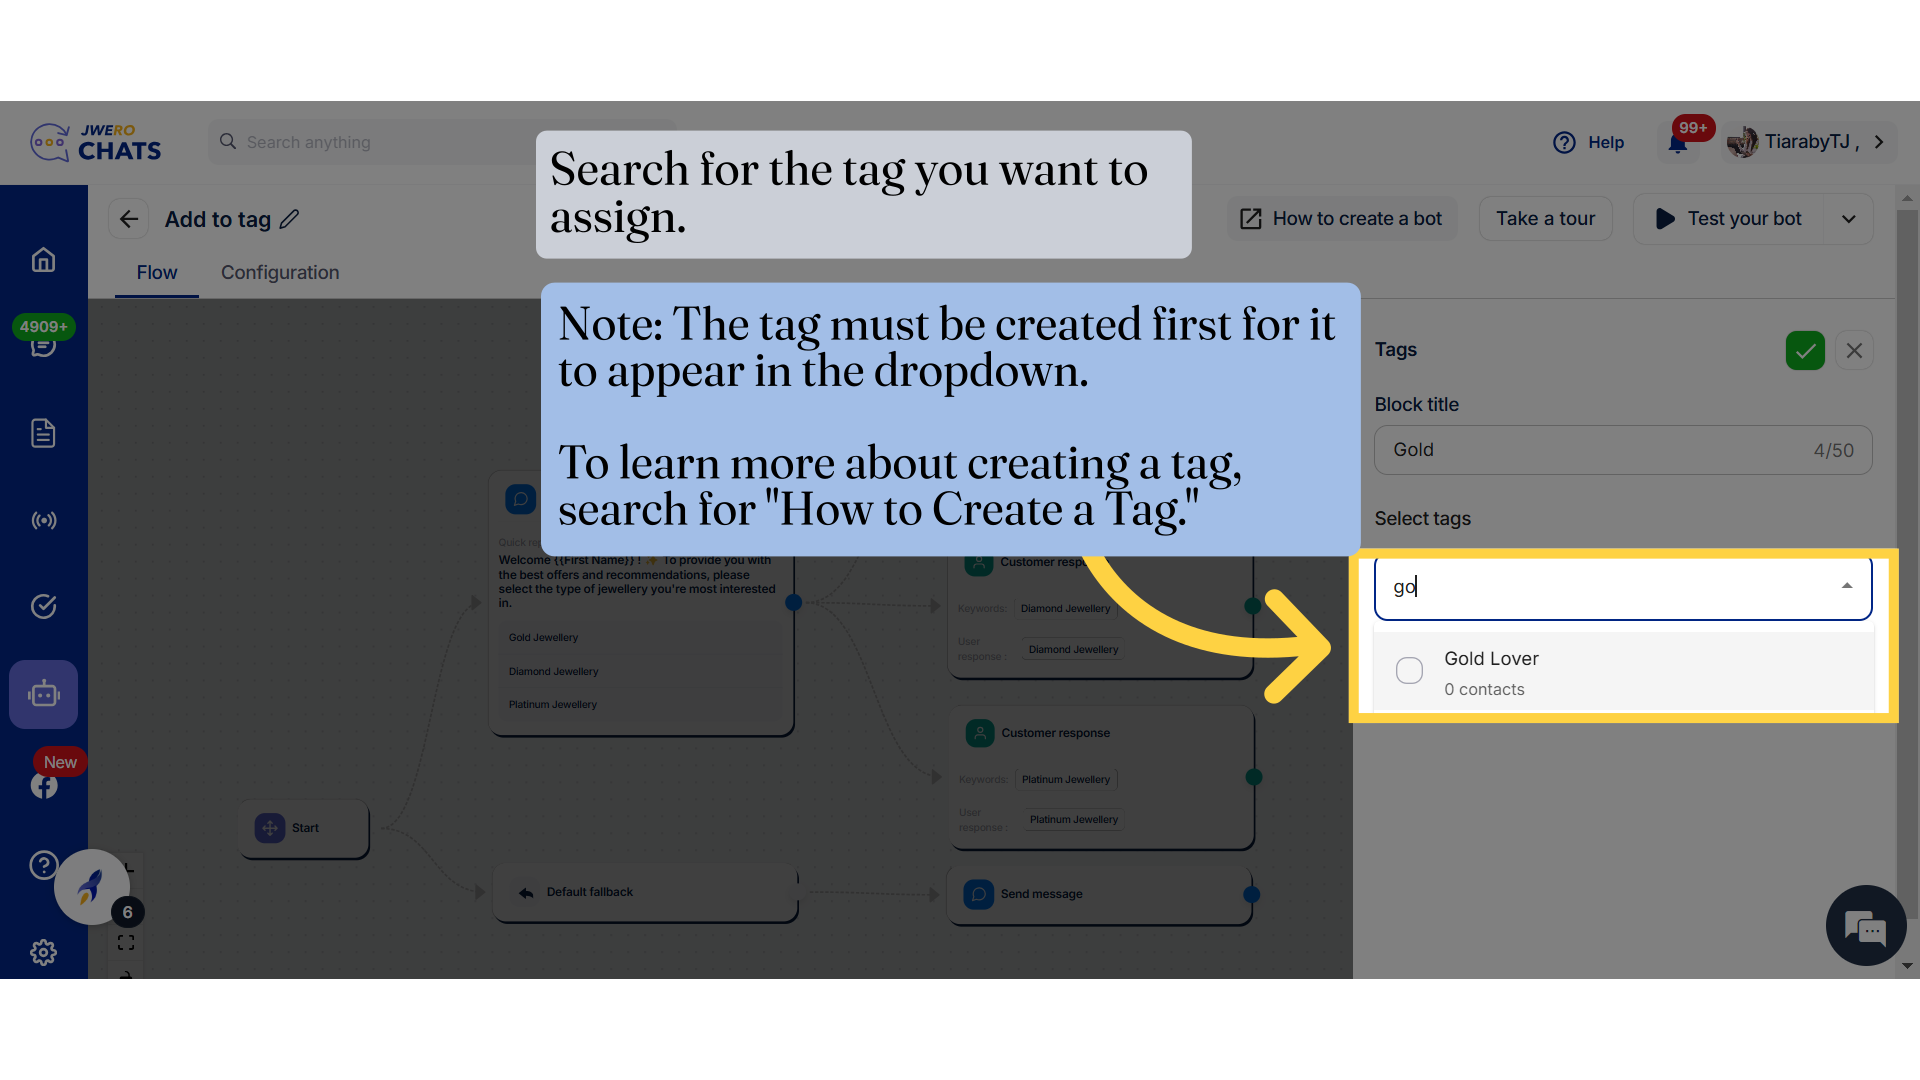
6. Search for the tag you want to assign.
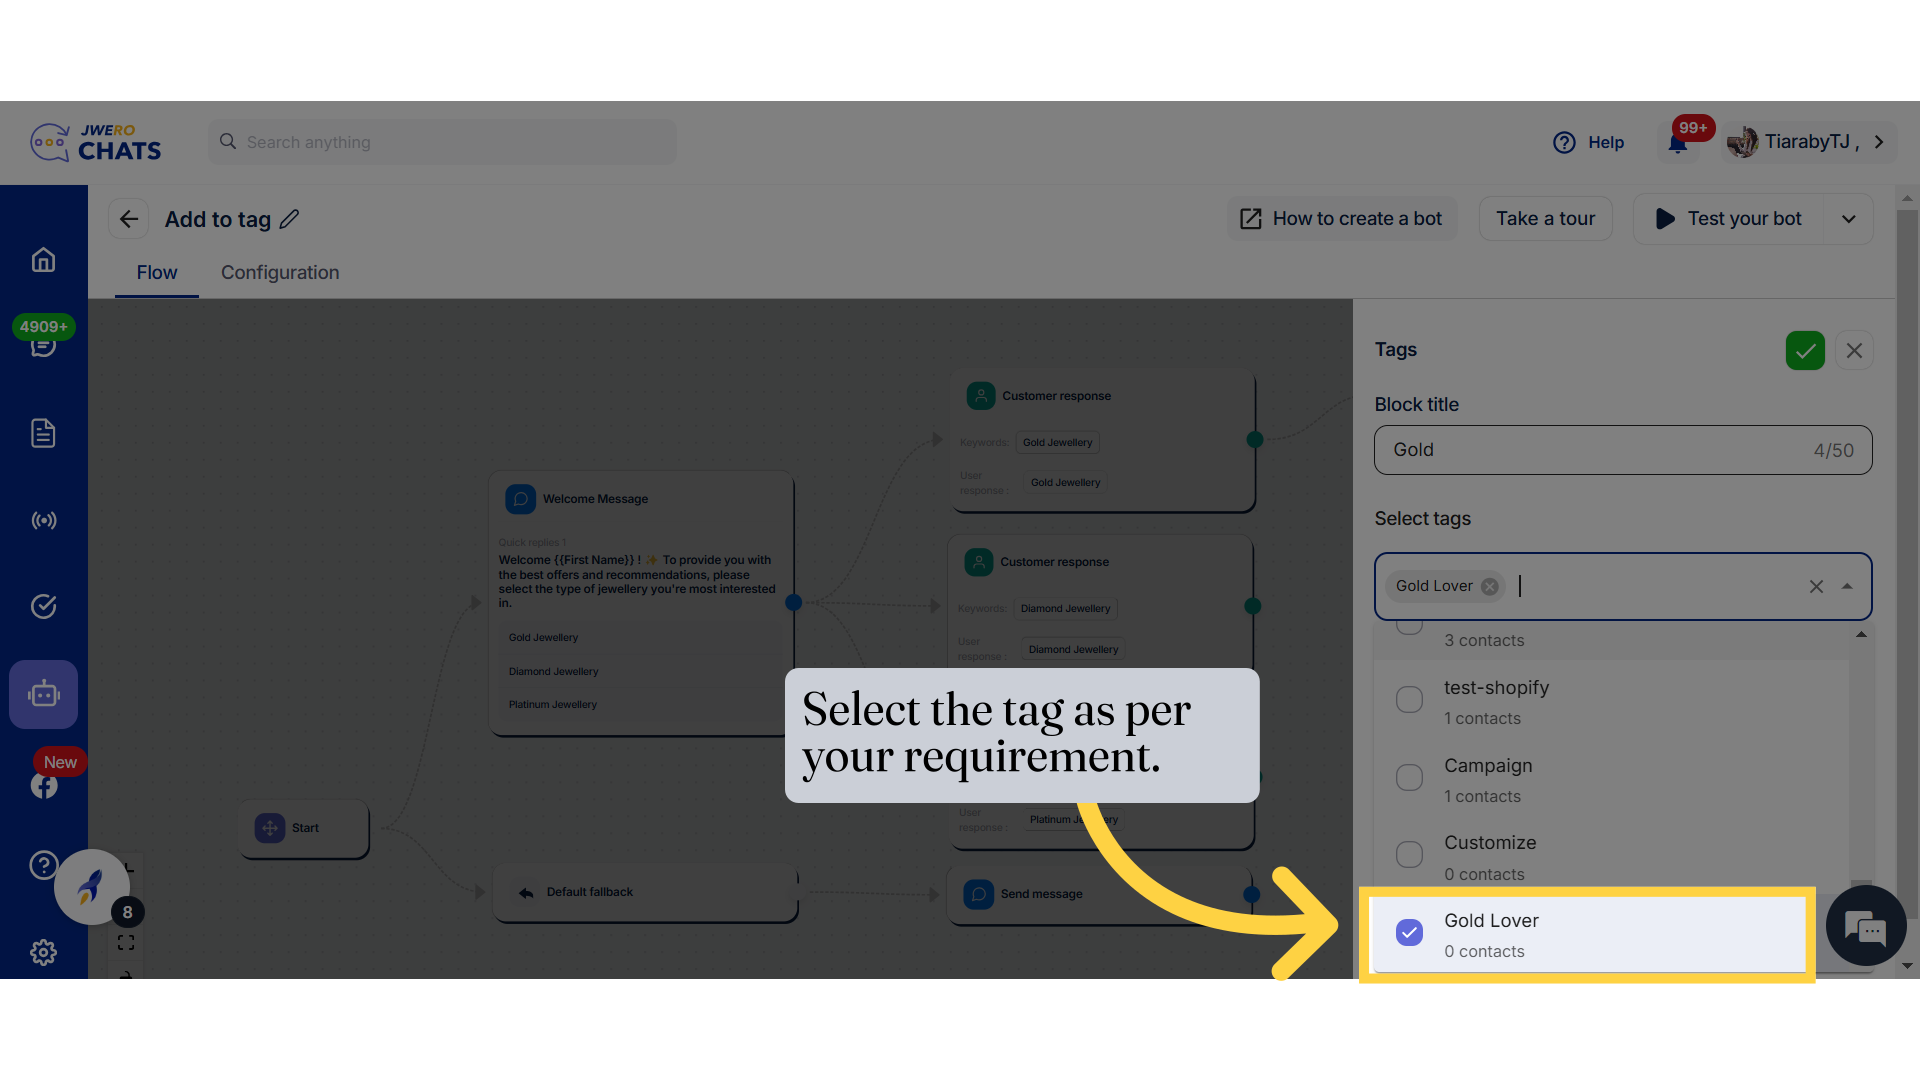
7. Select the tag as per your requirement.
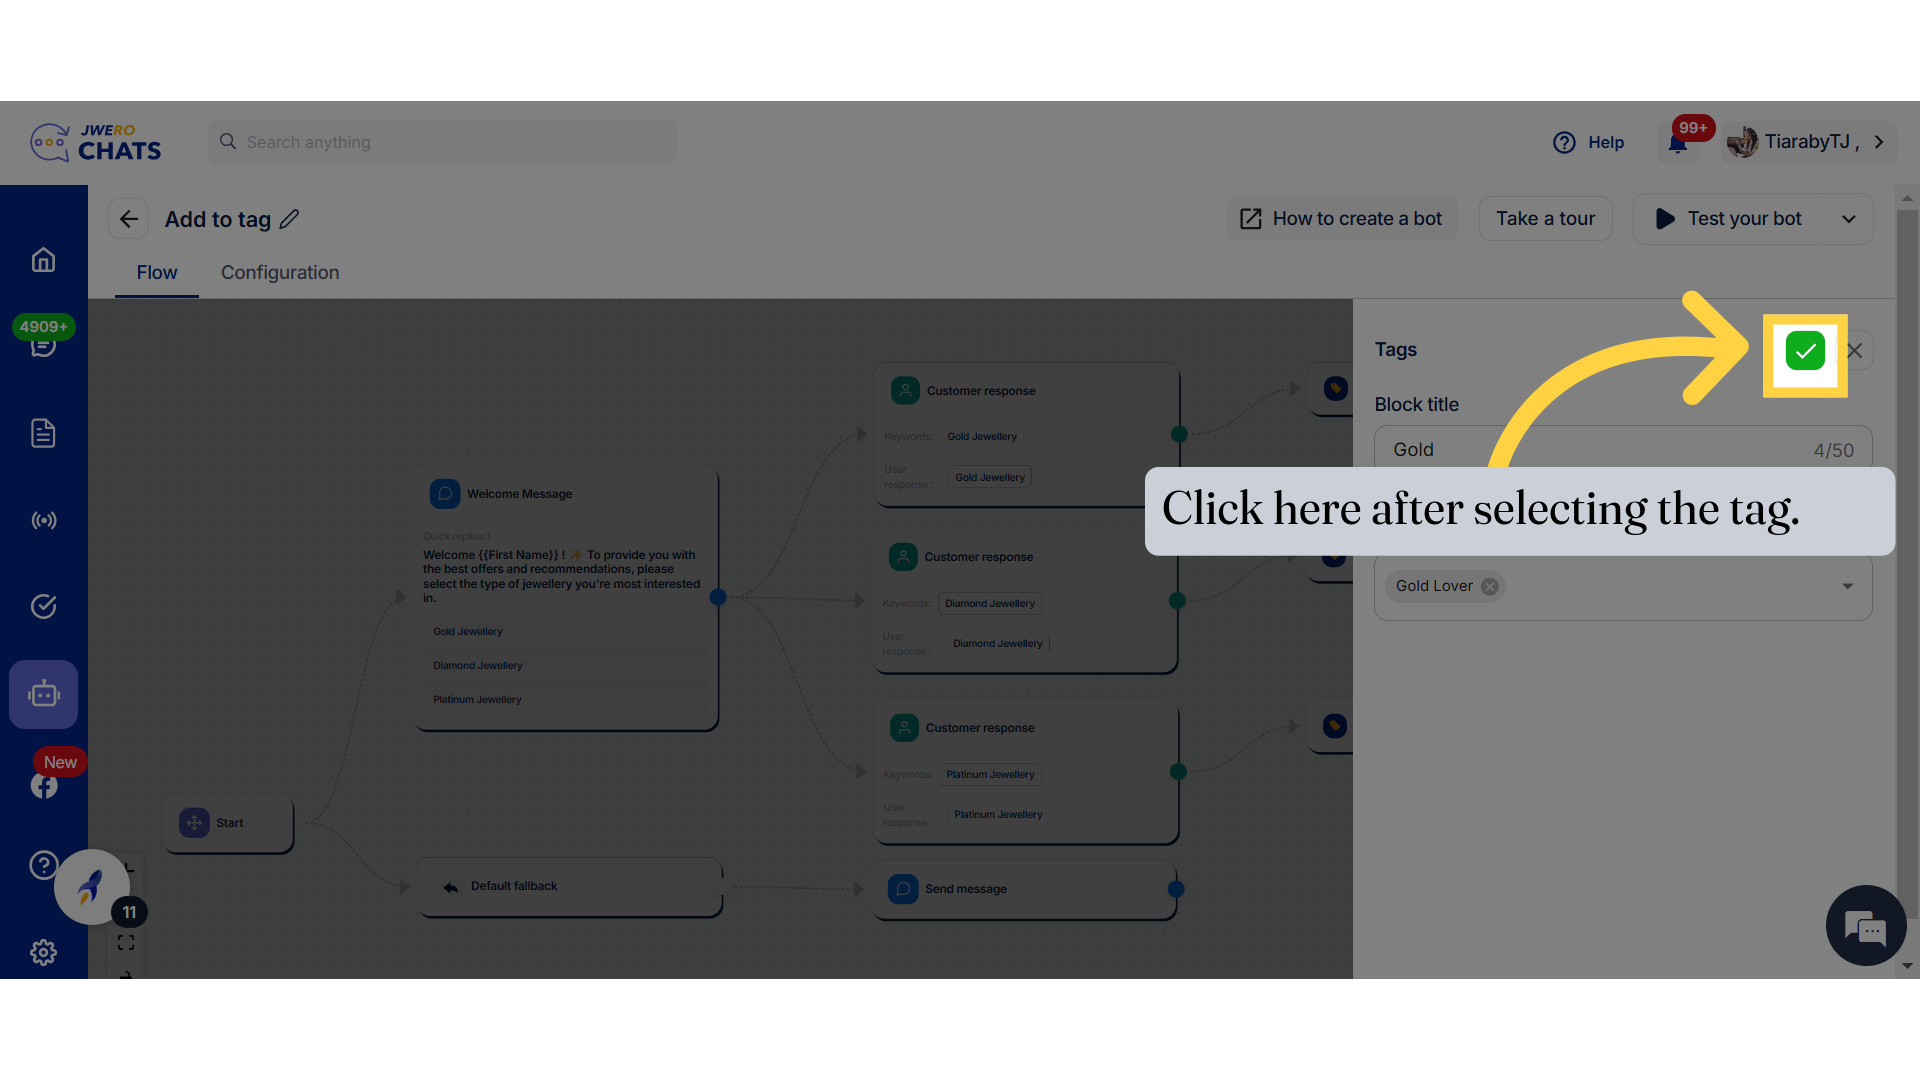
8. Click here after selecting the tag.
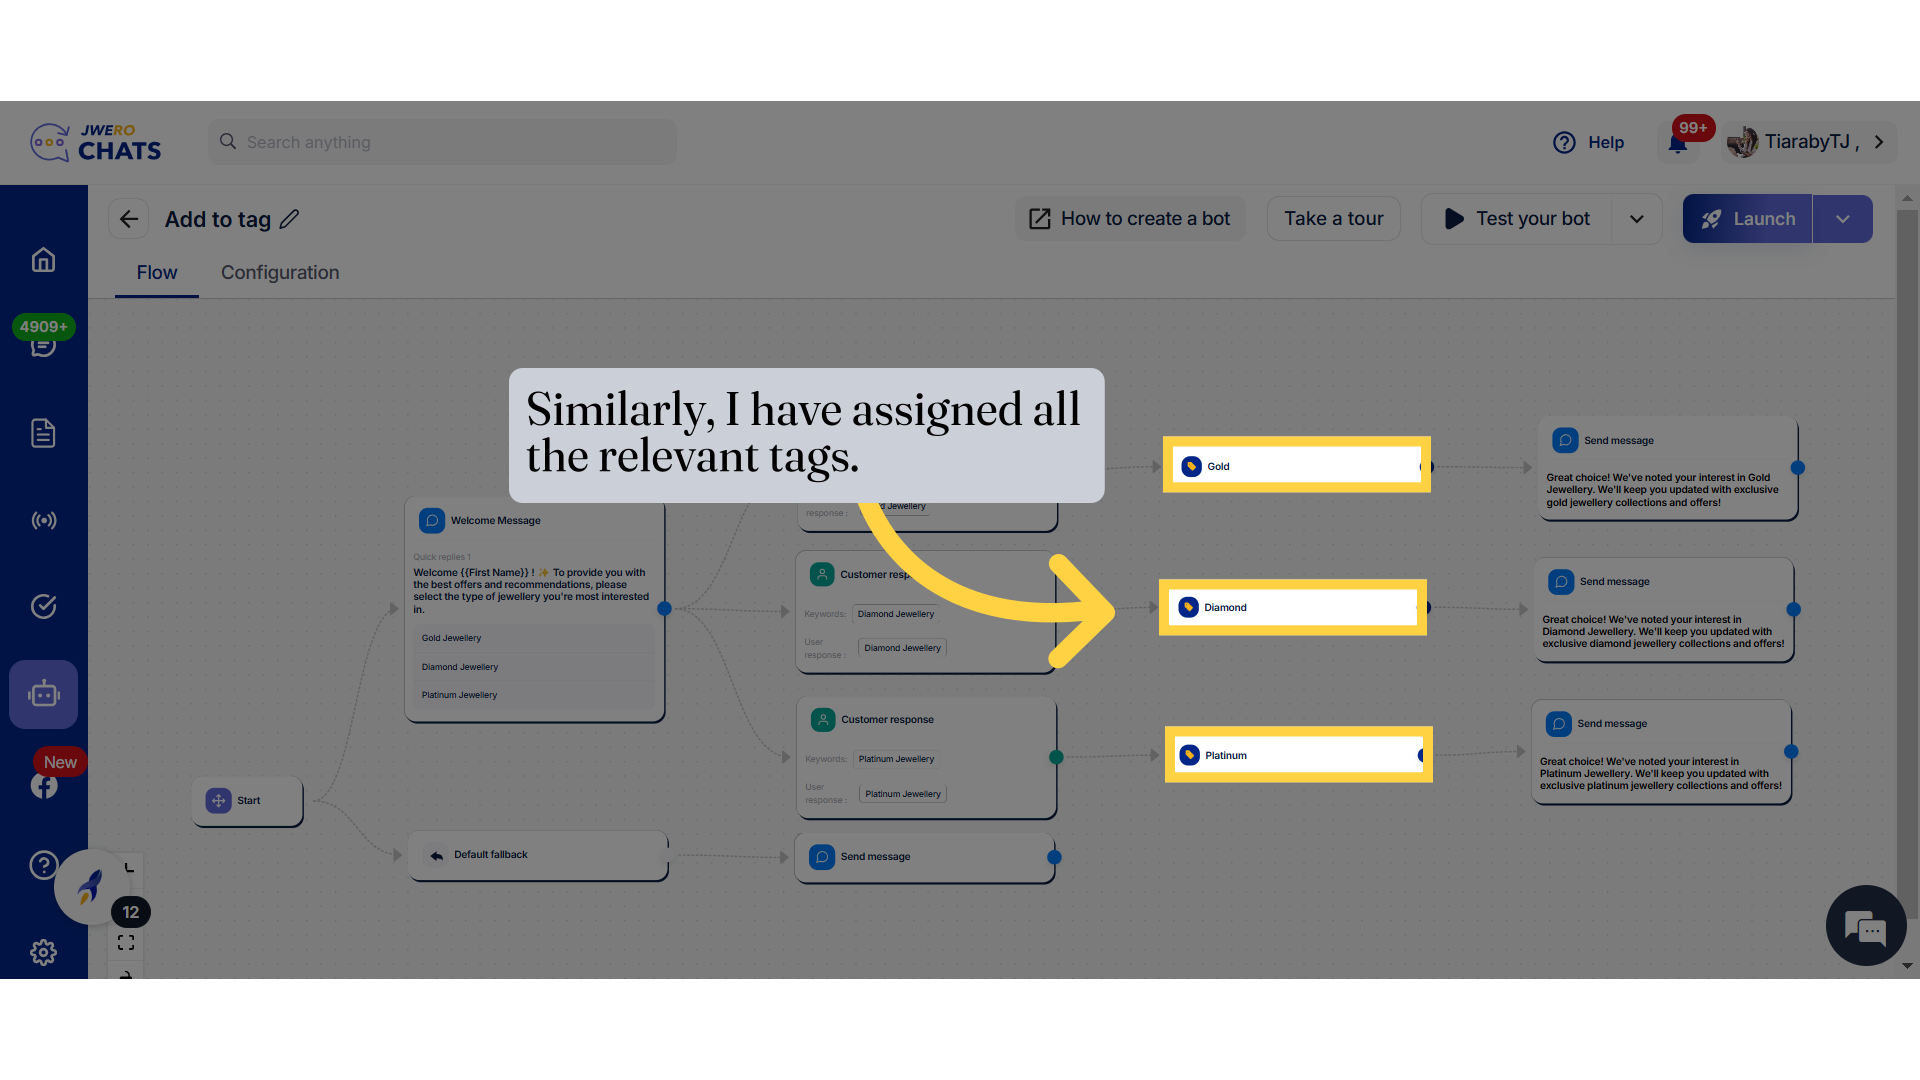
9. Similarly, I have assigned all the relevant tags.
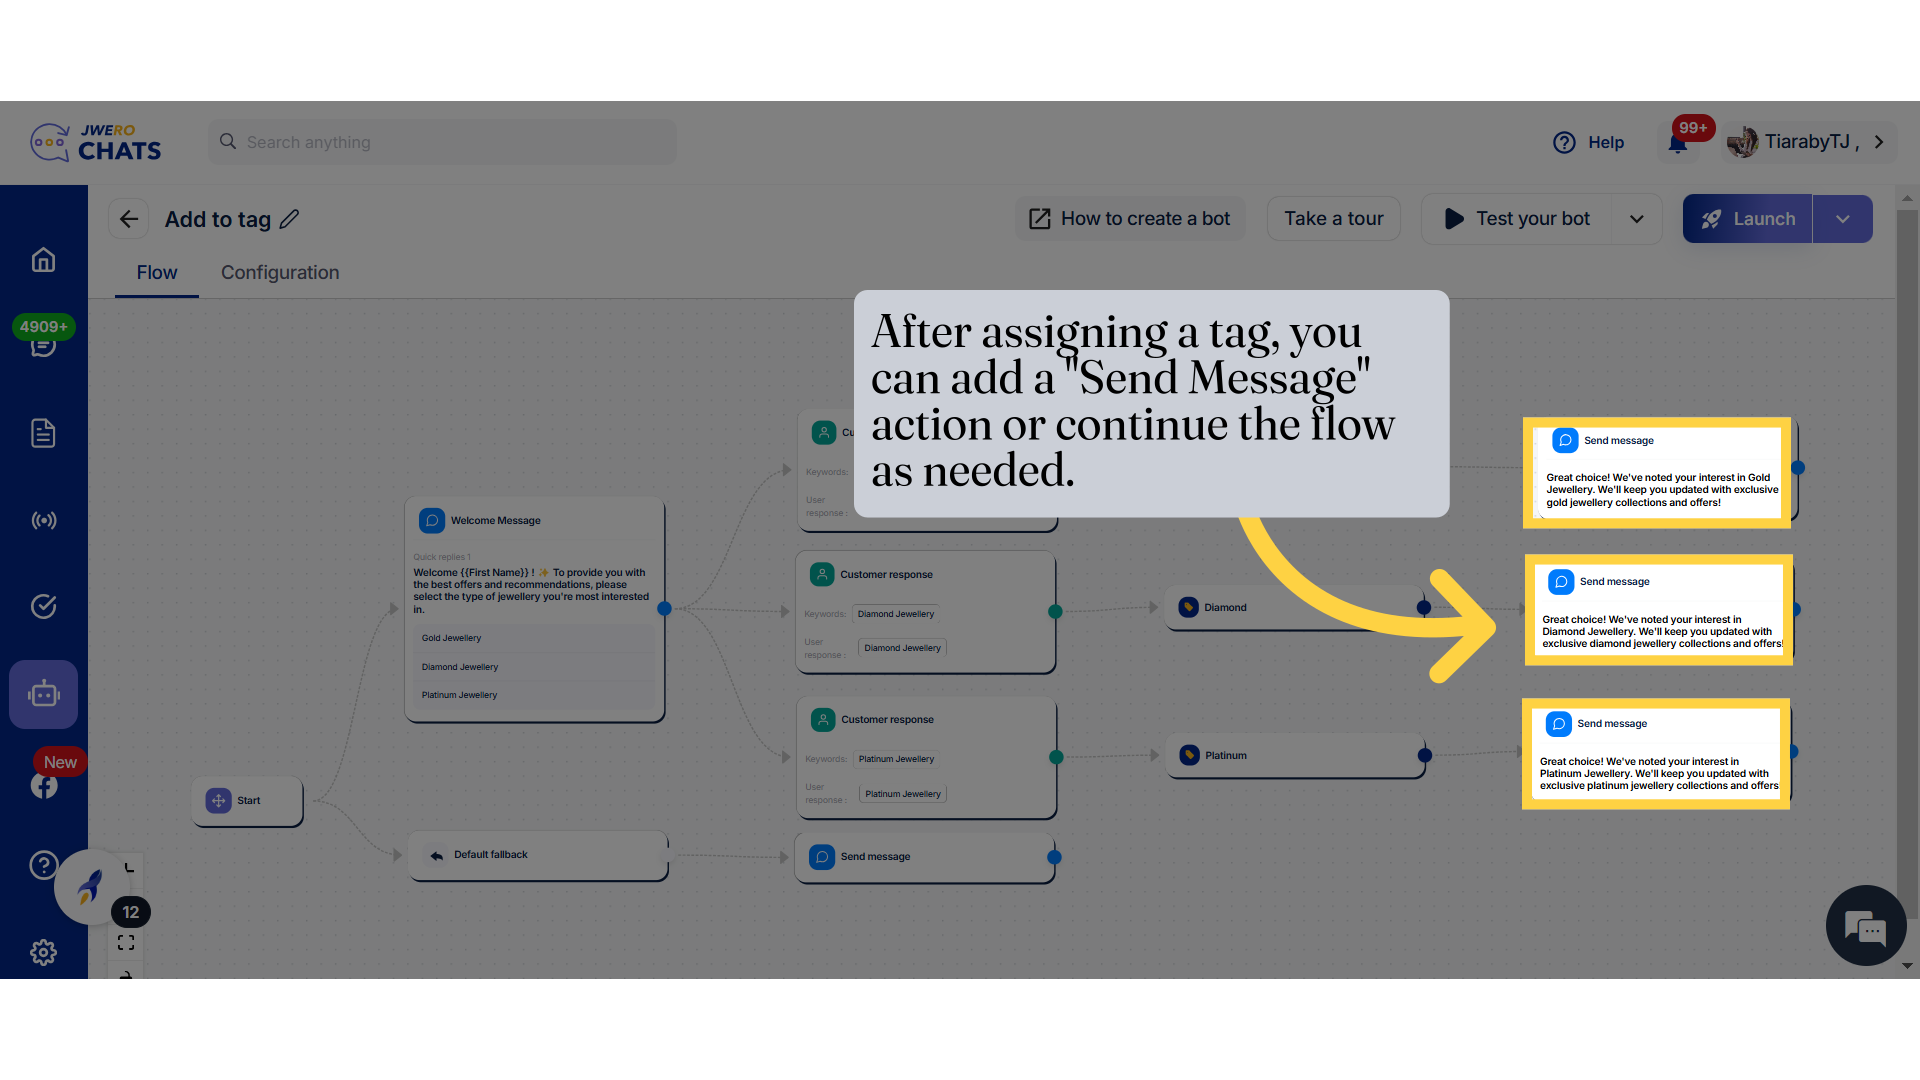
10. After assigning a tag, you can add a "Send Message" action or continue the flow as needed.
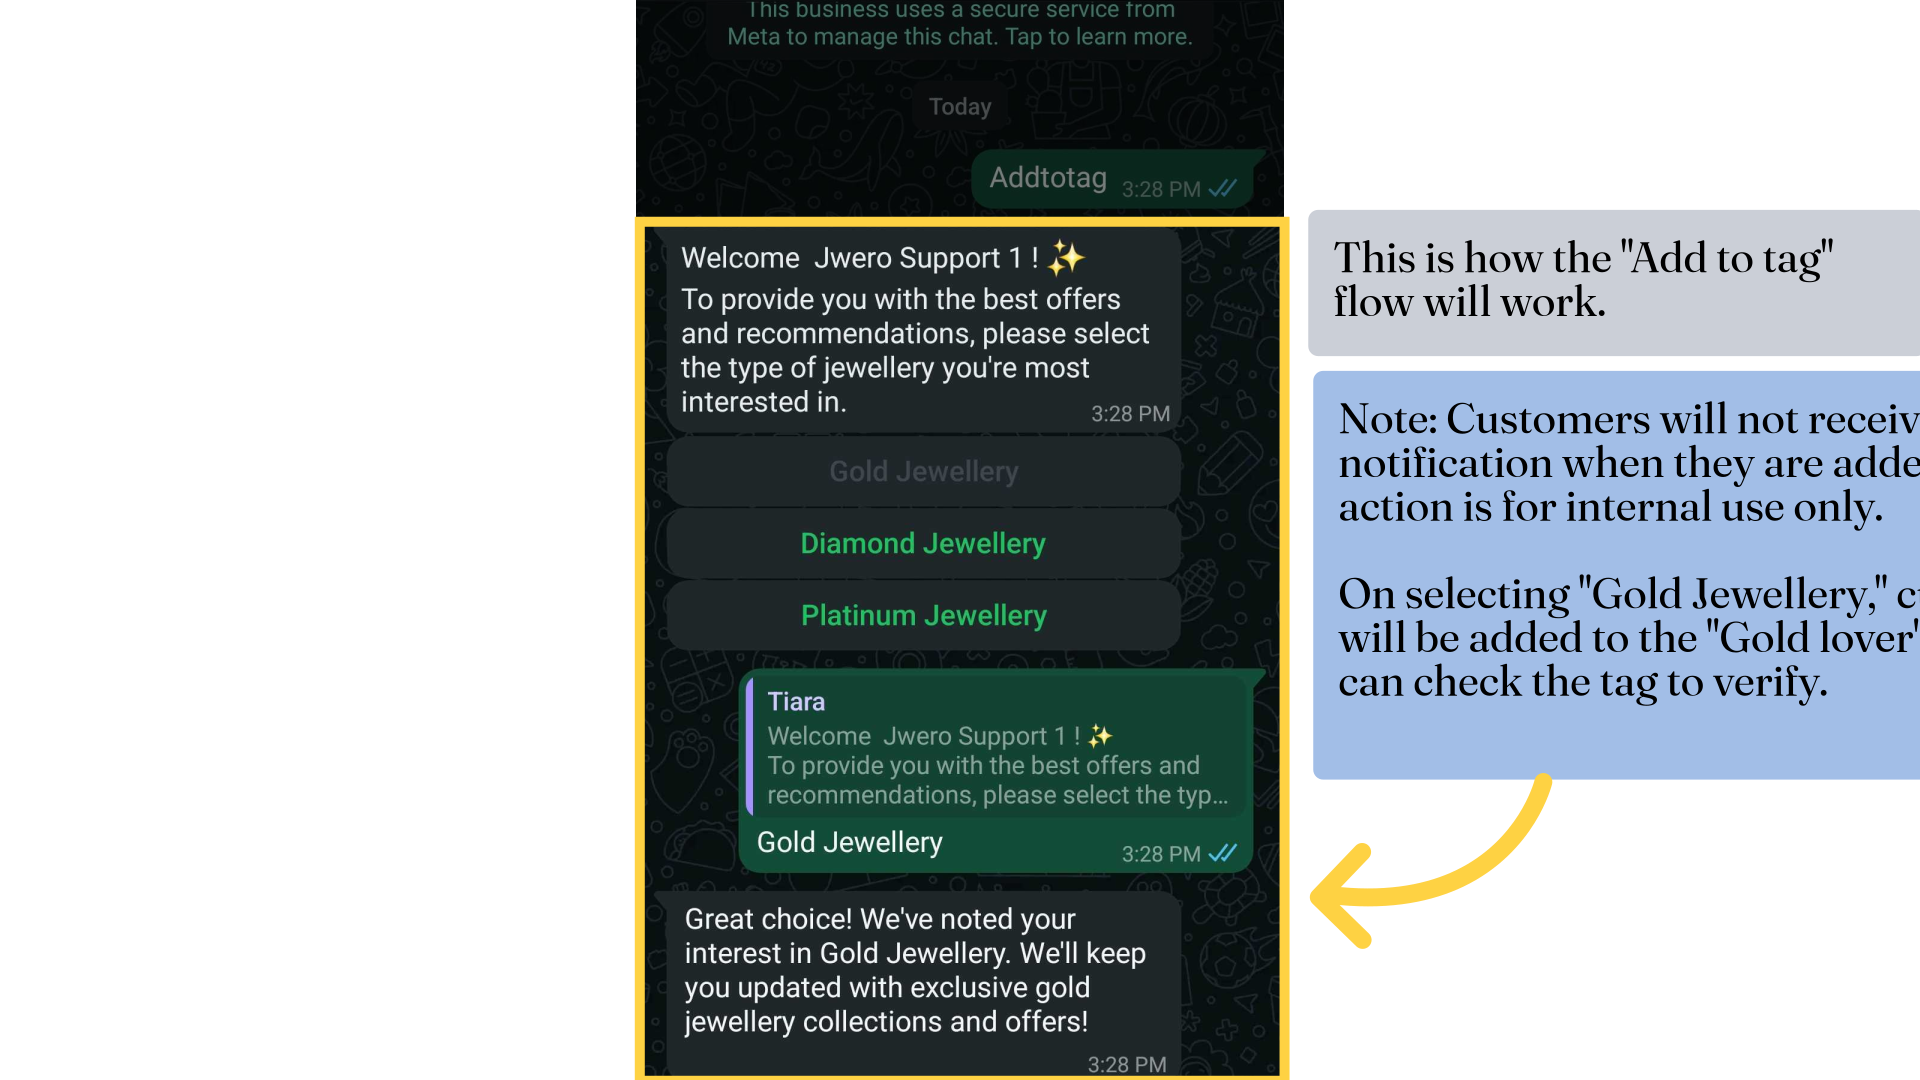
11. This is how the "Add to tag" flow will work.