How To Create Utility Template
1. Utility templates
2. To create a template, log in to your Jwero Chats admin dashboard and navigate to the "Templates" section.
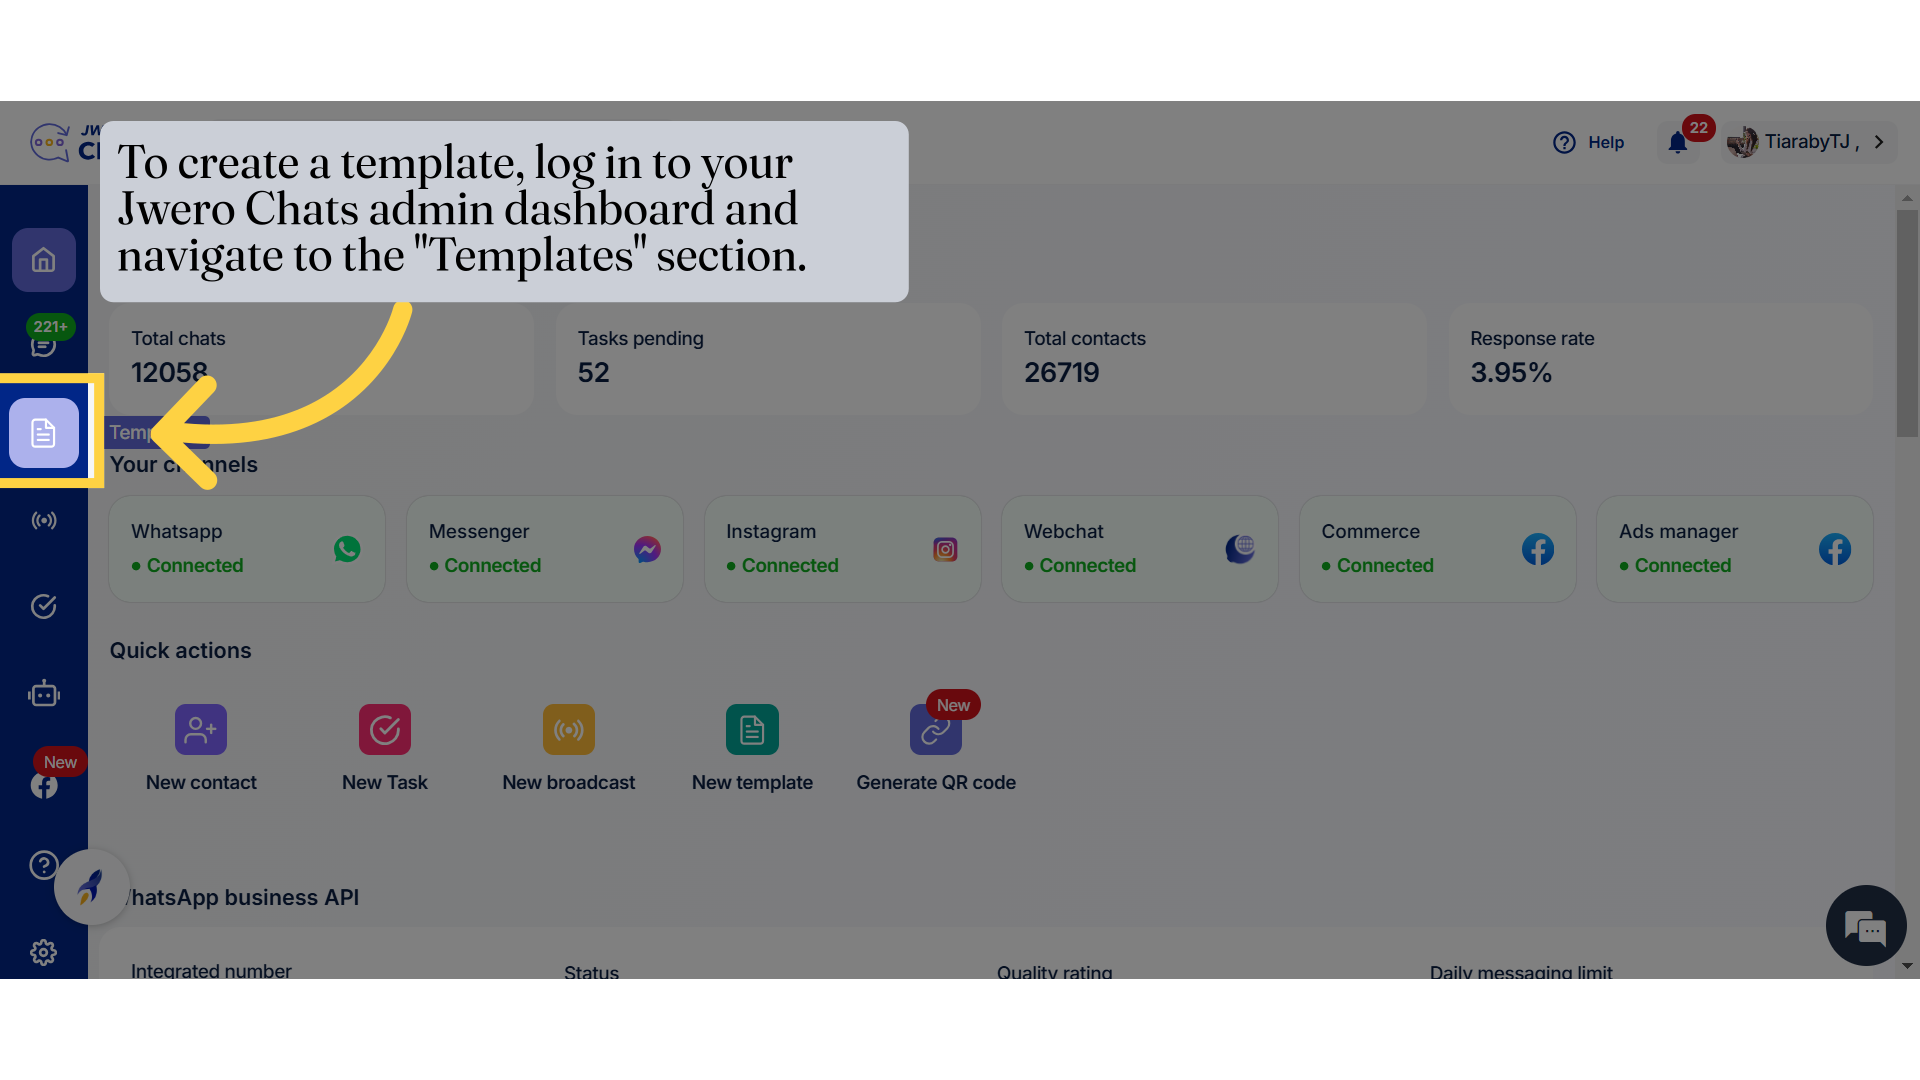
3. Click on "New template"

4. Enter the title name
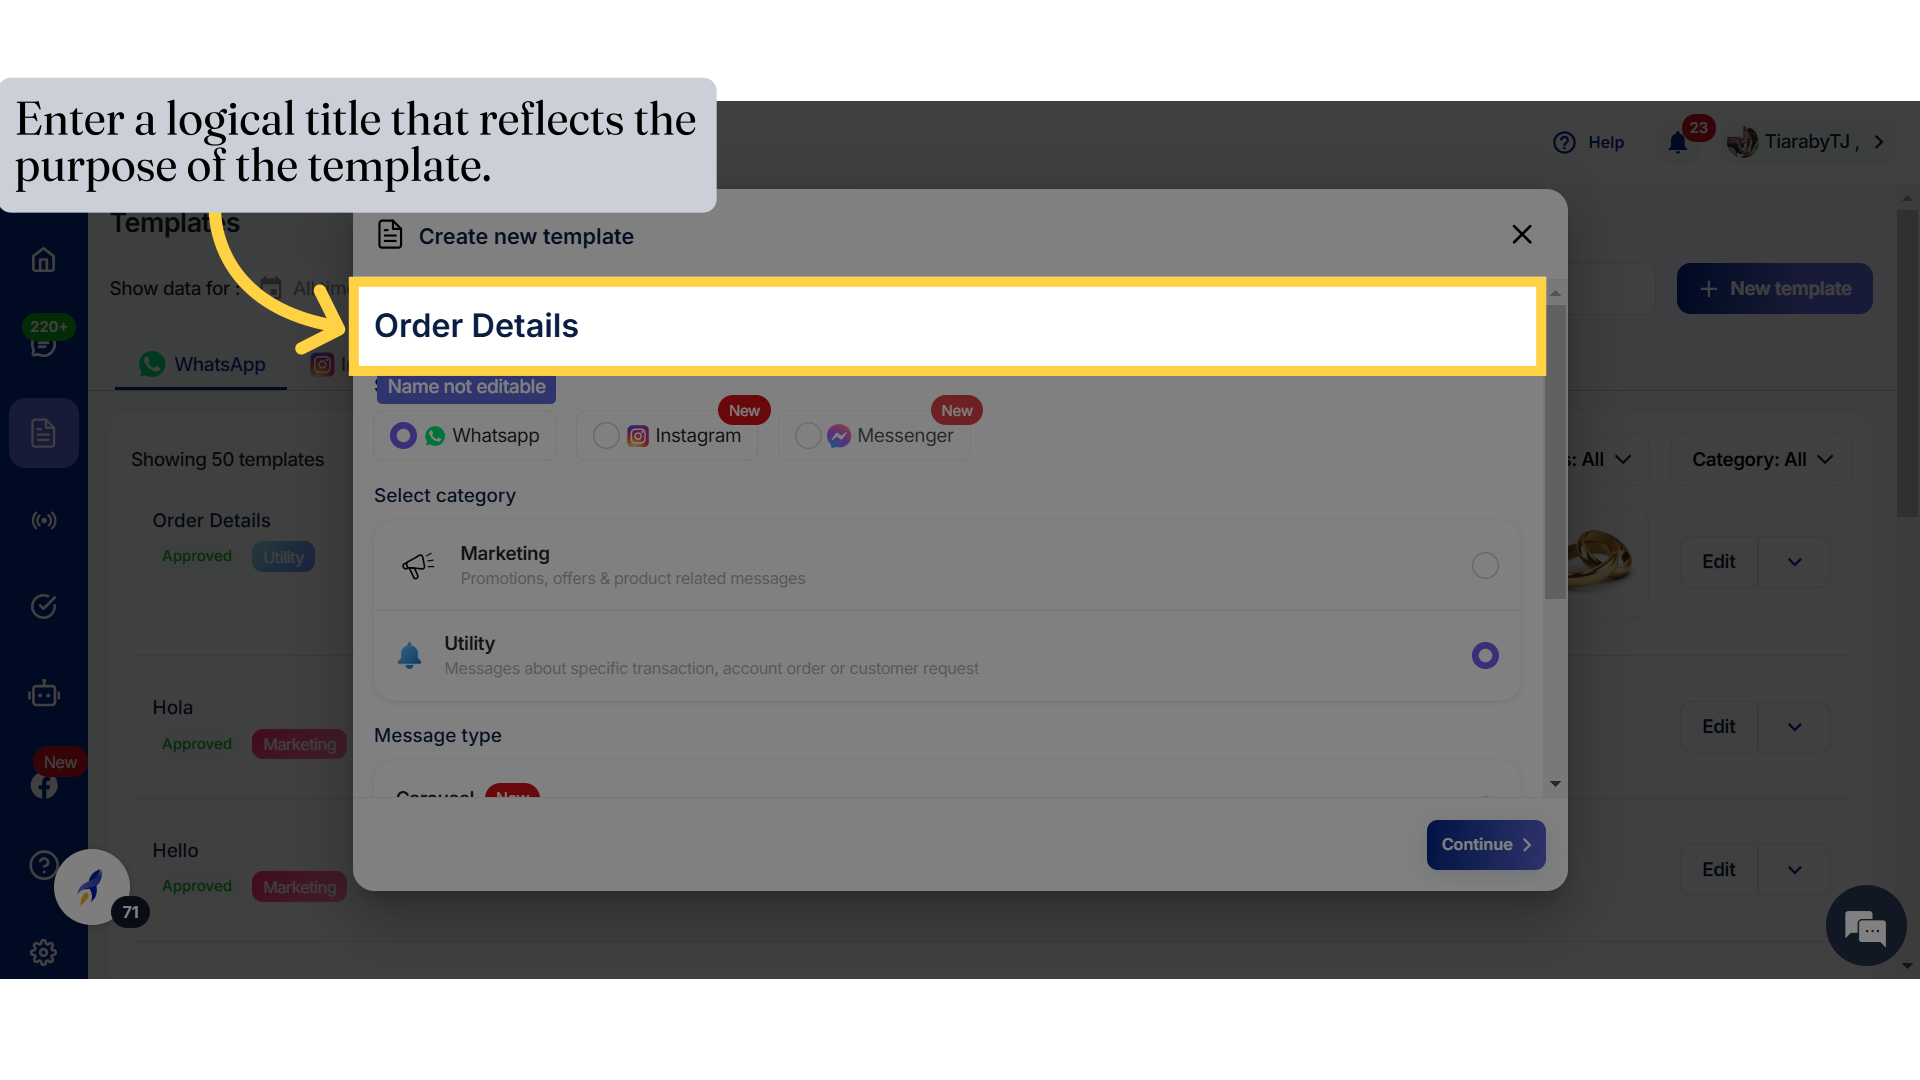
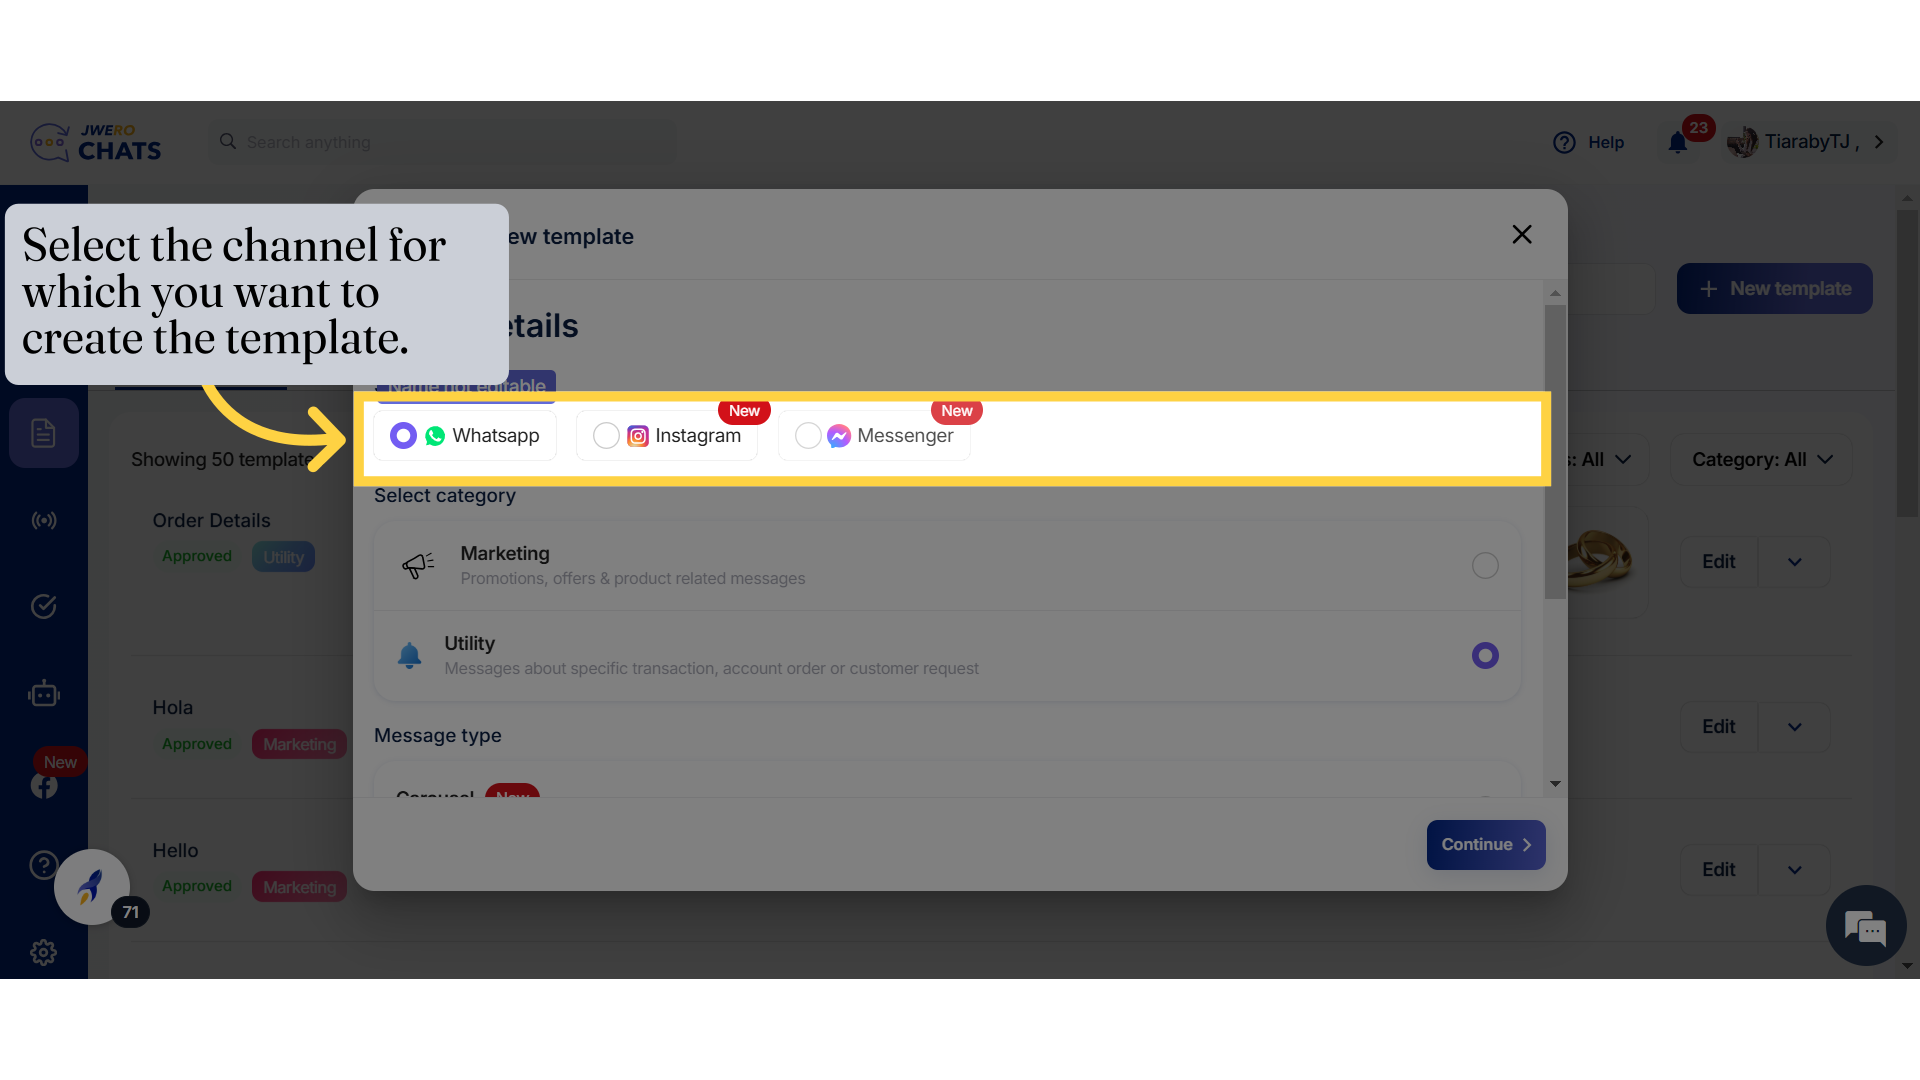
5. Select the channel
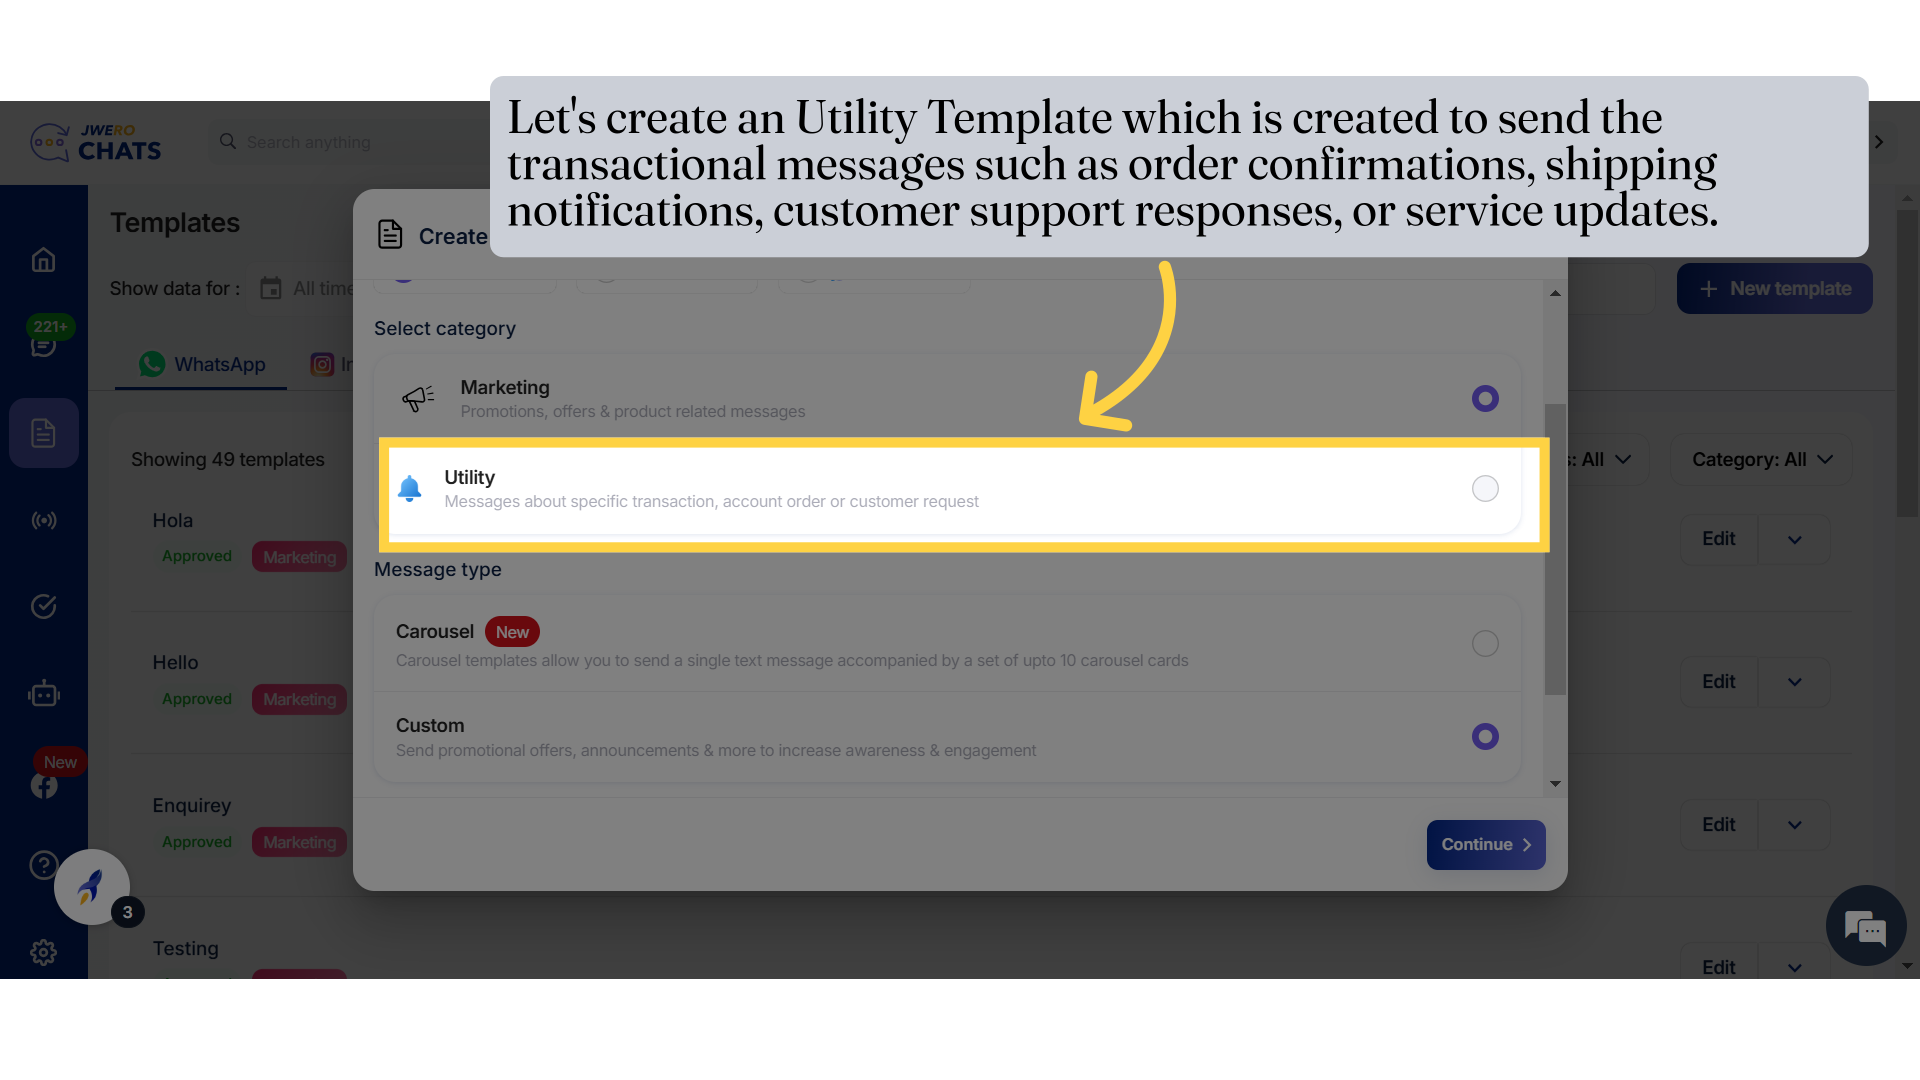
6. Select Category
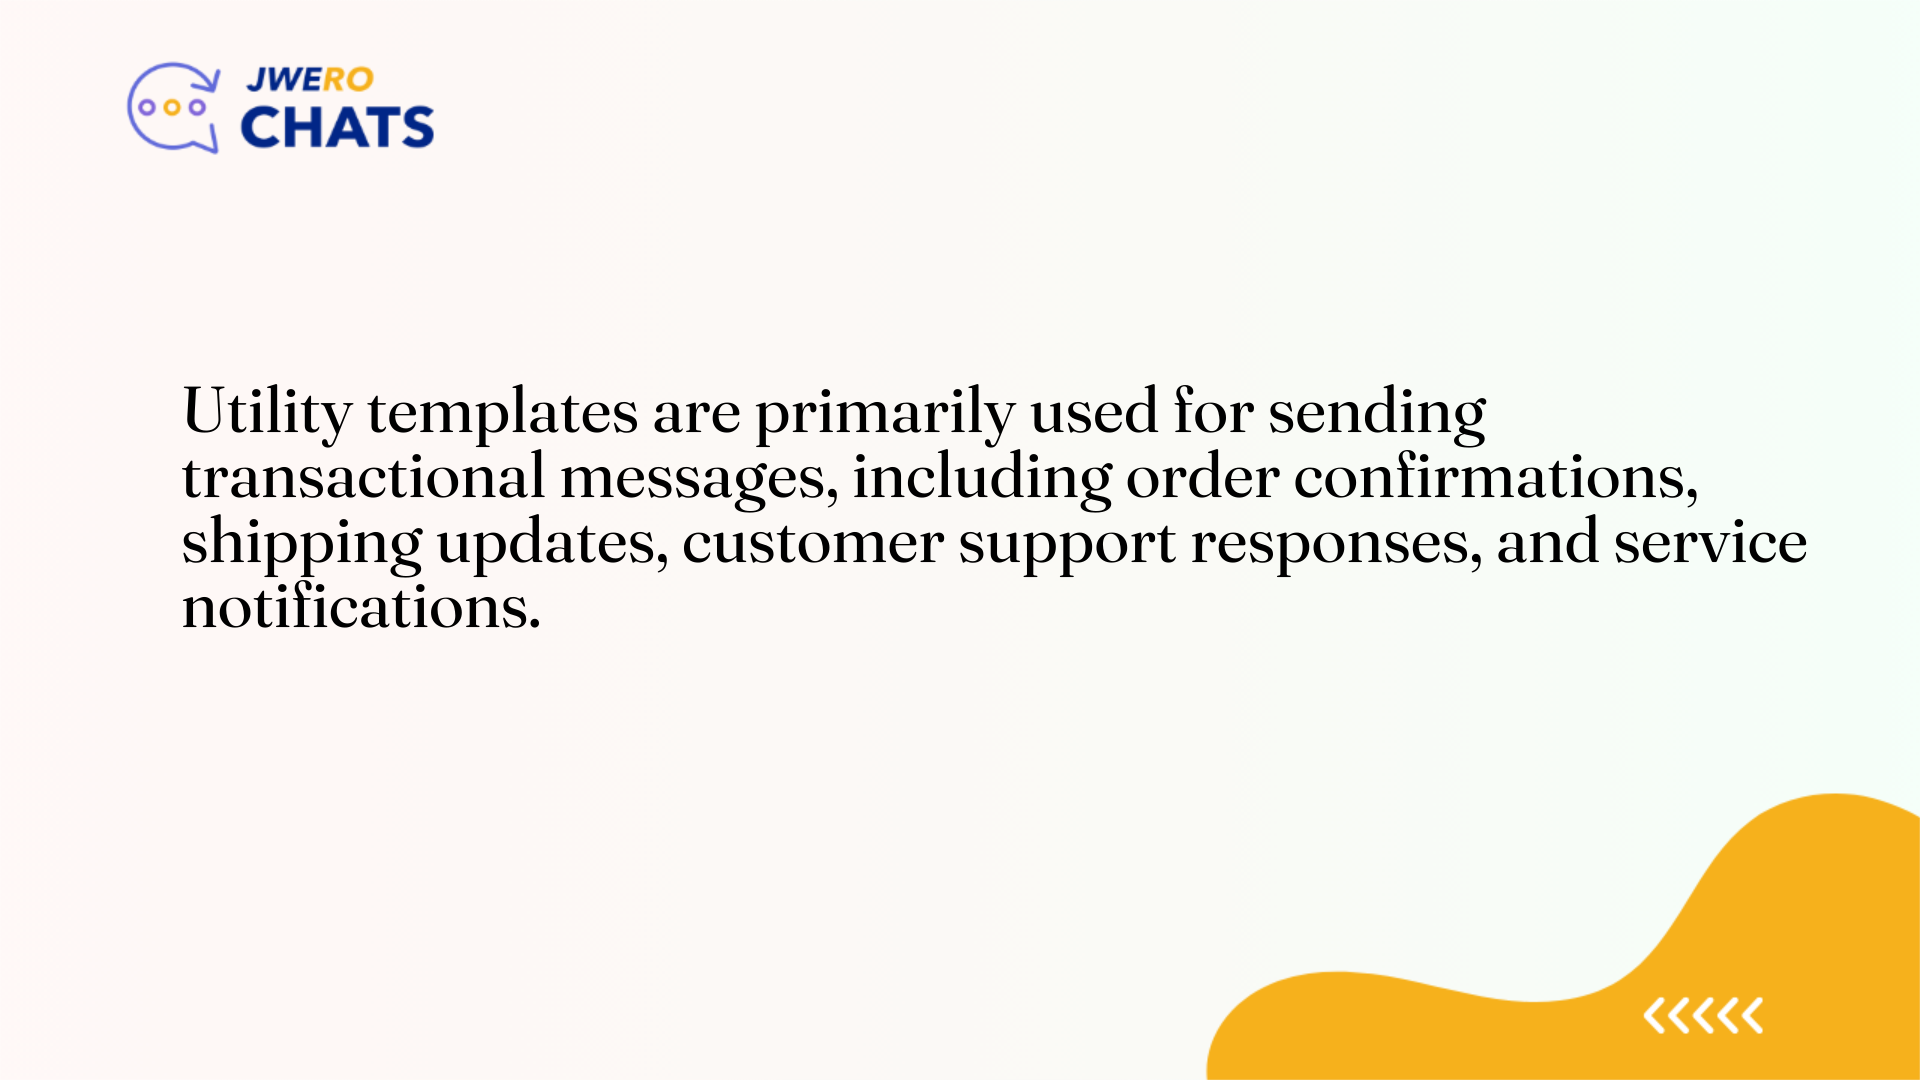
Utility Template is created to send the transactional messages such as order confirmations, shipping notifications, customer support responses, or service updates.
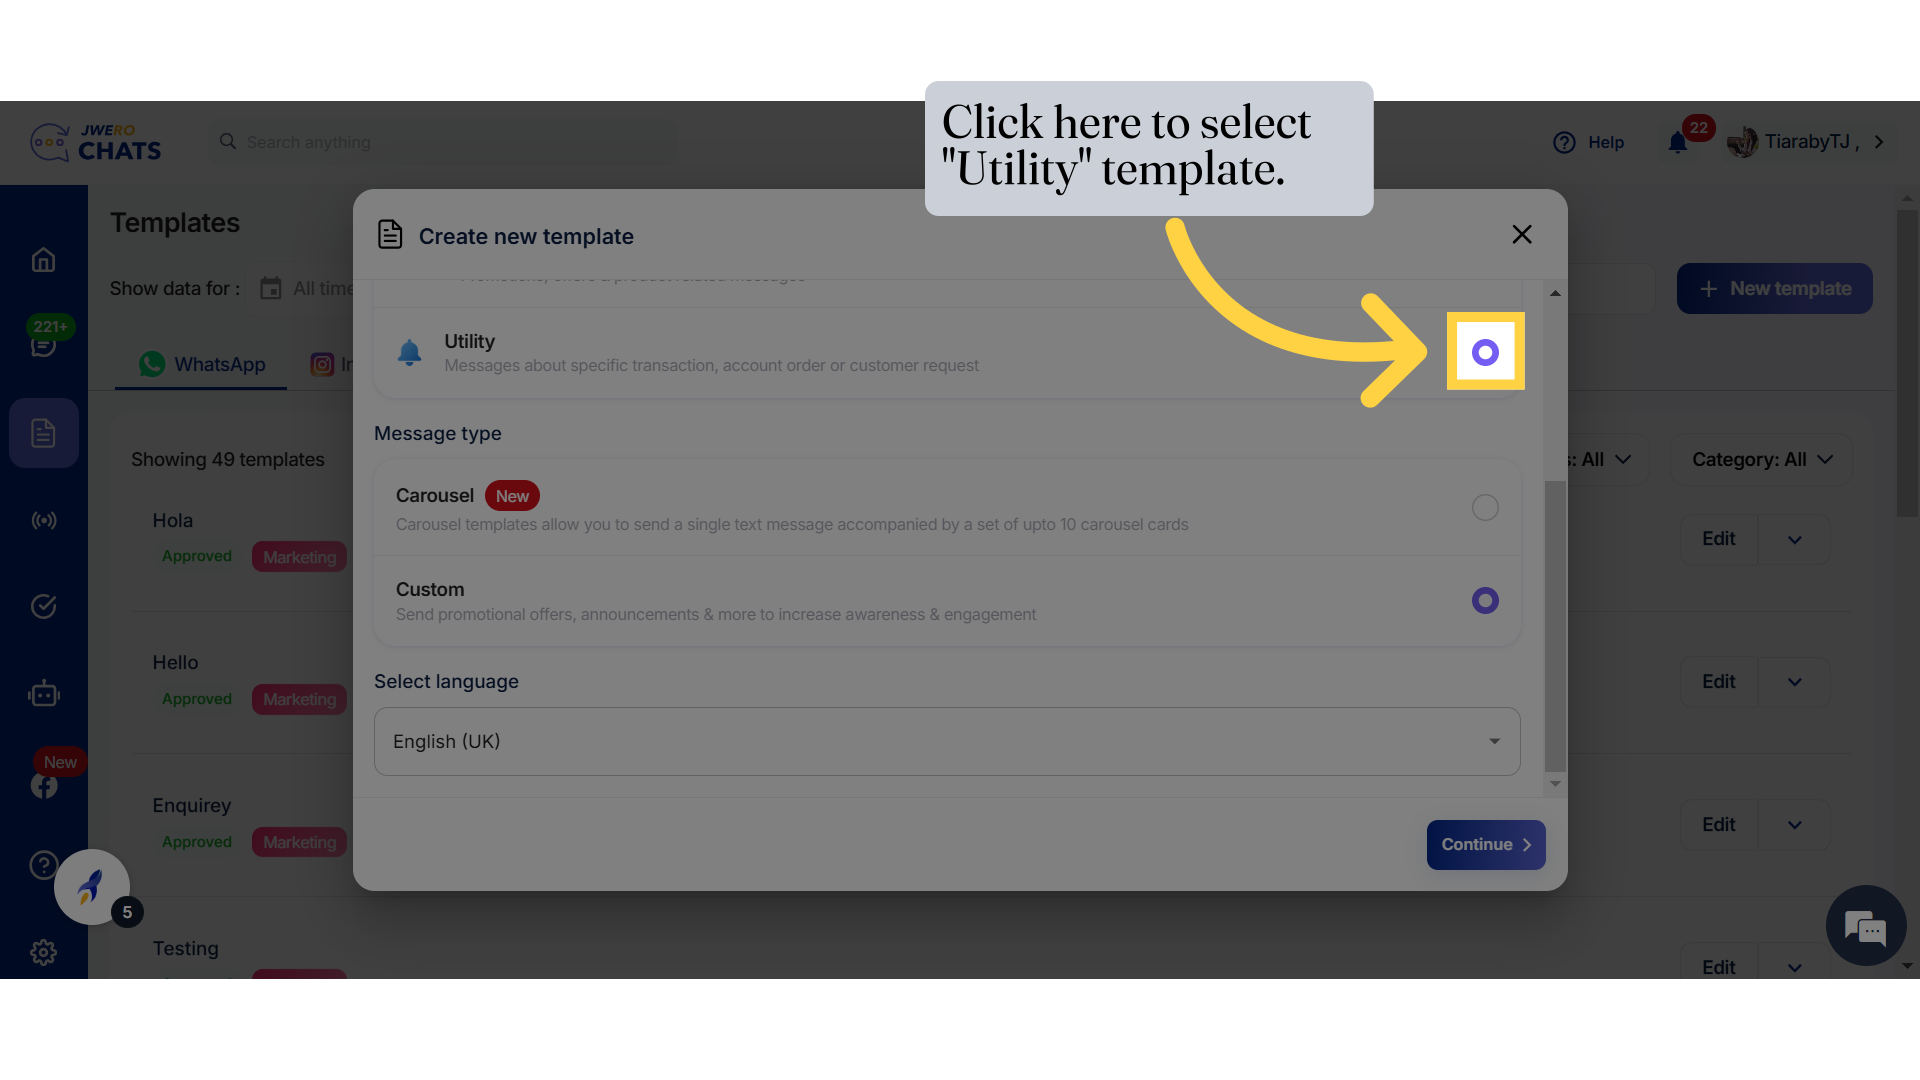
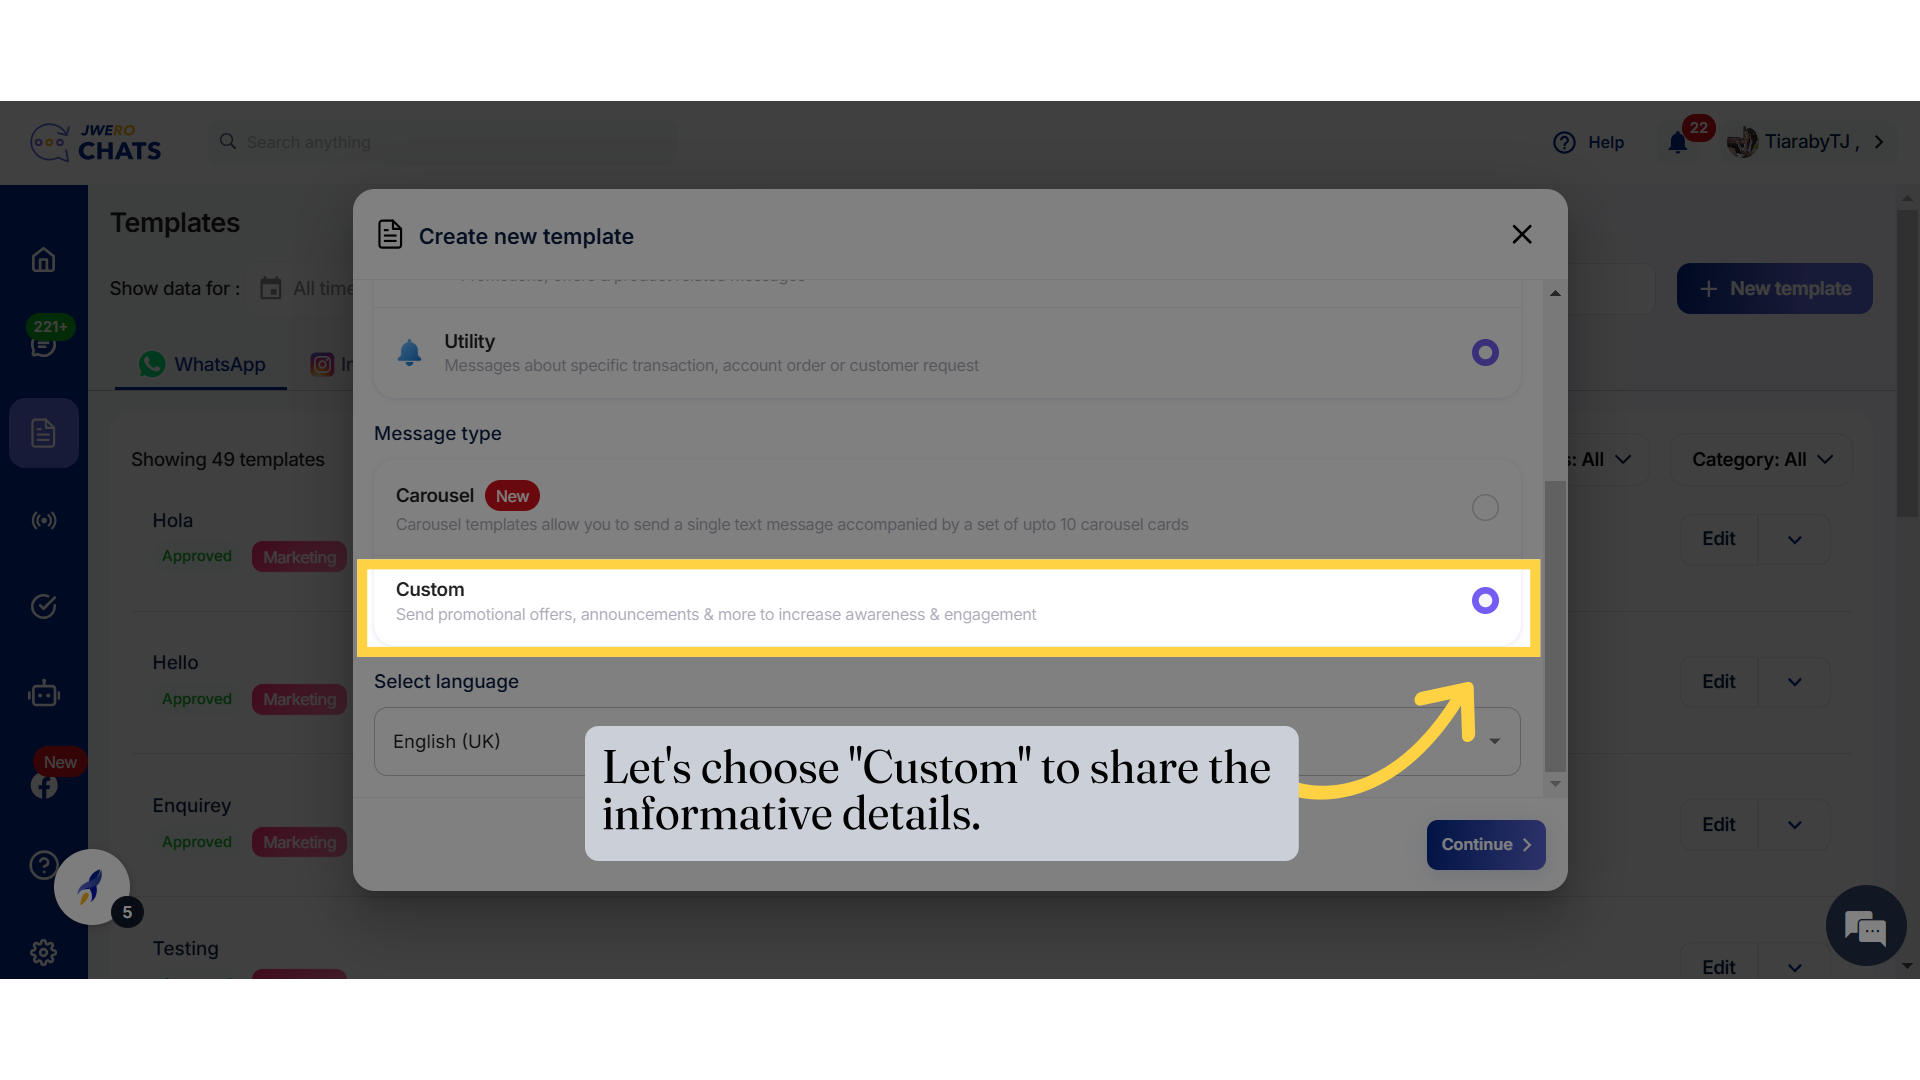
7. Select "Utility" template.
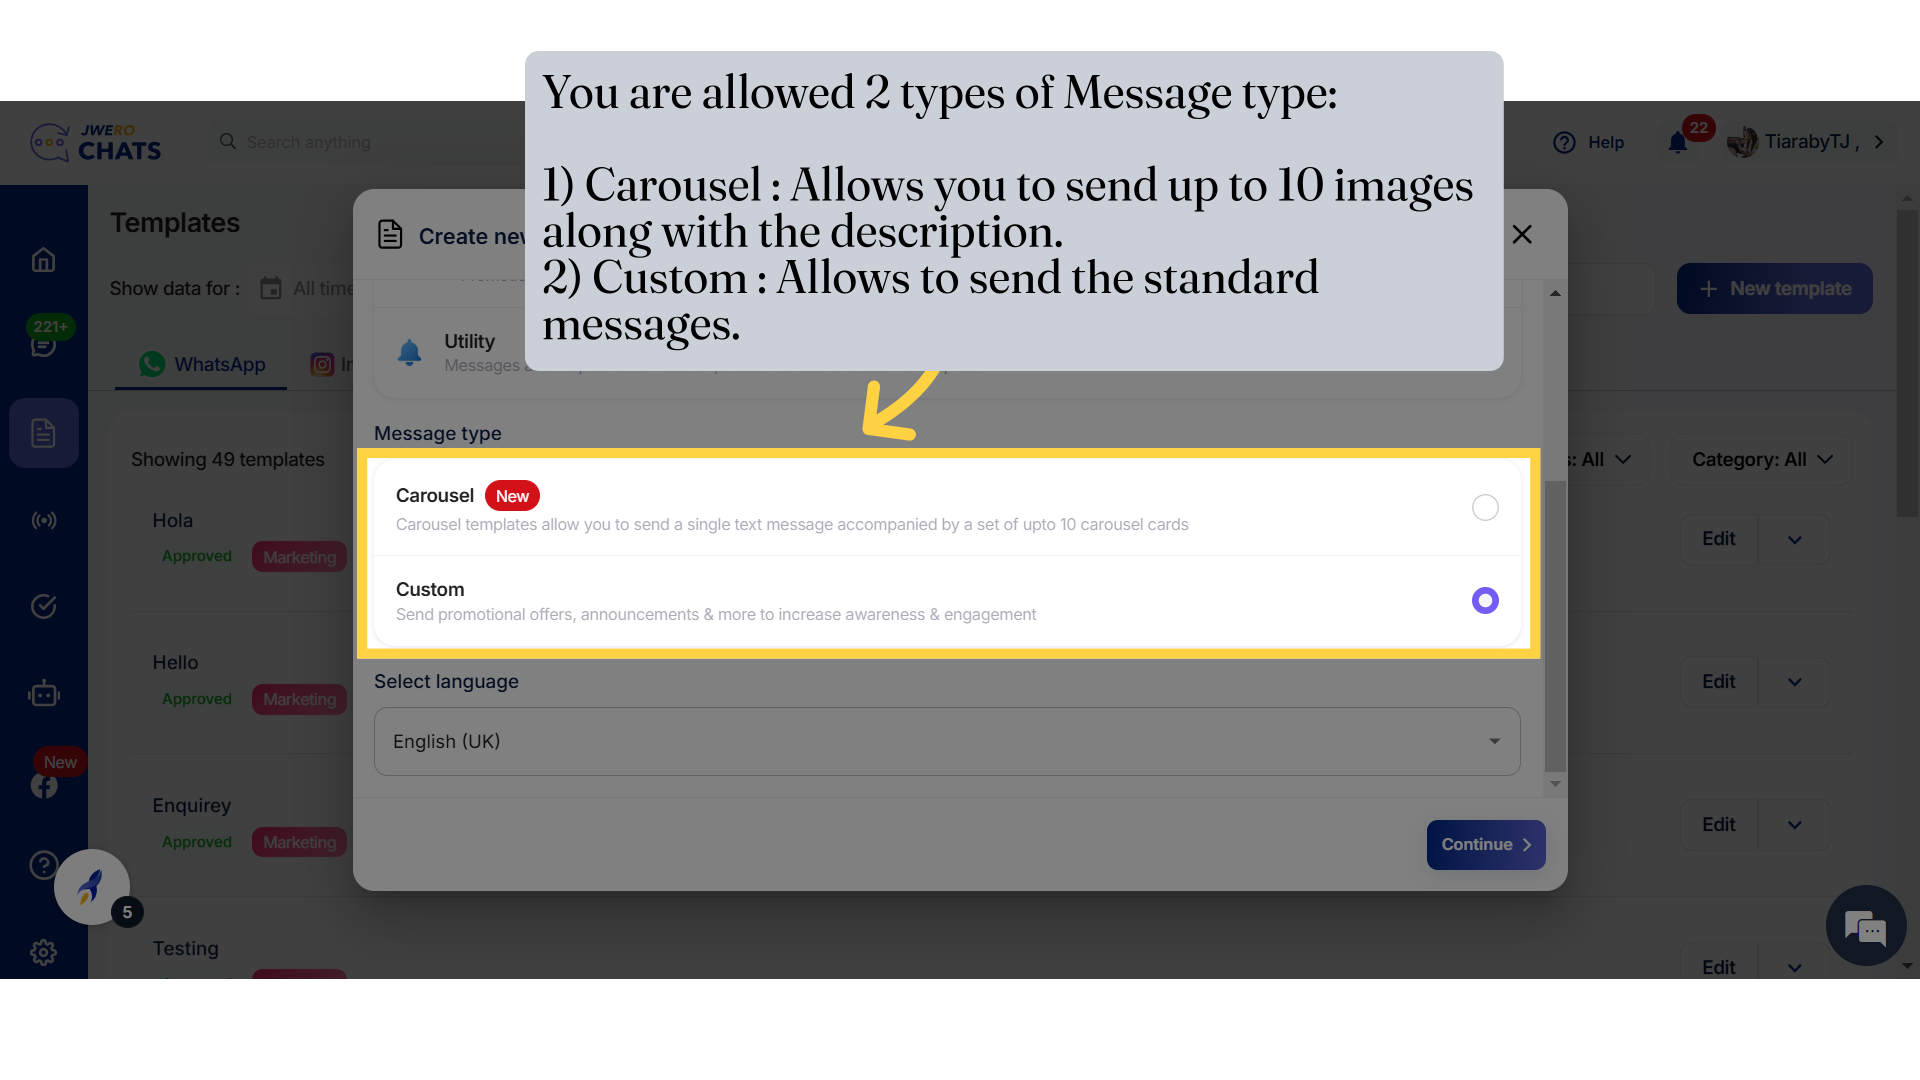
8. Message Type
You are allowed 2 types of Message type:
1) Carousel : Allows you to send up to 10 images along with the description.
2) Custom : Allows to send the standard messages.
9. Custom Message Type
10. Select the language you prefer.
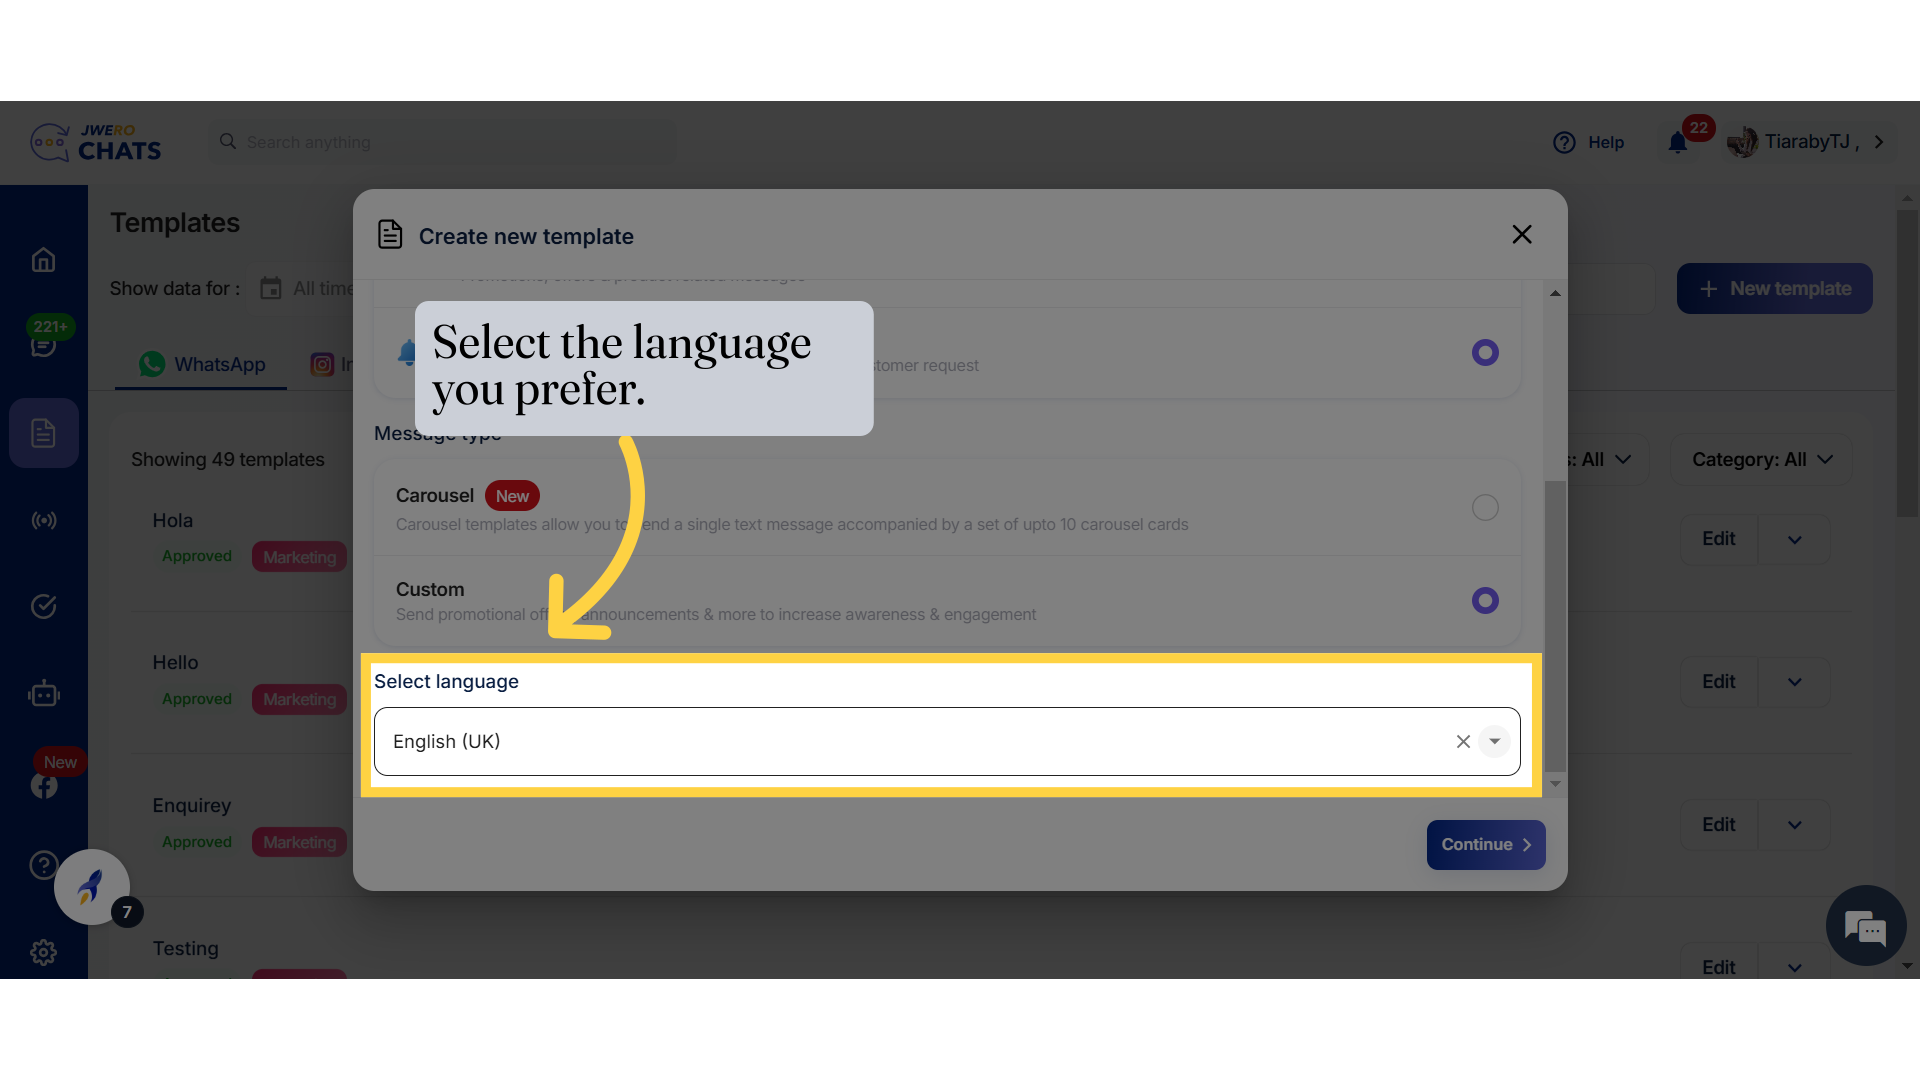
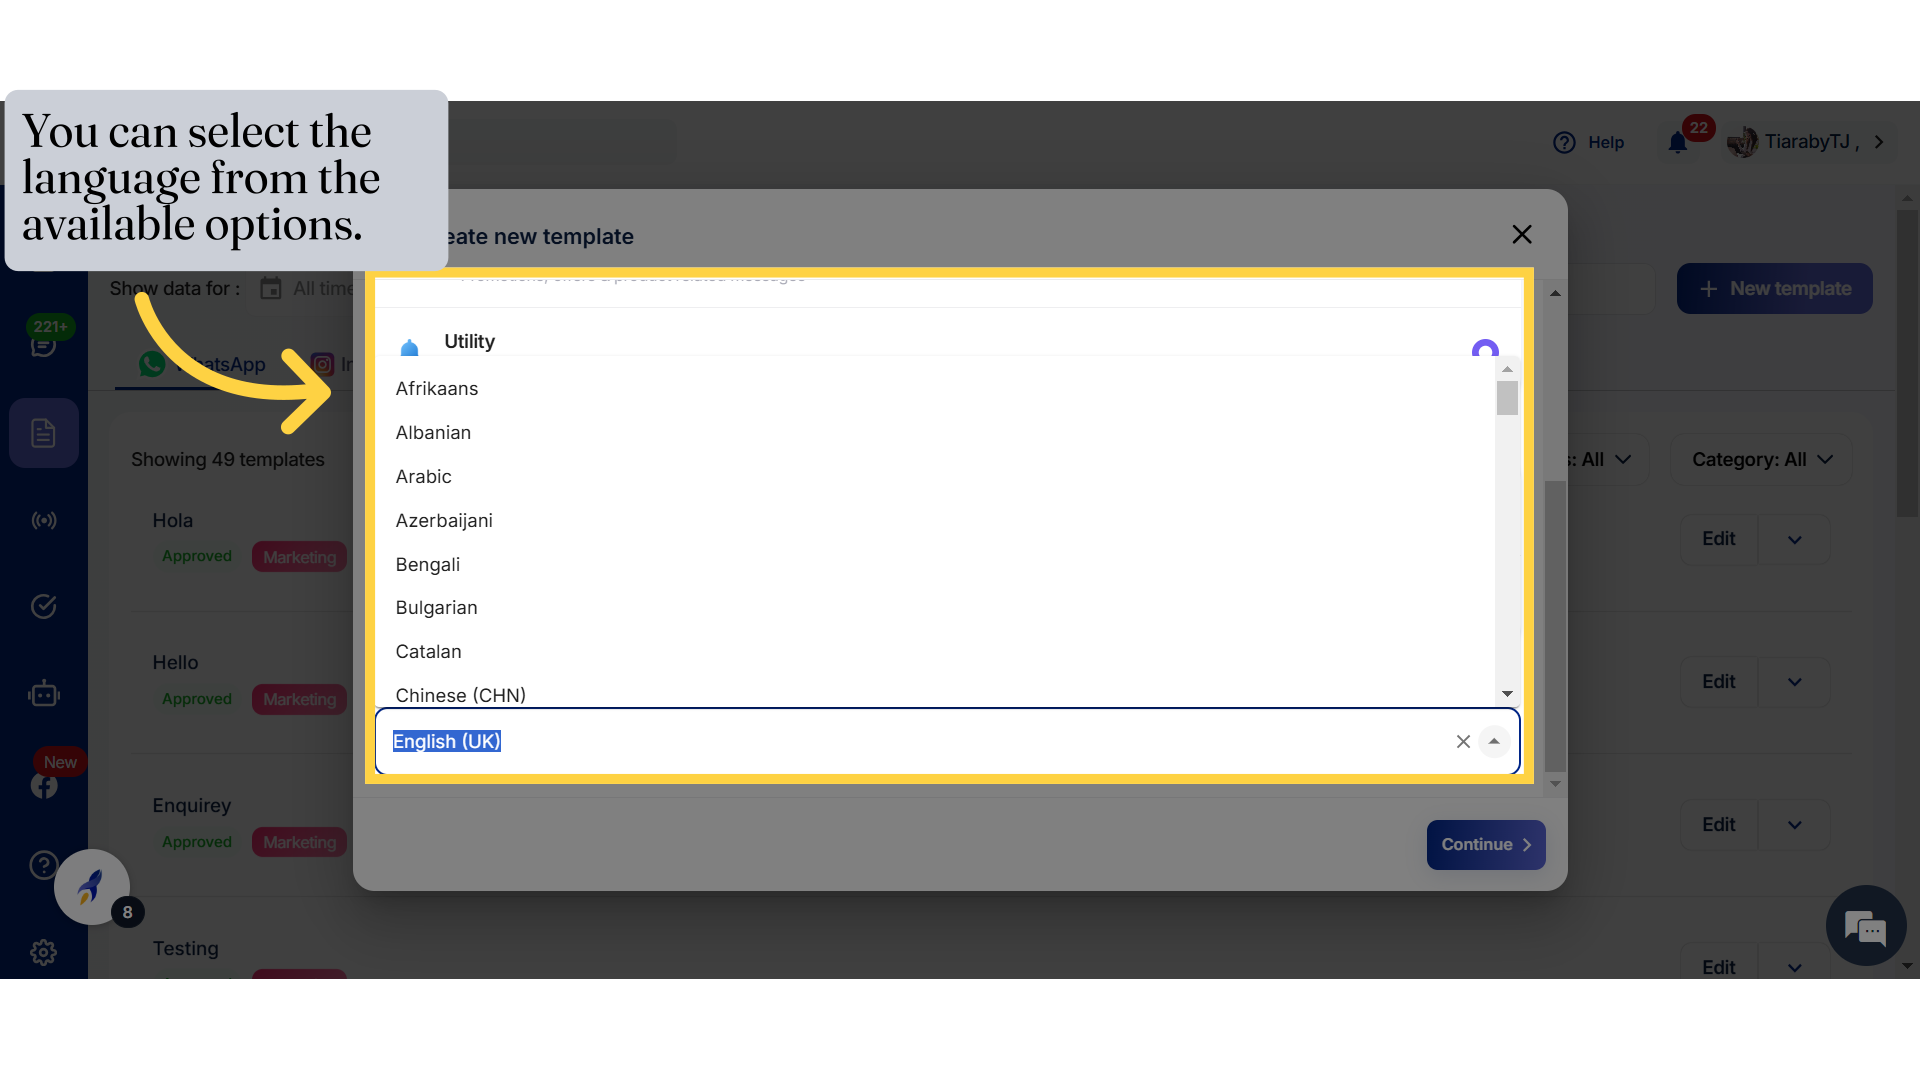
11. You can select the language from the available options.
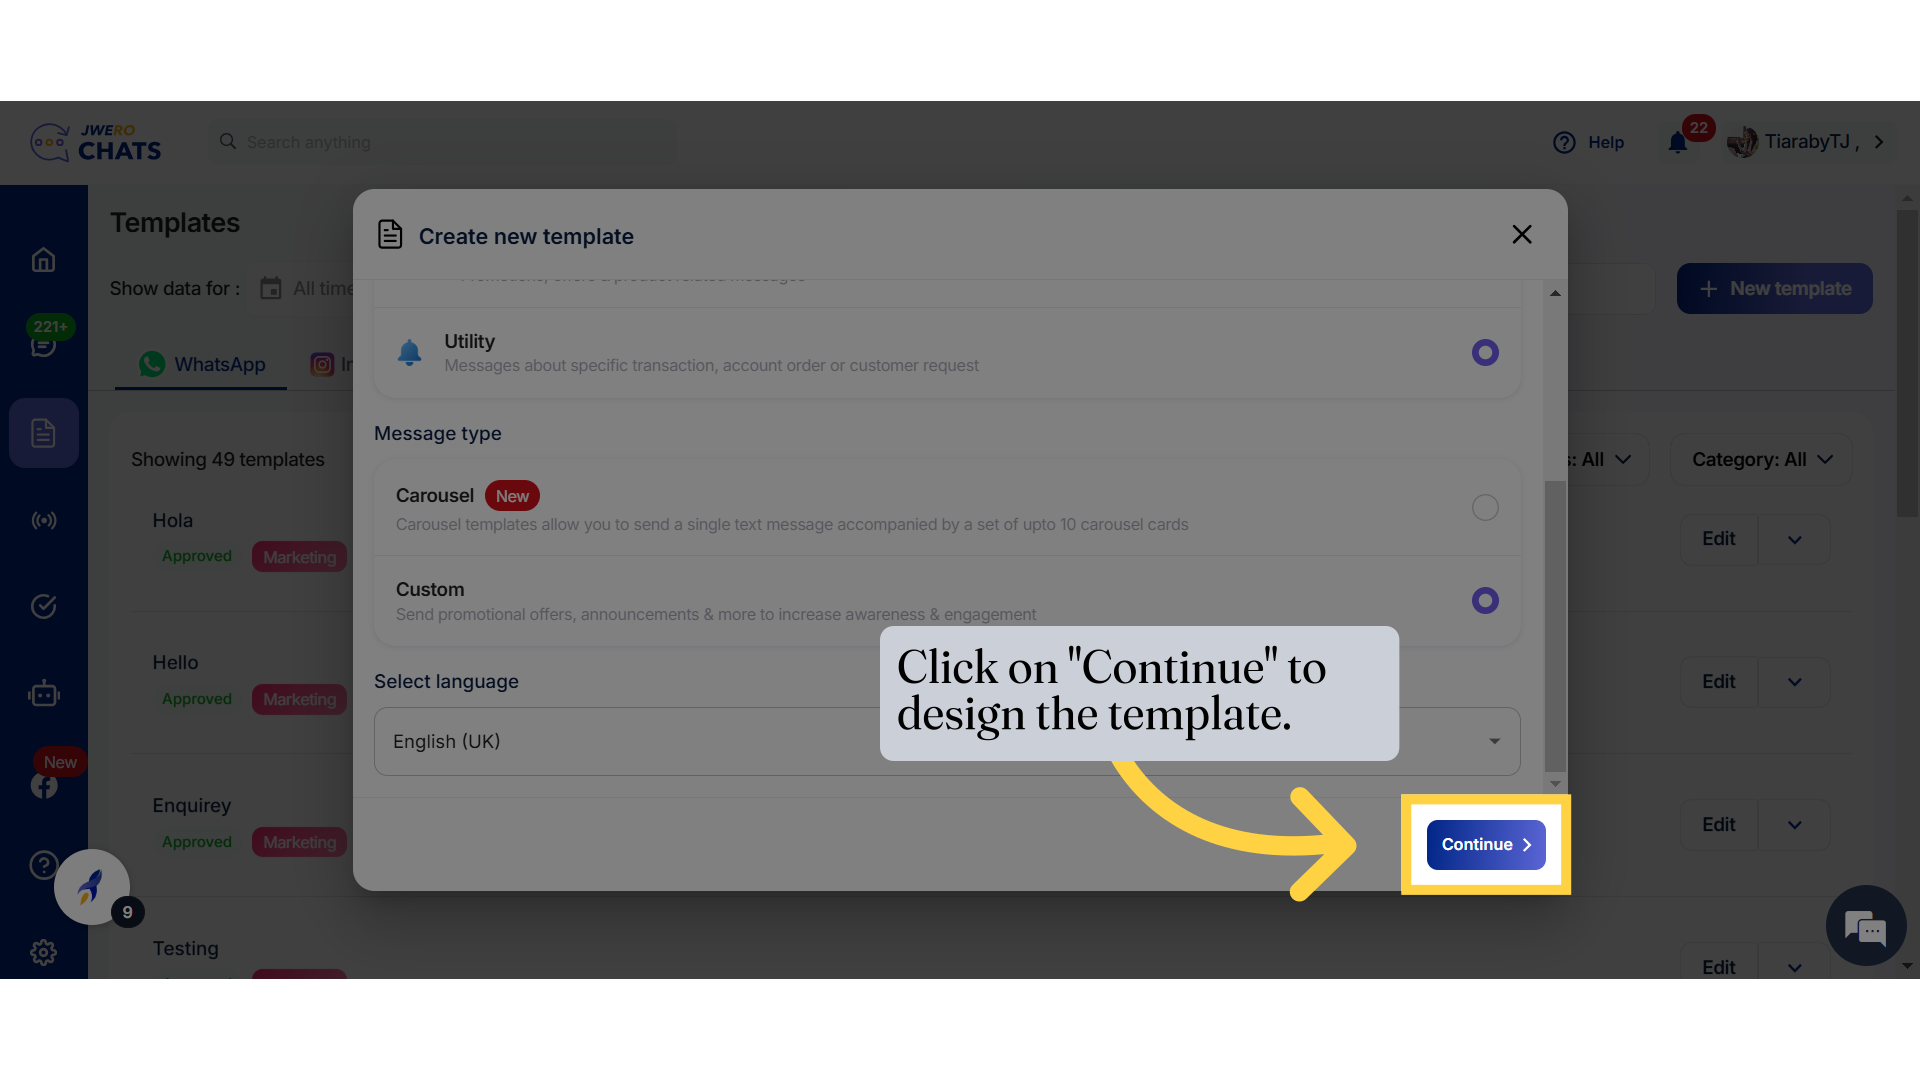
12. Click on "Continue" to design the template.
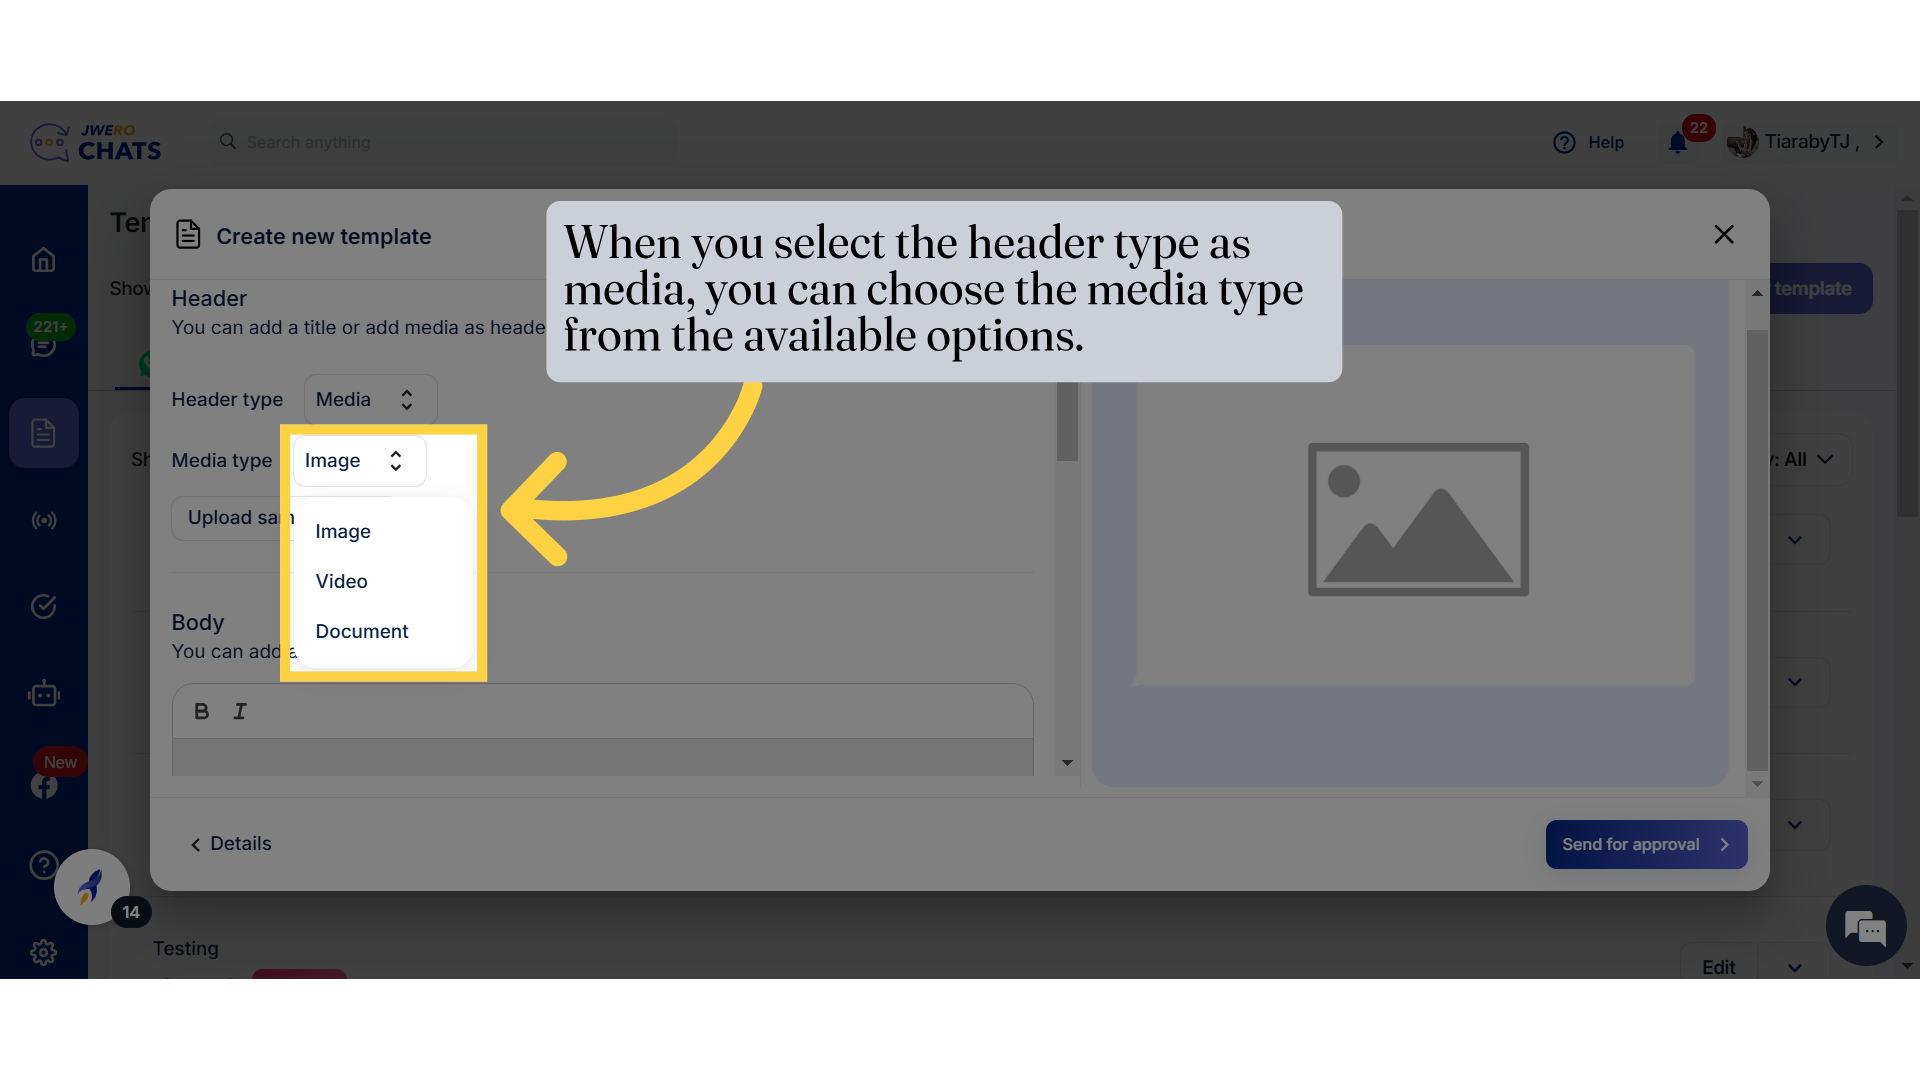
13. You can add a title or add media as header.
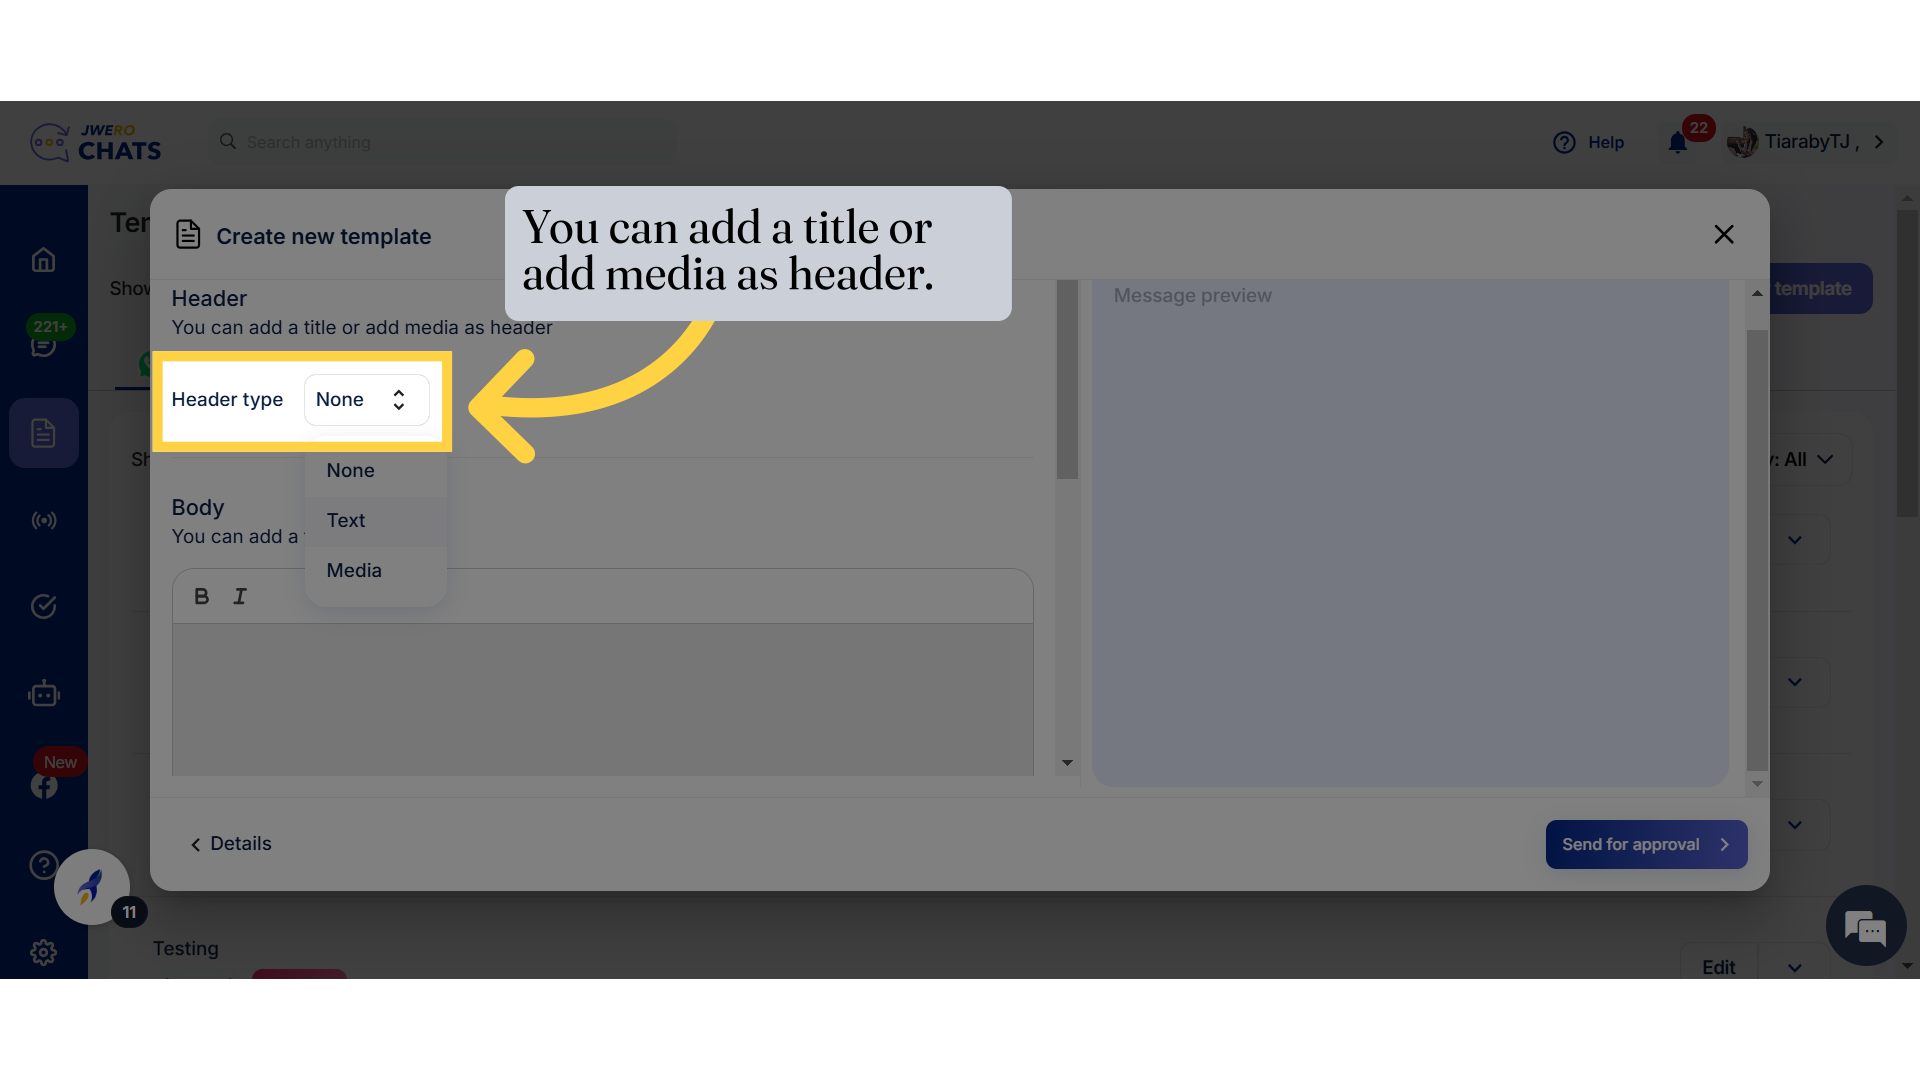
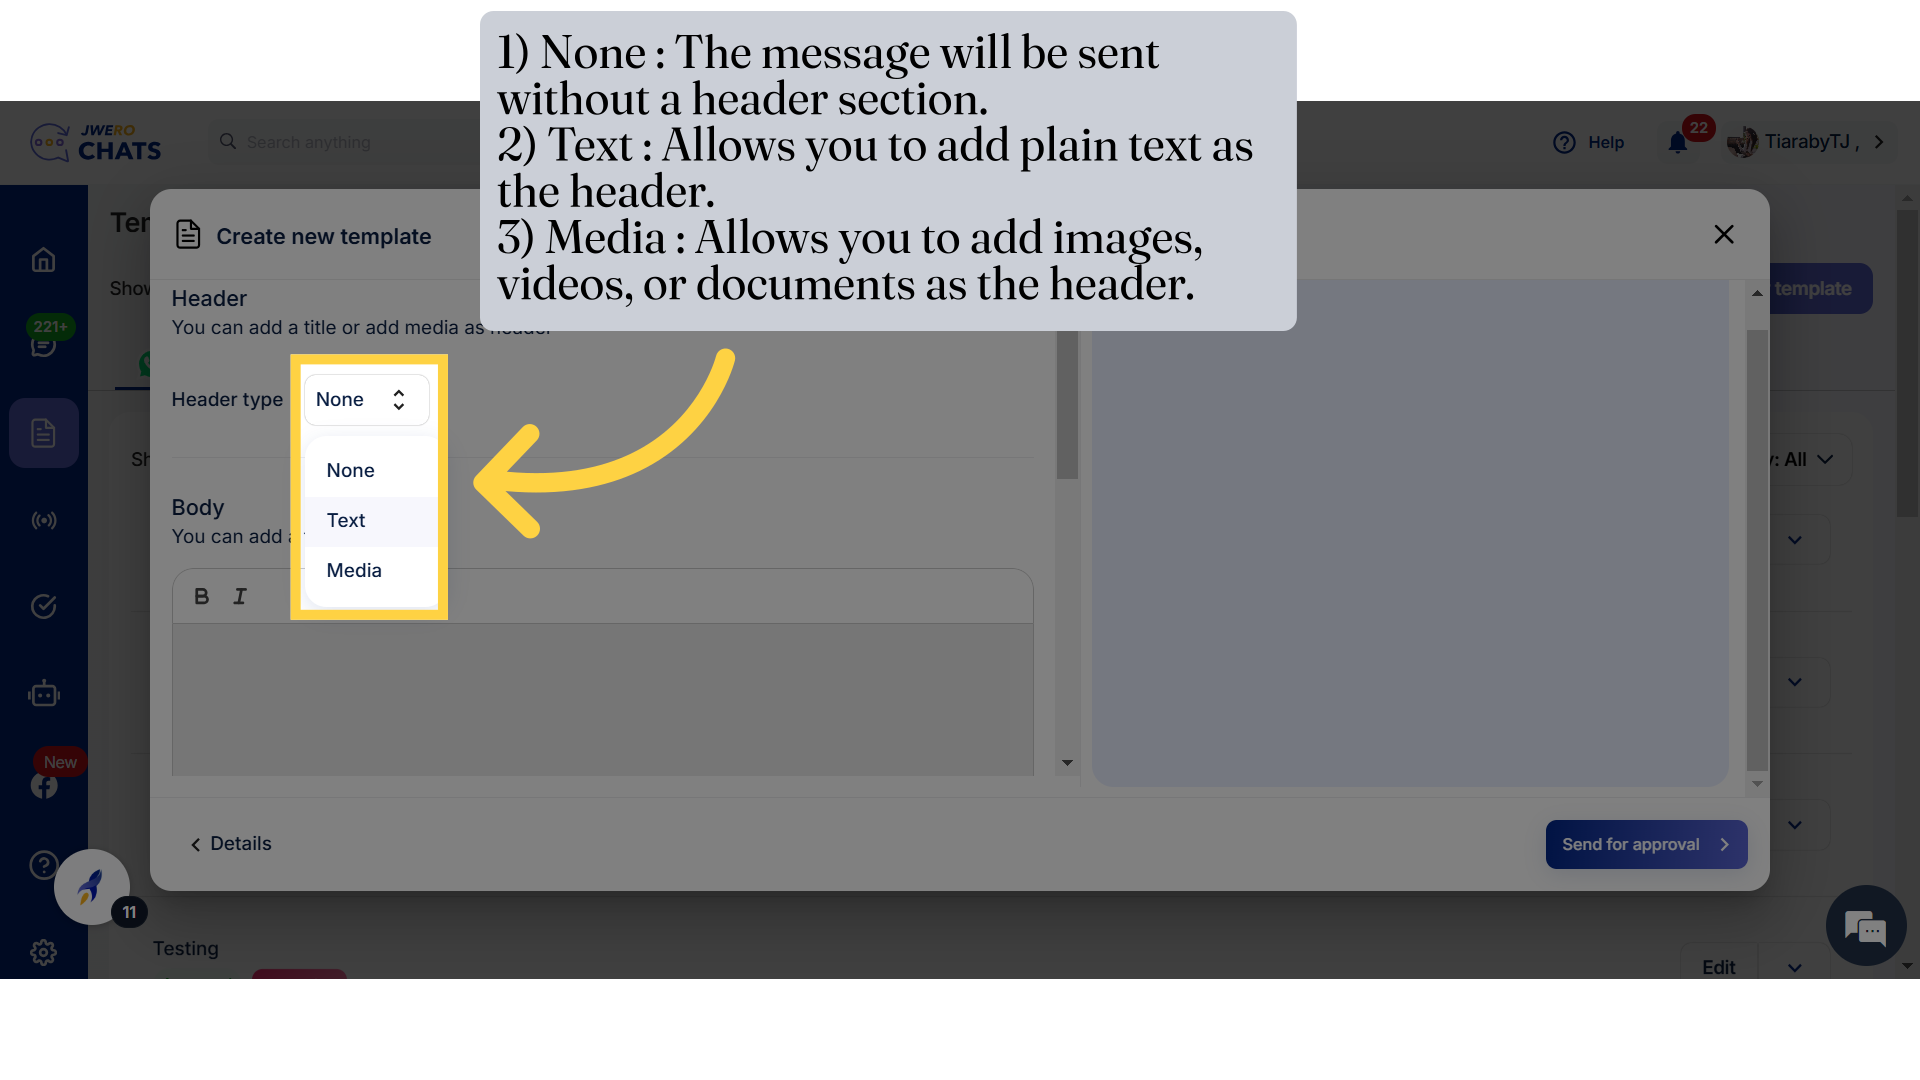
14. Header Type
1) None : The message will be sent without a header section.
2) Text : Allows you to add plain text as the header.
3) Media : Allows you to add images, videos, or documents as the header.
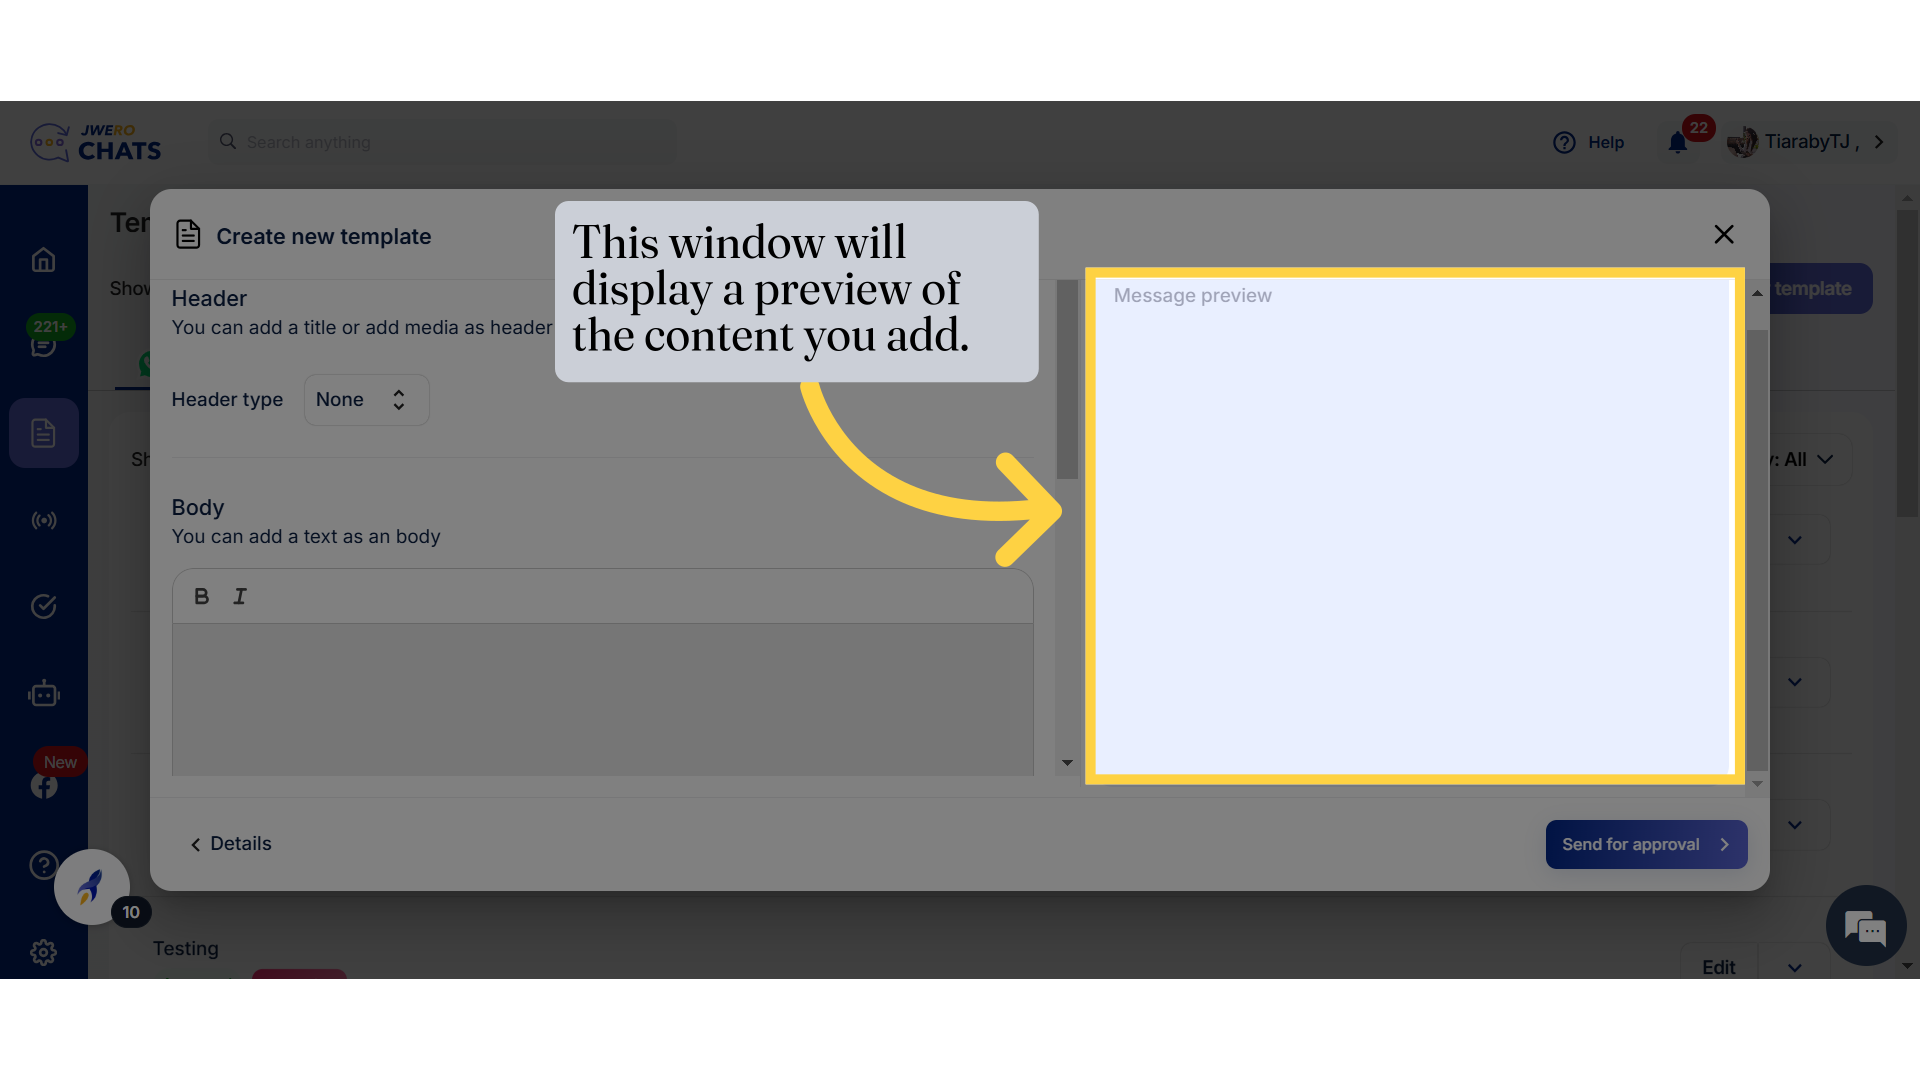
15. This window will display a preview of the content you add.
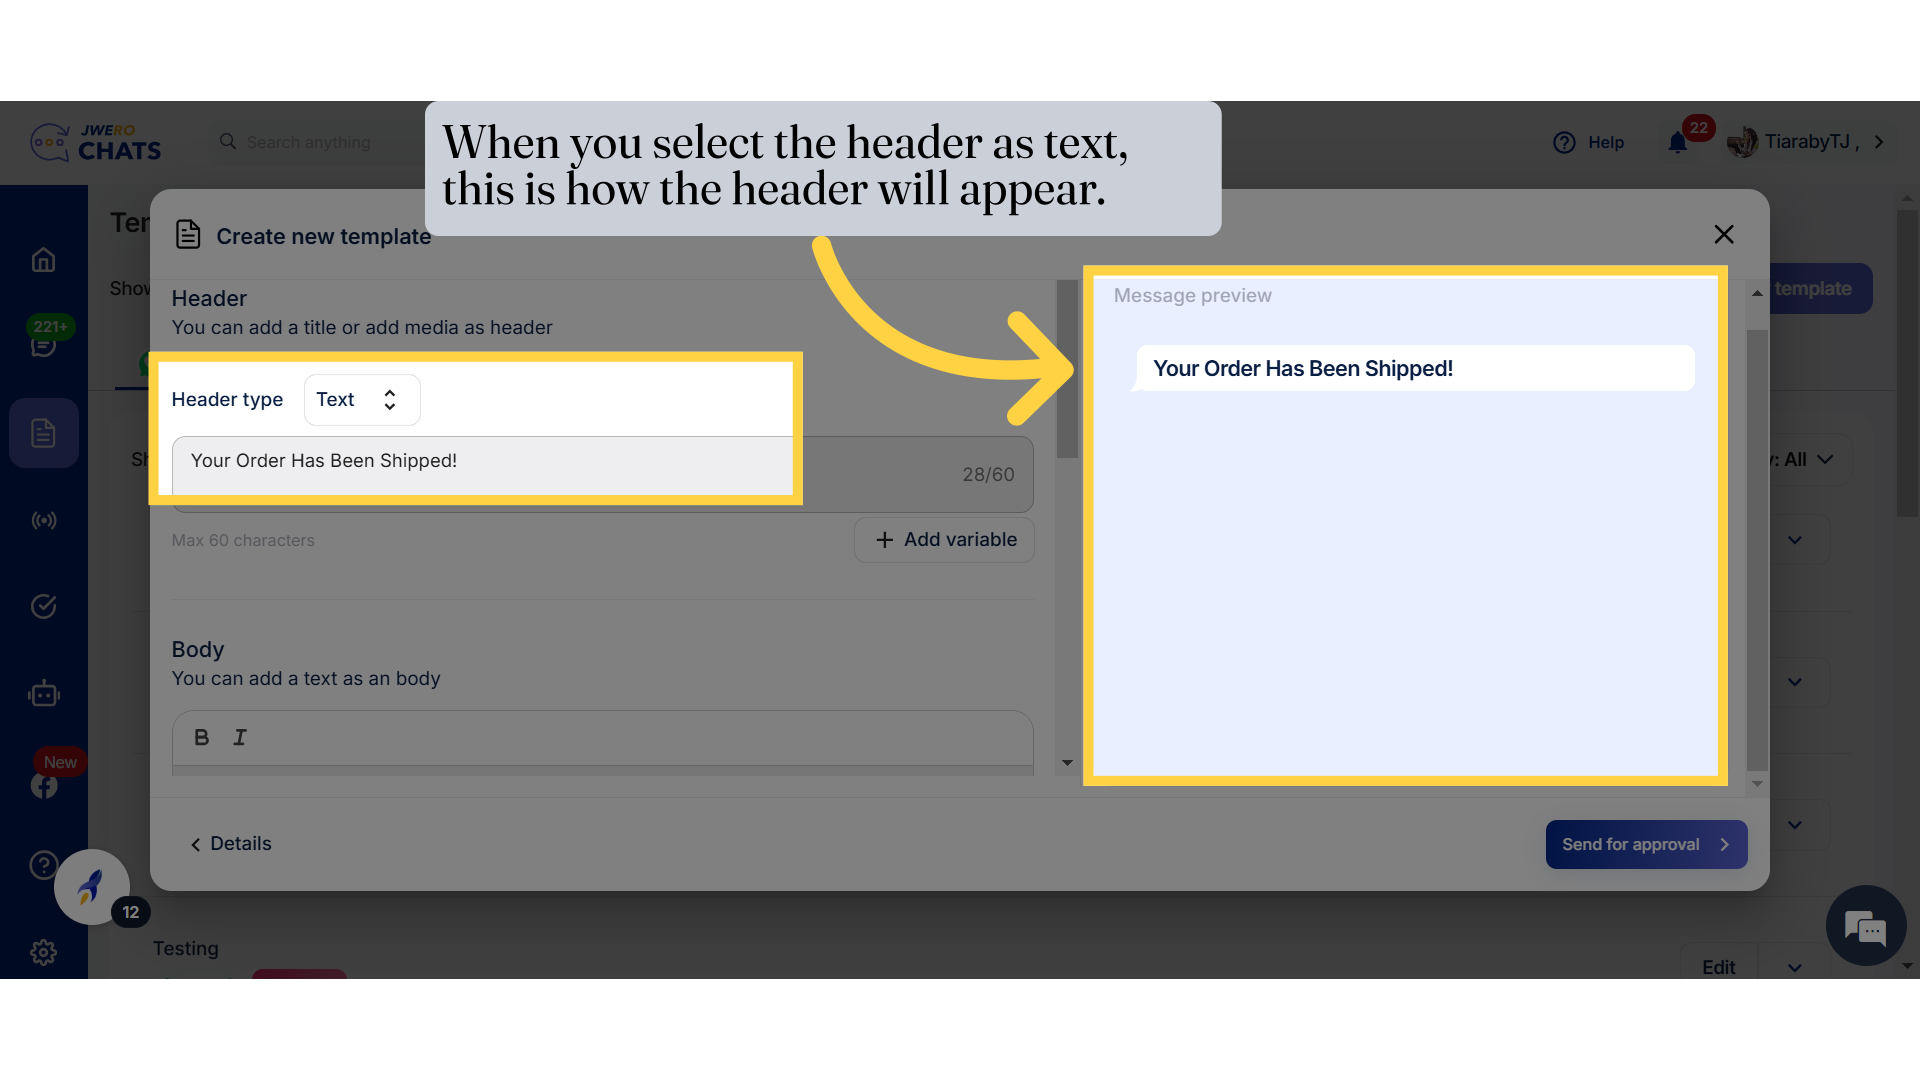
16. When you select the header as text, this is how the header will appear.
17. When you select the header type as media, you can choose the media type from the available options.
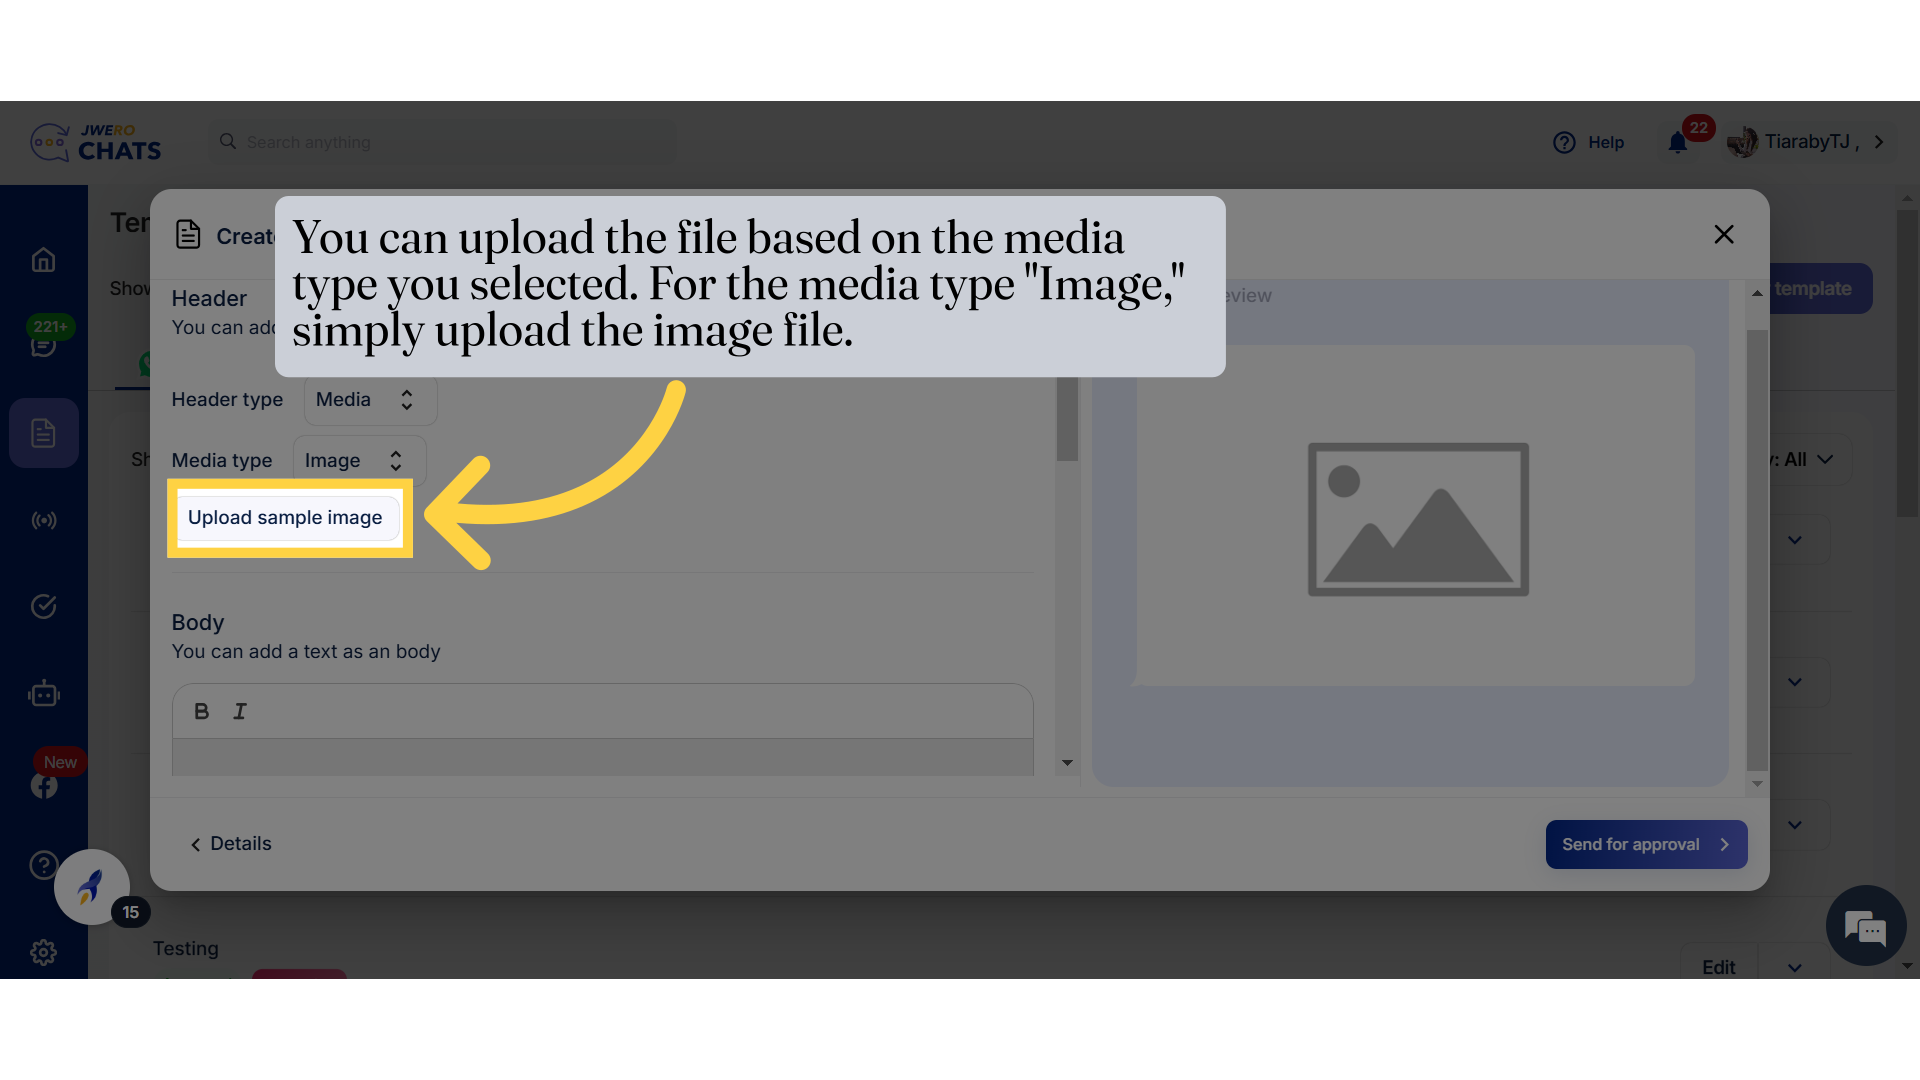
18. You can upload the file based on the media type you selected. For the media type "Image," simply upload the image file.
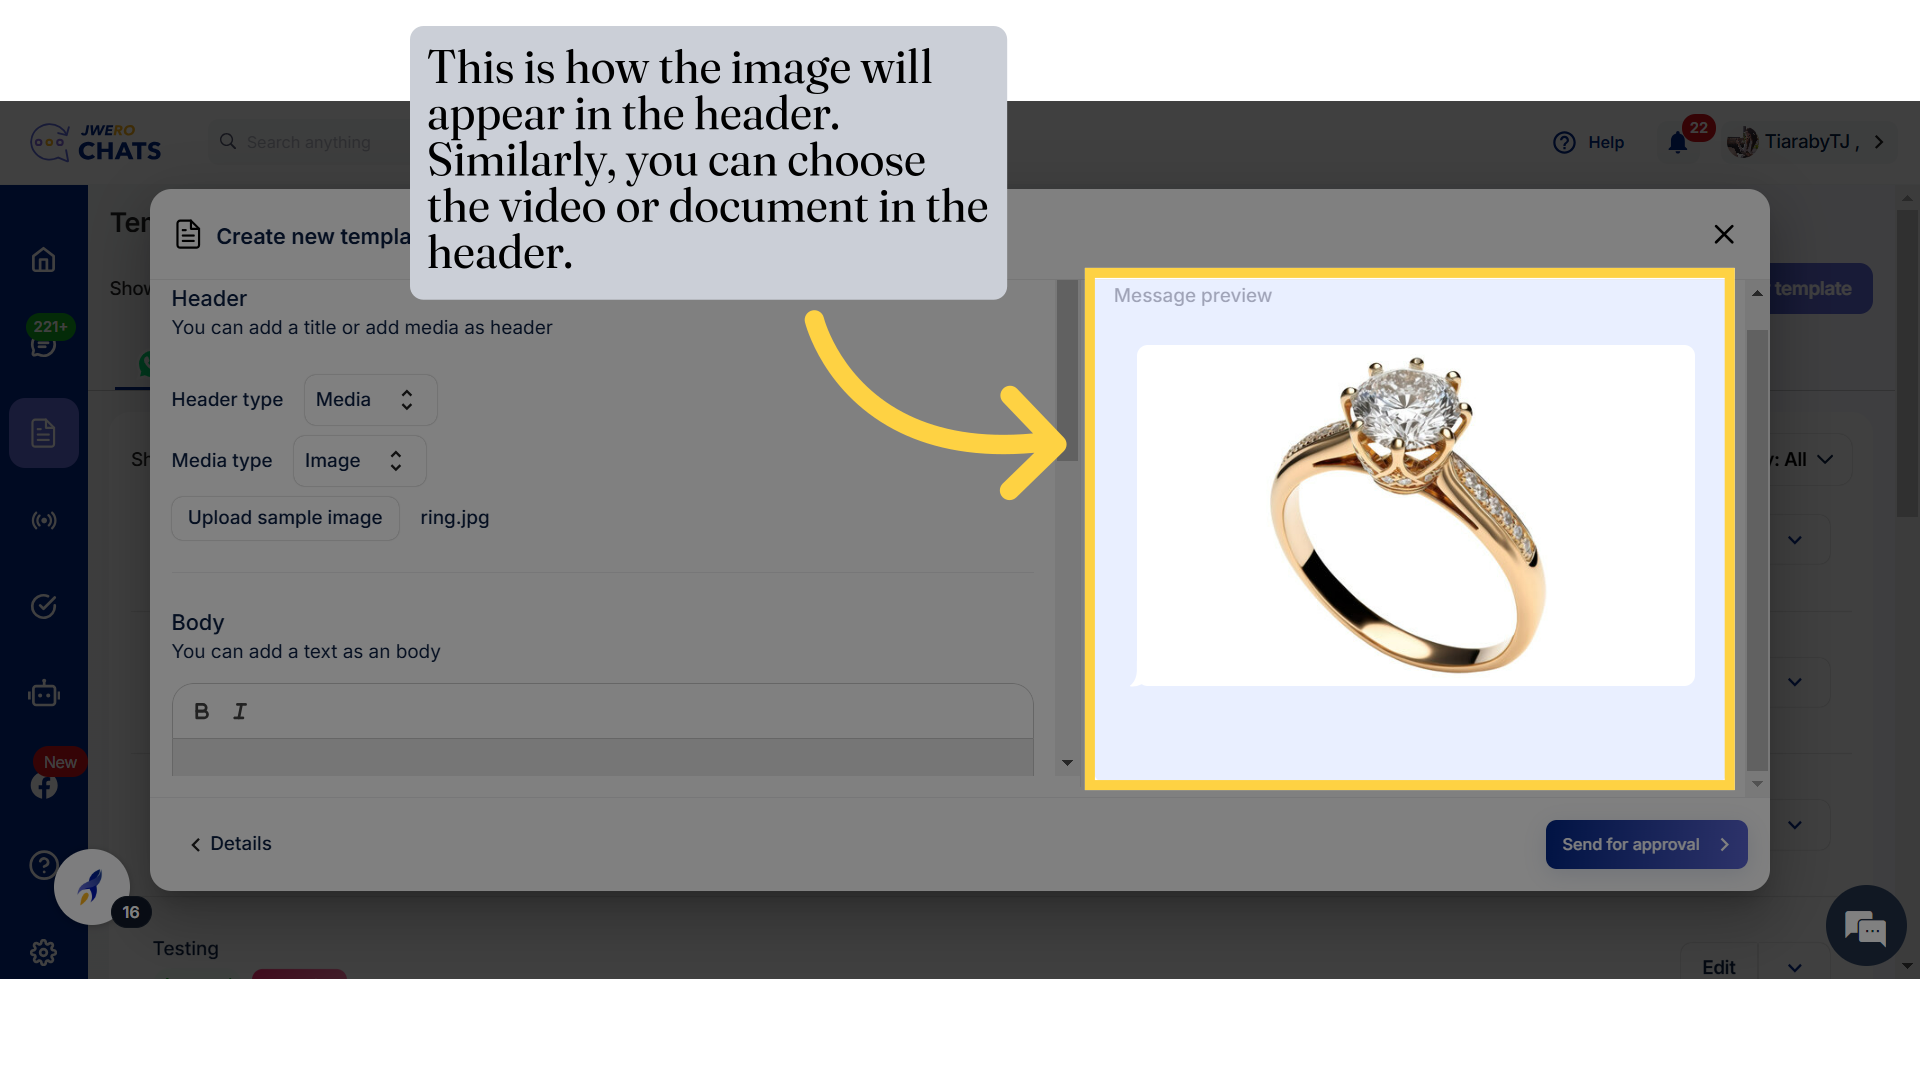
19. This is how the image will appear in the header. Similarly, you can choose the video or document in the header.
20. Enter the template content
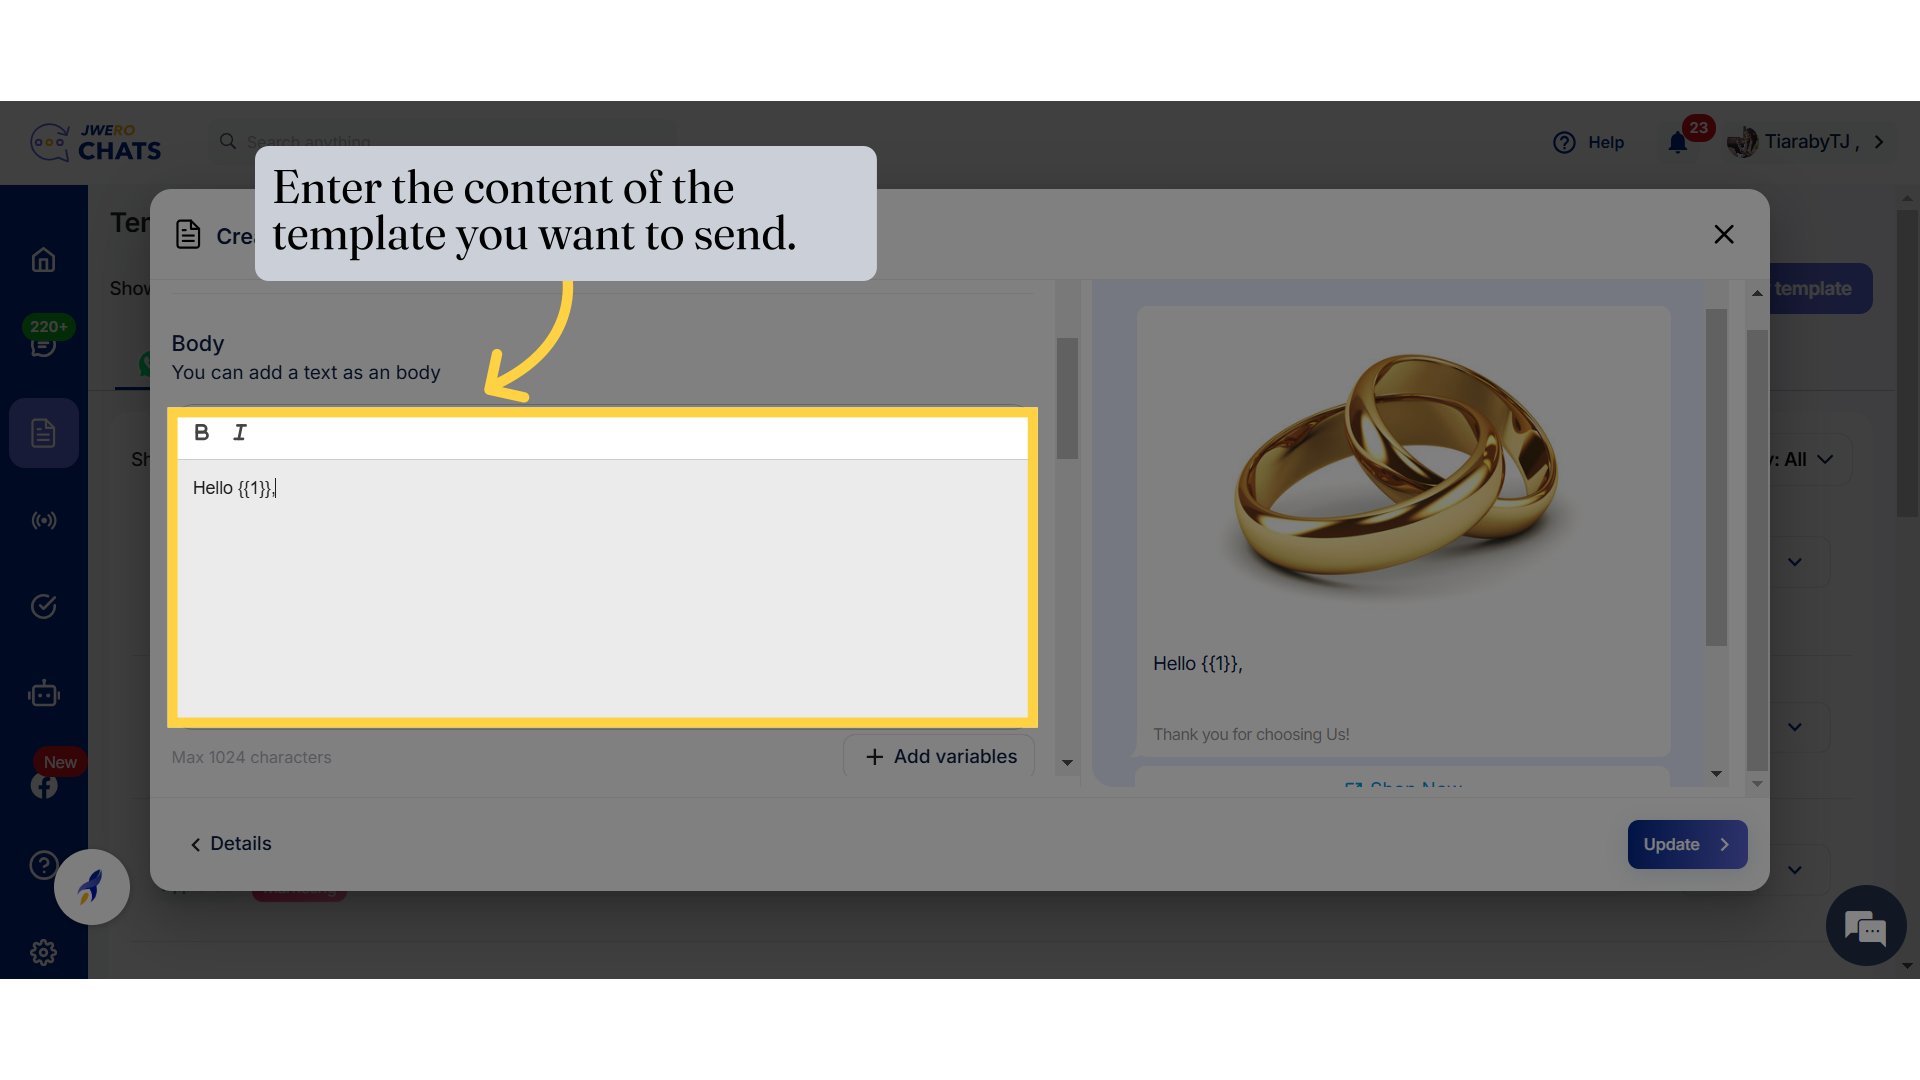
21. You can also include variables in your content, which will be automatically replaced with the customer's actual details when the message is sent.
You can also include variables in your content, which will be automatically replaced with the customer's actual details when the message is sent.
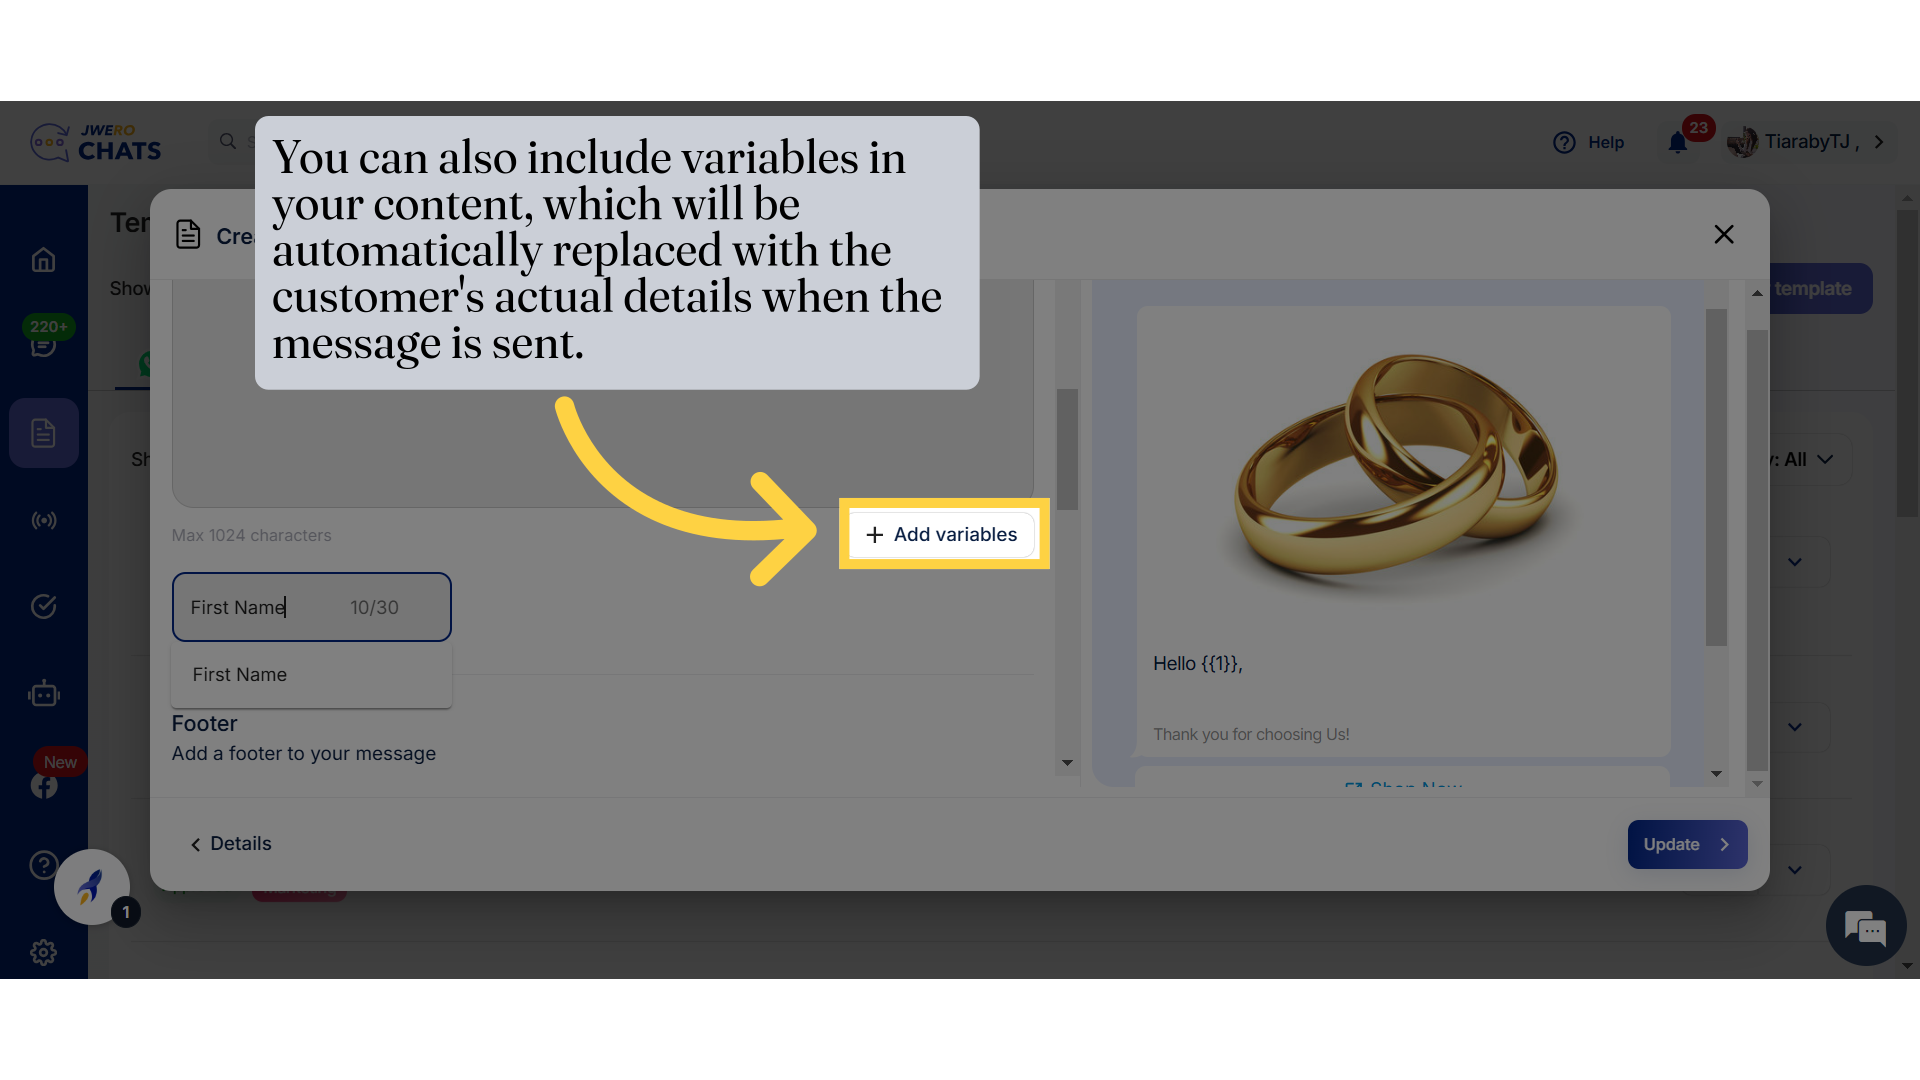
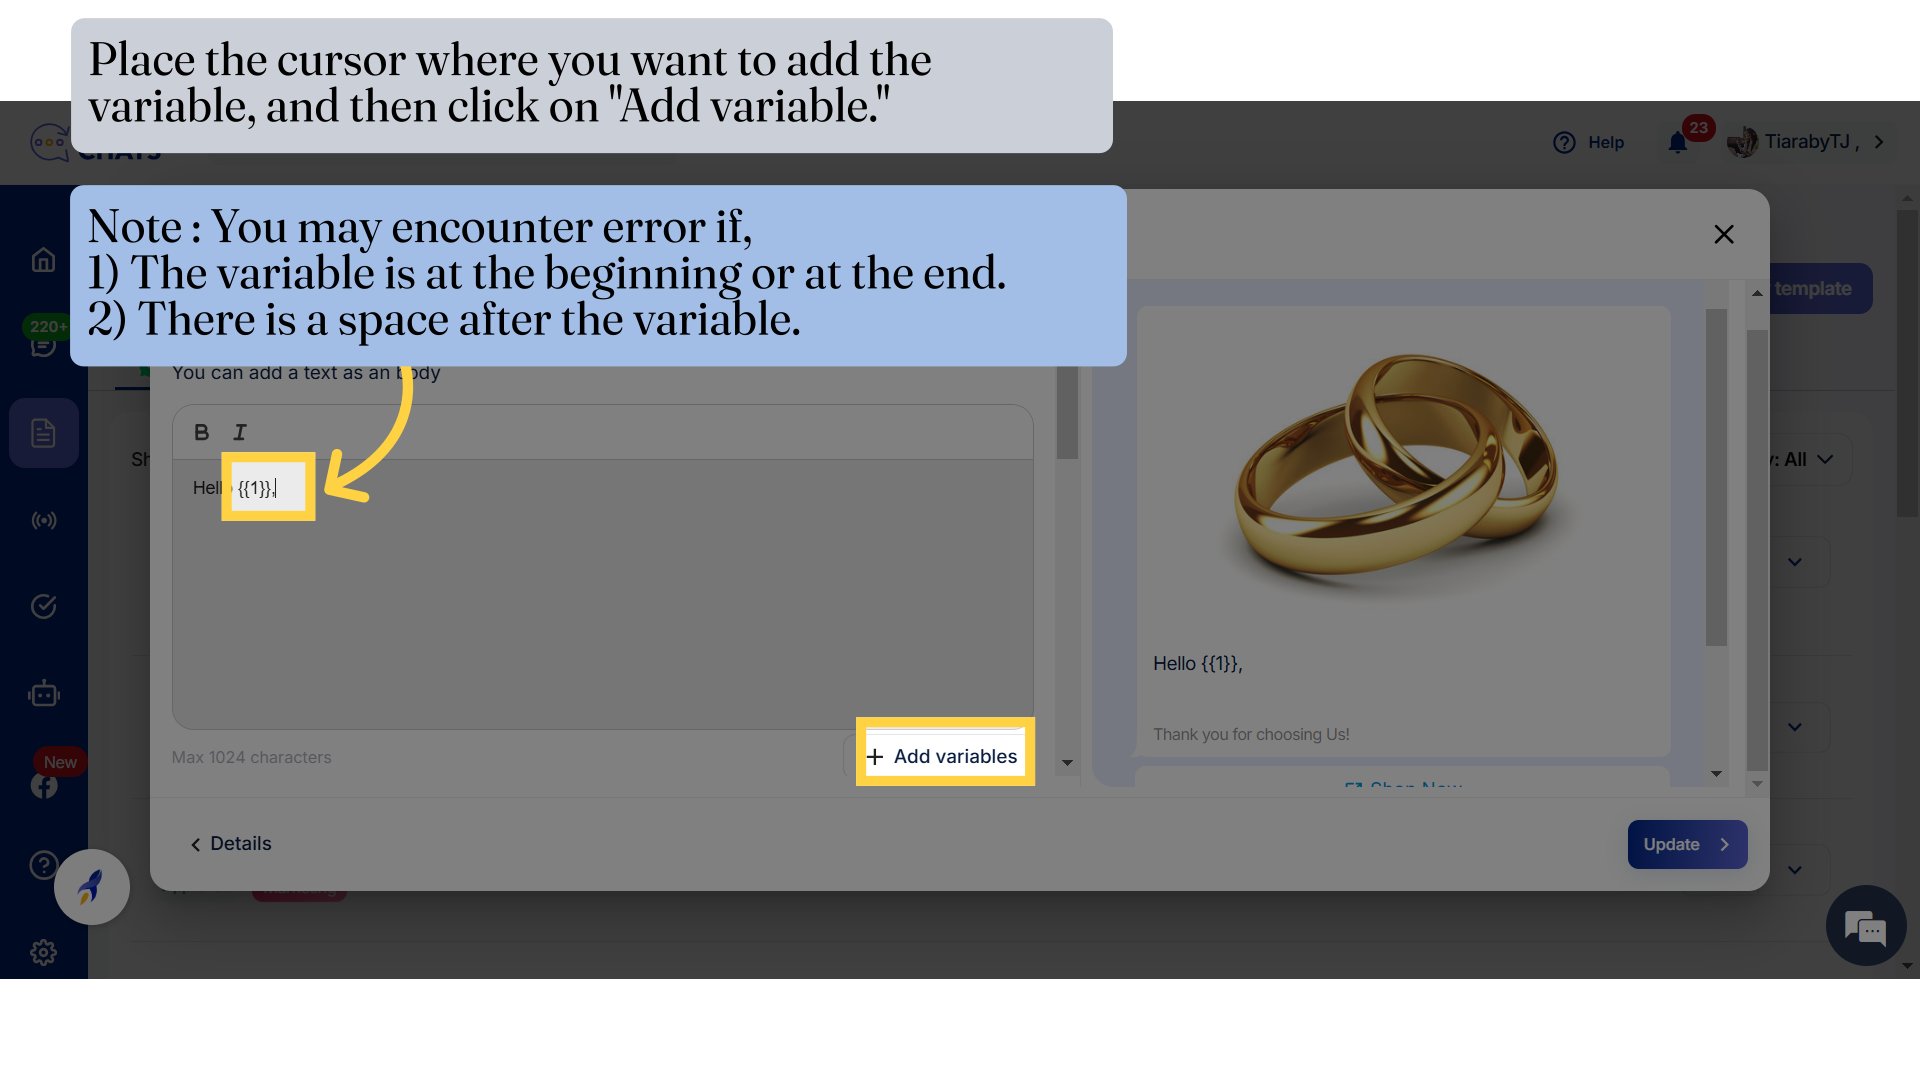
22. Place the cursor where you want to add the variable, and then click on "Add variable".
The variable names will follow the order in which they are added. For example:
The first variable will be named
{{1}}.The second variable will be named
{{2}}.This pattern will continue sequentially for subsequent variables.
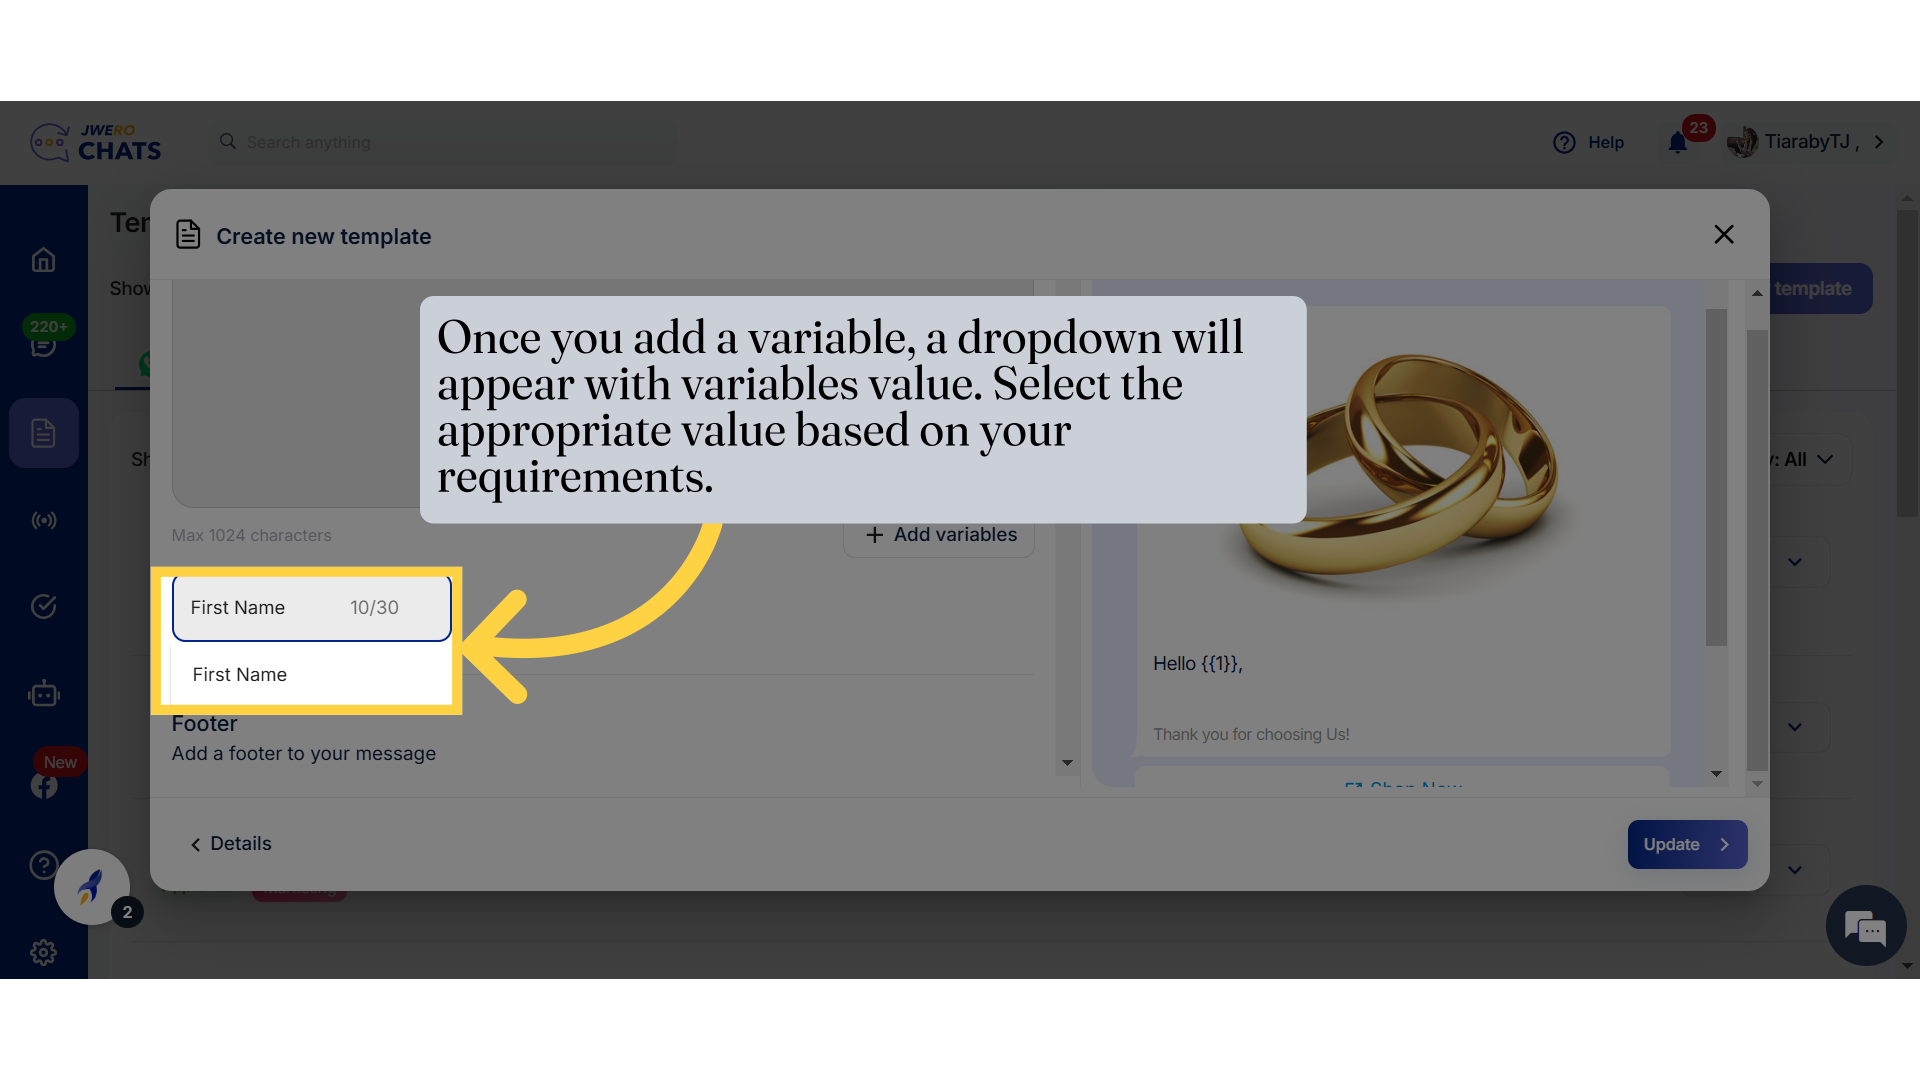
23. Once you add a variable, a dropdown will appear with variables value. Select the appropriate value based on your requirements.
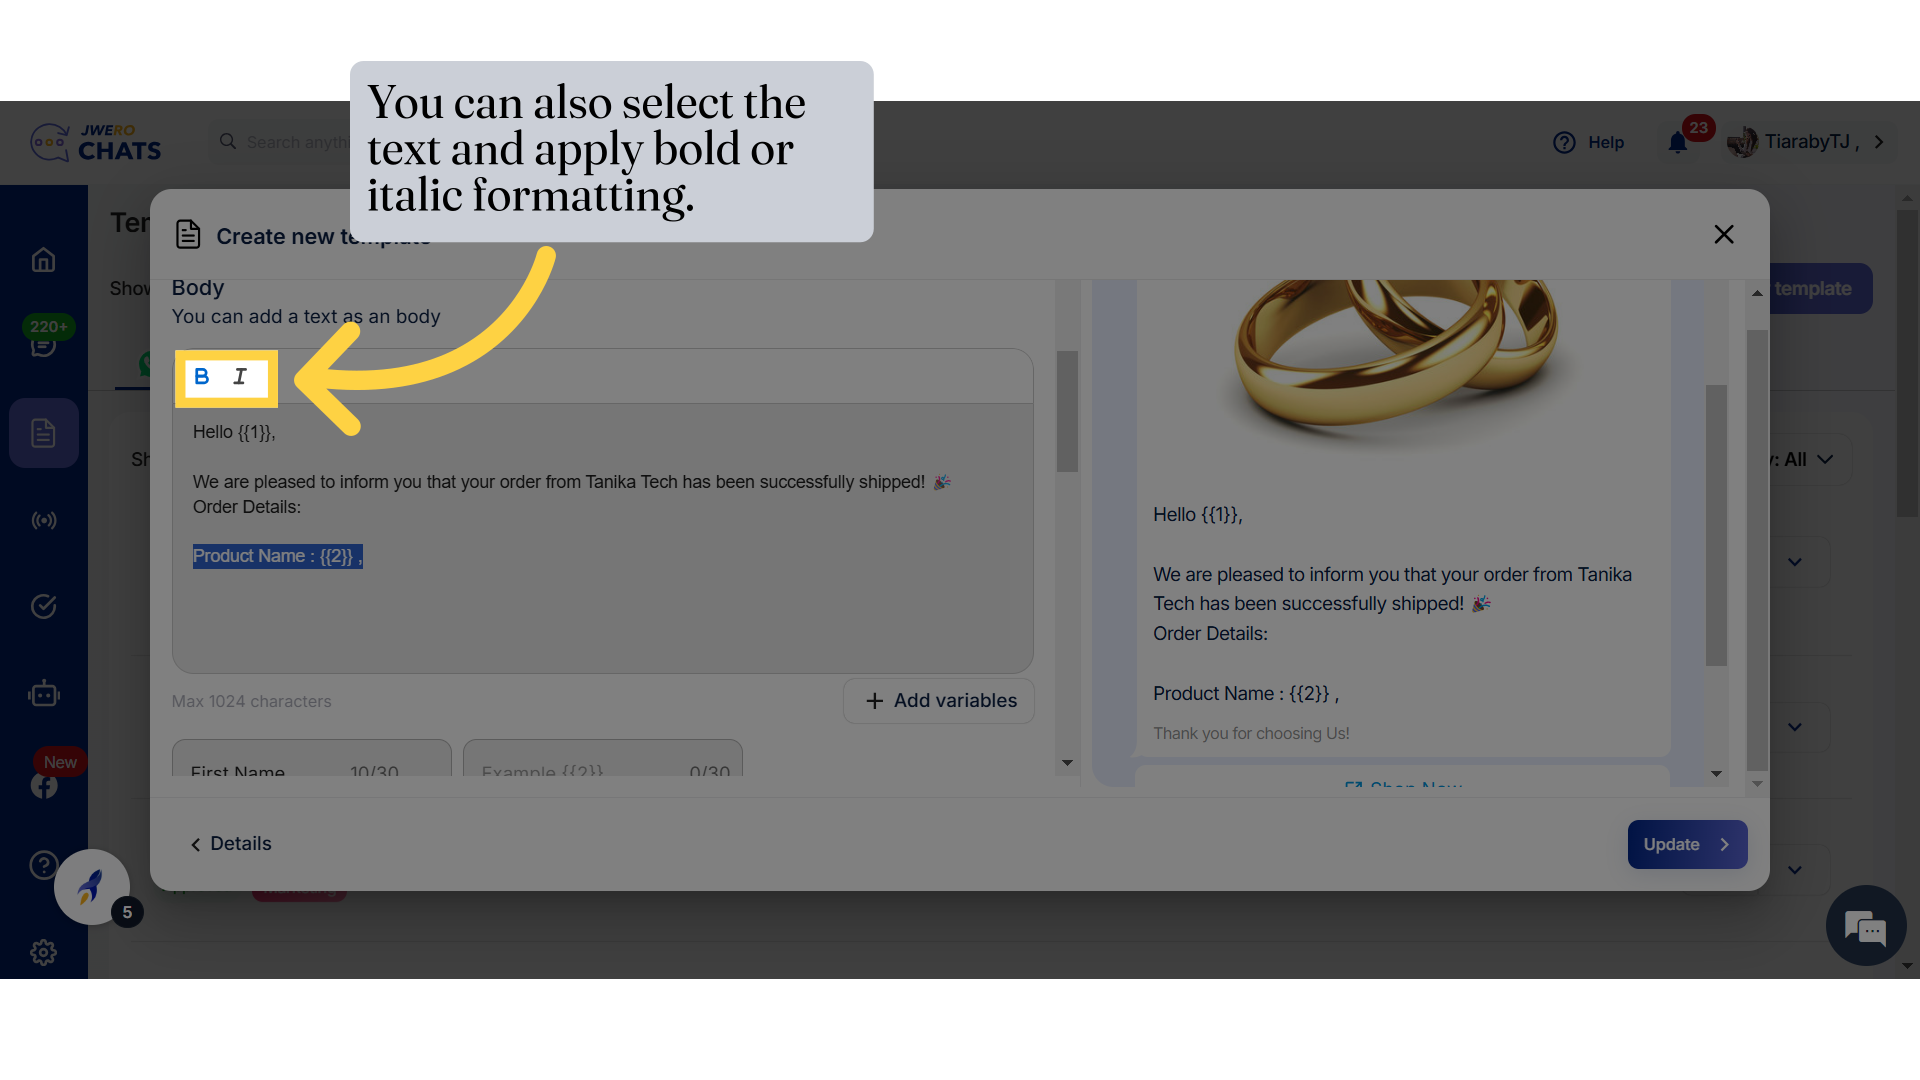
24. You can also select the text and apply bold or italic formatting.
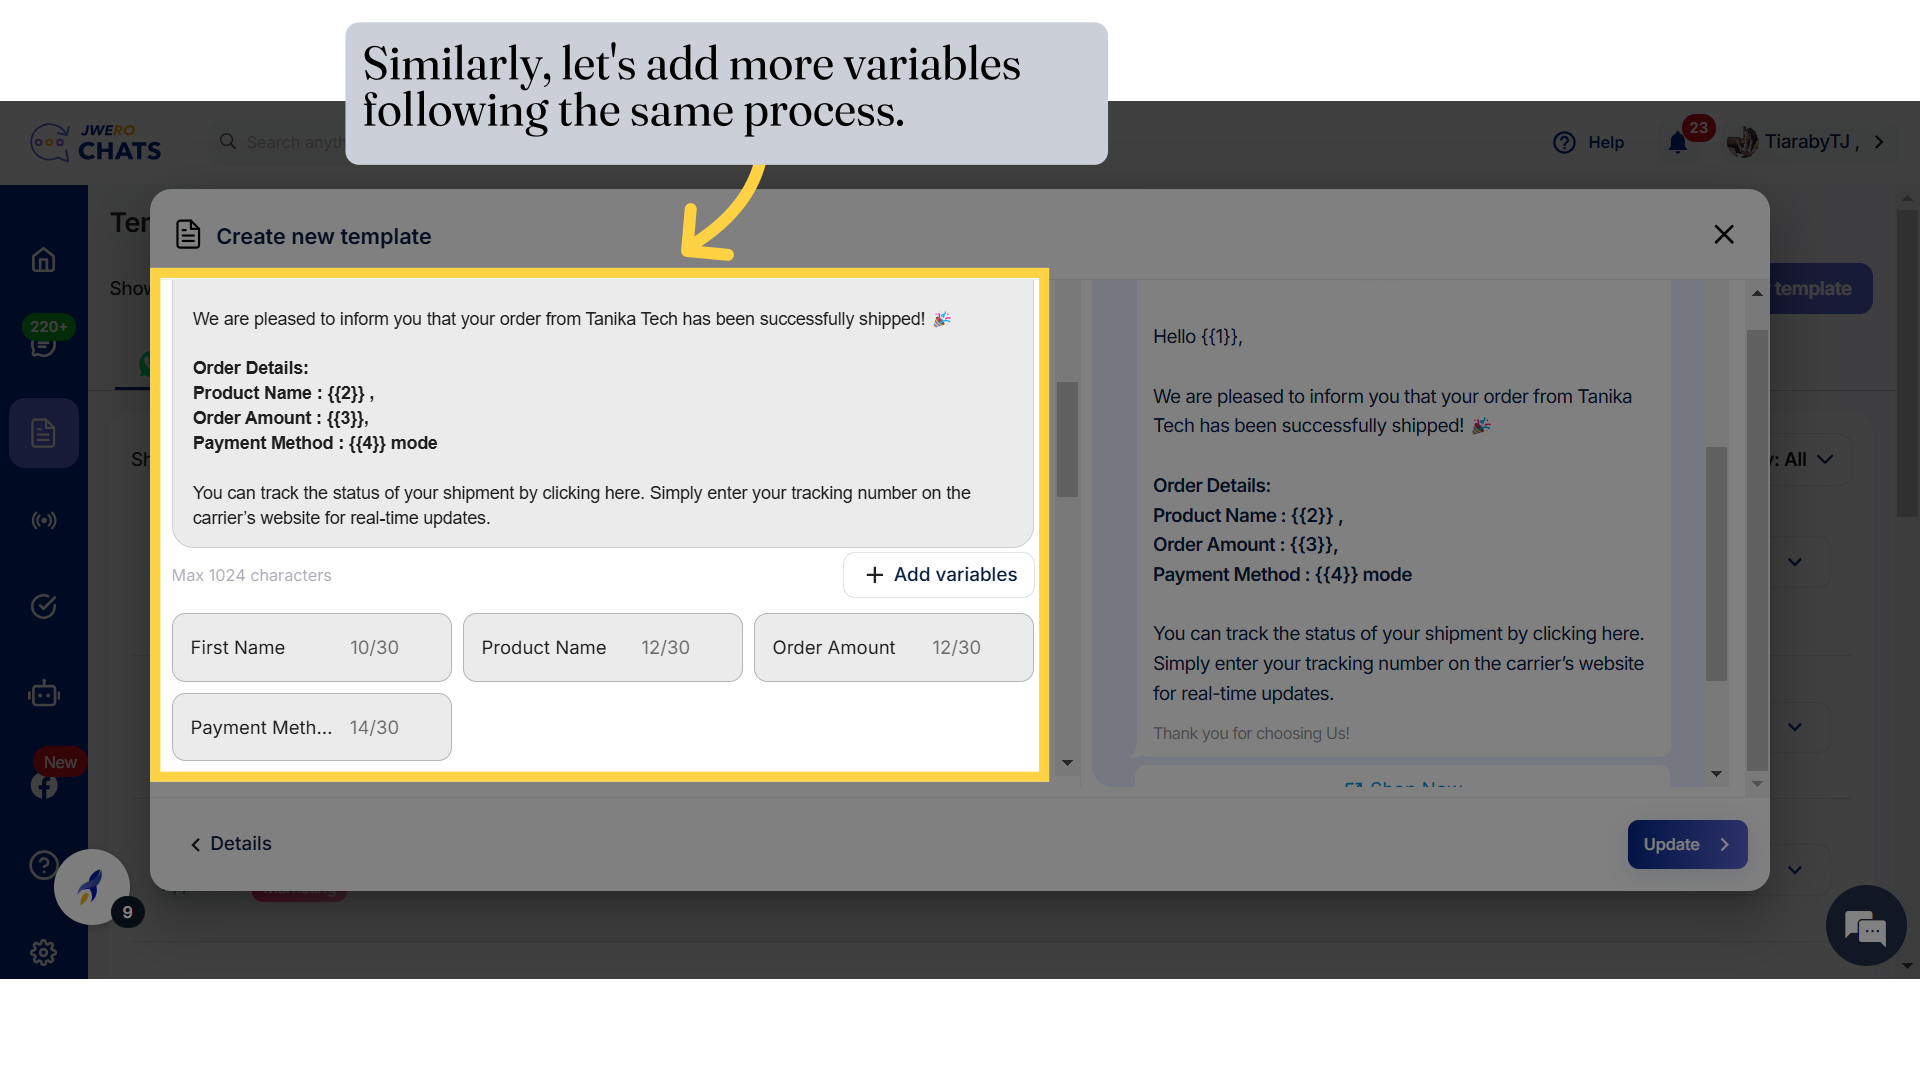
25. Similarly, let's add more variables following the same process.
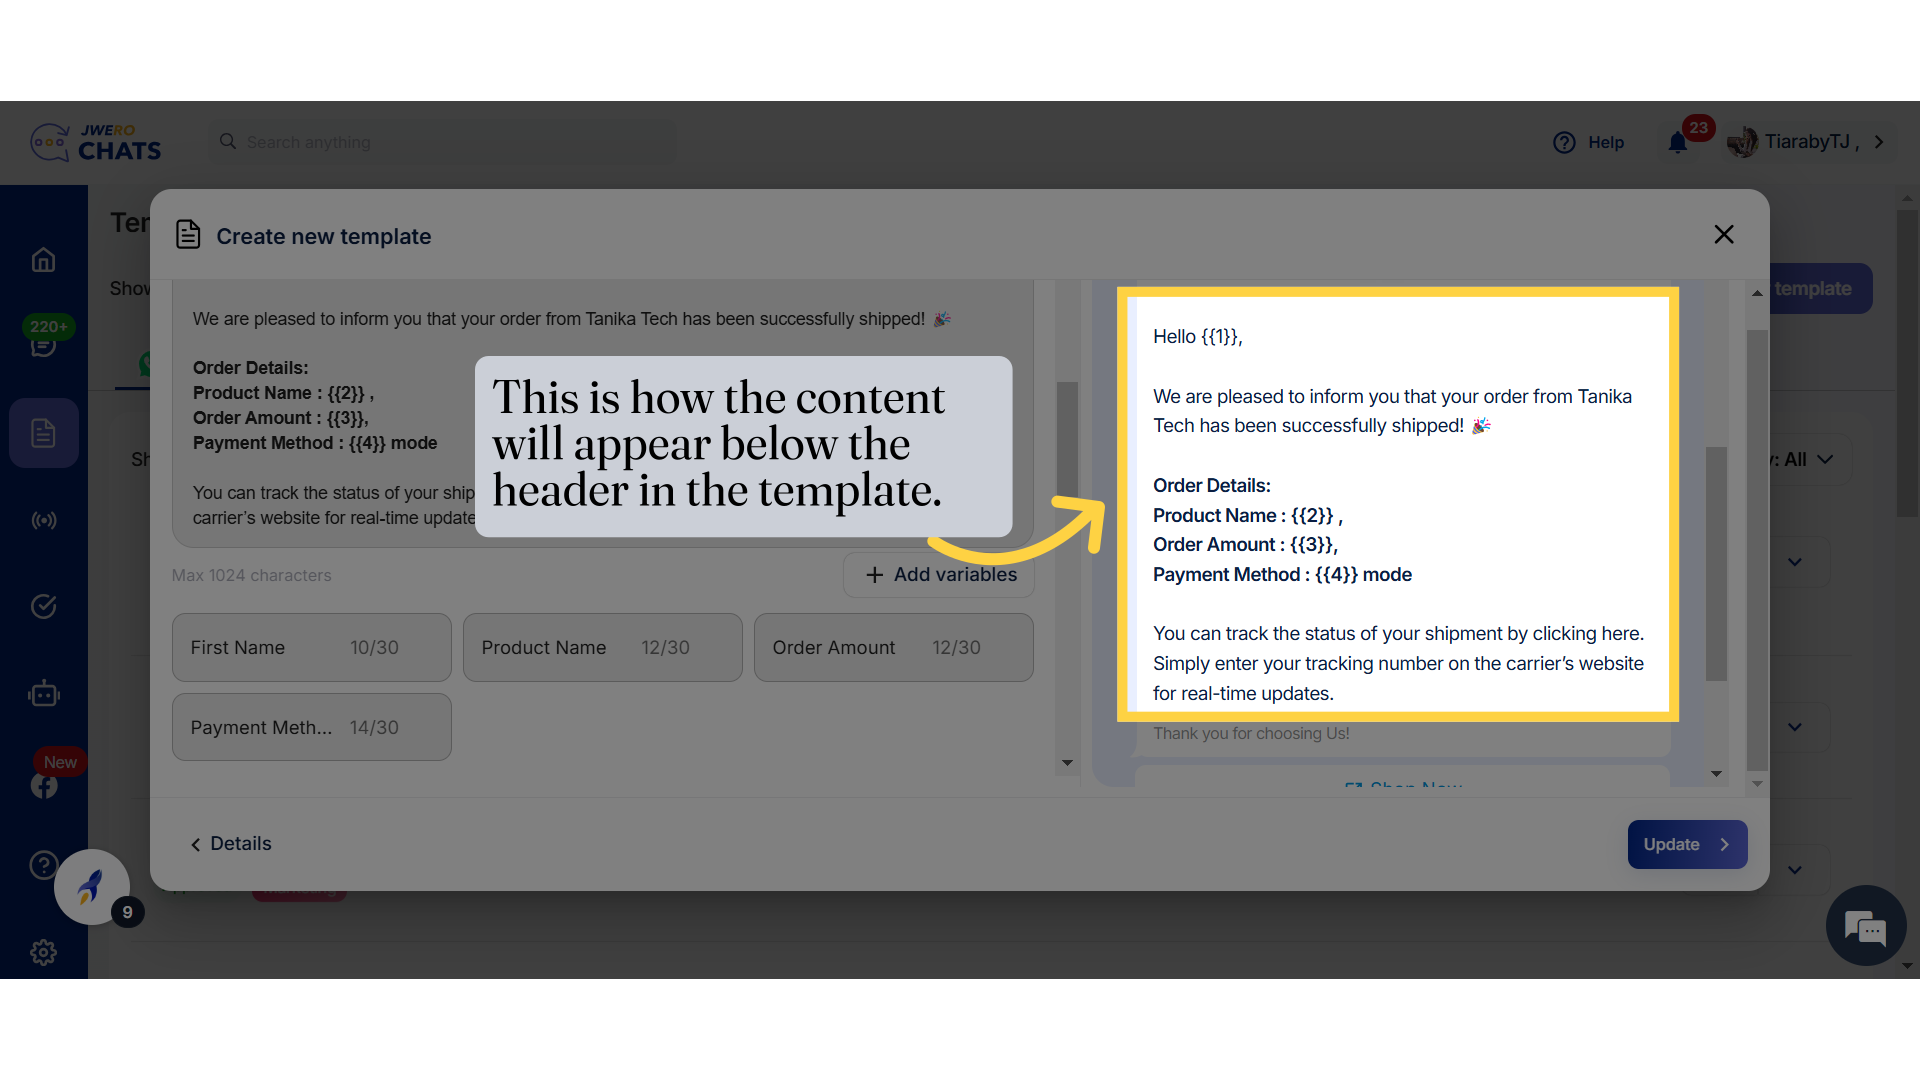
26. This is how the content will appear below the header in the template.
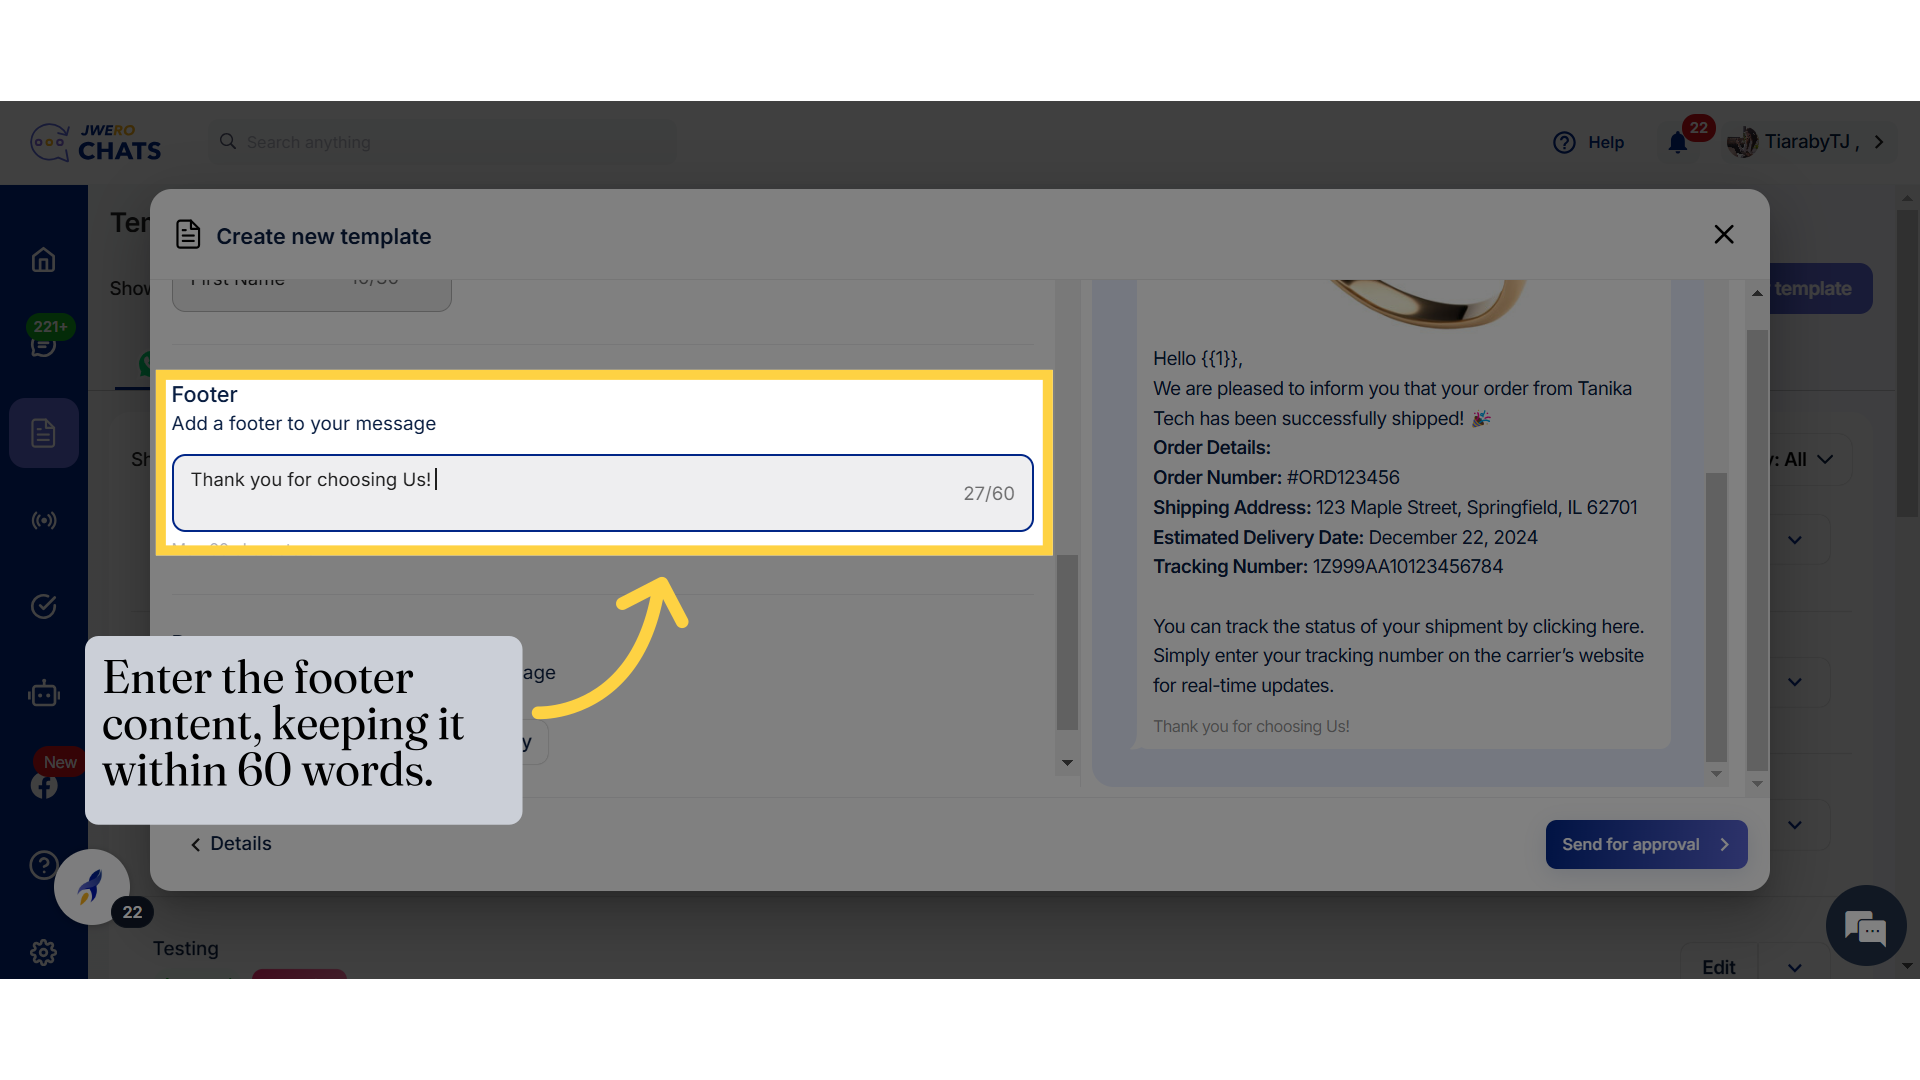
27. Enter the footer content, keeping it within 60 words.
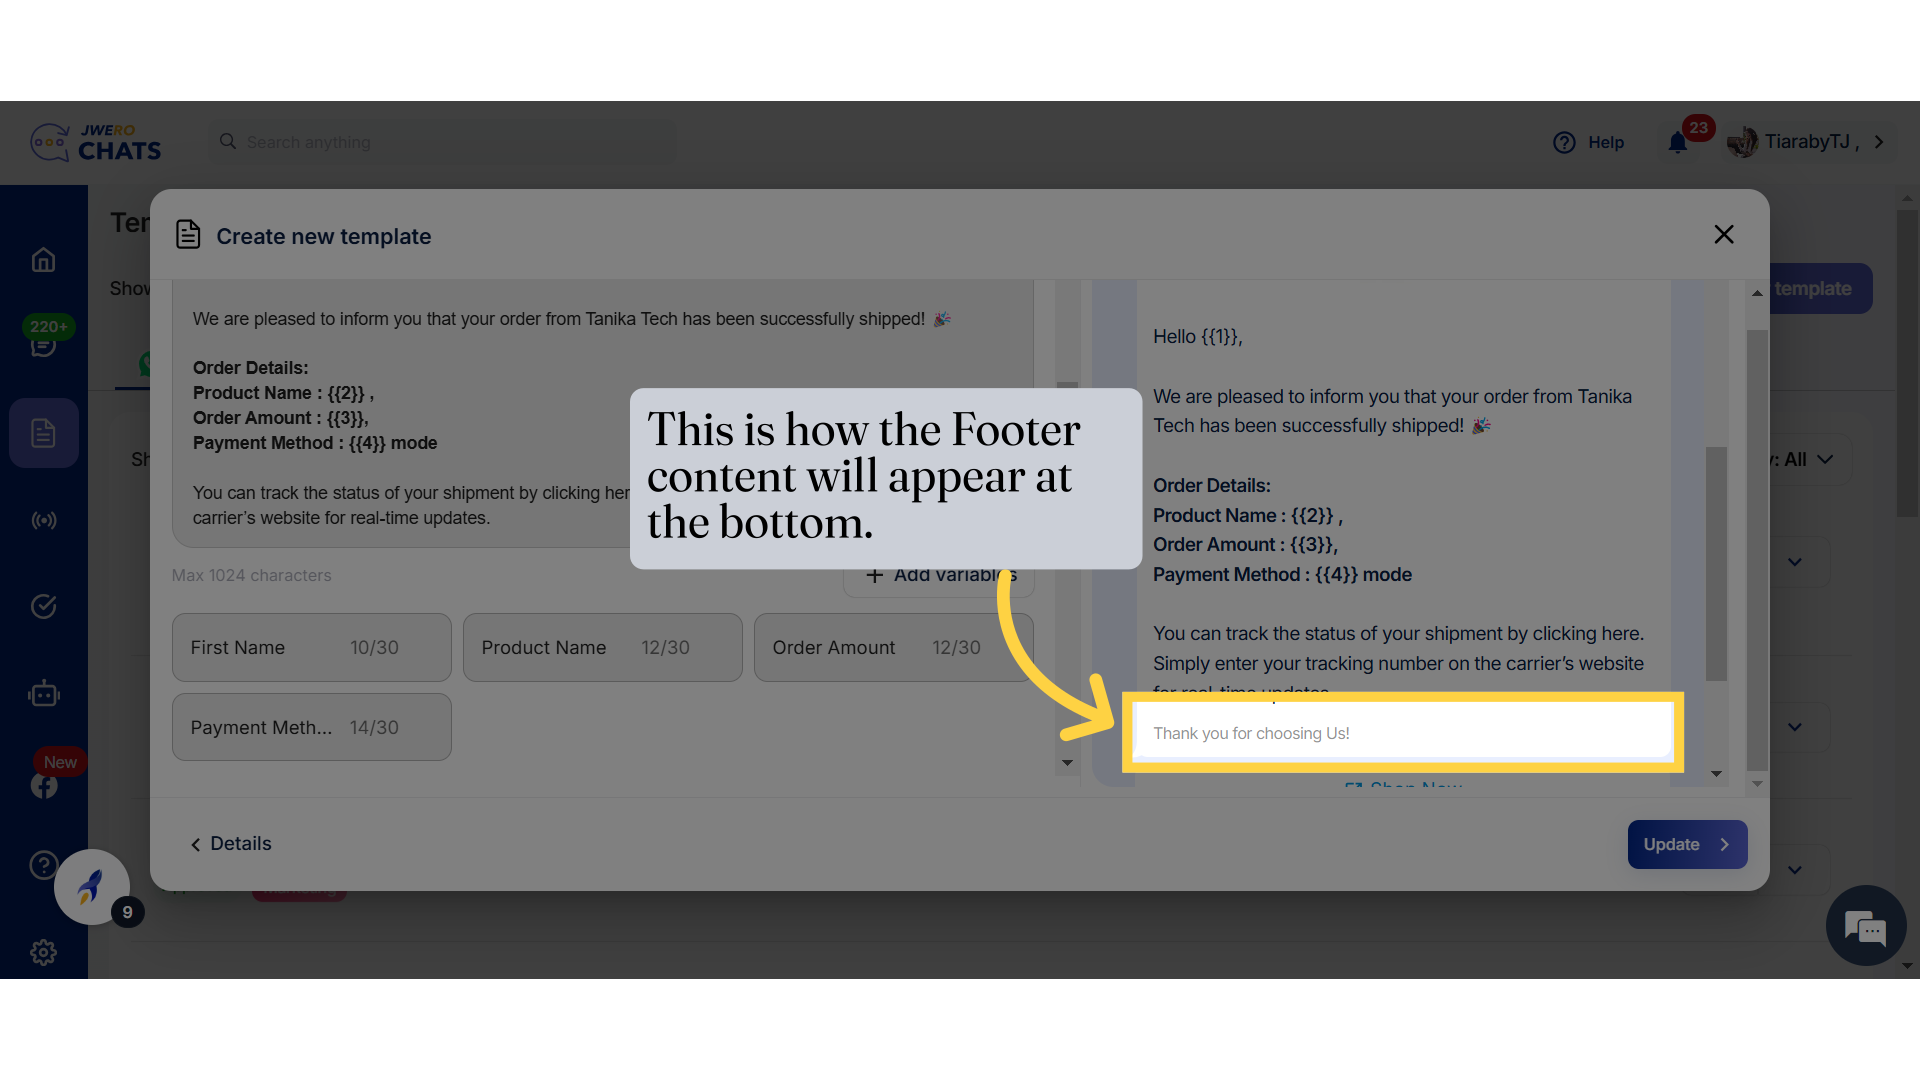
28. This is how the content will appear below the header in the template.
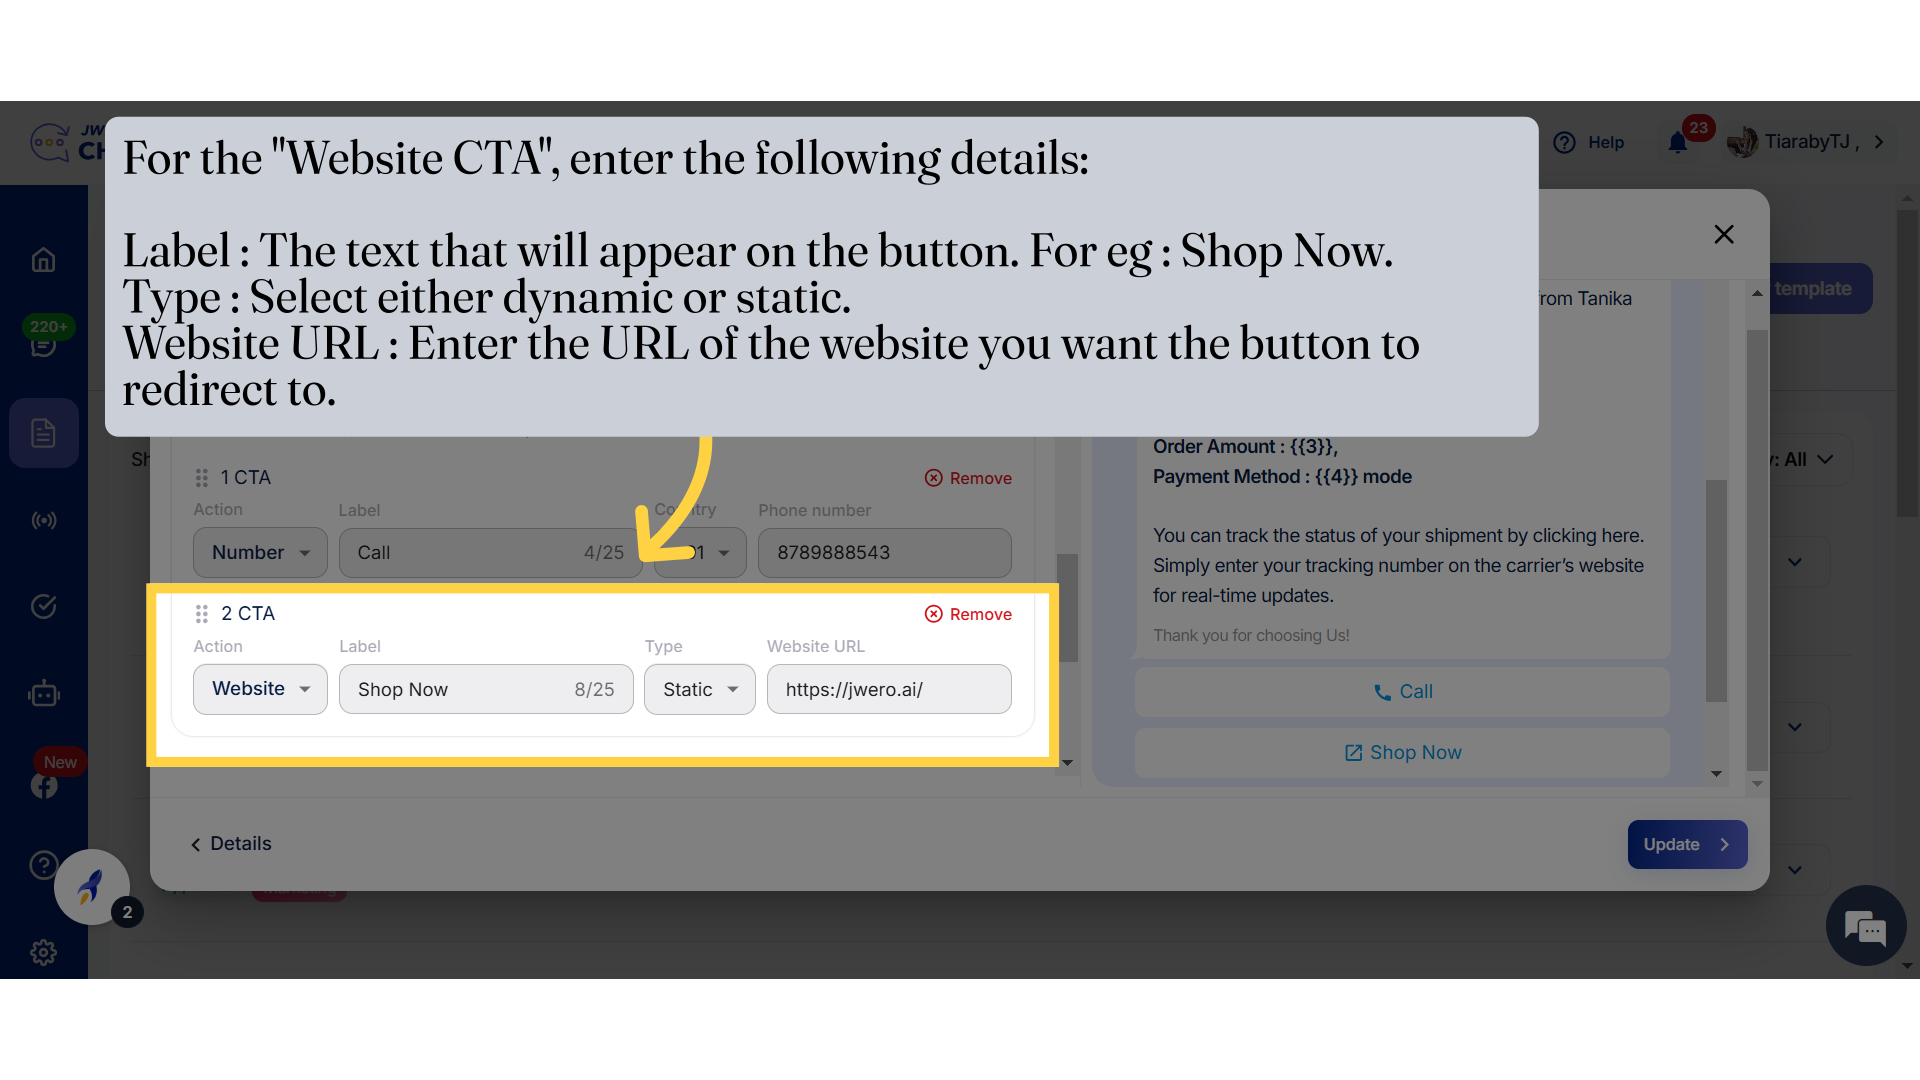
29. Add CTA (Call To Action)
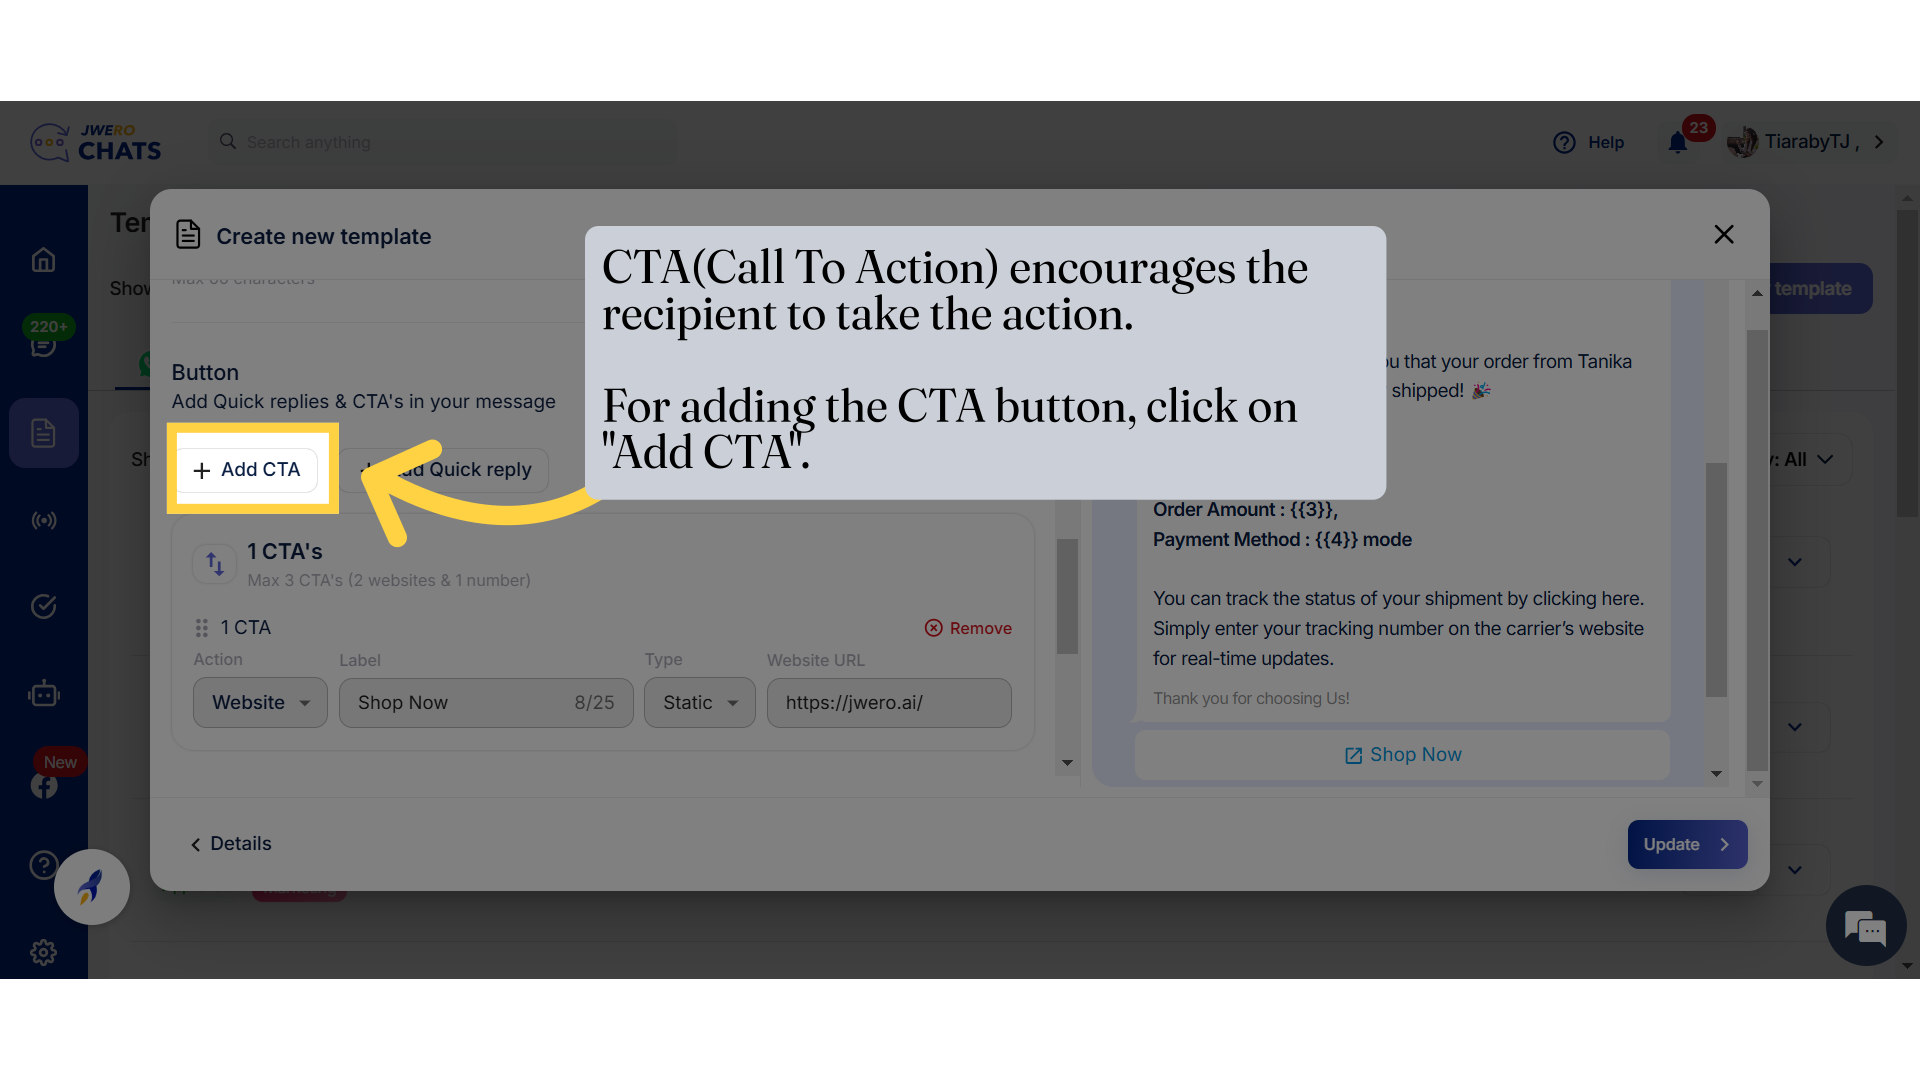
30. CTA allows 2 actions: Number : Calls to the entered number. Website : Redirects to the entered Website url.
CTA allows 2 actions :
Number : Calls to the entered number.
Website : Redirects to the entered Website url.
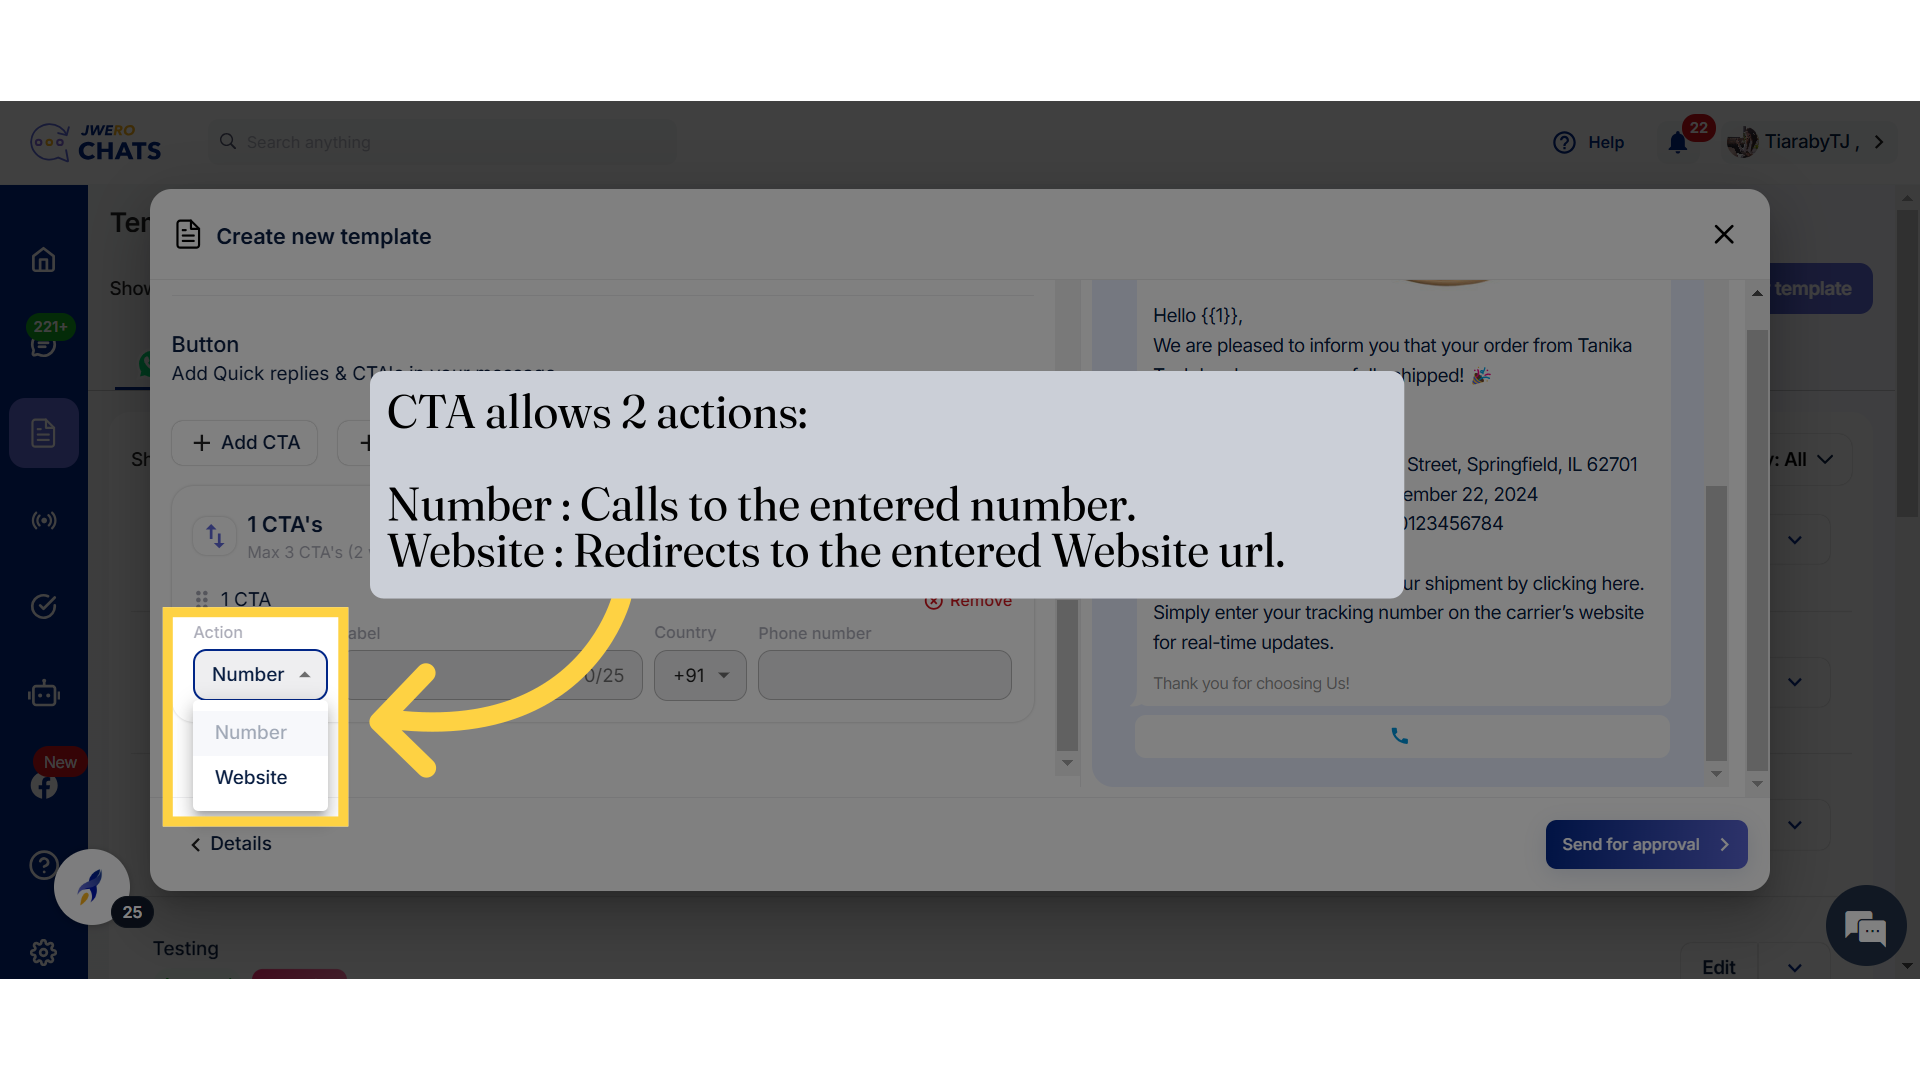
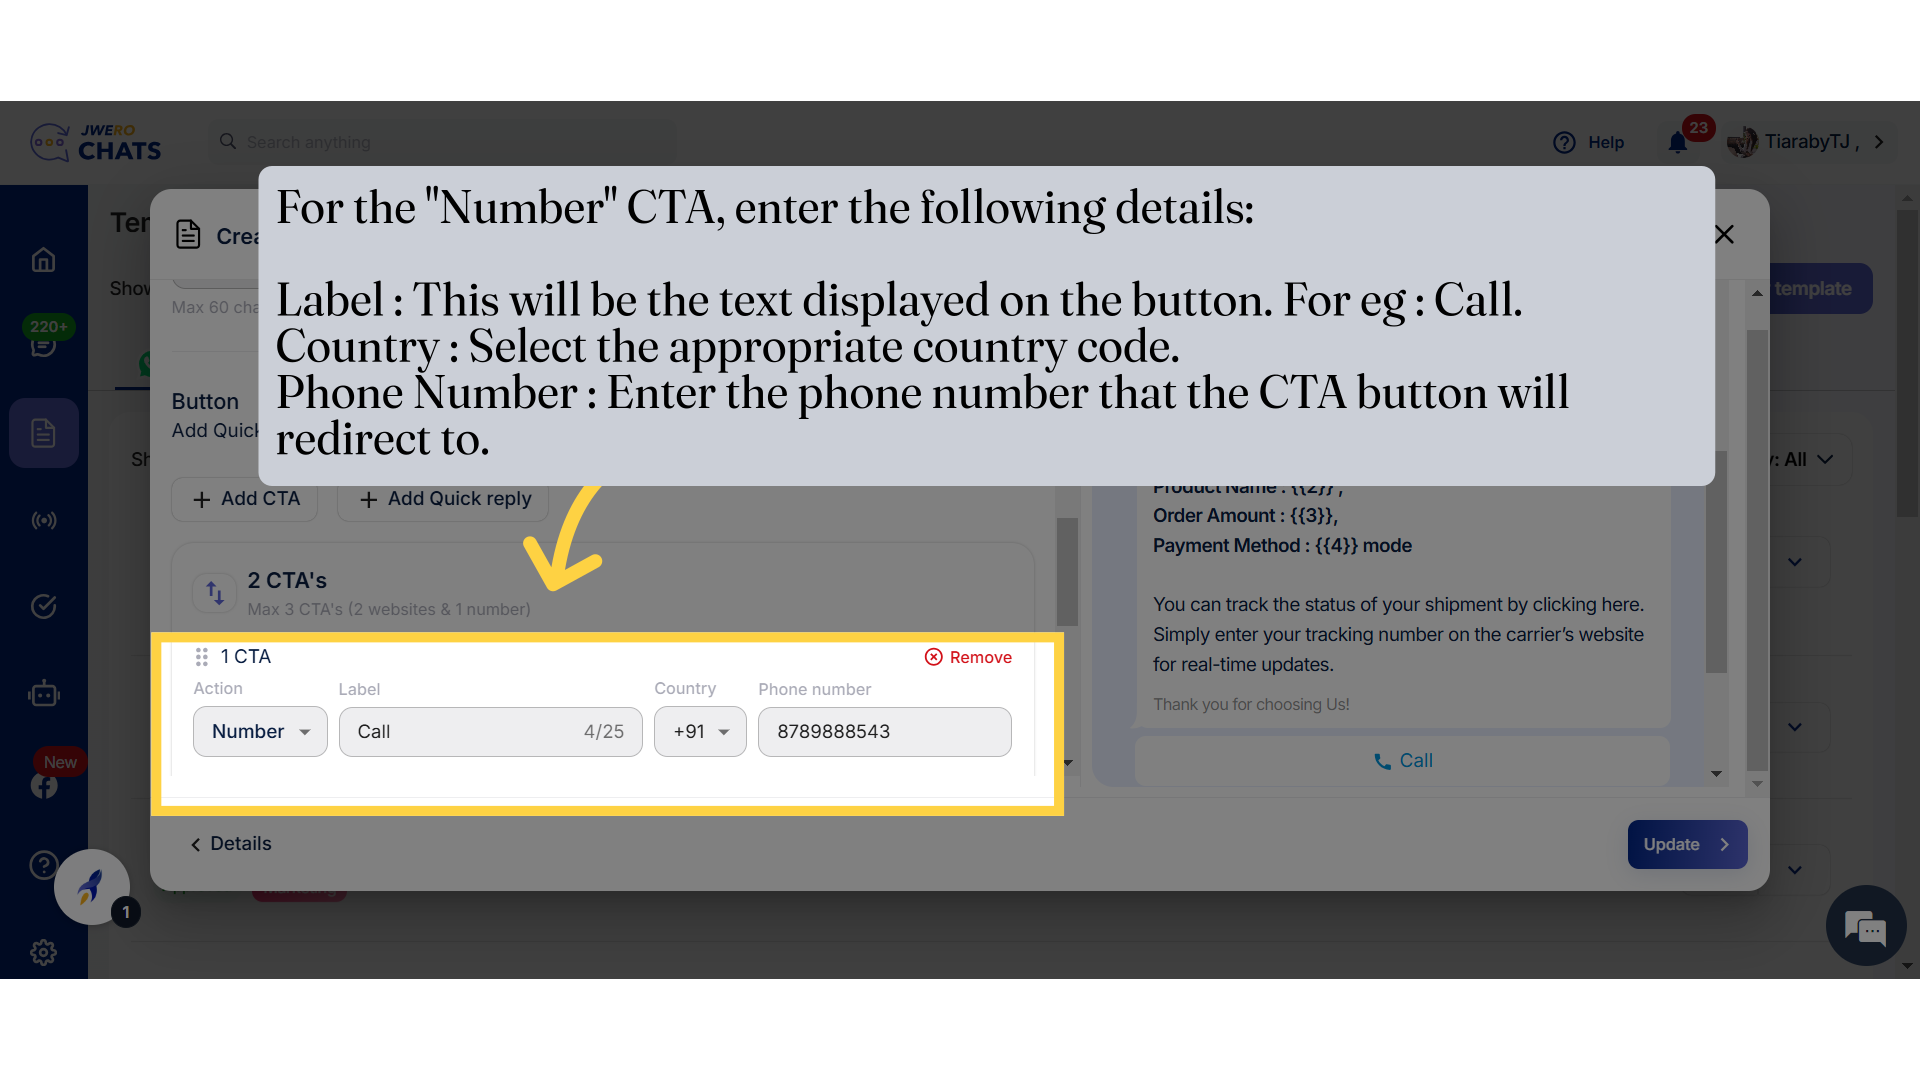
31. Number CTA
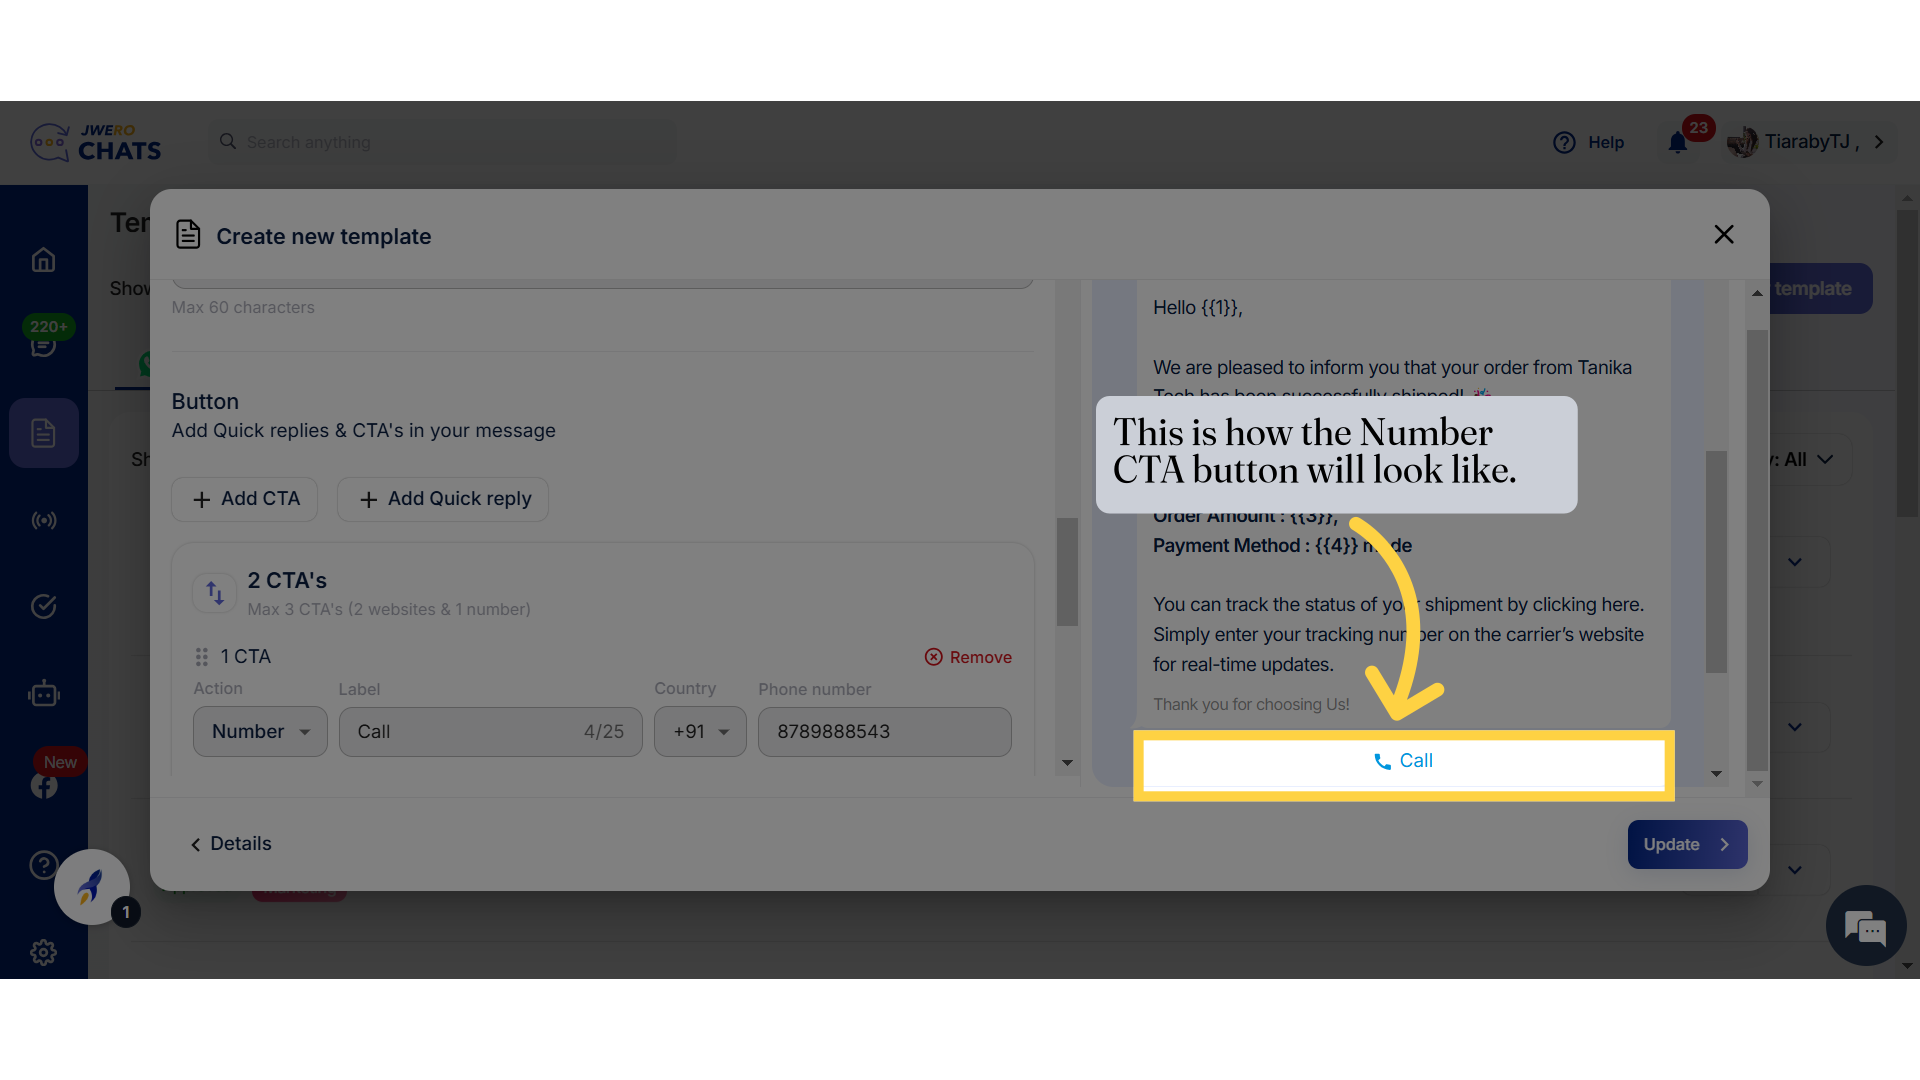
32. This is how the Number CTA button will look like.
33. Website CTA
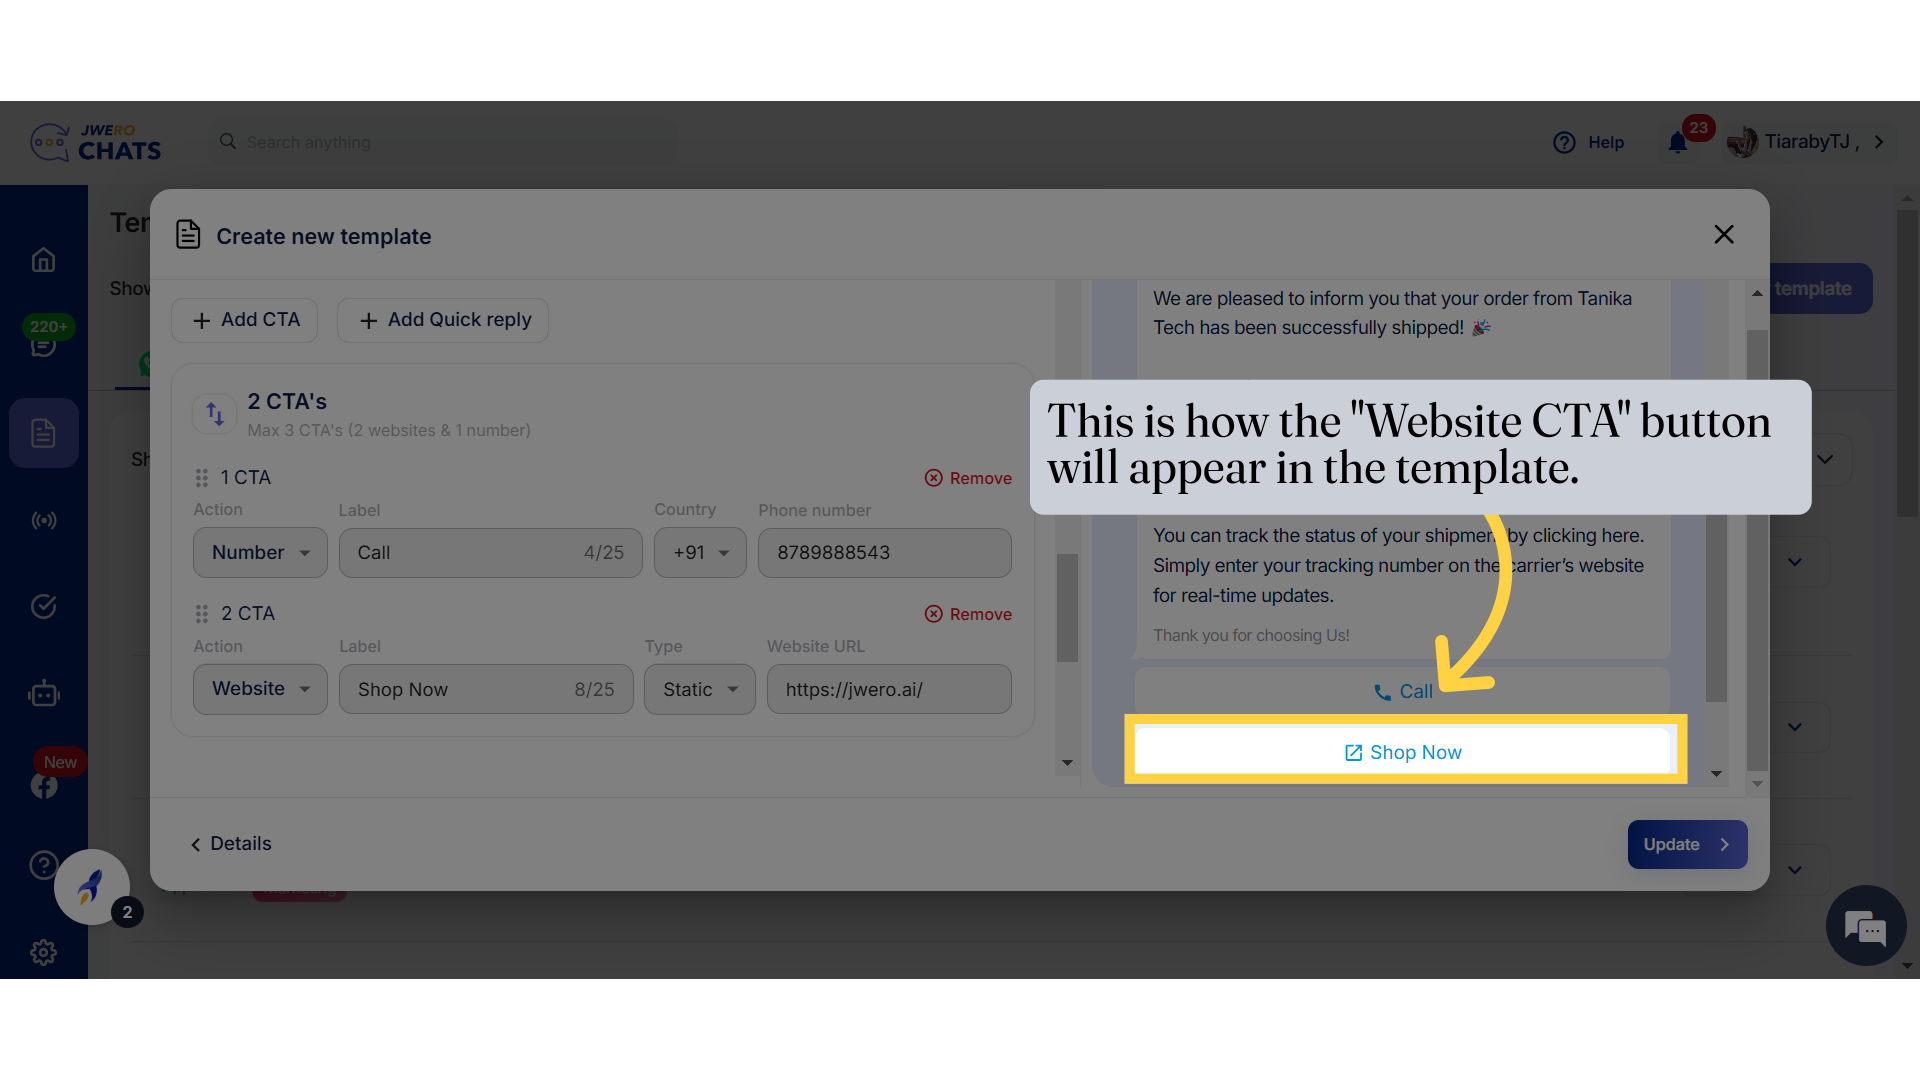
34. This is how the Website CTA button will look like.
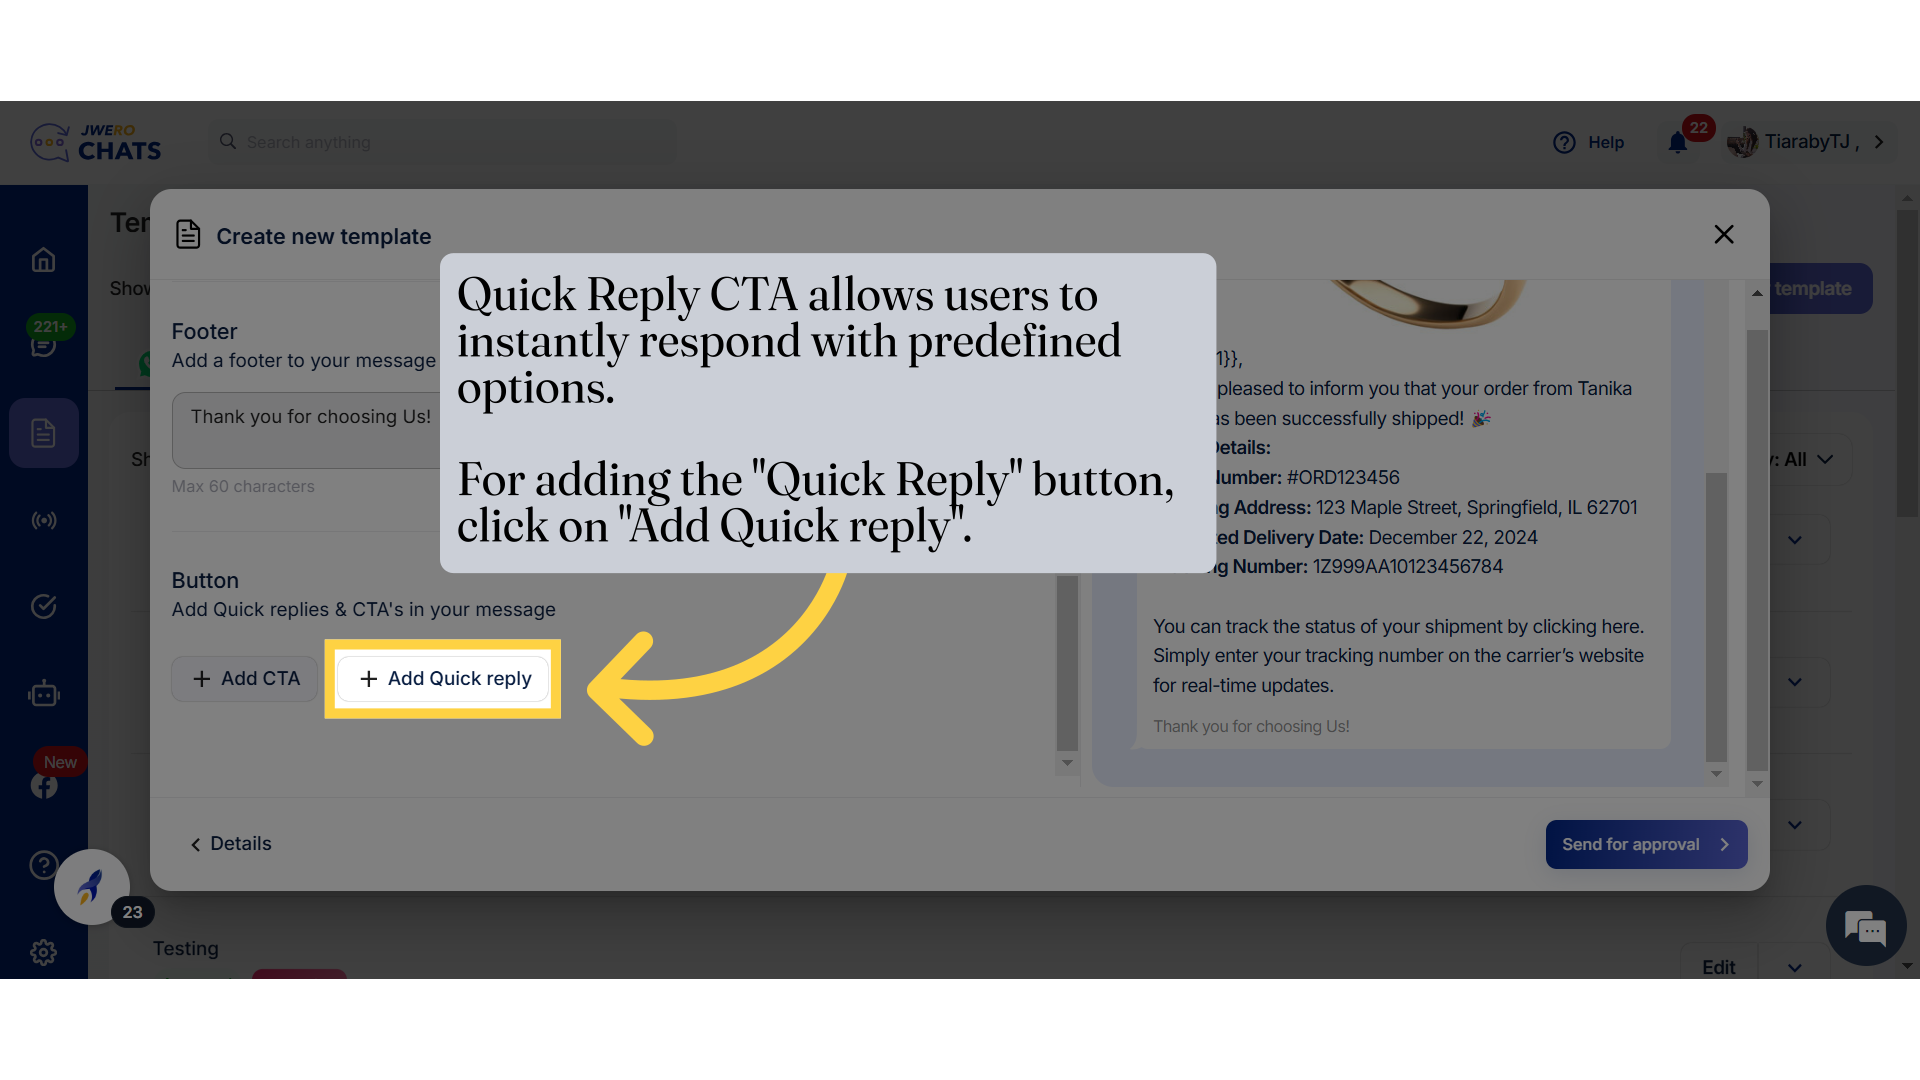
35. Quick Reply CTA allows users to instantly respond with predefined options. For adding the "Quick Reply" button, click on "Add Quick reply".
Quick Reply CTA allows users to instantly respond with predefined options.For adding the "Quick Reply" button, click on "Add Quick reply".
36. Quick Reply

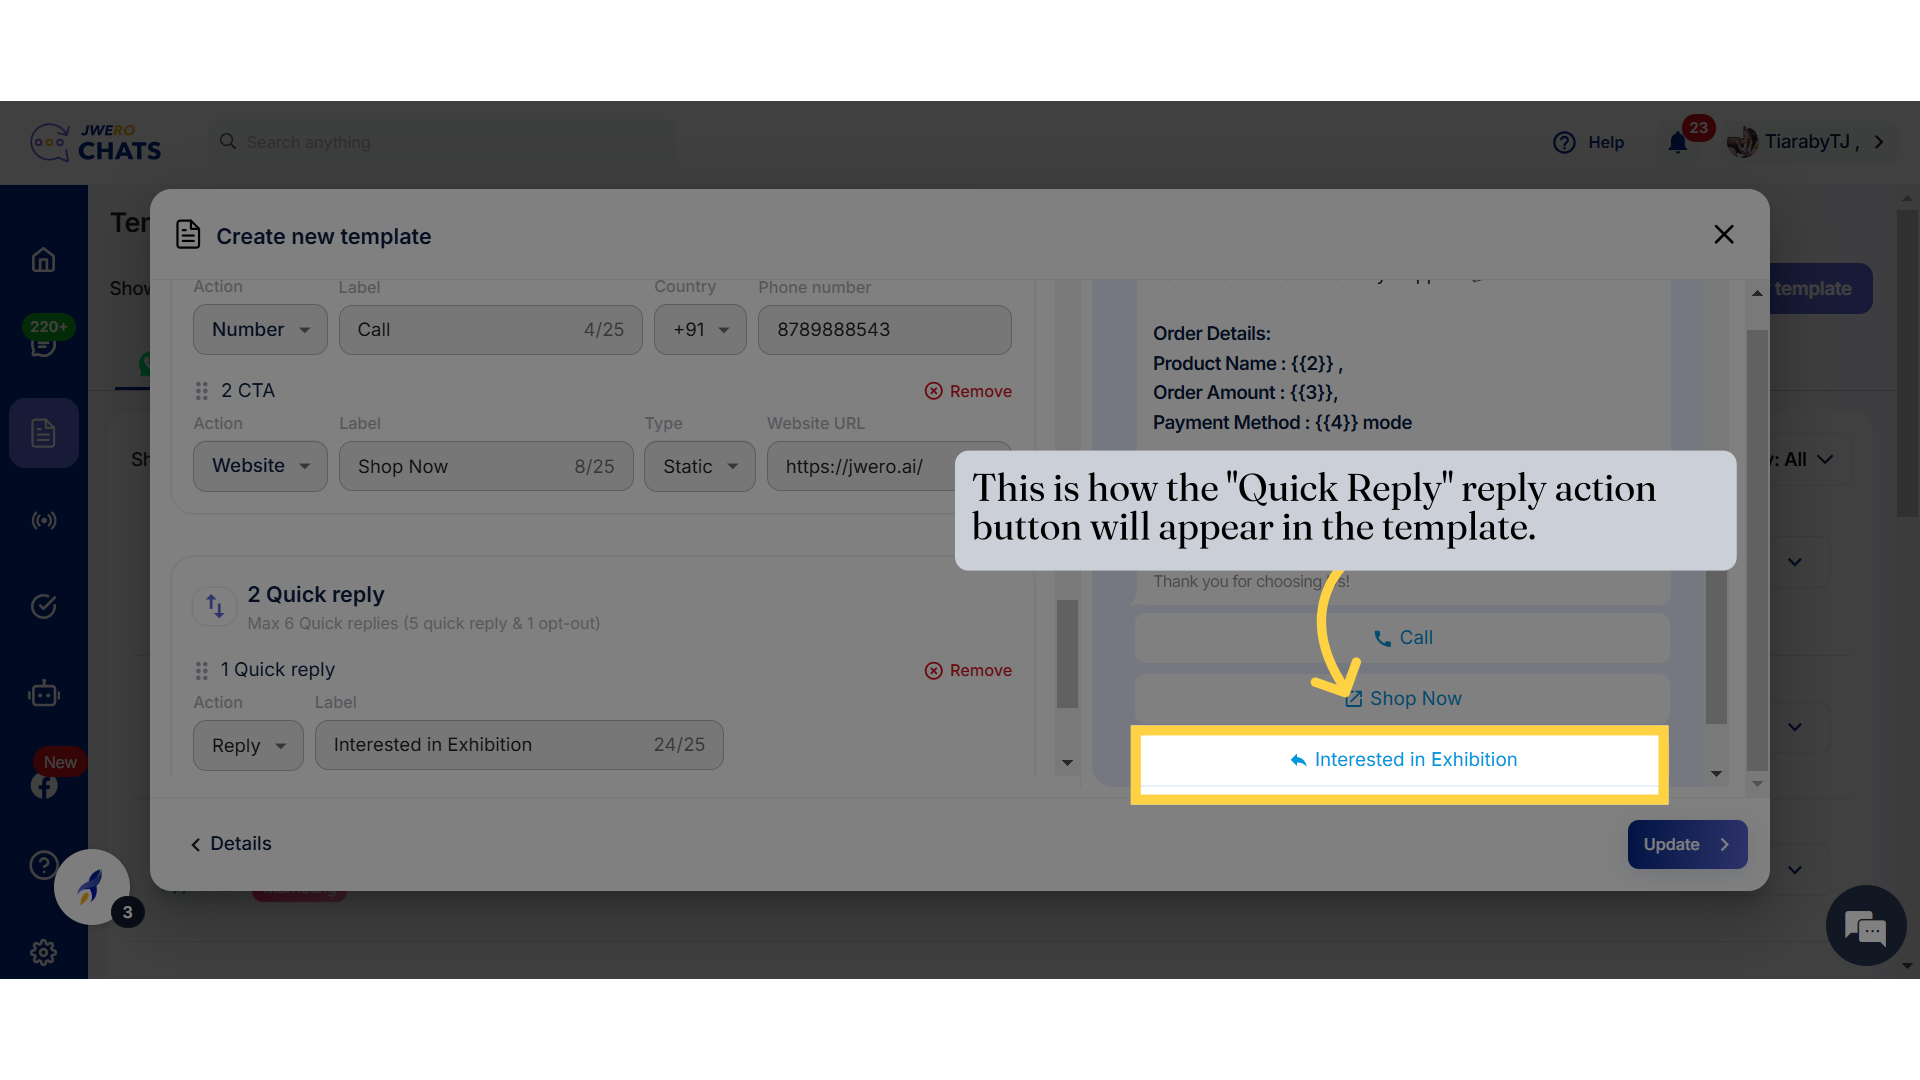
37. This is how the Quick Reply button will look like.
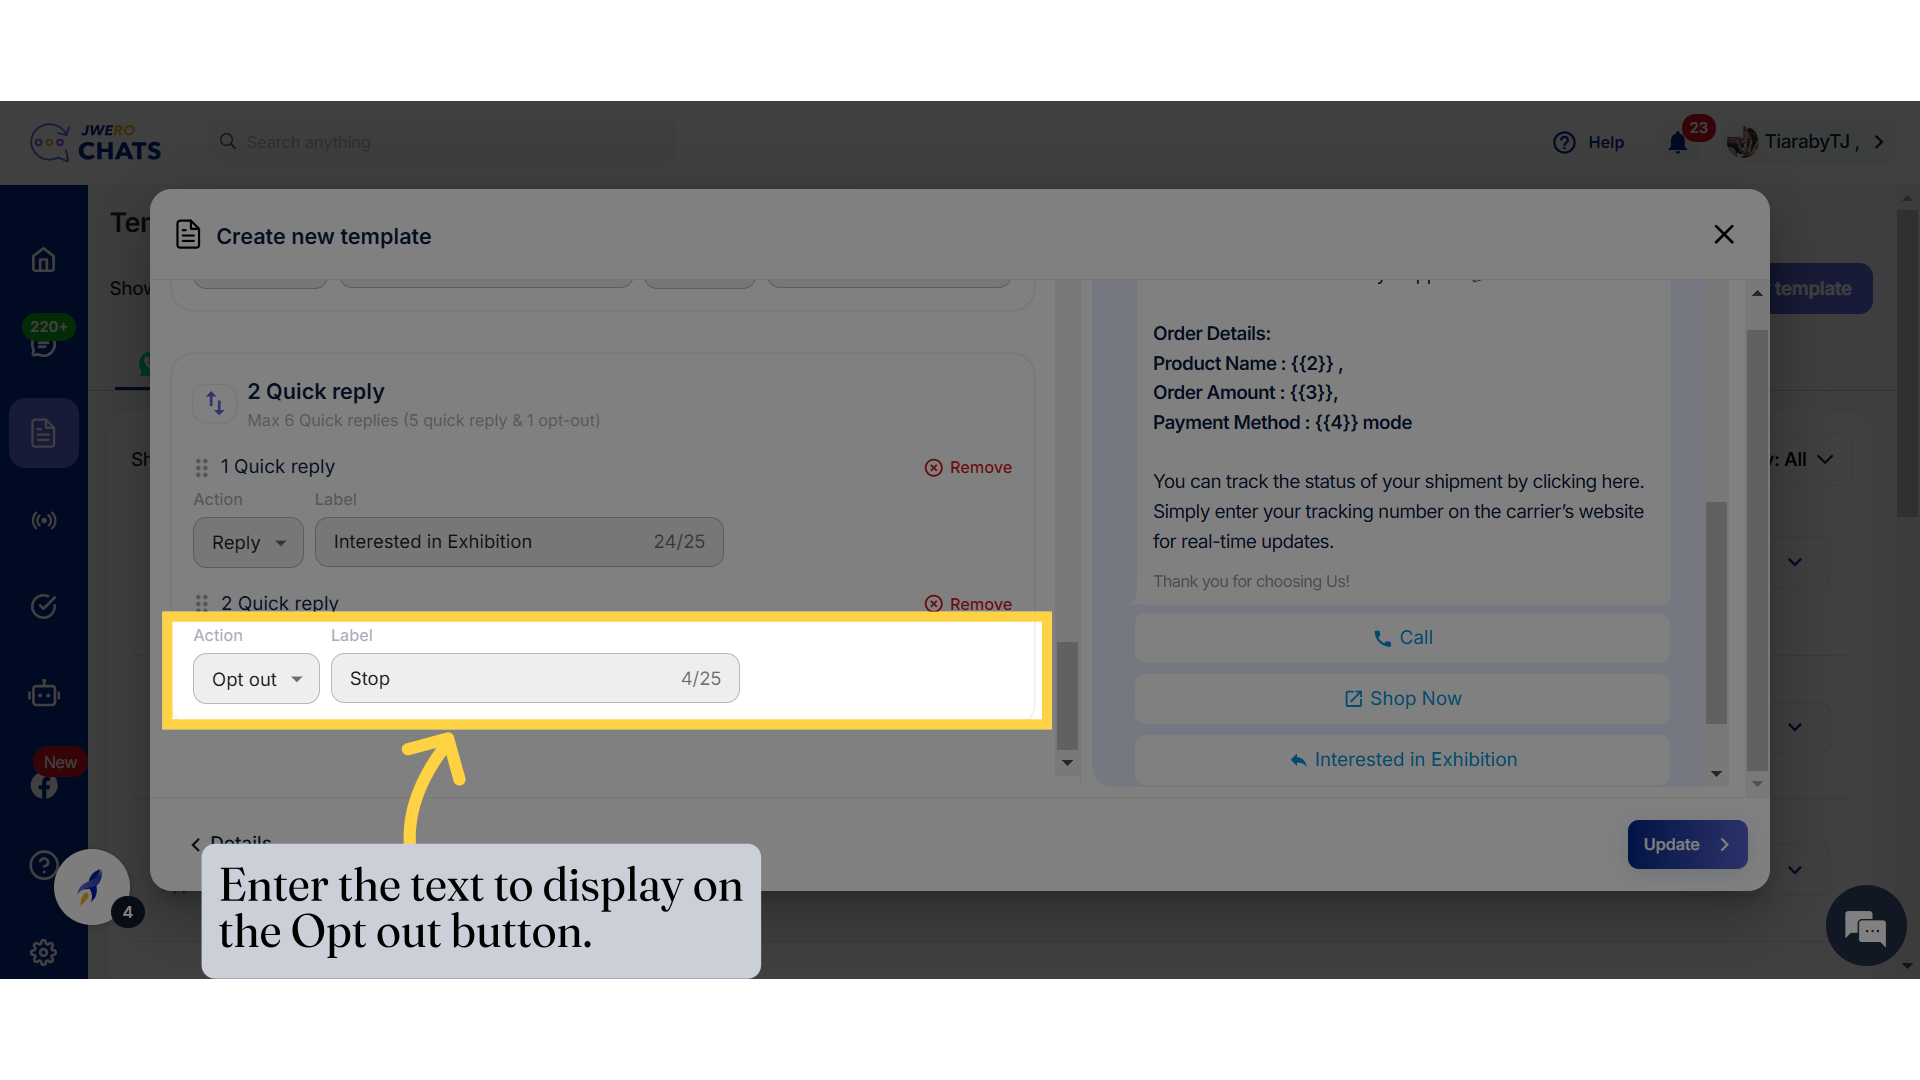
38. Opt out allows the user to unsubscribe the channel. To add it, select "Opt out" action from the dropdown.
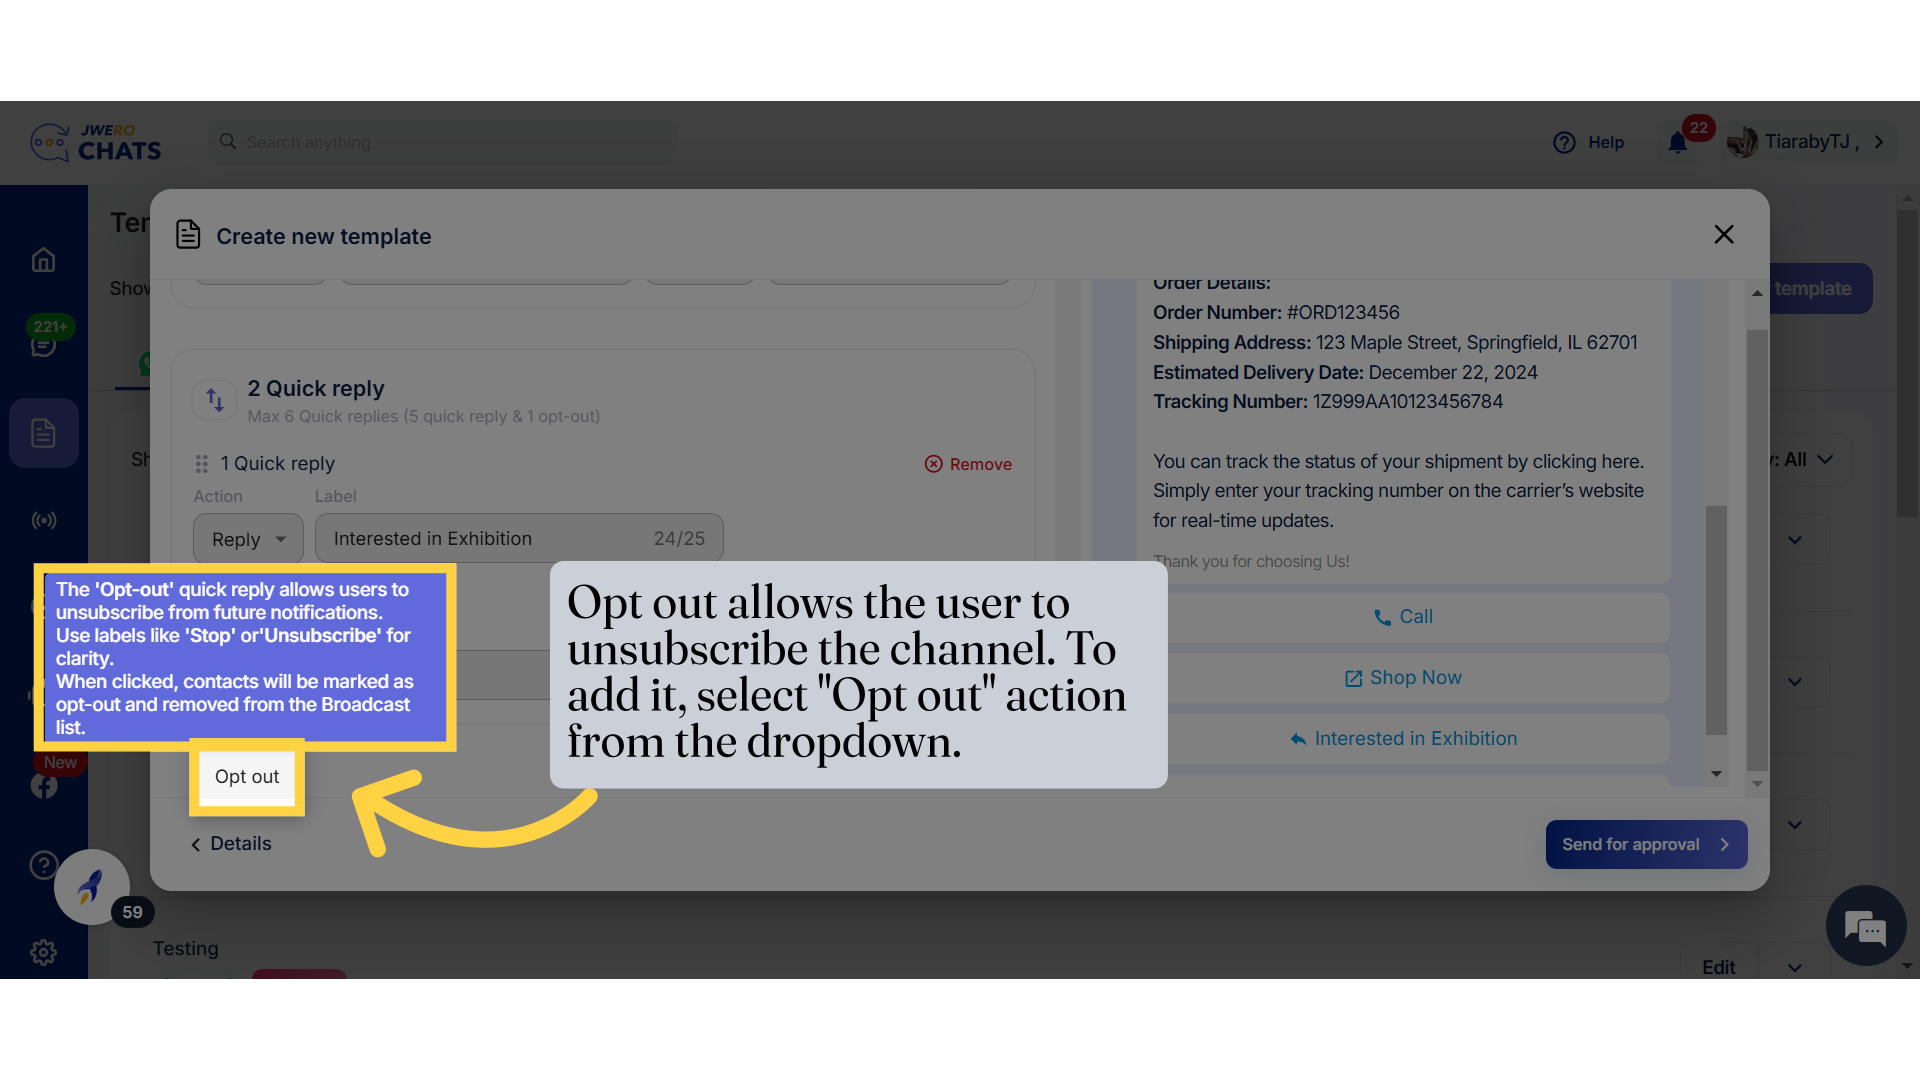
39. Opt Out Details
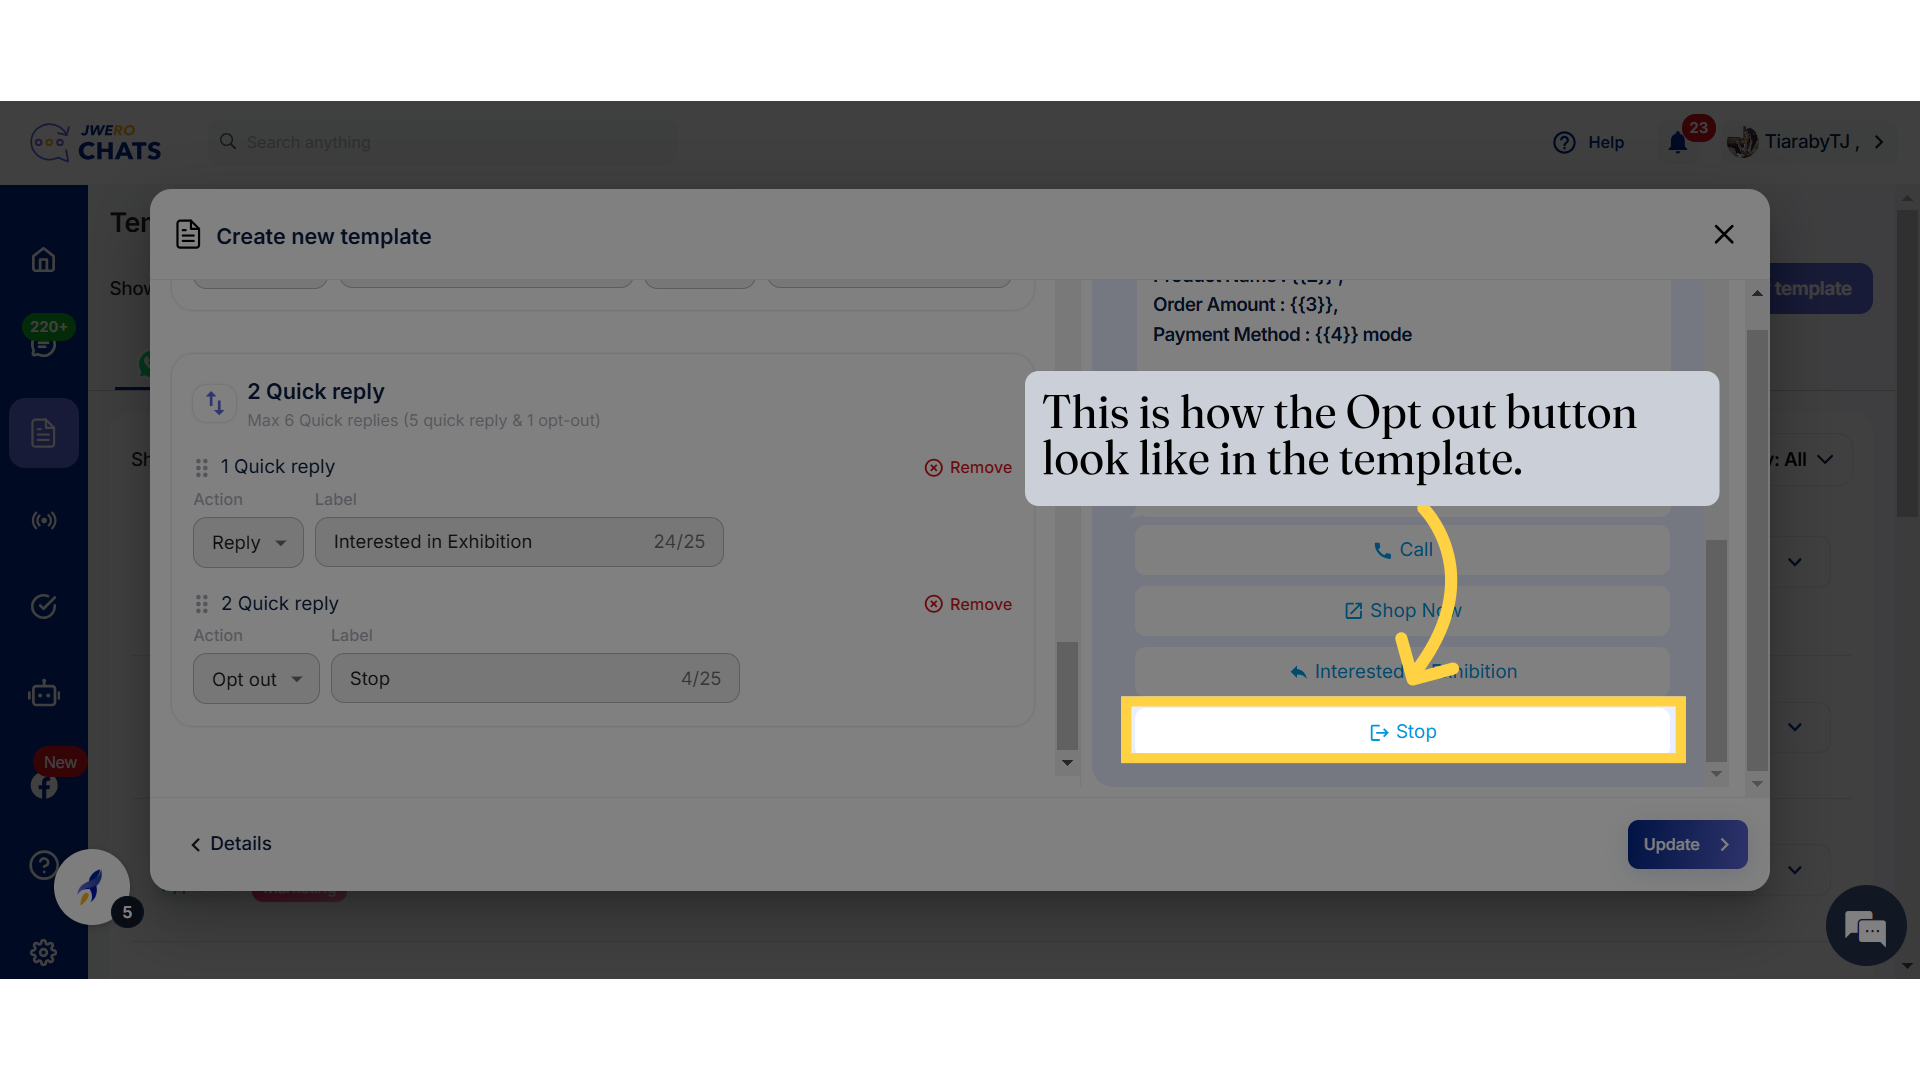
40. This is how the Opt Out button will look like.
41. Click on "Send for approval"

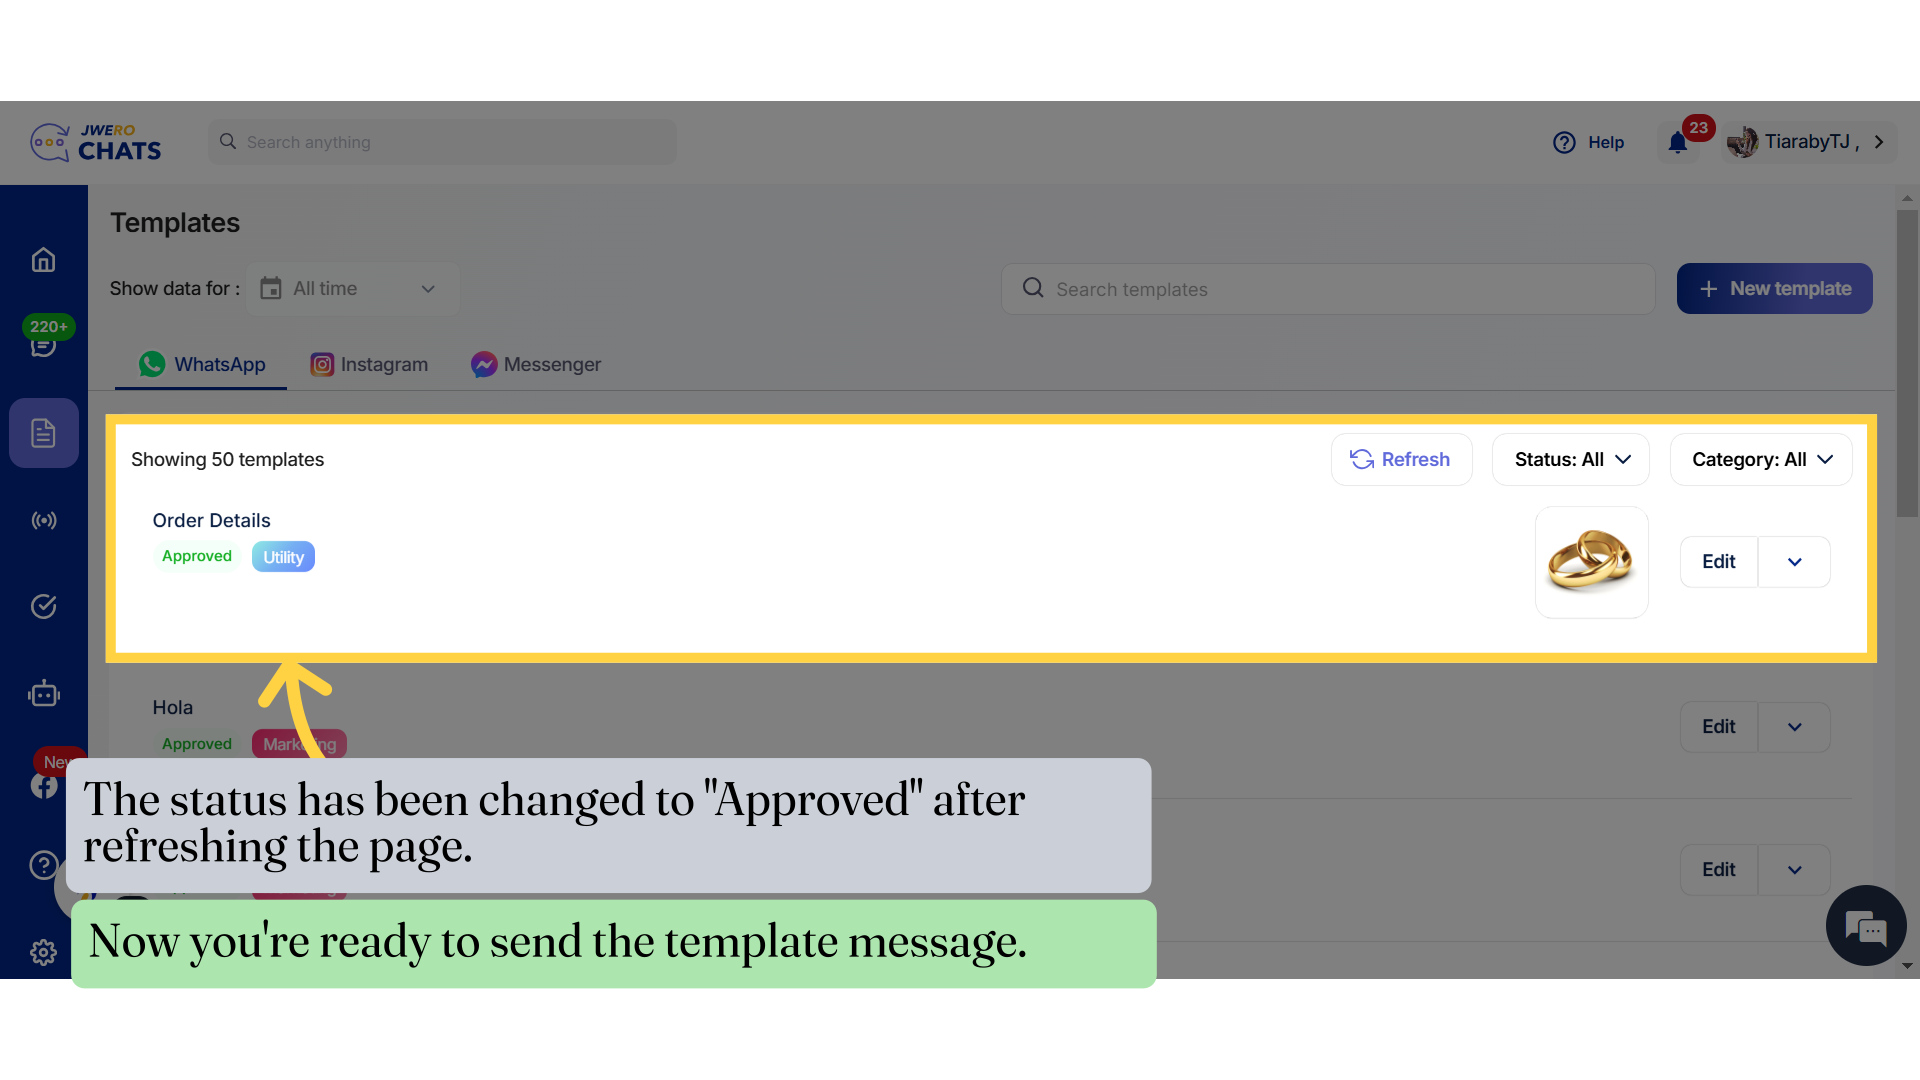
42. As you can see, the template has been created, but it's currently in the pending state. Refresh the page, and it will change to the approved state.
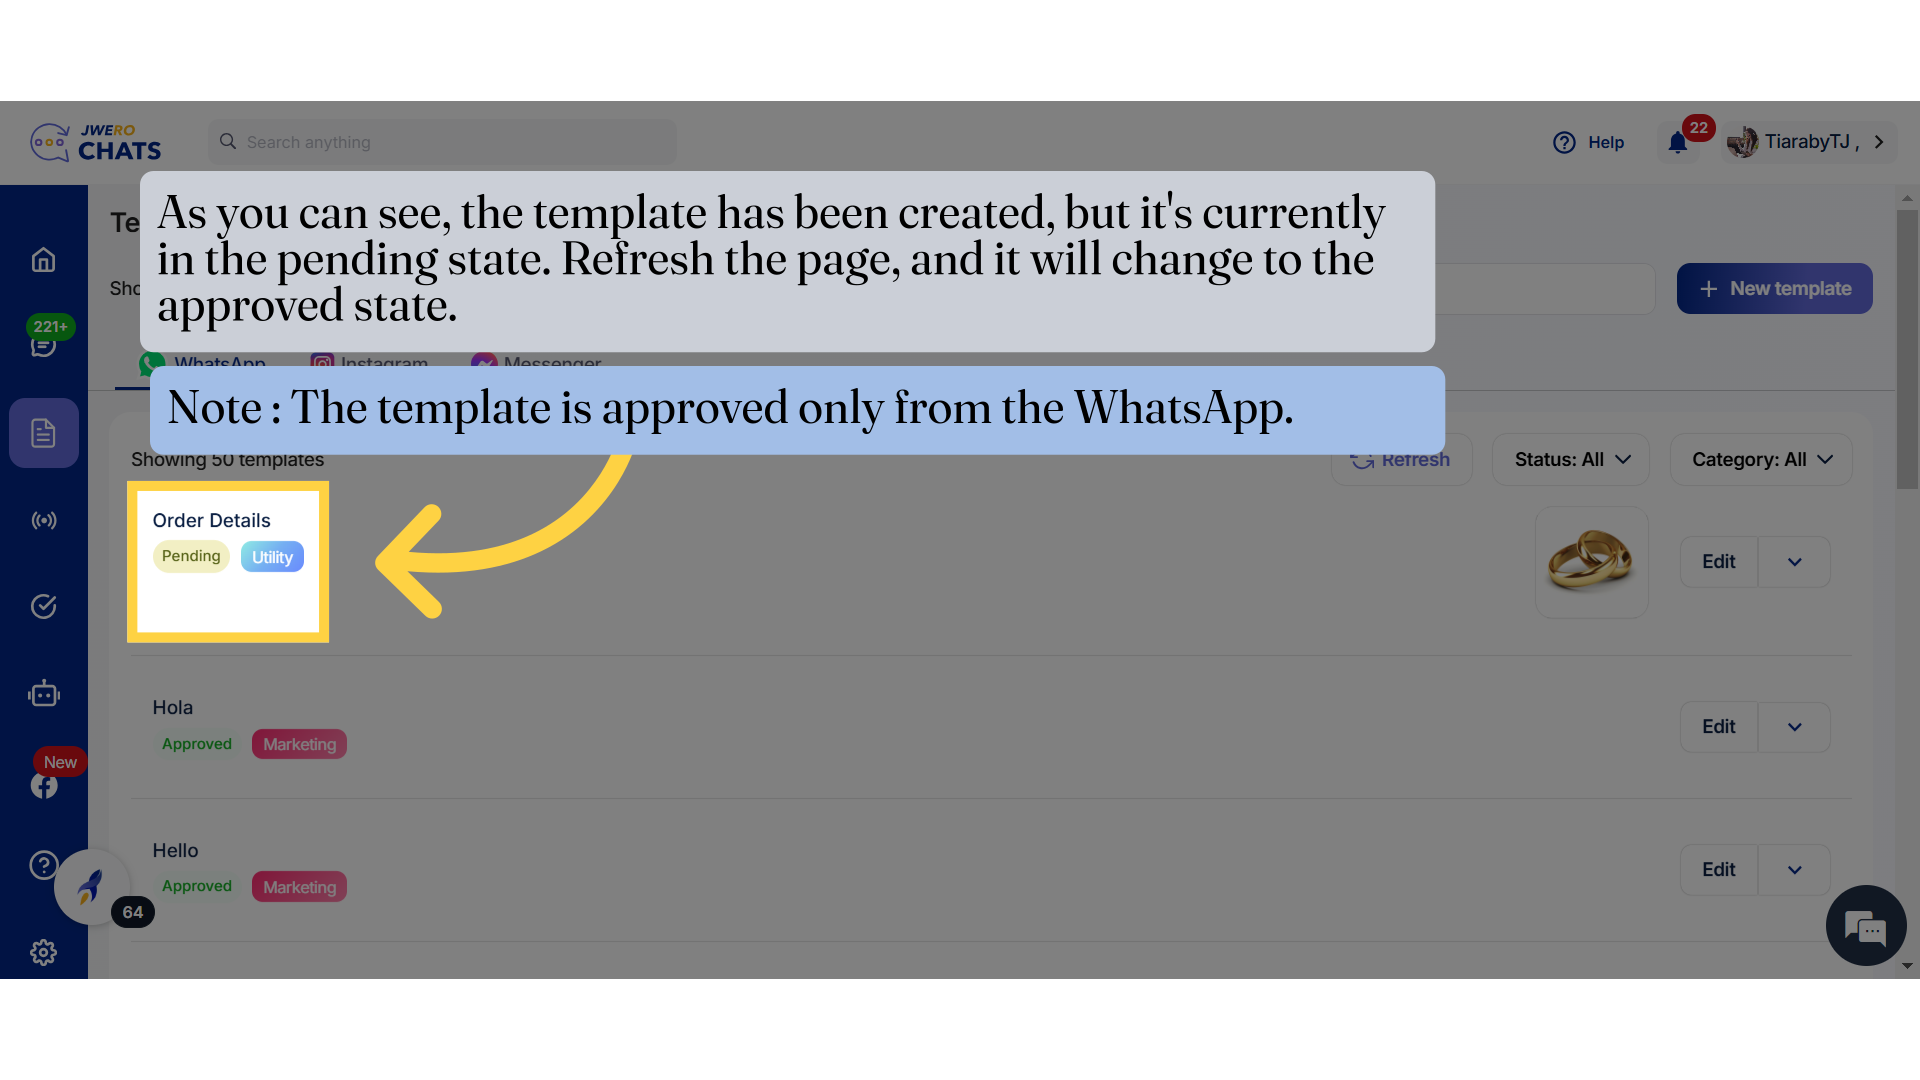
43. The status has been changed to "Approved" after refreshing the page.